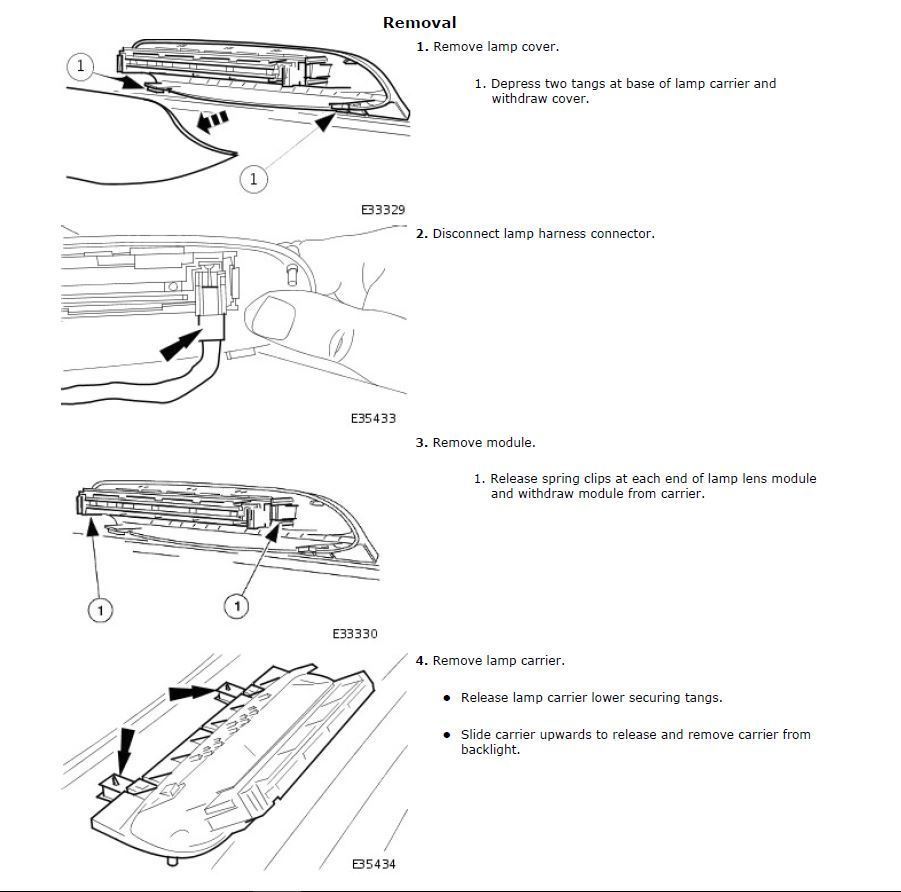
Rear parcel shelf removal advice,
#2
Join Date: Feb 2013
Location: Trying to escape Central Florida
Posts: 4,674
Received 1,794 Likes
on
1,316 Posts
#4
Join Date: Feb 2013
Location: Trying to escape Central Florida
Posts: 4,674
Received 1,794 Likes
on
1,316 Posts
#5
I was looking @ those high mount LED strips, I saw a member here used a Bentley version but didn't specify which Bentley, I messaged him so maybe I'll get a lead.
They have new Oatmeal/AGD units on eBay & I do have ample SDZ seat colorant left over so I could easily paint it.
#6
Join Date: Feb 2013
Location: Trying to escape Central Florida
Posts: 4,674
Received 1,794 Likes
on
1,316 Posts
Trending Topics
#9
Will do, but it's a Jag theme of having contrasting official info & a hodge podge of methods for the same item. Like the overhead console I sent the OEM diagram w/ the parts I needed highlighted & #'s to 3 reputable vendors & they each wanted to send me a different part from the same diagram lol. Right now it's being held w/ the damn engine trim/bulkhead fastener & receptacle lol go figure.
#10
Join Date: Feb 2013
Location: Trying to escape Central Florida
Posts: 4,674
Received 1,794 Likes
on
1,316 Posts
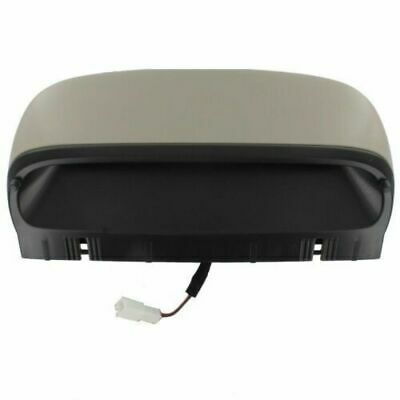
I'm going to step out of the truck..as the beep, beep, beep is happening. ..and jump behind it....because I was perusing my process when I redid mine and remembered that the other 2 cars I tried to get the 3rd light out of, and mine, I thought had short direct wiring. Because when I tried to remove them the wire came out the same short distance (before disintegrating), no matter how I fiddled with them. Now I wonder if it was the plug stuck under the deck is all and I am totally wrong on my interpretation? ...which seems most likely from the pics. 

#11
I'm going to step out of the truck..as the beep, beep, beep is happening. ..and jump behind it....because I was perusing my process when I redid mine and remembered that the other 2 cars I tried to get the 3rd light out of, and mine, I thought had short direct wiring. Because when I tried to remove them the wire came out the same short distance (before disintegrating), no matter how I fiddled with them. Now I wonder if it was the plug stuck under the deck is all and I am totally wrong on my interpretation? ...which seems most likely from the pics. 

I'm going OEM replacement , not sure I like those LED bars aesthetic wise.
Last edited by King Charles; 11-13-2019 at 07:13 AM.
#12
I'm going to step out of the truck..as the beep, beep, beep is happening. ..and jump behind it....because I was perusing my process when I redid mine and remembered that the other 2 cars I tried to get the 3rd light out of, and mine, I thought had short direct wiring. Because when I tried to remove them the wire came out the same short distance (before disintegrating), no matter how I fiddled with them. Now I wonder if it was the plug stuck under the deck is all and I am totally wrong on my interpretation? ...which seems most likely from the pics. 

1.Remove the seat bottom (screws along the bottom/forward edge).
2. Remove seat back. Screws along the bottom edge. The top edge lifts up and over the shoulder harness retractors. Before attempting to lift the seat back, release the lower fastening tabs on the shoulder straps, as the straps must be fed through the slots at the top of the seat back to remove it from the vehicle.
3. With the seat back out of the way, removed the small child seat brackets (if so equipped), and the seat belt retractor bracket to your right (as you face the seat back). This provides space to angle the parcel top finisher as you remove it.
4.The top finisher of the parcel shelf can now be lifted at the forward edge, and pulled toward you at your right hand side (left side of the car) and angled through the space provided when you removed the shoulder harness retractor.
5. The lower pad/insulator layer comes out next, and you will see what is depicted in the photo.
Note that removal of the seat back is best done by two people as it is wedged into the opening very tightly.
Last edited by 64etype; 11-13-2019 at 10:53 AM.
The following 3 users liked this post by 64etype:
#14
Ok ordered the new oatmeal OEM unit & am going to do the seat removal method, if it's worth doing, do it right lol.
Going to go ahead & put red LEDs back there so hopefully I won't be handling it again any time soon. Also heavily debating switching out the entire rear lighting for CanBUS error free lights for uniform shine.
Going to go ahead & put red LEDs back there so hopefully I won't be handling it again any time soon. Also heavily debating switching out the entire rear lighting for CanBUS error free lights for uniform shine.
#15
Hi 64etype.........I am very interested in your effort to remove back seat on XJ8, and rear shelf as I also want to cut into the potion above the fuel tank to expose the top , so I can replace the fuel pump without dropping tank. At this point I am trying to remove the rear seat( very tight as you mentioned.) . Do you have any other info as to the steps taken to remove shelf and get to the fuel pump to replace..?? Thx in advance...Chris Elley ( chriselley@hotmail.com)
#16
Join Date: Feb 2013
Location: Trying to escape Central Florida
Posts: 4,674
Received 1,794 Likes
on
1,316 Posts
#17
#18
Join Date: Feb 2013
Location: Trying to escape Central Florida
Posts: 4,674
Received 1,794 Likes
on
1,316 Posts
 ...in case your wondering, this came from the "How To" at the top of this forum. I know, ..who woulda thunk...right?
This is an older tutorial, I myself did not find it necessary to remove the driveshaft. One thing I do recommend, is to spray the fuel line releases with pressurized air (compressed can or a compressor) to get the dirt out to make it easier for the A/C clip release tool to work. https://www.mediafire.com/file/377tq...._1.3.pdf/file
This is for an XK8, but its very similar and doesn't have the annoyance of removing the drive shaft as in the PDF link.
JagRepair.com - Jaguar Repair Information Resource
#19
Remove the driveshaft?? Iíve never had to do that on any Jag to gain access to the fuel lines. Iíve had to either remove the parking brake linkage just in front of the diff and/or lower the rear subframe about an inch if the lines were being that stubborn releasing from the tank. Perhaps my arms are skinny enough just to maneuver through all that stuff and put the plastic release tool up in there. I definitely agree with blowing compressed air up inside the fuel line connections.
#20
Join Date: Feb 2013
Location: Trying to escape Central Florida
Posts: 4,674
Received 1,794 Likes
on
1,316 Posts
Remove the driveshaft?? Iíve never had to do that on any Jag to gain access to the fuel lines. Iíve had to either remove the parking brake linkage just in front of the diff and/or lower the rear subframe about an inch if the lines were being that stubborn releasing from the tank. Perhaps my arms are skinny enough just to maneuver through all that stuff and put the plastic release tool up in there. I definitely agree with blowing compressed air up inside the fuel line connections.
Thread
Thread Starter
Forum
Replies
Last Post
Currently Active Users Viewing This Thread: 1 (0 members and 1 guests)


