When you click on links to various merchants on this site and make a purchase, this can result in this site earning a commission. Affiliate programs and affiliations include, but are not limited to, the eBay Partner Network.
Unless you have one of our own JagWrangler's "Real Gauge" kits installed, your temp gauge will read right in the middle like that until it is close to overheating and cooking your aluminum engine.
Search for "RealGauge" and you will see that our temp gauge is just a fancy idiot light.
Vector
I've had it already about 1 mm from the red area of the gauge the Idiot Light didn't come on
I've had it already about 1 mm from the red area of the gauge the Idiot Light didn't come on
As far as I know, there is no "idiot light" for the engine temp on our cars, it may go into restricted performance, but from reading all the horror stories about owners continuing to drive after the temp reaches the red zone, I don't think it gives you any warning that you are about to turn your Jag into scrap metal.
From the RealGauge site:
"Once Jaguar's factory cooling gauge reaches about 185 degrees F, the instrument cluster forces the gauge to remain at mid-scale until the temperature reaches approximately 235 to 240 F. This allows virtually no time to react to an approaching overheat condition. Overheating may be extremely damaging to our aluminum engines in a very short matter of time."
So you got pretty close to cooking your engine. Not something I would be smiling about.
The RealGauge kit also adds an audible alarm so you get additional warning of high engine temp.
You understand that the factory temperature gauge is not linear in function.
It is designed so that it doesn't "scare" novice owners by showing the normal fluctuations of engine temp that occur with varying driving conditions. It stays in the center until things are close to getting ugly and expensive. The result is very little warning of an overheat condition.
Your car could have been running warmer than normal for some time with no indication from the gauge and then shoot up to an overheat condition in a short period of time.
I am not affiliated with JagWrangler or RealGauge, I just think it is a great product that solves a very serious design flaw in our cars, especially as they get older and components of the cooling system are more prone to marginal performance or failure.
Vector
Replaced the number 5 coil pack. Car runs perfectly again
Fingers crossed my procrastination hasn't shortened the life of the cats and O2 sensors though.
In other news, I finally got around to ordering a set of 20" BBS Detroit wheels and tyres from Japan. They won't turn up for a while though.
Still waiting on my lowering springs, but word is they're not far away... (why does that sound familiar?)
I'll be happy if they're here by the end of the month. It's not like I'm in a hurry, but I do understand there are a few people waiting on my review/writeup about them too.
Meanwhile, my Arden sideskirts, Brembo conversion and headunit are still sitting in the "I'll do this one day, honest" pile, but on a more positive note, her's a pic of the old girl doing what she does best
:edit: here are the wheels I ordered. Not a fan of the colour, but will see how it looks in person before making any decisions about repainting them. Quite a fan of the original oyster/gold-ish colour, especially with a red car
Last edited by grandell; 05-03-2015 at 12:59 AM.
Reason: added wheel pic
As far as I know, there is no "idiot light" for the engine temp on our cars, it may go into restricted performance, but from reading all the horror stories about owners continuing to drive after the temp reaches the red zone, I don't think it gives you any warning that you are about to turn your Jag into scrap metal.
From the RealGauge site:
"Once Jaguar's factory cooling gauge reaches about 185 degrees F, the instrument cluster forces the gauge to remain at mid-scale until the temperature reaches approximately 235 to 240 F. This allows virtually no time to react to an approaching overheat condition. Overheating may be extremely damaging to our aluminum engines in a very short matter of time."
So you got pretty close to cooking your engine. Not something I would be smiling about.
The RealGauge kit also adds an audible alarm so you get additional warning of high engine temp.
You understand that the factory temperature gauge is not linear in function.
It is designed so that it doesn't "scare" novice owners by showing the normal fluctuations of engine temp that occur with varying driving conditions. It stays in the center until things are close to getting ugly and expensive. The result is very little warning of an overheat condition.
Your car could have been running warmer than normal for some time with no indication from the gauge and then shoot up to an overheat condition in a short period of time.
I am not affiliated with JagWrangler or RealGauge, I just think it is a great product that solves a very serious design flaw in our cars, especially as they get older and components of the cooling system are more prone to marginal performance or failure.
Vector
When you Start your engine, you'll see a red warning light above the gauge. That comes as far as I have been told. And yes, the temperature shot up but luckily enough I noticed it and could react quick enough. Engine is totally fine... Nothing wrong anymore.
Regarding the reaction: I come from Volvos. Volvos have always had the nonmoving gauge. So that isn't New for me. My gauge in the X308 did ist sometimes a tad below and a tad above the middle mark...
I finally got around to repairing the front bumper where it had gouged paint/plastic on a couple of poorly placed parking lot concrete boundaries (and poorly observed I should probably add).
I sanded, filled, primed, painted (anthracite pearl) and clear coated....looks like new - very happy with my first attempt at [very very minor] panelbeating
...of course I didn't do all of this "today"...it took a 10 days between coats :-)
In other news, I finally got around to ordering a set of 20" BBS Detroit wheels and tyres from Japan.
So you finally bought them, he? Congratulations, they look awesome!
And I am happy they are off Yahoo after such long time, they looked too tempting every time I saw them ....
Scooped up a set of floor mats off the usual place; the foam on the back of the fronts is deteriorated (I just scraped it off...I have replacement foam-backed headliner left over from my Europa resto that I'll use to pad it a bit...) but the rears are absolutely cherry.
Had to hit the fronts with some carpet/interior shampoo to lift some stains/dirt...but, they came out just fine.
They're not the taupe color, but the beige carpet. But, the edges are serged in taupe, so, it gives a good transition to the somewhat lighter color of the rug material itself. It's not that bad; and considering the seat and rest of the interior colors, it all kind of works together. I'm good with it.
And, oh, yeah, the leaper/text logo is done in taupe, also. So...they do look good, fit properly, and I can bin the universal set I picked up after I bought the ride last September.
Next stop: body shop to remove the rust on the passenger side forward end of the wheel arch, have a PDR guy come by to take out 4 dings (one on each front door and two on the bonnet...), and that spot o'rust at the lower corner of the rear window on the passenger side. Have a couple good bumper covers I'm going to have repainted in BRG to replace the ones I have (they're fine, but I scored the covers for the price of helping wrestle a tranny out of an XK at my wrench's shop)
Then a good buffing to bring her shine back up.
Driver side carpet. Nice shape for a set originally bought for a '99.
So you finally bought them, he? Congratulations, they look awesome!
And I am happy they are off Yahoo after such long time, they looked too tempting every time I saw them ....
Yeah, everything kinda fell into place. They dropped the price, I got my bonus, and I have a friend who brings in containers full of parts from Japan every few months, so figured I'd earned it :P
Hopefully the tyres have some life left in them too
Going to attempt to repair my cupholder today, if all goes well. One of the little pin tabs that hinge it in place is broken, so it WILL latch shut if you do it just right, but the slightest bumps will cause it to shift enough (since it's missing one end to hold it in) and it pops open. It might not be the prettiest when I get done, if it even works. The way I figure it, for the 2 bucks in parts I'm attempting, it's worth a shot. If not, I can't make it worse, and would need a new one anyway. If it works, I'll have a video sorta, of what I did.
And another 10 hours to see if I win an ebay auction to replace my stupid door handle mechanism that someone gunked together before I got the car. I would repair the door card push holder things if I had remembered to bring my trim panel set back from my boat last Saturday. Oops. For now... to the Batmobi--er, I mean...car!
Repair successful! I took a couple quick video clips, but my phone is having a heart attack in this heat so the uploading them is taking a little bit of my patience away.
What I did, was pick up some 1/8" aluminum round bar fro the local hardware stores (Lowes, in my case), drill a slight bit into the cupholder assembly itself, clip off about 5/8" inch of the bar and slid that into the newly drilled hole. Then popped it back into place, and voila! Works perfectly now, took all of about 5 minutes, cost of two dollars and change, and I feel accomplished for the day.
Dropped off the cat at my body guy's shop yesterday. On the list:
1. Remove rear window (which means I can get the headliner out to recover...kill two birds with one stone..) so he can attend to the small rust bubble starting at the lower right corner and repaint. Has a window specialist coming by to cut out old window. May replace the rubber gasket and chrome insert while out, too (see 'shipwright's disease' for a more complete explanation)
2. Call in a PDR guy to take care of 4 dings, one each on front doors and a couple on the bonnet, and one minor crease on the front fender, along the side right above the bumper from the light to the wheel arch.
3. Cut out the rusted front of the passenger (NA model) rear wheel arch and splice in a new piece from the quarter of a body I picked up from a Texas car.
4. Sand and paint the front two doors from the window trim to the body break line (they're both scratched pretty badly and the driver door seems to have had the previous owner's initials in a crest on it...not well covered or sanded down before previous repaint...)
5. Remove the external mirror covers and install chrome plated covers (a la VDP)
6. Remove, strip, sand, and repaint both front and rear bumpers.
Figures about 2 - 3 weeks, since he has to subcontract some of the work (glass and PDR), and about 2.5-3K for all of it. Some of that is labor, since with my travel, just didn't have time to strip out the rear seat so he could get in there to weld...but, considering I've sent him over 10 lotus owners to have their cars redone, and he's done 2 of mine...we have a good working relationship (which says a lot about developing a working and mutually respectful relationship with professionals who you engage rather than a confrontational mein...).
So...my big cat is getting some lovin'. Won't win any concours awards (that's what the Europa is for), but will be just a nice daily driver (12K miles on her since September last...who says you can't use them regularly?)
Spent the absurd amount of almost 90 US dollars for the small, blue capped light bulbs at the official Jaguar dealer here .
But they will make all door switch-packs light up at least, something which bothered me since I knew they should be lighted ...
Will need to spend some time this week to install these, install a Parrot, take out the last little squeaks in the process, clean the leather one more time, and then the interior is back to perfect!
Crashed it 3 weeks ago. On checking me for possible injuries (none) I was found to have pneumonia, which, when added to existing emphysema had resulted in lack of oxygen to my brain causing confusion, and conviction that I was fit to drive - when obviously not. Have had several estimates for repair am now awaiting spare parts to enable panel beater to proceed. First estimate was �5k. Awarded job to old fashioned panel beater, who quoted �1.5k. No competition. Damage was to f.r. wing, f.r. door, rear bumper, and rear r light fitting. My son, who knows the repairer guarantees he's so good at his job I won't even know it's been bumped when I get it back. Hmm, here's hoping!! After 2 weeks in hospital, could do with some good luck for a change !!
Last edited by Richy_Jsy; 05-12-2015 at 05:06 AM.
Reason: completion
1. Body guy (Dave) removed both bumpers and is in the process of sanding back to the base plastic, will rectify (previous work exposed that was basically just spot putty and paint...no, not on my car...) the surface, prime and repaint (with the proper flex agent in the prime and paint layers.
2. Rear seats came out (back squab not without some grunting and colorful anglo-saxon metaphors, though), rear shelf, C pillar trim, and all the bits at the rear so the window guy can separate the glass out to fix the rust bubble. Dave mentioned that when he pulled the parcel shelf, the lower corner of the body flange was obviously a spliced-in portion that was NEVER PRIMED by the previous shop whoever did the work, hence the rust starting. It's just basically surface rust; a bit of sanding, a bit of rust stabilization, and repaint.
3. Along with the rear window coming out, and considering the amount of stuff that had to be removed to do it properly...Dave asked if I wanted him to remove the headliner (which he said made a nice curtain once he removed the upper rear window shade mounts...) so he could bring it to the local trimmer (who orders his stuff from woolies in the UK); said the trimmer quoted him $150 US to recover (and that includes the cost of the material). Might as well, right? Not that much more to pop the rest of the trim off and pull the card out via the open rear window.
4. Dave cut out the questionable wheel arch trim. Seems (like the other body work that was done...) to have been a half-assed attempt; while the pinch weld along the door opening was spot welded...the rest of the joints were sealed with freaking RTV! Which meant that, yes, there was water ingress into the leading edge of the wheel arch...and, according to Dave, about 6" of mud/sand/muck that filled in that area of the body. The rust damage to the wheel arch did NOT affect the lower rocker panel or the inside metal to the extent of having to replace those pieces; he'll clean up, acid etch primer the exposed metal, weld-through primer on the new pieces (which he's cutting off the body section I gave him, weld in the replacement, shoot acid etch into the cavity before closing it up, along with Corrosion-X along the sill and rocker), then WELD in the closeure pieces as was done at the factory. (
5. PDR guy quoted 200 to take out ALL the dings and creases. Luckily, they're all in accessible areas of the body.
6. When it's all done and metal work finished, Dave suggested steam cleaning inside the front and rear wheel arches, cleaning up any obvious rust, masking off the various drains (sunroof, etc) in the arches and suspension bits, and putting in a good coat of truck bed liner (minus the grit) to really seal and protect the inner surfaces. I've done this to good effect on other cars...and since it's a high-abrasion resistant coating, might not be the worst thing to do to help ward off the tin worm in those areas.
FWIW, stopped by my wrench's shop in Flemington NJ yesterday...and he had in the forecourt an XJ6 Mk-II. Chrome wheel arch accessory...felt underneath...no original Jag metal. Guess that's why the owner put the chrome arches on, right?
And has a 98 VDP that's been sitting in the rear of the lot. Just sitting there. Owner can't afford the bill for the brake job that was done. Sad...body is in great shape, paint is slowly oxidizing to chalk...leather is cracking just looking at it (it's cashmere, body in black). So sad. At some point, will be a parts mule (I'd love to get the VDP bits like the grille, rear trunk eyebrow, tray table/seat backs, steering wheel, VDP wheels...) but, my friend has mentioned that it might be worth just selling to recoup his mechanics bill...but, some folks just don't see the light until it's too late...oh well.
More as it happens or Dave updates me. He figures it will all be finished by the end of next week.
Oh, yeah, he's using Sikkens system products. Paint supplier swung by yesterday and scanned the existing paint panel to get the color match; Dave said the BRG and what the paint guy came up with by scanning is almost a perfect match, so feathering in the repairs should go just fine. I trust Dave to do the right thing...after all, all the cars he's done for me have gone on to take the blue ribbon in local and regional shows...
And...adding in some photos from today:
Front, bumper cover and bar removed (to maintain the stiffness while working on it...
Old rusted body shell cut away, new interior metal welded in place, leaded, and acid etch primer drying.
Yeah, that headliner needs refreshing...'They all do that, sir...'
Rear bumper being stripped, sanded, chips and dings in the plastic found under 3 layers of paint being rectified.
Front bumper, being readied to be renovated. Dave was careful with the chrome blades to not scratch/break them whilst taking apart.
Trunk open; yeah, that's body shop fluid in the cups there...
Inside the wheel well; leaded and acid primer. Will clean off rest of wheel well, acid etch and cover with trunk liner once all the body work is done.
As bad as body shop work looks while in process though...
It's father's day here in Germany so I had a day off of my slavery job to sort something on Rusty, which has been getting on my nerves sind day #1:
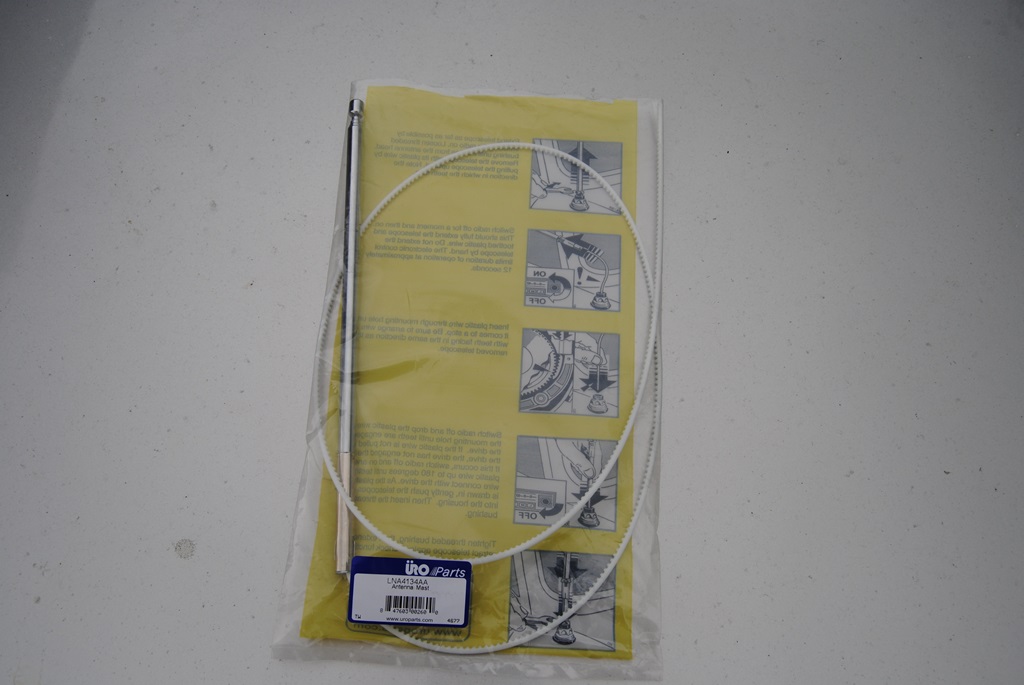
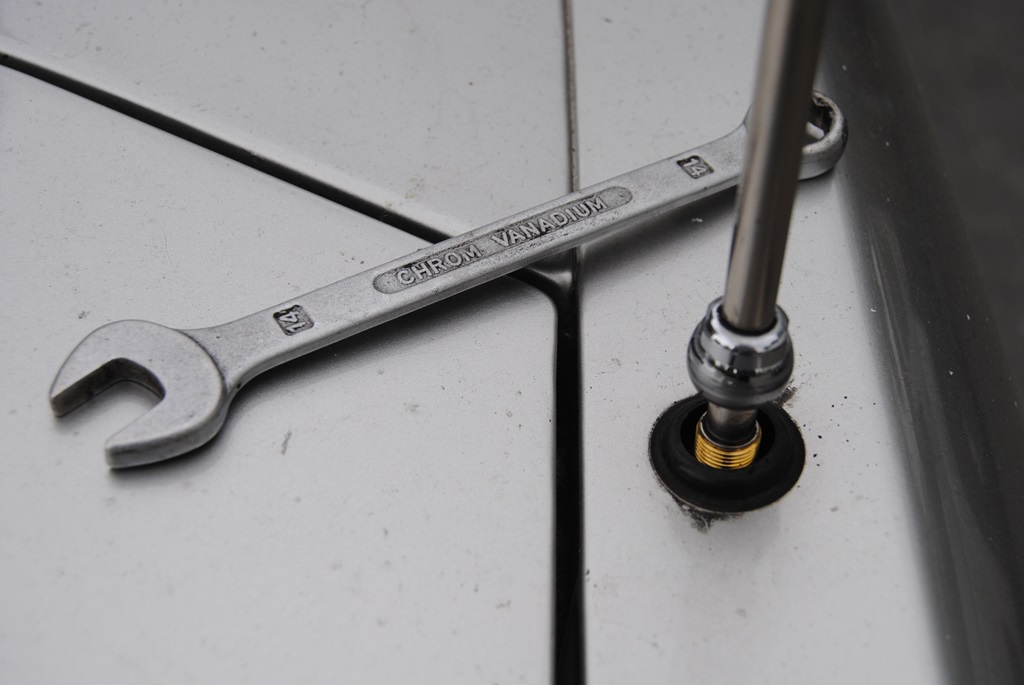
The antenna!
It works, but doesn't lift it properly. So I replaced the rod
Before:
After:
And inbetween:
I must say, it was a little fiddly at first but the results are great. I finally can get BFBS in! For those who don't know what that is: it is the British Forces Broadcasting Service Broadcasted normally in most of Europe for the troops stationed everywhere
I wrapped the dash trim wood stuff with vinyl. No, not a tacky fake carbon fibre. Nor any fake brushed aluminium or so. I went simple but elegant... Matte Coffee Brown.
Replaced the worn front left anti-rollbar-link... Mine was well worn and fell apart in my hands. Explains why it would always go "clonk clonk" over bumps... No more "clonks" anymore
And at the same time, I noticed my front left brake doesn't work. Not any kind of motion or movement at all. The car still works/slows down properly... Just not as good
Luckily the calipers from my old XJ6 (X300) are the same. So I'll get them sand blasted, give them a coat of paint, replace all the rubbers and refit them. I should then have some good brake results... All important for the due T�V appointment!
 05-02-2015, 02:16 PM

 the Idiot Light didn't come on