When you click on links to various merchants on this site and make a purchase, this can result in this site earning a commission. Affiliate programs and affiliations include, but are not limited to, the eBay Partner Network.
So this is my XJ40 which I sourced for a friend a few years ago. He had an office in Bulgaria and wanted a vehicle kept out there that was unique, didn't make him look like a mafia drug dealer, had little value but portrayed and image of being special. German performance cars were out as nobody but the Mafia have German cars in Sofia, so we thought outside of the box and I found this. We picked it up for about �1500 with around 50k on the clock. It was in mint condition and it drove to Bulgaria without missing a beat. Despite the rather brash gold wheels, we felt it kinda worked on this car and it certainly turned heads everywhere it went. People of Bulgaria thought my friend was a billionaire. They had no idea it cost less than a 15 year old golf tdi at the time. Mission accomplished
When my friend no longer needed it, we brought it back and it got parked at his uk office and forgotten about. I went down there one day and saw it covered in crap and looking sorry for itself, so, I "looked after it". I used it for a while but as lovely as it is, its main purpose seems to be converting fuel into noise which was fine in the 80's and early 90's but today, �10 worth of fuel to do 20 odd miles, very sedately and drama free... It wasn't working for me. If I'm going to spend an outrageous amount of money on fuel, it needs to go and sound like a beast.
The car sat parked under a tree for over 2 years. I spoke to my friend and said we needed to get this off my drive, its going to be in a sorry state if something isn't done with it soon and I didn't want to spend the money on buying it off him as i could just go and buy a car that suited me better, so, it needs to go and its pretty much worthless in its currant state. He just said i could have it for nothing so that means that I can justify keeping it and doing something with it. Happy days!
I have been looking at buying myself a "nice"car for a while and I just couldn't find anything that interests me. I find modern cars really boring these days and when they go wrong, its usually electrical and... MONEY!
In my youth I have had 90's hot hatches, several rover coupe turbo's, several modified 200sx's, and RX7's. I then grew up a bit and went down the German route with BMW 330 coupe, tuned Audi S4 Bi-turbo avant and an E46 BMW M3. My friends all had German cars which i got to drive regularly, cars such as, C5 and C6 RS6's, Z4's, Z3, tuned Skoda VRS/golf GT's, Golf R32, F10 M5, etc etc. We were all chasing serious horsepower and we kinda lost our way with what actually matters in a car. Sure, my friends 800BHP M5 is absolutely mind warpingly fast, however, nobody that isn't a professional racing driver can use it to anywhere near its potential and when it breaks, its a grand per opening of the bonnet if you are lucky. The other issue with cars like this is, when you are not shredding �600 per corner in tyres, you could be in a normal diesel 5 series for all you know.
Nothing has made me feel like i felt when I had the cars that I had in my youth and I have come to realise that a medium amount of power in a car that you feel excited to drive, no mater how old, how poorly built or how much its worth, is what being a petrol head is all about. I want the simplicity, the drama and the enjoyment again.
So my plan for this car. I want to keep it a Jaguar through and through, I want circa 400bhp with a v8 soundtrack, I want it to cost as little as possible and I want it to be reliable.
This has led me to the decision to buy an X308 XJR as a donor car. I have found one with shoddy bodywork but less than 90k on the clock for peanuts. I'm going to swap everything off of that, into the XJ40 so that it has all the XJR running gear and electrics, as well as air con.
From what I can tell, the subframes look like a direct swap (or at least, require minimal modification to fit), I'm swapping the entire loom, security system and electrical components so i shouldn't run into any issues with ECU's or alarm issues. The only thing that i can see is that is massively different is the front suspension turrets. Looks like i will need to do a bit of fabrication there. I haven't had a look at the rear end yet but at the end of the day, if it doesn't fit, you just have to make it fit or work around the issue.
Once its all running and driving correctly, it will become a rolling restoration project and then i might look into upgrading to the 4.2 supercharged v8 in the future.
So guys, what do you think? Any pointers? Is there anything that you think will stop the project in its tracks? anyone done this before?
The donor car has arrived!
80K miles on the clock and runs as sweet as a nut. Having never driven one and having owned some seriously fast cars, i was expecting to be slightly underwhelmed, but boy do these things shift! The front suspension is shot to bits so that added to the drama a bit but wow! If this project is successful, once its had a smaller pulley and some breathing mods, its going to be everything I was hoping for in terms of performance.
I'm going to be getting them both in the workshop tomorrow and start pulling them apart. I did some basic measurements on the floor, where they are and its looking promising. The chassis look pretty much identical between the radiators and the spare wheel well.
The front subframe to chassis leg mounts look to be in the same positions for a simple bolt in job although i have not been able to measure the width due to engines being in the way, but the distance between the bolt holes in the chassis rails are identical and looking at the rear, front subframe mounting points under the footwell's, they to seem to be exactly the same
.
In the middle, the XJR has a big, "cradle" style gearbox mount which the xj40 does not have but the rails are the same so that will make fabricating the mounts to bolt up, easy.
On the rear end, I was only able to measure between the front mounting bolts and again, they are the same.
In regards to the suspension. Looking at the front wishbones, they look very similar. They have a bolt on spring seat which may be interchangeable. If this is the case then i can run the XJ40 suspension, which means i wont need to fabricate the strut towers. I can just buy some aftermarket, performance parts for an xj40.
I'm sure there are going to be some surprises lurking in there somewhere but from what i can see on the surface, I'm feeling pretty confident that its not going to be a mamouth task.
So I have been busy.
got the engines, gearboxes and front suspension/subframes out of both cars.
The XJ40 has been an absolute pleasure to work out and there has been literally, not a single problem nut or bolt. The XJR on the other hand has been a pig! Anyway, it�s done.
next step was what I was most nervous about and that�s, does the subframe fit as, if it didn�t then it�s a whole world of pain with custom fabrication, making sure the engine sits exactly where it should etc.
Well, it turns out that it bolts straight in. I obviously need to measure everything and make sure but on the surface it appears to be perfect.
you can see that there are two options for position on the rear mounts. The 3.2 has narrower subframe and therefore uses a bolt on adapter, where as the X308 subframe utilises the wider position which just had a spacer sitting in there.
next step is to tidy up the V8 loom and then test fit the engine and box in order to fit the gearbox mount location. This is going to require some minor fabrication but it�s pretty straight forwards. After that i�ll Need to cut out any brackets etc that I need from the X308 and mount them in place in the XJ40 engine bay.
So it all seems to measure up so I went ahead and started the first fitment. Slotted straight it with no issue. Just need to weld some captive nuts into the chassis rails for the gearbox mount.
Small update as I have been busy with other stuff and I�ve been tackling the electrics which has been slow going. I have just been walking away from it when I get fed up as it�s all too easy to get impatient and break something or make a mistake when removing interior pieces and these horrendous ford electrical connectors!
i now have all of the wiring from the front seats back to the boot transferred into the XJ40. This was time consuming and really not much fun but fairly straightforward. I had to cut some clearancing holes in the beam under the rear seats, pop some riv-nuts in place and mount the main part of the body control loom in place.
There are two connectors that need extending as they no longer reach their intended destination with the new routing and I need to weld in some earthing points as I don�t trust riv-nuts as a good earth.
next I moved onto the boot. Swapped the fuel tanks over with no issue. The only thing I had to do was use the xj40 filler surround which meant I needed to cut out the OEM locking mechanism and then modify the X308 one to fit. I knocked up a simple bracket which seems to work. I�ll make a new prettier one once I know the car works.
the battery and fues box then needed a home. I cut out the battery tray from the X308, reshaped it, welded in some mounting brackets and made it a bolt in piece so that when you drop something underneath it, it can be removed. I also wanted to be able to remove it in the event that I have to cut the boot floor to clearance the rear ARB which looks like it�s going to be very tight. I have left room for this, thus the position of the battery tray is set as far back as possible and the top of the relay box sits level with the chassis rail ready to receive a nice carpeted box.
there was another slight modification required and that was the aerial mechanism. I just reversed the X308 mounting bracket, welded on a tab and mounted it on the xj40 mounting location.
once everything was in place I routed the loom into place and secured it. I will change plugs etc and plug it all in on a final pass through the car.
i have now removed the engine again and have started on the front end. I�ve removed all of the engine bay pipe work and wiring. Im then going to cut off any brackets and bits that I don�t need to keep, give the bay a good old spruce up and then fit the X308 loom, brackets, pipe work, etc.
in response to the question re ABS. Everything is being transferred. There will be no xJ40 parts in the system. The servo looks like it will be tight but i�ll Cross that bridge when I find out just how tight. I might need to clearance the wheel well or look for an aftermarket/slimline replacement. The other issue is going to be the box that houses the ECU. That very much doesn�t fit so I�m going to have to get creative.
Tackled the engine bay today. Removed everything, gave it a quick clean up and I�m now waiting for the rust eliminator to do its thing on a couple of areas. Next I will cut off any redundant brackets and then crack on with transfering everything from the X308.
This is a great project, on a real beauty of a car. Thank you for all of the detail on this. This will be quite the transformation once it is all said and done, and I'm looking forward to seeing it.
Bit of an update for you guys. Unfortunately i have had to build a new workshop space so i have had limited time on the car in recent weeks but i'm back on it now.
So after cleaning up the engine bay, it was time to start putting in the ancillaries/brackets/etc into the xj40 engine bay.
Started with the ABS pump and relay boxes.
As you can see, it sits too high. In order to lower it without having to chop the car, i took the bracket off and modified it.
This allowed it to sit at an acceptable height. I am going to make my own brake lines as I'm not happy with the way they route over the exhaust headers.
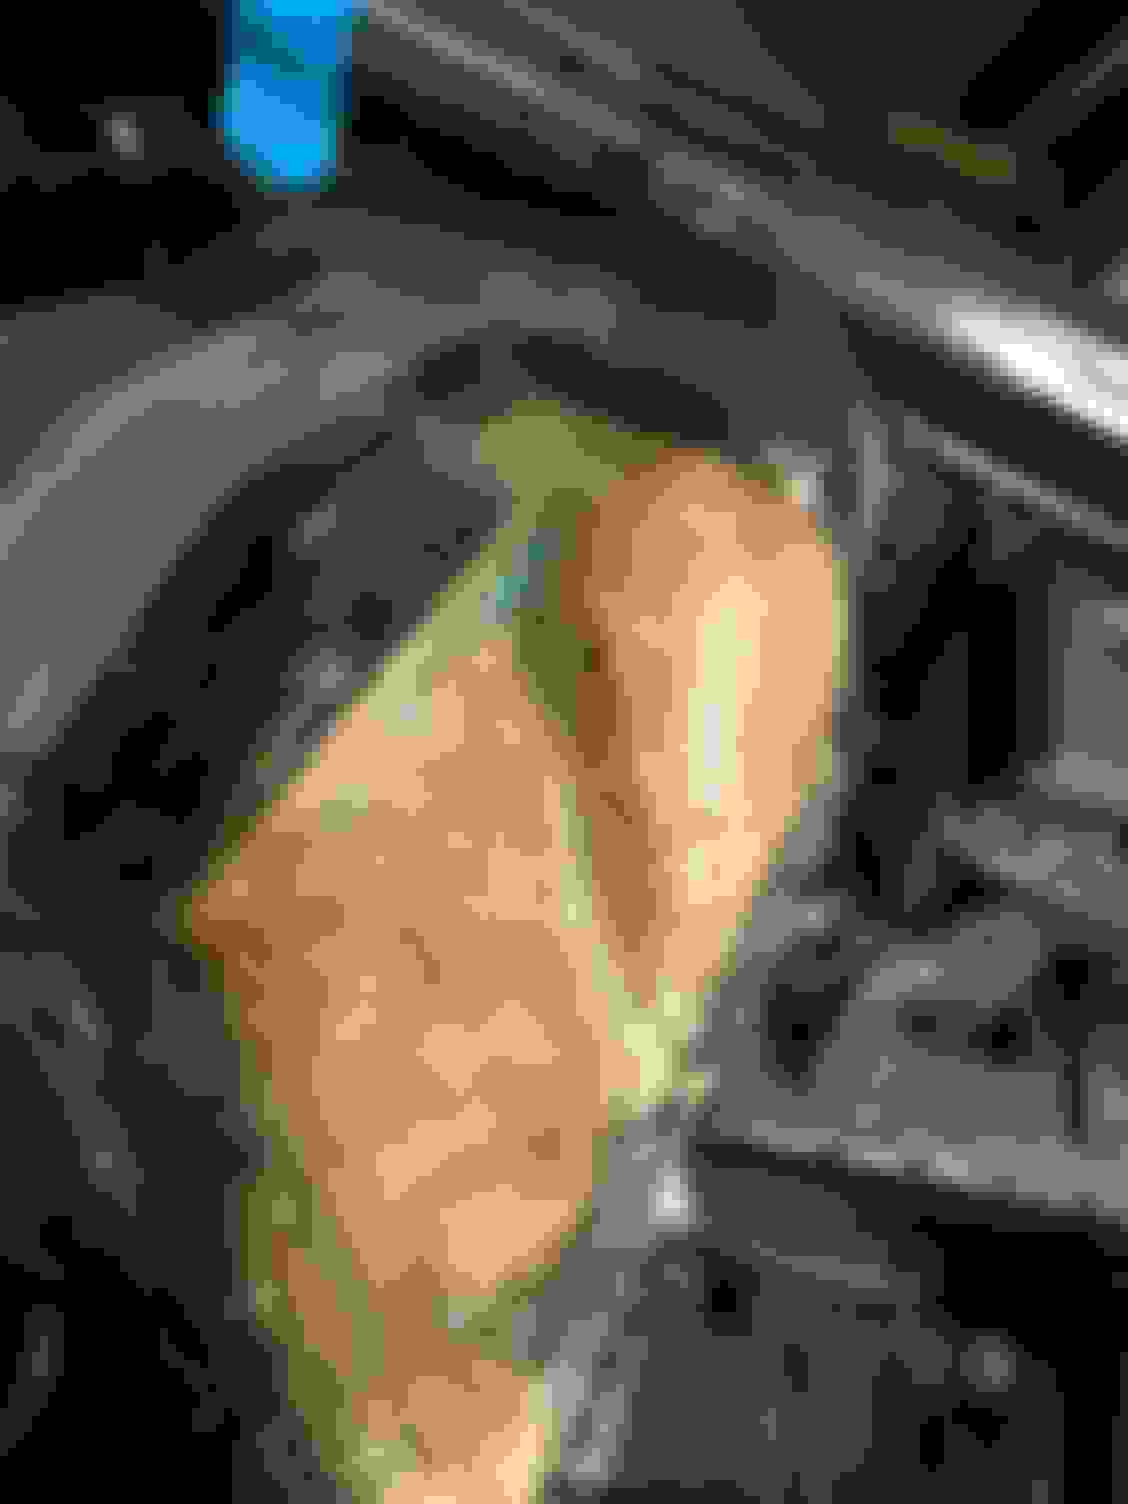
Next i installed the bracket for the relay box and then moxed on to the ECU box. This doesn't fit because of the shape difference in the wheel wells. I chopped it up until it sat on its flange and the wheel well brace cleared.
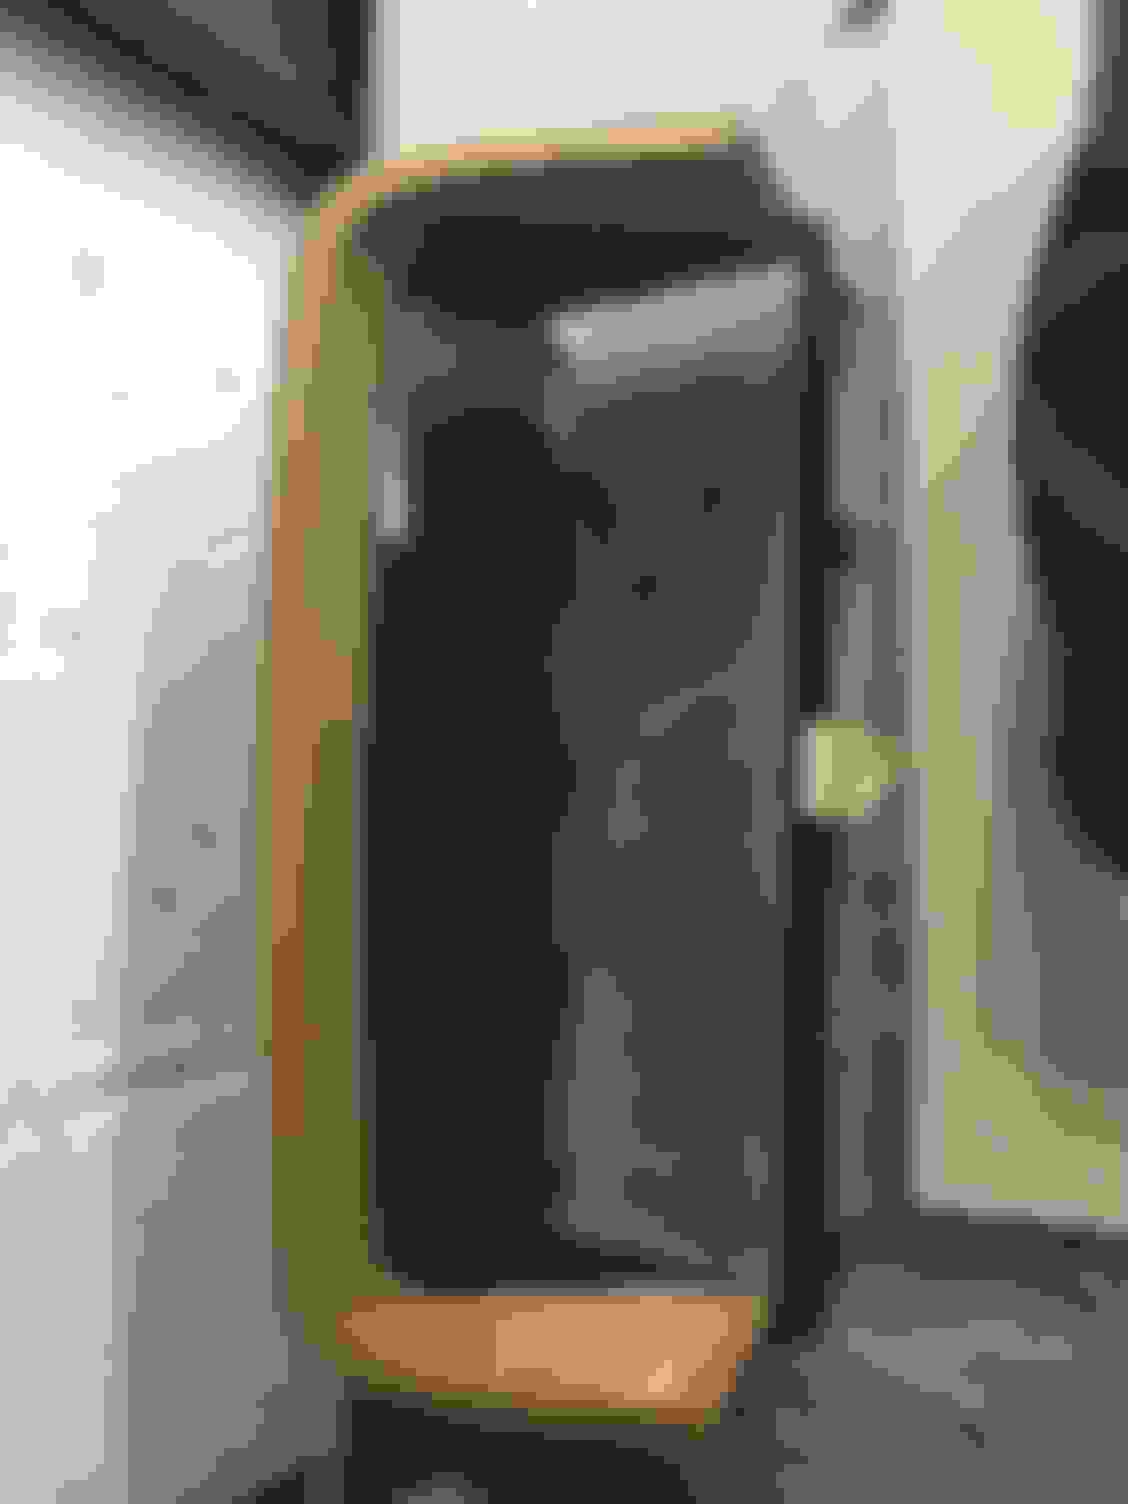
I then made some metal tabs to get the basic shape right for the easy bits. I basically moved the top section inboard enough for the ecu to clear the wheel well brace, whilst being able to utilise the OEM mount. I then reconstructed using fiberglass.
Once I had got the structure back into it, i was left with a hole that required a very complex shape to be created. I was going to try and make plates and shape them but it was just too difficult so I taped up the wheel well.
Then i put the box in place, but let it lean forwards to contact the area of interference so that when tilted back into the correct position, it would naturally create clearance.
Once the box was in place i then taped over the tape that was stuck to the wheel well, from inside the box. I then cut some fiberglass and bonded it in place. Once set, i pulled it off the tape and built up layers from the outside.
Next it needed sanding and touching up. Its still a work in progress and still needs more work but, it fits really well, the ECU fits perfectly and its structurally sound. It will be prepped and painted.
Next it was time to tackle the brake servo.
Yes, as I was dreading, that doesn't fit! Now we are into full on project issues!
So after looking at every option from remote system to running without a servo, i decided it was just going to have to be chopped.
I cut out the whole panel from the X308. I then used tin foil to model the shape of both cars to compare and see where exactly the interference was and where I could weld the new piece in. After hours of trying to make it work, I was in a situation where every adjustment led to another area distorting. I was just going around in circles so I decided to just make a piece from scratch. Tig welded what I could in place to minimise the heat and risk of distortion. Once the basic shape was welded in place, I then back plated it and tied it all together to make up for the fact that I had had to cut a structural area.
Thats now all tidied up and primed ready for paint. Brake servo assembly all fits.
Next I fitted all of the brackets for AC, Relays, expansion bottle and radiator mounts.
Next i stripped out the dash, dealt with some rust and welded in a plate that holds the X308 style plug, rather than a rubber boot going through a hole. I then put the AC unit in roughly the correct position. The position of the AC coupler is different so i will need to cut and weld a plate into the bulkhead but thats a job for later.
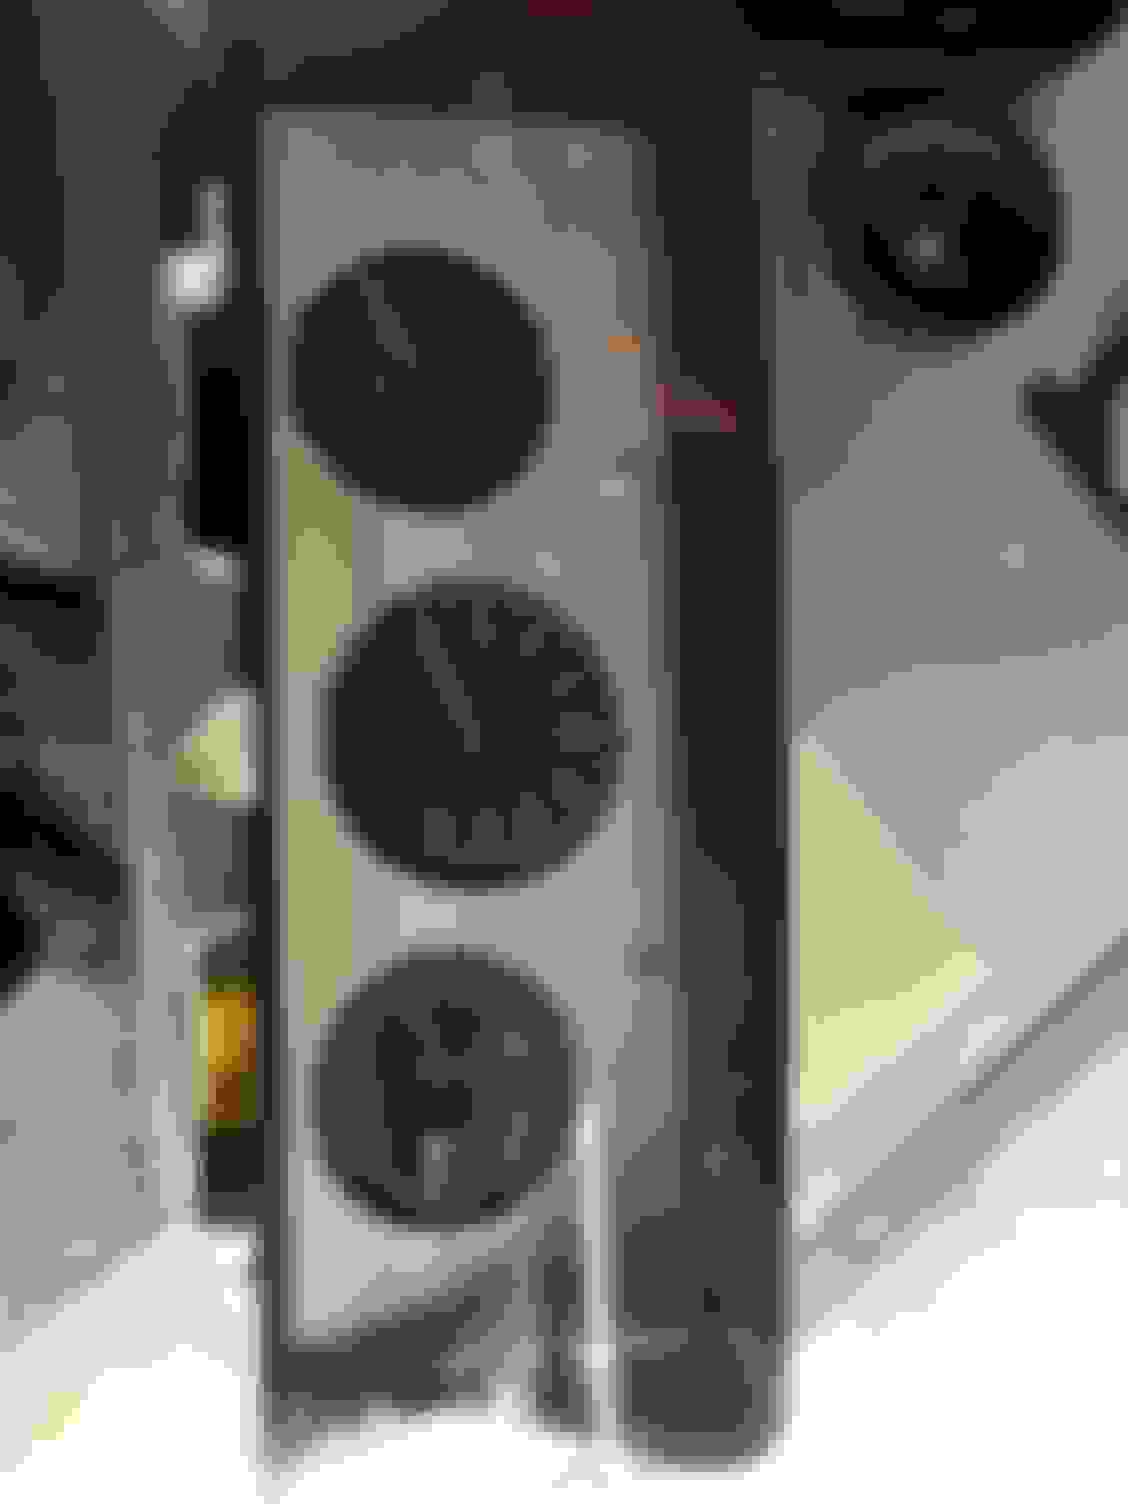
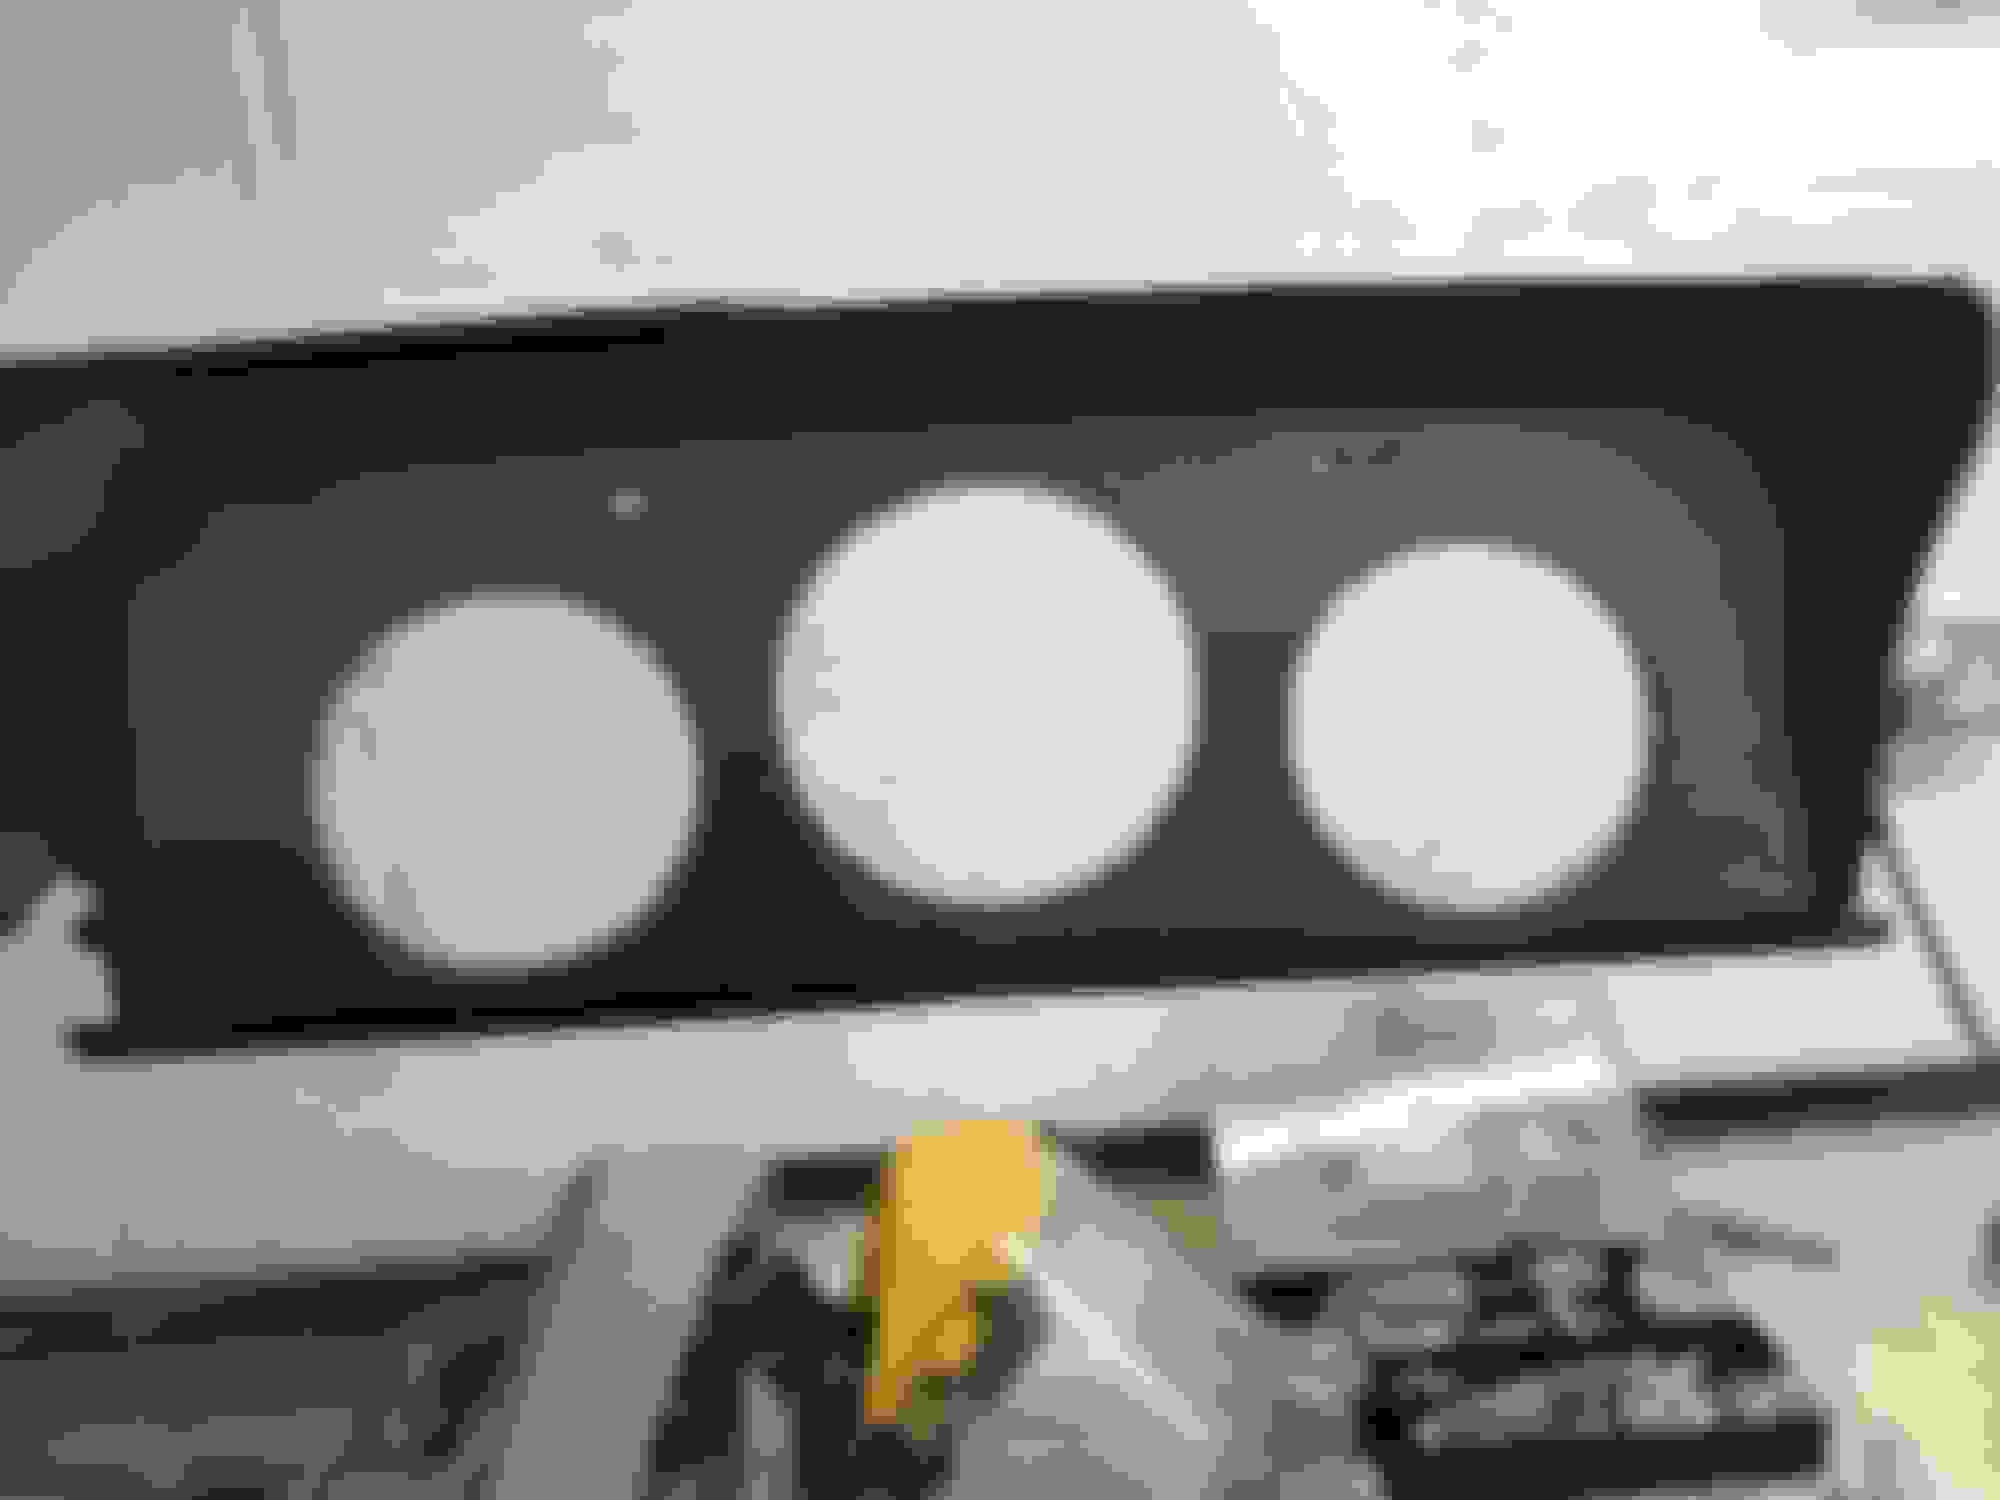
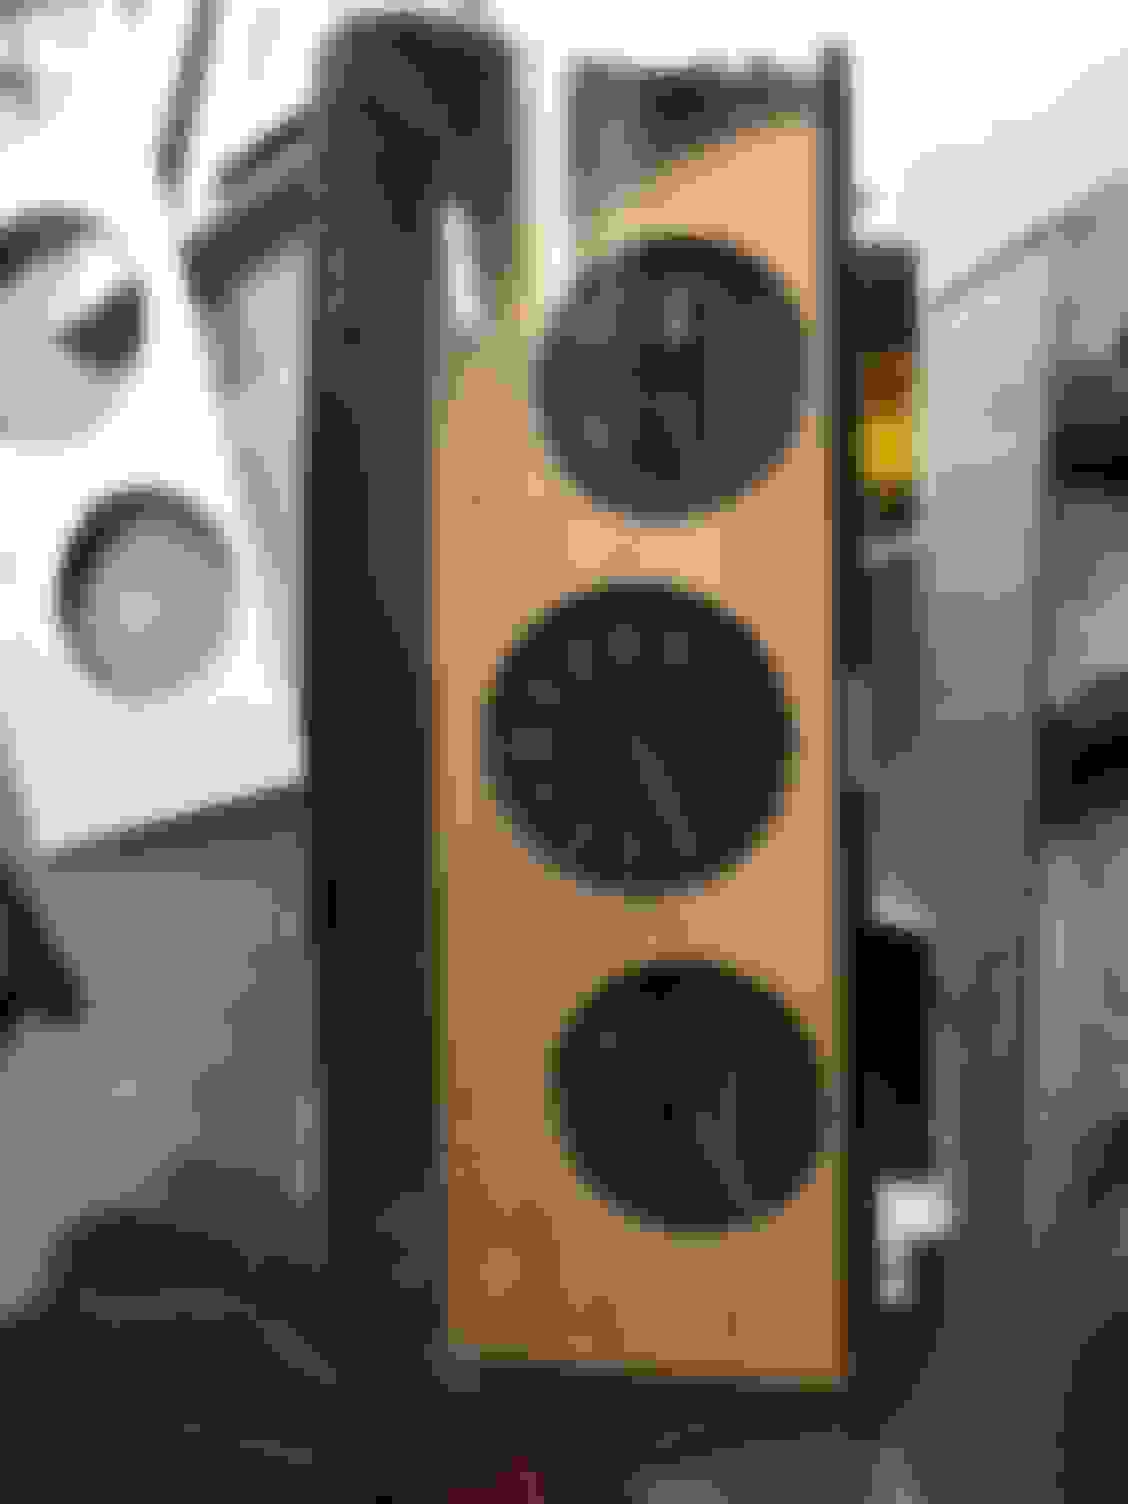
I then moved onto the dash cluster as it was playing on my mind a bit.
First i took the xj40 and x308 clusters apart.
I then used the bezel to mark out a card model.
It worked out nicely. The X308 clocks fit very well and theres lots of room. I then got some 8mm timber and used the model as a template. Worked a treat and I'm hoping to get away with wood dye and lacquer but if that doesn't look right i will remake out of real timber to match the rest of the trim.
That is all for now. Next update should see it closer to the point of the engine going back in!
Unfortunately the project has had to go on hold for now. COVID put an end to my hospitality business by way of ruining our exit plan/sale of the business and we just weren�t prepared to start over after putting 5 years of 100 hour plus weeks into it. This has led to a change of location and career and at the moment I just can�t find an affordable workshop. There is one in the pipeline but it won�t materialise until next year. Hopefully I can pick up where I left off soon but I can�t justify �800 a month to rent space for a hobby. Sorry for lack of updates, it�s been a bit of a rollercoaster of a year.
That�s life I suppose. Unpredictable and challenging at every turn. I did assume something had put a hold on things.
let�s hope you get back on track eventually. It would be good to see one of these conversions completed.
Thanks for the updates on your project....thats a ripper colour for an xj40....and yes they are a better shape than the x300 but that supercharged v8 looks great in the '40 engine bay. If anyone can do it you can im sure.
I must learn how to weld one day....in the uk everyone can weld cars in australia they get rusty they go to the tip....Covid restrictions lifting in my state getting close to ninety percent vaccinated !

 04-09-2020, 09:27 AM