'72 XJ6 rear brake overhaul
#21
 01-29-2015, 10:57 AM

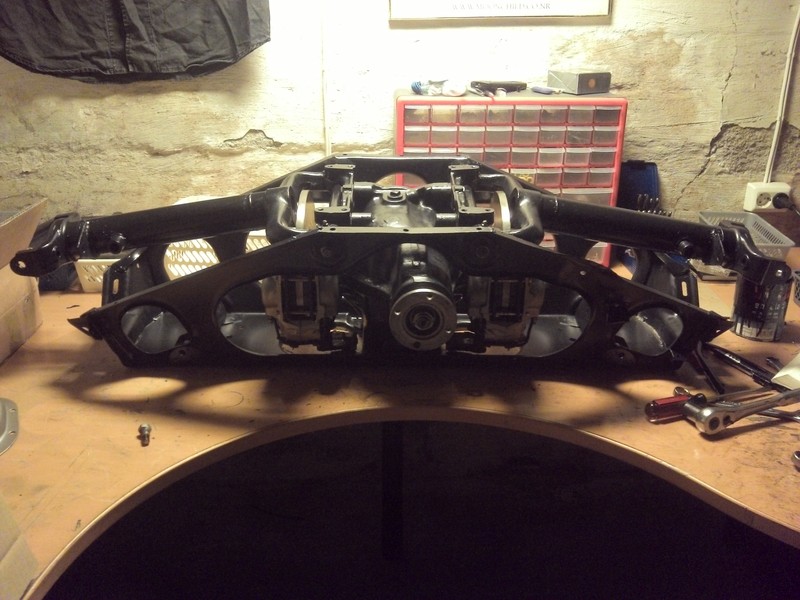
I've cleaned and de-greased a lot of the parts now. They'll all get a coat of Paint before they go back in. The Cage, the bottom plate and the diff lid is off to sand blasting.
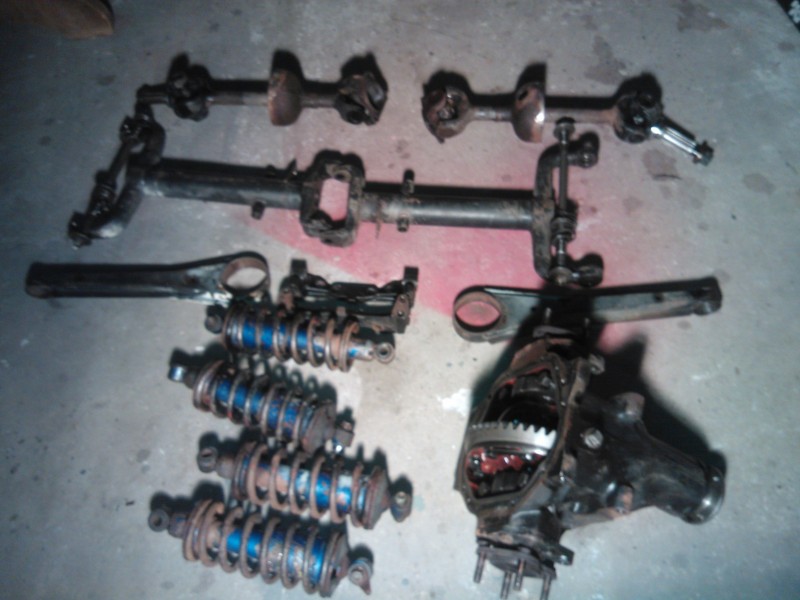
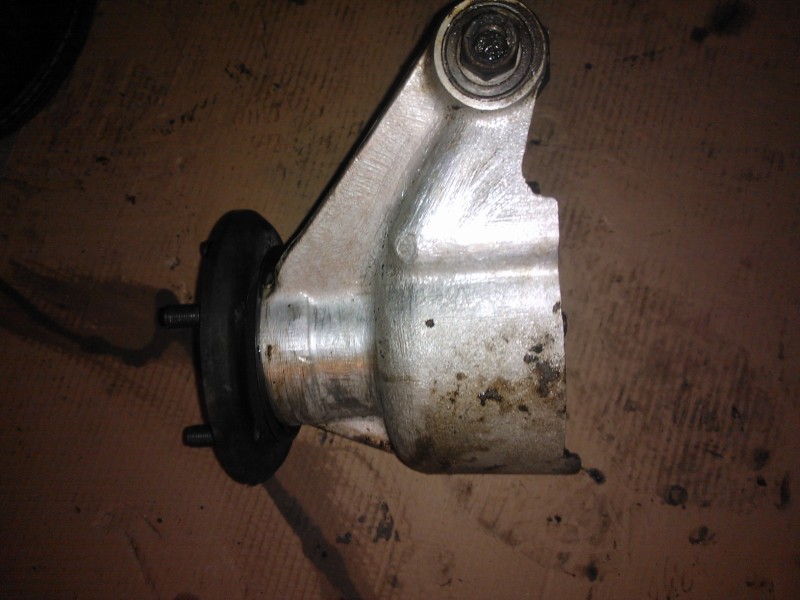
The hubs are covered with a thick layer Tectyl mixed with old muck. Really nasty stuff.
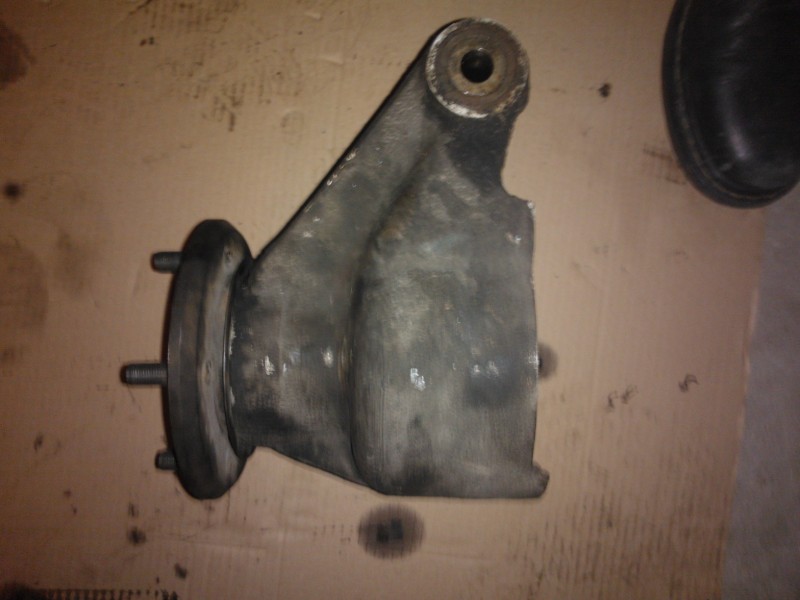
After a good 20 minutes of scraping and cleaning however, it seems there is hope.
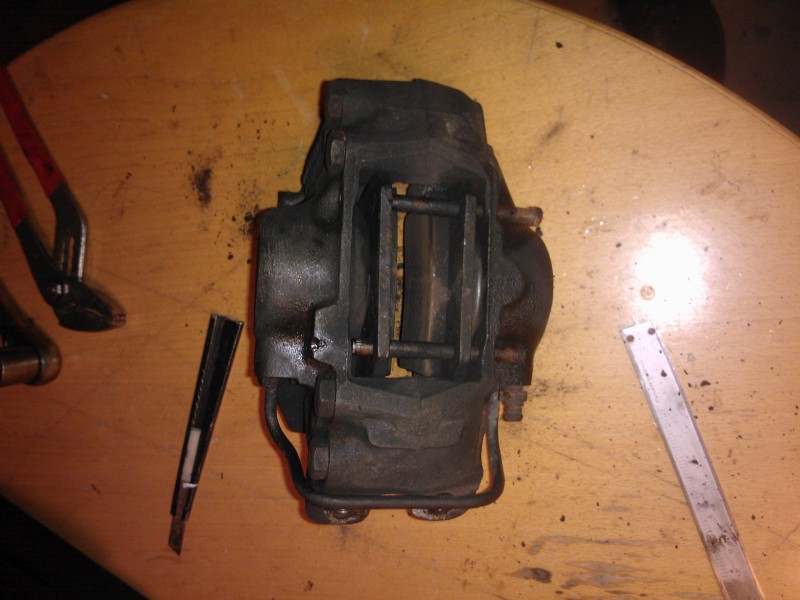
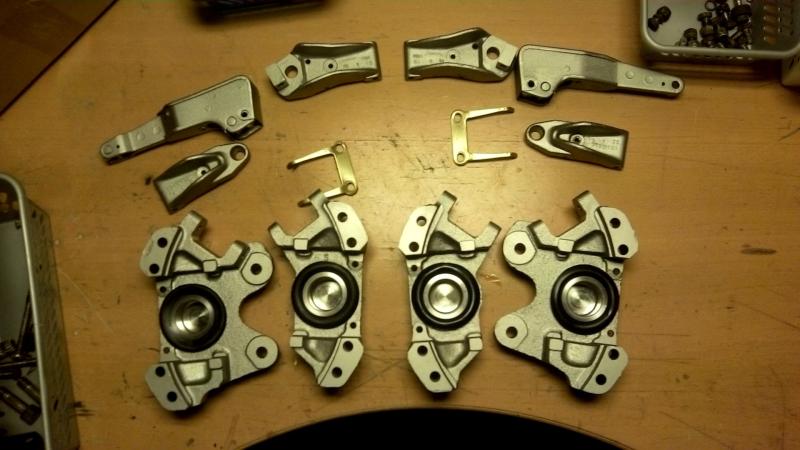
Time to disassemble the calipers, give them a good clean up and rebuild them with New pistons and seals.

The hubs are covered with a thick layer Tectyl mixed with old muck. Really nasty stuff.

After a good 20 minutes of scraping and cleaning however, it seems there is hope.

Time to disassemble the calipers, give them a good clean up and rebuild them with New pistons and seals.

#22
02-15-2015, 10:32 AM
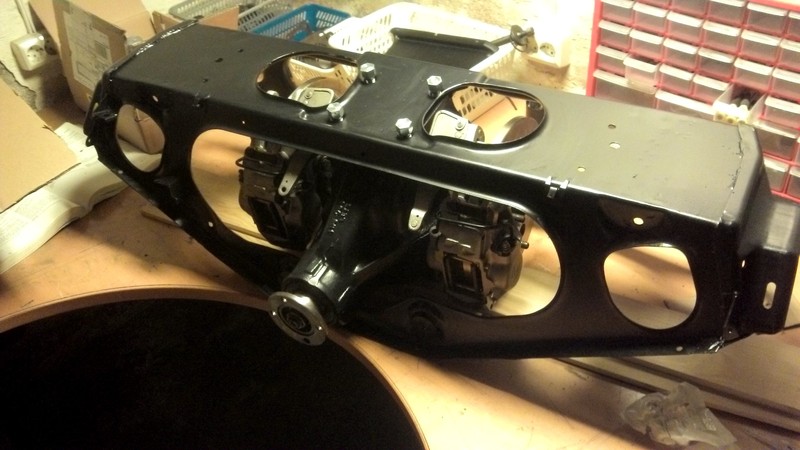
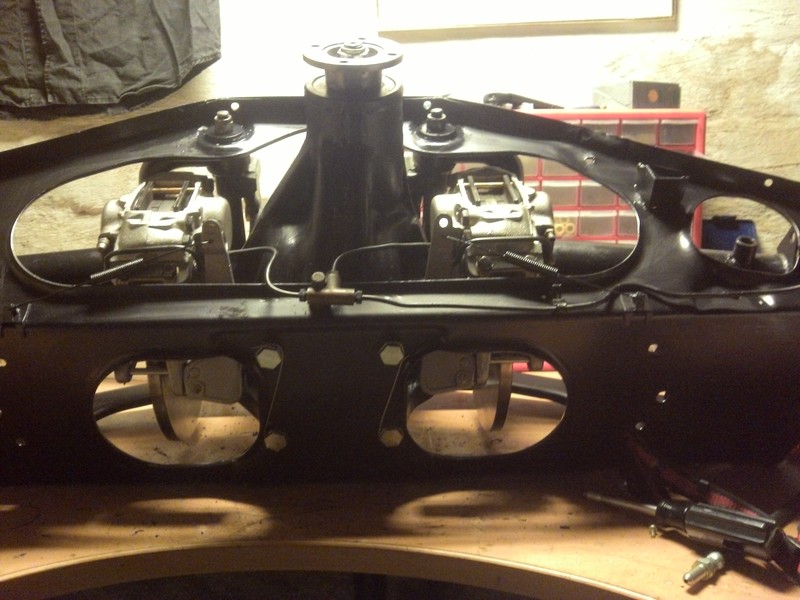
The calipers are blasted, cleaned, painted and rebuilt with new seals and stainless steel pistons.
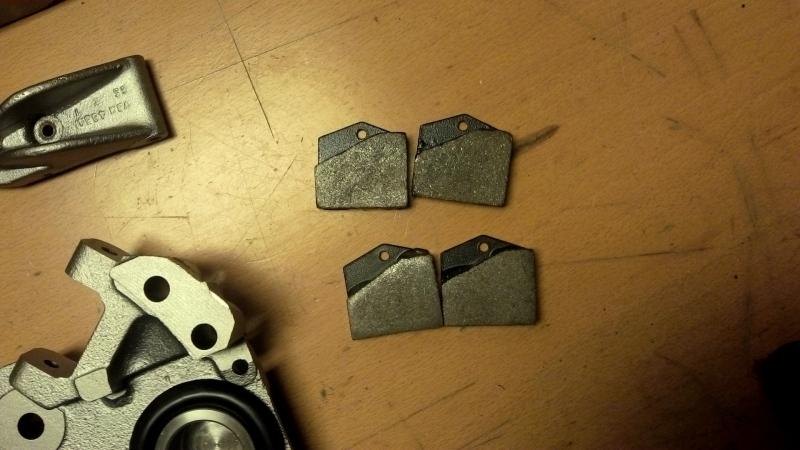
My parts supplier have sent me 4 Equal e-brake pads! I guess I'll have to give them a call in the morning!
Lots of other bits have been thoroughly cleaned and given a new coat of paint.
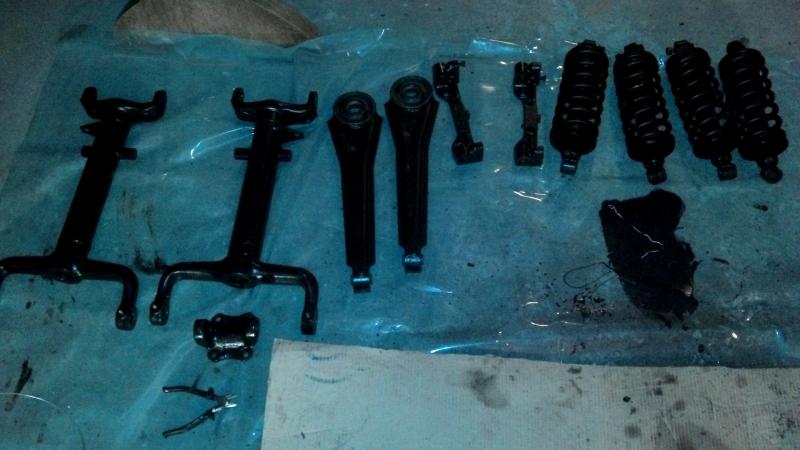
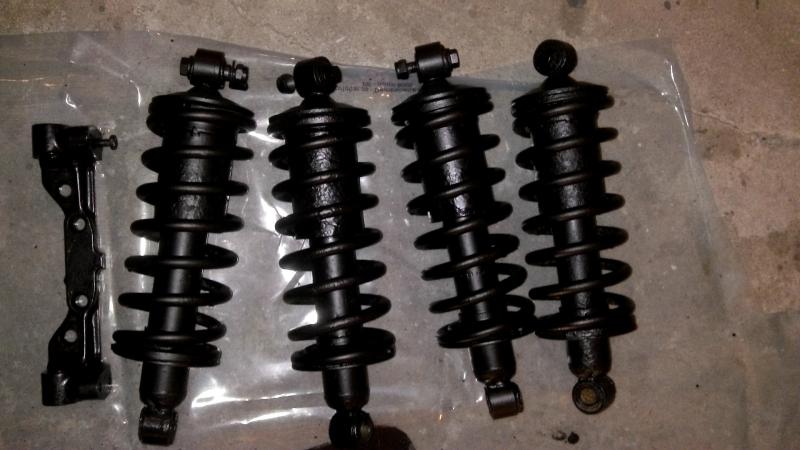
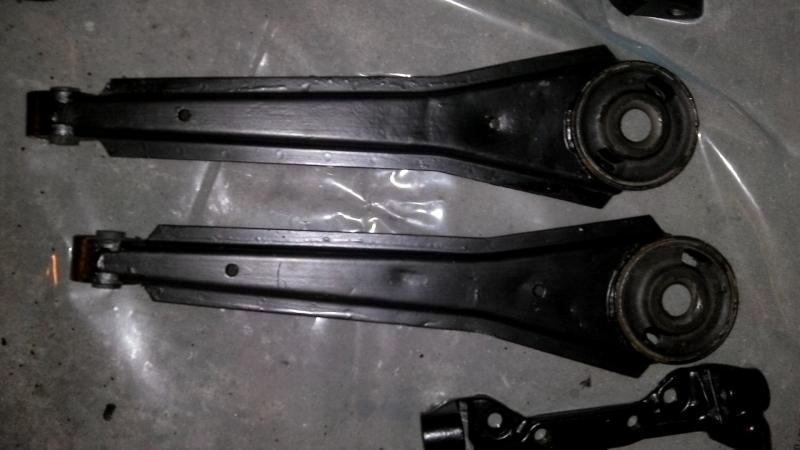
The radius arms have been fitted with new bushings
The subframe and bottom plate is still off to blasting and paint

My parts supplier have sent me 4 Equal e-brake pads! I guess I'll have to give them a call in the morning!

Lots of other bits have been thoroughly cleaned and given a new coat of paint.


The radius arms have been fitted with new bushings

The subframe and bottom plate is still off to blasting and paint
#23
02-15-2015, 02:47 PM


#25
02-16-2015, 06:55 AM

Join Date: Jan 2014
Location: Delaneys Creek,Qld. Australia
Posts: 28,381
Received 6,327 Likes
on
4,370 Posts
#26
02-16-2015, 10:39 AM

Veteran Member
Join Date: Jul 2012
Location: Walnut Creek, California
Posts: 6,796
Received 2,399 Likes
on
1,880 Posts
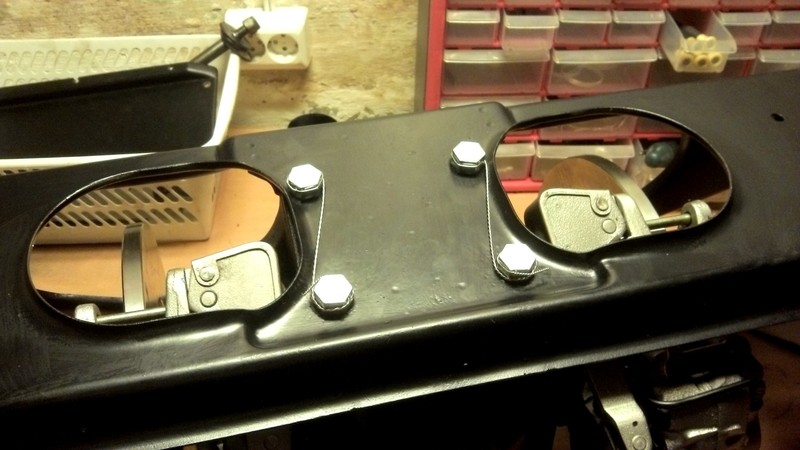
My compliments, sir. Very nice work. And, I learned where the bolts are that mount the calipers to the "pumpkin". wondered about that when I contemplated installing mine in situ. Chickened out and farmed it out. But, they messed up my e-brake. although, I seldom use them, one day, I'll ;look into a fix. But, I may have done the last get under it. At my age, up and down is a major event.
Those twist pliers are neat. I've pair on my bench back board in the "special" tools section. Did a few on my roadster project. Safe, fun and look neat.
Somewhere, I have or had a lexicon on how to use them and the wire in various locations. Aircraft in origin, I think.
And, the wire itself is handy. Done lots of things with it. Among, them, fixed the flapper valve control in a toilet tank. The no rust feature is handy as it is immersed in water!!
Carl

#28
02-16-2015, 12:04 PM
Veteran Member
Join Date: Jul 2012
Location: Walnut Creek, California
Posts: 6,796
Received 2,399 Likes
on
1,880 Posts
#29
02-16-2015, 01:07 PM
Lol! Yeah the project has definately grown! It started out as a brake job, but as I got along and I had everything out, in pieces and put so much effort into cleaning etc. I figured I'll go the distance and make it all purdy! It is a summer car for me, so it's not going anywhere in a couple months anyway.
Thanks for the nice comments everybody, it's really rewarding and fun to put the refurbished parts back together. Especially after cleaning decades of accumulated oil and road muck off every imaginable little piece of the IRS in diesel! Yuck! I hate diesel!
Many moons ago I served in the air force, and I would do daily inspections on light aircraft. I would also assist in routine maintenance like oil changes etc. One of the skills I learned was to secure the oil filters with wire and twist pliers. I finally got to put that skill to use!
There's really nothing to it, but I agree it looks really neat. It's also a really good idea on the IRS. Some of these bolts are not accessible for re-tightening should they ever come loose once the IRS is in place.
Cheers
Last edited by Aviator-Olav; 02-16-2015 at 01:13 PM.
#30
03-01-2015, 02:12 PM


#31
03-01-2015, 07:06 PM

Veteran Member
Join Date: Mar 2014
Location: Tehama County, California, USA
Posts: 25,545
Received 9,329 Likes
on
5,429 Posts
#32
03-02-2015, 05:24 AM
Join Date: Jan 2014
Location: Delaneys Creek,Qld. Australia
Posts: 28,381
Received 6,327 Likes
on
4,370 Posts
Hi Elinor,
A while back I started a thread with links to all threads referring to XJ brakes for another member, you may find it helpful.
https://www.jaguarforums.com/forum/x...dbrake-128298/
The following users liked this post:
LnrB (03-02-2015)
#33
03-02-2015, 09:14 AM
Veteran Member
Join Date: Jul 2012
Location: Walnut Creek, California
Posts: 6,796
Received 2,399 Likes
on
1,880 Posts
#34
03-04-2015, 11:49 PM
#35
03-14-2015, 04:02 PM
Thanks for the nice words everybody! Progress has been slow lately due to other commitments, but I managed to get some work done this evening.
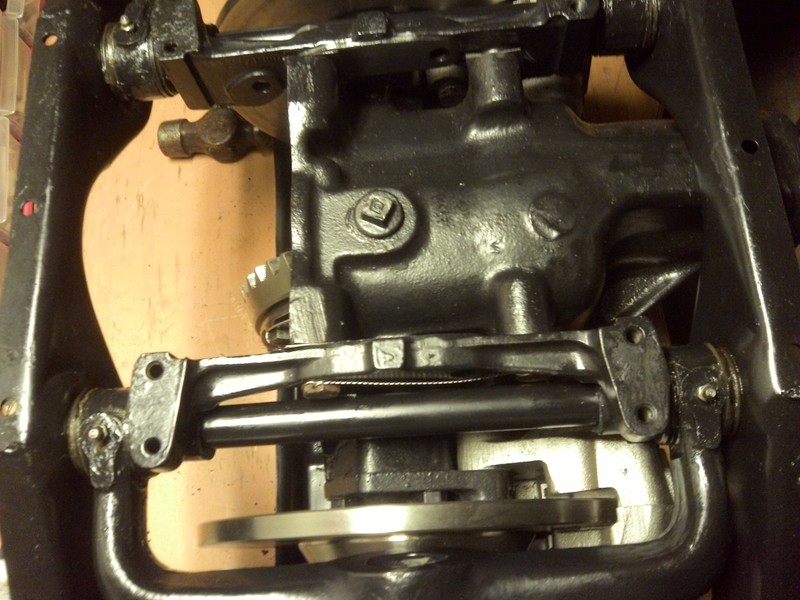
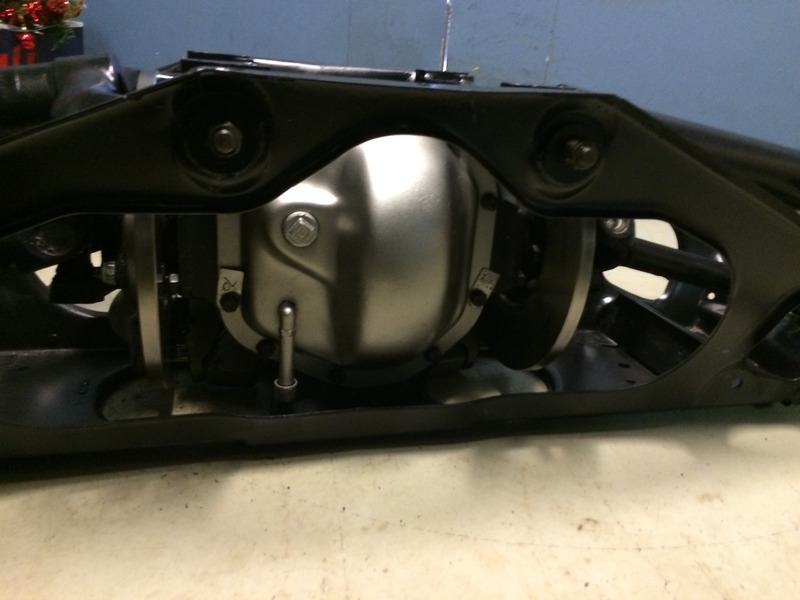
Putting the diff back inside the cage.

Safety wire in place
Flipped over
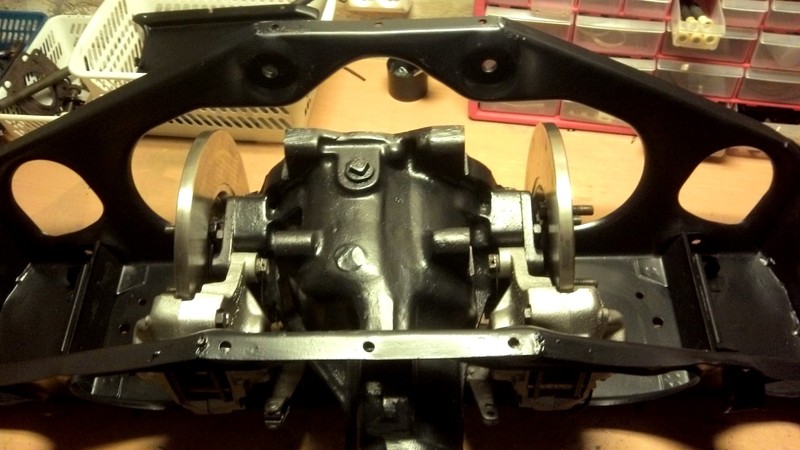
If this isn't a design flaw, then nothing is! This bolt is virtually impossible to get to with the axle in Place. Very impractical!
Shims going in. Fiddly work that, didn't manage to finish it tonight. Tomorrow hopefully!

Cheers!
Putting the diff back inside the cage.


Safety wire in place

Flipped over

If this isn't a design flaw, then nothing is! This bolt is virtually impossible to get to with the axle in Place. Very impractical!

Shims going in. Fiddly work that, didn't manage to finish it tonight. Tomorrow hopefully!

Cheers!
The following 2 users liked this post by Aviator-Olav:
LnrB (03-14-2015),
TheWarlock (03-15-2015)
#36
03-15-2015, 04:07 PM
Veteran Member
Having done both jobs and looking at another heater core job... I would rather rebuild the IRS again.
Check out where the heater core is in a S1 and what has to be removed... picture is black and white as it was from an old early phone.
Heater core is behind the foam covering in upper center part of the photo - is in an actual recessed "shelf". You can get an idea by
locating the RH heater/AC fan in the photo.
Makes the IRS stuff look like child's play.
Last edited by Roger Mabry; 03-15-2015 at 04:09 PM.
#37
03-15-2015, 09:35 PM
Veteran Member
Join Date: Mar 2014
Location: Tehama County, California, USA
Posts: 25,545
Received 9,329 Likes
on
5,429 Posts
I nearly got my fingers on one of those once, Roger.
I had just got my Sll which needed both fans, and I was determined to get ALL the climate control components from an Slll in a local wrecking yard. But we had an official ROM from BL which was quite detailed what I needed to do.
I got the fans, vacuum lines, switches and dampers, but I was stopped Dead in my tracks by the plenum screws being filled with tar, the back ones I couldn't reach anyway with the windshield in place and the tools we could drag into the yard. We didn't want to break the windshield because someone else might actually want it.
In the end I ran out of ideas since that was my very first experience with Any Jaguar, besides which bad weather moved in and the next week they crushed the car.
I do NOT look forward to replacing my core when it starts leaking.
At least the IRS isn't hidden in an inaccessible body cavity.
(';')
#38
03-16-2015, 01:38 AM
Having done both jobs and looking at another heater core job... I would rather rebuild the IRS again.
Check out where the heater core is in a S1 and what has to be removed... picture is black and white as it was from an old early phone.
Heater core is behind the foam covering in upper center part of the photo - is in an actual recessed "shelf". You can get an idea by
locating the RH heater/AC fan in the photo.
Makes the IRS stuff look like child's play.
Check out where the heater core is in a S1 and what has to be removed... picture is black and white as it was from an old early phone.
Heater core is behind the foam covering in upper center part of the photo - is in an actual recessed "shelf". You can get an idea by
locating the RH heater/AC fan in the photo.
Makes the IRS stuff look like child's play.
Rant over! 😊
#39
03-17-2015, 04:51 PM
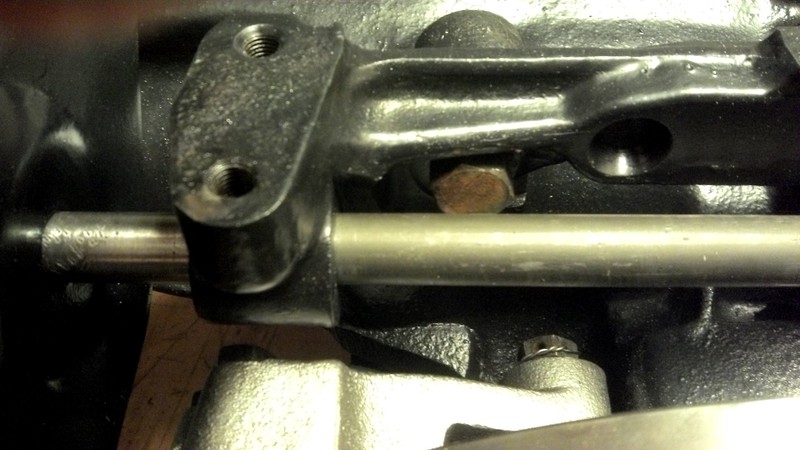
The fulcrums are lined up, shimed, torqued and wired

The variuos parts that go onto the inner wishbone. Rubber seal rings are new
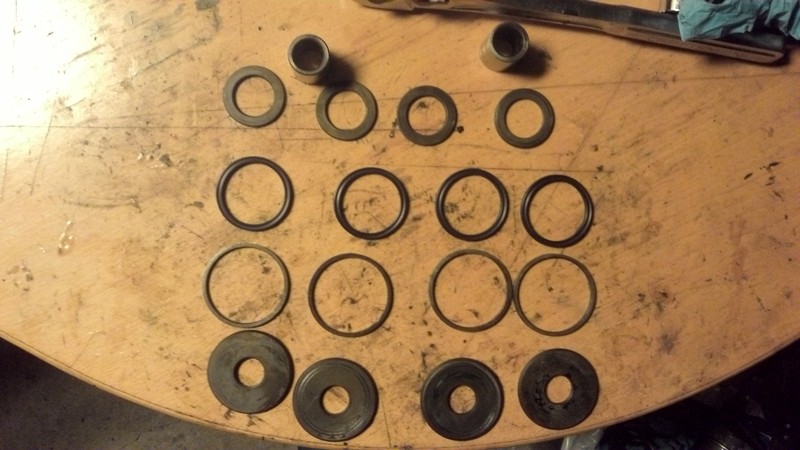
Stacked up and greased, ready to go in.
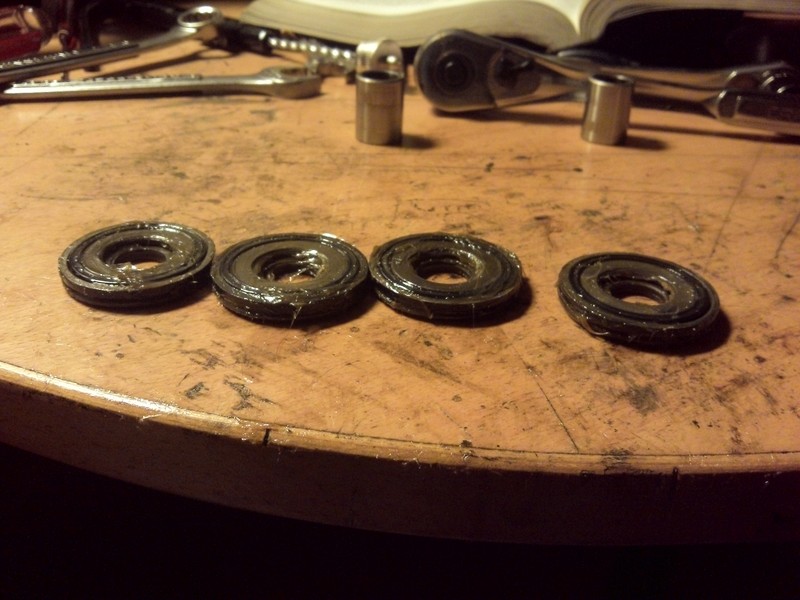
Metal sleeve goes inside the needle bearings

Then the washers and seal rings on each side.

Voilla

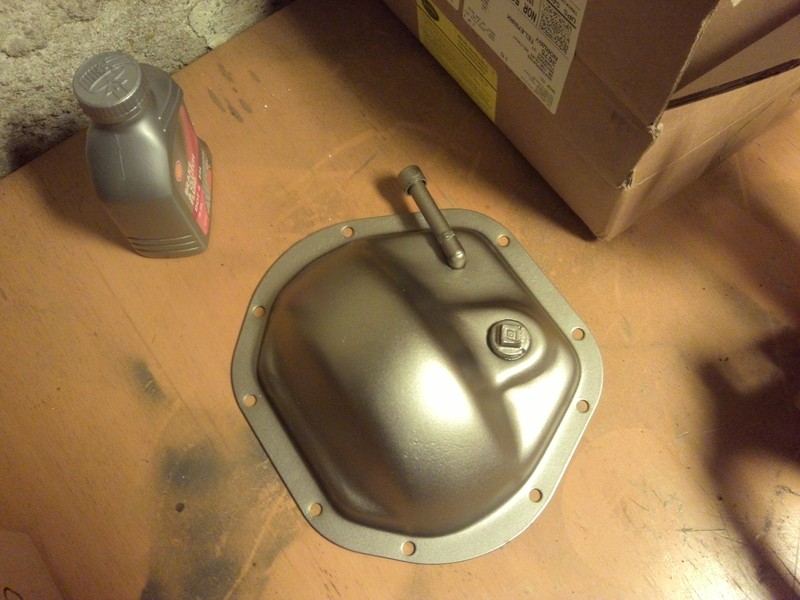
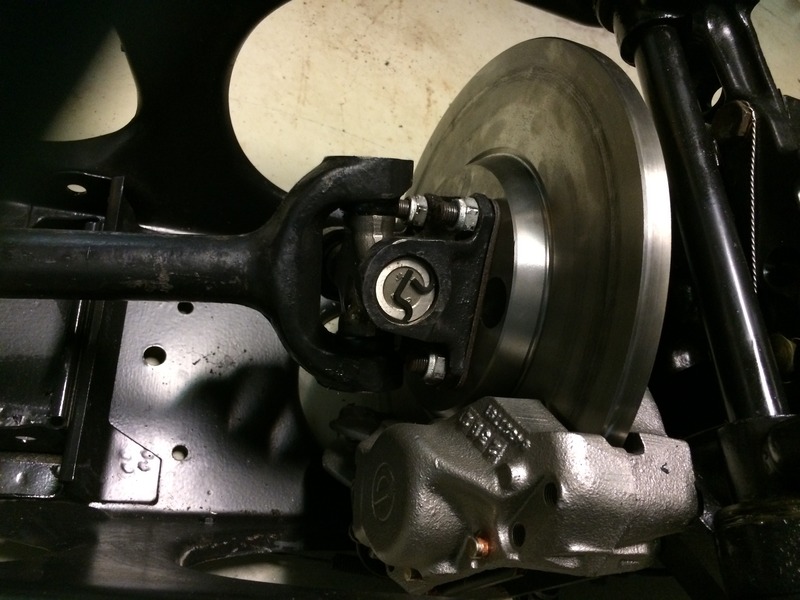
Diff cover painted and ready to go back on
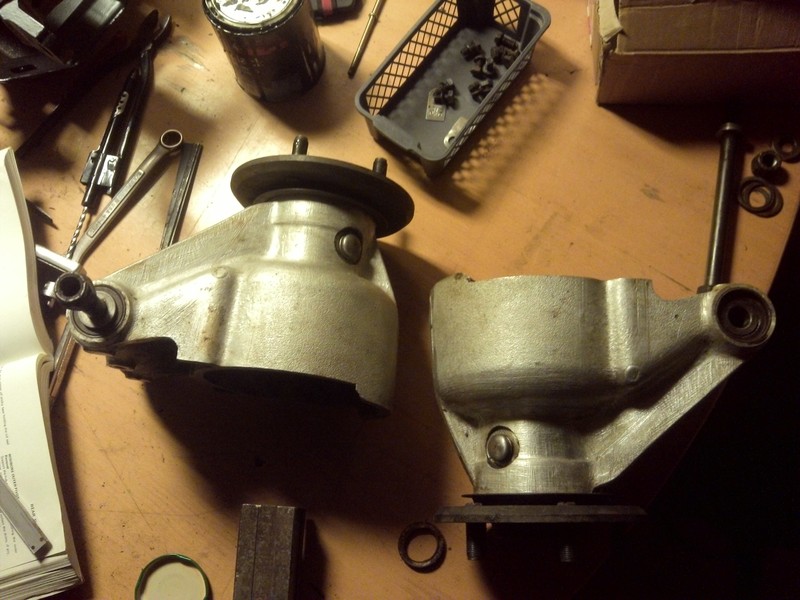
Hubs cleaned up quite nicely. Both fitted with new bearings and oil seals
The rest of the brake lines are mounted

The variuos parts that go onto the inner wishbone. Rubber seal rings are new

Stacked up and greased, ready to go in.

Metal sleeve goes inside the needle bearings

Then the washers and seal rings on each side.

Voilla


Diff cover painted and ready to go back on

Hubs cleaned up quite nicely. Both fitted with new bearings and oil seals

The rest of the brake lines are mounted

Last edited by Aviator-Olav; 03-17-2015 at 04:54 PM.
#40
03-22-2015, 03:16 PM
Got the IRS transported back to the garage today.
Diff cover mounted.
Half shafts back on.

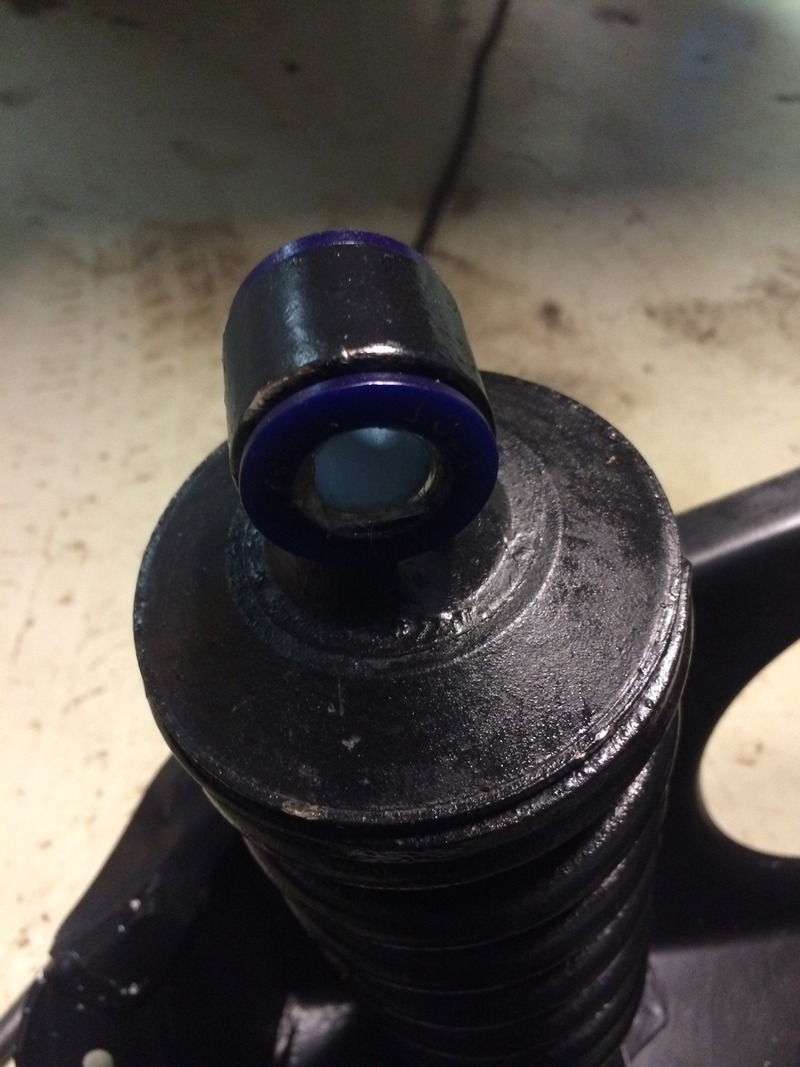
New poly bushes fitted to the struts
Preassembly Complete
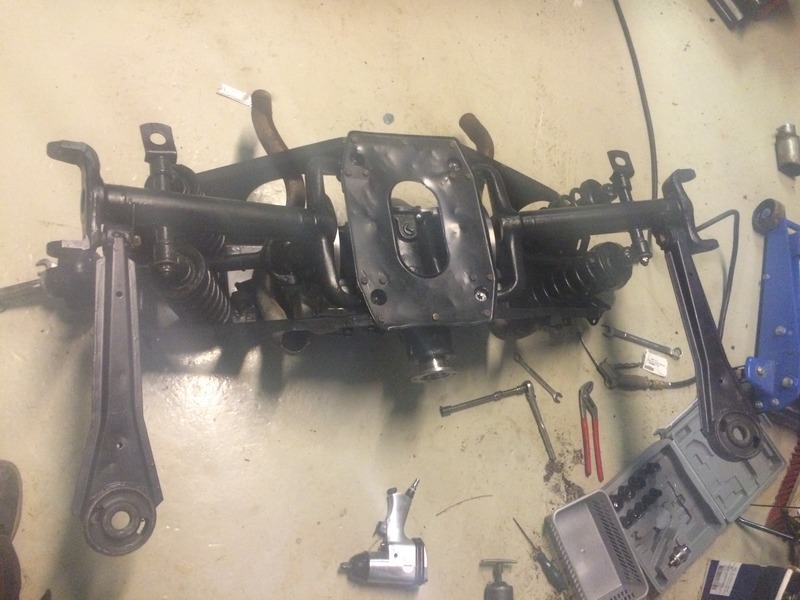
Ready to go in. Notice how I routed the exhaust pipes wrong. Took me a while to figure out why the hell the IRS wouldn't fit back in!

Got it right in the end!

Radius arms back on
That's as far as I got today. One more day of work now, and it should be ready!
Diff cover mounted.

Half shafts back on.


New poly bushes fitted to the struts

Preassembly Complete

Ready to go in. Notice how I routed the exhaust pipes wrong. Took me a while to figure out why the hell the IRS wouldn't fit back in!

Got it right in the end!

Radius arms back on

That's as far as I got today. One more day of work now, and it should be ready!
The following users liked this post:
LnrB (03-22-2015)