When you click on links to various merchants on this site and make a purchase, this can result in this site earning a commission. Affiliate programs and affiliations include, but are not limited to, the eBay Partner Network.
It's been awhile since I've updated, so I thought I would make another post.
I work on the project every day, but the visual progress seems a little sparse. I slid a little sideways on the electrical after I got everything working that I could without an engine, PCM or console. I now have all the door locks, windows, red door lights and electric mirrors working and lubed. New fuel pump, filter, flex hoses and a shut-off valve for each tank in addition to replacing both senders in the fuel tanks.
I finally found the window wash bottle in the "other stuff" I got with the car and couldn't see a good place to mount it except where it was originally. So I basically worked everything else that was not stock around it and had to make three brackets. I used a couple of great pictures from this Forum for guidance, but I have spent half an hour trying to find that thread again and don't remember who's picture it was. If you see this post and recognize your picture, thank you very much. The top radiator support is still a work in progress and in it's ugly stage yet. I really like what Roger Mabry did with his intake through the top of the support and I would like to do the same. I have not installed the brake booster and steering rack on purpose, I don't want them to get in my way while I'm futsing around in the engine compartment. They have been rebuilt and are ready when I am. The radiator is for a '93-'97 Camaro Z28 and looks like it will work. I wanted to keep the hole in the top support as small as possible (after I did a hatchet job on it) so I found an old style radiator cap without any ears---and then had to attach 36 grit sanding disc to the top in order to turn it. Works fine, even if it doesn't look that way.
Most of the loose wires laying around will go to the PCM harness fuse block, engine or gauges. I'm still debating whether to buy a stand-alone after market harness and add the non-PCM circuits myself or overhaul the original harness that came with the engine. I did get one unexpected wrinkle from a well-know harness maker when they said they wouldn't guarantee their product if I didn't use the EXACT!! sensors they use in their shop to build/test their harness. They gave a list of those sensors, but a couple of them were superseded years ago, theirs are all ACDelco or Genuine GM and that's what I'm using. I might call another vendor if I decide on a new harness and listen to their story.
Inside the car will probably stay a mess for awhile. The console will stay out until the engine/trans is completely installed and new shift linkage is figured out. All the seats will stay in storage, of course, as will the radio and trip computer. The next, and hopefully last, items on the list are to remove the front/rear windscreens to repair some rust; remove and replace the headliner; inspect/repair the drain pan under the rear package shelf; dismantle the sun roof and see how things are there; see if the antenna will go up and down (not that important) and rejuvenate my ambition to re-veneer the dash. Sounds like about 3 days of work, right? It goes without saying that the car won't be ready to roll out of the shop until late spring. Then I start putting the engine together and decide where I will take the transmission to get rebuilt. The trans is the only part of this rebuild that I will farm out entirely, I did an overhaul of my '73 Corvette trans on two fuel barrels and a 4x8 sheet of plywood in my front yard (late 70's) before I had a shop. I just don't have the tools or desire to do it again.
Here's a few pictures that include a couple of "tool tips" that might benefit someone.
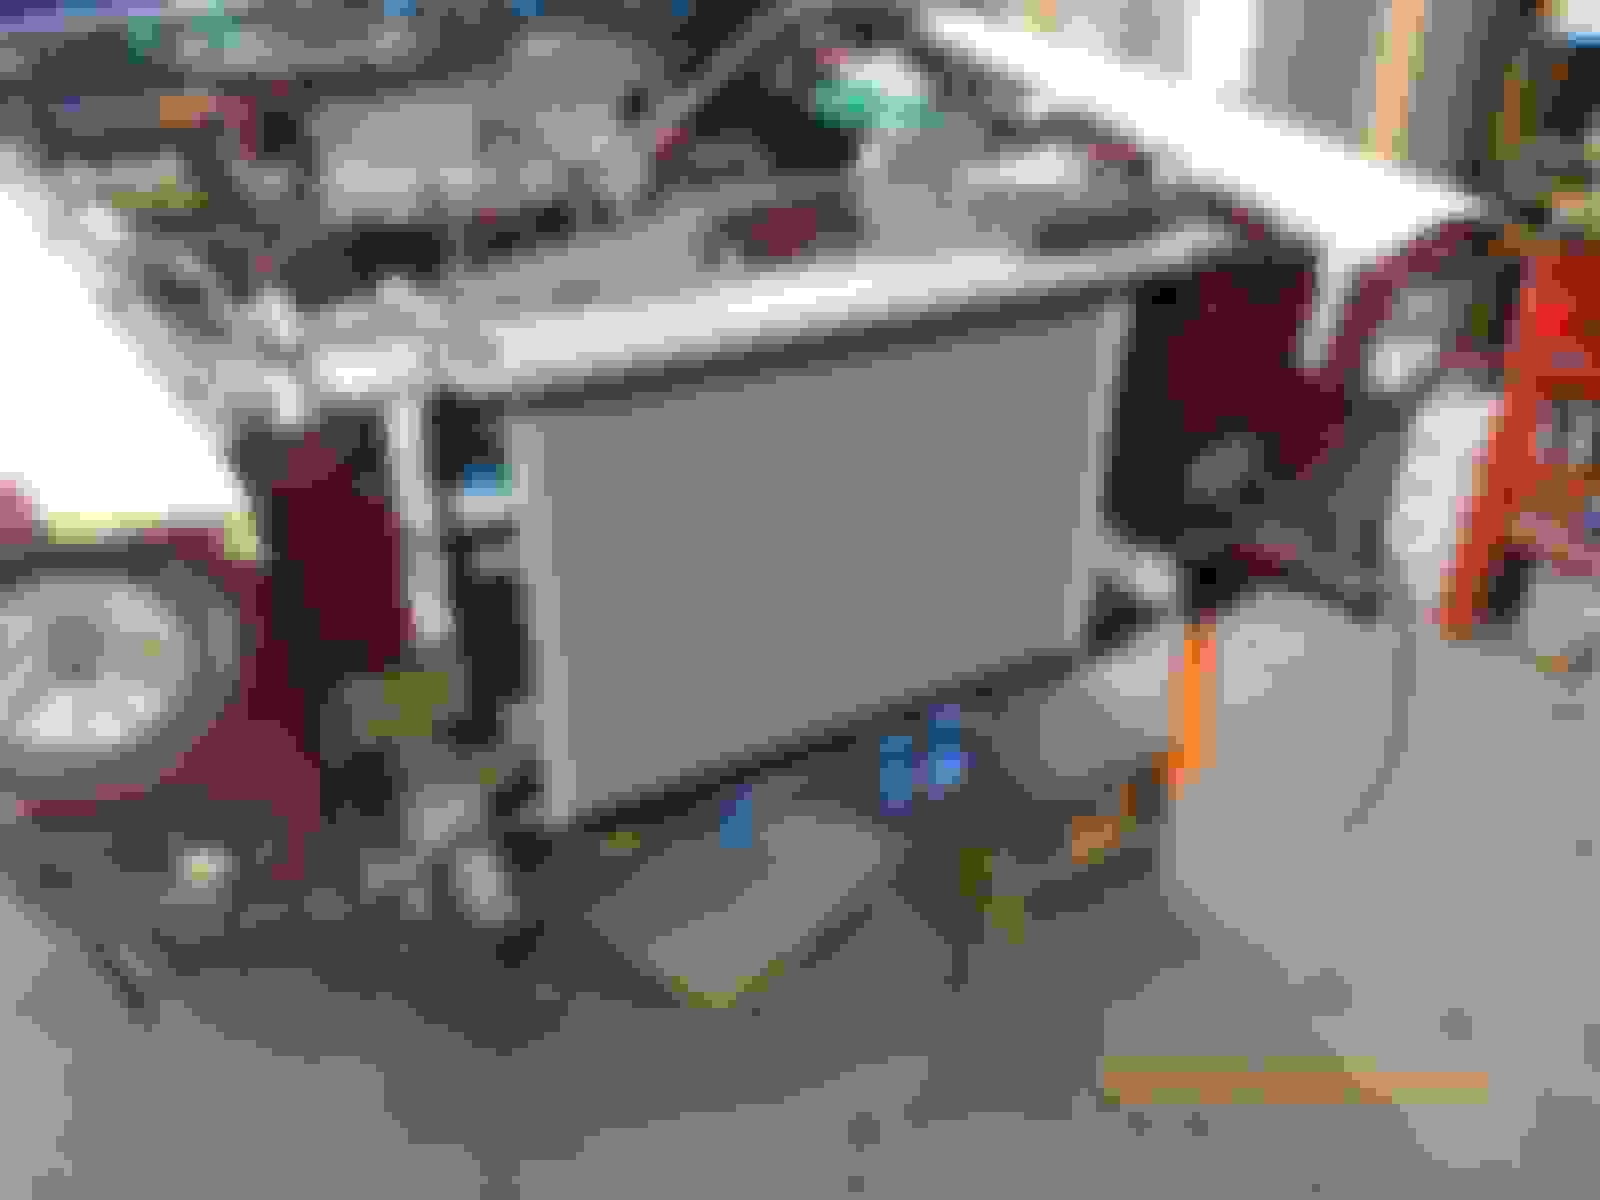
P.S. Can someone tell me what the light NR wire with a single pin-connector is for? Nothing I saw or removed had that kind of connection and I can't find it in S57. Thanks, see pic. What's this thing do?
In no way is this my invention. Better 'n sliced bread when working with connectors. The other slice of bread.
I added a photo of the cold air intake installed with a front view. It also shows how the stock Pontiac AC condenser, radiator and fans fit in the Jaguar. Literally drop in since they all "clip together".
The cold air intake was custom made by Bob Loftus in Arizona...I had this one and then bought another for my S1.... I cannot imagine ANYONE allowing hot air into the intake???? Those that
make those short intakes and have the air cleaner inside the engine compartment DO NOT UNDERSTAND engines at all. Those shiny things on each sides are the new horns...
Contact me with a PM for Bob's contact information off the Forum...
Dave I tried to reply to your PM and send more photos... let me know if you got the detailed reply... here are the photos showing the cold air intake housing being made, radiator, Meziere water pump and relays for the three fan speeds and
more.
Well folks, this is the wordy part of my update pictures. Somehow the two didn't connect last night.
Since last update the headliner has been recovered and both windscreens removed. My wife and I used the wire method for the glass removal and only ran into a couple temporary snags. There are small nylon spacers imbedded in the adhesive that the wire can't cut, but they will displace and allow the wire to pass if you increase your pull and don't jerk. Removed the rear package tray plenum and was pleased to find very little rust, but the cloth hinges on the air pressure flaps were in sad shape, so a nylon stuff sack that had not been camping for a long time became a donor for new hinges. I ran a "snake" through the plenum drain tubes and put everything back together--mark that off the to-do list. BTW, I found that a length of 1/4" nylon air brake line works great, it's flexible and stiff enough to push on without collapsing, just heat the end a little and round over sharp edge after cutting.
The sunroof came out and a coat of rust converter and paint fixed a couple of small spots. Waiting for all new seals in the mail. I ran my "snake" through the front drain tubes and they were open, but the snake didn't see daylight when pushed through the back drains. I posted a separate thread on this issue. I happened to be reading a thread on J-L and came across a few posts that had issues with water/rust forming on the lower wing behind the wheel well. This is apparently caused by crud being kept wet by the front sunroof drains. I had removed the access panel at the rear of the wheel well when I was undercoating and that area was clean, but I decided to have another look and try to avert a future problem. One of the pictures in previous post shows my solution.
The antenna remains untested, just a matter of priority and interest. I'll get to it eventually. While we're on antenna's, I'll comment on rust repairs around the windscreens and over one rear wheel arch. This is where I come clean on the kind of car owner I am and I will take the heat for it. Engine/drive train; suspension; interior; body, in that order, have always been my priorities. That being said, I am very averse to rust anywhere and wadded up sheet metal is even worse. My plan here is to have a mechanically superior drive train surrounded by a 35 year old body. A "nice looking old car", a "sleeper" if you will. Rust conversion, fiber glass, bondo, primer, block sanding and a couple of "rattle cans" of code-correct paint and I'm done. Some (most) of you have beautiful cars (truly), but I would be uncomfortable driving them in public. Parking lot dings, rock chips, running into wild animals, and all the other atrocities that are available on public roads would make me as nervous as a long tail cat in a room full of rocking chairs. I can live with all of those if my nice looking old car doesn't have a $10,000 paint job.
I have some veneer coming in tomorrow and I thought I had better re-veneer the dash and console pieces, which will include the ski slope and computer surround. The existing finish is peeling off in chunks.
I had to make a couple of pieces again and there are pictures in previous post of those. Didn't get a manual sunroof crank, so with a little file work and piece of aluminum I now have one. Crude but effective. The plenum grill below the front windscreen seems to be designed as a one-and-done attachment. I, of course, broke the little studs and the perimeter in one spot when removing mine. So I conjured up a couple of hold-downs. I drilled through the grill section where the stud used to be and then fashioned a piece of something to cover and reinforce around the hole. The screw (3/16) will thread into the plastic bushing in the plenum perfectly. Stainless acorn nut is epoxied to 3/16 screw for painless grill removal.
The last major item on the interior will be to test the Delanair unit, I'm scared to death. I plan to borrow a vacuum pump from Autozone, and with the great information given to me from Jag Aire, see if everything clicks and whirs correctly.
I am down to the bottom of the barrel, literally. The Delanair 2 is the very last system/moving part in the whole car that I am going to test and repair. I discovered the heater core had a minor leak at one time and that one of the linkage levers had bent and taken a set. I also found the hub of another lever that had spit. Fix-it time. I learned that while a few retailers have "replacement heater cores", complete with the correct part number (all after market), they will not fit. The upper tube is not formed correctly and runs right across the front of the blower motor resistors. Must be the same manufacturer because all the parts are identical. I'm taking the original to a local radiator shop tomorrow in hopes they can fix it.
The dash has been veneered with birds eye maple and I think it will look good with the black accessories. Still have to fix the cracks in the dash crash pad and clean/grease the sunroof cables.
Doesn't sound like much for a months worth of work, and it's not.
Installed a new throttle cable and mounted new double-action (probably a more technical name for it) switch on the brake pedal for the brake lights and torque converter lockup release (TCC). Also added another N/O switch for future cruise control, or not, I never use it. I took the suggestion of Jose and Doug to upgrade the wiper system by adding relays which move the high current and system ground away from the column controller. I think they were right and I should see improved speed and less trouble with the controller. I have a thread on this upgrade on this Forum.
As I mentioned in the last update, I replaced the veneer on the dash with birds eye maple and finished putting everything back in the dash. I've included a picture, but staged the lower pieces for the picture. I haven't decided whether to go all the way at this point and re-install the whole console or wait until I see if I need to do some shifter work when the engine/trans are in place. If you look closely, you'll see there is a hole where the radio normally goes. I don't listen to the radio either and because it was not original and the PO really hacked up (literally) the opening, I decided to leave it out and make a "possibles cubby" in it's place. I'm a big fan for a place to stick your breath mints, a small box of tooth picks (yup, lasts about three months), spare pen, cell and wallet on long trips, and whatever else needs to be collected over time. The bottom is lined with cork.
Sun roof cables are greased and I think installing the headliner and sliding panel will be the next project. Trying to picture ways of doing it without getting it smudged-up. Online Tech Tip from Jaguar Specialties answered a question I was about to wrestle with concerning the neutral safety switch and the starter relay. Parts should be here tomorrow, my hats off to Andrew.
Nothing more that would be of interest, I'm afraid. Couple of pictures.
Dave
Home made veneer glue roller and veneer saw. Need to use a contact cement sleeve on it, better off just using a 3" or 4" paint roller.
It seems like I progress at such a slow pace that there wouldn't be much of interest in a real update, but here goes......
I just finished installing the console today, working in the middle of a smallish car is a back breaking hobby, there is not a smooth place on the whole floor-pan that is where you want it. Two new micro-switches have been installed ahead of the shifter for the PNP operation and to activate the backup lights. I am using a Dakota Digital SGI-100BT interface for the speedo and tach conversions.
I am using the stock LT1 engine harness and PCM, but I sorted through everything and will use it as a stand alone setup just for managing the engine and transmission. The Jaguar functions will remain analog and operated as before (I hope). Because I didn't have the complete fuse block from the donor car, I couldn't use it, so I added a couple of small fuse blocks and wired them for the "Ign-Hot" and "Batt-Hot" requirements of the PCM and whatever else. Not pretty, but very functional. You'll notice, at least, a couple of other items that will probably keep me from that blue ribbon, using a simple radiator over-flow catch tank and a very minimalist windshield washer tank. Original parts just didn't fit with the other "stuff".
I am currently waiting for the second A/C condenser to arrive, the first one had some unusual bends from shipping. Hopefully tomorrow. The dual '97 Camaro cooling fans have been ordered as well as the pieces of a K&N cold air intake that I am copying from Roger Mabry. You will notice in one of the pics that the top radiator support has been modified for the air filter. The little black box on the left side of the top support is the cooling fan controller. I chose a Flex-a-Lite unit with soft start and adjustable temperature on/off. I plan to leave the engine wiring harness in it's current state until the engine is in and running, then I'll pretty it up a little.
I have started a couple of other threads about specific issues I've had, the most notable for me was the headliner project. Probably the most irritating and unpleasant project so far. But it's done and it looks better than it did. Sun roof panel slides like Teflon on ice. The picture of the interior has only three items that I put in place just for the picture; dash crash pad, glove box door, and console box lid. They are all ready to be installed, just going at my own pace so that I don't cover up something that needed to be tested first.
The transmission was delivered to a local expert that most of the hot rodders and builder use, and he also is the transmission/speed tech at the GM dealership where my Son works. I told him no hurry because needing that piece is still down the road a ways. IRS is still sitting on the rolling work table, but installation day is getting closer. I have had to pick it up with my engine hoist, roll it, and block it with the pinion down and pull the diff cover off twice because of a little oil seep. I think it's fixed now, 5 days and still dry. Found a new sealer just for differential covers and other parts that need to seal against gear oil. I like it.
I am beginning to collect more parts that are engine and A/C related, engine work is probably a month or so away and I like to have everything I need before I get started. I'm beginning to think about how to pressurize and circulate the oil before I fire it up, I
can't use the traditional spare distributor and electric drill procedure like the older engines. I've seen a couple of YouTube's using a tank of some kind that will stand 30 or 40psi and hold 5 or 6 quarts of oil and tapping into the oil galley at the filter boss and then use air pressure to prime everything. I'm not a fan of just cranking a new engine (with or without spark plugs) until the gauge shows some pressure.
Right off the top of my head I can't think of anything else that is note worthy. I've added a couple of pictures.
Dave,
i used the standard ditributor looking thing to prine my oil syatem, but intake has to be off and the oil pump drive gear removed. Glad you are thinking ahead there, as i didnt, and had to pull intake back off to do it.
I've read about that method, but when you pull the top plug that holds the driven gear don't you open the oil galley along the cam? I've got awhile to come up with something, the tires won't be hitting the road before next spring.
I dont think so, i had no issue, took a good minute to get oil flowing through rockers this way though. The pressurized oil can works better; but i already had the priming tool, only cost me the price of new intake gasket.. This is my tool,
Darren, take a look at this thread and pictures on post #8. The priming tool in your hand with the aluminum plug and under-cut "waist" is what plugs the hole in the side of the oil galley-OK fine. I misunderstood your process, I thought you just pulled the LT1 pump drive assembly out and used a long rod of some sort to spin the pump. That would make a huge "oil leak" in the rear of the galley. https://www.camaroz28.com/forums/lt1...roblem-858326/
The thread above brings up a detail I didn't know about. No such thing as too much knowledge.
It's been a couple of months since my last update and it will be pretty short (what the heck have I been doing with my time??? I dunno).
Took the MC off and primed it on the bench. The Son and I bled the brakes and that system is working fine. The parts came in for the cold air induction, but will have to wait now until the engine is in place for the last coupler from MAF sensor to throttle body.
Dual cooling fans came in and fit on same-year radiator just like they should. Wired to controller with 50amp SY Power Connector disconnect and upped the wire gauge to fan connector. An "unbent" A/C condenser arrived and fits as it should. 1997 Camaro radiator, A/C condenser, and cooling fans make a very nice package.
I've been losing sleep over installing the front and rear glass, but I'm going to bite the bullet and put the front in tomorrow. I've got the adhesive, one step primer, pneumatic caulking gun, the opening is masked off, and the dash/interior is covered. Today was spent engineering and building the glass support blocks that the factory used to set the perimeter spacing. I am planning on setting the glass and installing the chrome trim/outer trim pieces all in one operation. My chrome trim is in perfect condition and fits against the glass just right (in my opinion). In theory, and the shop manual, the inner trim piece should be able to be pushed into place between the chrome and the glass just before the adhesive sets firm. It works during dry runs at least.
I decided to paint the body repairs before the glass installation because I thought it would make the outer trim piece to body reveal look cleaner. Once I give it a buff and polish next spring it should be a solid 100' paint job.
Semi related, my solution to a front end alignment is to rest all four wheels on "slip plates". I don't have enough shop space to roll the car back and forth to settle the suspension and if I roll it out of the shop, I don't have enough muscle to roll it back in. So I built short supports to set the wheel on, along with the slip plates. I should be able to normalize the suspension with a little up and down on the bumper. The reason for elevated supports is because I plan to have the car up on them when I do the first start up on the engine. That way I can roll under the car and check for leaks, hot spots, sounds, etc. and also drop the oil/filter after the first 20-30 minutes.
That's about it so far folks. I'm thinking ahead to new seat covers and carpet and finally getting to sit in it for the first time. Wouldn't it be demoralizing after all this work to find the seating position uncomfortable?! Can't think that way.

 01-23-2020, 02:59 PM