When you click on links to various merchants on this site and make a purchase, this can result in this site earning a commission. Affiliate programs and affiliations include, but are not limited to, the eBay Partner Network.
My antenna failed. Motor works but the drive cable is apparently stripped. This is typically repairable/replaceable but I had a complete functioning antenna assembly in my spare parts collection so I decided to simply do a swap. I've never been one to avoid easy choices . What follows is a brief pictorial that might help a first-timer understand the lay-of-the-land, so to speak. I have not gone into too much detail as that can be excruciating for both reader and author. If questions arise, I'll try to help.
This is the complete assembly. From left to right: motor with drain tube, drive cable, plastic escutcheon for pass-thru hole, and the mast itself. Grey cable from the mast in the lead-in to the radio which disconnects well forward in the trunk...roughly in the area of the RH trunk lid hinge
This is the motor and bracket. The bracket is two pieces, motor side and body side. Remove this bolt and wriggle the motor up and away from the body-side bracket. Remove the two wires to the green antenna relay, noting their location. Remove ground wire. The motor-side bracket is held onto the motor with two small bolts. You'll see 'em.
Remove four screws holding this escutcheon to the body and lift the escutcheon away slightly. You'll now see an oblong hole in the body. This is the pass-thru hole that the mast and drive cable go thru. At the other end is the open area behind the tail light where the mast is mounted
This is how the mast looks when installed. A clamp holds it to the side of the trunk. The grey lead-in cable has a pass-thru into the trunk
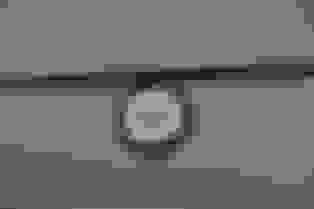
This is the arrangement of nuts and bezels at the upper part of the mast. With the side clamp (previous photo) removed you will now loosen the knurled ring which de-clamps the weird looking semi-circular bracket. The mast will then be loose enough to remove the upper nut--the one that is chrome and cup shaped. The mast is now free from the body and can be maneuvered into the trunk
My finger is pointing to a can't-be-seen 'tunnel' that goes to the trunk. At the end of the tunnel is the previously mentioned oblong hole. The mast is wriggled thru this hole using a combination of pushing the mast end with one hand and gently pulling the long drive cable with the other hand. It's seems impossible as first. It isn't. Just gotta get everything wriggled and jiggled the right right way
Once the mast is thru the tunnel you're home free. The whole shebang can now be removed from the trunk. Installation is just the reverse process.
I spent about an hour or so on this job but I've already BTDT. If you're a first-timer I'd allow a couple hours.
Hope this helps.
Cheers
DD
PS-
Another easy fix today:
My interior lamps have not been working right for months when the driver's door is opened. Flickering, or not working at all. Very irritating. Faulty door switch. In most cases the switch needs just cleaning but doing so gave no joy in this case. The switch was just old fashioned worn out. I swapped it for the one on the passenger door, which hardly ever gets used. Total repair time, 5 minutes. I have to shake my head at myself sometimes. Annoyed by something for months that only took five minutes to fix !
A timely how-to for me. If I ever put a radio back in mine, this is about the only moving part I haven't looked at or tested. Good to know how to do it.
there is a rubber grommet / boot at the oblong hole through which the antenna and cable passes. This rubber boot needs to be transferred to the replacement antenna and is fitted to the hole last after everything else is in its place.
My aerial is currently working fine but the grommet at the top that covers the hole in the wing, as in Doug's photo, has split and I can't find a replacement here in the UK.
I can get a replacement aerial set for �100 GBP (about $135 US) but that's a bit expensive for want of a grommet worth a couple of � at most..
I've tried repairing it with glue and black silicone sealer but the break is uneven and the split line still shows.
Does anyone have an idea where I might find one?
Thanks
Ray
Ps, I did copy and paste a couple of photos but they just showed as nonsense text. I obviously did something wrong.
Last edited by XJRAYUK; 02-01-2022 at 06:07 PM.
Reason: photos not working
Thanks for the great antenna replacement documentation. Also, I've been living with the driver door light switch intermittently work for 6 months. you've motivated me to spend 5 minutes to repair it.
I've tried repairing it with glue and black silicone sealer but the break is uneven and the split line still shows.
Does anyone have an idea where I might find one?
You would think there would be a number of breakers yards in and around London, as there used to be, but the old fashioned 'breakers' just don't seem to exist over here any more. They have become scrap merchants rather than breakers and not interested in selling parts. Less trouble and more lucrative no doubt.
Plus the chance of coming across one with a S3 XJ6 seems most unlikely.
I have contacted a couple of so called breakers further up the country without success. I also contacted someone I came across who was scrapping his S3 and selling parts but got no reply. No money to be made in selling a rubber grommet !
I could use an ordinary rubber washer or grommet but the original has a groove around the inside that the chrome top plate fits into as it clamps down to the wing.
It gives it a nice neat finish and helps keep the water out. And it's nice to have things original .
Perhaps you could buy a cheap telescopic aerial (antenna) from eBay or similar just to get the rubber washer. There are a few advertised there (non-motorised type) for about �7 up
I have scoured the web for aerials with a similar type of fitting. Unfortunately 99% of them have the common domed type of top mounting grommet which is usually a hard plastic rather than soft rubber and a completely different fitting. Looks like I'll have to stick with my repaired one for now.
I have an original Series 3 antenna assembly. I will check to see if I have the original rubber sealing gasket, can't remember if I reused it with the replacement antenna.
Hi Jose, if you do have such a thing in good condition, and are prepared to part with it, I would happily buy it from you and pay whatever the postage cost to the UK might be.
Hey Doug! Great write up as always... I'll just add that if you don't want to pull the mast through the body, the mast will separate from the motor pretty easily... The tip of the antenna mast is actually a screw on nut.. You remove that, and then two screws at the very bottom of the mast. With some wiggling, the line will come out of the mast... The very last section of the antenna mast is attached to the line... So that when you pull it out, the last section of the mast (where you unscrewed that nut) comes out with the line... Now the motor and line are free from the mast and much easier to feed through the body... A similar operation would be used if you were just replacing the mast, and the motor and line were OK..... Cheers! David shop.EverydayXJ.com

 01-30-2022, 09:05 PM


 . What follows is a brief pictorial that might help a first-timer understand the lay-of-the-land, so to speak. I have not gone into too much detail as that can be excruciating for both reader and author.


 !
!