Front too high or rear sagging
#1
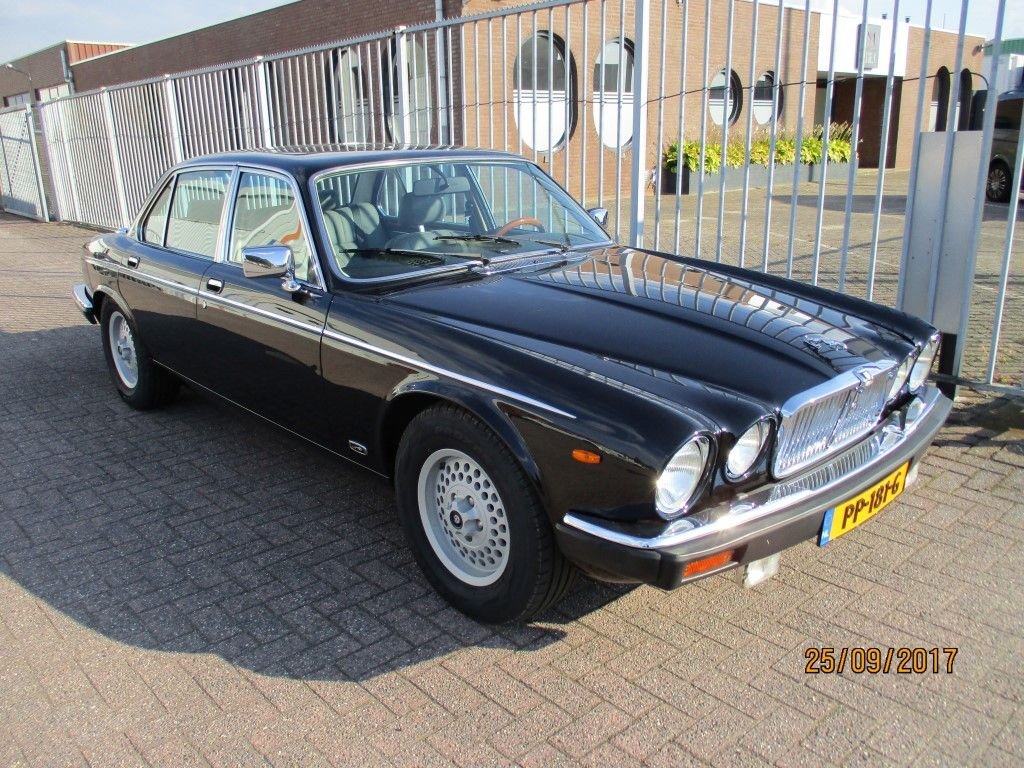
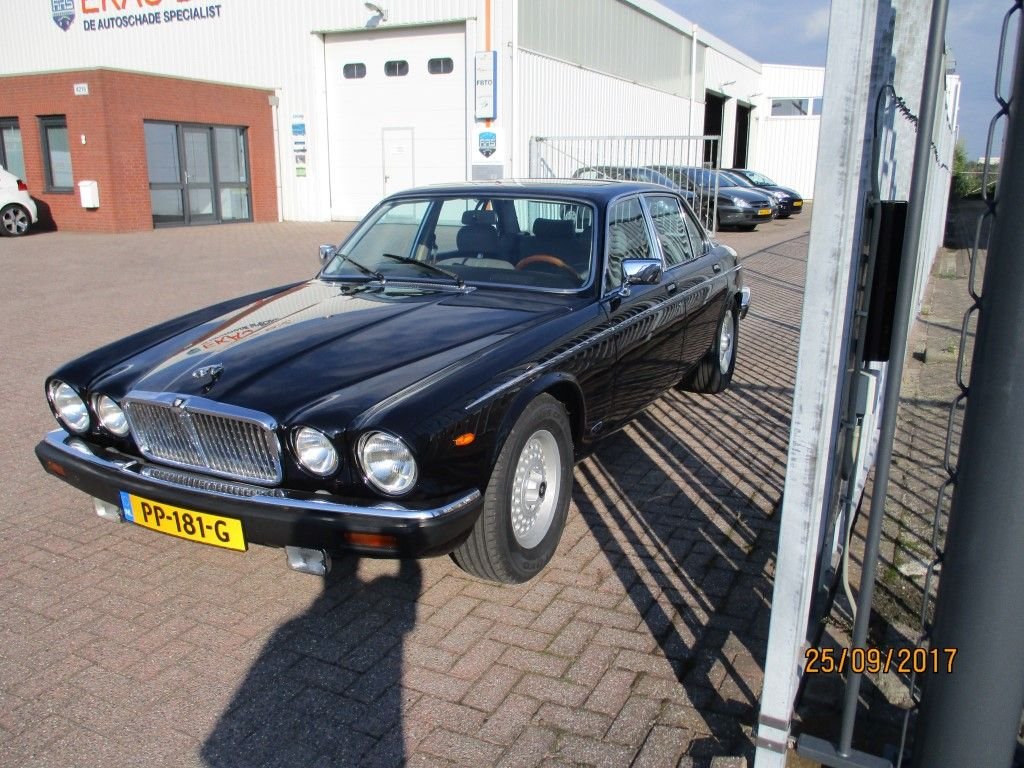
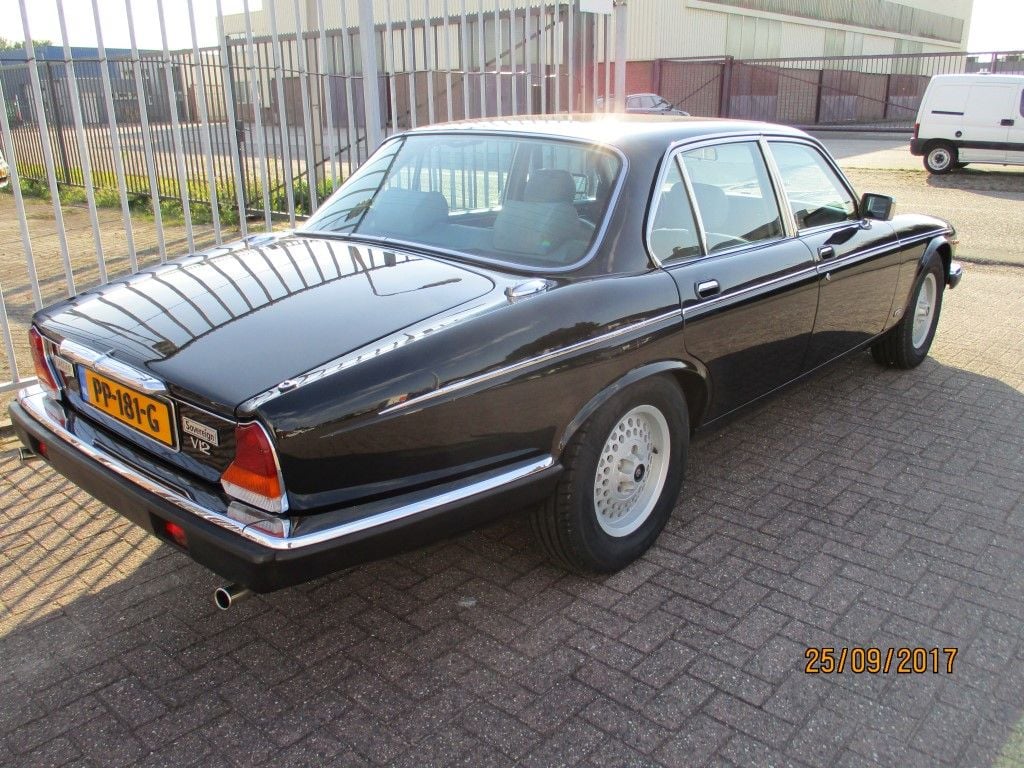
Here are some pics. What are your thoughts?
Given that I am using a slightly tire 215/60/15.
If I raise the rear 1.5 inches, the front lowers to approx 24 1/2 inches.
If so, can I lower the front by removing spacers if there are any present or should I lower the front if spacers are there and raise the rear by replacing the rear shocks and springs or replacing just the spacers at the rear. It looks as if the front and rear springs are original to the car. Shocks are "good" I did the bounce test.
I have located a pair of front springs that were made to order to compensate for the ride height change for an XJS that had a Chevy engine installed.
Length of spring 12 inches. Spring rate is unknown.
I believe the OEM spring for the XJ6 is 12.65 inches long. Not sure if that is correct.
How do you measure the rear ride height? I have searched all over but I can't find any specs for the rear.
Doug posted that the front is measured from the floor to the middle of the outboard headlamp and it should be about 24 1/2 inches + or -.
Anybody?
Pic#2 front floor to fender. Pic#3 Rear floor to fender
I know for sure that the front needs lowering as it is at 25 1/2 inches from floor to middle of headlamp.
Last edited by sanchez; 01-02-2018 at 10:49 AM.
#2
Engine too light? ;-)
The rear seems quite right to me...the front is definitely too high..
I am using the same tire size as you, on original pepperpot rims.
Have a look at the pics below...
I can measure floor to wheelarch center on my V12 if you like...
The rear seems quite right to me...the front is definitely too high..
I am using the same tire size as you, on original pepperpot rims.
Have a look at the pics below...
I can measure floor to wheelarch center on my V12 if you like...
Last edited by Dutch-Cat; 01-03-2018 at 11:22 AM.
#4
Dutch-Cat: Your car has the stance I am looking for. I would appreciate it very much if you can post the height measurements for me. It does not matter that yours is a V12.
Once I know what the measurements are, I will get the appropriate front springs to lower the car. This car has a Chevy 350 motor and lowering springs are available from different sources. Thank you for your response.
Once I know what the measurements are, I will get the appropriate front springs to lower the car. This car has a Chevy 350 motor and lowering springs are available from different sources. Thank you for your response.
#7
Finally found the time to measure the ride height for you:
The middle of the front wheel arch on a level floor is at 68cm from the floor / road ( +/- 27.7 inches )
The middle of the back wheel arch at 63cm ( 24.8 inches )
The car is equipped with
Toyo Proxes CF2 SUV
215/70 R15 98 H
The middle of the front wheel arch on a level floor is at 68cm from the floor / road ( +/- 27.7 inches )
The middle of the back wheel arch at 63cm ( 24.8 inches )
The car is equipped with
Toyo Proxes CF2 SUV
215/70 R15 98 H
Trending Topics
#8
@ Dutch-Cat and all.
Mine:
Rear from floor to Center of wheel arch: 24.25 inches =61.595 cm.
Yours:
Rear from floor to Center of wheel arch: 24.8 inches =63 cm.
Mine:
Front from floor to center of wheel arch 27.625 inches = 70.1675 cm.
Yours:
Front from floor to center of wheel arch 26.7 inches = 68 cm.
So I am slightly lower at the rear and about 1 inch higher at the front.
I acquired a pair of front springs that were made for the XJS V8 conversion.
The unsprung measurement is 12 1/8 inches with blue paint marker. I would not know the difference between my OEM springs and these until I disassemble my car since no one seems to know what the unsprung length of the OEM spring should be.
Some quote it to be 12.75 inches and others quote it to be 12.25 inches.
I am hoping that there are spacers on my OEM springs when I take them out.
The shop that had these spring said they were ordered for an XJS that they were doing a Chevy V8 conversion on and the owner of the vehicle also ordered a set of springs for the conversion and that is the reason why they had the second set.
Who really knows?
Disassembly set for next week. I am in the process of making the tool for spring removal.
Mine:
Rear from floor to Center of wheel arch: 24.25 inches =61.595 cm.
Yours:
Rear from floor to Center of wheel arch: 24.8 inches =63 cm.
Mine:
Front from floor to center of wheel arch 27.625 inches = 70.1675 cm.
Yours:
Front from floor to center of wheel arch 26.7 inches = 68 cm.
So I am slightly lower at the rear and about 1 inch higher at the front.
I acquired a pair of front springs that were made for the XJS V8 conversion.
The unsprung measurement is 12 1/8 inches with blue paint marker. I would not know the difference between my OEM springs and these until I disassemble my car since no one seems to know what the unsprung length of the OEM spring should be.
Some quote it to be 12.75 inches and others quote it to be 12.25 inches.
I am hoping that there are spacers on my OEM springs when I take them out.
The shop that had these spring said they were ordered for an XJS that they were doing a Chevy V8 conversion on and the owner of the vehicle also ordered a set of springs for the conversion and that is the reason why they had the second set.
Who really knows?
Disassembly set for next week. I am in the process of making the tool for spring removal.
#9
I found a old Forum article that said "The spec clearance is 7.45" =/- .025" measured from the bottom of the cross member - and of course equal on both sides".
Will measure mine today at that spot for comparison purposes as I have purchased the needed 3/8 24 bolts in Grade 8, nuts and washers. I hope two thick washers will lower the car enough for my purposes - looks. Will take pre and post lowering photos.
The center of my outer seven inch headlights are 25" from the ground but the car is too high.. Hope to get around to putting in the lowering stuff today.... wil pre soak the bolts with PB Blaster.
#10
Join Date: Mar 2014
Location: Tehama County, California, USA
Posts: 25,480
Received 9,245 Likes
on
5,402 Posts
As we're measuring these things, this is how Nix stands:
Center of outer headlight to floor; 22 inches.
Center of front wheel arch to floor; 26 inches
Center rear wheel arch to floor; 24 inches
Tires; General Altimax, 215/60/15
She sits Low, and just a little menacing I think, just what I like.
Of course, I am careful about speed bumps, pot holes and tank traps.
(';')
The following users liked this post:
leroy1 (05-18-2020)
#11
So I made the spring removal tool using 3/4 inch all thread stock.I made mine 20 inches long. 18 inches will be long enough.
At the top I drilled a 5/16 hole 1 inch from the top and installed a 5/16 grade 8 bolt with 1 side of the hex cut off and ground smooth. This bolt fit into a notch at the top so the 3/4 threaded rod will not spin when turning the big nut to decompress the spring. It also allows the rod to pivot as the spring pan changes angle while lowering. I also cut a piece of metal stock at a 22 degree angle to match the angle of the spring pan for installation of the new springs.
I also used 9 inch pieces of full thread 3/8 x 24 stock as the guides to lower the spring pan.
Since I could not get the 3/8 x 24 in grade 8, I used what was available and used 4 pieces of 3/8 x 24 x 9 with nuts against the spring pan to remove the first spring but the 3/4 inch rod was good enough to withstand the pressure of the compressed spring.
I tentatively released the nut on 3/4 rod 1/2 inch at a time, then released the nuts on the guide rods the same amount. Little by little until the spring was free.
It took approximately 2 hours to do the first side due to fear that the rod and threaded guides would not hold up to the spring pressure.
On the other side, using only two 3/8 guide rods with no nuts, it took about 45 minutes to remove the spring.
The springs had three 1/8 spacers on each side. Two on the top and one on the bottom
I will be reassembling the new springs without the spacers, since I need to drop the front 2 inches.
Based on what I read, each 1/8 removed will lower the front 5/16 of an inch. This would mean that the front will lower almost an inch.
If I need spacers between the spring pan and the control arm, I will add as necessary.
I do not fear the integrity of the tool I made. So onward march.
BTW: The old spring with the spacers measure 12 3/16 from end to end. The new springs measure 12 1/8 from end to end
Last edited by sanchez; 01-08-2018 at 04:12 PM.
#12
@ Roger: Some of my spring pan bolts came out easily. However there were two, one on each side that would only move 1/2 turn. I used PB blaster for 2 days with no good results because the bolt does not come thru the control arm. Fearing that the bolt would shear, I used a propane torch on the the control arm for about 3-5 minutes and the bolt came right out. FYI, there was no rust on the bolt, just some sort of thread lock.
The following users liked this post:
Roger Mabry (01-08-2018)
#13
I took out one bolt easily this AM to confirm the threads and the bolt length... raining today so I will not get the job completed today.
I attached a before photo showing the tire clearance before adding the spacers.
Did purchase steel 3/8 inch - 1/4 thick inch chrome plated spacers to use instead of the two washers... want the drop to be about 1 inch when done.
I attached a before photo showing the tire clearance before adding the spacers.
Did purchase steel 3/8 inch - 1/4 thick inch chrome plated spacers to use instead of the two washers... want the drop to be about 1 inch when done.
Last edited by Roger Mabry; 01-08-2018 at 04:24 PM. Reason: Add photos of tire clearance before spacers used
#14
Update: I just ordered new springs and shocks for the rear. The kit comes with coilovers for the rear, 2 rear shocks and 2 front shocks. Special price now.
Each assembled rear shock is approx $105 plus shipping.
Kit is $381 plus shipping.
I will install the rears first before making any adjustments to the front spring pan.
The new coil overs will raise the rear some with the new hardware that comes with the kit.
Each assembled rear shock is approx $105 plus shipping.
Kit is $381 plus shipping.
I will install the rears first before making any adjustments to the front spring pan.
The new coil overs will raise the rear some with the new hardware that comes with the kit.
#15
The following users liked this post:
Roger Mabry (01-09-2018)
#17
I also finished up my lowering after two days of working on the car.
I removed the front springs and found that there were 3 spacers on each side and the spring together with the spacers were the same unsprung length (12 1/8 inches) as the new spring.
I installed the new springs with no spacers and the height from the fender lip to the floor increased from 27.625 inch to 28 inches.
Since my homemade spring compressor was working flawlessly, I removed the new springs and installed the old springs without the spacers and it did lower the front but only 1 inch so it still looked high.
I found some 3/8 x 5/16 spacers at GRAINGER supplies. They did not have 3/8 x 1/4 but they were made of stainless steel so they were a little more costly and I needed 24 spacers to complete the job. (Series 3) The sales person told me that if they lowered the car too much, I could return them if they were not damaged, so I bit the bullet. Knowing that I could return them I made the purchase.They were $4.10 each times 24.
Using my favorite homemade tool and two 3/8 x 9 as guides, I was able to install the spacers on both sides in under 2 hours. That included lifting the car removing the tires and installing the tool.
My numbers are pretty close to Roger and LNR.
Center of spindle to bottom lip of fender = 14.5 inches
Bottom lip of fender to Floor 25.5 inches.
However, center of outer headlamp dropped to 22 inches.
I drove the car and it feels good.
Attached pics.
The following 2 users liked this post by sanchez:
LnrB (01-11-2018),
redtriangle (09-06-2021)
#18
#19
Join Date: Jul 2012
Location: Walnut Creek, California
Posts: 6,796
Received 2,399 Likes
on
1,880 Posts
Neat, butt, I ain't going out and measure my car!! It ain't warm around here. Not freezing cold, but cold enough!! Fire in my son's fireplace felt great. On coming home yesterday PM, stuffed with crab and fixin's, I built a fire in my fire place. Great, Coco liked it as well.
Sanchez:
Check with David Boger for wheels. Just up the coast from you, a couple of states... One of the Carolina's.. Everydayxj..
Carl
Sanchez:
Check with David Boger for wheels. Just up the coast from you, a couple of states... One of the Carolina's.. Everydayxj..
Carl
The following users liked this post:
ronbros (12-26-2019)
Thread
Thread Starter
Forum
Replies
Last Post
edobernig
XJ XJ6 / XJ8 / XJR ( X350 & X358 )
55
08-18-2016 11:47 PM
Louenigma
XJ XJ6 / XJ8 / XJR ( X350 & X358 )
6
04-25-2016 09:18 PM
jacobzking
S-Type / S type R Supercharged V8 ( X200 )
7
02-05-2016 07:58 AM
Currently Active Users Viewing This Thread: 1 (0 members and 1 guests)


