When you click on links to various merchants on this site and make a purchase, this can result in this site earning a commission. Affiliate programs and affiliations include, but are not limited to, the eBay Partner Network.
Second time writing this because the first one didn't save, but thats par for the Jaguar course isn't it.
Alrighty, long time since I've posted, I had two kids in the meantime, and let the ol' Daimler rot away while raising them.
I've started a quest to get her back on the road, and below is that story thus far.
So during this time of rotting and neglect, I was starting it up here and there to keep everything moving in there.
My first hurdle I came across (some time ago) was that the fuel return was sending fuel back to the wrong tank, classic!
Fuel flew out of the filler everywhere and it was very dramatic. How fun, got to love an overly complex fuel system from the 80s.
I've managed to get a working set of valves from the pick and pull just today, so they are on the shelf and ready to go.
My second hurdle came as I was bleeding the brakes, the seal in the booster/servo gave way and it just hissed now. Very annoying.
Then a little down the track, the big issue happened, a large squirt of oil flew out of the exhaust side of the engine while cranking. Right over the fender and on to the wall.
It wasn't cranking amazingly well honestly. I thought that starter might have been a bit tired.
So anyhow, I was heart broken and pretty much threw in the towel then and there, after trying to find the source of the leak she had sprung so vigorously.
Next day I spent some more time and the best I could do was to track it down to one on the vertical bolts on the top of the timing cover.
I cleaned the area down and there was oil seeping from the thread of the bolt. It didn't seem to match the power of the initial squirt or but sort of matched the location I saw it coming from.
I assumed head gasket. How punishing. (If anyone has a better diagnosis please comment below.)
Apathy followed.
OK, it's going to the car crusher.
Obviously not, I couldn't bring my self to do it. So I just left it there. For more years, probably two more.
So she's still here:
Note the black top is simply a peel off black plastic paint, to make it a little more like the vinyl top variant.
THEN in December, I found a reasonably priced RHD aftermarket booster online, and brought that.
Now I had a reason to get the car back on the road.
So I went hell for leather and ripped the sucker (booster) out.
And found this:
Gross. Not amazing news, because now my master cylinder looked like this:
Well I had a rebuilt kit for the master on hand so I cleaned it up and rebuilt it.
Looked good in the end, but upon testing the pistons would get stuck very occasionally. The internals of the cylinder were just too worn, and honestly didn't look amazing.
Hence the thorough testing.
So thats gone in the bin, and a new one ordered.
At this point I felt like I needed a win, so I pulled out a metal fan that I had as spare parts to replace the aged plastic one.
Battled the viscous fan clutch off the water pump, which involved me getting very distracted by a small hole in the end of the shaft which I thought had something to do with getting it to release from the shaft.
(It doesn't), though it was missing the little thingy that goes in there. (Is that little pin important?)
Heres the fan after stripping to bare metal, inspecting, priming and painting. (Same clutch re-used, it passes the spin by hand test).
Thats on the shelf with booster, and master now, all ready to go.
At this point, I made a very important decision, I decided that I would get my self into a stuffed if I do and stuffed if I don't situation. ON PURPOSE.
I'd just start dismantling, then either it's going to the wreckers in parts or its going back on the road.
Should be good right?
Note: The following methods etc are probably all mildly strange, but it's what I did, and it got me this far. Would have been easier with the engine out of the car.
Heres the before pic I took to remind me of the (grubby) beauty I'd destroyed by taking it apart and not putting it back together (if incase that happened).
The Toyota windshield washer is the only thing I don't like about this engine bay. But you do what you have to do.
Yea nice.
So the pull apart begins.
Intake came off without drama, just the pain of reaching the nuts to contend with, that hurt, and was very grubby.
Exhaust manifold came off good too, that was nice.
Couple of good wins.
Next day, the head came off, pretty well actually, it took me maybe 2 minutes of wiggling to get it loose, then the neighbour helped me lift it out.
Heres my hands after that:
Fun stuff, worth it for the win.
BUT, drama. I did break a stud. I did have that sinking feeling.
The very same one when I first got this car home and checked under the floor mats and found the whole floor surface rusted. (silly me for not checking, but it's fixed now).
Second long one from the back on the intake side. Rusted thin at the very bottom.
I needed a win, so I tidied up the air intake box, here it is primed and ready for paint.
Yay, Win.
RIGHT. Back to the drama, so I'm flushing the block and all sorts of brown horrible crud is coming out and then it goes clear.
Great! (but not really).
So I thought I'd take out the water jacket drain plug, google that, find a post on this very forum saying that they don't ever come out. URGH.
Well anyhow mine did, quite well actually.
BUT. Nothing came out of the hole, what the heck,
Theres something solid in there, just what you want. It makes your car go faster. I poke it with a screw driver. A LOT. Dig at it. A LOT. No coolant.
Now I get a hack saw blade (Sorry. But it's quite good in that it's rigid in one direction) and then root around down through the top of the block (carefully, precautions taken, protection was used).
Mashed it all up and got the coolant flowing.
Then I poked around in the others and noticed that the hacksaw blade only dropped in a different depth in all the coolant holes.
So it's got this crud through the entire water jacket.
I did all sorts of poking and brushing with a long thin brush with a little tiny hose of water running into the head.
The water went brown, thats good. I did that a lot. A LOT.
The water went clear. Problem solved.
NOPE.
I got curious and poked a very small magnet down into the head and what did it bring up? All sorts of rusty crap.
The blocks still filled with crap.
Ok so, the freeze plugs are coming out (more than just the one that I needed to get at the snapped stud.
Here's what I found:
No amount of mashing or back flushing was going to move that, and I wasn't going to be loosening any studs at this point for fear of the crap going into the thread.
THIS is why I now know that flushing your block with the hose is going to clean pretty much NOTHING out. (Could be wrong, but this is what happened to me.)
GRIM, wasn't happy at this point. But we go headlong into the fray.
So the next step involved me removing as much of the crud as I could by poking and prodding and getting loose with various tools.
Then extracting with a magnet to find the rest.
It took some time, and one might say that its a stupid way to do it, but it felt safe.
In the end this method didn't bear fruit really, other than finding and loosening most of the baked on crud.
We needed to get more serious, so out comes the pressure washer. I didn't want to do this, high pressure water in the engine bay just didn't jive with me.
But alas, it had to be done.
Plastic sheets were installed to cover everything, pistons blocked and everything taped to stop water. (it still comes out of the stud holes on the top of the block so I used a rag to soak it up as it came through).
Lots of blasting and we have some success, most of the crap is now out. Great!
Oh and heres the broken stud:
It's only proud of the steel by a few mm.
Anyhow, let the below image be a warning for those loosening head nuts.
Battle on (carefully).
But I needed some wins before that, so I did a few easier and more rewarding processes.
Tiding of the intake loom:
and dismantling of the head:
The heads gone to the shop to get a skim, I got a call today that it's all ready for collection.
I'll maybe lap the valves, but I'm not sure if I want to have to adjust the valve lash again. I'll check it regardless.
A week passes with daily spraying and soaking of the studs in CRC penetr8 (which apparently works quite good.)
Then I start to attempt to get the studs out, I was going to discard all the studs other than the shortest ones so I took a pipe wrench and attached that as low on the stud as possible and put a nut on the top of the stud. Held the wrench and hit the top of the stud, sometimes while applying torque, sometimes not.
They started to come out, four the first day, then a few more the next. That just left that two most rusted studs.
Same trick, smack it, turn it, smack it and turn it, spray it etc etc.
Well good news, they all came out.
All but one, which I haven't touched. Because of this heinous thing:
I know full well that the area below the stud is going to be full of crap, and I won't loosen that stud until it's cleaned out.
Problem being that I can't until I get that thing out and it will. not. turn. Not after two weeks of soaking in the CRC product/some ATF and acetone.
If any one has advice here I'd love to hear it, I'm only using a (good quality) 40cm power bar, and it feels like the tool is gonna break and not the plug, I can see it deform and bend.
Do I assume that this plug wont break and just get a bigger power bar and force it out? Or do I need some heat? (I don't have a torch and I'm a little scared of heating the block to be honest, though I could get a torch).
Now at this point, the next step is to get the block out, which I never intended on doing, which is why all this work was done (painfully) in the engine bay.
So thats going to come out and get sent for a skim and broken stud removal.
I don't think I'll do the bottom end or piston rings while it's out though, or is that crazy?
It's just an extra expense at this point. Cars done about 128,000 KM.
I'm doing some other items while I'm at it too, "new" reconditioned starter motor, new water pump and that pipe under the intake manifold was heavily rusted so thats getting replaced too.
And since the timing cover is coming off, then all the guides and the lower hydraulic chain tensioner.
Theres a story! I'll update with more details when theres more to report (time allowing).
H.
Other things for the readers,
Check under your battery because mine was rusted to bits:
Last edited by Harry Dredge; 01-16-2024 at 01:29 AM.
WOW Harry, You have my admiration for sticking with this project.
I have a yellow 1980 XJ6 also that gets worked on 'occasionally'
Thanks for giving me some inspiration to dust off mine and get back to making things work.
Great job and thanks again for the documentary
Bobmo
Hi, Harry, I remember you, wondered where you'd slithered off to!
You/re gonna have a LOT of fun for the rest of the winter, aren't you!
(Well I guess you have summer now.)
I *Luv* this sort of thread. I'll be tuning in regularly... Very Grateful that I'm not doing it. LOL
(';')
WOW Harry, You have my admiration for sticking with this project.
I have a yellow 1980 XJ6 also that gets worked on 'occasionally'
Thanks for giving me some inspiration to dust off mine and get back to making things work.
Great job and thanks again for the documentary
Bobmo
Thats awesome!
The water jacket was the real shock, I do wonder how many XJs have this problem, though this one ran fine and kept cool quite well with between an inch and half an inch of crud.
Maybe it ran a little hot, but not overly.
Originally Posted by LnrB
Hi, Harry, I remember you, wondered where you'd slithered off to!
You/re gonna have a LOT of fun for the rest of the winter, aren't you!
(Well I guess you have summer now.)
I *Luv* this sort of thread. I'll be tuning in regularly... Very Grateful that I'm not doing it. LOL
(';')
Haha I hope you mean a lot of fun driving and not a lot of fun putting it back together! I want to get this adventure finished, very excited to take it for a spin (hopefully).
Bit of an update too, though I don't the pace will continue like this.
I've got the head back, a few issues but the cylinder head guy doesn't seem worried, so I'm not too worried. Maybe a little but not too much.
Will take advice if anyone has any to give of course.
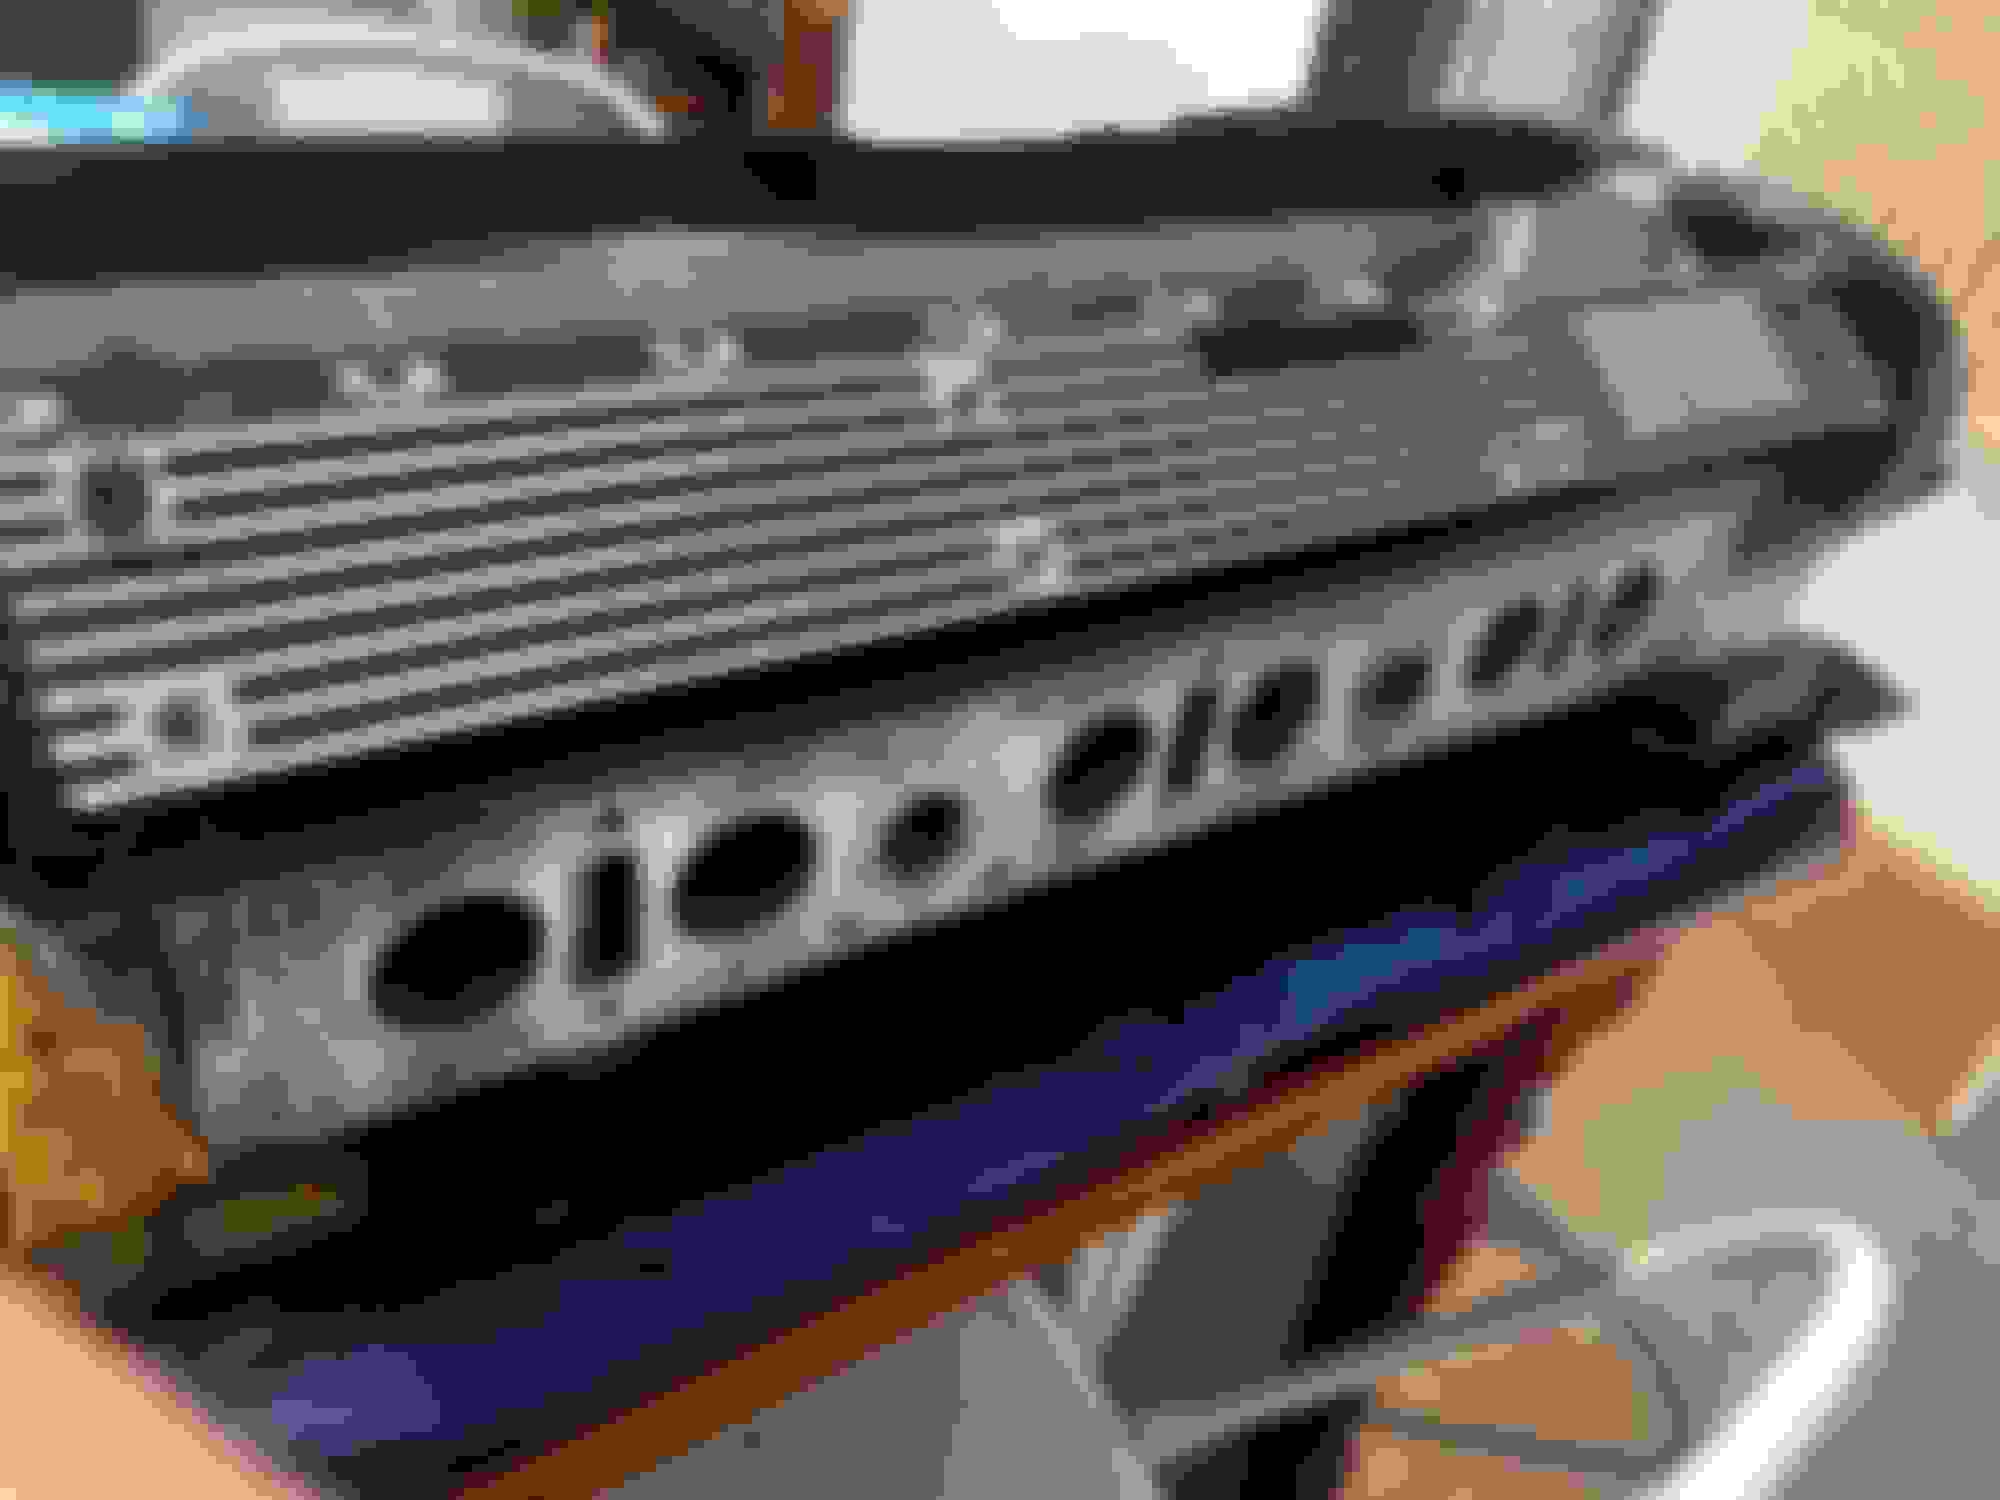
Heres the head with a fresh new skim:
Looks reasonably ok, there some pitting on the mating surface around 2, counting from the back which if i remember correctly is the Jag way haha.
Cylinder head guy didn't seem too worried but I'm not sure my self.
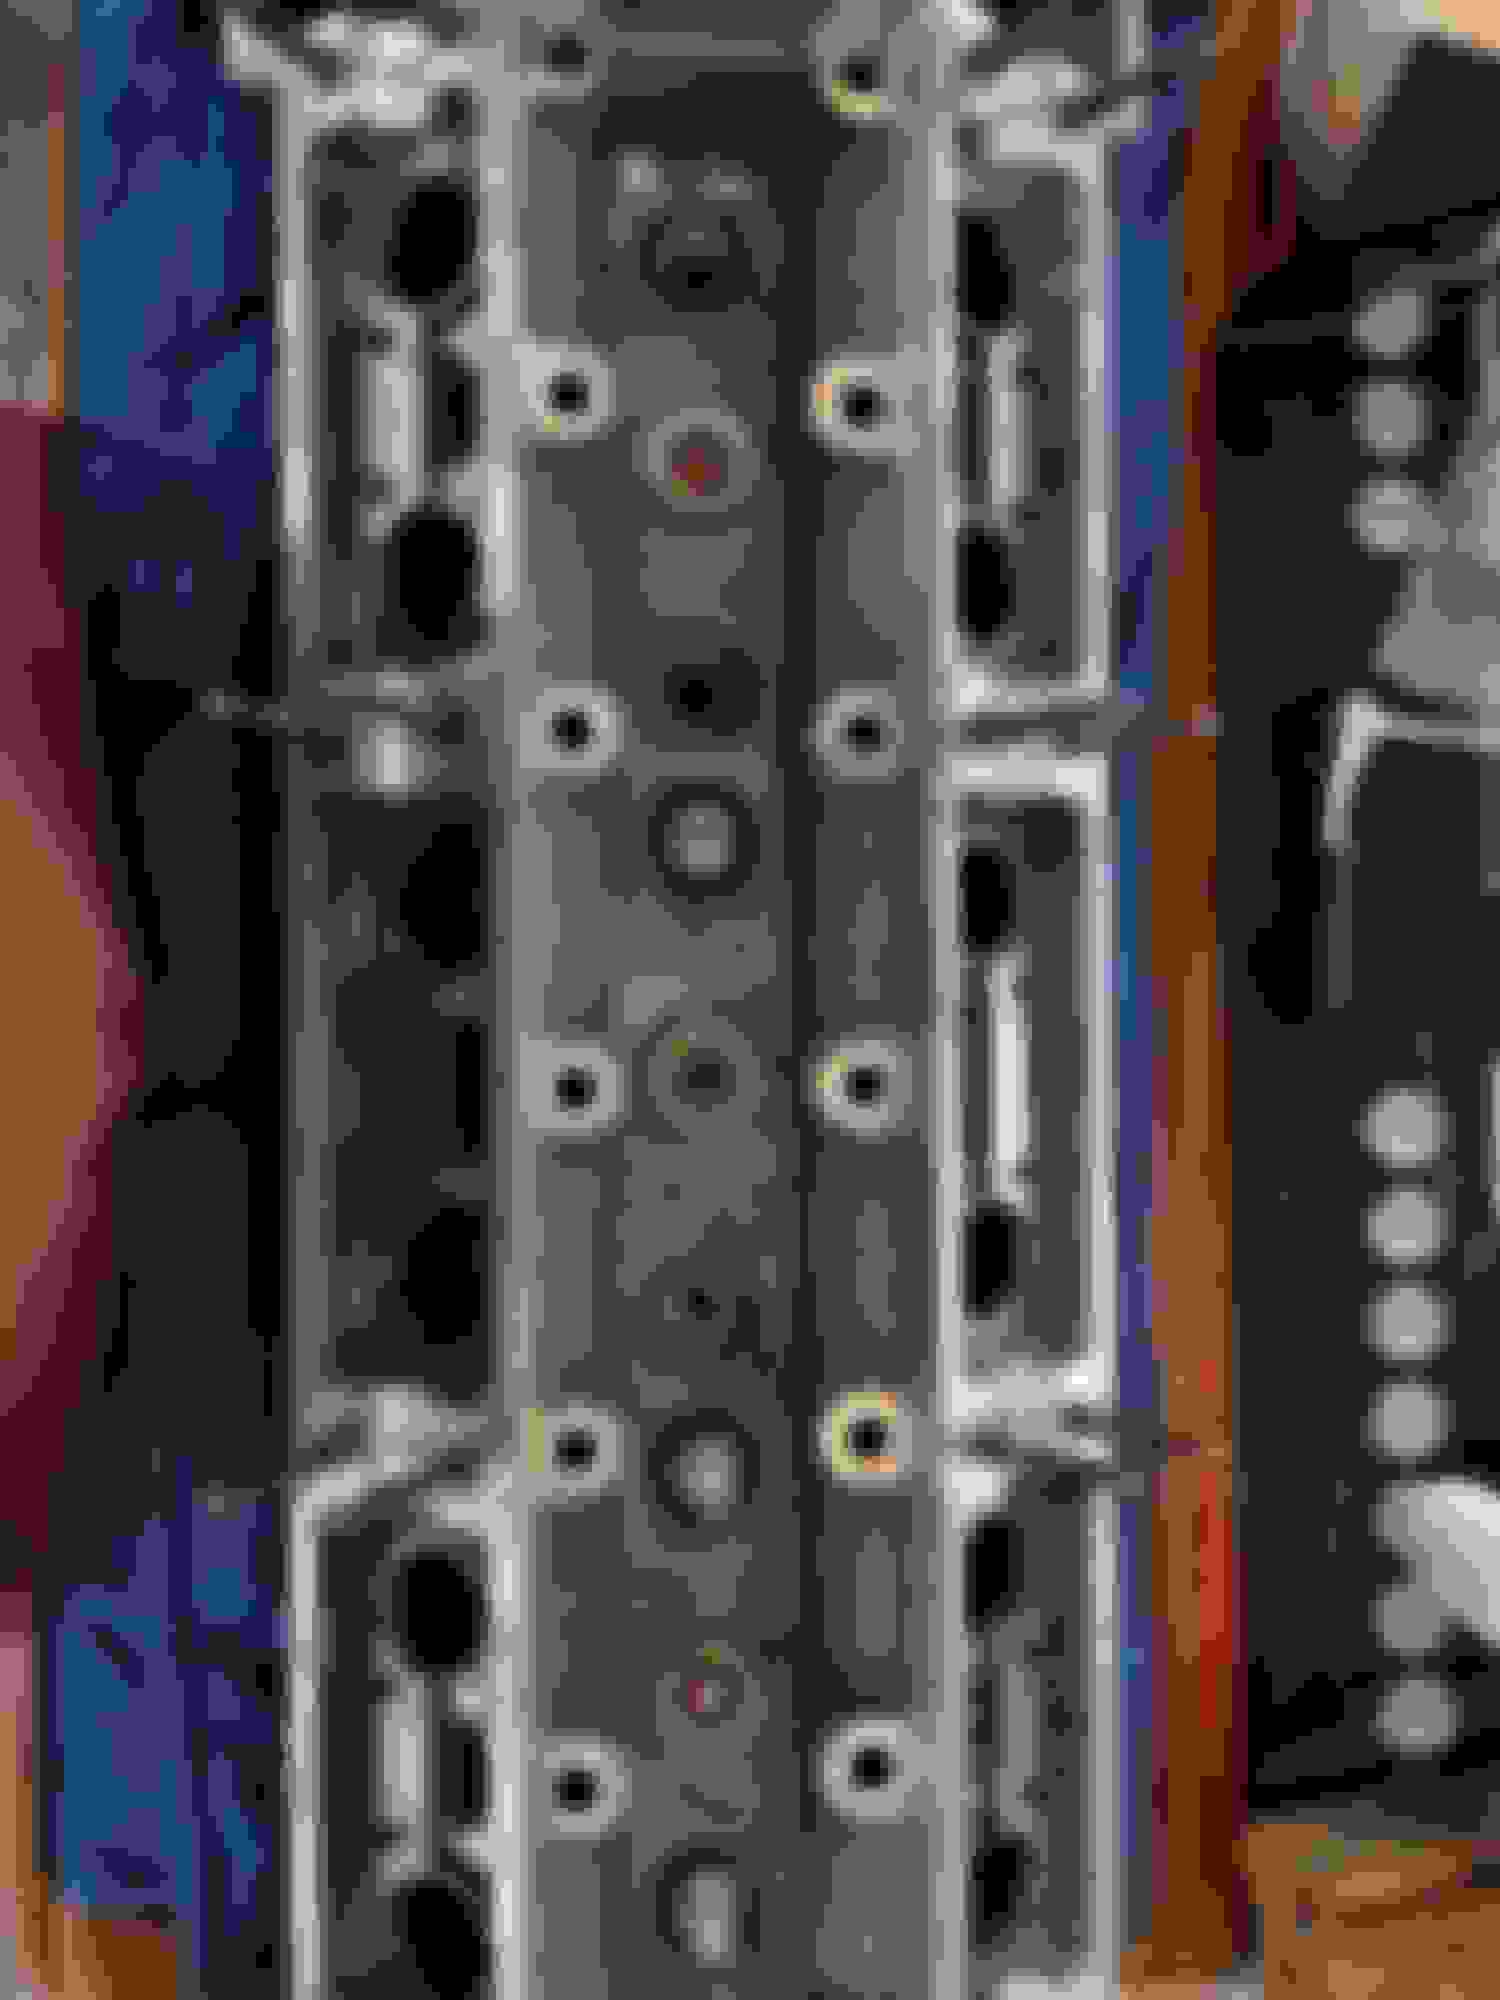
A closer look in cylinder two shows quite bad pitting, but the valve mating surfaces look ok. Maybe a lap and they should be good enough?
A few things coincide here, the broken stud was next to this cylinder, and the following intake valve was in that position.
The valve seat is a bit pitted, but I guess this isn't a race engine so perhaps the seal being a little less than ideal could be ok?
All points towards a coolant leak into that cylinder, perhaps this head was done before and they knew that stud was no good and didn't torque it correctly?
Not sure.
Mating surface on the pitted valve looks ok too, I think but I have no reference point.
I don't really want to do a new valve and have to do the valve lash again, so currently I'm thinking that Ill run with this valve unless there is an outcry from the people.
Over all the valves look ok after a clean I guess.
The head guy says these holes are from welding, possible repair but also possible that it was welded in the factory as it wasn't that uncommon back in those days (or so he says).
Any comments?
This is what most of the other cylinders look like.
Whatever you do, do not try to break that screw plug cold. I did on my spare engine and just sheared off the hex.
A lot of heat maybe necessary, but I have never known anyone to get this plug out.
It is unlikely you will be able to shift that last plug, but that need not matter. There is adequate access via the coolant passages that emerge at the top of the block to get a small vacuum nozzle into the block and clean out the remaining debris
The last plug with the hex head is for a block heater. Was standard on Canadian cars. The only way I have been able to get one out is to get everything red hot with an oxy-acetlyene torch and then a very hefty impact wrench. If you're not planning to install a block heater, leave it in place.
Whatever you do, do not try to break that screw plug cold. I did on my spare engine and just sheared off the hex.
A lot of heat maybe necessary, but I have never known anyone to get this plug out.
Originally Posted by Andy T.
It is unlikely you will be able to shift that last plug, but that need not matter. There is adequate access via the coolant passages that emerge at the top of the block to get a small vacuum nozzle into the block and clean out the remaining debris
Originally Posted by Jagboi64
The last plug with the hex head is for a block heater. Was standard on Canadian cars. The only way I have been able to get one out is to get everything red hot with an oxy-acetlyene torch and then a very hefty impact wrench. If you're not planning to install a block heater, leave it in place.
Noted, thanks for the advice, maybe it just has to stay in and I'll do a painfully slow clean out via the access I have.
Perhaps the machine shop can blast/suck enough air in there to clear out the thread when they skim the block.
I've got a scope on the way so that might allow me to check.
Small update, I've lapped the valves, once with course, once with fine, they look good now, found two bent during lapping.
So my suggestion is to try to rotate each valve in its guide whilst moving it in and out slowly, if it binds at all, I guess it's bent.
Thats the exhaust valve, visibly bent, but no signs of being hit, and the valve guide feels no different from the others when tested (by feel) with a known good valve.
This is the bent intake valve, very hard to see by eye but it's certainly bent, this one shows what I think is signs of being hit by the piston.
As Below:
Camera missed focus but you can see the row of small impact marks, which I think are from the piston. (I have no reference point.)
I've ordered new valves, but I think will be leaving the valve guides alone, and installing the stake down kit I have on hand.
I'm not sure how to very bent exhaust valve got bent honestly, the bucket guides look fine as do the valve guides (to my uncalibrated eye-crometer).
For reference I had set valve clearance to spec in an effort to clear up a sewing machine sound from the top end (to no avail), so maybe it's damage from before then and these two bent valves are the source of the noise, I hope so, I really disliked that sound.
The clearance was tight before I adjusted it, between 0.007 and 0.009 on the intake and 0.010 and 0.011 on the exhaust. I set them all to 0.014.
Piston, or a bit of grot in there from an untidy plug change, causing the impact.
Appreciate that, based on the Roberts comment, I do wonder if the clearance was very low in the engine too.
Originally Posted by Robert Laughton
It may just be the lighting, but it appears that a lot was shaved off the head. I think I see one of the 4 pads now ground level.
If so, this may cause high compression, and maybe make the cam chains too long to adjust.
I know you can get a Cometic gasket for this to restore dimensions.
Good luck,
Rob
Hmm cheers, thanks for the advice, I think I need to consider this, and the piston to valve clearance. Which I can't find any specs for, despite googling and looking in the jaguar service manual all afternoon.
It's clearly been skimmed before, maybe more than once.
If anyone knows the stock piston to valve clearance that would be helpful information. Google "Bard" the google AI chat bot tells me that it's 0.040". But trying to verify this info has been hard.
I might start another thread for that question because I have not been able to find that detail anywhere on the forum during my copious searching. Though maybe I'm using the wrong terms.
I don't have any first-hand experience with these engines (air-cooled m/c's was my trade) but I'd not be pleased with that area on the head near pot #2....I'd at least get a few opinions from a few people who work on XK engines before running it. Also, the sharp edge where the combustion chamber connects the mating surface can become a hot spot, causing pre-ignition - were it me I'd dull that edge down a bit.
Fwiw, the higher the compression ratio, the bigger the bang, which means the more important a tight seal becomes.
Also, valve lapping's not for removing material, just showing that there's an even (and wide enough to dissipate heat) seat to seal, so imo there's a potential issue there...I reckon you're already aware that you might have to adjust the lash on that one
Bent valves are another red flag - hard on guides, small-ends of rods...I'd want to check more before buttoning it up.
Again, this is just my take, others more experienced may have more info but unless time and/or finances are a significant part of the overall plan, I'd need to have more info before proceeding.
Good luck mate!
Last edited by Chris Scott; 01-19-2024 at 05:24 PM.
Piston, or a bit of grot in there from an untidy plug change, causing the impact.
I don't think it's impact damage, to me that looks more like detonation damage. It typically starts on sharp edges, and there is where I have seen that sort of damage to XK pistons before.
These engines are not known for valves hitting pistons, I don't think I have ever heard of a case of that happening, assuming the cams are in the correct position. Similarly, I've never heard of a piston to valve clearance either. Usually when a head or block has been skimmed too far you'll run into detonation and pre-ignition problems well before any possible mechanical contact problems.
I'd generally want the compression no higher than 9.2 assuming you are running 91 AKI / 95 RON fuel. You can check by doing some measurements, putting them into this spreadsheet and that will tell you the thickness of the headgasket you need to bring the compression ratio to a good range.
I don't have any first-hand experience with these engines (air-cooled m/c's was my trade) but I'd not be pleased with that area on the head near pot #2....I'd at least get a few opinions from a few people who work on XK engines before running it. Also, the sharp edge where the combustion chamber connects the mating surface can become a hot spot, causing pre-ignition - were it me I'd dull that edge down a bit.
Fwiw, the higher the compression ratio, the bigger the bang, which means the more important a tight seal becomes.
Also, valve lapping's not for removing material, just showing that there's an even (and wide enough to dissipate heat) seat to seal, so imo there's a potential issue there...I reckon you're already aware that you might have to adjust the lash on that one
Bent valves are another red flag - hard on guides, small-ends of rods...I'd want to check more before buttoning it up.
Again, this is just my take, others more experienced may have more info but unless time and/or finances are a significant part of the overall plan, I'd need to have more info before proceeding.
Good luck mate!
EDIT:
Re. valve to piston clearances...I should think 1mm would be barely ok - all it takes is a bit of an over-rev or missed shift to be a deal breaker....tough call, the only way to know for sure is to use modeling clay which means head on/off an extra time...might be the way to go though, as there's really no other way to KNOW what kind of clearances you've got.
Appreciate the thought you've put into your reply, Re. the piston to valve clearance, I believe that I have figured out that there was no spec supplied by Jaguar.
So the spec the Google AI provided is likely very wrong, the general rule of thumb for engines seems to be 0.100 exhaust and 0.080 for the intake.
Regardless, I think I'll be measuring that with a magnetic dial gauge. I've got the time to put the head on to do that so no drama.
I'll report back on those measurements.
I've only lightly lapped the valves and checked for seal and a good seat, I shouldn't think that I've taken off much material, but will check lash of course. Thanks for raising that flag.
You are correct about the sharpness of the edges, do you have a suggested method to dull them without effecting the seal?
Originally Posted by Jagboi64
I don't think it's impact damage, to me that looks more like detonation damage. It typically starts on sharp edges, and there is where I have seen that sort of damage to XK pistons before.
These engines are not known for valves hitting pistons, I don't think I have ever heard of a case of that happening, assuming the cams are in the correct position. Similarly, I've never heard of a piston to valve clearance either. Usually when a head or block has been skimmed too far you'll run into detonation and pre-ignition problems well before any possible mechanical contact problems.
I'd generally want the compression no higher than 9.2 assuming you are running 91 AKI / 95 RON fuel. You can check by doing some measurements, putting them into this spreadsheet and that will tell you the thickness of the headgasket you need to bring the compression ratio to a good range.
Cheers thank you, I've had a look at the spreadsheets, measurements seem easy enough to take with a little youtube help.
I'm interested in this type of calculation so I'll certainly be getting use of these sheets.
Could be detonation damage huh, I was thinking more piston hit because the marks are all in right next to each other, and I thought perhaps the valve had been rotating over time.
But detonation could be a good diagnosis if the compression is a little high due to multiple skims.
As an update on progress, in an effort to check the cam journals are straight which is good news, I've just put in new cam bearings with a little oil and the cams without any springs etc.
The good news is that the intake cam is in good condition and spins freely by hand. Very nicely in-fact.
Bad news being that the exhaust cam is slightly bent.
I've verified this by carefully swapping the intake cam to the exhaust side and doing the same test.
To make me feel better about this test, I left off the cam hold down brackets and tested the exhaust cam rotation with the cam sitting in, its very easy to find the tight spot.
Then I put the intake cam in the exhaust side and carefully rotated to compare, it spins freely, tested the exhaust carefully on the intake side and the exact same tight spot occurs.
Repeat test in correct locations to compare for feel and the feel remains the same. ie it follows the cams.
So the problem moves with the cam, so thats a bent exhaust cam.
I picked one from the pick and pull this afternoon but it's in bad condition in comparison to mine, which makes me feel good about the intake cams condition.
I think I will investigate getting the original exhaust cam straightened (if possible) because the bearing surfaces are in much much better condition.
Any comments on the expanded picture here?
1x Bent exhaust valve
1x Bent intake valve
1x Bent Exhaust cam (I could have bent this the first time I adjusted the valve clearance, or on removal).
1x Blown head gasket
Straight cam journals and head (as far as my basic tests show).
Cheers,
H.
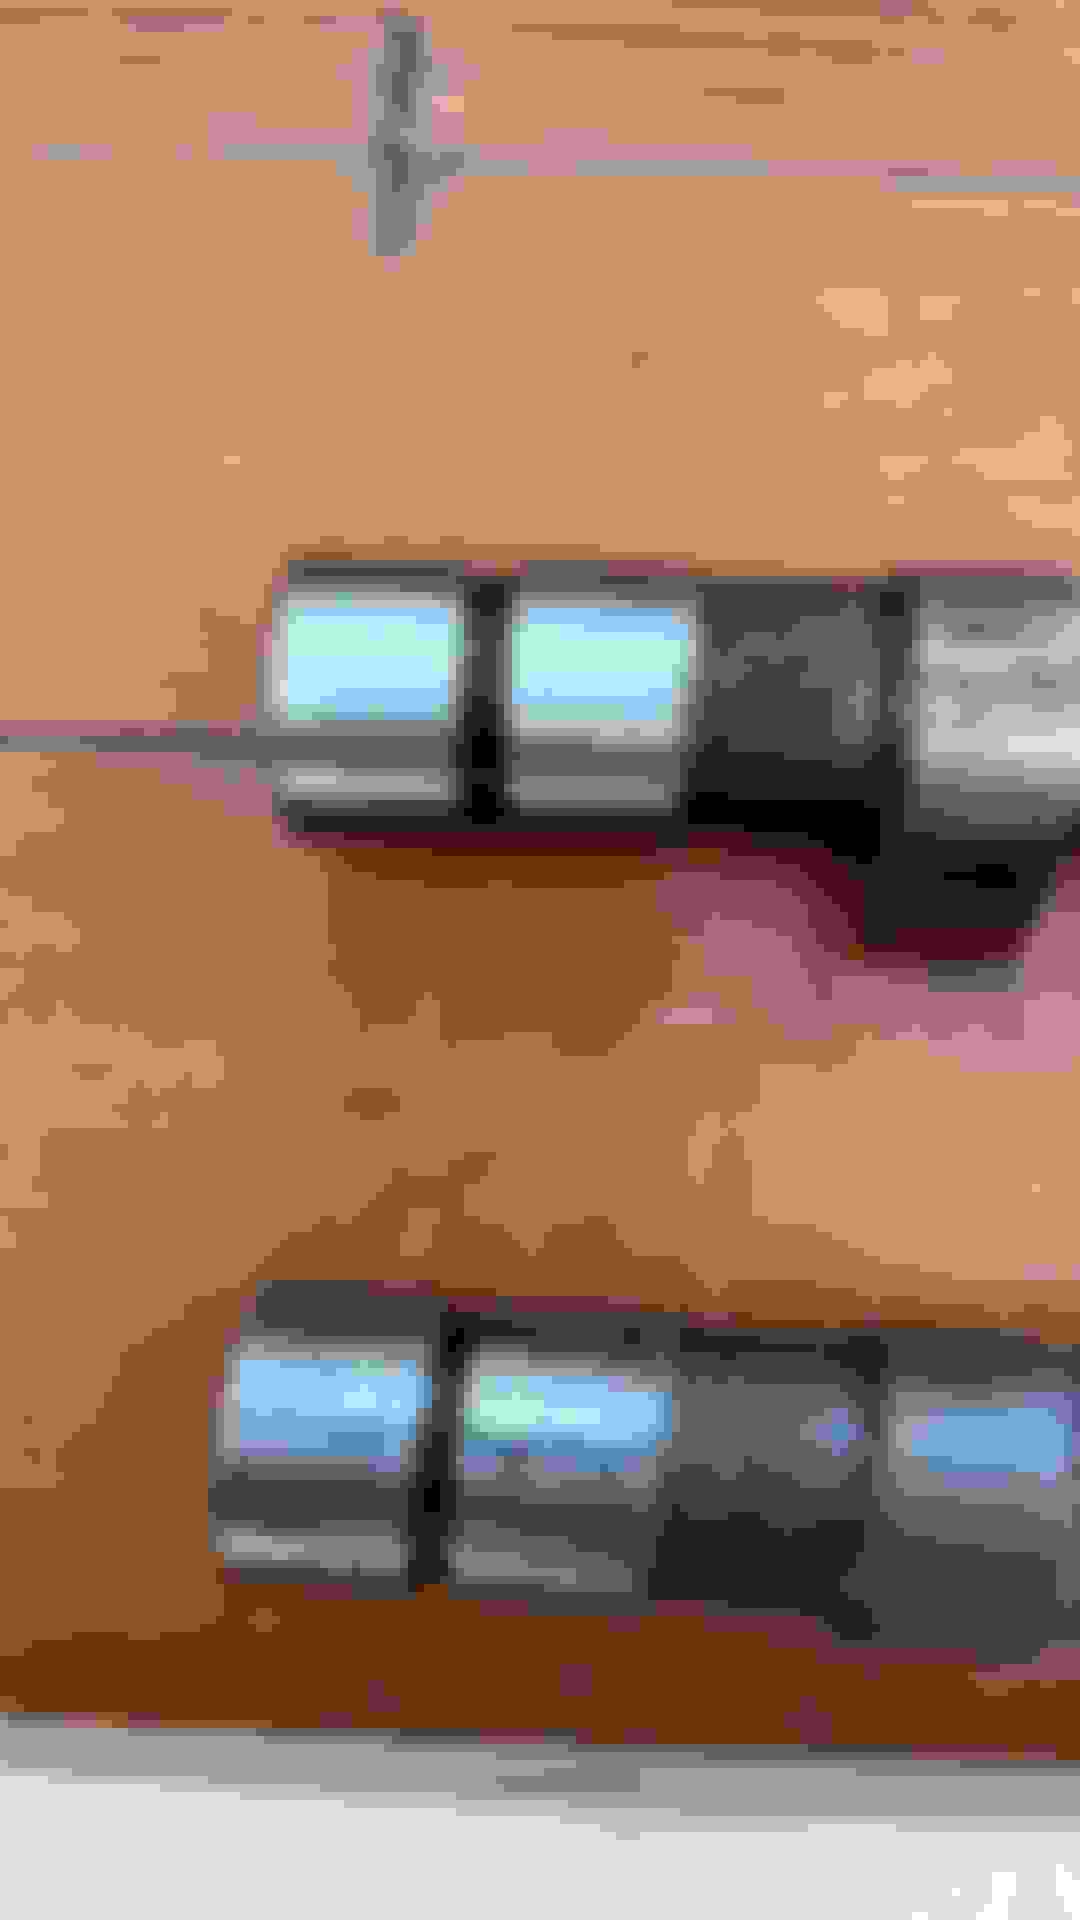
Comparison of cam bearing surfaces, top one is original, bottom from wreckers:
Appreciate the thought you've put into your reply, Re. the piston to valve clearance, I believe that I have figured out that there was no spec supplied by Jaguar.
So the spec the Google AI provided is likely very wrong, the general rule of thumb for engines seems to be 0.100 exhaust and 0.080 for the intake.
Regardless, I think I'll be measuring that with a magnetic dial gauge. I've got the time to put the head on to do that so no drama.
I'll report back on those measurements.
I've only lightly lapped the valves and checked for seal and a good seat, I shouldn't think that I've taken off much material, but will check lash of course. Thanks for raising that flag.
You are correct about the sharpness of the edges, do you have a suggested method to dull them without effecting the seal?
Cheers thank you, I've had a look at the spreadsheets, measurements seem easy enough to take with a little youtube help.
I'm interested in this type of calculation so I'll certainly be getting use of these sheets.
Could be detonation damage huh, I was thinking more piston hit because the marks are all in right next to each other, and I thought perhaps the valve had been rotating over time.
But detonation could be a good diagnosis if the compression is a little high due to multiple skims.
As an update on progress, in an effort to check the cam journals are straight which is good news, I've just put in new cam bearings with a little oil and the cams without any springs etc.
The good news is that the intake cam is in good condition and spins freely by hand. Very nicely in-fact.
Bad news being that the exhaust cam is slightly bent.
I've verified this by carefully swapping the intake cam to the exhaust side and doing the same test.
To make me feel better about this test, I left off the cam hold down brackets and tested the exhaust cam rotation with the cam sitting in, its very easy to find the tight spot.
Then I put the intake cam in the exhaust side and carefully rotated to compare, it spins freely, tested the exhaust carefully on the intake side and the exact same tight spot occurs.
Repeat test in correct locations to compare for feel and the feel remains the same. ie it follows the cams.
So the problem moves with the cam, so thats a bent exhaust cam.
I picked one from the pick and pull this afternoon but it's in bad condition in comparison to mine, which makes me feel good about the intake cams condition.
I think I will investigate getting the original exhaust cam straightened (if possible) because the bearing surfaces are in much much better condition.
Any comments on the expanded picture here?
1x Bent exhaust valve
1x Bent intake valve
1x Bent Exhaust cam (I could have bent this the first time I adjusted the valve clearance, or on removal).
1x Blown head gasket
Straight cam journals and head (as far as my basic tests show).
Cheers,
H.
Comparison of cam bearing surfaces, top one is original, bottom from wreckers:
Yeah, that cam from the wreckers is, well...wrecked. Shouldn't be too hard to get another.
Re. the sharp edge on the combustion chamber; it's no big deal, just a light pass or two with a sharp chisel or scraper, then rub it down a tad with some fine emery paper - you just want to bust the edge off, no need to remove much material.
...oh, and regarding valve to piston clearances..after reading a bit more posts someone mentioned that this was never an issue with these (non race-tuned of course) engines, though I'd say since your head seems to have been skimmed a fair bit, you might try the following;
With the engine in running condition, pull the plugs and while turning it over by hand, take a mag light and look into the #6 plug hole towards the inlet cam to see if the head of the valve drops into view - I reckon you should see it, and if so there will be a a time where the piston and valve are the closest to each other, and you just might be able see the amount of space between them....I've never tried it on an XK engine, but this is how we'd sometimes check clearances on race engines, by getting the intake valve to it's closest proximity to the piston, then manually levering it in further to register how much space there is before they touch.
Again, it seems that this isn't an issue with stock engines, but it couldn't hurt to see if you can actually see where everything's at in there.
Good luck, I'm sure you'll get it all sorted soon!
Last edited by Chris Scott; 01-20-2024 at 12:28 PM.
Yeah, that cam from the wreckers is, well...wrecked. Shouldn't be too hard to get another.
Re. the sharp edge on the combustion chamber; it's no big deal, just a light pass or two with a sharp chisel or scraper, then rub it down a tad with some fine emery paper - you just want to bust the edge off, no need to remove much material.
...oh, and regarding valve to piston clearances..after reading a bit more posts someone mentioned that this was never an issue with these (non race-tuned of course) engines, though I'd say since your head seems to have been skimmed a fair bit, you might try the following;
With the engine in running condition, pull the plugs and while turning it over by hand, take a mag light and look into the #6 plug hole towards the inlet cam to see if the head of the valve drops into view - I reckon you should see it, and if so there will be a a time where the piston and valve are the closest to each other, and you just might be able see the amount of space between them....I've never tried it on an XK engine, but this is how we'd sometimes check clearances on race engines, by getting the intake valve to it's closest proximity to the piston, then manually levering it in further to register how much space there is before they touch.
Again, it seems that this isn't an issue with stock engines, but it couldn't hurt to see if you can actually see where everything's at in there.
Good luck, I'm sure you'll get it all sorted soon!
We agree on the wrecked cam then haha, I mostly took it as a core to be machined in the case I end up in a sticky situation.
Ok, thanks for the advice on the sharp edges and the checking of the piston to valve clearance.
As I'm overhauling a ser 3 engine also I got to the point of clearing out the water jackets. They were filled with rust behind the freeze plugs and tried to clean behind the screwed in plug to no avail as the head stud wouldn't screw back in. I decided to fire up the torch until smoke began to rise from around the plug and the water jackets.So with the electric impact it spun right out with no resistance. I'm glad I did as I found that my efforts to clean behind the plug without unscrewing it turned out to be a fail.
I've finished lapping in the new valves and did the water in the cylinder dome trick to check for any terrible leaks. Found a few that needed a little more, did those and no more leaks.
Though the "fine" grit wasn't that fine, I'm sure you could go further, but I don't see the point really, I just want it to run reasonably.
Next on the agenda was painting the cam covers, I've done this is VHT engine enamel in satin black, and then baked it with 2400 watts for 4 hours of lamps in an attempt to cure it a bit before sanding.
They got very hot but not uncomfortably hot where I was worried about the aluminium. Might have been a pointless exercise.
I started to sand by hand but honestly it was just way way too slow, so I ended up using the flat orbital sander on it. Which worked well, but I wouldn't suggest that for a show car as there was some chips of paint that came off around the edges.
160 grit to start, then finished with a 1200 grit wet sand, all on the orbital. - Do it by hand if you want perfection and probably go higher than 1200 grit.
Looks pretty good though:
Oh yes, I installed the tappet guide stake down kit also, on both sides, heres MY method for anyone looking. It may not be the best but it worked for me.
Firstly, you CAN drill right though if you are tapping a thread, it's just another oil gallery. BUT I wouldn't do this with the head on the car due to the shavings.
I've seen some suggest that it's ok to do, but the valve stem guides are right there and it just doesn't seem like a good idea to have those shavings washing around in there.
I preferred the drill through method because you know that your tapped thread is going to be long enough for the machine screw.
First I placed all the plates and taped them firmly into place with gaffer tape, taped all openings and cam bearings.
Centre punch in screw hole for a drill guide.
Drilled right though - which for reference is roughly 25mm measured from the TOP face of the plate in place - ie set your depth gauge (or bit of tape) at 25mm and you'll probably go through.
My kit from XK unlimited needed a 10 - 24 UNC thread. Which is the same as 3/16 UNC apparently, using kooky imperial math.
I left the plates in place while I cut the thread, this gave me a useful guide as to if I was reasonably square. Dont for get to be square in vertical and horizontal axis.
I used a tapered tap to start and then a bottoming tap to finish, which I would also suggest.
Then blew it all out with compressed air.
I also used a cheap Chinese endoscope to watch the drill bit come through, though you can clearly feel it. It was a nice piece of mind having inspected the area below before starting work.
The interior looks like this for those wondering:
You come through that top face if you drill right through, plenty of space and nothing to hit.
Valves are installed along with cam shafts and the valve clearance measured, it's mostly within spec but I'm unsure if my measurements are good because I can push in larger sizes with some force.
Just don't really know what it should "feel" like, and it's a sprung surface, leading to my questioning of my measurement.
I'll get a pro with the feeler gauges to check it for me.
For the tightening down of the camshaft, it's very nerve racking. The service manual says to start with the cam timing notch in the upmost position and tighten from the middle evenly.
However, it's quite tricky when pushing against the valve in cylinder 1 (rear most).
The cam needs to travel much further there and its hard to tell if I've done it right, lets hope its not bent.
Actually, while I'm posting, I also cleaned up the trans oil cooler, that greasy thing under the rad.
I found a pin hole in the inlet tube which would explain the mess, though I never lost much if any at all trans fluid.
Very tidy, but this is one I got from the 81 XJ6 at the wreckers, and its slightly different.
So I'll document that difference, the later one "81" is slightly longer and is lacking a coolant drain plug and the oil cooling internals are different.
On the left is what I believe to be the later longer version without coolant drain plug.
They are the same diameter despite looking different in the photo.
Originally Posted by Gatucho
As I'm overhauling a ser 3 engine also I got to the point of clearing out the water jackets. They were filled with rust behind the freeze plugs and tried to clean behind the screwed in plug to no avail as the head stud wouldn't screw back in. I decided to fire up the torch until smoke began to rise from around the plug and the water jackets.So with the electric impact it spun right out with no resistance. I'm glad I did as I found that my efforts to clean behind the plug without unscrewing it turned out to be a fail.
Great advice, I think I'll get the machine shop to heat it up and remove/clean. Or I'll asked them if dipping the block will clear that area out well enough.
Great to see some more progress...just that much closer to the end.
...well, we both know it never ends, but you get my point.
Only thing I'll add is when doing a "leak test" on the valves, use a solvent...not terribly important what you use, it's just that water has a fairly high surface tension, and can actually hold fast where a solvent will leak through.
It makes a difference.
...and plus 100 on getting the block properly flushed - the peace of mind when it's done is well worth the extra work/expense.
Looking forward to seeing more completed tasks mate!
Last edited by Chris Scott; 01-27-2024 at 09:16 AM.

 01-15-2024, 11:32 PM