
1989 XJ-S, a renovation project, epilogue
#61
 01-03-2017 | 09:29 PM
Thread Starter
|
Veteran Member
Joined: Dec 2013
Posts: 3,247
Likes: 1,354
From: Taiwan, R.O.C.
Thanks Greg, most are on the list already.
I will change all fuel and ignition and coolant related seals, washers, hoses and whatsoever, no worries there.
The list is getting longer and longer...
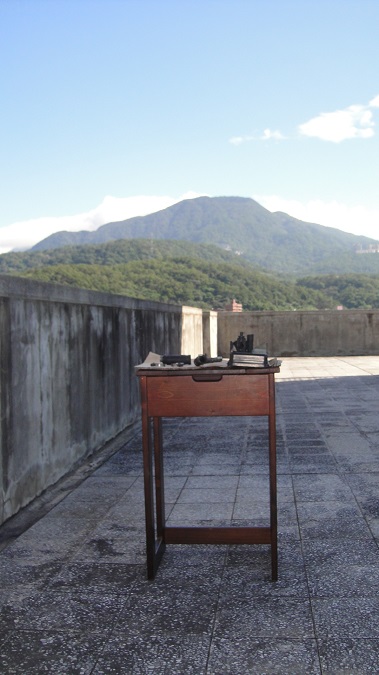
I today took advantage of the summer-like weather we are experiencing, and in stead of gonig to the dark B2, went to the roof and de-greased one of the manifolds.
Cleaned up not too bad.
Will need to do some detailing tonight, and will take the linkage apart for some further cleaning, greasing and adjustment.
Saw it is also missing some parts.

I will change all fuel and ignition and coolant related seals, washers, hoses and whatsoever, no worries there.
The list is getting longer and longer...
I today took advantage of the summer-like weather we are experiencing, and in stead of gonig to the dark B2, went to the roof and de-greased one of the manifolds.
Cleaned up not too bad.
Will need to do some detailing tonight, and will take the linkage apart for some further cleaning, greasing and adjustment.
Saw it is also missing some parts.


#62
01-03-2017 | 10:41 PM
Veteran Member
Joined: Mar 2016
Posts: 1,331
Likes: 581
From: North Carolina
This, dizzy cap labeling. this is... this is just un-possible. What? The rest, loose and cut wiring, that coil rigging, plugged and open vac lines. I can imagine some possible explanation, some sequence of Dr. Frankenstein random jabbing and poking that could...OK not the WOT switch either, but this, this is just... inexplicably wrong.

The following users liked this post:
Greg in France (01-04-2017)
#63
01-03-2017 | 10:53 PM
Thread Starter
|
Veteran Member
Joined: Dec 2013
Posts: 3,247
Likes: 1,354
From: Taiwan, R.O.C.
Frankly I did not even dare to post the dizzy yet, as I wanted to be sure there was no hidden story behind the weird numbering ....
Strangely, with all wrong numbers everywhere, they were still connected correctly.
It is crazy, he? I really don't get the logic behind anything they did so far.
Strangely, with all wrong numbers everywhere, they were still connected correctly.
It is crazy, he? I really don't get the logic behind anything they did so far.
#64
01-04-2017 | 07:16 AM

Veteran Member
Joined: Jan 2012
Posts: 13,624
Likes: 9,464
From: France
Frankly I did not even dare to post the dizzy yet, as I wanted to be sure there was no hidden story behind the weird numbering ....
Strangely, with all wrong numbers everywhere, they were still connected correctly.
It is crazy, he? I really don't get the logic behind anything they did so far.
Strangely, with all wrong numbers everywhere, they were still connected correctly.
It is crazy, he? I really don't get the logic behind anything they did so far.
Greg
#65
01-04-2017 | 07:30 PM
Thread Starter
|
Veteran Member
Joined: Dec 2013
Posts: 3,247
Likes: 1,354
From: Taiwan, R.O.C.
Thanks Greg, got the firing order and cylinder numbering hanging inside the bonnet, and prefer to keep my 10 questions for you for later
 .
.
#66
01-07-2017 | 11:54 PM
Thread Starter
|
Veteran Member
Joined: Dec 2013
Posts: 3,247
Likes: 1,354
From: Taiwan, R.O.C.
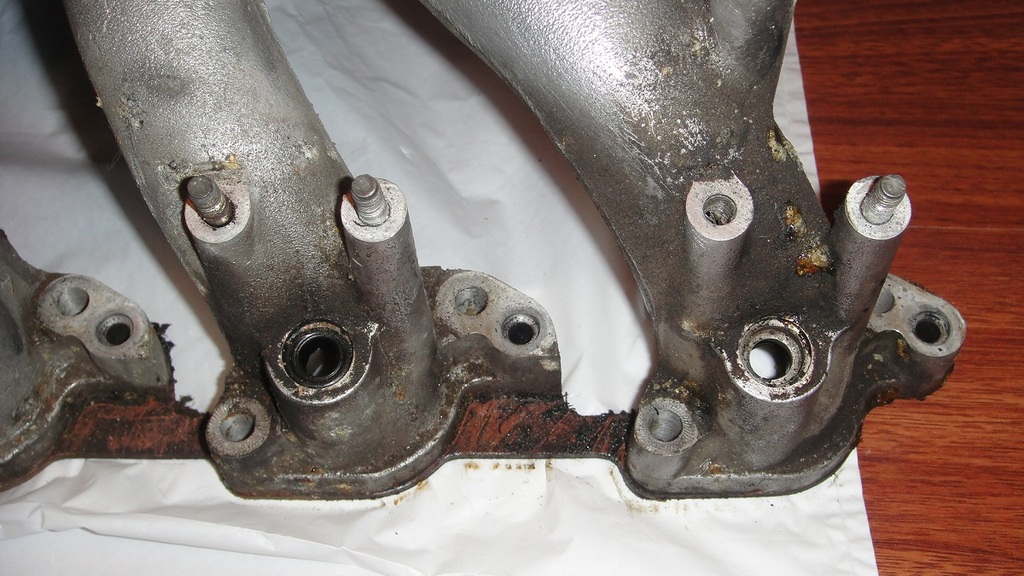
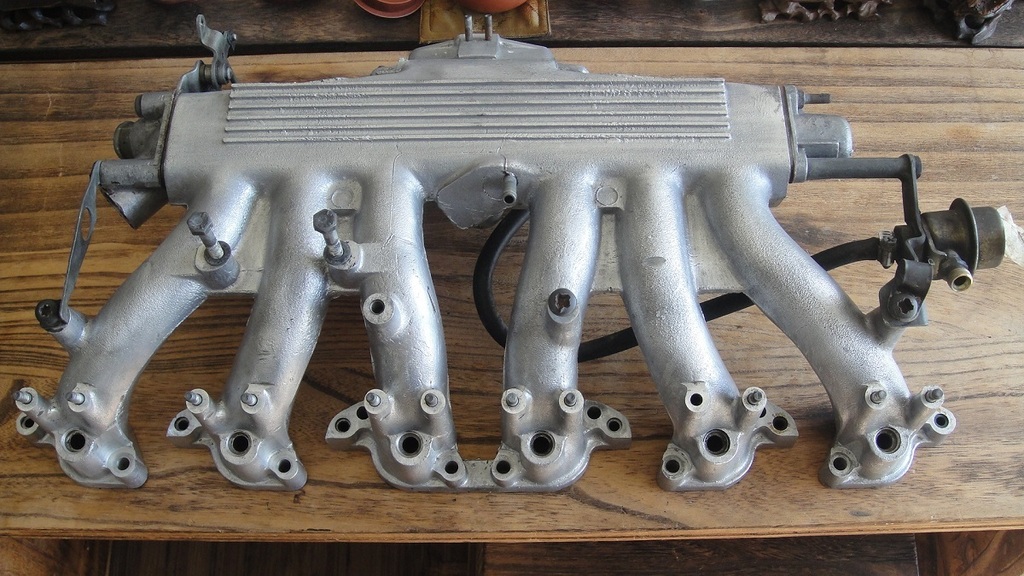
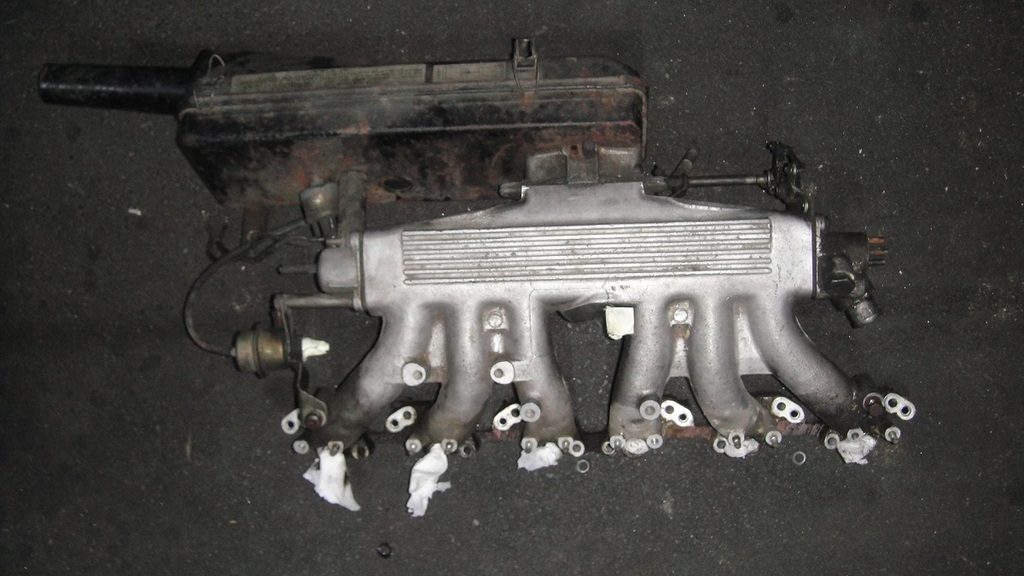
Old and new, lots more of cleaning, and a little bit of constructive work, slowly some satisfying results.
Throttle mechanism is cleaned, and without play now.
Rest is just loosely fitted, as several parts will be replaced, and as I have a lack of original nuts, washers and bolts and all little other things which went missing over the last 30 years.
I hope to get a first order together by the end of this month, need a lot .
.
Fuel rail and injectors next.

Throttle mechanism is cleaned, and without play now.
Rest is just loosely fitted, as several parts will be replaced, and as I have a lack of original nuts, washers and bolts and all little other things which went missing over the last 30 years.
I hope to get a first order together by the end of this month, need a lot
.Fuel rail and injectors next.


The following 3 users liked this post by ericjansen:
#67
01-08-2017 | 02:55 AM
Veteran Member
Joined: Jan 2012
Posts: 13,624
Likes: 9,464
From: France
The following 2 users liked this post by Greg in France:
Daim (01-08-2017),
orangeblossom (01-10-2017)
#69
01-08-2017 | 03:18 AM
Thread Starter
|
Veteran Member
Joined: Dec 2013
Posts: 3,247
Likes: 1,354
From: Taiwan, R.O.C.
The following 2 users liked this post by ericjansen:
Daim (01-08-2017),
orangeblossom (01-10-2017)
#70
01-08-2017 | 03:31 AM
Veteran Member
Joined: May 2014
Posts: 5,906
Likes: 2,182
From: Bremen, Germany
#71
01-08-2017 | 01:58 PM
Veteran Member
Joined: Dec 2013
Posts: 1,078
Likes: 398
From: Greer SC
Out of curiosity, are you planning on checking the valve clearances? I have been unfortunate enough to suffer two V12 dropped valve seats. One of, if not the main reason, to me, "may" be from the increasing lack of tolerance as the engine wears. The valve clearances lessen rather than increase as the valves and seats wear. With that, especially the exhaust valve, stays on seat less and less. As I understand it, it is important for the seat to absorb the heat from the valve in order to "cool" it to some degree. It won't cost anything but time to check the clearances, if for no other reason than to just know.
The following users liked this post:
ericjansen (01-08-2017)
#72
01-08-2017 | 06:33 PM
Thread Starter
|
Veteran Member
Joined: Dec 2013
Posts: 3,247
Likes: 1,354
From: Taiwan, R.O.C.
The following users liked this post:
Daim (01-09-2017)
#73
01-08-2017 | 06:56 PM
Thread Starter
|
Veteran Member
Joined: Dec 2013
Posts: 3,247
Likes: 1,354
From: Taiwan, R.O.C.
As you, I want to know, both the clearances and eventual disposed valve seats.
I have to take the covers off anyway, they are badly corroded and bubbling, and then it is indeed just a very small extra effort to check.
First need to clean the remaining engine though, it is too big a mess to open up anything right now.
And yes, I do know I am taking a kind of a gamble to clean all stuff before absolutely sure on the engine itself, especially after seeing how 'well' it was taken care off by these clowns.
However, before we bought this car, we saw several other XJS V-12's, and all but one had some kind of ticking or ticking related noises.
This one however, in spite of the dizzy vacuum disconnection, and some clogged injector filters, ran super smooth on idle.
I prey every day that the base is indeed good, the rest I will manage.
#74
01-08-2017 | 07:27 PM
Veteran Member
Joined: May 2010
Posts: 4,638
Likes: 2,578
From: Vic Australia
The following users liked this post:
Daim (01-09-2017)
#75
01-08-2017 | 07:30 PM
Veteran Member
Joined: May 2010
Posts: 4,638
Likes: 2,578
From: Vic Australia
#76
01-08-2017 | 09:42 PM
Thread Starter
|
Veteran Member
Joined: Dec 2013
Posts: 3,247
Likes: 1,354
From: Taiwan, R.O.C.
As a reminder, I have a picture from I think Orangeblossom who did id recently, wearing some sexy glooves, normally used by vets doing the cow-under-the-tail thing
 .
.I am disassembling the fuel rail and its old hoses.
They came off easily from the rail (the cups long gone, and installed with clamps).
However, 9 out of 12 injectors were having what I think the original hoses, and installed with the cups.
However careful I am, the hoses kind of disintegrate upon removing, leaving the last 5mm within the cup, behind the last fin, and preventing the cup from slipping off.
I have not found any other solution than carefully prying out piece by piece, which takes me about 1/2 hour per injector, making it a almost a full day job
.
Next is cleaning up the parts, and cleaning the little filters.
Most look clean, but one is heavily clogged, confirming my earlier suspicion of one cylinder not getting sufficient fuel.
I will order replacement cups for the ones missing, I like how they look once installed.

And for everyone still not convinced replacing fuel hoses sometimes, this is how one of them came out (not damaged by me, only kept closed by the clamp).

The following users liked this post:
Greg in France (01-09-2017)
#77
01-09-2017 | 01:50 AM
Veteran Member
Joined: Apr 2016
Posts: 2,047
Likes: 1,049
From: Japan

The following 2 users liked this post by Some Day, Some Day:
Greg in France (01-09-2017),
orangeblossom (01-10-2017)
#78
01-09-2017 | 02:38 AM
Thread Starter
|
Veteran Member
Joined: Dec 2013
Posts: 3,247
Likes: 1,354
From: Taiwan, R.O.C.
While living in China, I had a garage and most of the common tools and accessories while doing the motor bikes.
Here, I basically have nothing, no air, no power tools, no vice, nothing.
So all cleaning is done by hand, with lots of elbow grease.
The good thing though, we have a 2nd apartment on the same floor, basically as an art studio for my wife.
She is travelling this week, so I took over the place, and try to finish all these stinky jobs before she returns.
Guess will need to open the windows to get the fuel smell out
.I am progressing on cleaning the fuel injectors, 8 done, 4 to go.

- The injectors seem to be coated in a very thin plastic like layer, which is partly gone already, and partly loose.
Is it wise to pain them in a new layer of heat resistant black paint, or better leave them bare?
- One out of the 12 yellow caps has a crack, seems old one.
Is this a reason to replace the injector, or how does that work?

#79
01-09-2017 | 03:05 AM
Veteran Member
Joined: Apr 2016
Posts: 2,047
Likes: 1,049
From: Japan
I look forward to following your progress, at any rate.
The following users liked this post:
orangeblossom (01-10-2017)
#80
01-09-2017 | 03:16 AM
Veteran Member
Joined: Jan 2012
Posts: 13,624
Likes: 9,464
From: France
Replace the cracked injector Eric. I expect the gum covering them is just fuel and oil varnish built up over the years, leave the injectors cleaned but not painted with anything. But do ensure you get the injectors spray patterns cleaned and checked though, that is most important. Your photo of that injector supply pipe is a caution to all V12 owners everywhere, really sensible to do everything properly! I believe I am right in saying that when refitting, you should NOT use clamps, by the by, and hose and pintle caps, ferrules etc and other bits are available as a kit, if you want to ensure you get everything to refurb them yourself.
It is also a good idea to site the fuel rail slightly closer to the heads than OEM, which is easy to do by reducing the feedpipe lengths by half an inch or so. This gives a touch more bonnet clearance. The steel bits of the rail can actually foul the bonnet slightly and produce an impossible to find knocking on rougher surfaces that seems from the cabin to come from the exhaust in the rear (guess how I know!).
Really great effort, plus shows confidence and bravery to infuse Madame's studio with ineradicable petrol smells!
Greg
The following 2 users liked this post by Greg in France:
Daim (01-09-2017),
orangeblossom (01-10-2017)