
1989 XJ-S Resto-Thread - or "my Iron Lady"
#202
 03-29-2017 | 03:02 AM
Thread Starter
|
Veteran Member
Joined: May 2014
Posts: 5,906
Likes: 2,182
From: Bremen, Germany
#203
04-01-2017 | 09:53 AM
Thread Starter
|
Veteran Member
Joined: May 2014
Posts: 5,906
Likes: 2,182
From: Bremen, Germany


The following 7 users liked this post by Daim:
Doug (04-02-2017),
Flint Ironstag (04-25-2017),
JigJag (04-02-2017),
Jonathan-W (04-12-2017),
that guy (04-05-2017),
and 2 others liked this post.
#204
04-02-2017 | 07:23 PM
Veteran Member
Joined: Mar 2016
Posts: 1,331
Likes: 581
From: North Carolina
The following users liked this post:
Daim (04-03-2017)
#205
04-03-2017 | 01:13 AM
Thread Starter
|
Veteran Member
Joined: May 2014
Posts: 5,906
Likes: 2,182
From: Bremen, Germany
The following users liked this post:
JigJag (04-03-2017)
#206
04-03-2017 | 07:15 AM
Veteran Member
Joined: Mar 2016
Posts: 1,331
Likes: 581
From: North Carolina
#207
04-03-2017 | 07:55 AM
Thread Starter
|
Veteran Member
Joined: May 2014
Posts: 5,906
Likes: 2,182
From: Bremen, Germany
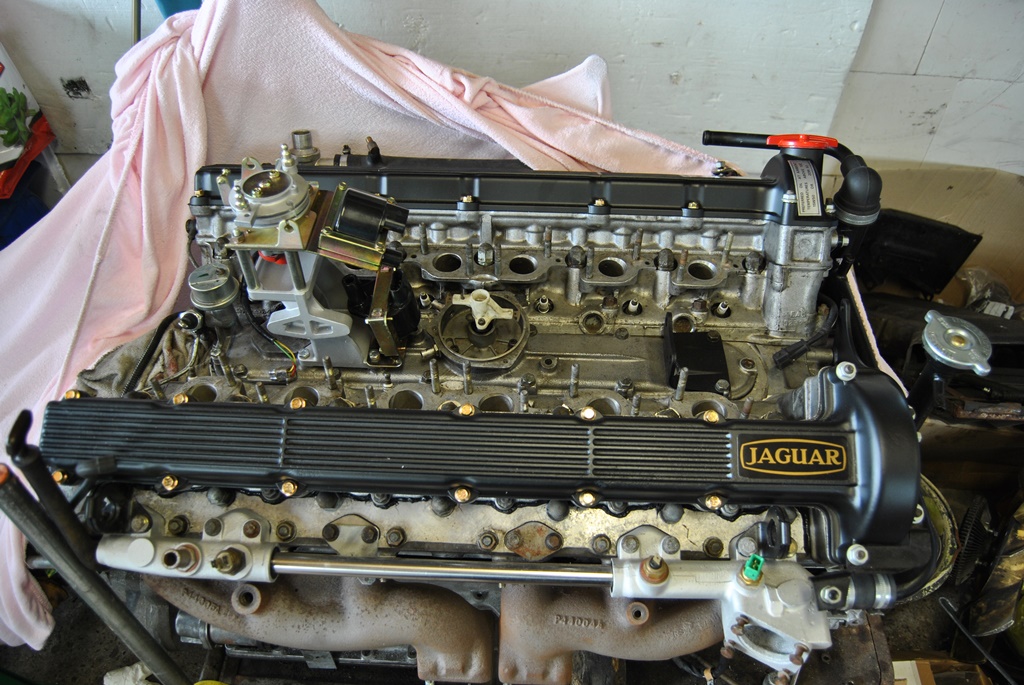
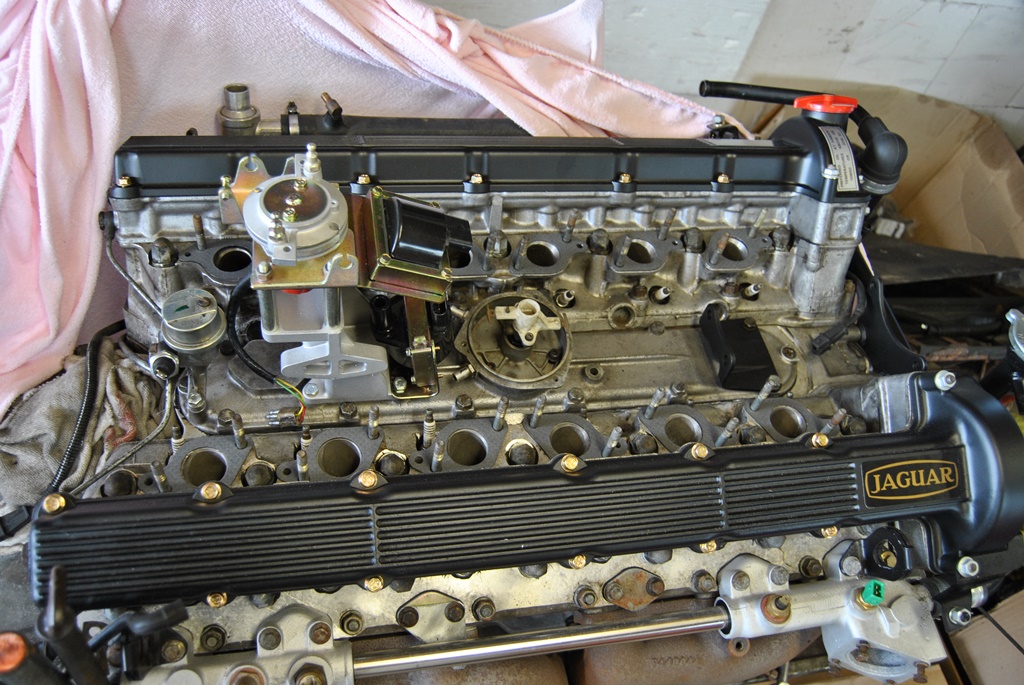
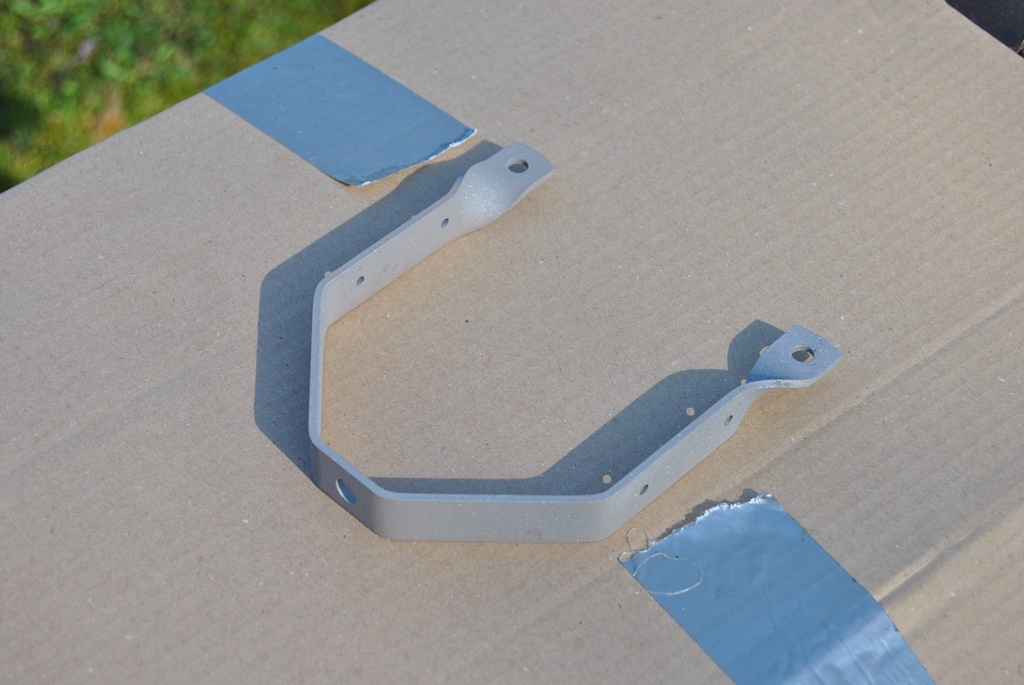
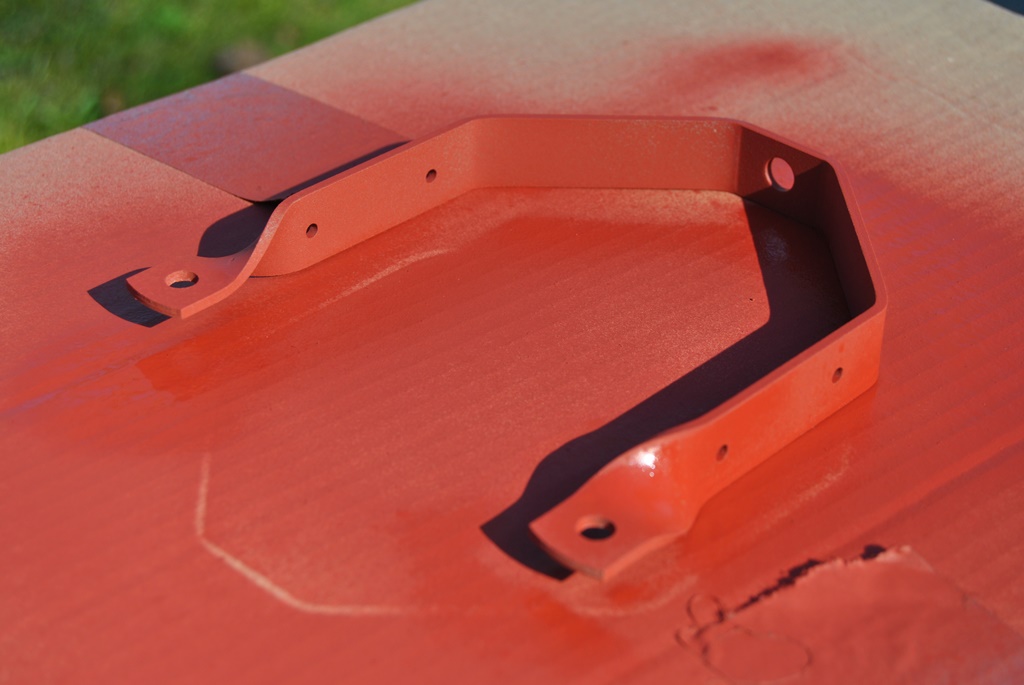
Will this do?
Shown is the picture in a reduced size. Link is the picture in full size (I had to crop it a little to get it straight)
https://c1.staticflickr.com/3/2919/3...15596385_o.jpg
I have no worry letting people use it as long as it isn't commercial!
Shown is the picture in a reduced size. Link is the picture in full size (I had to crop it a little to get it straight)
https://c1.staticflickr.com/3/2919/3...15596385_o.jpg
I have no worry letting people use it as long as it isn't commercial!
The following 3 users liked this post by Daim:
#209
04-05-2017 | 11:13 AM
Thread Starter
|
Veteran Member
Joined: May 2014
Posts: 5,906
Likes: 2,182
From: Bremen, Germany
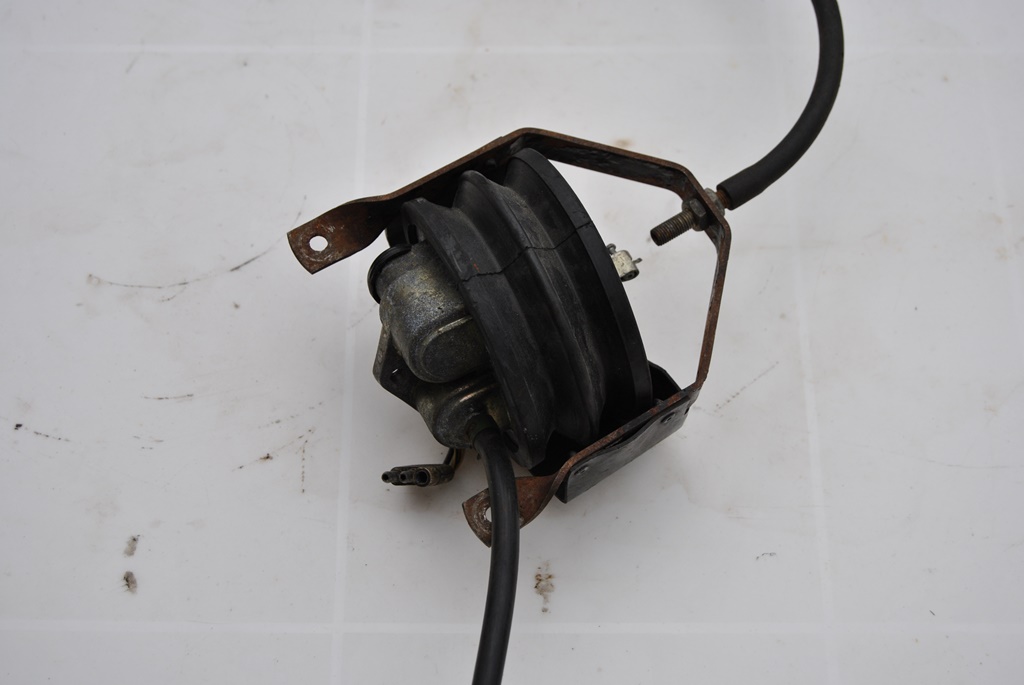
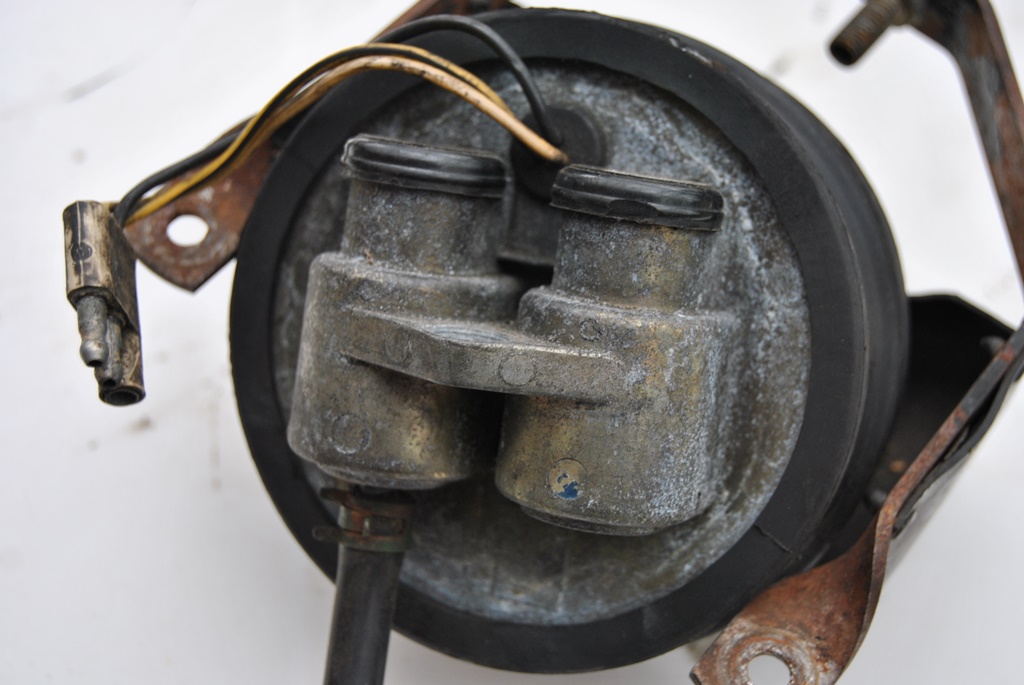
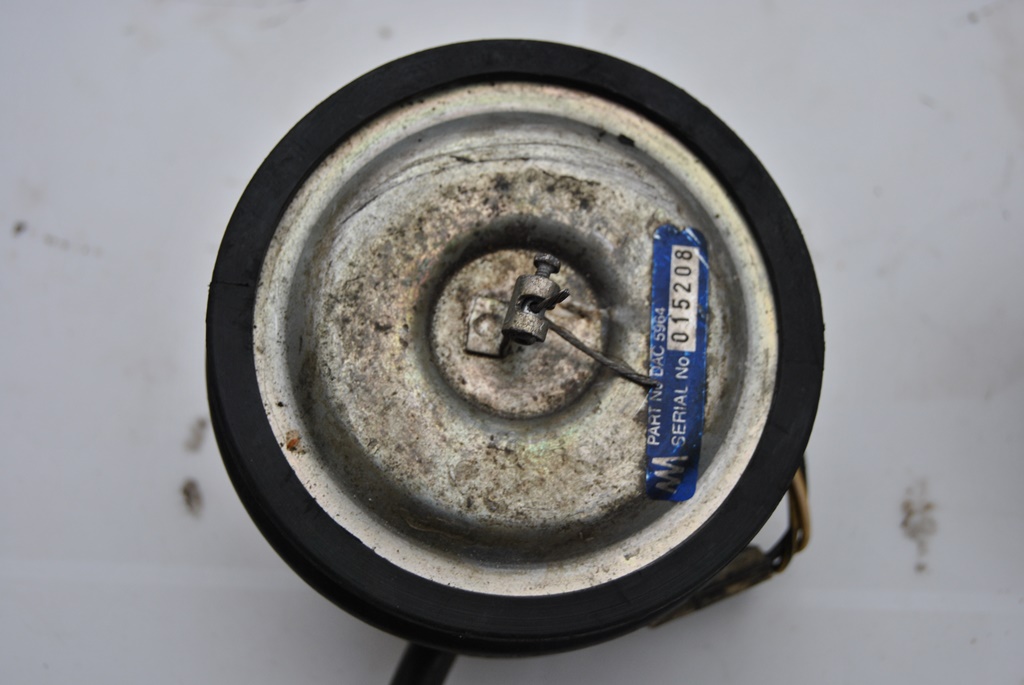
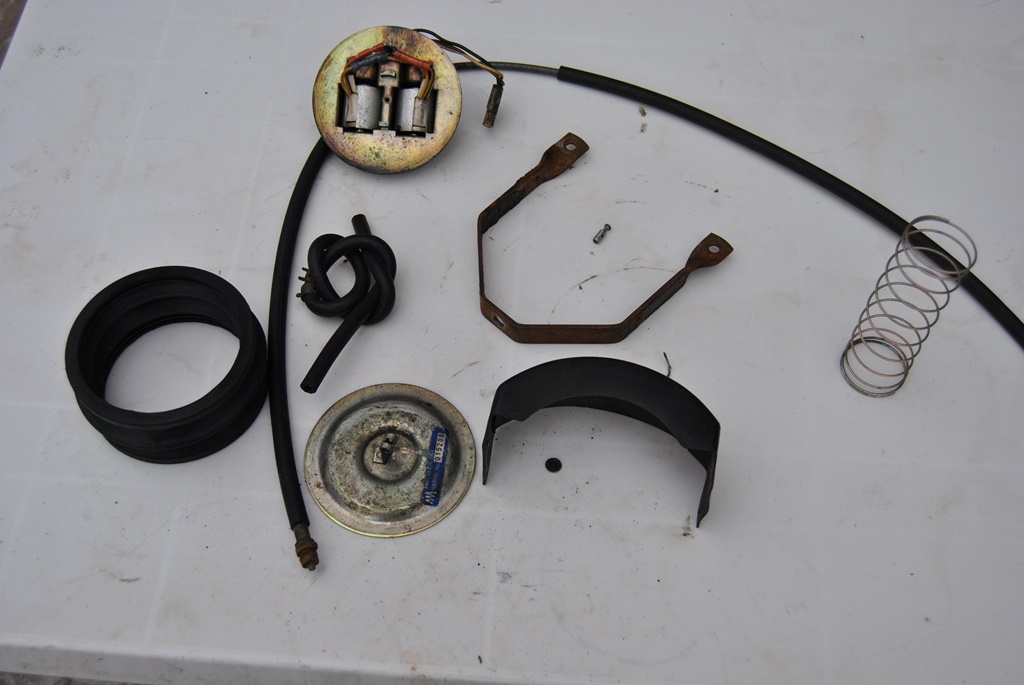
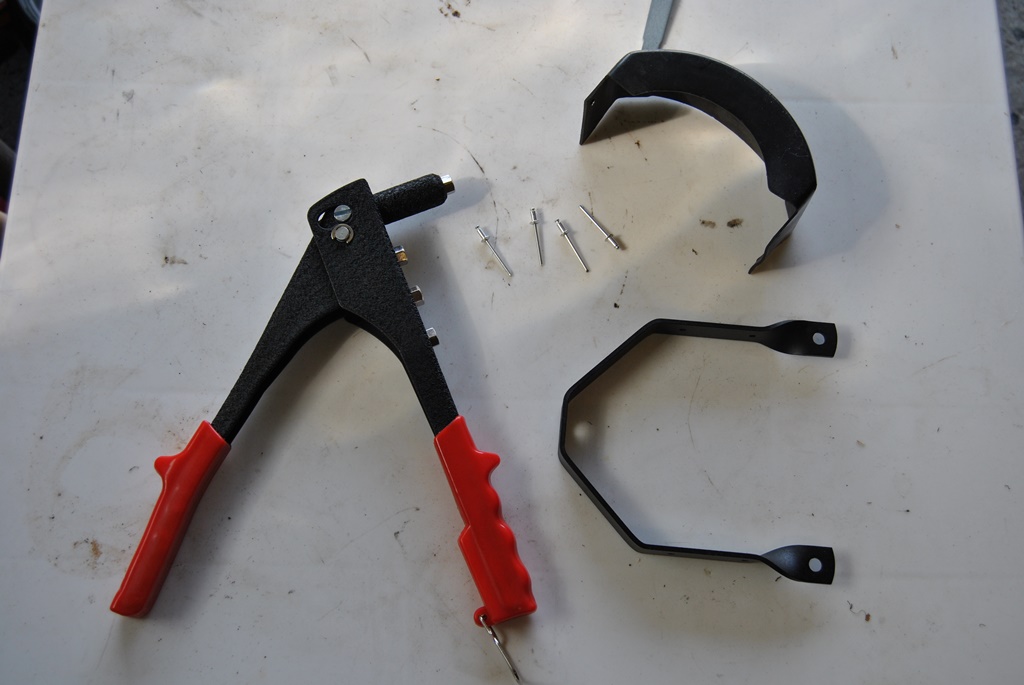
I've been using my 'internet mechanical genius', as Al Whitelock calls it, to overhaul my cruise control unit... I mean, there is loads of information on how to do this... ")
Just waiting for the housing parts to be galvanized, and then I'll be rebuilding it. The first parts have been reassembled. I'll be going the new cable way, with a custom made one (because I use my internet mechanical genius, I'm too stupid to make a cable myself) to my specs.
Just not sure yet if I will maybe adapt it to pull from a different area or not...
But, the wiring inside (and outside) is of course totally brittle. Will be replacing that. Just need to figure out how I can rebuild the plug. it looks like it has the standard Lucas style connectors (2 male, 1 female). Shouldn't be a problem to rip them out of the rubbery plastic (I assume it is PVC) and fit some new ones... The rubber connector/grommit between the inside and outside (sealing it all) is in good condition, so I'll be reusing it, just putting a dab of silicone around the areas, to make sure it is totally sealed.
The sticker on the front is a worry though. I am so fussy, I want the sticker to look exactly like that one WITH the same serial number. The ones available are from a different brand and don't have my serial number...
The following users liked this post:
Jonathan-W (04-12-2017)
#210
04-14-2017 | 08:31 AM
Thread Starter
|
Veteran Member
Joined: May 2014
Posts: 5,906
Likes: 2,182
From: Bremen, Germany
Well then Gents (and maybe the odd Lady  )...
)...
'Tis Easter, means bank holiday and a break from the new job I started on Monday Decided to work on my V12 (the 5hp24 out of the XJ8 is all overhauled in sorted with some Audi parts... So it will last A LOT longer - if interested, here is the thread in the X308 section just need to refit it).
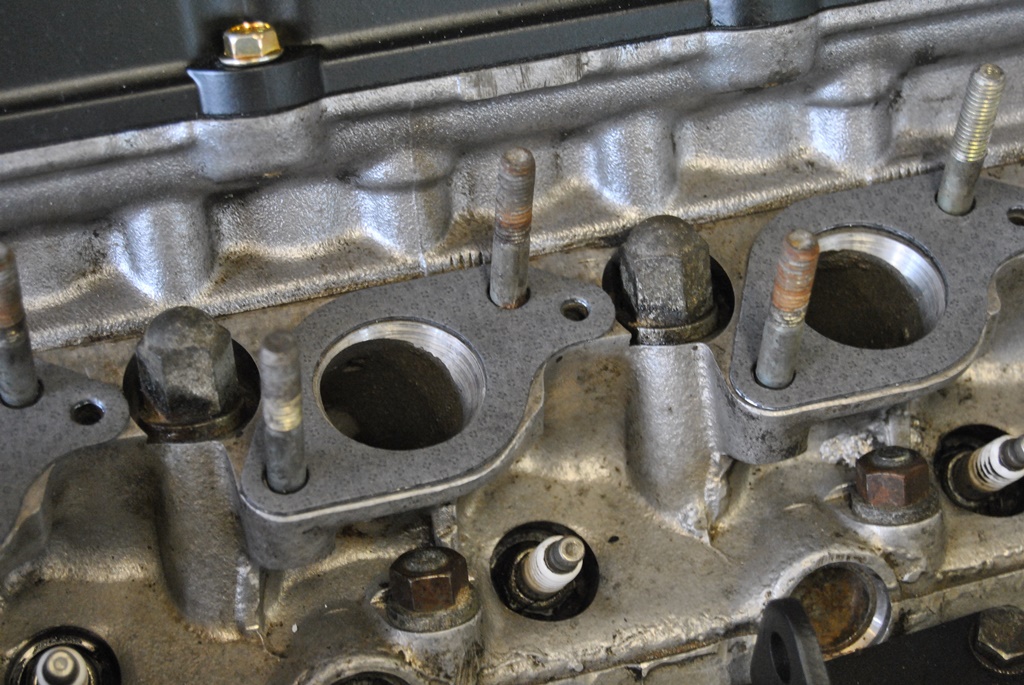
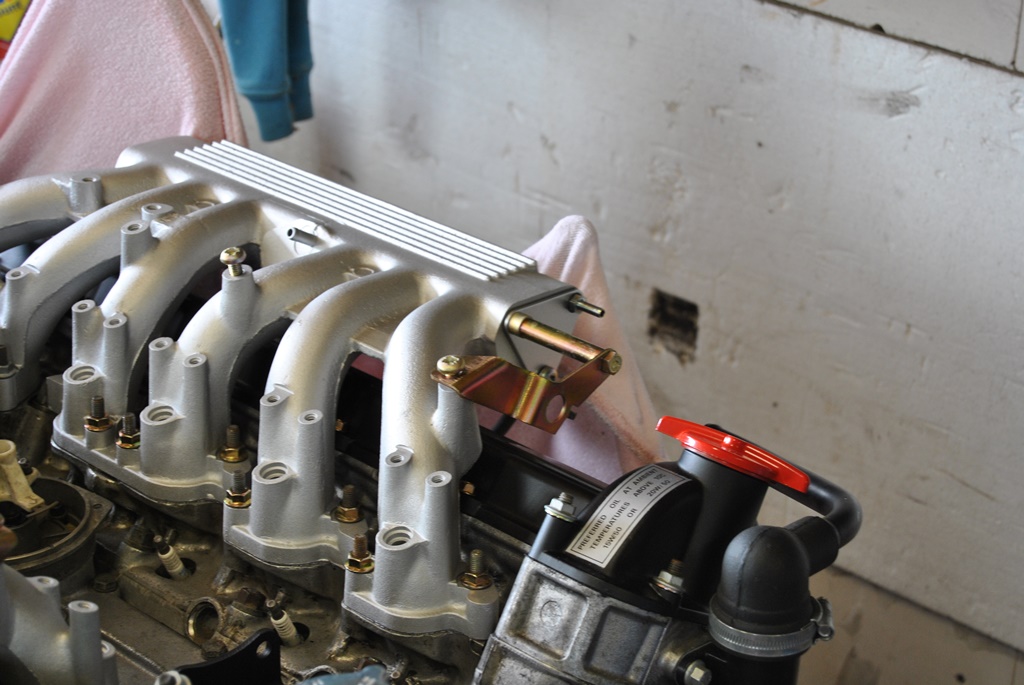
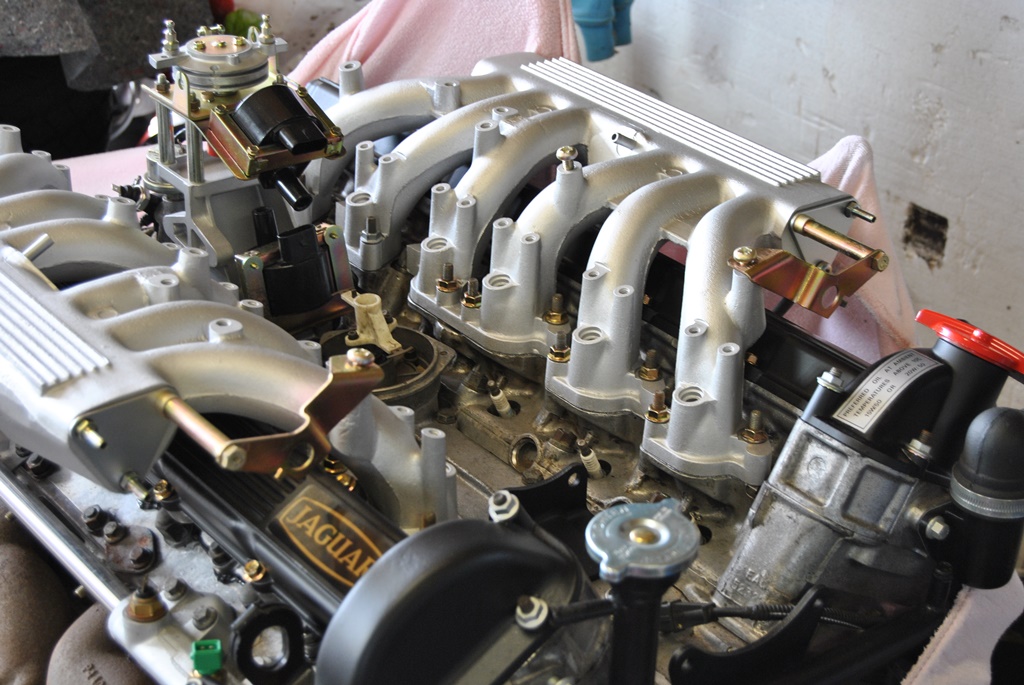
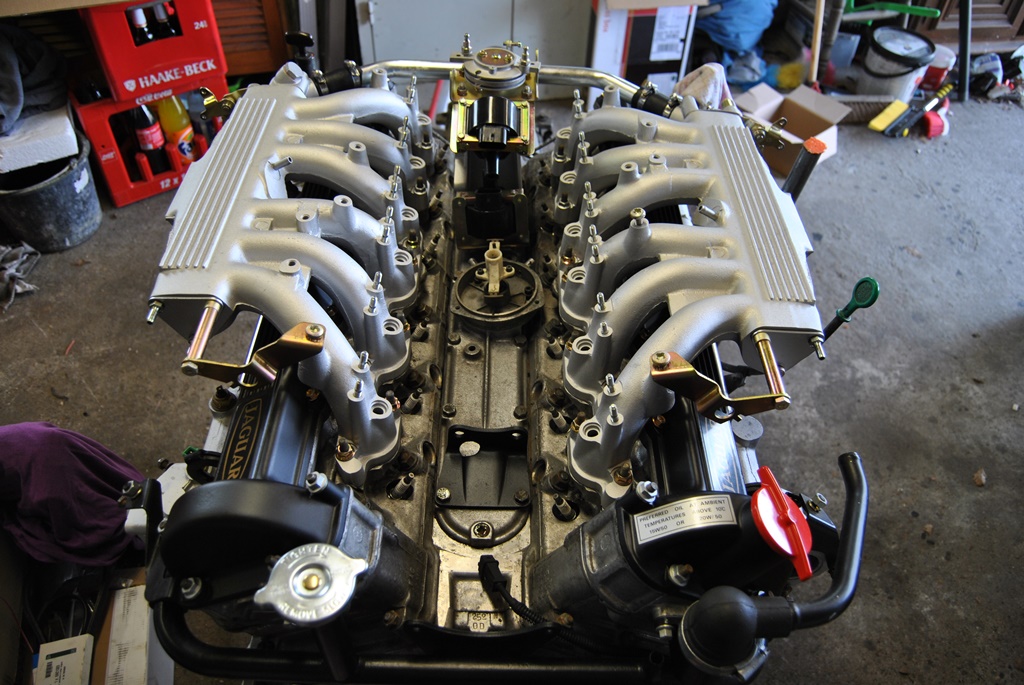
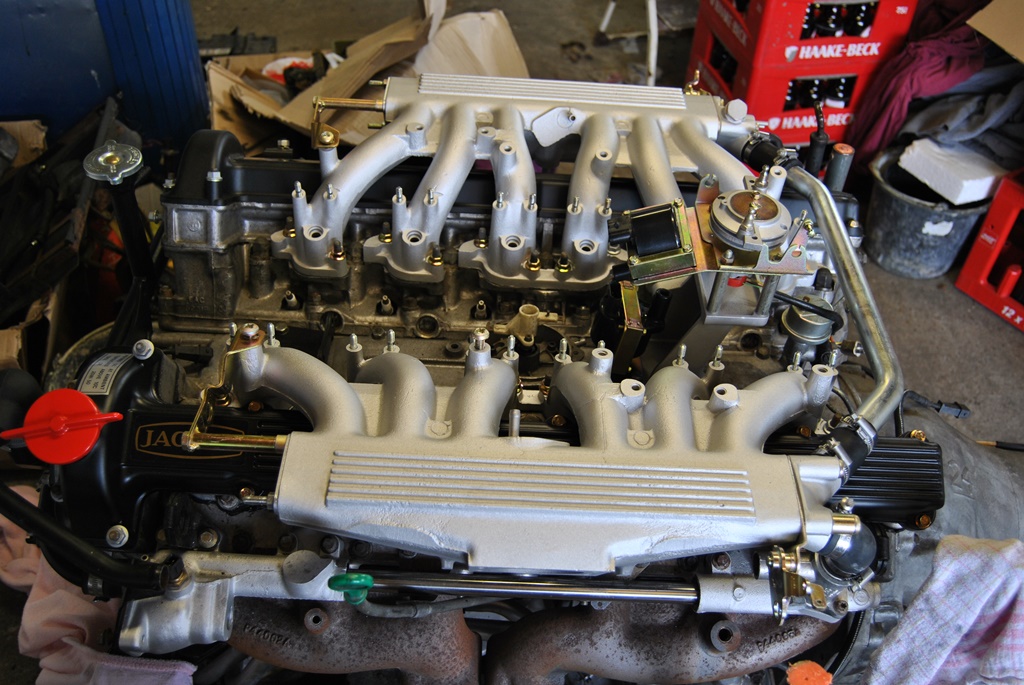
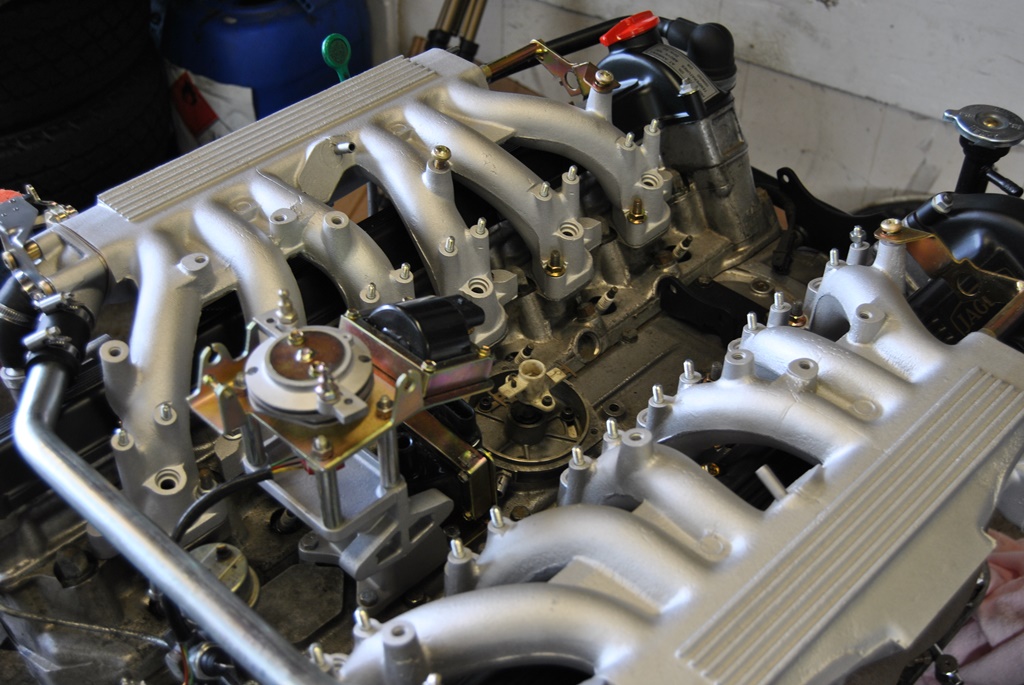
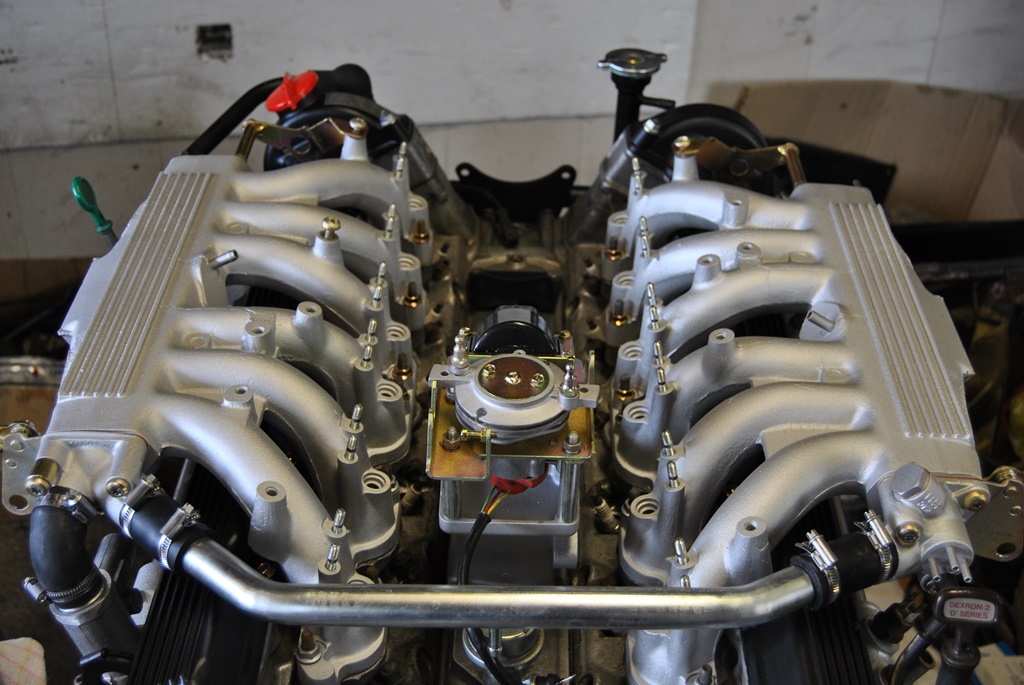
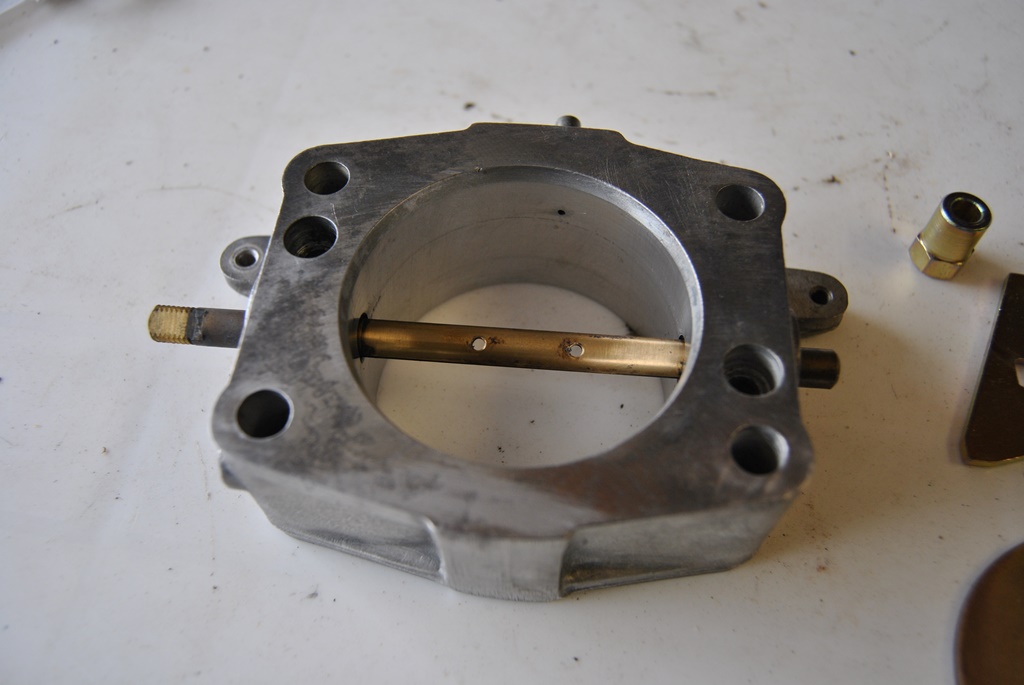
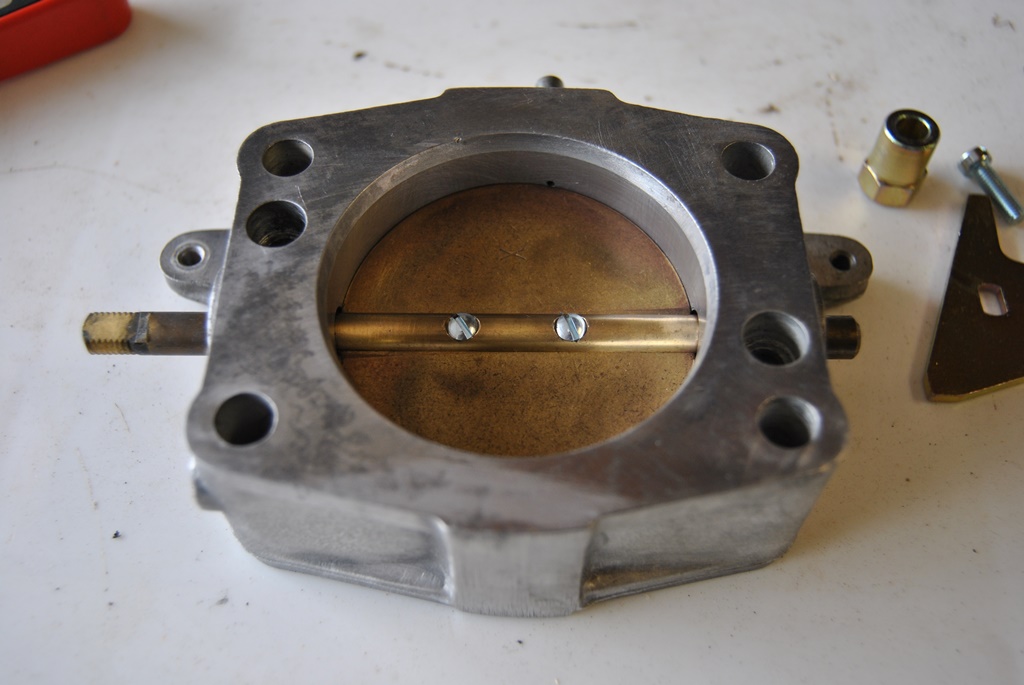
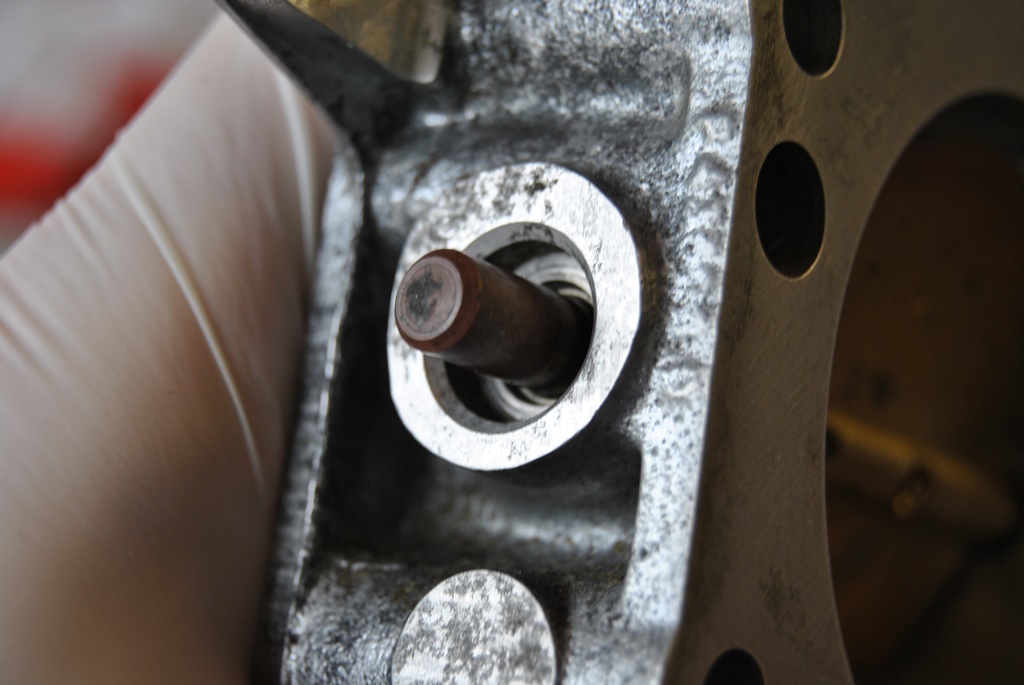
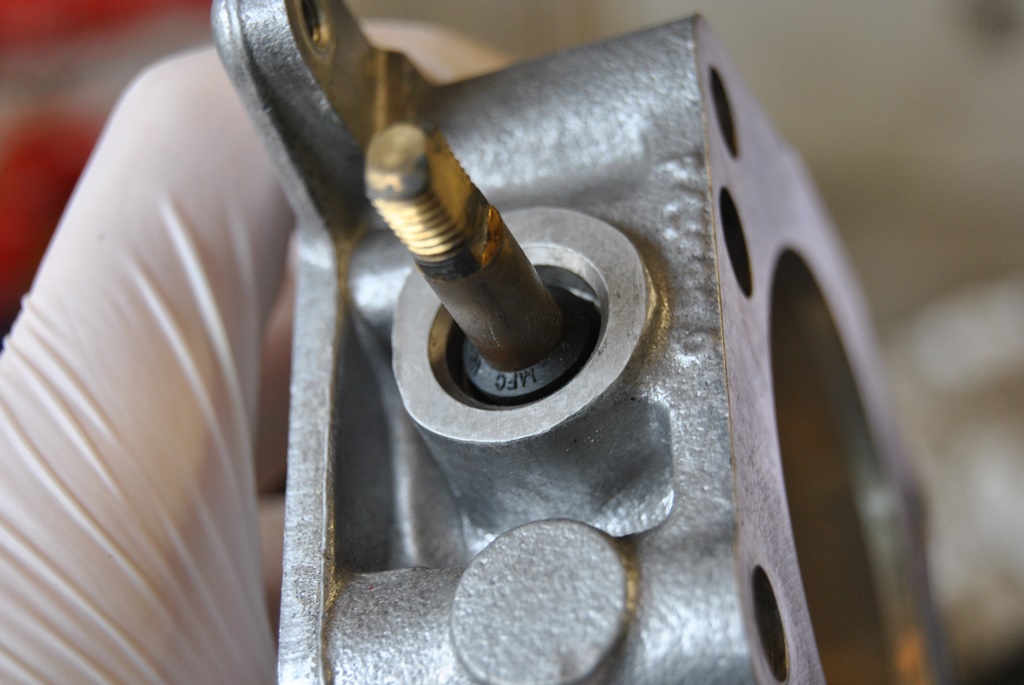
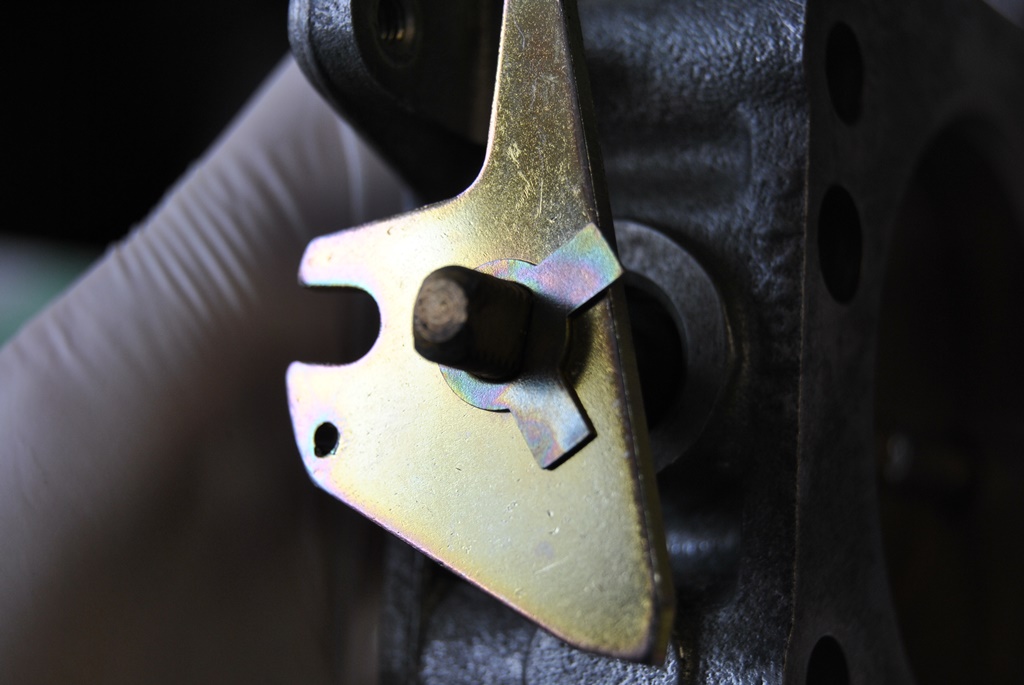
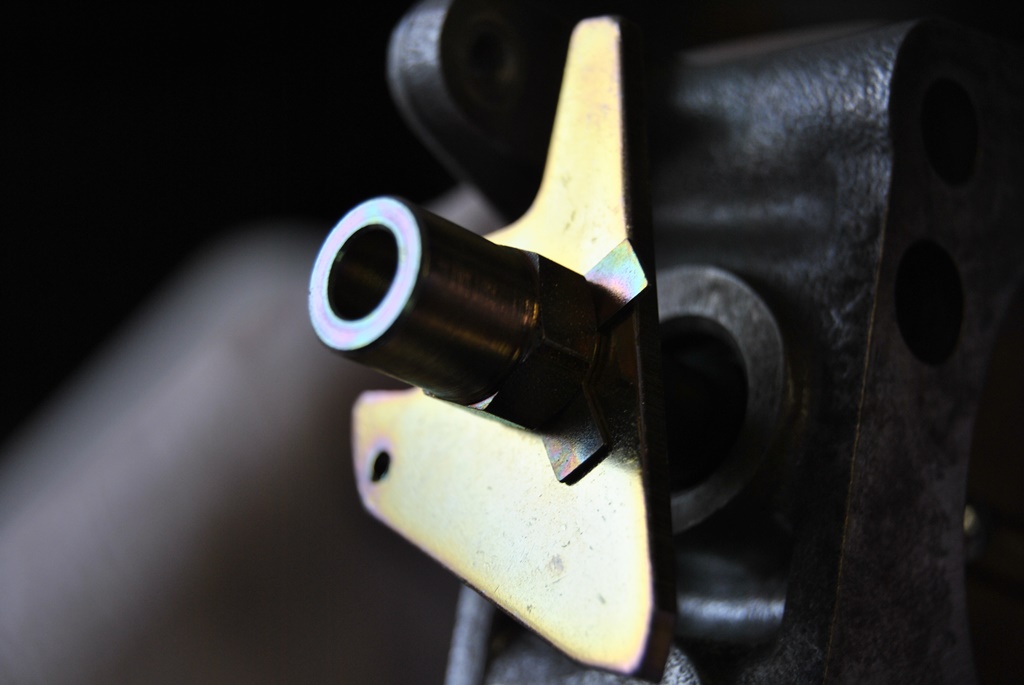
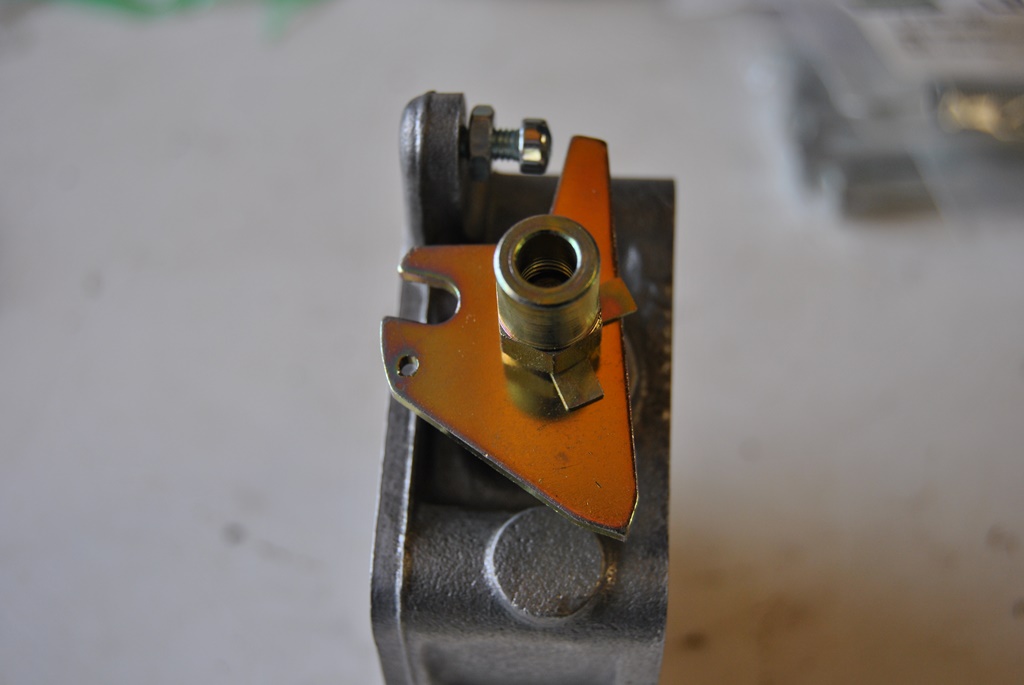
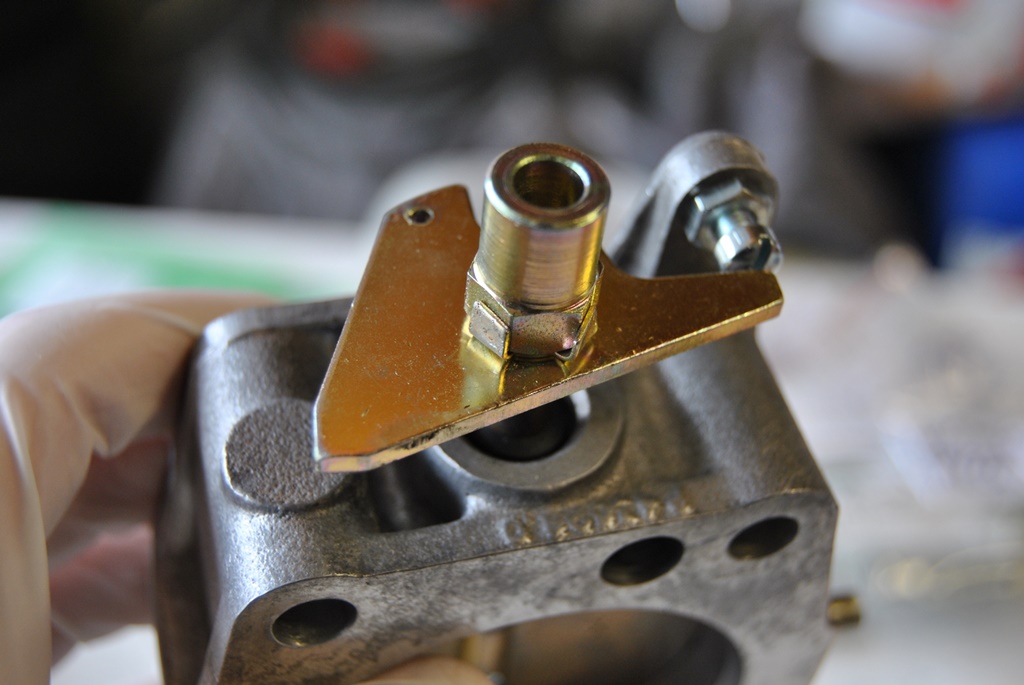
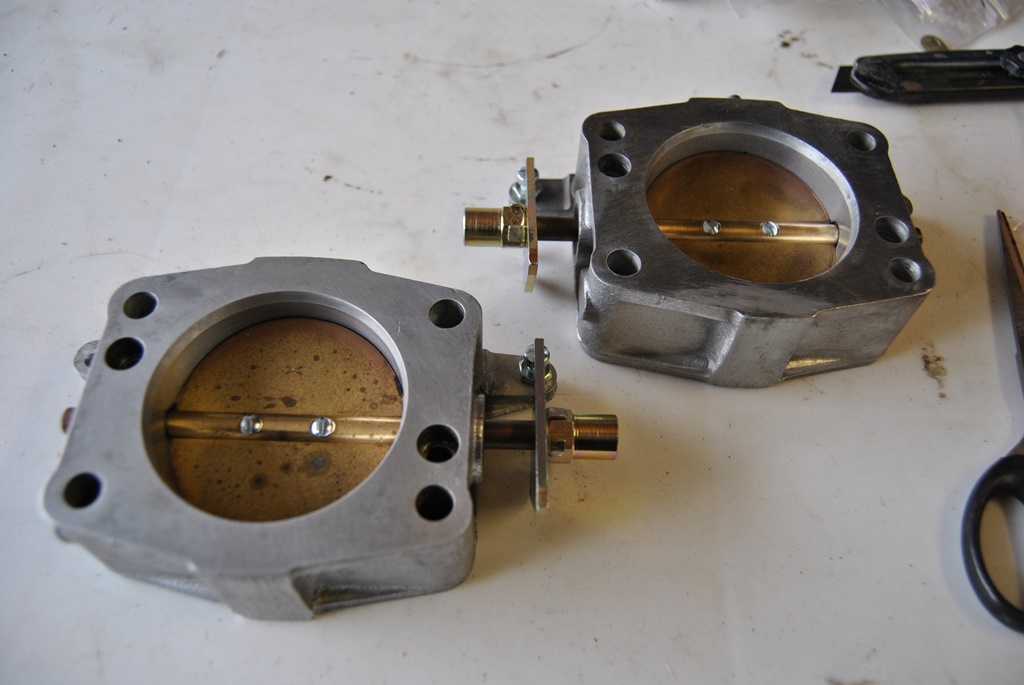
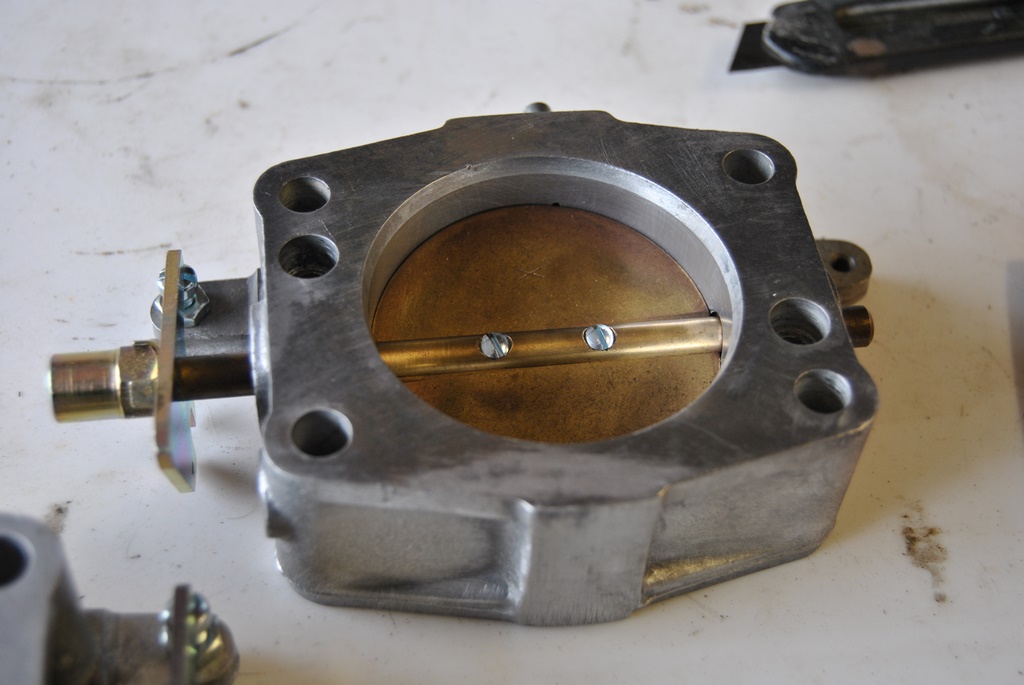
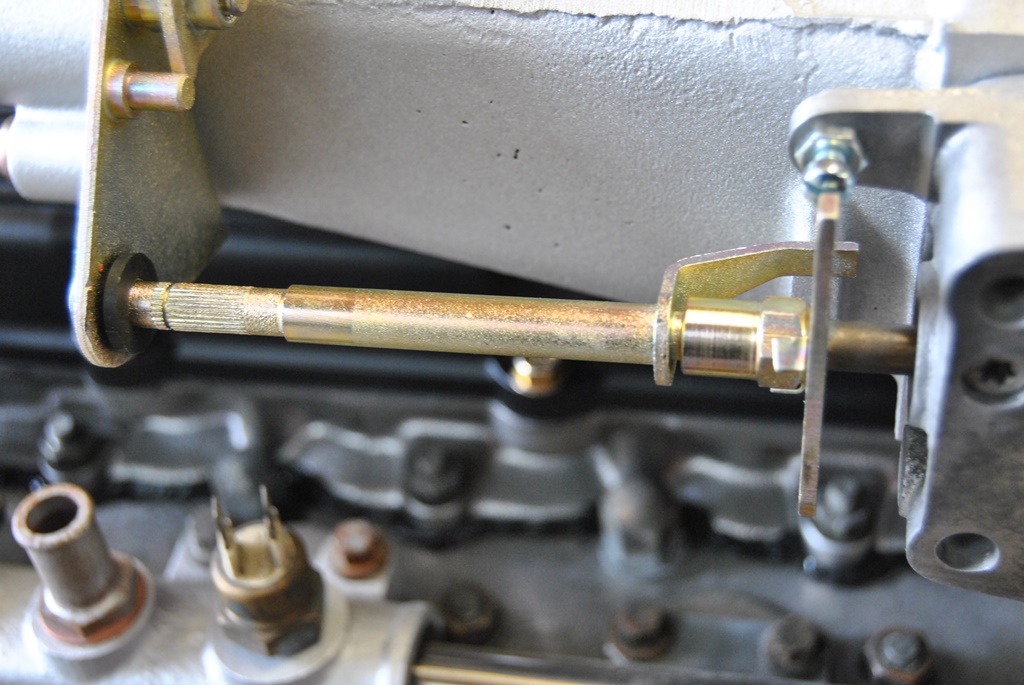
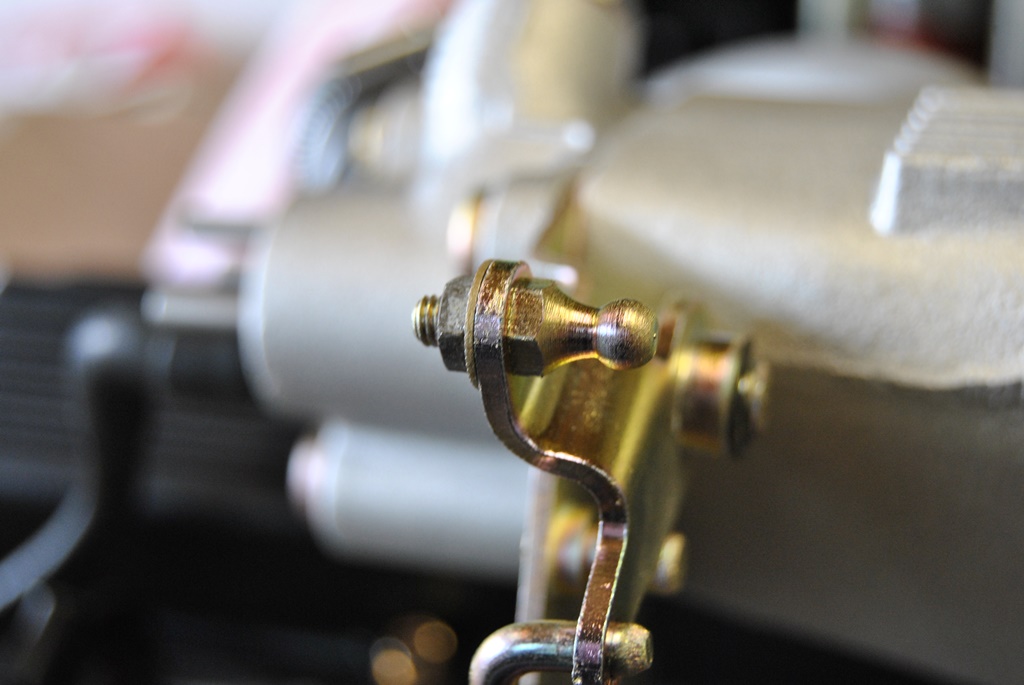
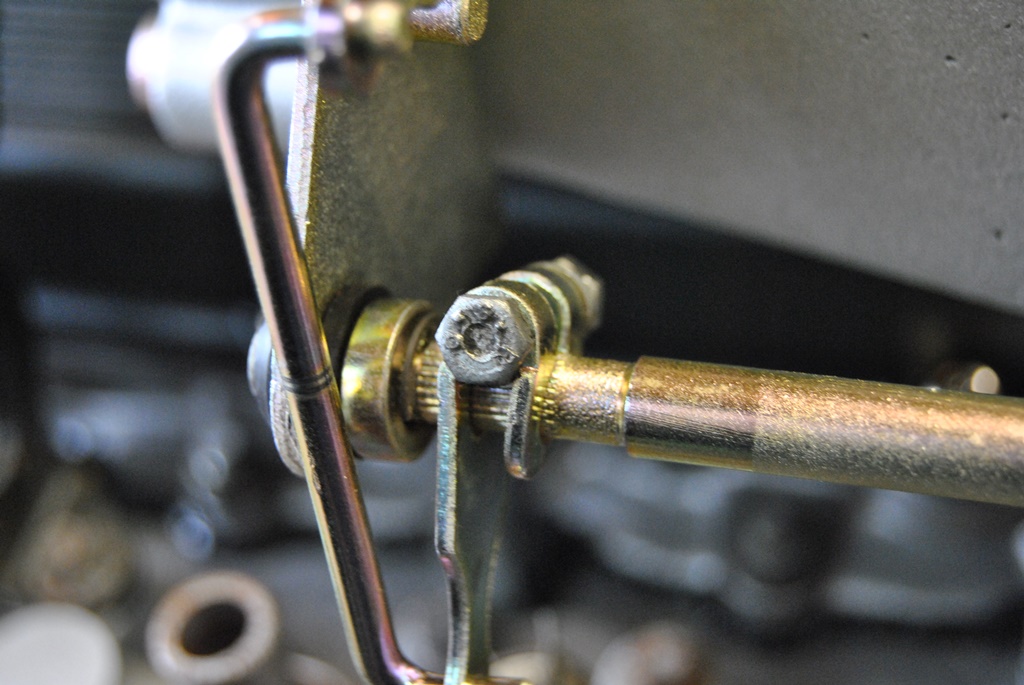
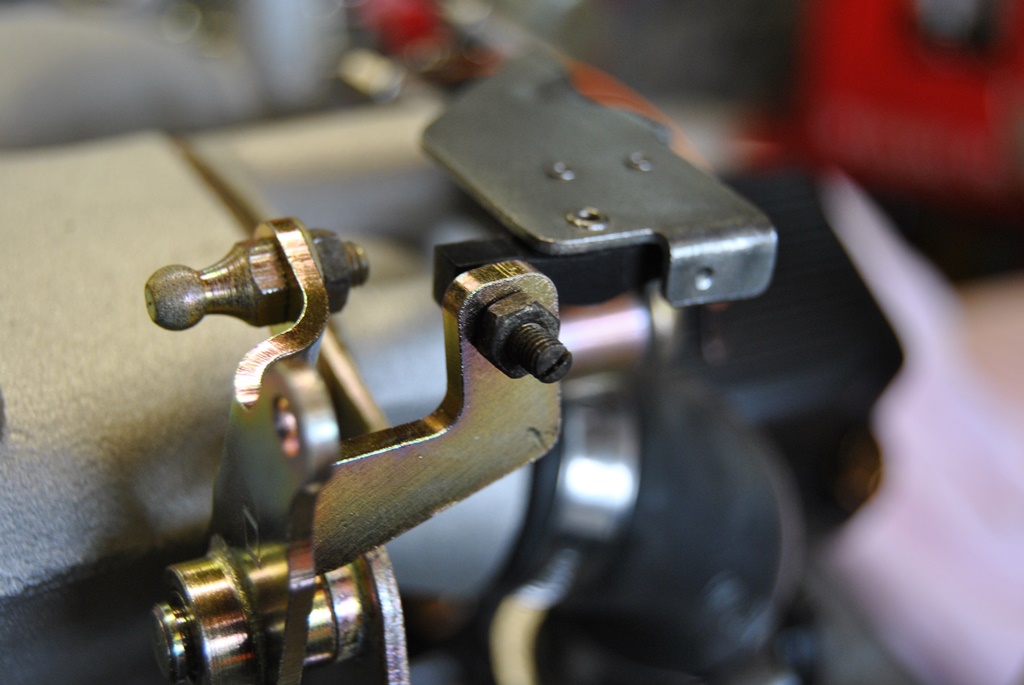
A few months ago, I took the throttle bodies apart to have some of the parts galvanised. Now it is ready to reassemble. The lever arms and other parts are now in a pretty yellow colour (again). As close as possible to the original cadmium yellow. All rubber (the two lower bushes) are originals. The aftermarket ones LOOK identical and have the same outer shape, but the difference is in the diameter of the rubber ring which sits in the opening of the bracket on the intake. That is about 3 mm larger and the original ones (a lot harder rubber!) are a tiny bit smaller...
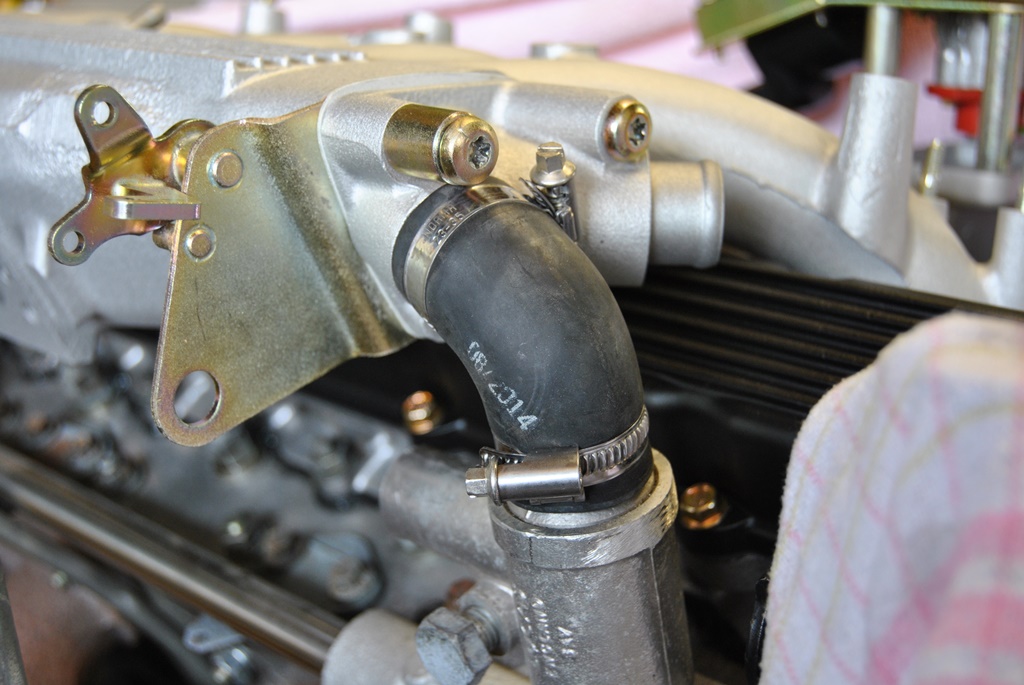
I didn't replace the bushes in the TBs themselves, as they weren't loose. Nice and tight. The spindle is the old one just like the butterfly valve. Just cleaned them up. The valve only fits in one position as I had to find out... New rubber seals around the TB of course as well. Don't want an air leak at all.
Also set up the TBs. German manual says the flaps/butterfly valves need a 0.05 mm gap. So I used my feeler gauge... Otherwise it clicks nicely (see video below).
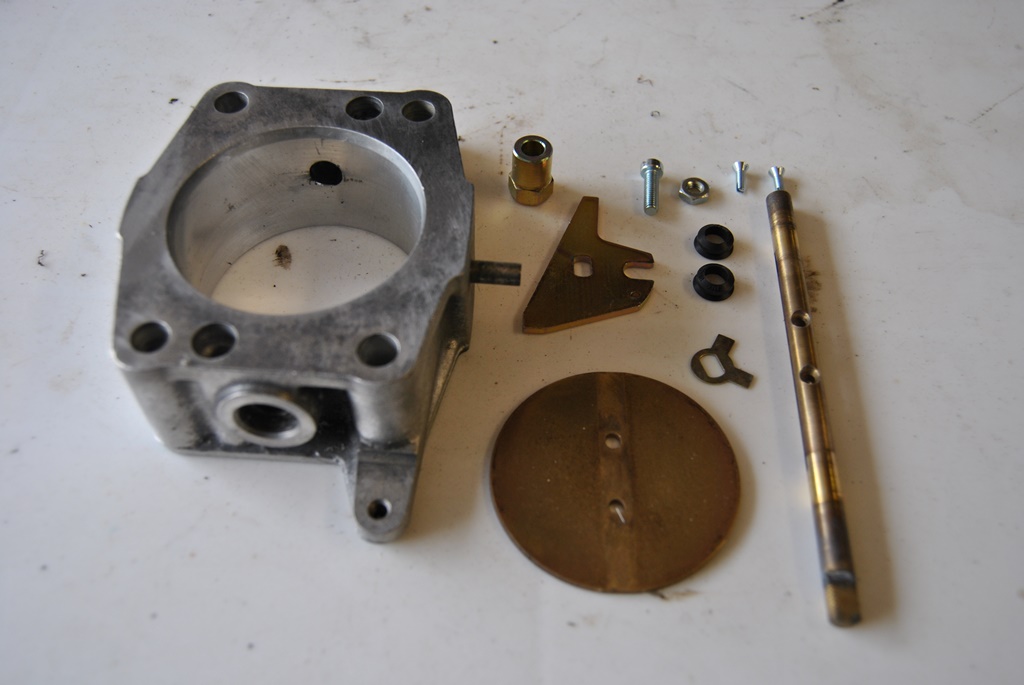


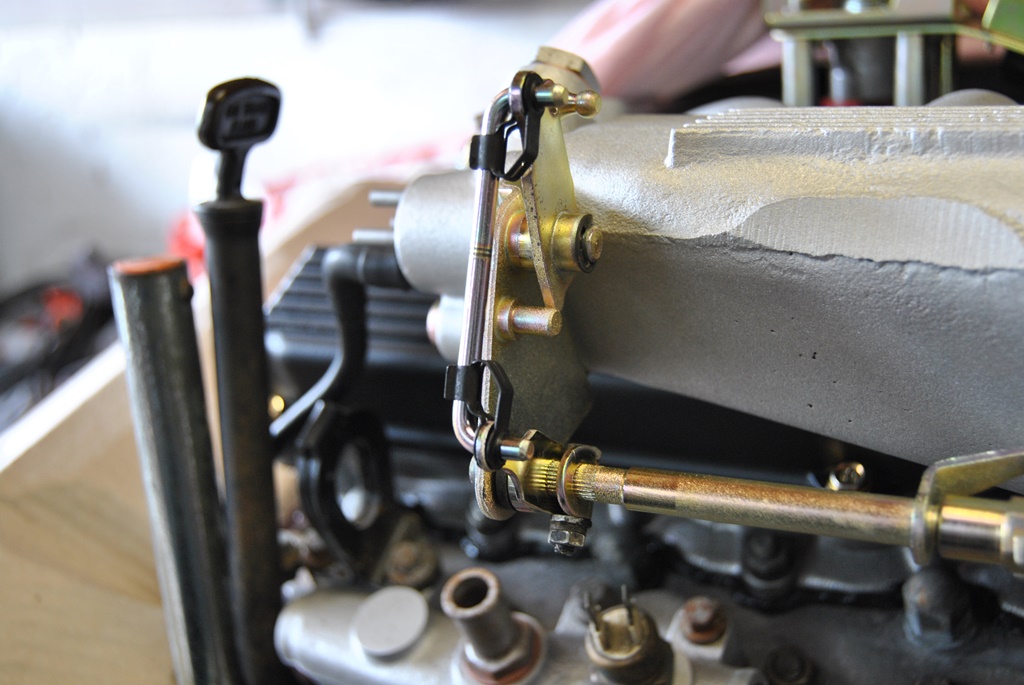
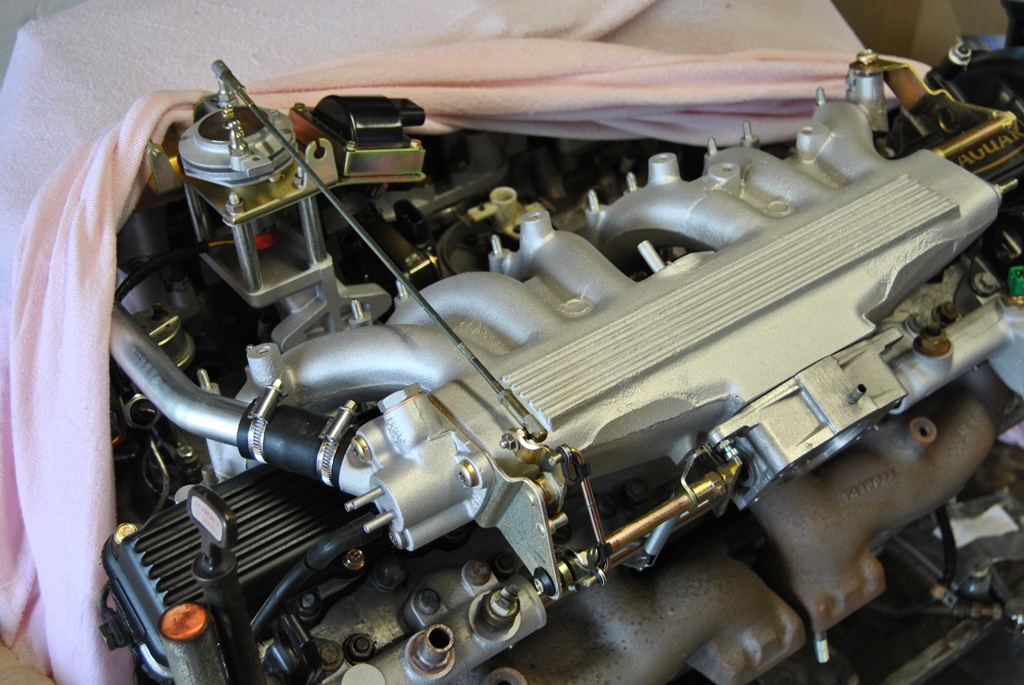
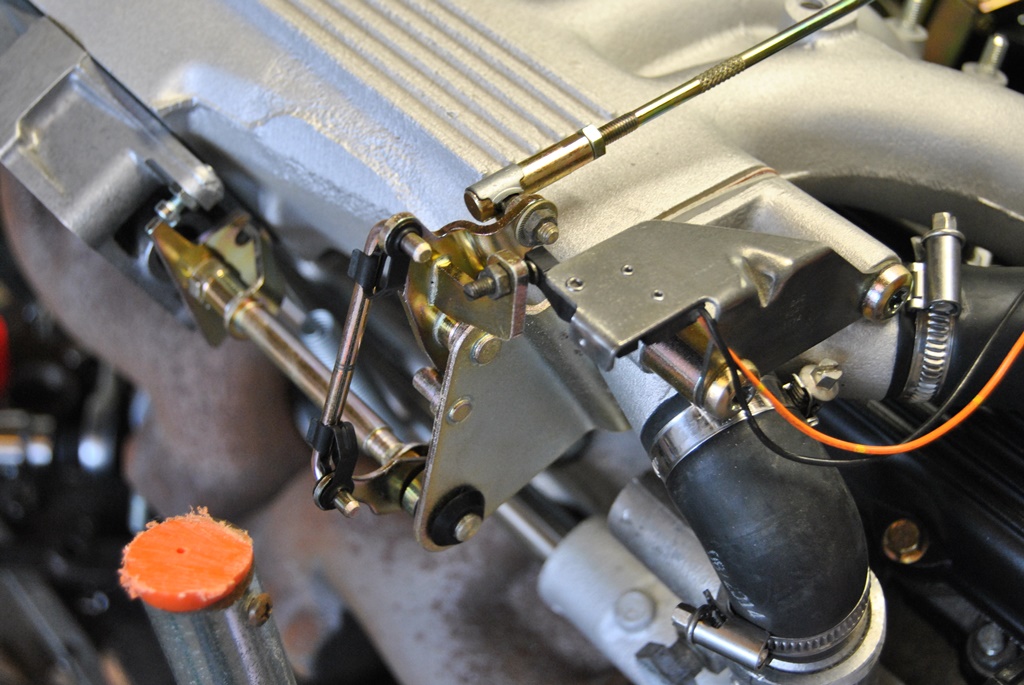
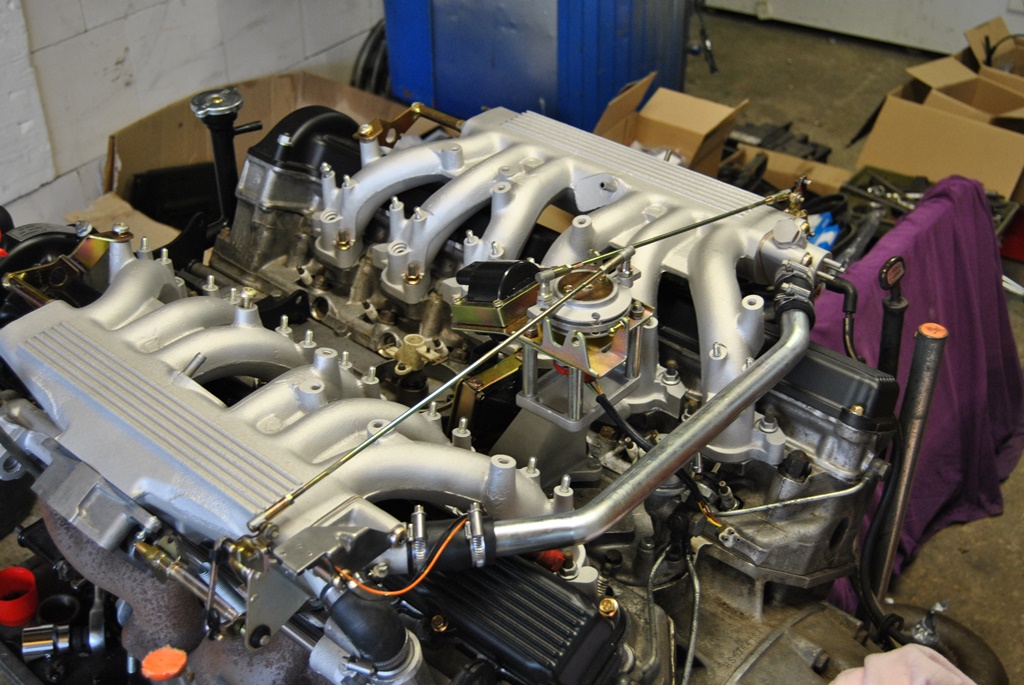
And the video of how these links all work together... Just so those who don't have a V12 know what they are "missing out" on
)...'Tis Easter, means bank holiday and a break from the new job I started on Monday
Decided to work on my V12 (the 5hp24 out of the XJ8 is all overhauled in sorted with some Audi parts... So it will last A LOT longer - if interested, here is the thread in the X308 section just need to refit it).A few months ago, I took the throttle bodies apart to have some of the parts galvanised. Now it is ready to reassemble. The lever arms and other parts are now in a pretty yellow colour (again). As close as possible to the original cadmium yellow. All rubber (the two lower bushes) are originals. The aftermarket ones LOOK identical and have the same outer shape, but the difference is in the diameter of the rubber ring which sits in the opening of the bracket on the intake. That is about 3 mm larger and the original ones (a lot harder rubber!) are a tiny bit smaller...
I didn't replace the bushes in the TBs themselves, as they weren't loose. Nice and tight. The spindle is the old one just like the butterfly valve. Just cleaned them up. The valve only fits in one position as I had to find out... New rubber seals around the TB of course as well. Don't want an air leak at all.
Also set up the TBs. German manual says the flaps/butterfly valves need a 0.05 mm gap. So I used my feeler gauge... Otherwise it clicks nicely (see video below).
And the video of how these links all work together... Just so those who don't have a V12 know what they are "missing out" on
Last edited by Daim; 04-14-2017 at 10:02 AM.
The following 3 users liked this post by Daim:
#211
04-25-2017 | 10:27 AM
Thread Starter
|
Veteran Member
Joined: May 2014
Posts: 5,906
Likes: 2,182
From: Bremen, Germany
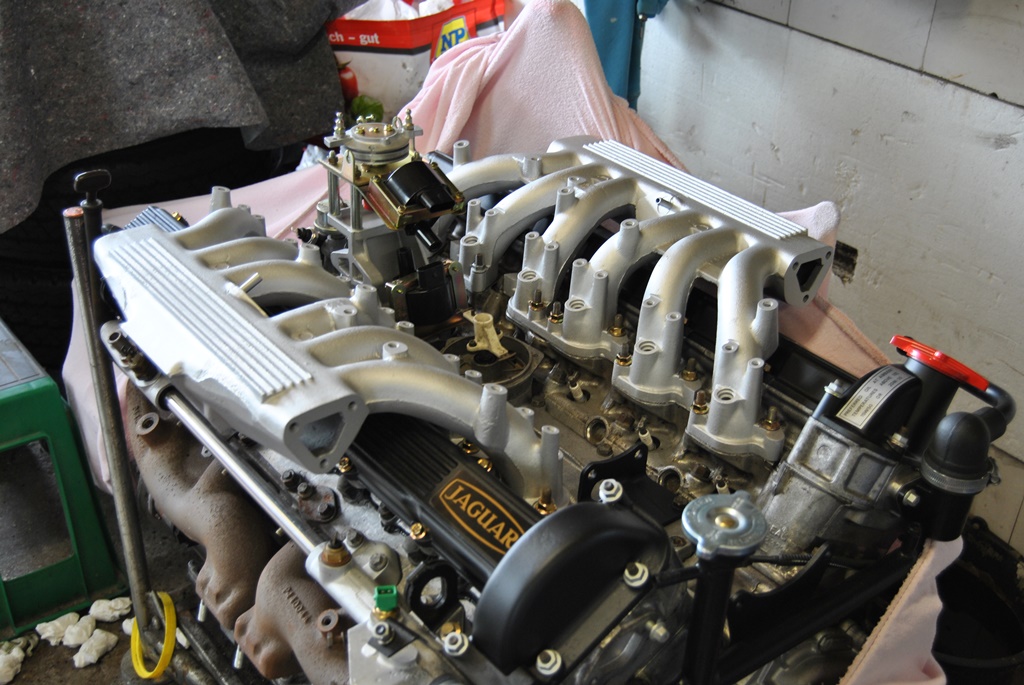
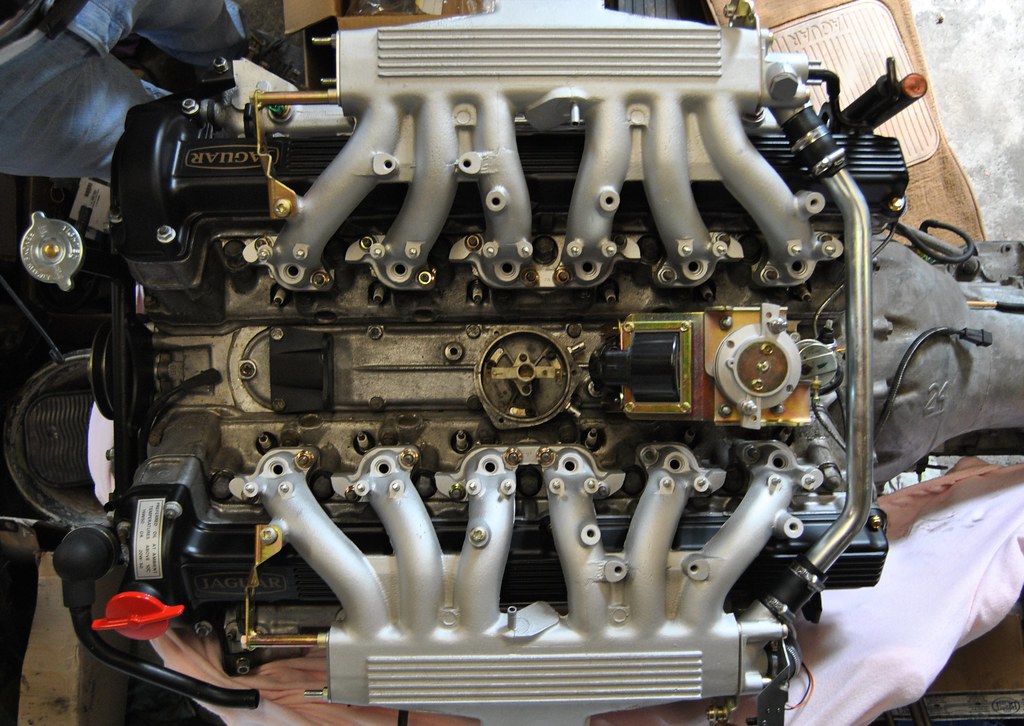
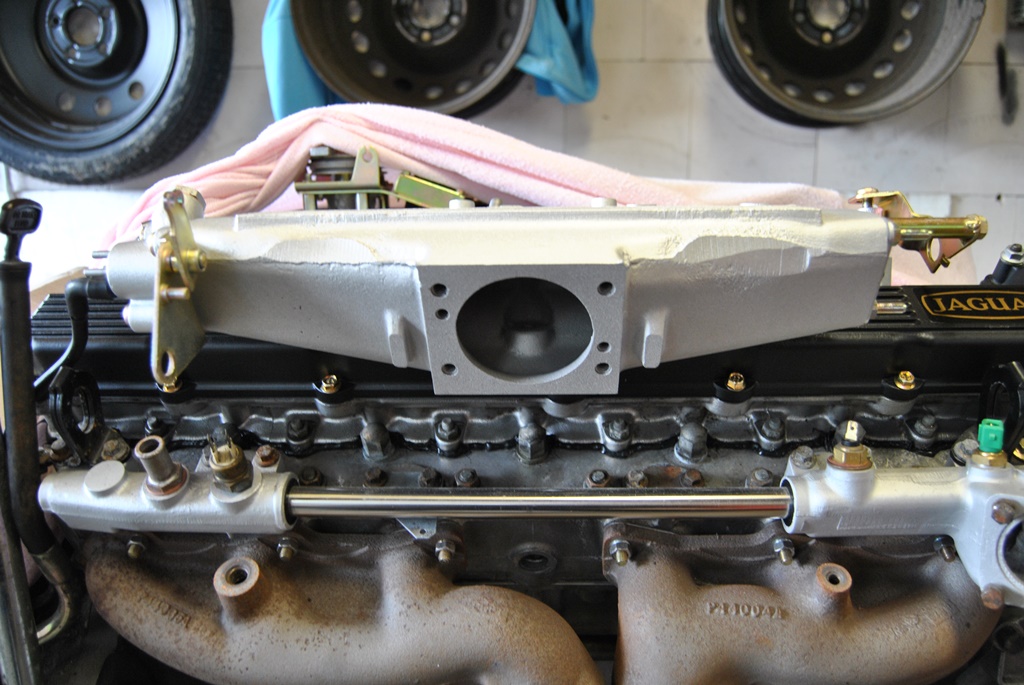
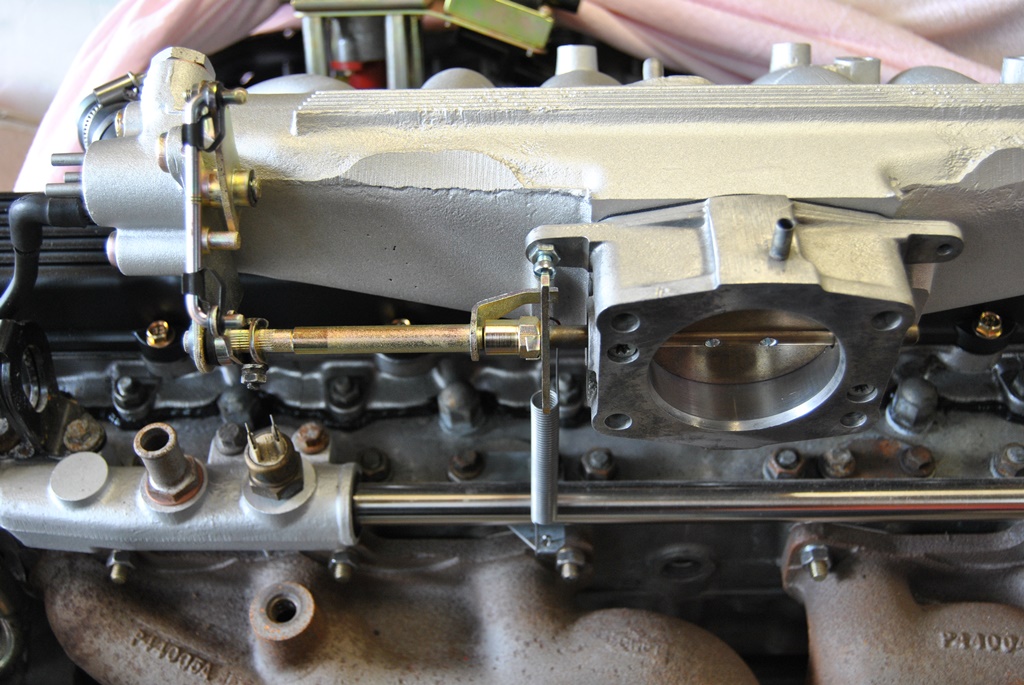
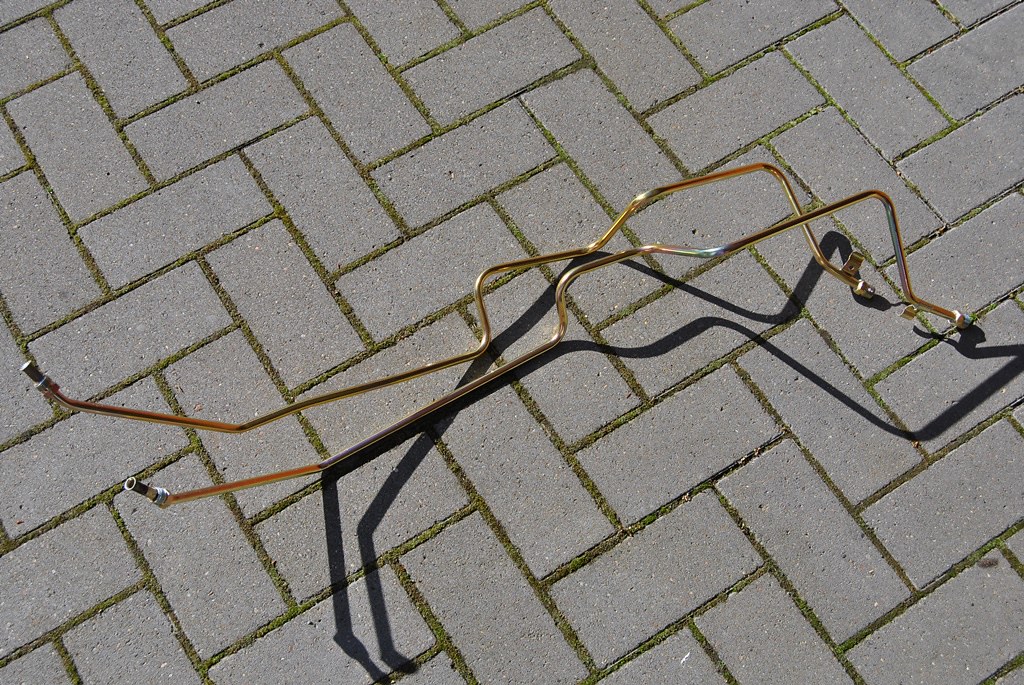
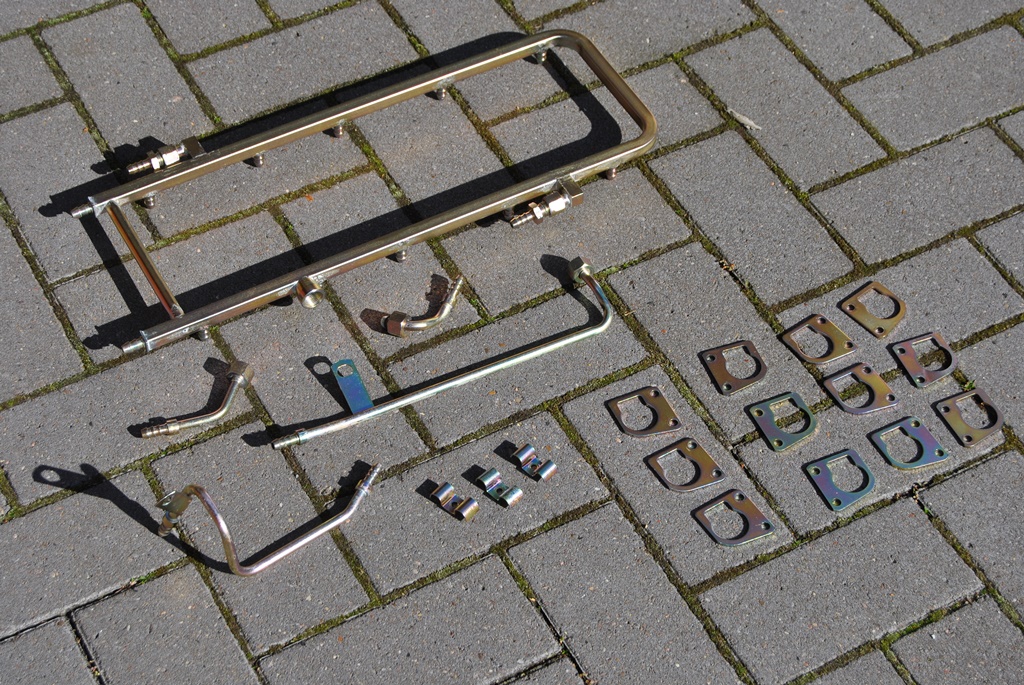
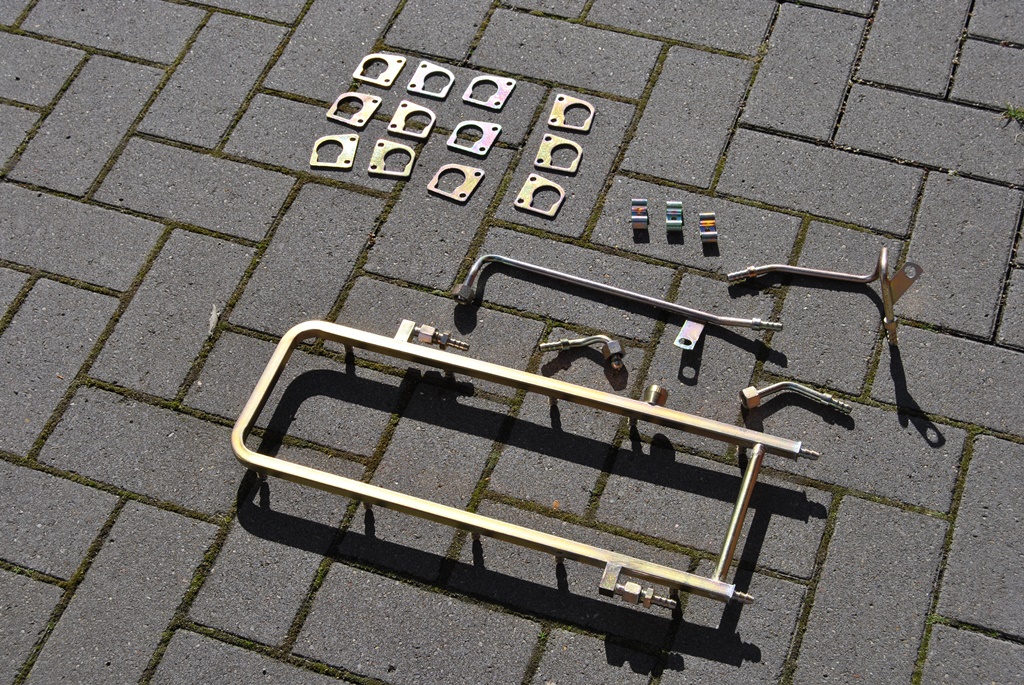
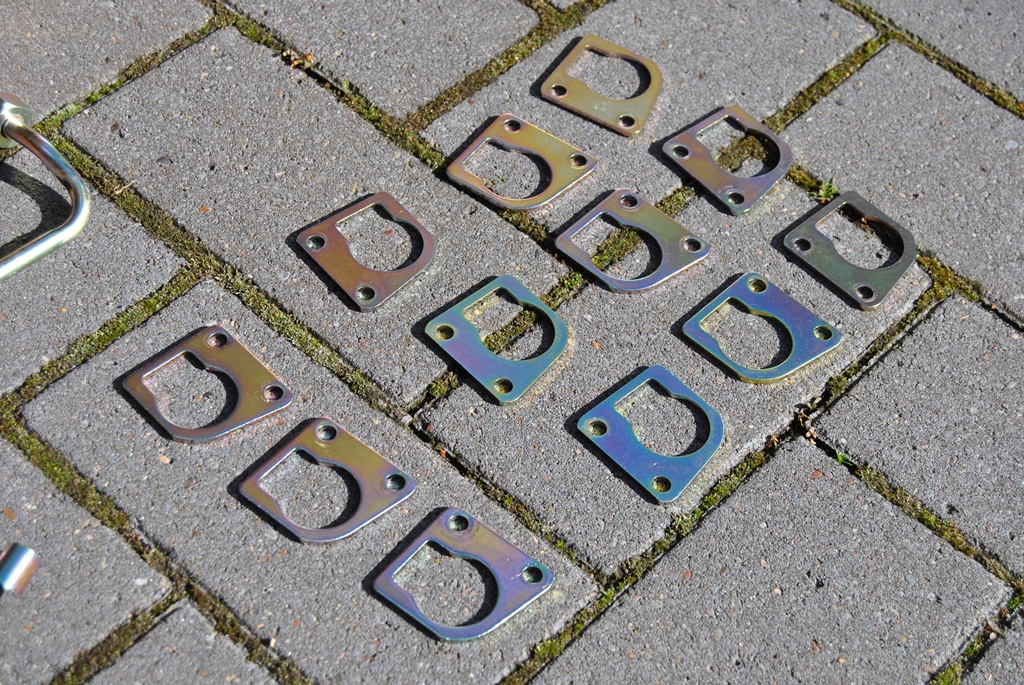
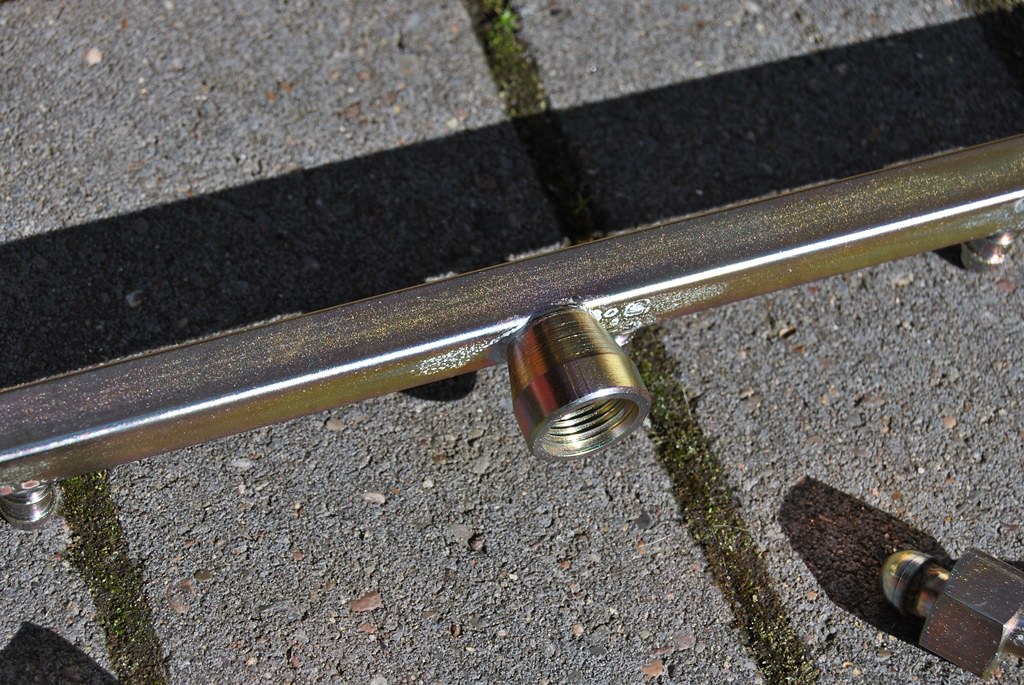
Had to share these. All parts refurbished with some nice zinc plating... The fuel rail is not perfect, as the welds around the injector conections were bad and seemed rather corroded, but the overall outcome looks nice! The ATF pipes look new, just like the injector clamps. The fuel pipes aren't perfect, so I might be looking for some new ones instead... Was worth a try.
The following 2 users liked this post by Daim:
Doug (04-26-2017),
Flint Ironstag (04-25-2017)
#212
04-25-2017 | 10:39 AM

Your engine is a work of art, I love the zinc plating.
They sell "do it at home" plating kits that I've been tempted to try, but it is hard to say what the level of quality can be when compared to a professional job.
Is that a stock fuel rail? It looks quite different from mine.
They sell "do it at home" plating kits that I've been tempted to try, but it is hard to say what the level of quality can be when compared to a professional job.
Is that a stock fuel rail? It looks quite different from mine.
Last edited by that guy; 04-25-2017 at 10:44 AM.
The following users liked this post:
Daim (04-25-2017)
#214
04-25-2017 | 11:37 AM

Veteran Member
Joined: Jul 2012
Posts: 6,796
Likes: 2,399
From: Walnut Creek, California
#216
04-25-2017 | 07:15 PM
Veteran Member
Joined: May 2010
Posts: 4,638
Likes: 2,578
From: Vic Australia
#217
04-25-2017 | 07:16 PM
Veteran Member
Joined: May 2010
Posts: 4,638
Likes: 2,578
From: Vic Australia
The following users liked this post:
Daim (04-26-2017)
#218
04-25-2017 | 11:36 PM
Thread Starter
|
Veteran Member
Joined: May 2014
Posts: 5,906
Likes: 2,182
From: Bremen, Germany
#219
04-26-2017 | 06:37 AM
Veteran Member
Joined: Mar 2016
Posts: 1,331
Likes: 581
From: North Carolina
Daim, really love all the pics! Looks great, and they're a great reference for all of us who haven't had all those bits out yet!
Each exposed rubber bit you show I'm thinking "need that".
Love the attention to detail and going original look you won't go wrong as some restos do. Are you going fully Original in the engine bay? Replacing stickers etc?
Each exposed rubber bit you show I'm thinking "need that".
Love the attention to detail and going original look you won't go wrong as some restos do. Are you going fully Original in the engine bay? Replacing stickers etc?
The following users liked this post:
Daim (04-26-2017)
#220
04-26-2017 | 07:22 AM

Veteran Member
Joined: Jun 2013
Posts: 1,943
Likes: 1,184
From: Australia
Your engine is a work of art, I love the zinc plating.
They sell "do it at home" plating kits that I've been tempted to try, but it is hard to say what the level of quality can be when compared to a professional job.
Is that a stock fuel rail? It looks quite different from mine.
They sell "do it at home" plating kits that I've been tempted to try, but it is hard to say what the level of quality can be when compared to a professional job.
Is that a stock fuel rail? It looks quite different from mine.
I don't have too many pics of individual bits but these may give you an idea at least.