
1989 XJ-S Resto-Thread - or "my Iron Lady"
#101
 11-05-2016, 03:09 AM

That's under the wings, right? They are only bolted, so I could give that a check...
These problems are really down to the car's having so much manual labour during production. I've got some weld spots in areas where there should't be any (middle of nowhere). And some body sealant rests. Must be a dirty drawing somwhere yet
These problems are really down to the car's having so much manual labour during production. I've got some weld spots in areas where there should't be any (middle of nowhere). And some body sealant rests. Must be a dirty drawing somwhere yet
#102
11-06-2016, 03:24 AM

Veteran Member
Daim
removing the wings is a very good idea if you really want to get to grips with any hidden rust, or to verify that there is not any. The wings are bolt on, BUT they are braised at the front to the lower quarter panel that runs round under the bumper to the lower grille. So if you want to remove them entirely it is more difficult. If you are very careful you can unbolt the wing tops, the hidden bolts just in front of the top door hinges, and the bolts behind the wheelarch (rearmost one) baffle, and the bolts around the bottom of the headlight nacelle, and then ease the wing away to see what's what round the scuttle and as importantly, the sill at the front.
FWIW, I have found that blocking the rooftop/A pillar drain hole at the top with gunk is the best way to protect the A pillar and the scuttle. I have never been soaked entering or leaving the car in 14 years after doing this. Then you can rust protect under the A pillar brightwork, and the scuttle under the wing, and under all the wingtop bolts etc etc. I attach a pic of the GiF scuttle drain system I rigged up, which I think is very important to keep this area dry, as water pools up here and has nowhere to go.
More work for you, if it's any comfort, it does eventually all get done!
Greg
Last edited by Greg in France; 11-06-2016 at 03:27 AM.
The following users liked this post:
warrjon (11-06-2016)
#103
11-06-2016, 05:18 AM
#104
11-06-2016, 12:22 PM
#105
11-06-2016, 11:26 PM
Veteran Member
The following users liked this post:
Greg in France (11-07-2016)
#106
11-06-2016, 11:35 PM
What ģuard do you mean?
#107
11-08-2016, 03:15 PM
Veteran Member

The following users liked this post:
Daim (11-23-2016)
#108
11-09-2016, 01:19 AM
#109
11-19-2016, 11:53 AM
Finally! I can nearly call one part of my "restoration" nearly complete 
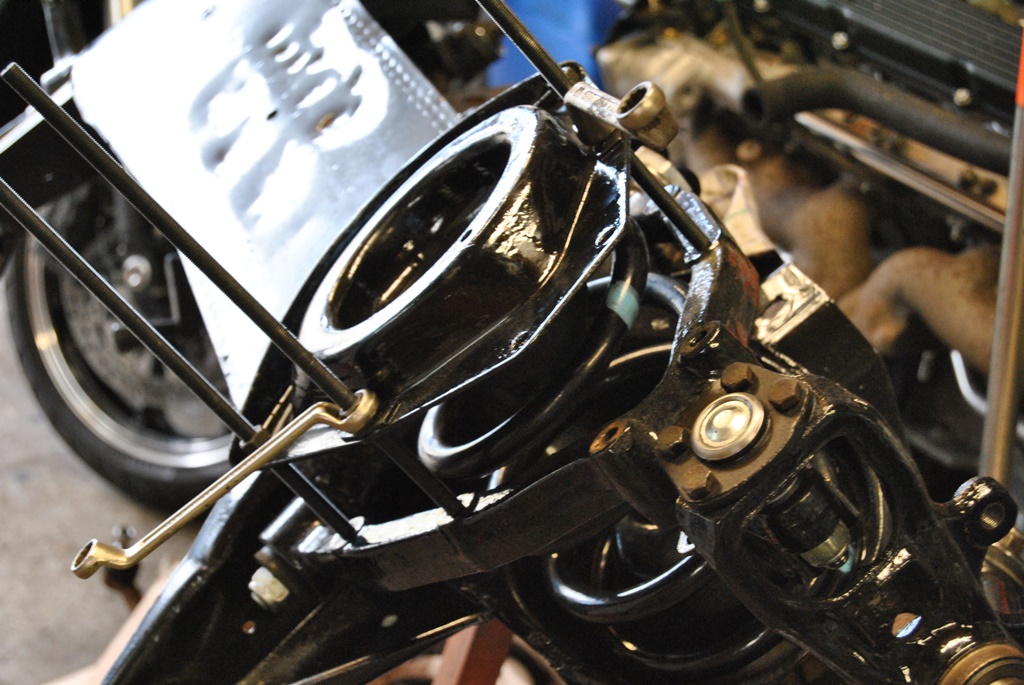
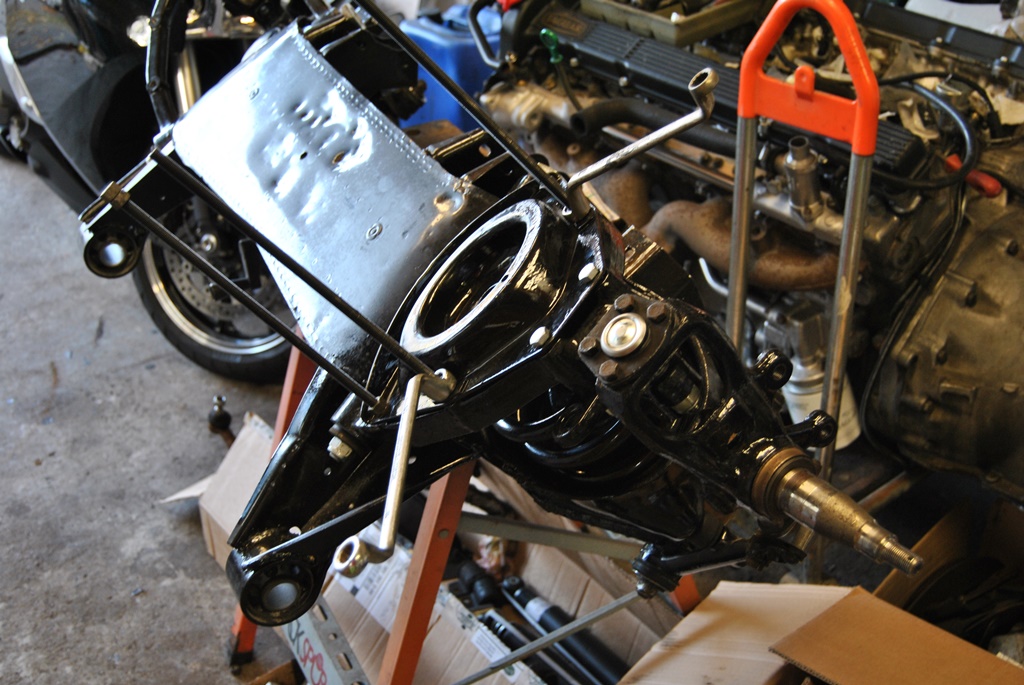
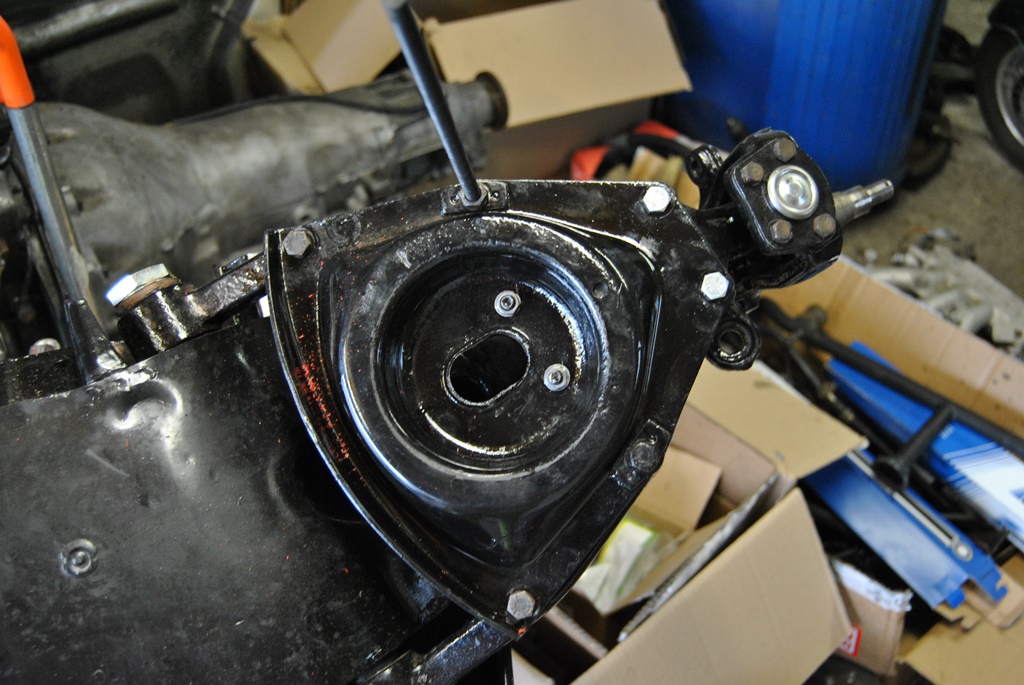
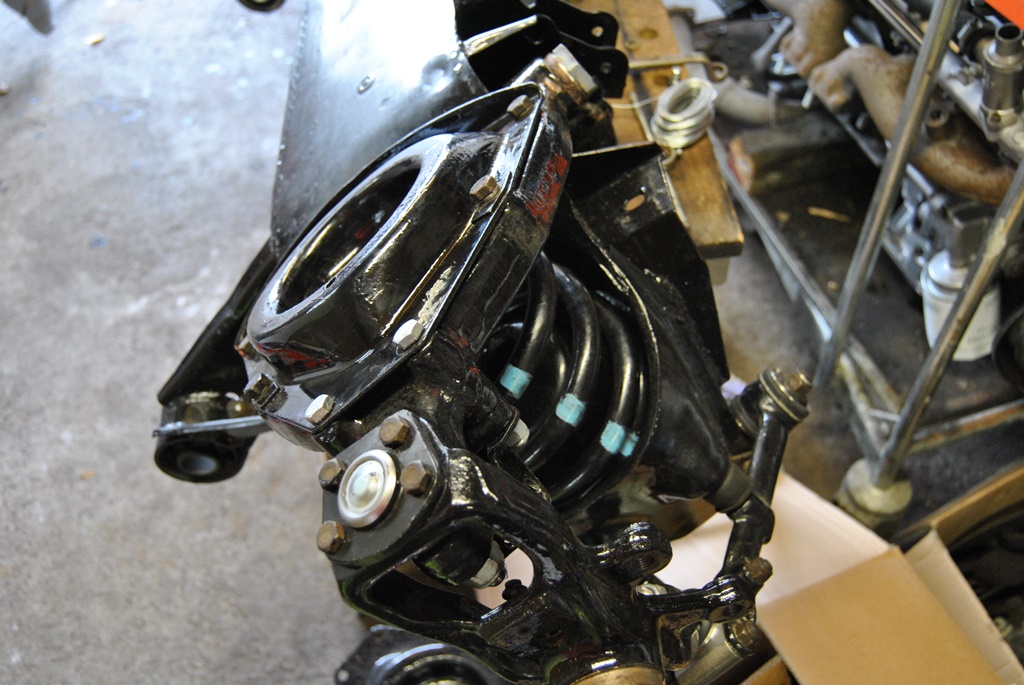
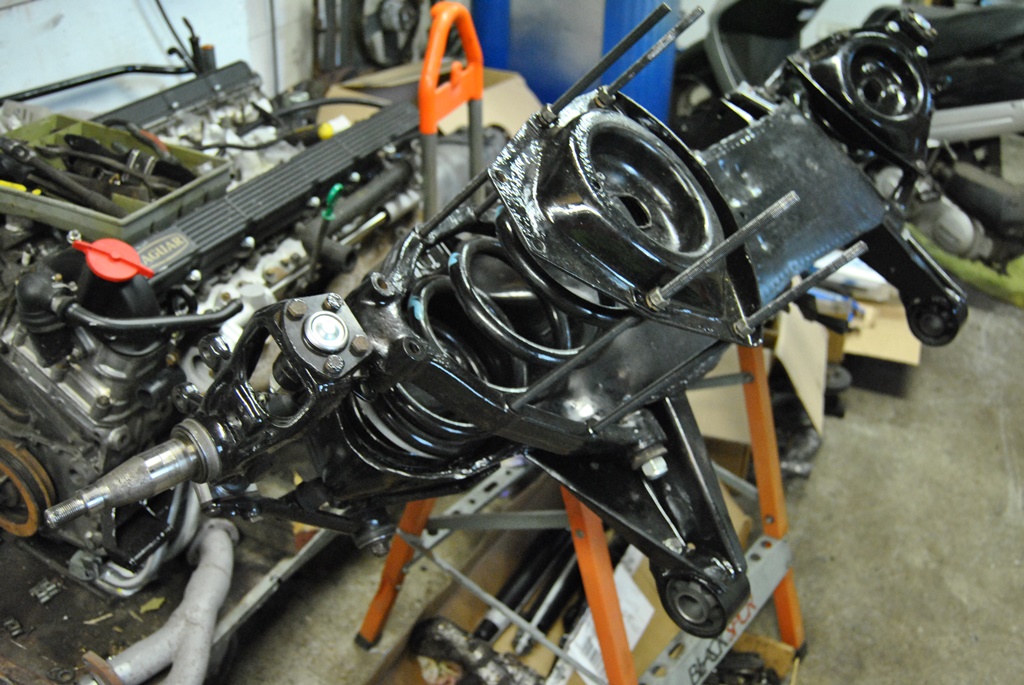
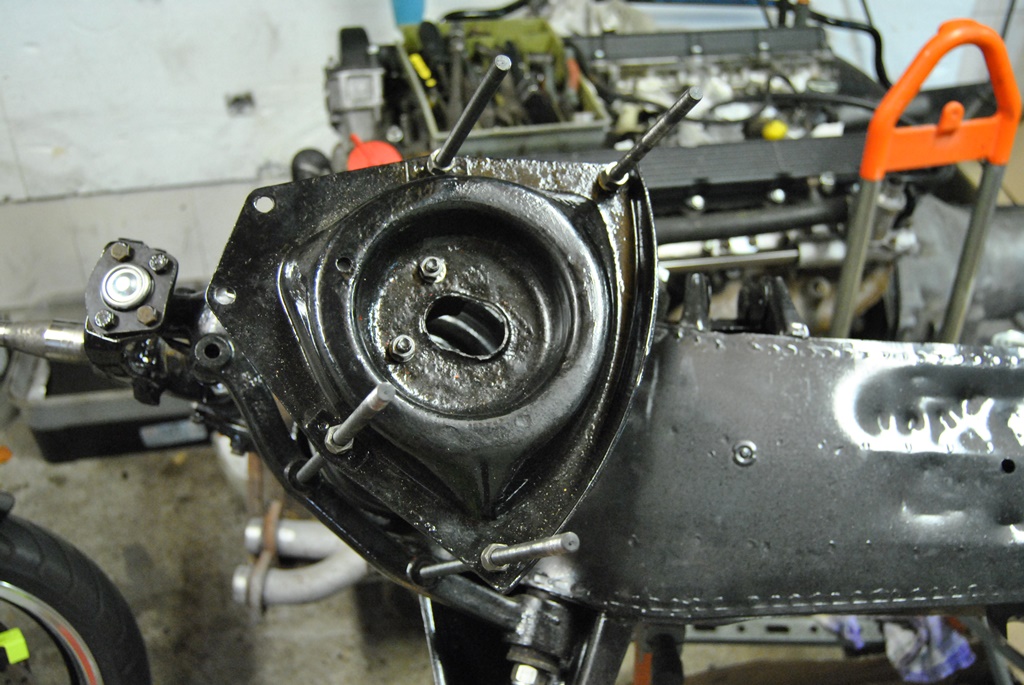
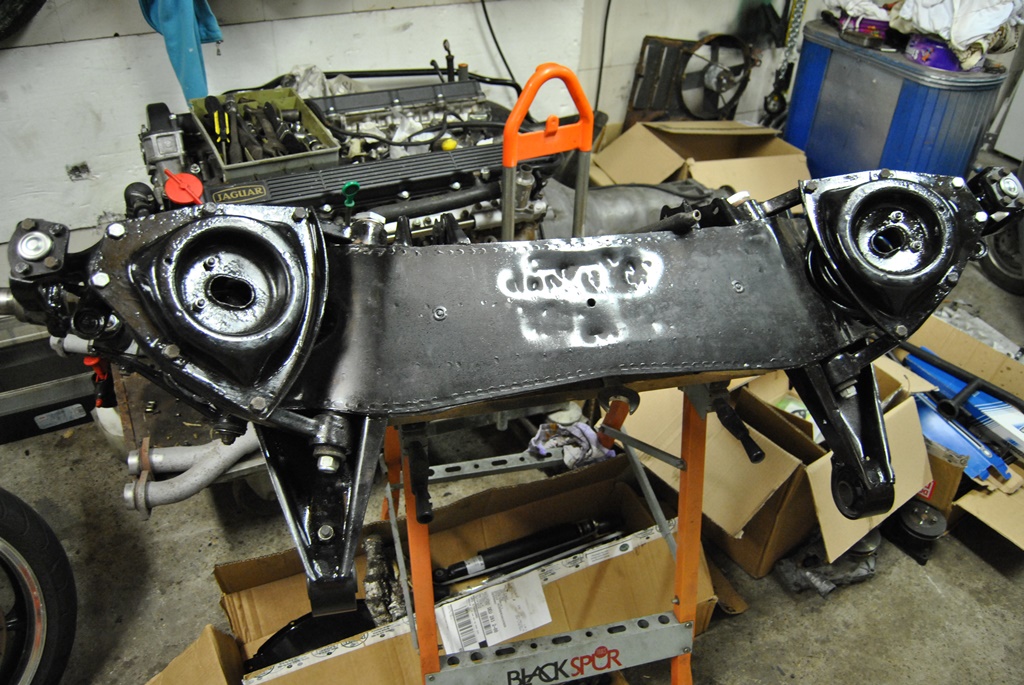
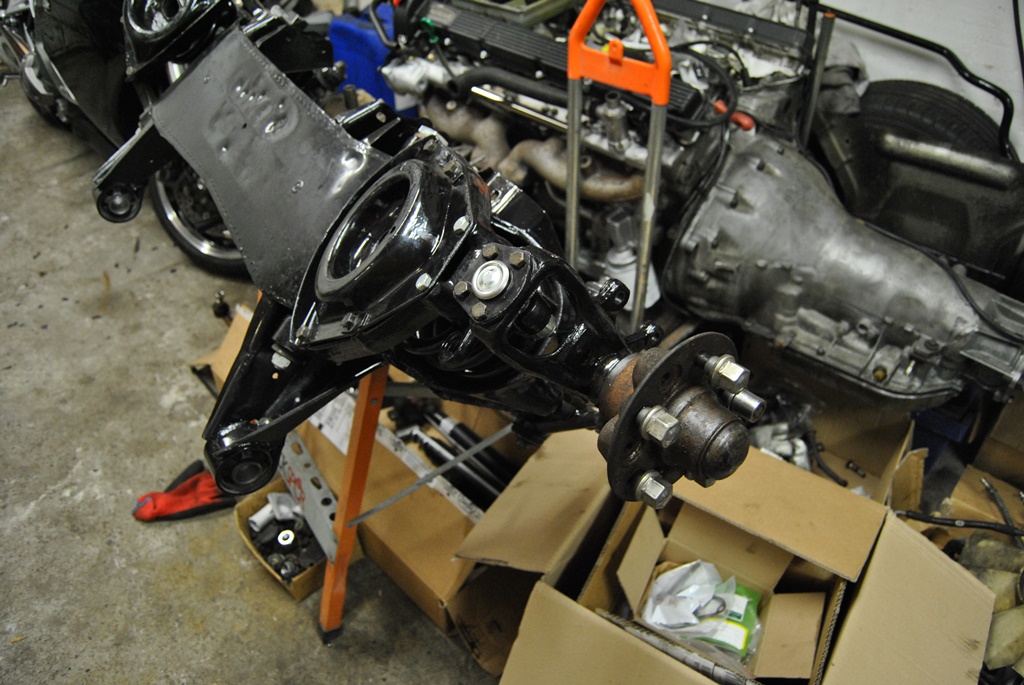
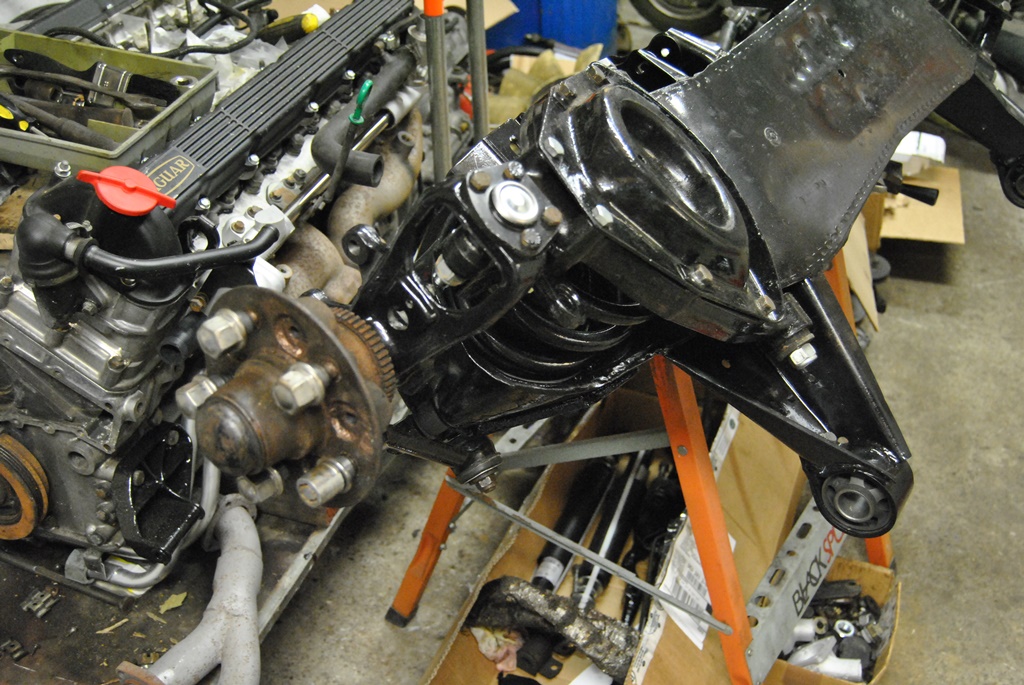
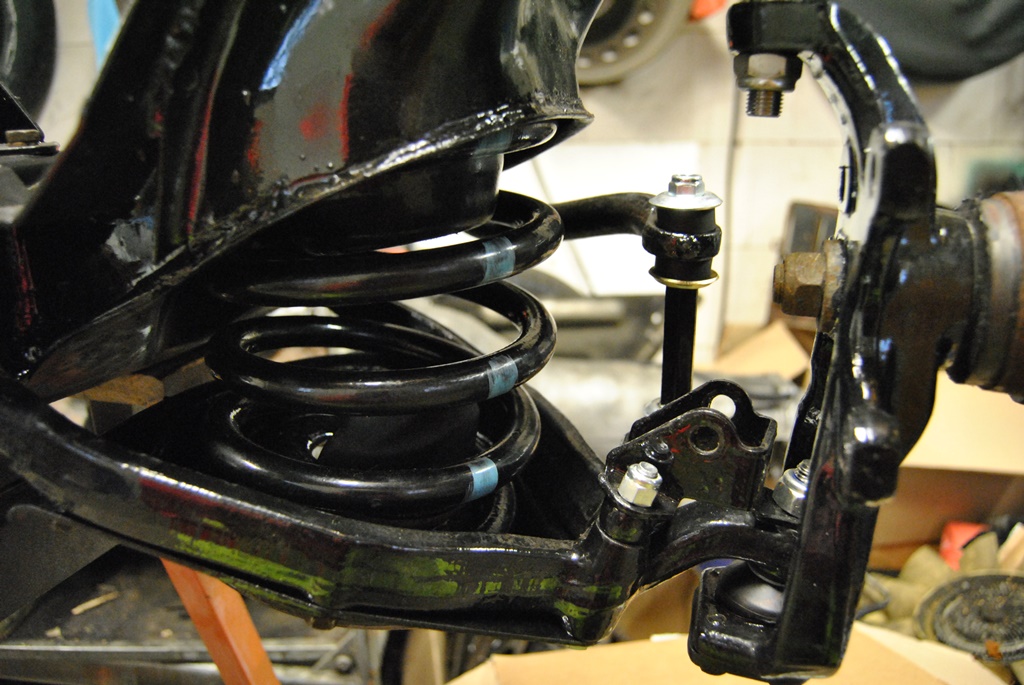
The front subframe has been reassembled, apart from the brakes. The threaded rods arrived today and even though I thought it would take for ever, 60 minutes later, the springs were fitted and everything else around it was done.
Thanks @ Greg, Doug and Grant for the tip with the rods! If I've forgotten anyone else: feel thanked and smiled at!
I've got a few little spots, where I have to touch up the POR15, as some brute force was needed every so often (first screw fitted resulted in the pan slipping about 1 mm, enough to allow the screw not to fit). But otherwise I am quite happy. Next step is to put the steering rack and steering links back on and then install it back in the car. The brakes are staying off a little while longer... Especially since I need some welding done prior to reassembly...
The following 3 users liked this post by Daim:
#110
11-20-2016, 01:50 PM
Veteran Member
The following users liked this post:
Daim (11-20-2016)
#111
11-20-2016, 02:27 PM
Yes, bog standard ones. Part number RTC2751.
I ordered them from SNG. I specifically wanted standard height springs. They are the same as in the XJ6 with the XK 6 cylinder (as heavy as the V12).
They were the same height as my old springs when removed and had the same material diameter...
I ordered them from SNG. I specifically wanted standard height springs. They are the same as in the XJ6 with the XK 6 cylinder (as heavy as the V12).
They were the same height as my old springs when removed and had the same material diameter...

#113
11-20-2016, 02:36 PM
#115
11-20-2016, 02:43 PM
Mine has no antirollbar... It has the sporty steering wheel. It has the sportier seats. But there are no markings anywhere. The only ones being some light blue paint stripes on the front springs, like the ones I got again...
So I'm not totally sure... I am happy I don't have the sportspack as like you said, springs are nearly impossible to purchase...
So I'm not totally sure... I am happy I don't have the sportspack as like you said, springs are nearly impossible to purchase...
#117
11-20-2016, 03:45 PM
Veteran Member
The following users liked this post:
Mountaineer (09-04-2017)
#118
11-20-2016, 03:46 PM
#119
11-20-2016, 03:48 PM
Veteran Member
Yes, bog standard ones. Part number RTC2751.
I ordered them from SNG. I specifically wanted standard height springs. They are the same as in the XJ6 with the XK 6 cylinder (as heavy as the V12).
They were the same height as my old springs when removed and had the same material diameter...
I ordered them from SNG. I specifically wanted standard height springs. They are the same as in the XJ6 with the XK 6 cylinder (as heavy as the V12).
They were the same height as my old springs when removed and had the same material diameter...
#120
12-05-2016, 08:44 AM
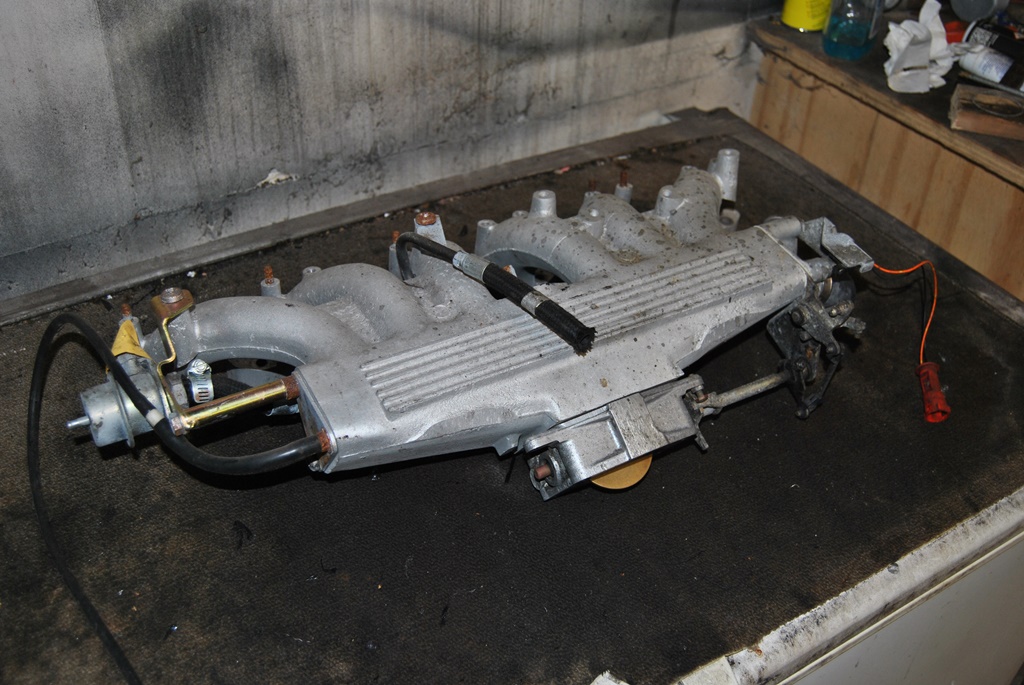
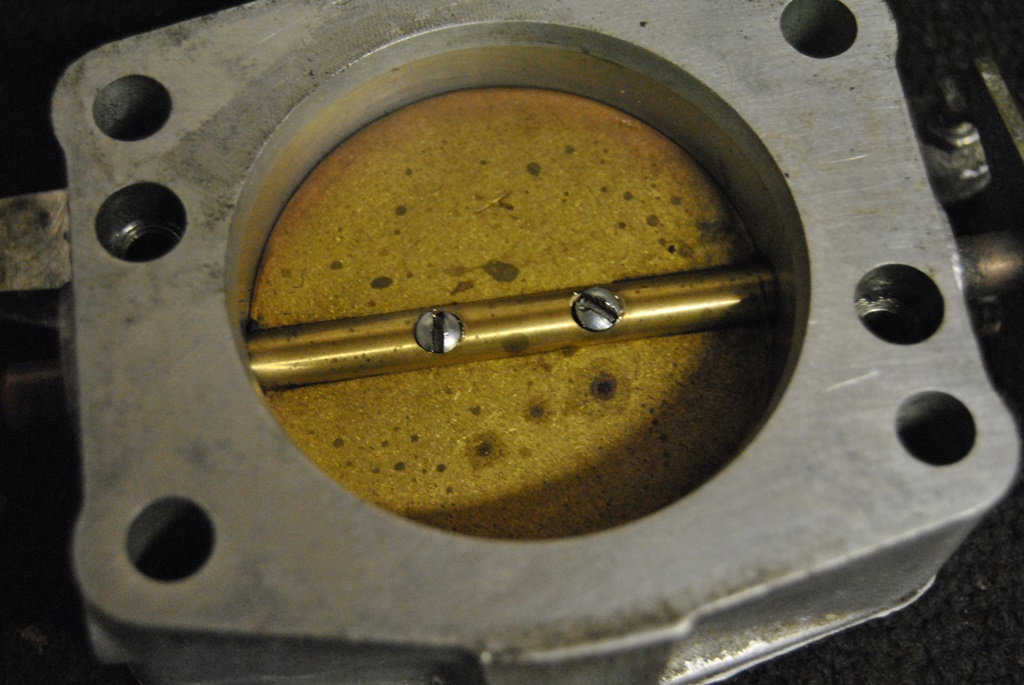
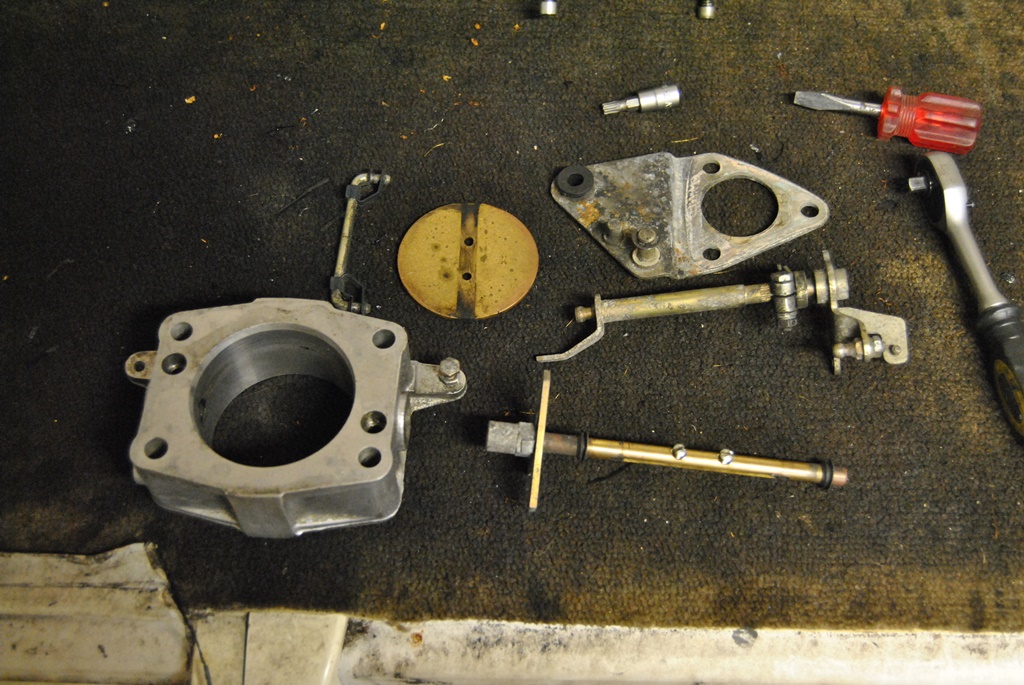
Aight, been not so busy lately, so not much going on. Due to lack of parts... So I'm doctoring around on some stuff I can do indoors, like the throttle bodies
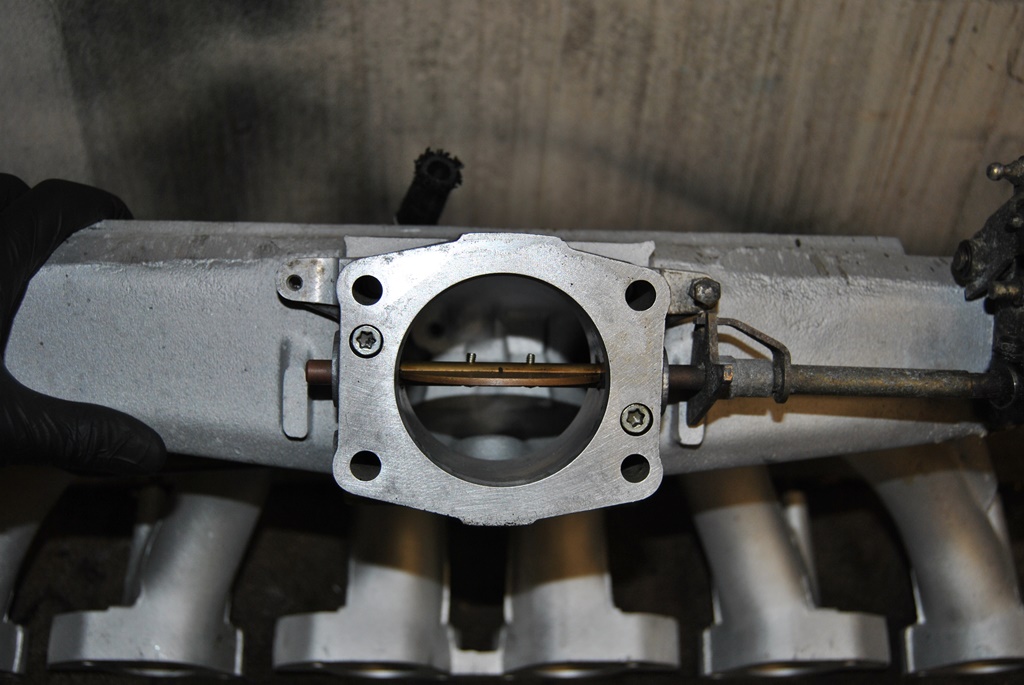
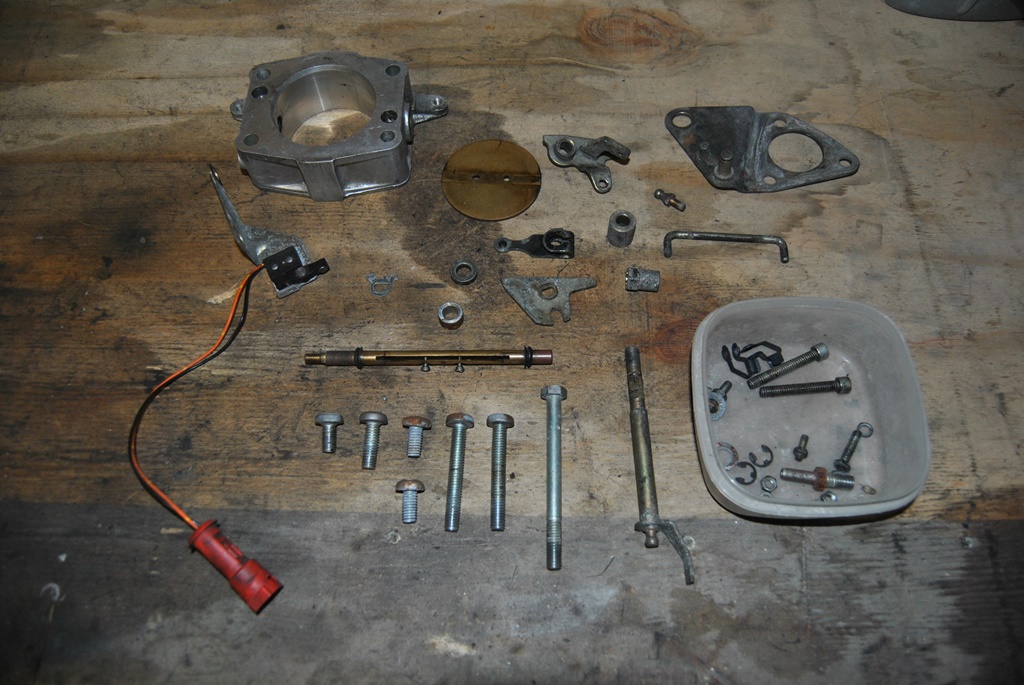
I took both throttle bodies apart, disc, spindle, nuts, etc., everything is in pieces, so I could assess which parts I need to buy and which parts I can have refurbed.
Both throttle body spindles had a little bit of play on one of the ends (mainly the end the linkage attaches to). So I'll be replacing the bushes in the housing when I am ready (haha). The same goes for the bush in one of the lever arms on the end linkages...
The parts are currently being galvanized again to look like original. I was considering going with nickle or chrome, but the effect would be nice, but a bit pricey, as the little pieces would require many coats of zinc, copper and co to build up and be smooth for a shiney chrome layer. So I'm going yellow zinc what ever it is called The bloke from the shop said straight away that the parts were galvanized, just by looking at the corrosion... The screws which mount the end caps to the intake manifolds will also be done. Just to make it all look tidy again. No rust (at least for a few more decades ).


More to come when all is done - at least I hope so!
I took both throttle bodies apart, disc, spindle, nuts, etc., everything is in pieces, so I could assess which parts I need to buy and which parts I can have refurbed.
Both throttle body spindles had a little bit of play on one of the ends (mainly the end the linkage attaches to). So I'll be replacing the bushes in the housing when I am ready (haha). The same goes for the bush in one of the lever arms on the end linkages...
The parts are currently being galvanized again to look like original. I was considering going with nickle or chrome, but the effect would be nice, but a bit pricey, as the little pieces would require many coats of zinc, copper and co to build up and be smooth for a shiney chrome layer. So I'm going yellow zinc what ever it is called
The bloke from the shop said straight away that the parts were galvanized, just by looking at the corrosion... The screws which mount the end caps to the intake manifolds will also be done. Just to make it all look tidy again. No rust (at least for a few more decades ).More to come when all is done - at least I hope so!
The following users liked this post:
orangeblossom (12-05-2016)