1989 XJ-S Resto-Thread - or "my Iron Lady"
#141
 02-09-2017, 09:33 AM

Busy busy busy! 
Time to post something more pretty and less dirty
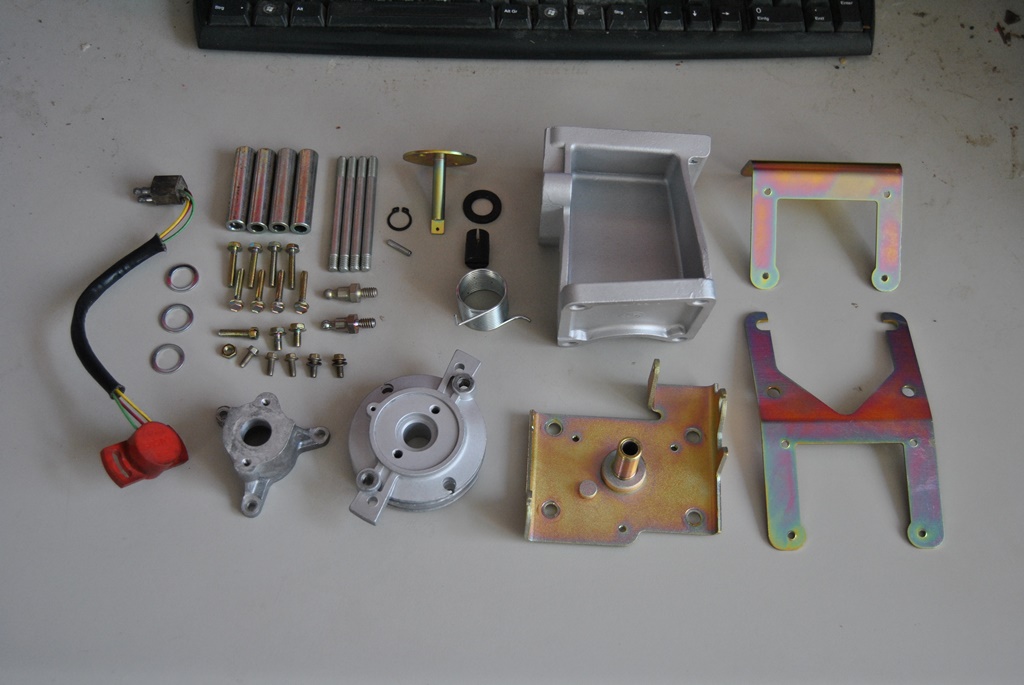
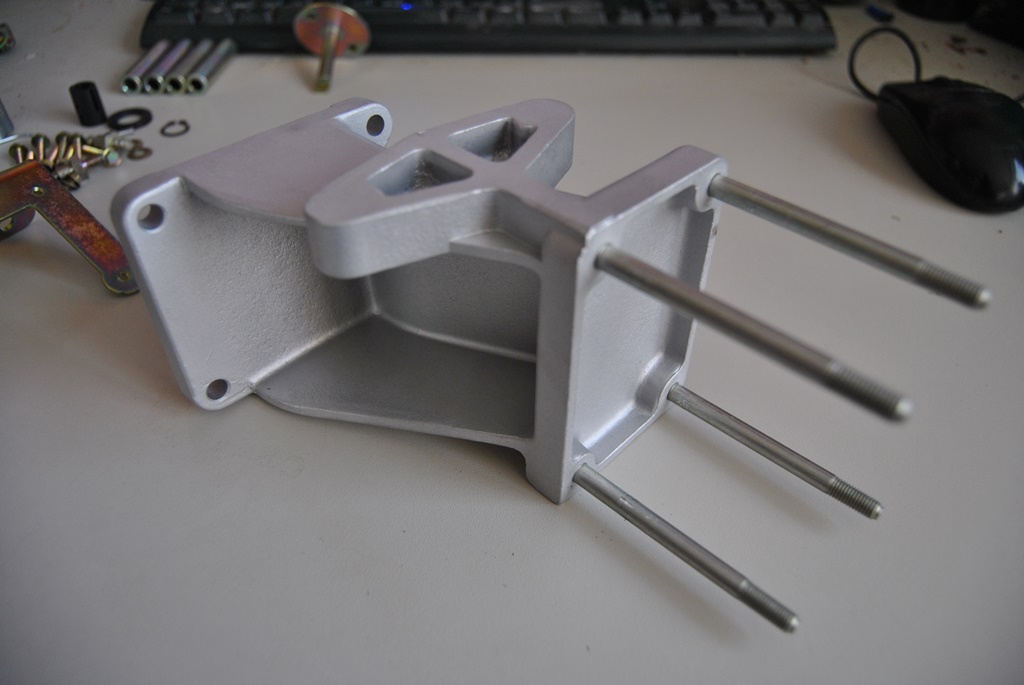
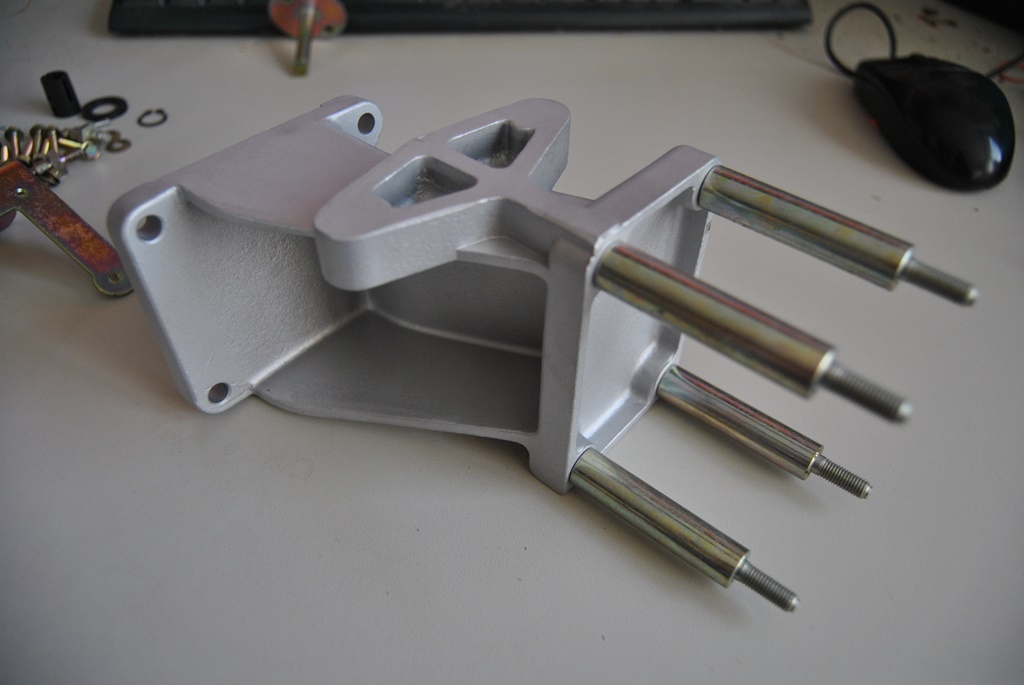
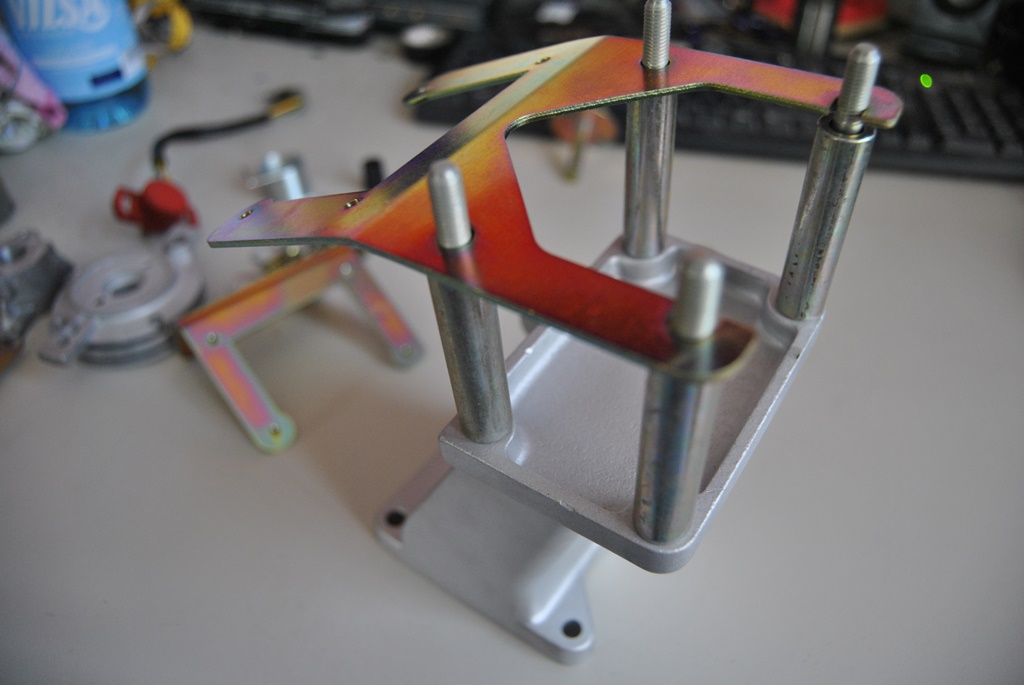
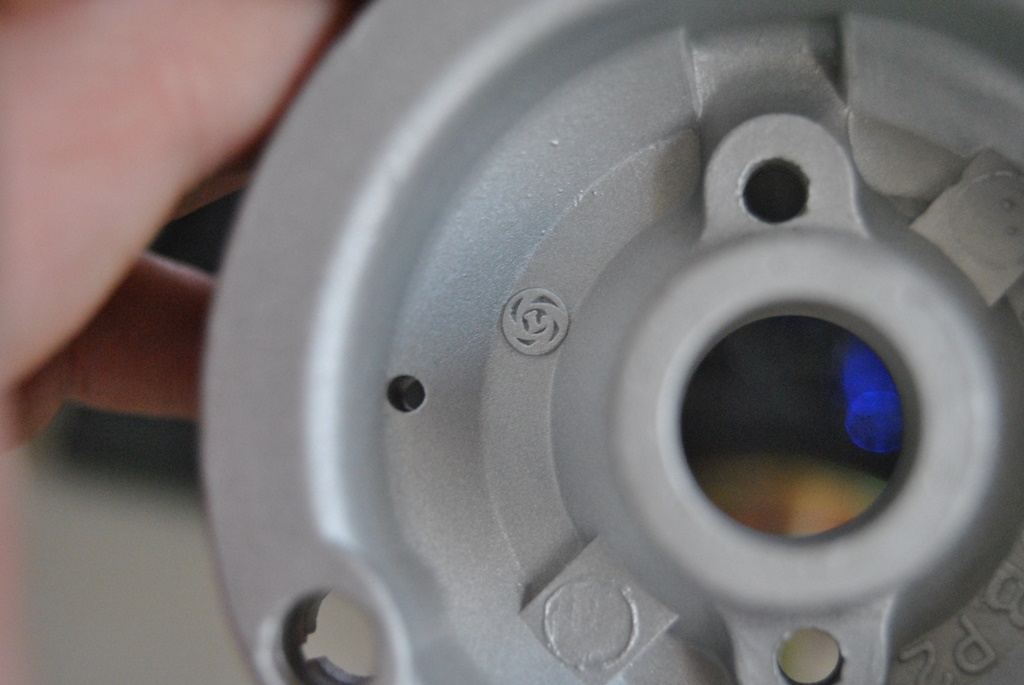
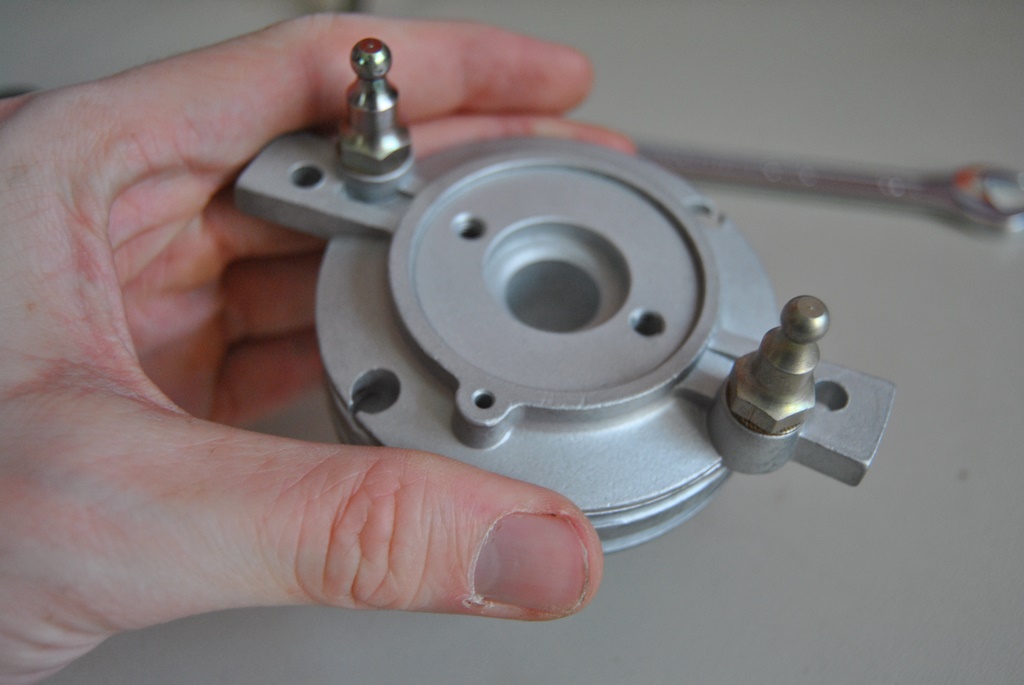
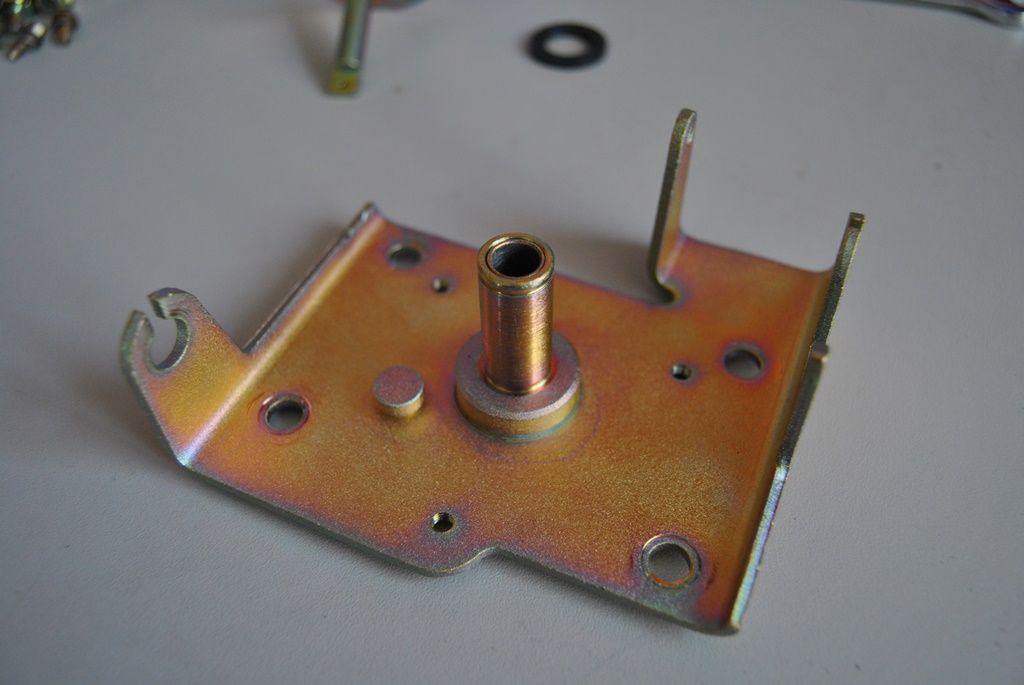
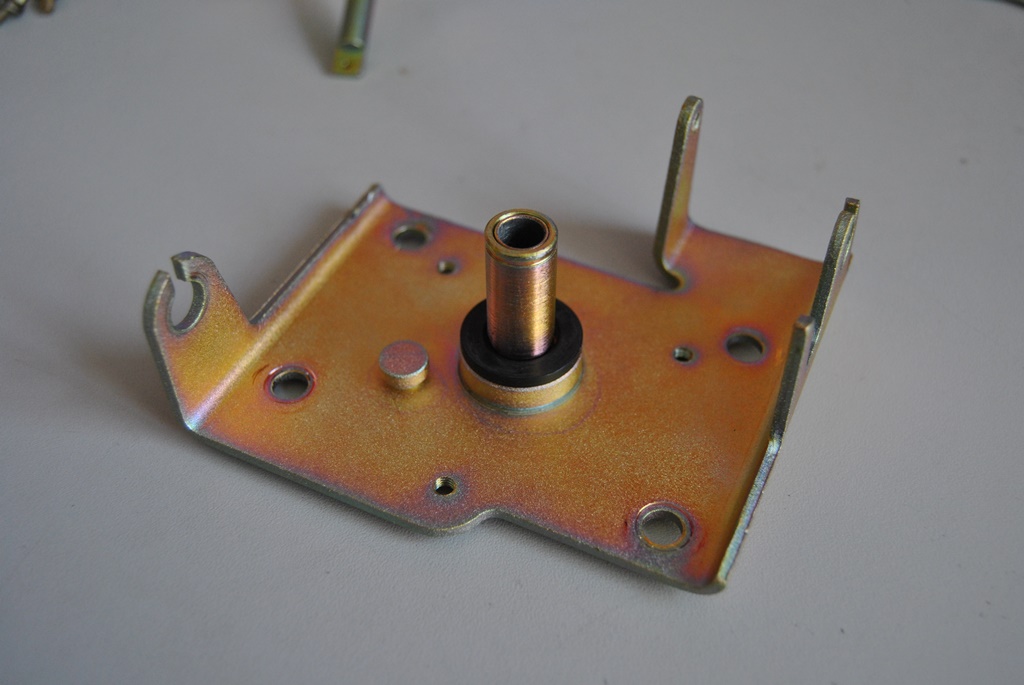
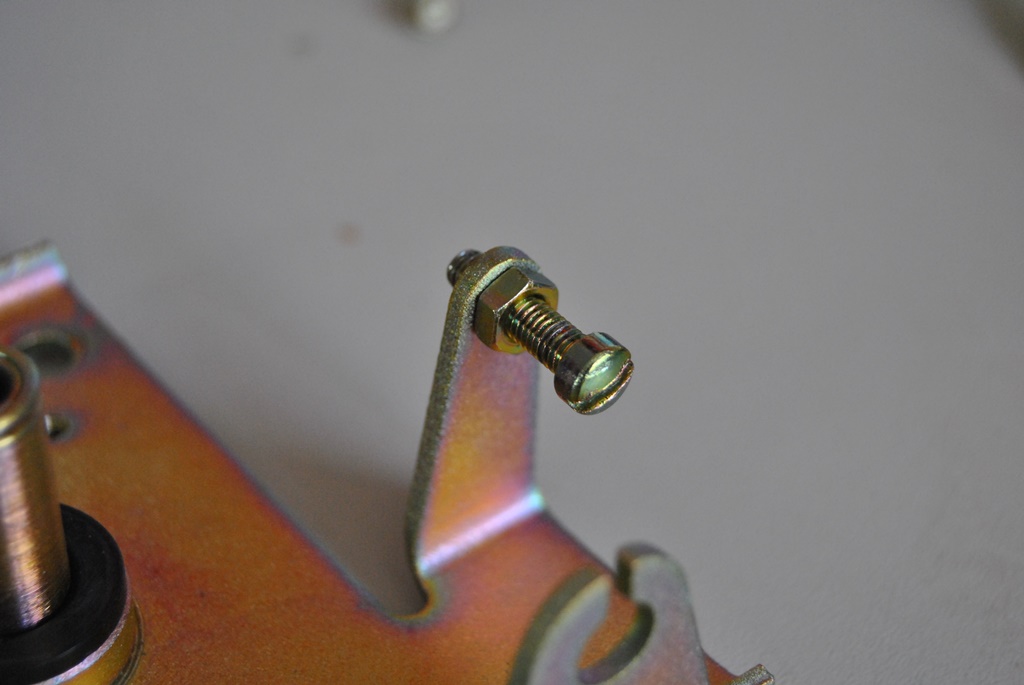
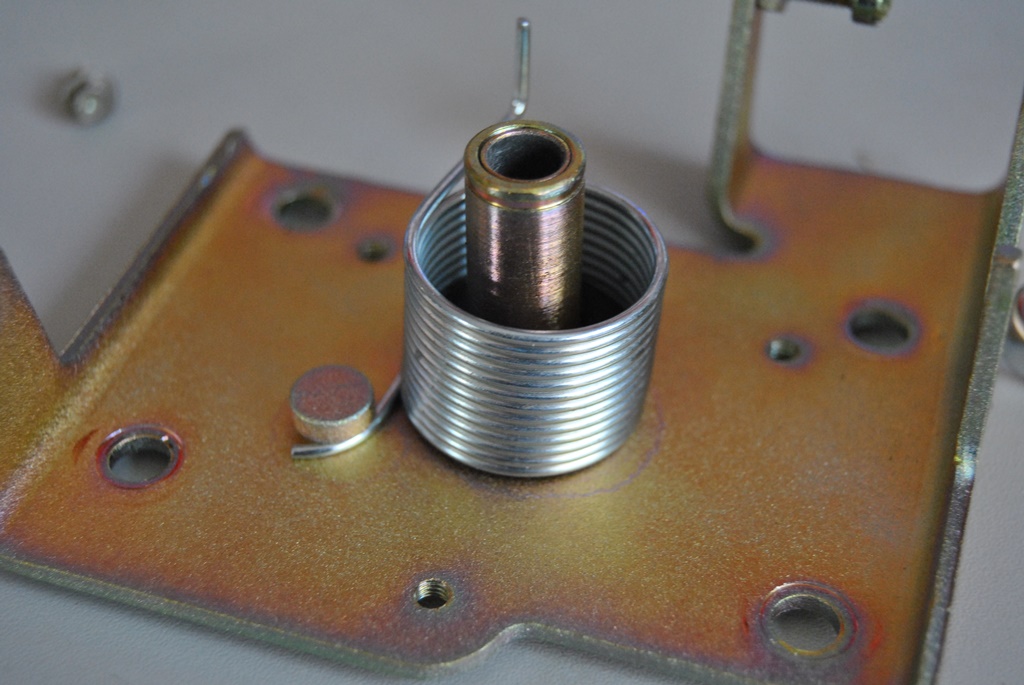
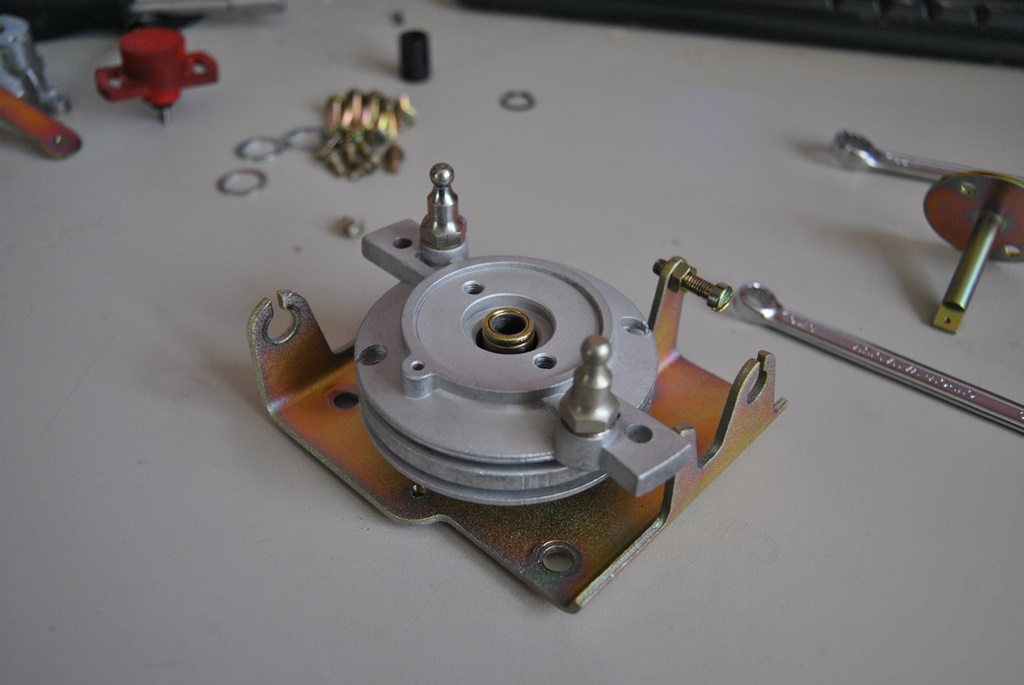
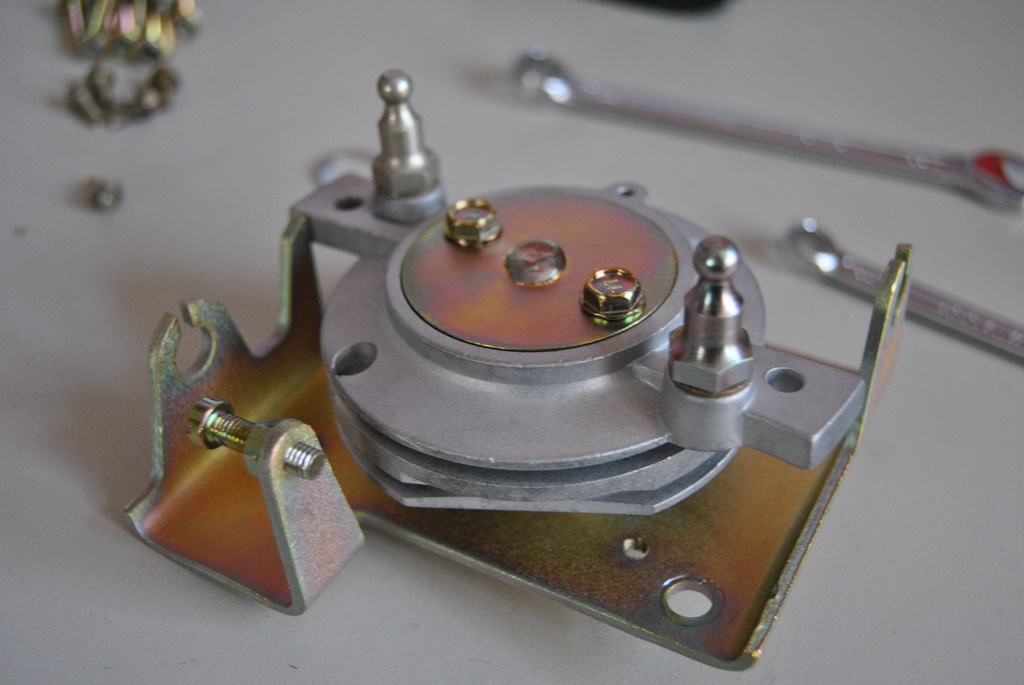
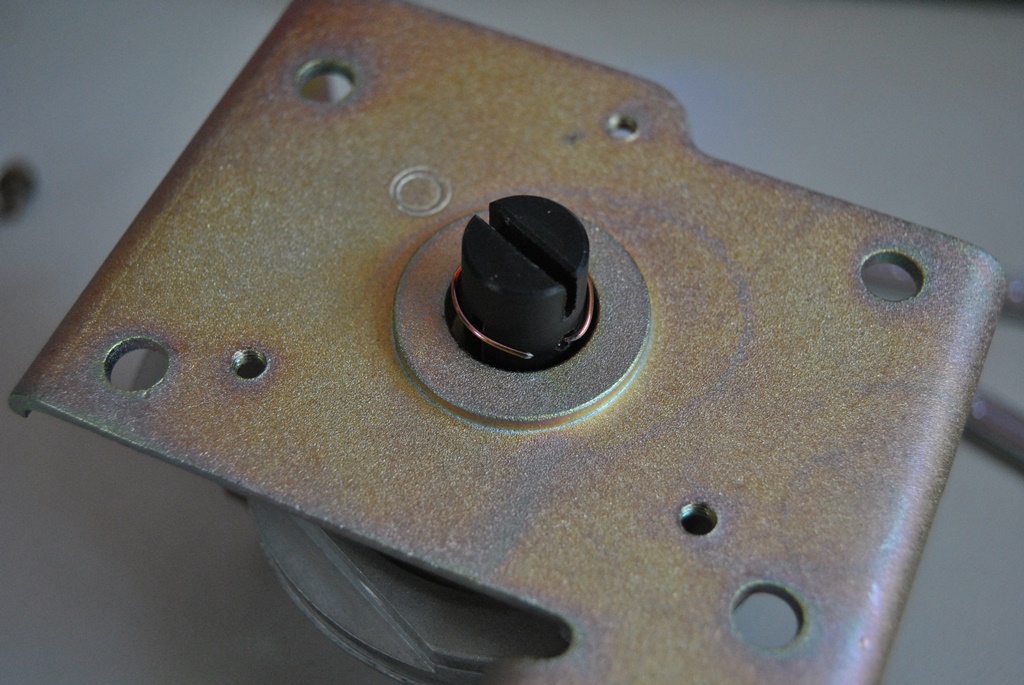
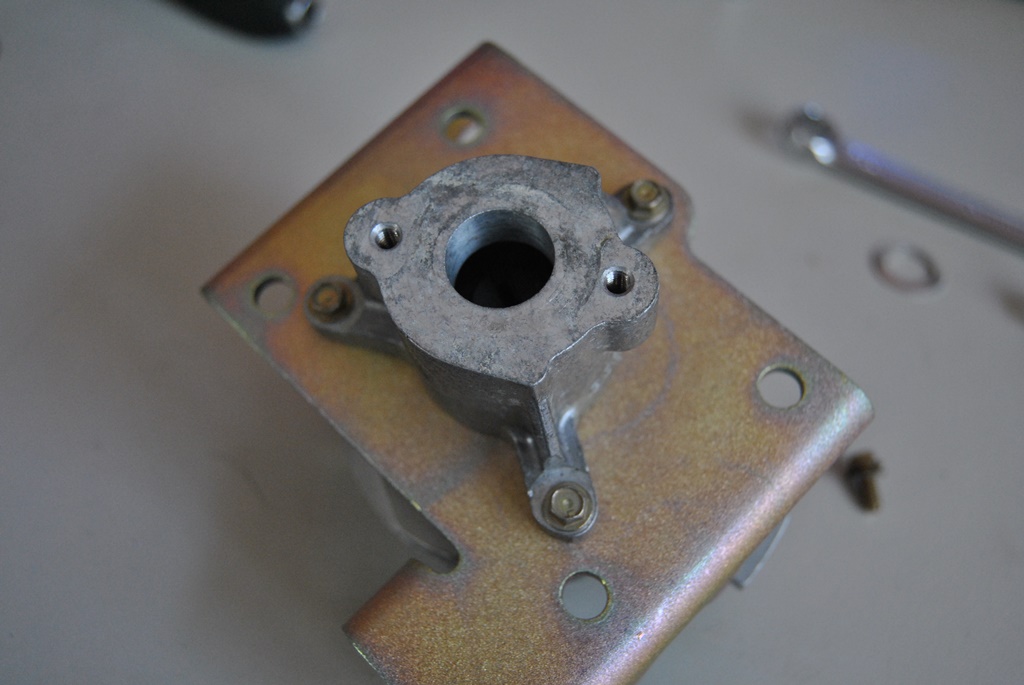
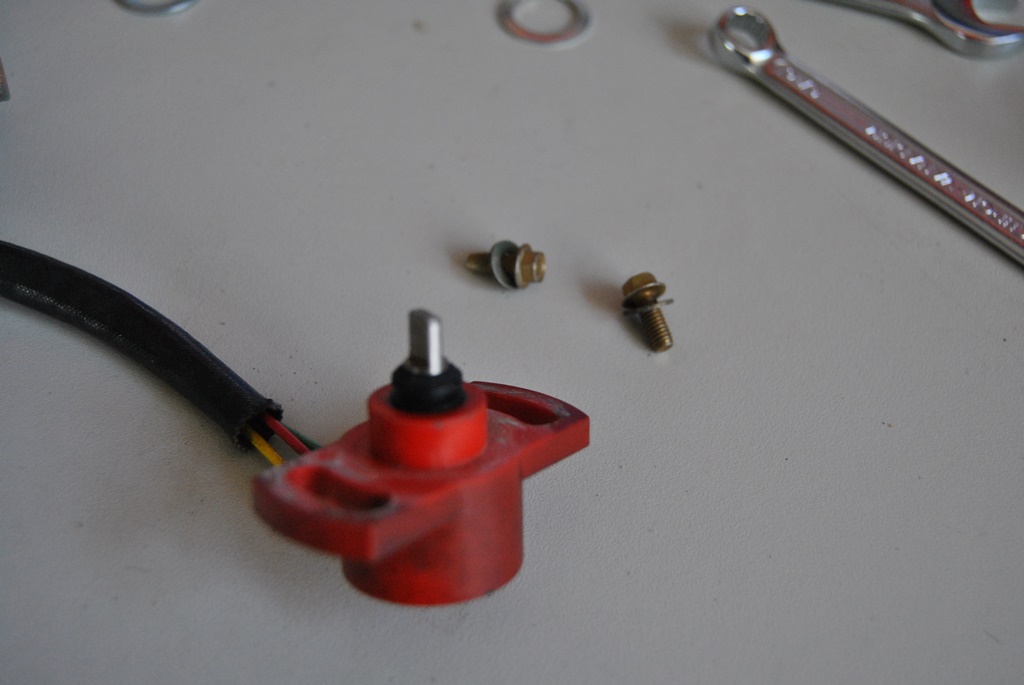
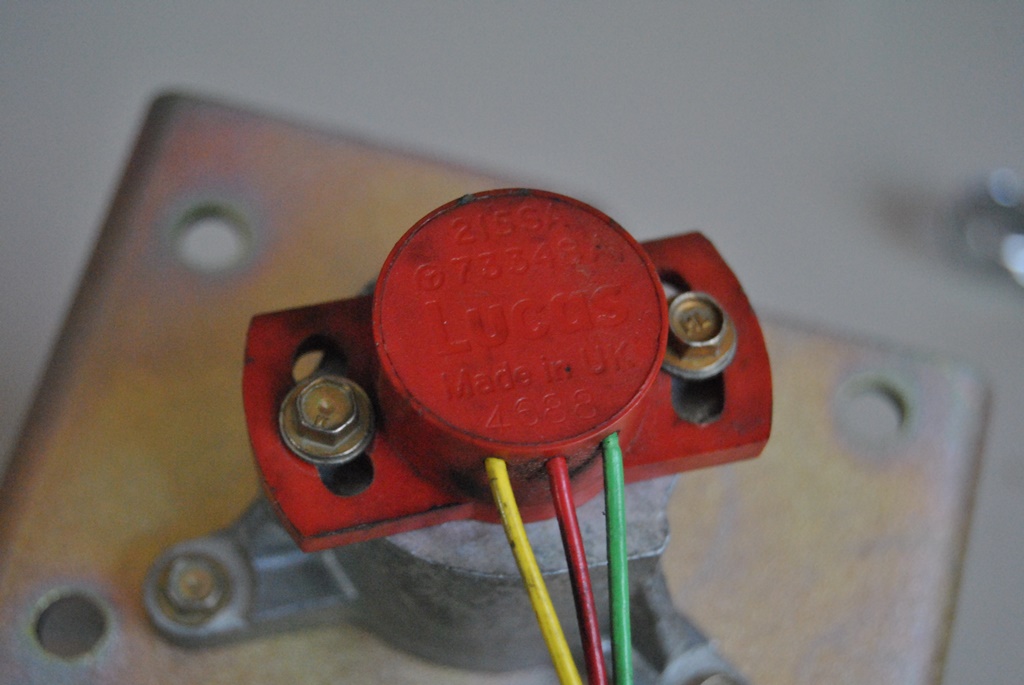
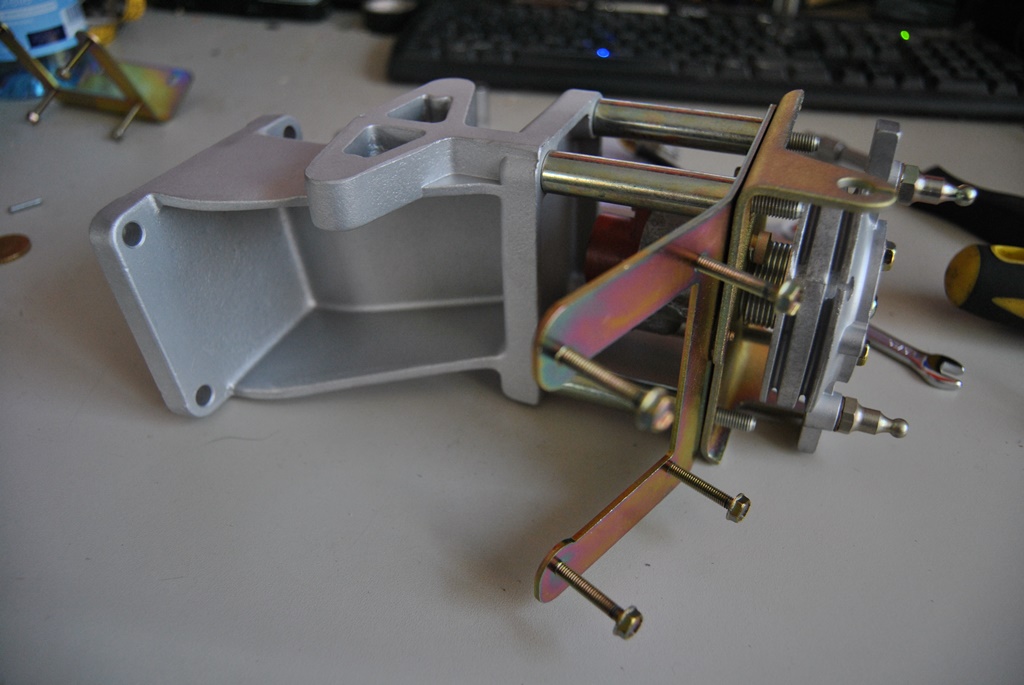
I've refurbished the entire throttle pedastal part. Steel plates have been zinc plated again, aluminium parts glass bead blasted, new screws where possible, new distances pieces, ...
Looks quite nice now... Nice and shiney! Just how it might have looked as it was new... I doubt it was that shiney but somewhere in this area


Time to post something more pretty and less dirty
I've refurbished the entire throttle pedastal part. Steel plates have been zinc plated again, aluminium parts glass bead blasted, new screws where possible, new distances pieces, ...
Looks quite nice now... Nice and shiney! Just how it might have looked as it was new... I doubt it was that shiney but somewhere in this area
The following 2 users liked this post by Daim:
Doug (02-09-2017),
Greg in France (02-10-2017)
#142
02-09-2017, 10:08 AM

Veteran Member
Join Date: Jul 2012
Location: Walnut Creek, California
Posts: 6,796
Received 2,399 Likes
on
1,880 Posts
Magnificent restoration work. I am amazed at the complexity of that assembly. I recall messing with a very roughly similar device on a much older USA critter. Mere shaped stampings did it!!! In that case, issue resolved with oils and motion!!
But, this is Jaguar engineering....
The only dampener to my admiration is the reuse of the slot head fasteners. Just a bias against them. Whenever, I encounter them I sub in hex heads or better yet, Allen heads.
Sure do enjoy reading and looking at your presentations. Not to mention, the obvious value to the archives.
Carl
The following 2 users liked this post by JagCad:
Daim (02-09-2017),
orangeblossom (02-17-2017)
#143
02-09-2017, 10:24 AM
The following users liked this post:
orangeblossom (02-17-2017)
#144
02-09-2017, 11:20 AM

Veteran Member
Join Date: Mar 2008
Location: Pacific Northwest USA
Posts: 24,821
Received 10,871 Likes
on
7,150 Posts
The following 3 users liked this post by Doug:
#145
02-09-2017, 11:27 AM
Cheers Doug!
I want this car to have a perfect engine bay... When I say perfect, I really do mean perfect. When I am at a show, I want to be able to open the bonnet and let that engine sparkle and shine... I don't want to be a shame of muck and grime... Not polished up but a clean "honest" engine is what I want. No show winner...
I want this car to have a perfect engine bay... When I say perfect, I really do mean perfect. When I am at a show, I want to be able to open the bonnet and let that engine sparkle and shine... I don't want to be a shame of muck and grime... Not polished up but a clean "honest" engine is what I want. No show winner...
The following users liked this post:
orangeblossom (02-17-2017)
#146
02-09-2017, 03:13 PM
Veteran Member
The following 3 users liked this post by warrjon:
#147
02-09-2017, 04:10 PM
I doubt that. I just want a pretty, presentable engine bay... But then I get too carried away with the details... My old C30 was the same. The engine was still clean after 125k miles... Not because I was always cleaning it, but I was changing parts and replacing seals before they were due... Undercarriage was spotless and rustfree... All showed up on sale... Was worth a few grand more than comparable cars of the same age...
The following users liked this post:
orangeblossom (02-17-2017)
#148
02-17-2017, 10:45 AM
As per this thread: https://www.jaguarforums.com/forum/x...attern-176777/ I am adding it to my resto thread...:
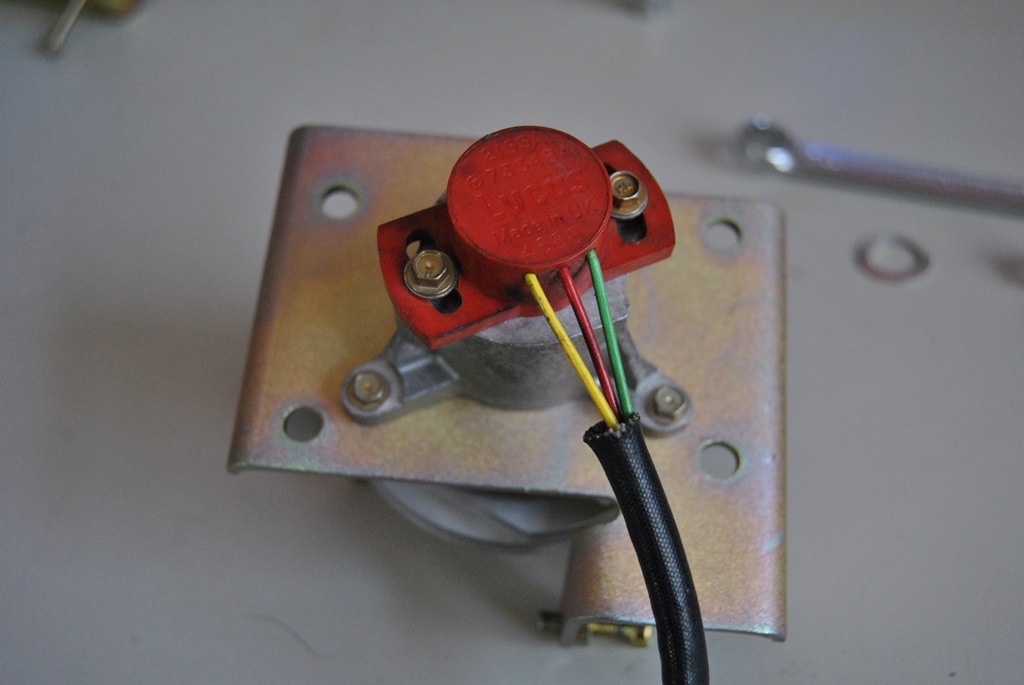
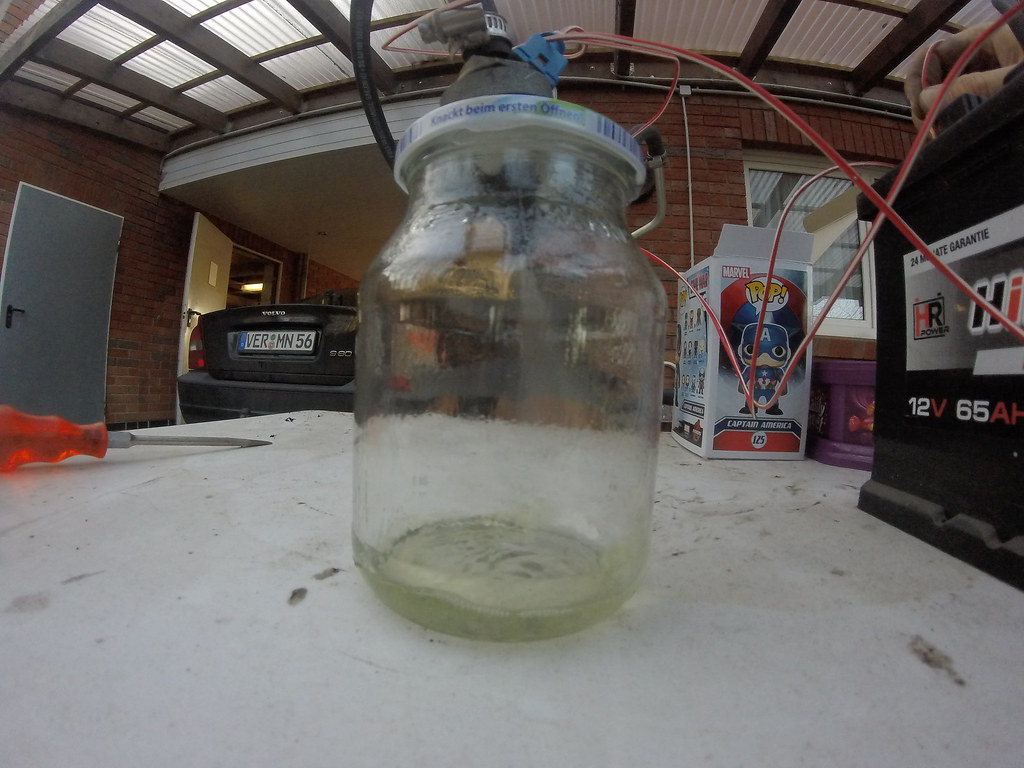
I'm not a lazy person but I really didn't want to have to do this. My fuel injection system is now 28 years old. It has also seen the days of leaded fuel (and has had it, as you can find some residue in certain areas) - even though the car didn't need it - ever. So I started to take the injector rail apart and built a cleaning unit.
First flooded the injectors with an injector cleaner (Liqui Moly Injection cleaner) and let it soak over night.
The next day I built a proper test rig... With fuel pump, pressure regulator, hoses, fuel tank (canister), battery and co... All worked well.
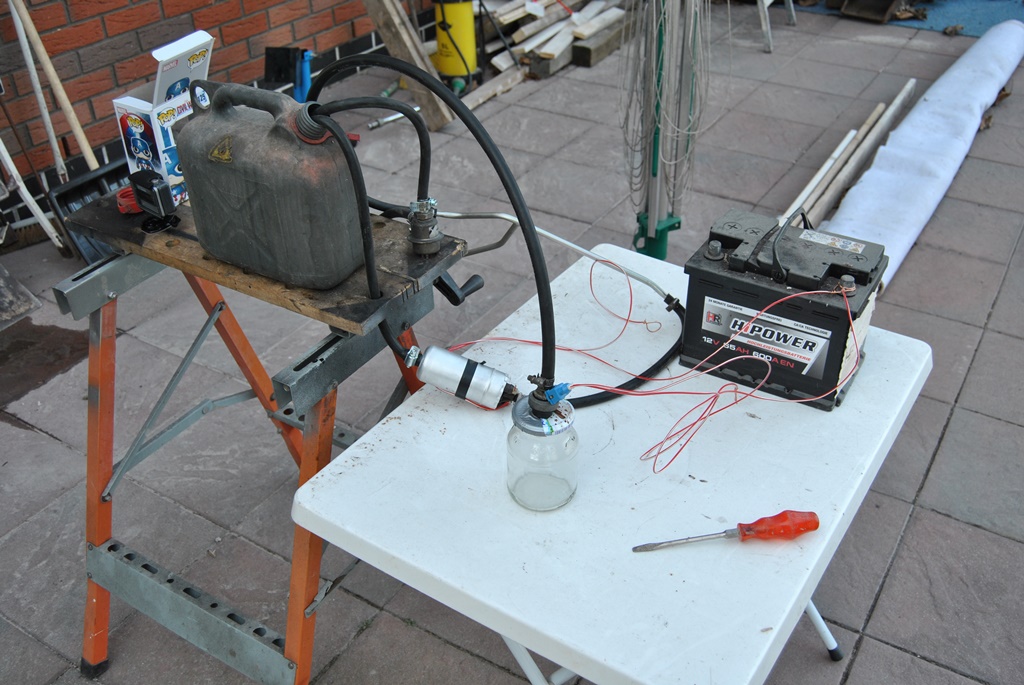
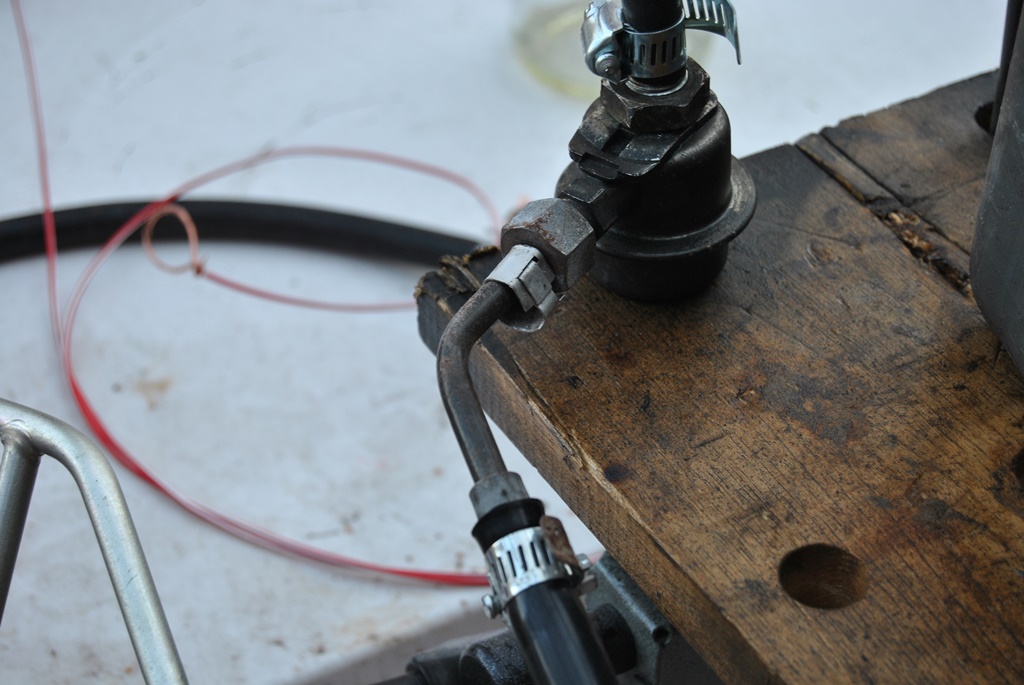
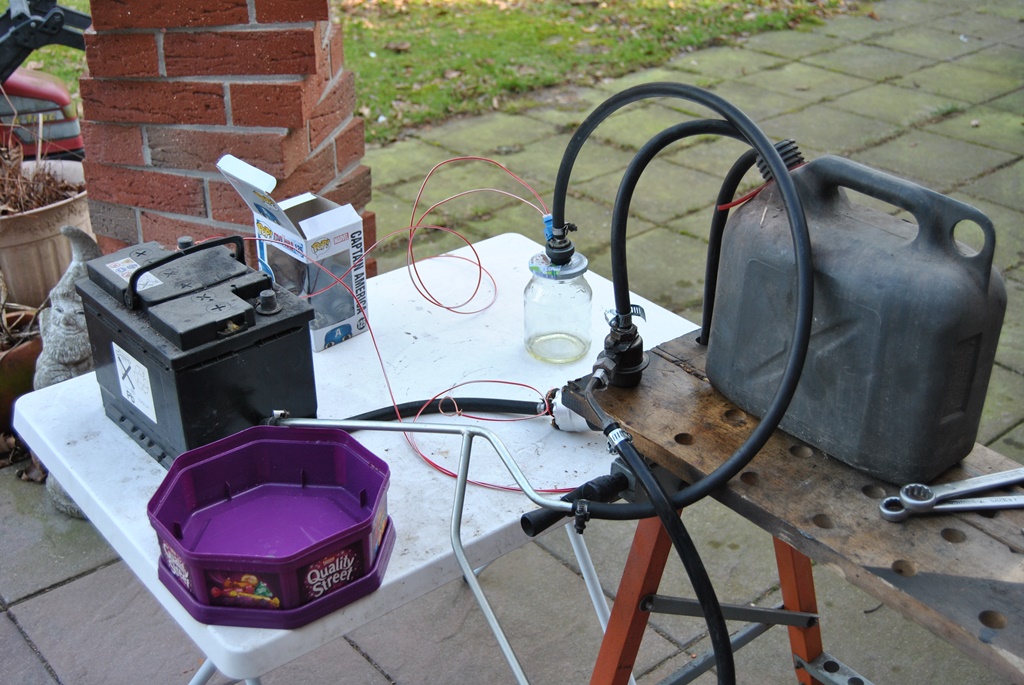

Here now in video form. The first video shows an injector being forcefed with the cleaning agent. The second video shows my second test bed with fuel pump and co. The third video shows the injector working with proper fuel pressure and producing a good spray.
Here a picture of the spray/jet of the injector. It isn't perfectly straight, as the injector is sitting on the wonk and it is a "photo burst" picture, so it isn't as sharp as it could be...
I'm not a lazy person but I really didn't want to have to do this. My fuel injection system is now 28 years old. It has also seen the days of leaded fuel (and has had it, as you can find some residue in certain areas) - even though the car didn't need it - ever. So I started to take the injector rail apart and built a cleaning unit.
First flooded the injectors with an injector cleaner (Liqui Moly Injection cleaner) and let it soak over night.
The next day I built a proper test rig... With fuel pump, pressure regulator, hoses, fuel tank (canister), battery and co... All worked well.
Here now in video form. The first video shows an injector being forcefed with the cleaning agent. The second video shows my second test bed with fuel pump and co. The third video shows the injector working with proper fuel pressure and producing a good spray.
Here a picture of the spray/jet of the injector. It isn't perfectly straight, as the injector is sitting on the wonk and it is a "photo burst" picture, so it isn't as sharp as it could be...
The following users liked this post:
orangeblossom (02-17-2017)
#149
02-17-2017, 05:18 PM
Veteran Member
The following 2 users liked this post by ericjansen:
Daim (02-18-2017),
orangeblossom (02-17-2017)
#150
02-18-2017, 12:32 PM
I like the weekend... I can act busy
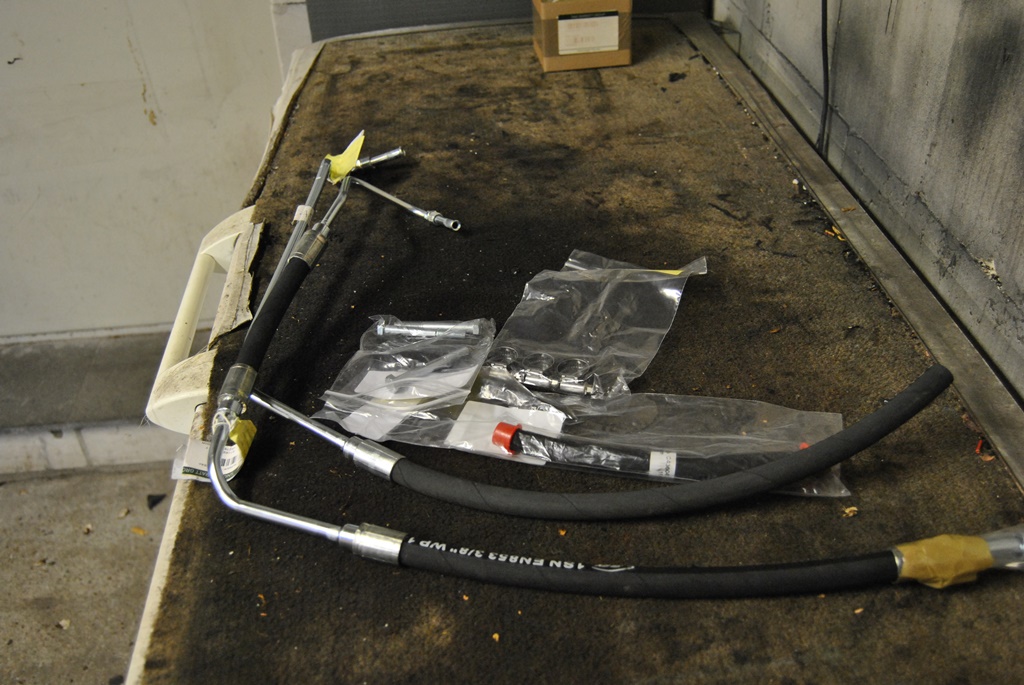
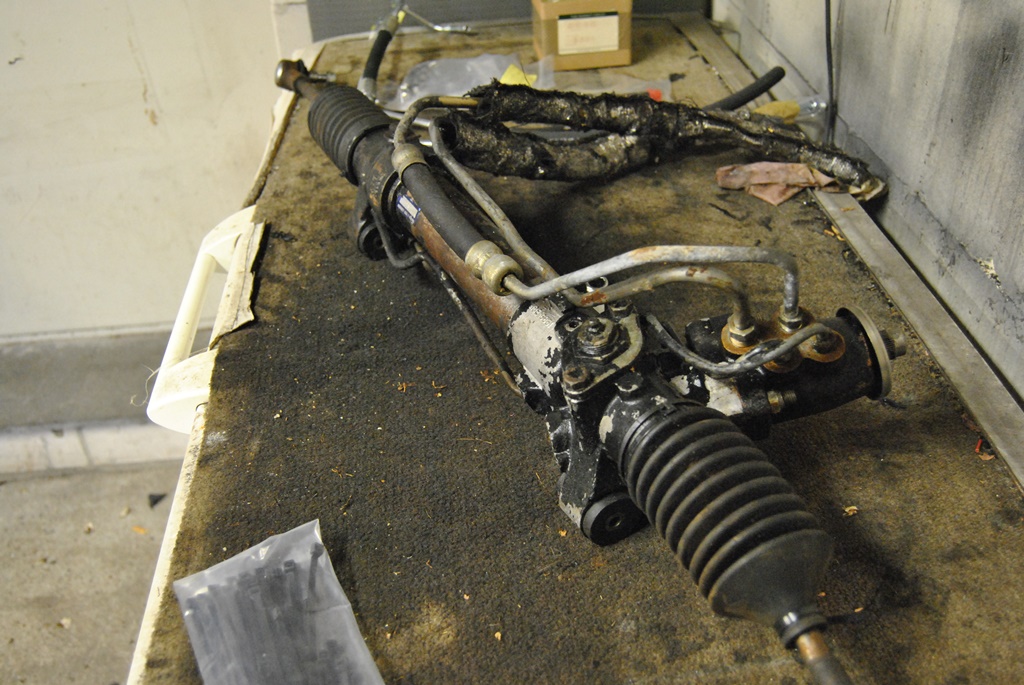
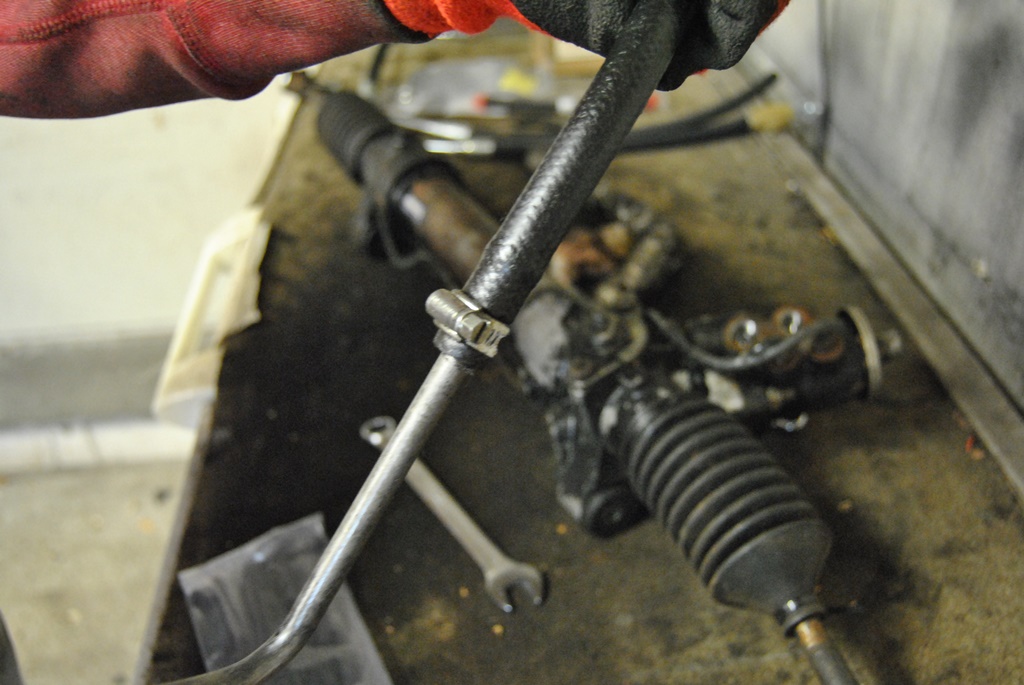
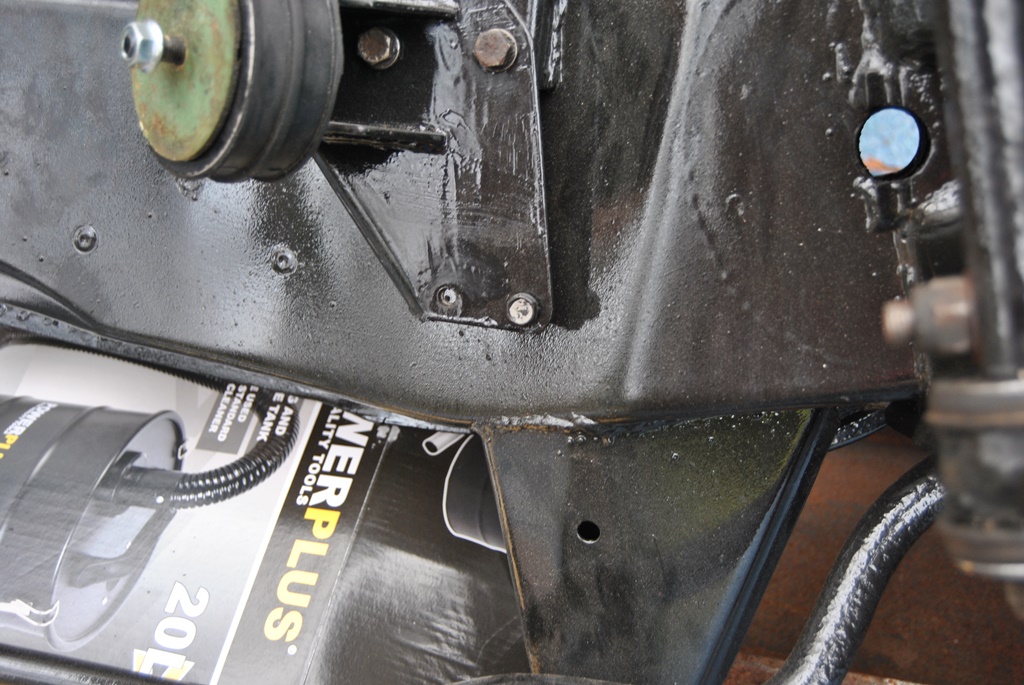
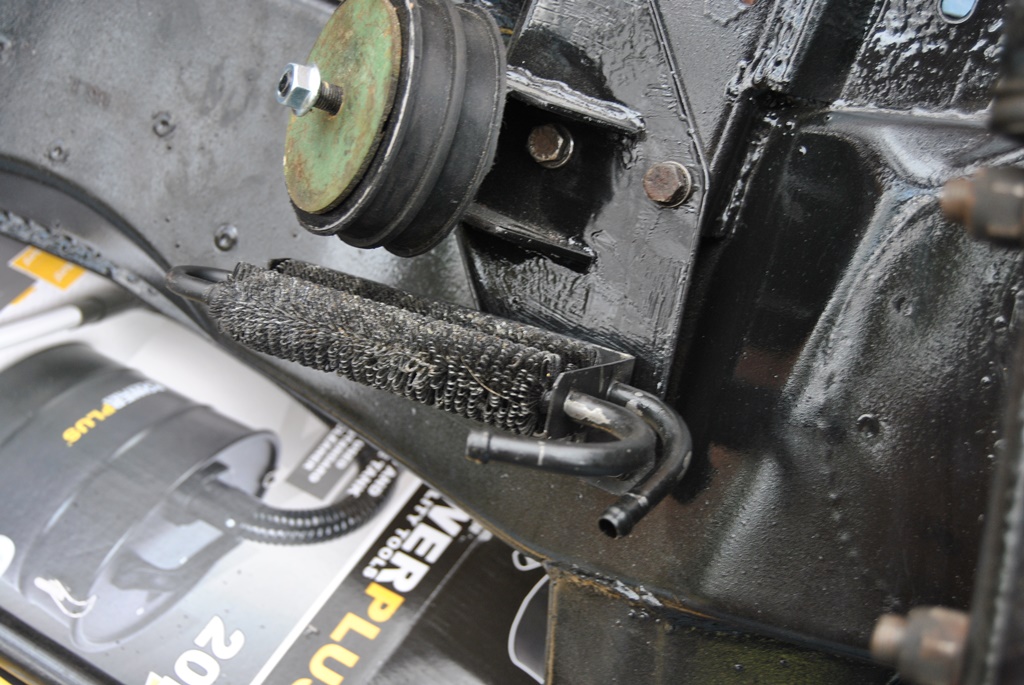
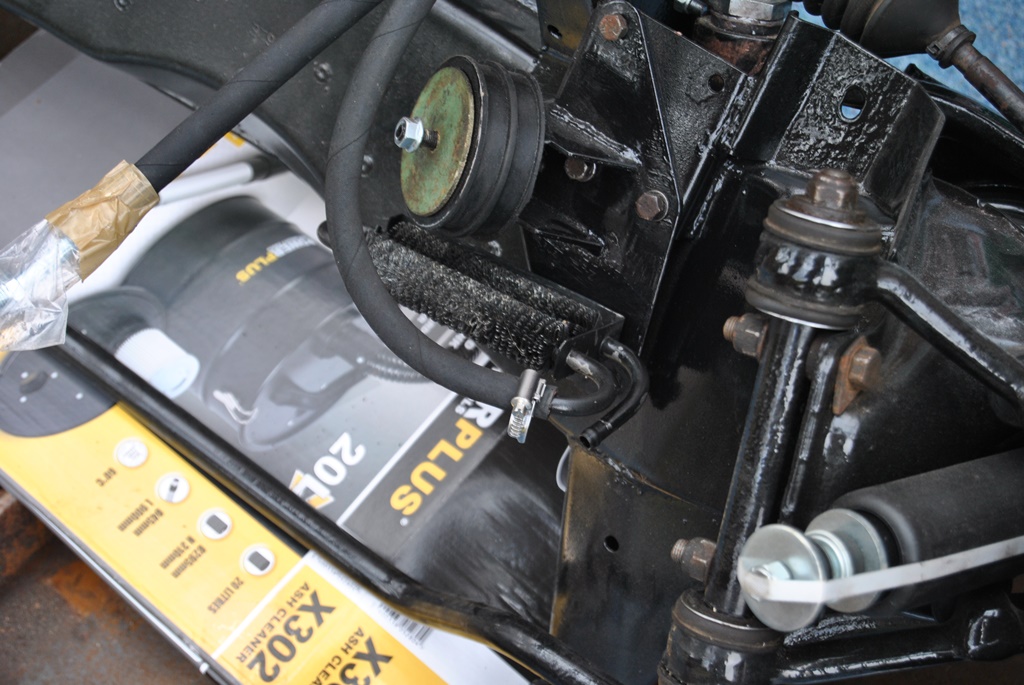
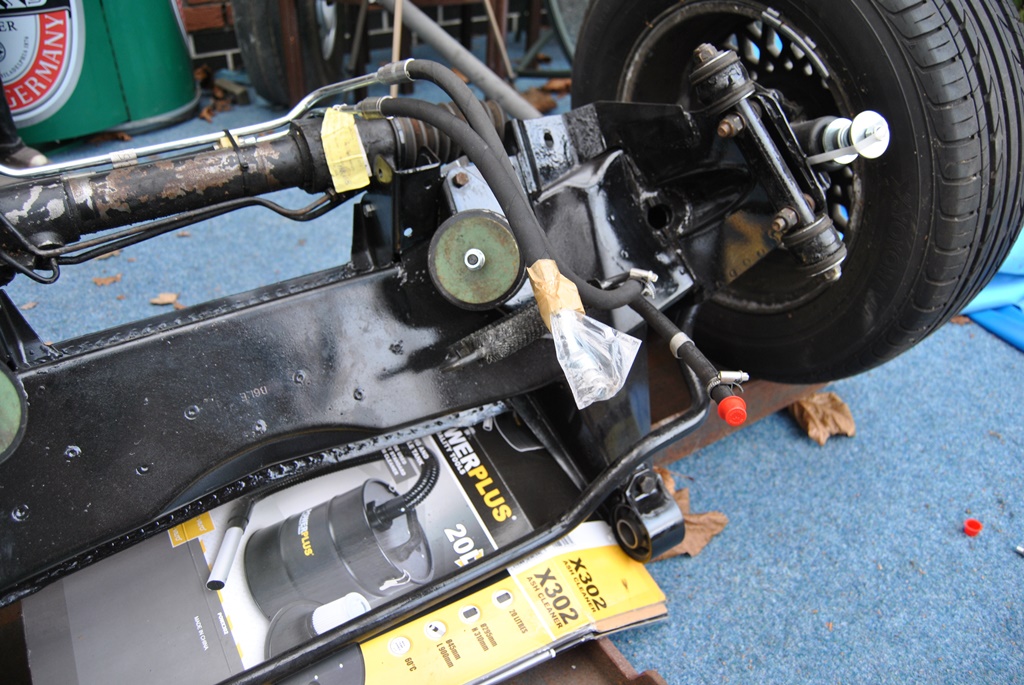
So, fitted the power steering rack today. New hoses, I love new hoses... YES! Brand new power steering hoses. Not original, but nearly perfect fit. Requires a little bending to make them fit right, but I'd say, considering the price, that they are okay. The old ones were bodged so badly.
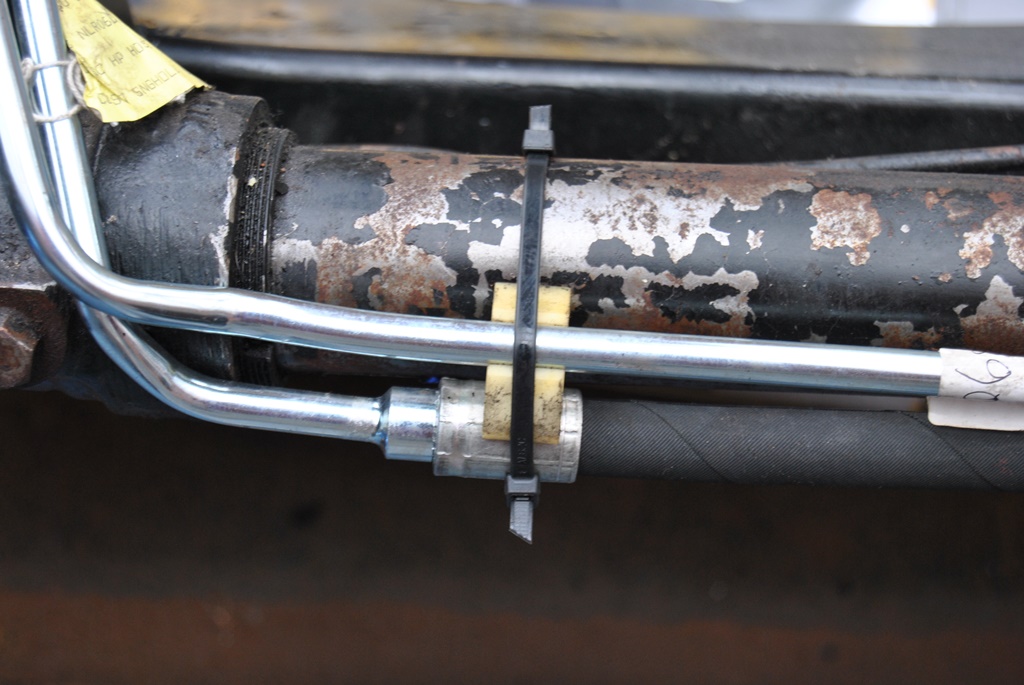
The return hose had a hose clamp between the steel pipe and last rubber section. Normally something like that is stupid, as the hose can pop off easily (no raised section around the "waist" for a clamp to slide against) and then you can imagine how fun that would be!")
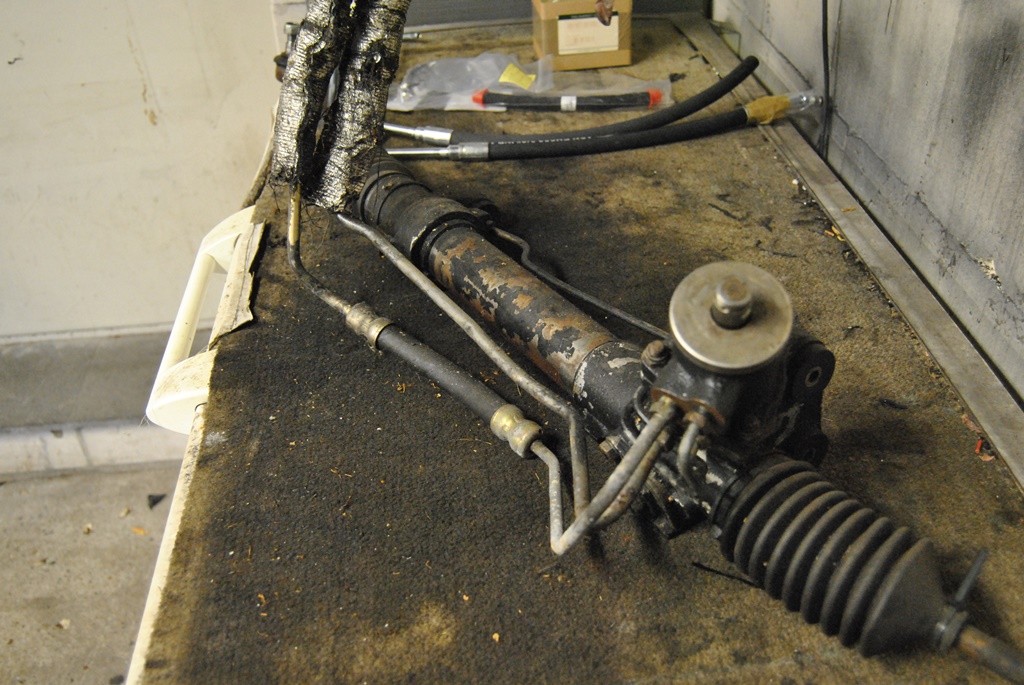
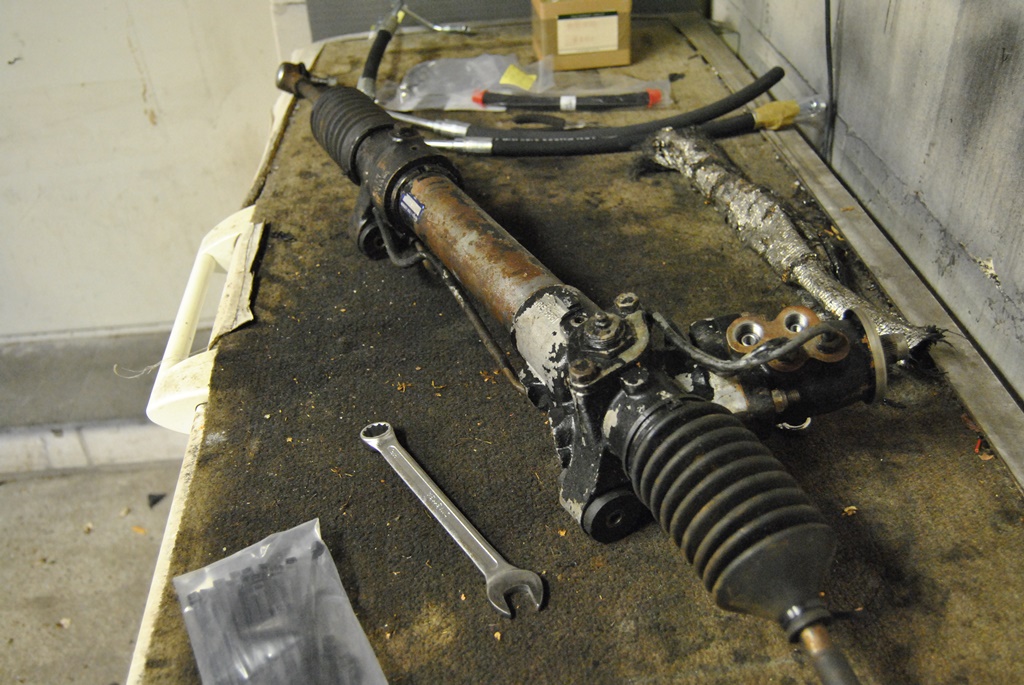
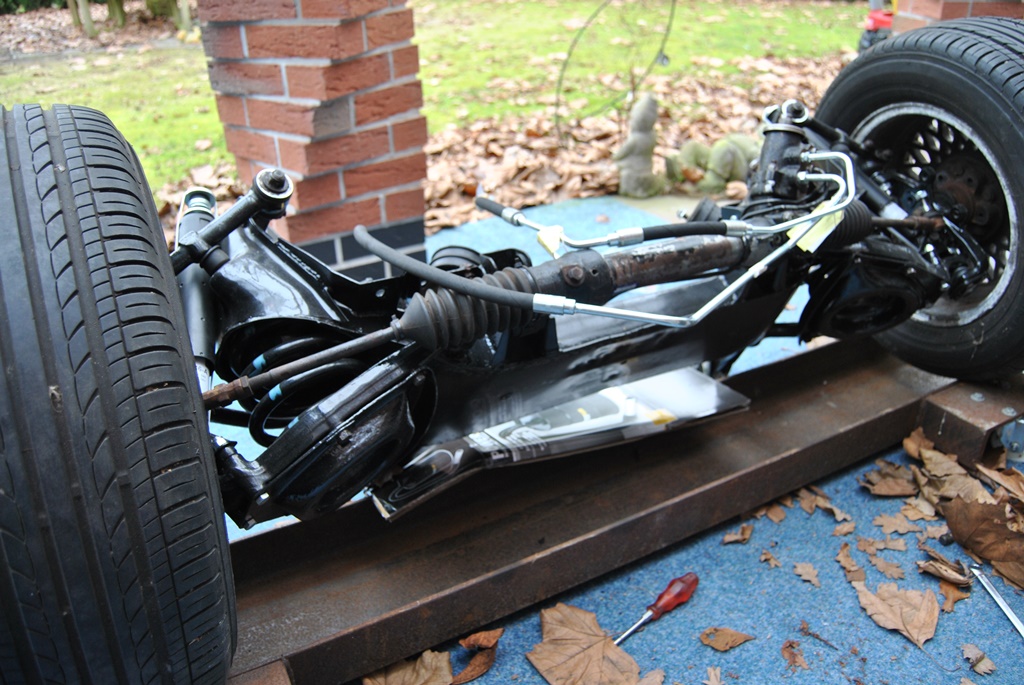
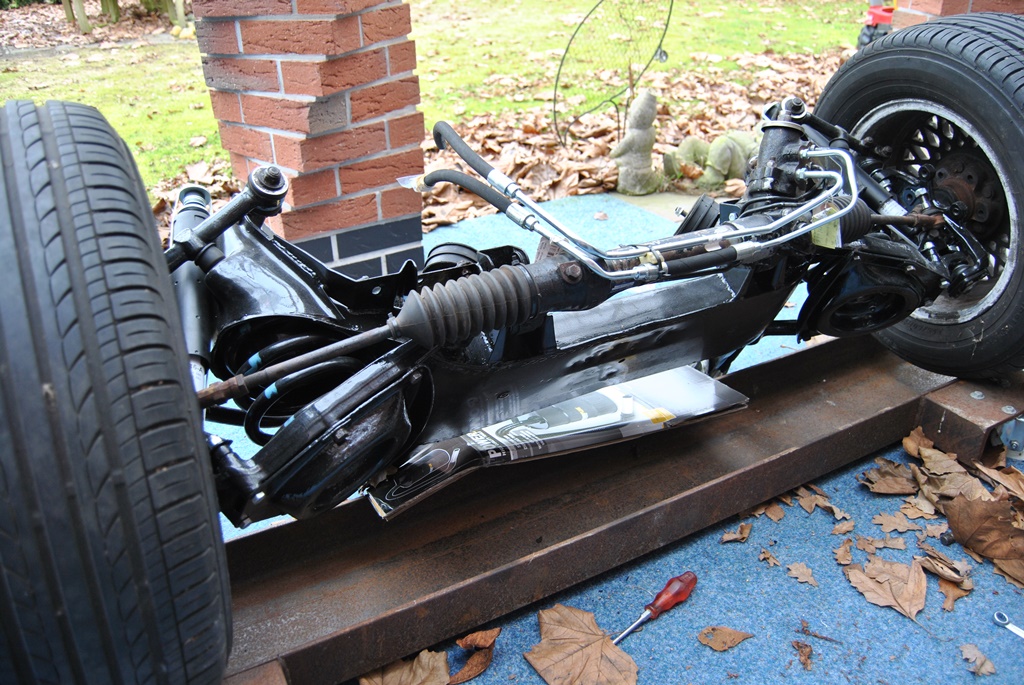
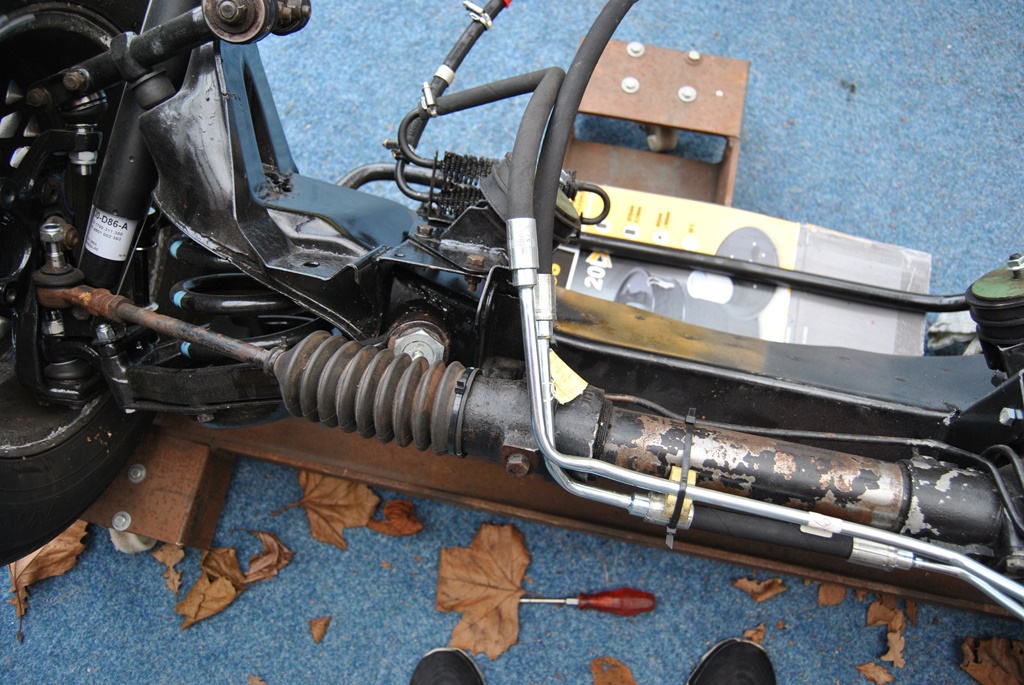
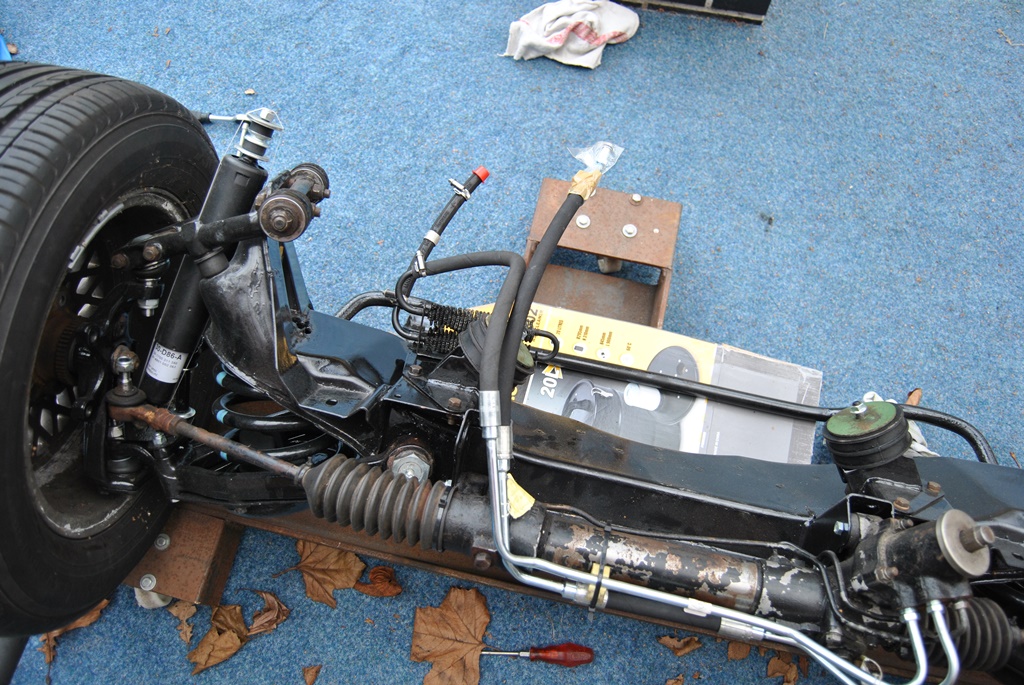
After a little tweaking and bending they all fitted nicely. The PAS cooler was fitted and then the hoses mounted. All prepared to fit in the old gal again. Just need to install the steering arms...
Must get a coat of paint on the steering rack. As it looks rather sad as it is. When it is warmer, I'd throw some POR15 on it. Should look tidier then. Oh, and the heat shields for the hoses. Mine are really worn and falling apart. I pulled one off carefully and all the fibres were falling off... So not that appealing...


So, fitted the power steering rack today. New hoses, I love new hoses... YES! Brand new power steering hoses. Not original, but nearly perfect fit. Requires a little bending to make them fit right, but I'd say, considering the price, that they are okay. The old ones were bodged so badly.
The return hose had a hose clamp between the steel pipe and last rubber section. Normally something like that is stupid, as the hose can pop off easily (no raised section around the "waist" for a clamp to slide against) and then you can imagine how fun that would be!
After a little tweaking and bending they all fitted nicely. The PAS cooler was fitted and then the hoses mounted. All prepared to fit in the old gal again. Just need to install the steering arms...
Must get a coat of paint on the steering rack. As it looks rather sad as it is. When it is warmer, I'd throw some POR15 on it. Should look tidier then. Oh, and the heat shields for the hoses. Mine are really worn and falling apart. I pulled one off carefully and all the fibres were falling off... So not that appealing...
The following users liked this post:
orangeblossom (02-18-2017)
#151
02-18-2017, 01:26 PM
Veteran Member
#152
02-18-2017, 01:30 PM
#153
02-18-2017, 03:37 PM
Veteran Member
The following users liked this post:
Daim (02-18-2017)
#154
02-18-2017, 04:29 PM
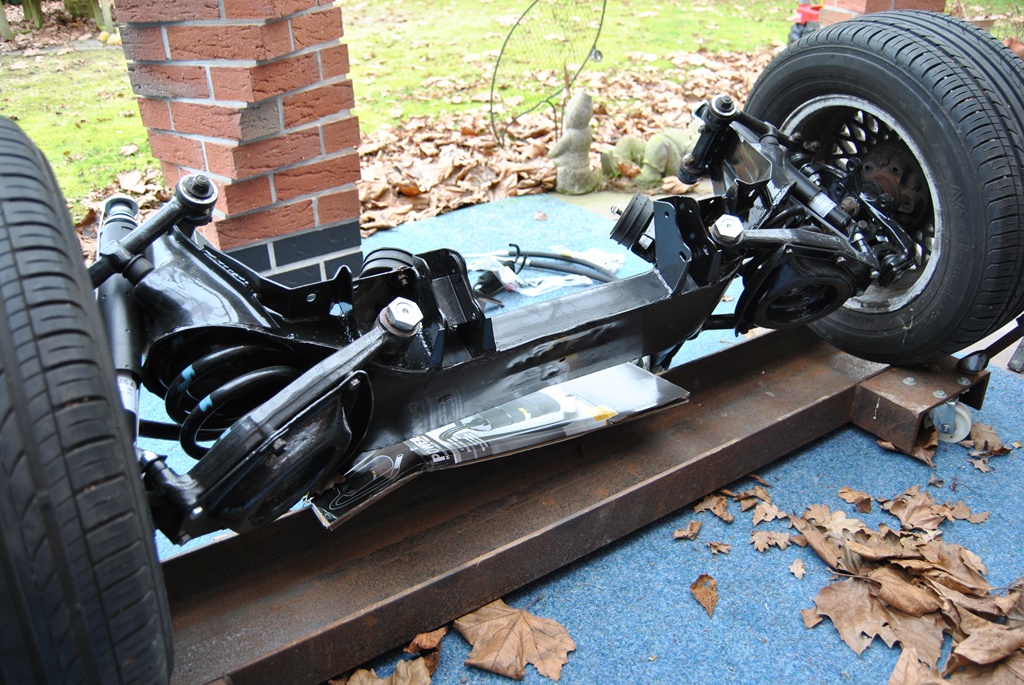
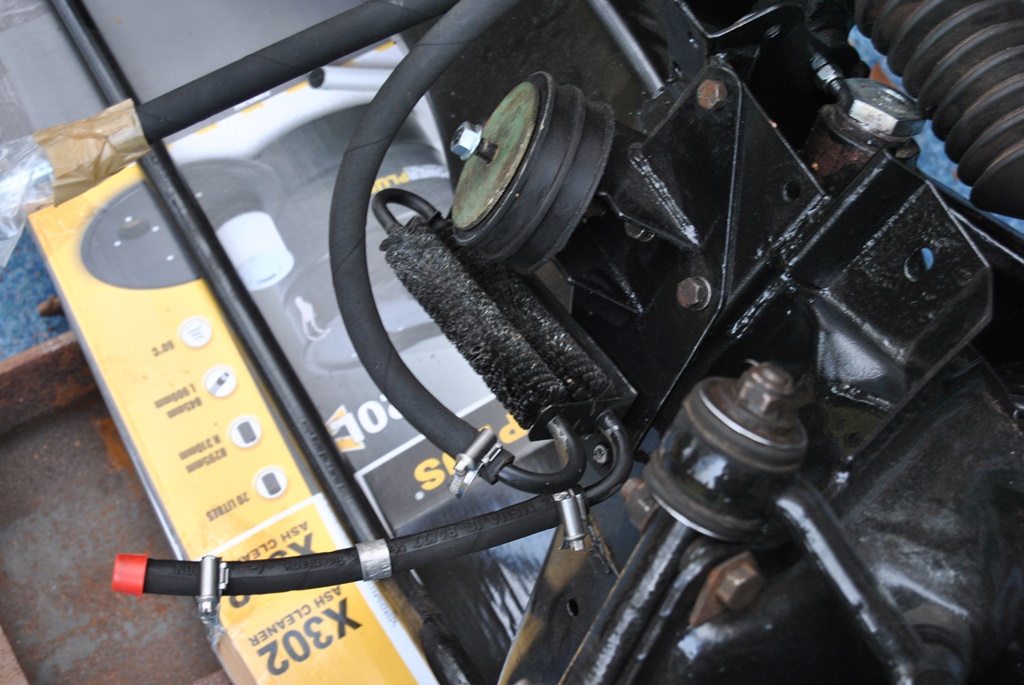
I only used one of the two clips to hold it in place and use to bend. I'll be using some proper clamps to get that tidy, although the X308 uses zip ties/cabke ties for the same job - stoopid car
I had actually considered moving the cooler forwards but then decided that longer hoses would result in the chance for more leaks (i.e. weasels/ferrets biting them - current issues here in the area). So I decided to keep the hoses as short as possible.
I had actually considered moving the cooler forwards but then decided that longer hoses would result in the chance for more leaks (i.e. weasels/ferrets biting them - current issues here in the area). So I decided to keep the hoses as short as possible.
#155
02-27-2017, 12:08 PM
Alaaf! (Cologne'ian greeting for the current "5th season" of the year)
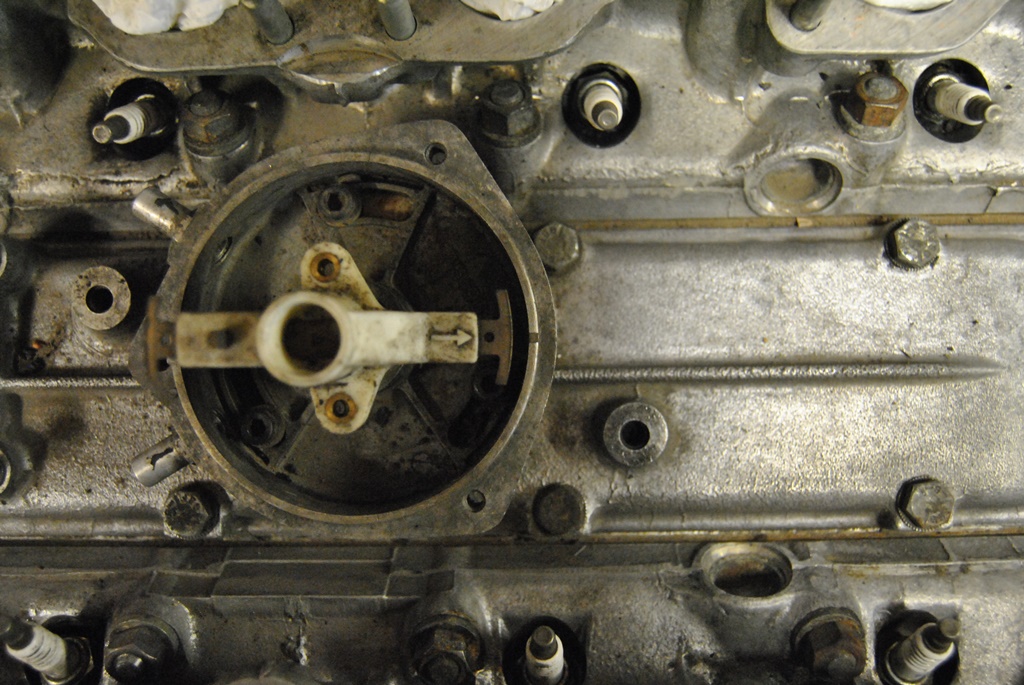
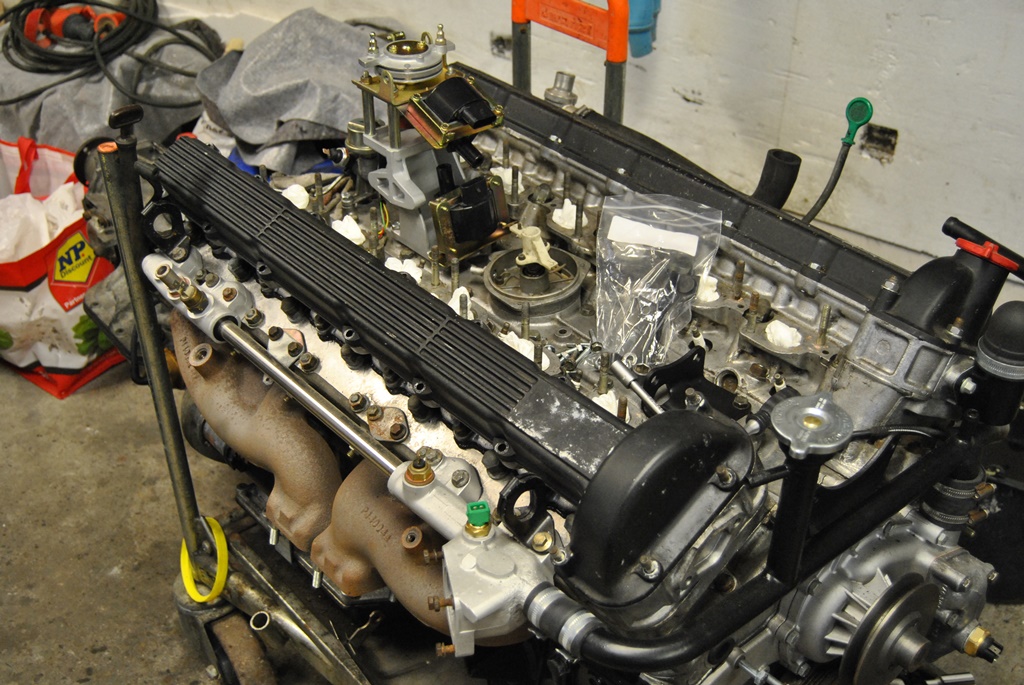
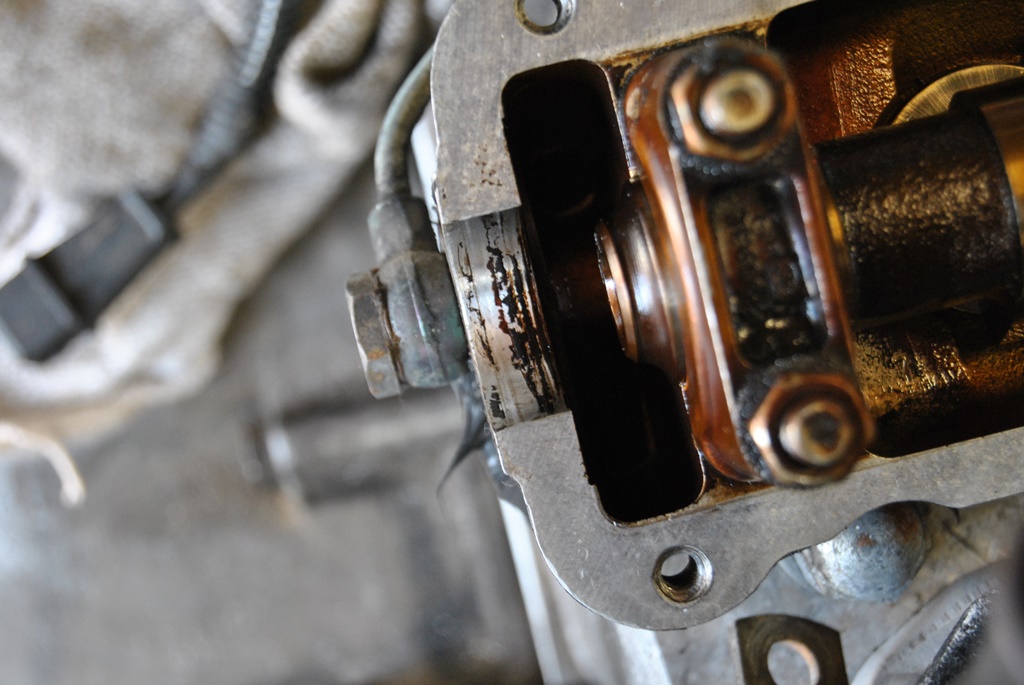
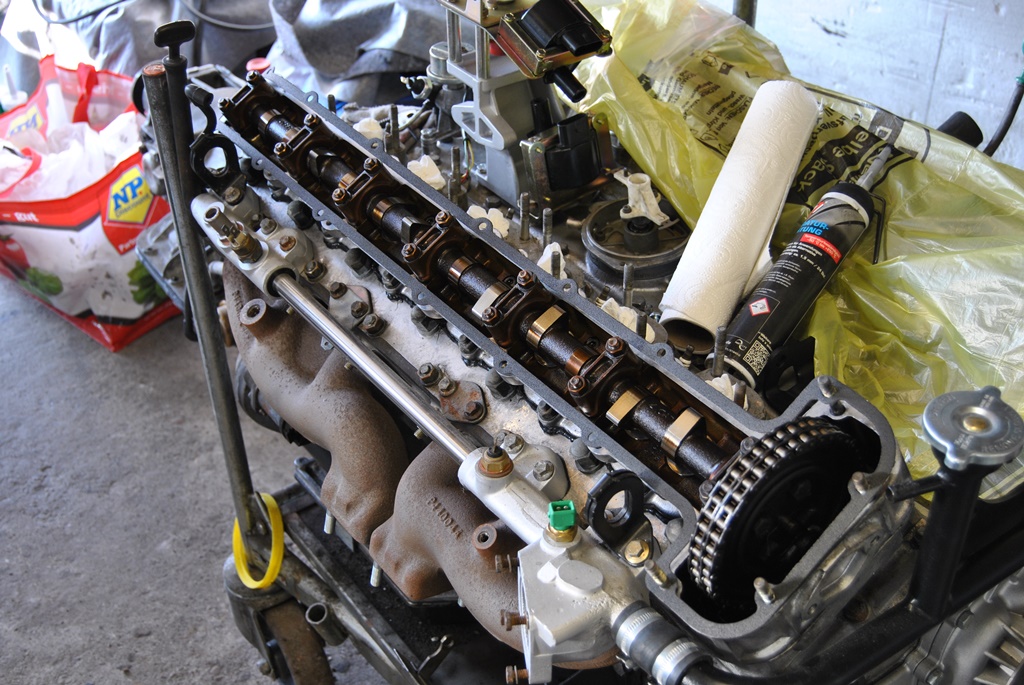
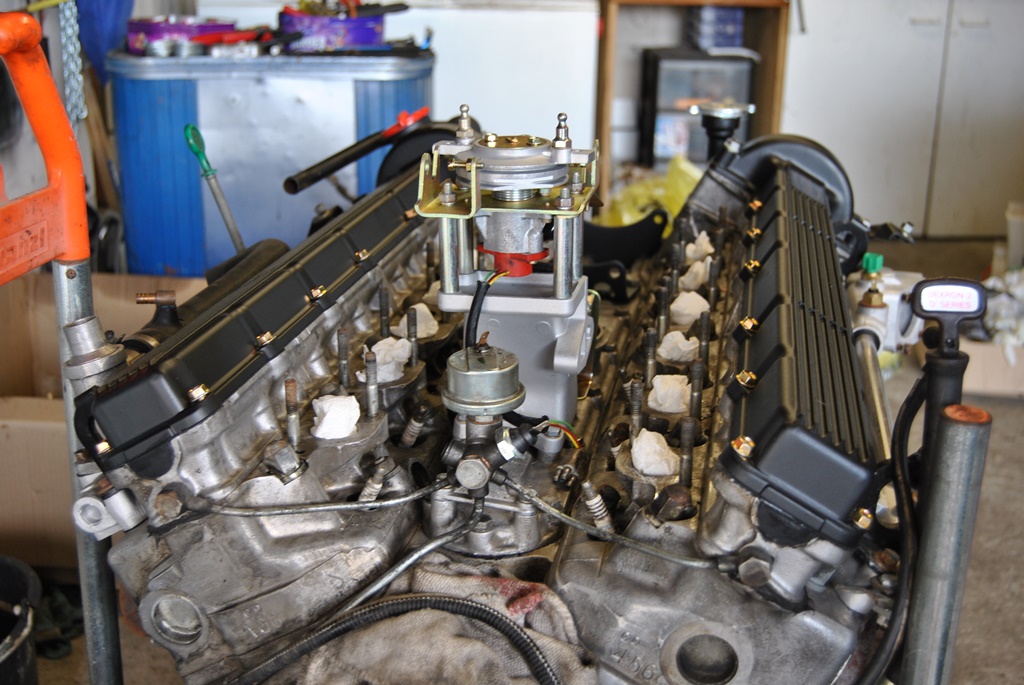
So, I needed to get my V area clean and some gasket there sorted. First needed to get the timing right. As the Marelli ignition is not tricky at all, no need to do much, other than align the markings on the crank shaft pulley (the smaller one for the altenator) with the rotor arm in the dizzy. When done, you can simply undo the dizzy (3 screws) and carefully pull it out...
After that, I removed the V-cover, removed the (rather fresh) silicone gasket I used and replaced it with the proper, modernised rubberised gasket (found on later V12s). Should be more protected against leakages...
This was followed by a new oil pressure switch (the sensor will come a little later) and the installation of the overhauled throttle pedastal assembly. Of course with the ignition coils (at long last). So the V is slowly getting back together again. The brackets for the Harrison A6 compressor have also been tidied up and installed.
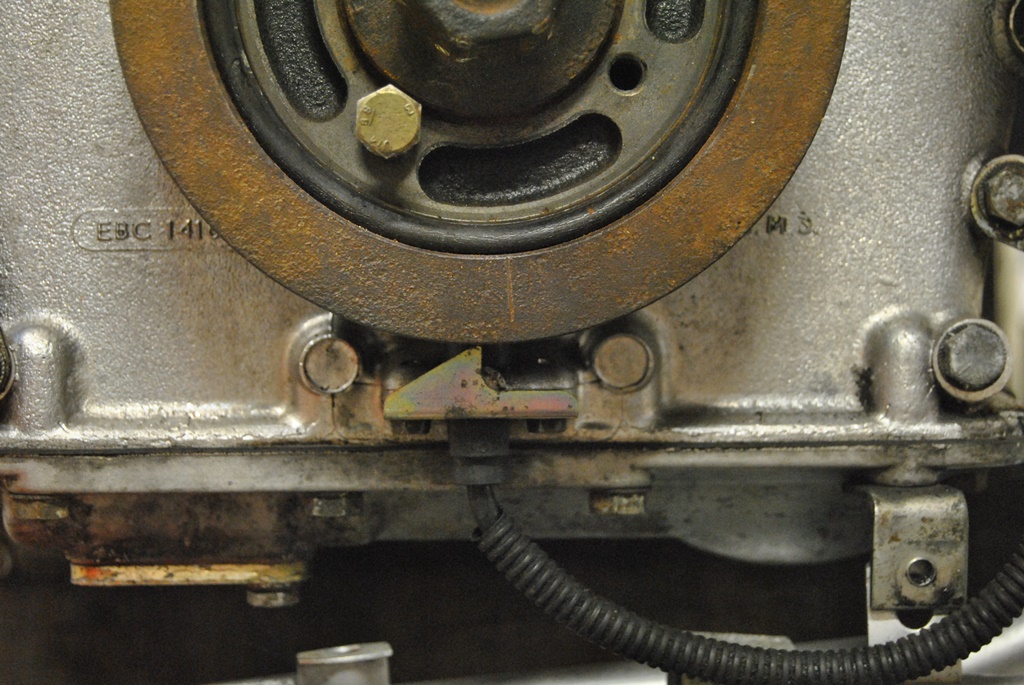
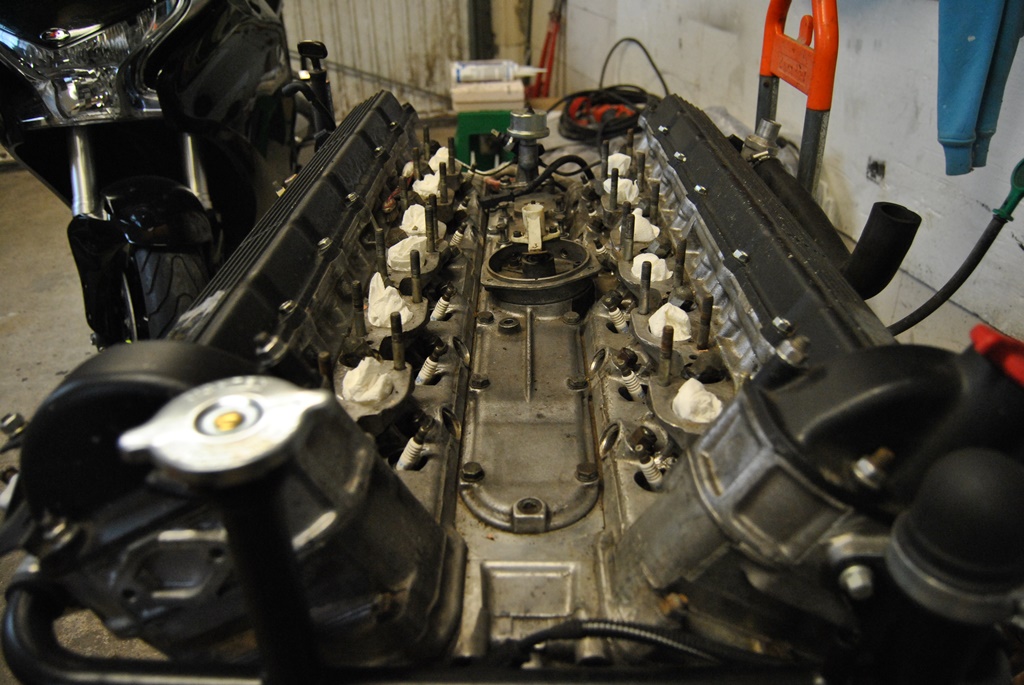
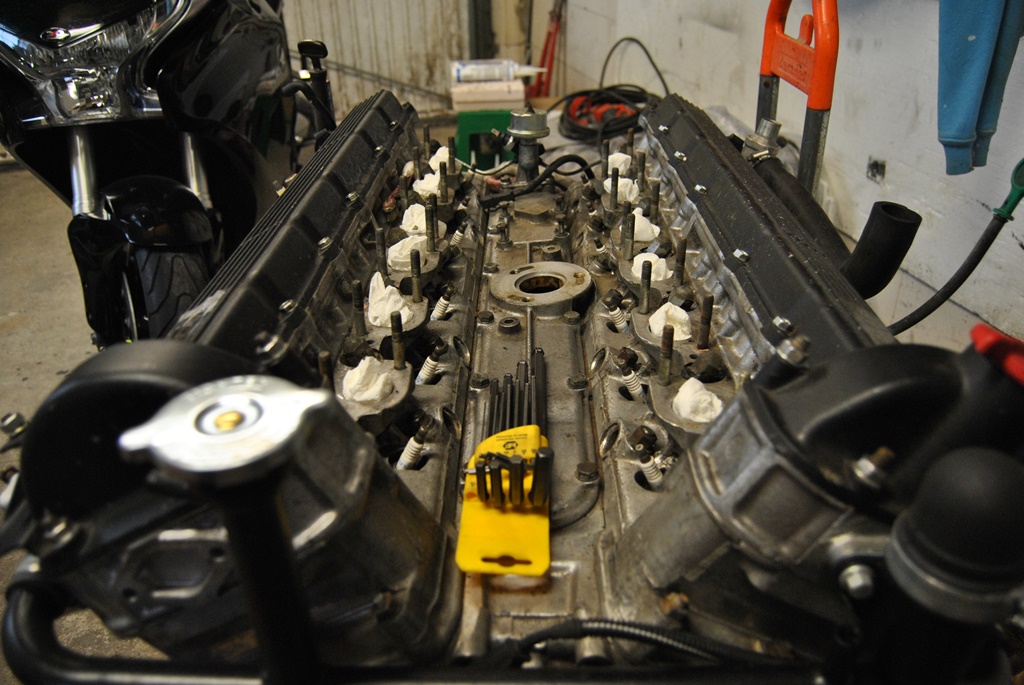
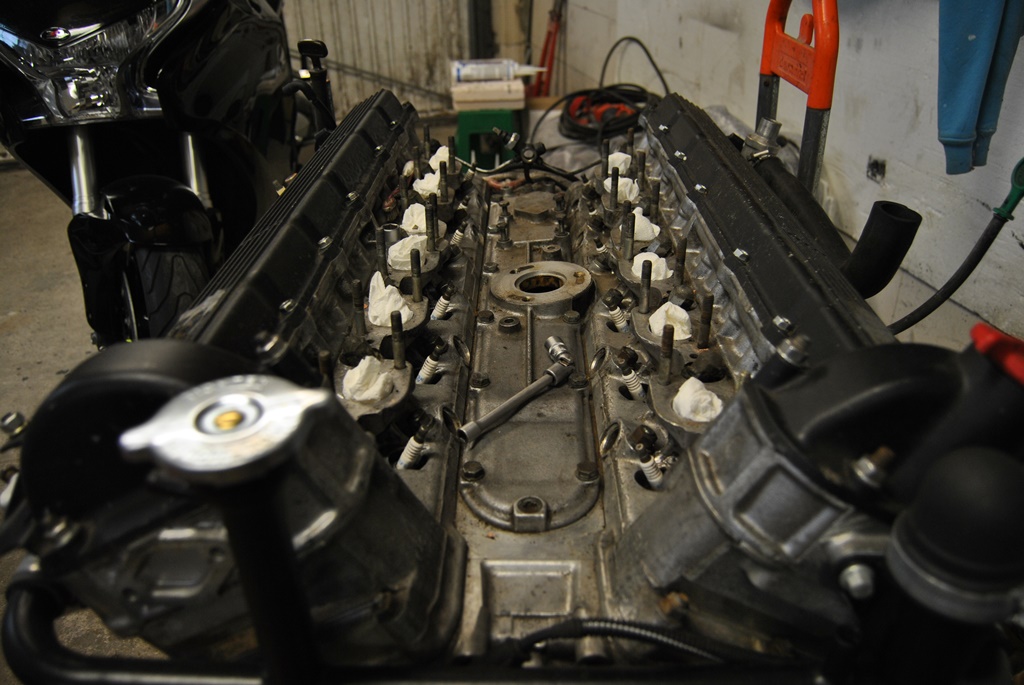
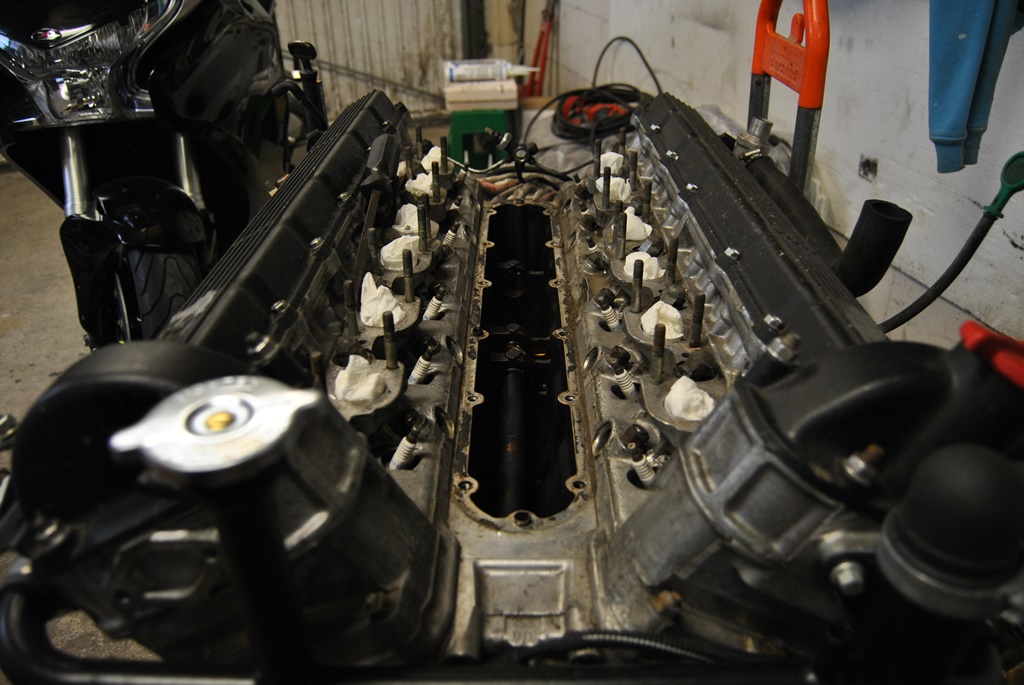
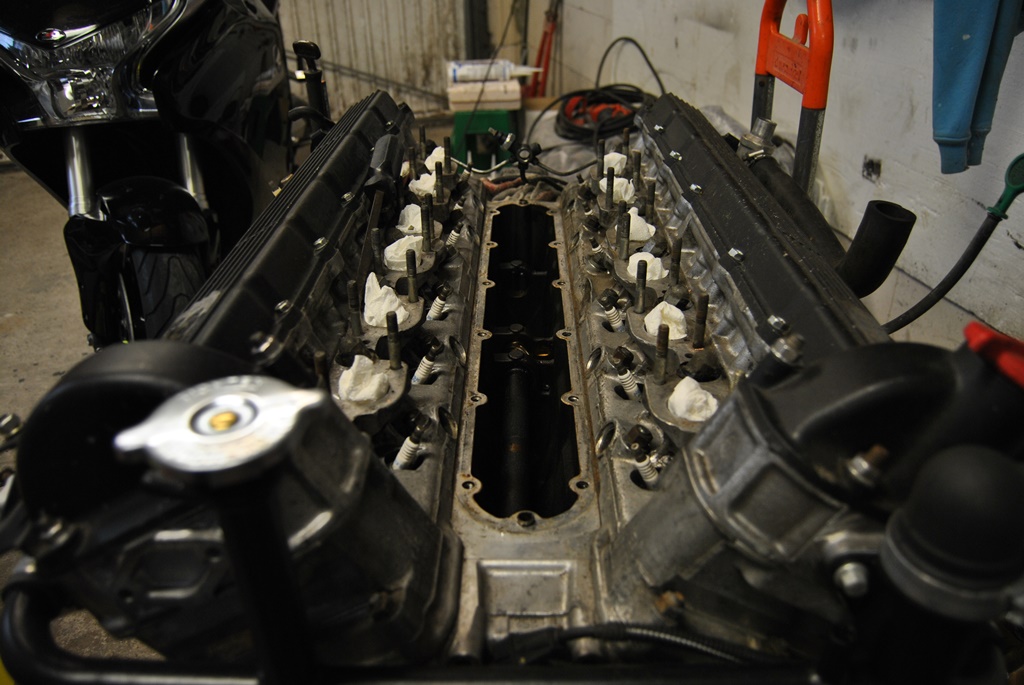
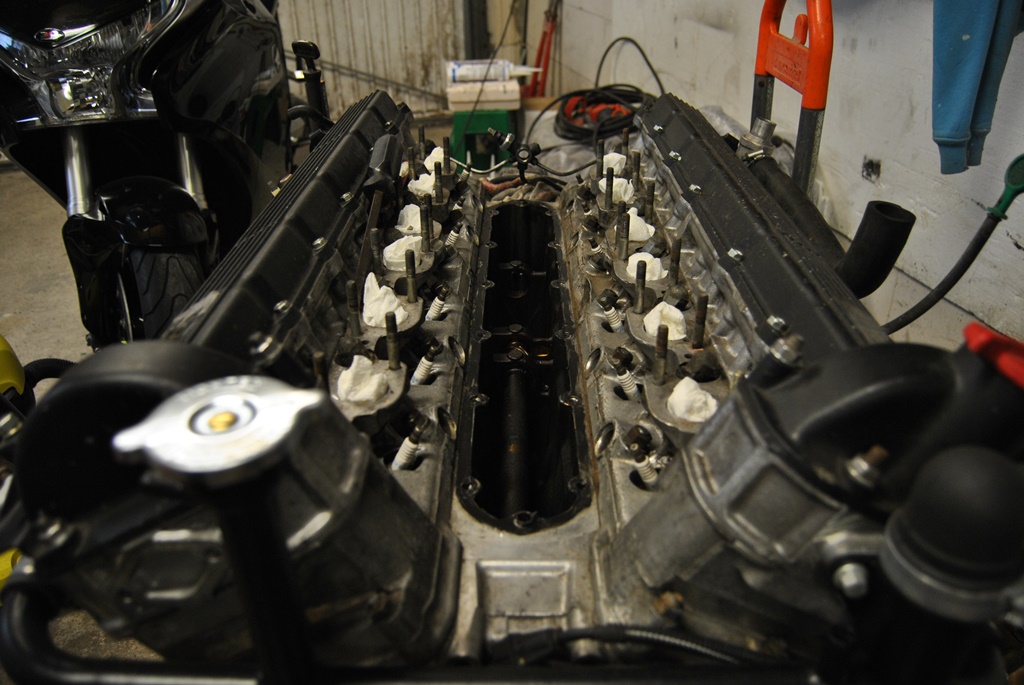
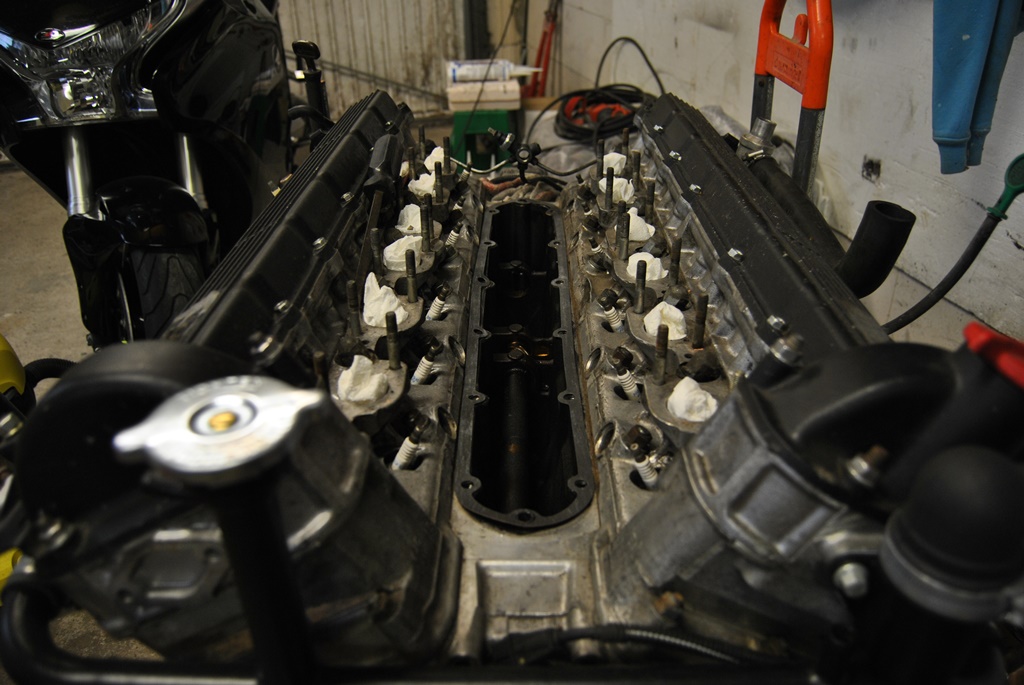

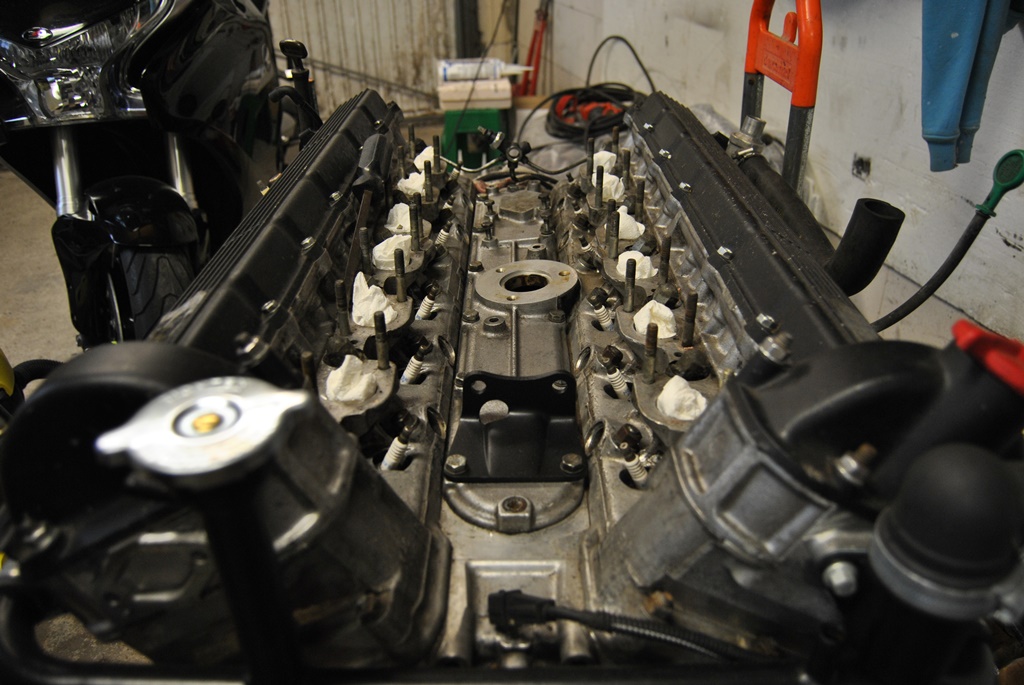


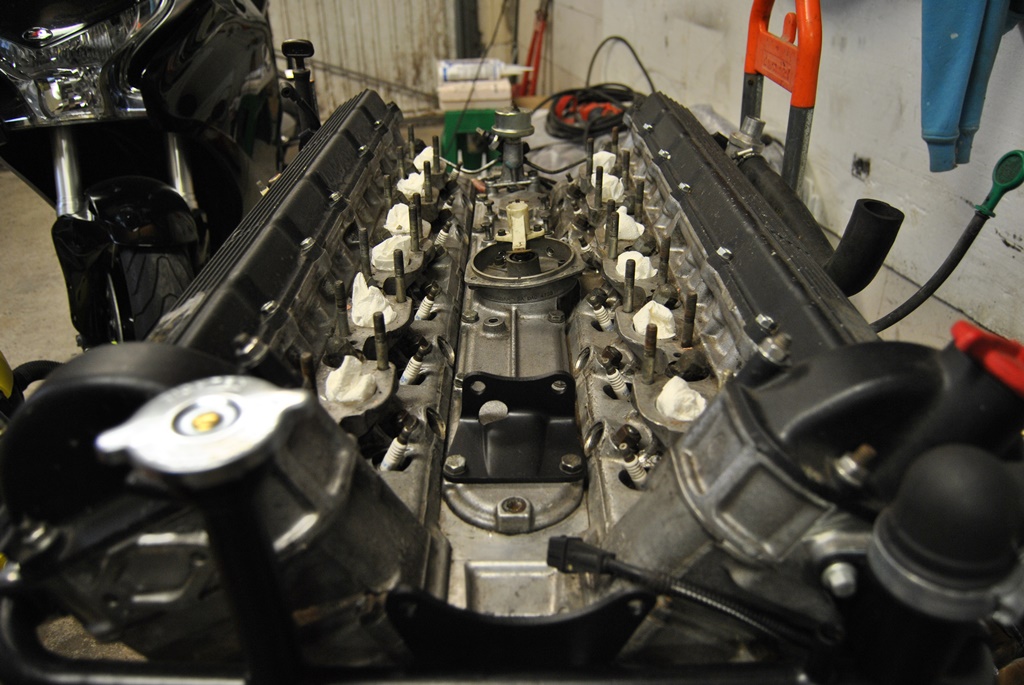
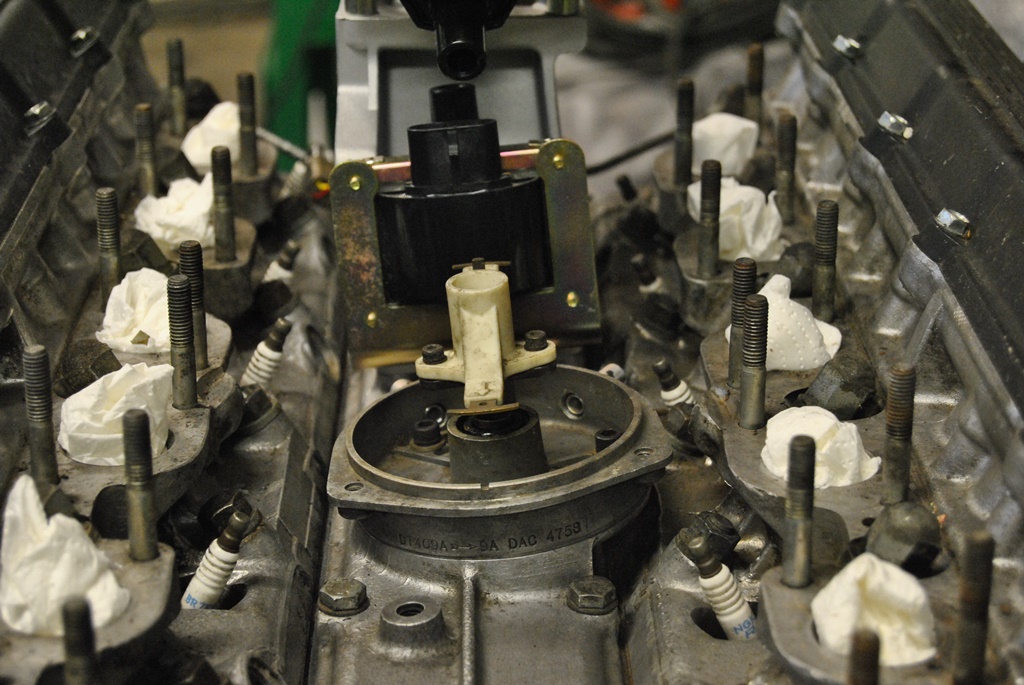
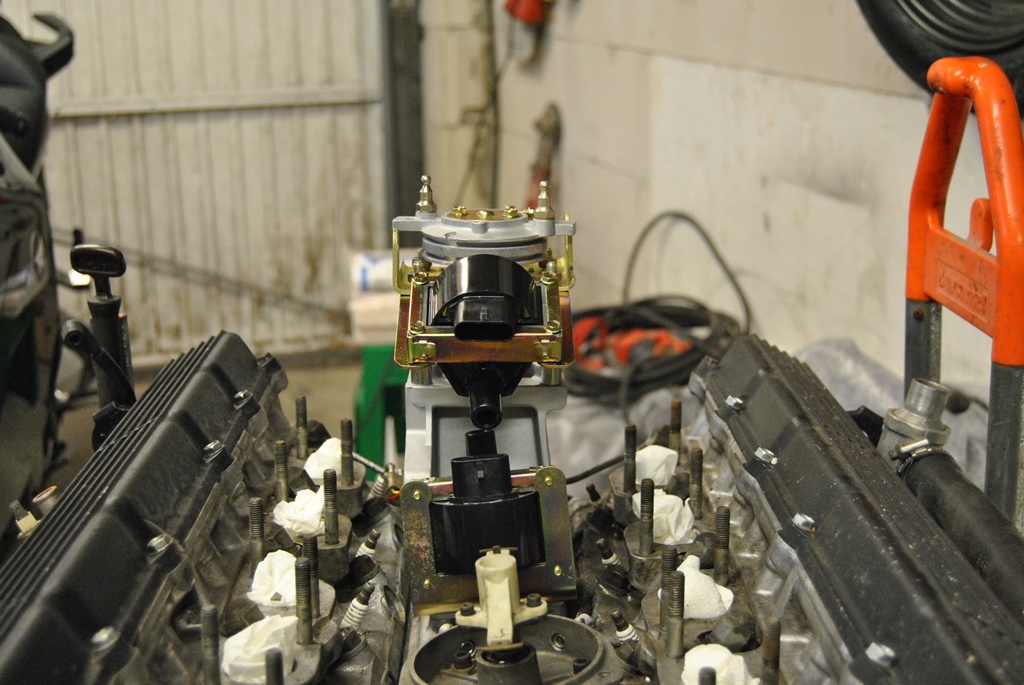
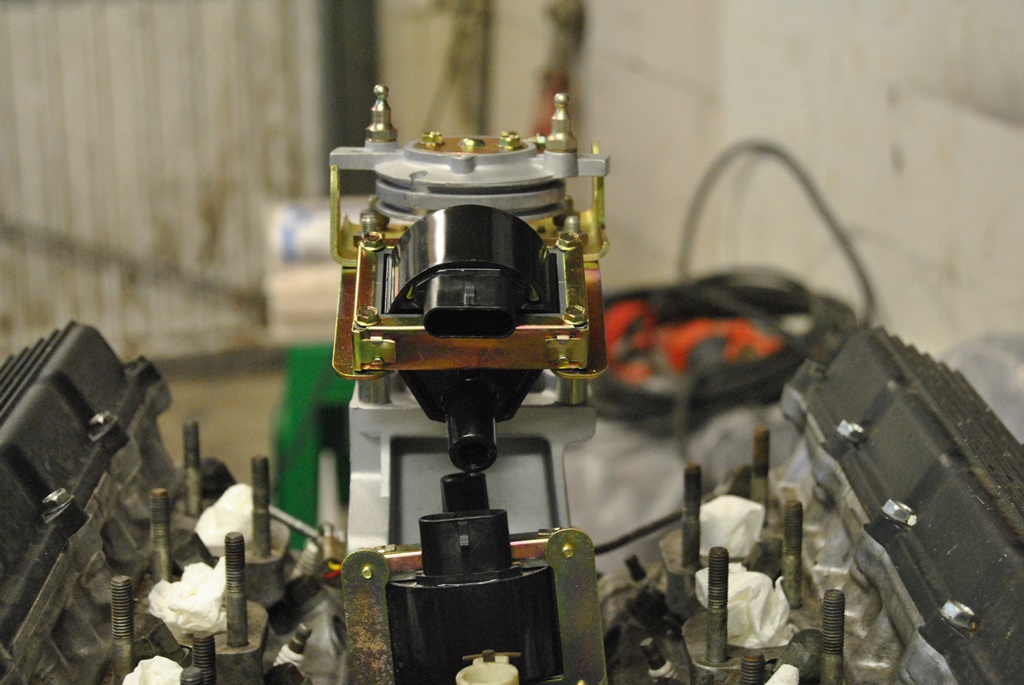
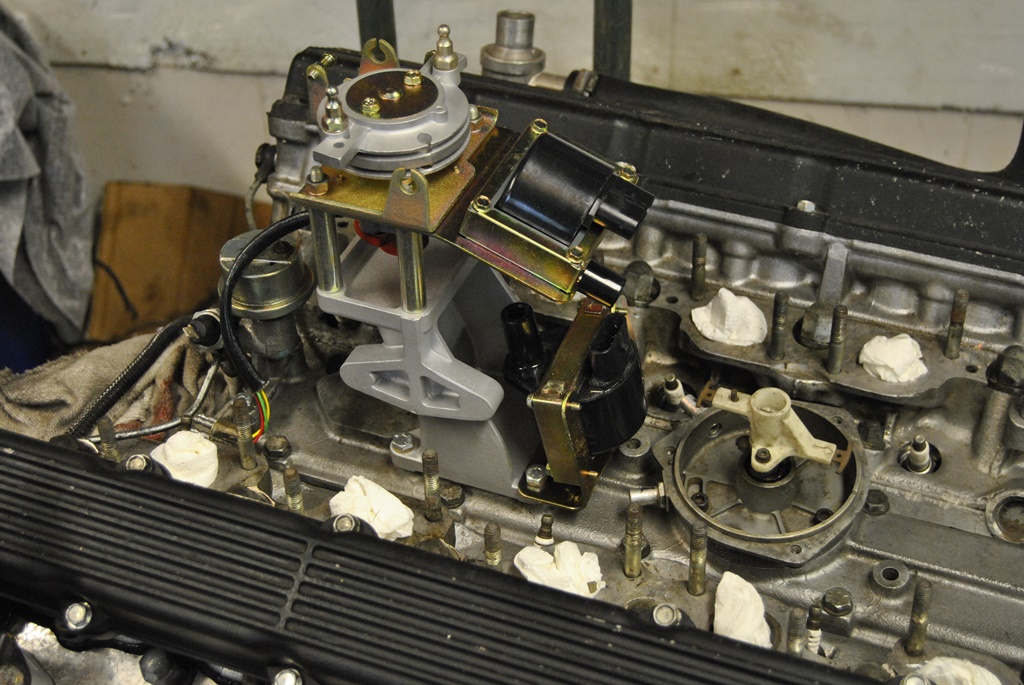
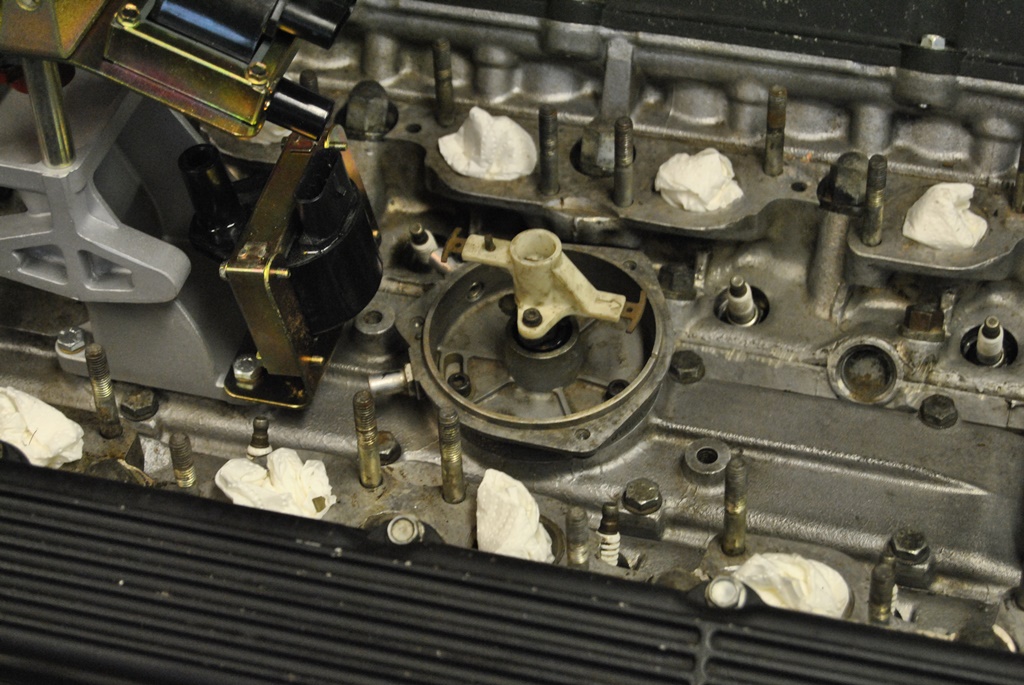
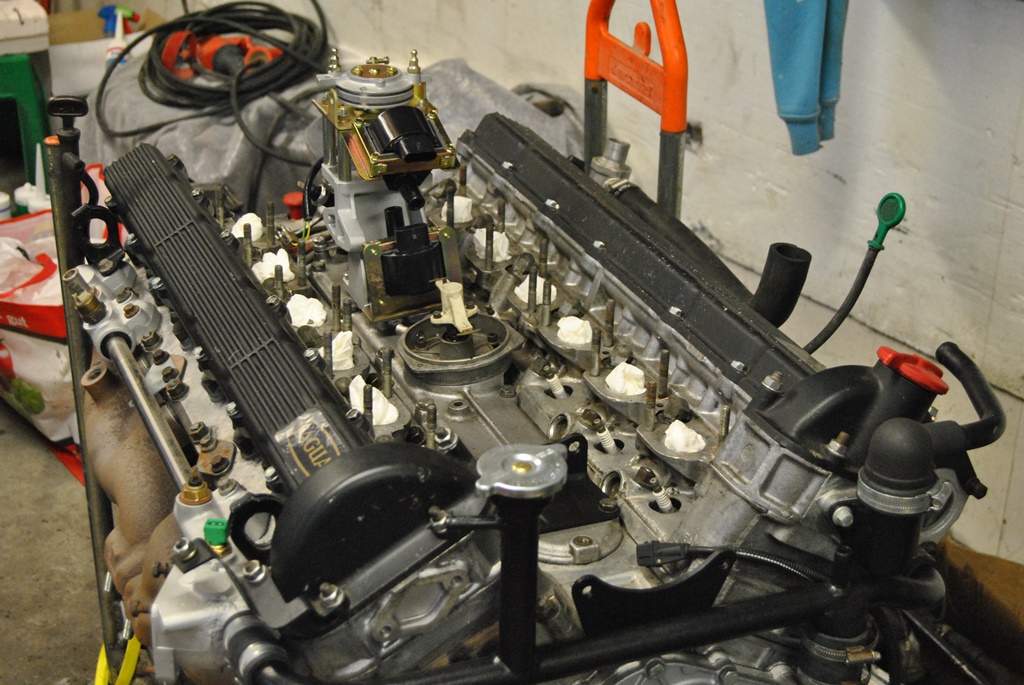
And what a marvelous piece of British engineering! This engine just looks so great... No matter what angle it is seen from. It just looks right all the time. 60� between the banks. All aluminium block. Simple looks... It just is soooo right!
So, I needed to get my V area clean and some gasket there sorted. First needed to get the timing right. As the Marelli ignition is not tricky at all, no need to do much, other than align the markings on the crank shaft pulley (the smaller one for the altenator) with the rotor arm in the dizzy. When done, you can simply undo the dizzy (3 screws) and carefully pull it out...
After that, I removed the V-cover, removed the (rather fresh) silicone gasket I used and replaced it with the proper, modernised rubberised gasket (found on later V12s). Should be more protected against leakages...
This was followed by a new oil pressure switch (the sensor will come a little later) and the installation of the overhauled throttle pedastal assembly. Of course with the ignition coils (at long last
). So the V is slowly getting back together again. The brackets for the Harrison A6 compressor have also been tidied up and installed. And what a marvelous piece of British engineering! This engine just looks so great... No matter what angle it is seen from. It just looks right all the time. 60� between the banks. All aluminium block. Simple looks... It just is soooo right!
#156
02-28-2017, 07:00 PM
Veteran Member
The following users liked this post:
Daim (03-01-2017)
#157
02-28-2017, 07:37 PM
Veteran Member
The following users liked this post:
Daim (03-01-2017)
#158
02-28-2017, 08:00 PM
Veteran Member
No rust under the floor anywhere. The only rust I found in the car was in the top of the car.
more pics here DSCN0433.jpg Photo by warrjon | Photobucket
Lotsa pics but a pic is worth a 1000 words


The following users liked this post:
Daim (03-01-2017)
#159
03-01-2017, 02:14 AM
#160
03-01-2017, 09:51 AM
I can't get bored now!
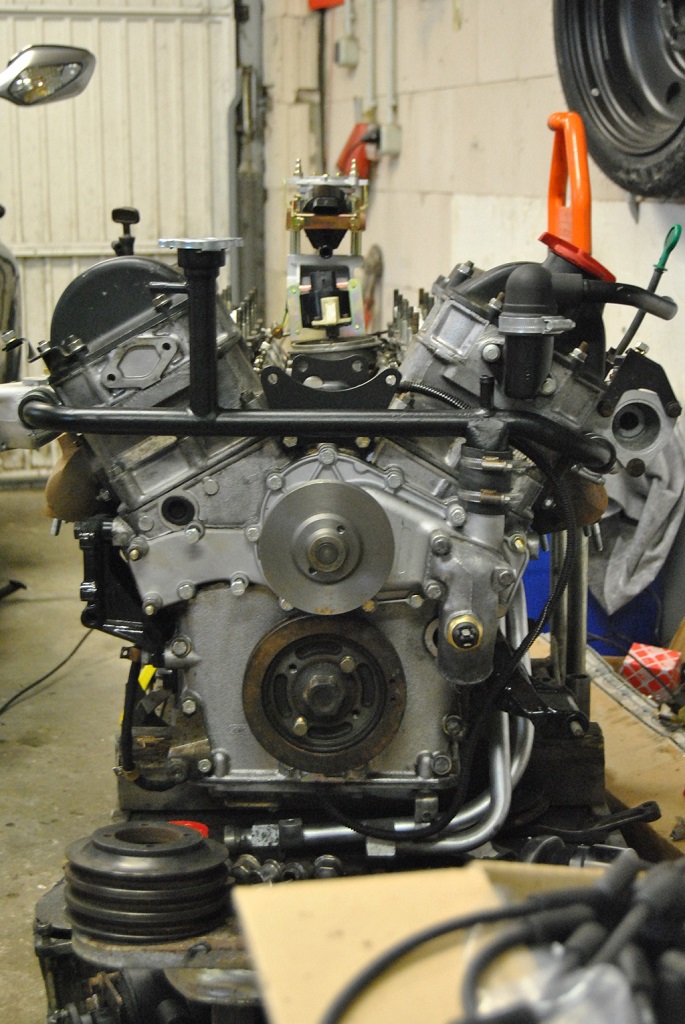
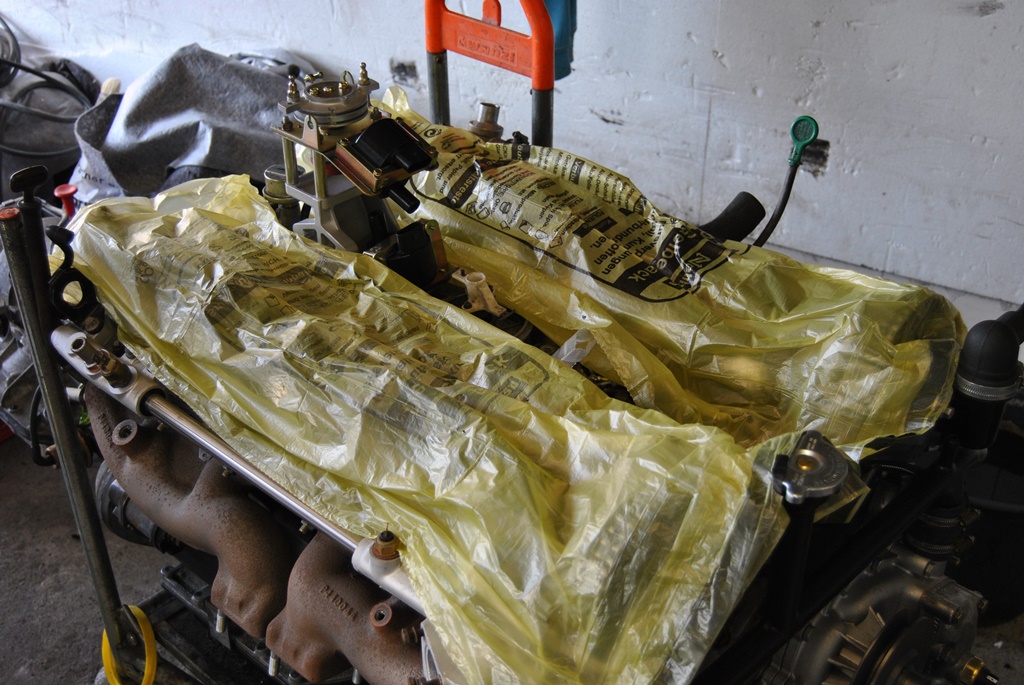
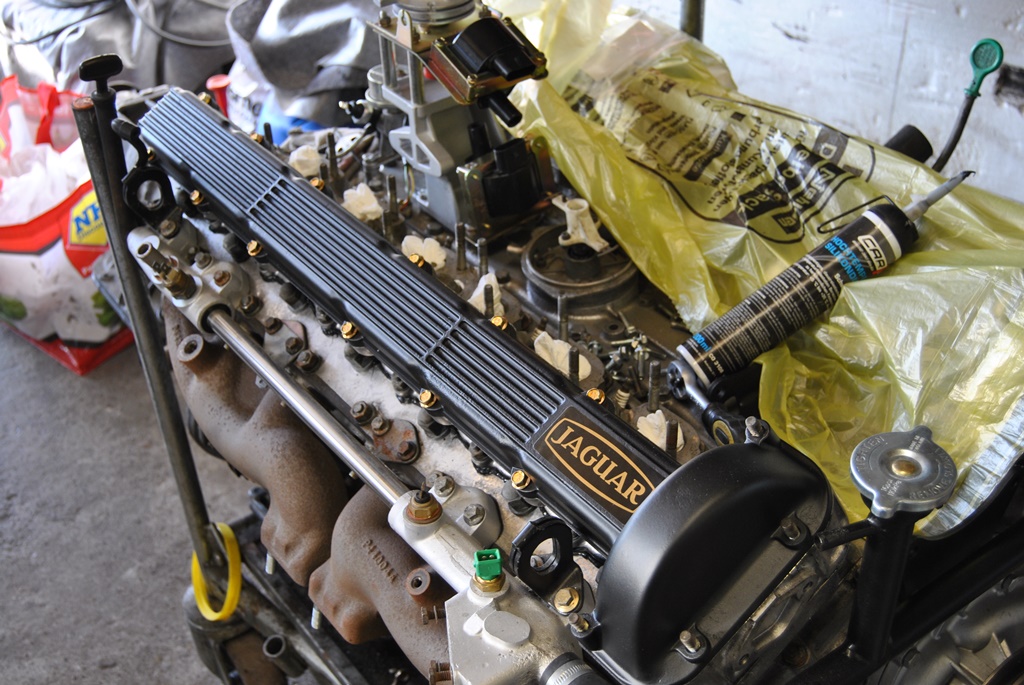
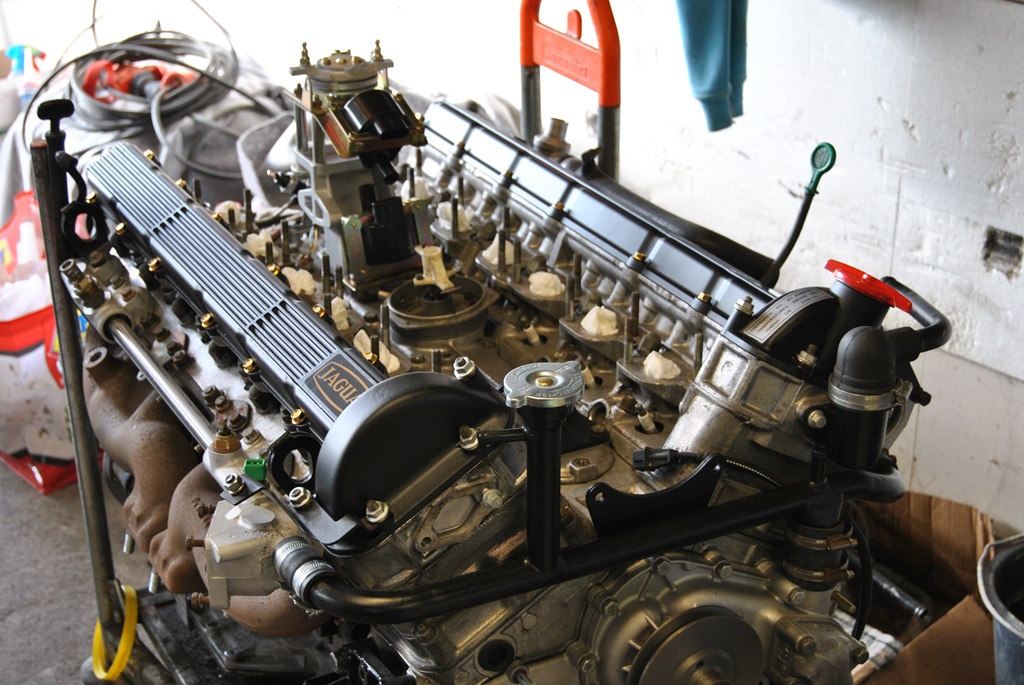
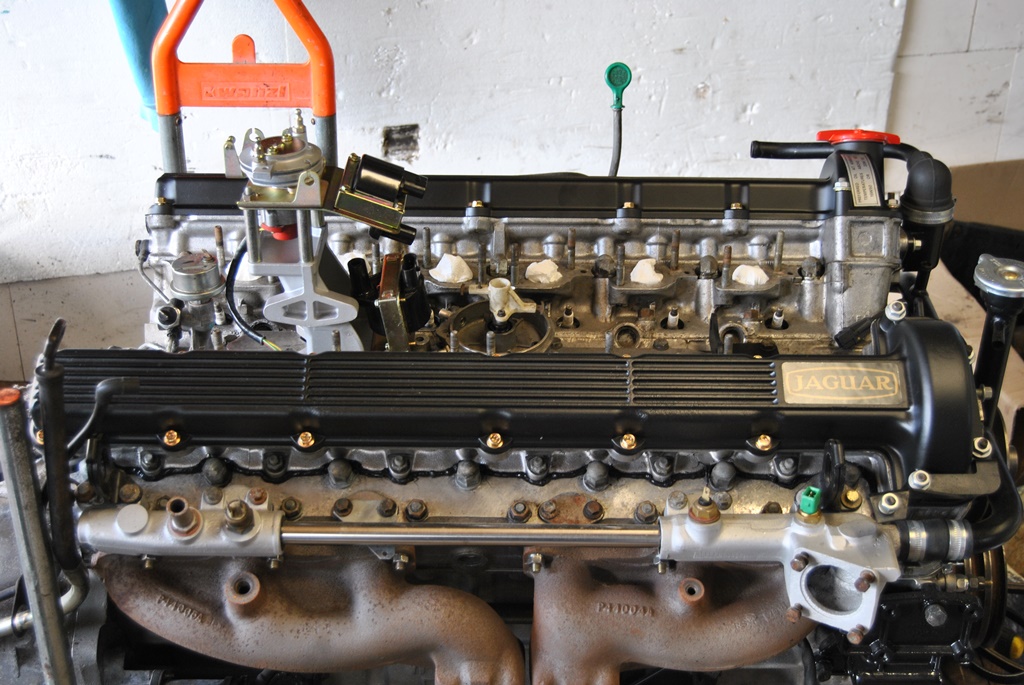
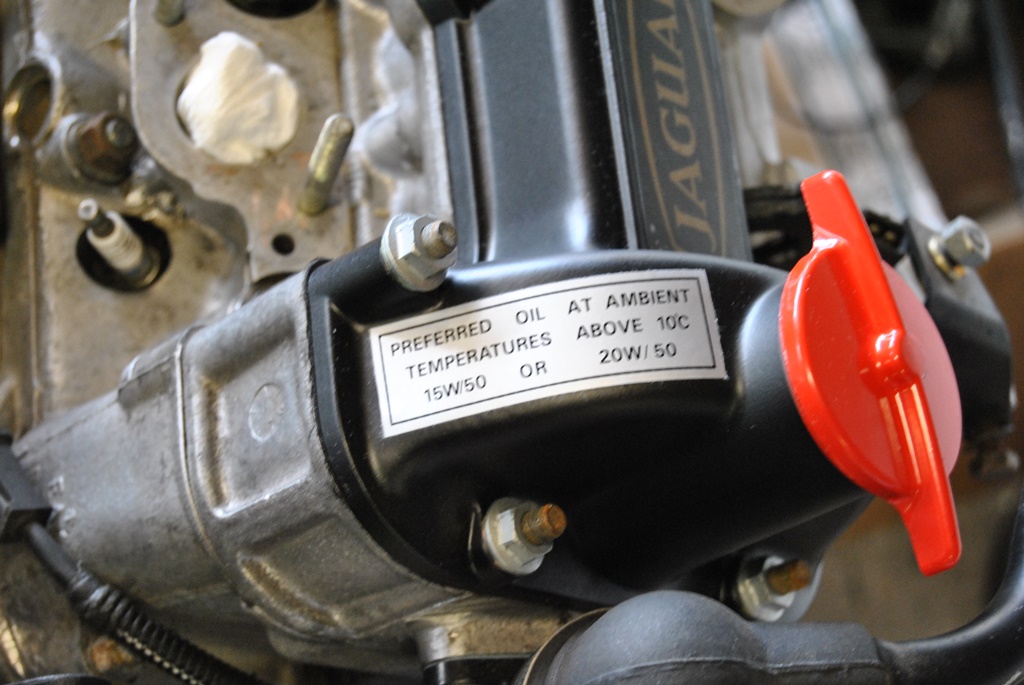
The vavle covers have finally completely dried out. So I could reinstall them today. With new gaskets, new halfmoon bungs, new screws (yellow galvanised), new stickers and a new oil cap. The cap is red, it isn't 100% correct for the XJ-S V12 (should be black) but it looks sooo much better in red than in black!
After that, the engine was covered up to prevent it from dusting up. I have now replaced ALL gaskets, that can be replaced without taking important parts of the engine apart (like headgaskets, front cover plate gaskets, etc.). So it basically cannot leak! If it does, then it is Voodoo!
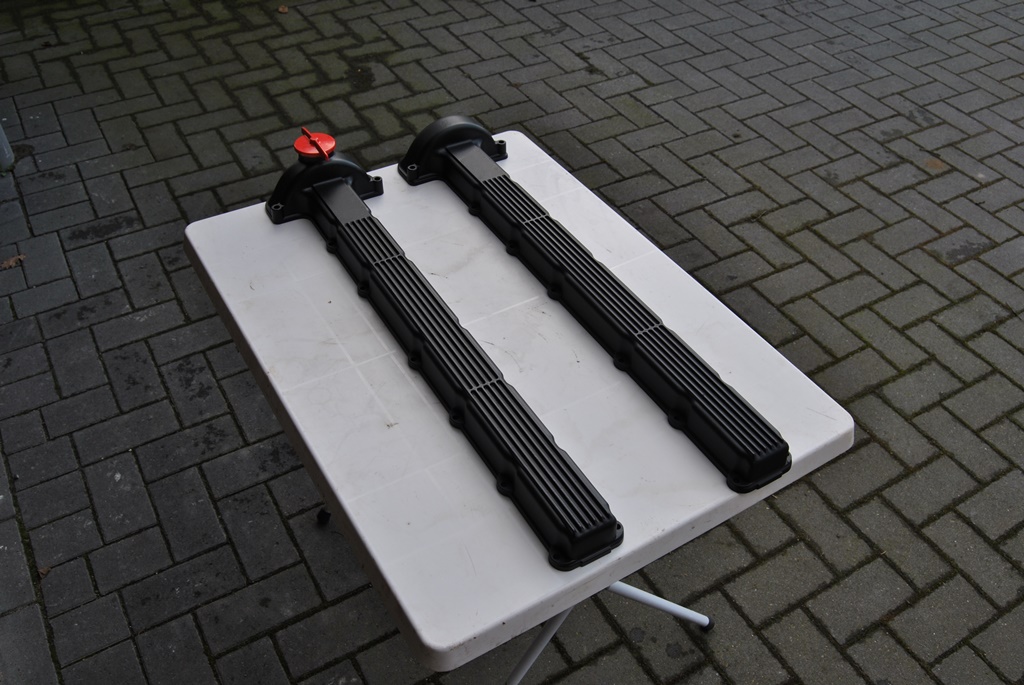
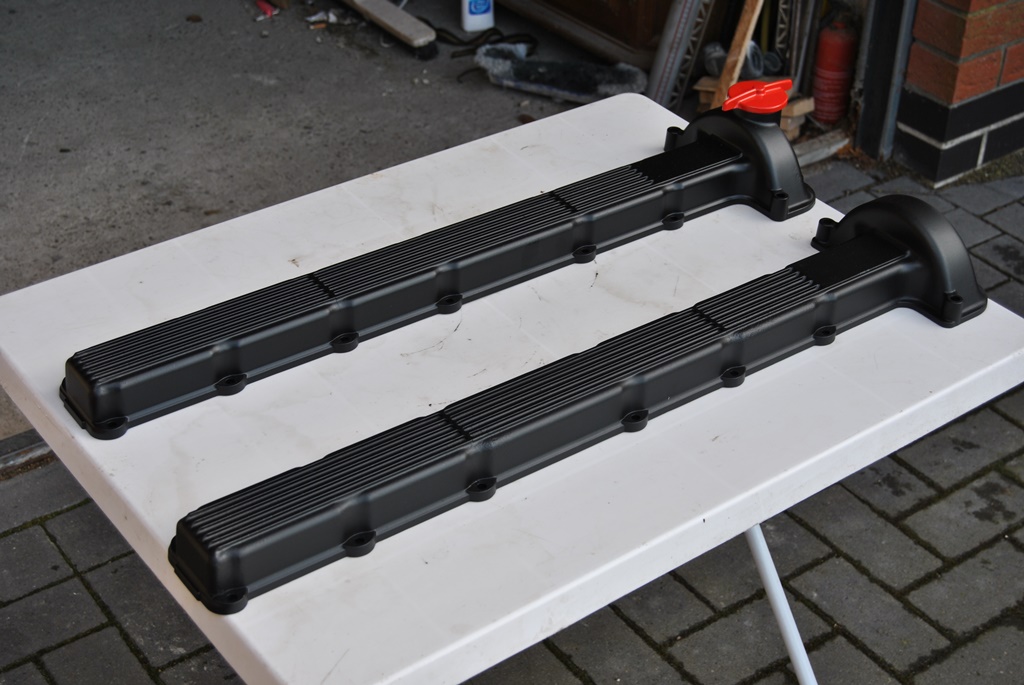
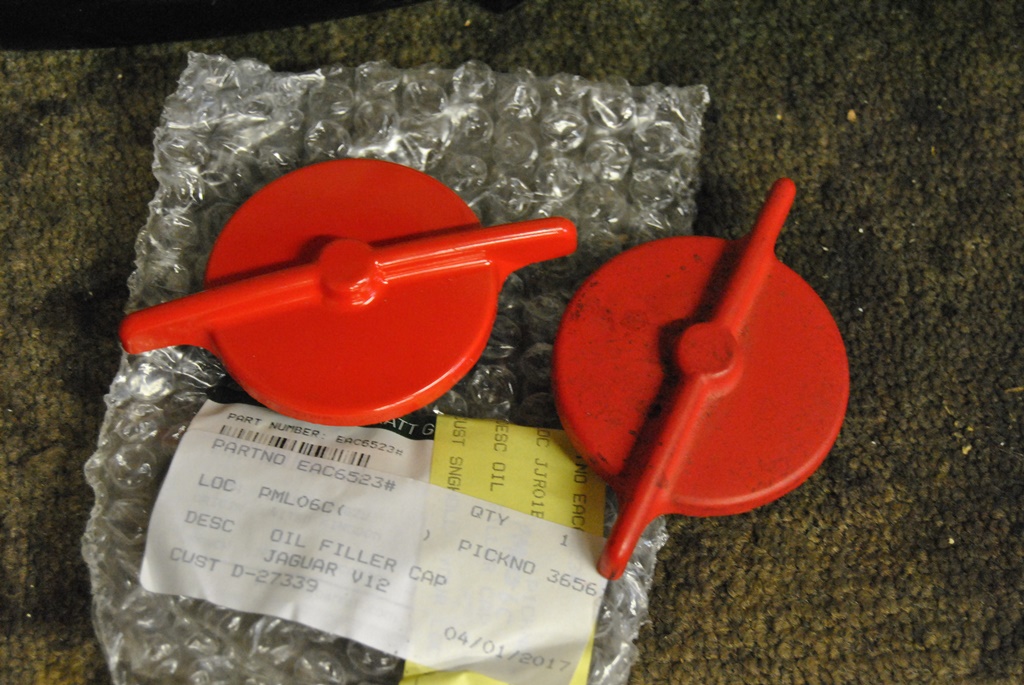
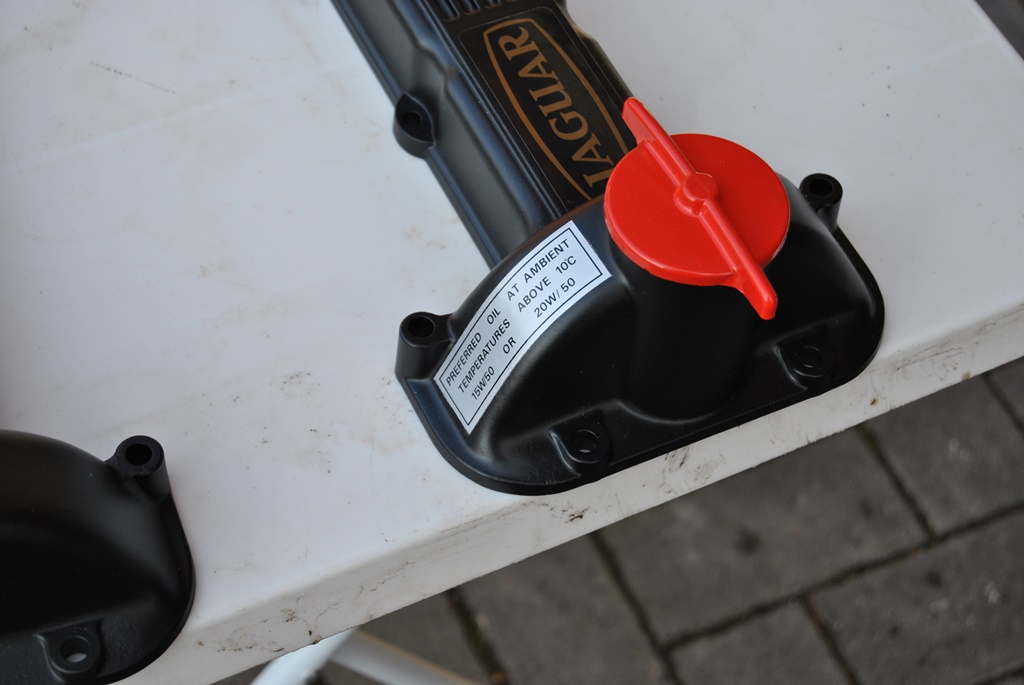
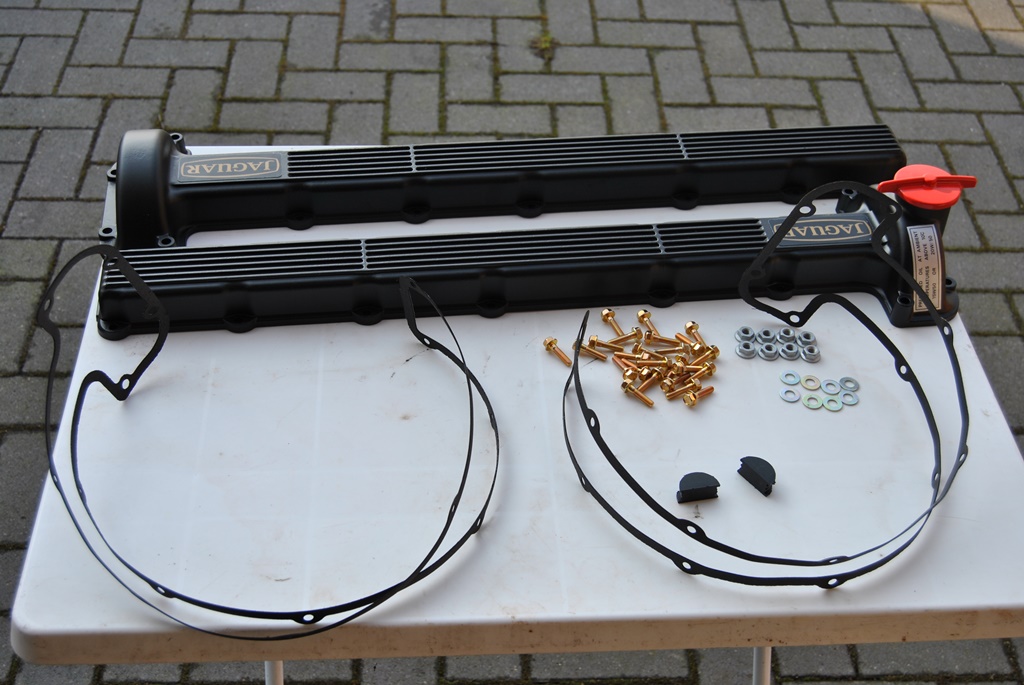
The following 2 users liked this post by Daim:
Greg in France (03-01-2017),
warrjon (03-01-2017)