1989 XJ-S Resto-Thread - or "my Iron Lady"
#161
 03-01-2017, 03:34 PM

Veteran Member
The following users liked this post:
Daim (03-01-2017)
#162
03-01-2017, 04:30 PM
Thanks Warren.
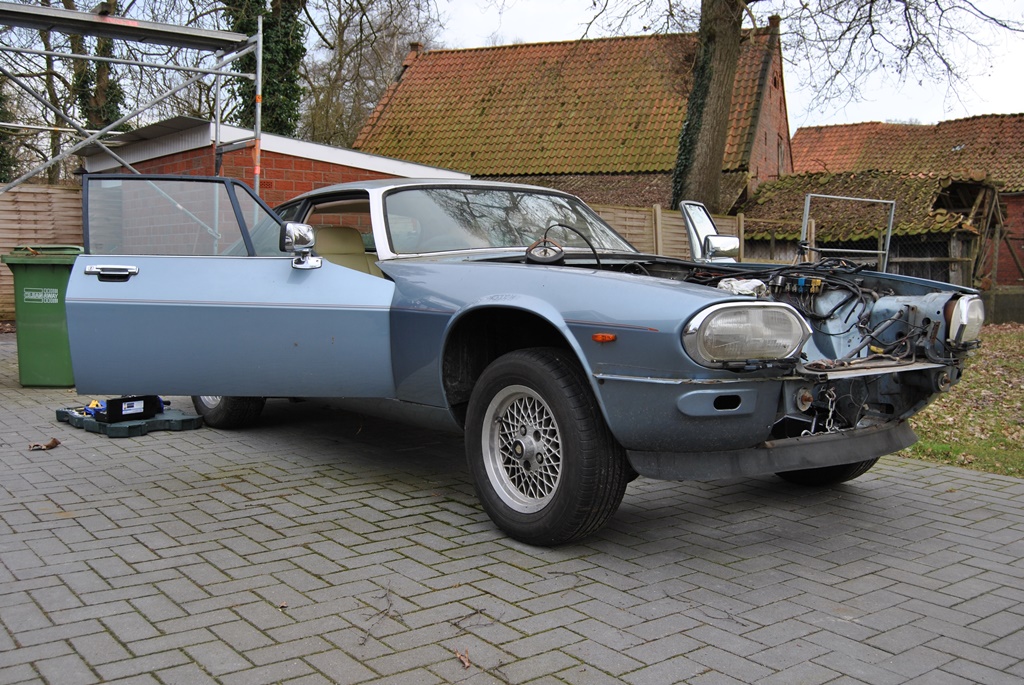
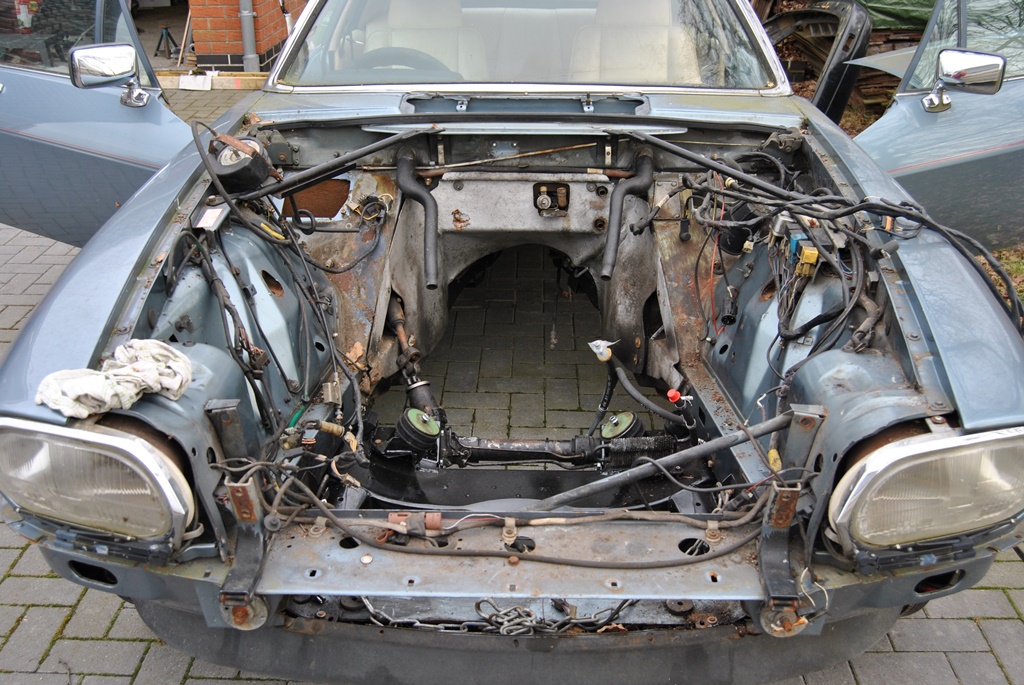
As I did them a few years ago, the A bank valve cover had warped. I removed it and it wasn't warped anymore... So that made me a bit happier.
Just now need my intakes blasted (again after some kind mice peed all over them), reassemble the throttle bodies, screw them to the intakes, set them up with the pedastal, get the fuel hoses and lines done (galvanized and new rubber with crimped ferrules), screw the injectors back in place, and get the belt drive all sorted and THEN I can have some welding done followed by some spraying and a few little bits and boby in the engine bay followed by reinstalling the engine after adding some new stainless steel downpipes andh eatshields, wiring it all up and setting the TPS up correctly, wiring the injectors with a diferent loom style, getting my radiator recored, installing all the air con stuff again (after overhauling the A6 compressor), getting a new oil cooler and piping (mine is all bodged too many times), doing all the water hoses up and then topping oilandatf up to see if she'll start again.
If she does and the idle is stable and she runs well, I'll then be turning her around, jacking up the rear and doing the rear axle as well as fuel tank and piping! Yay!
And when THAT has been done, then the sunroof is coming out, new windscreen, new headlining, and the last few little rust spots. And THEN, hopefully THEN it is 2019, roundabout october and I can get my 2- or 2 grade with an H numberplate and I'll be one really happy chappy!
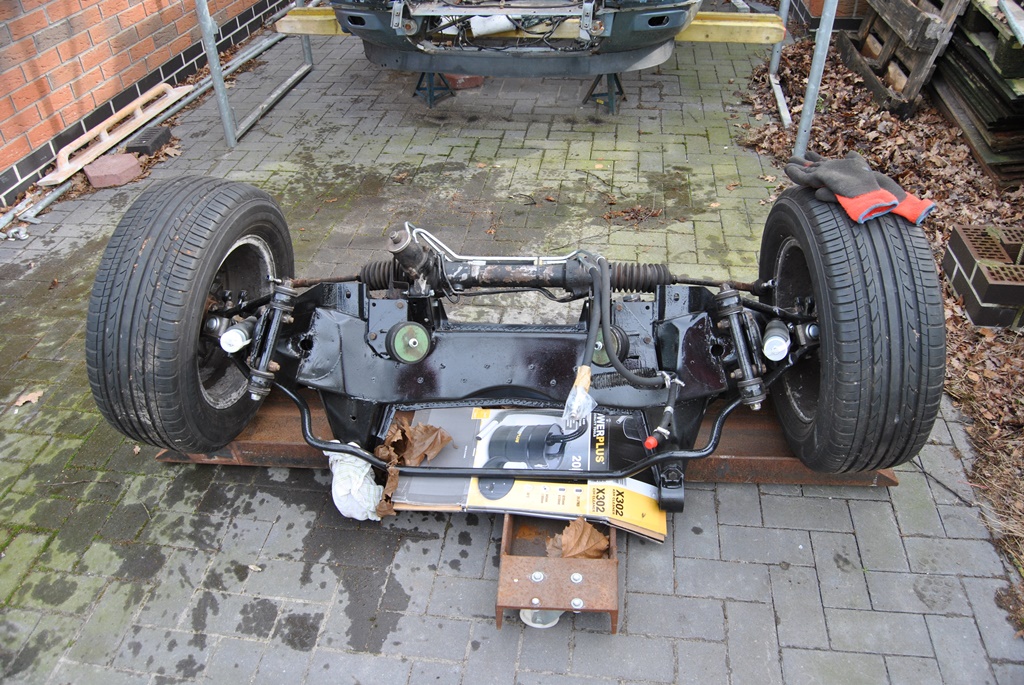
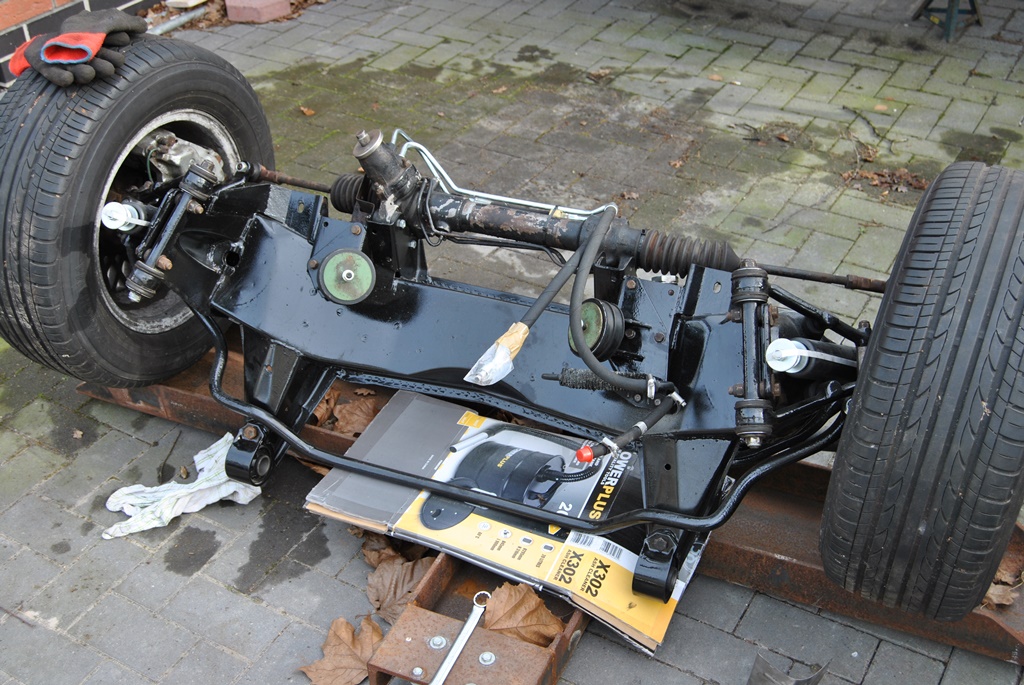
But as you can see, my list is long. But from here onwards, at least at the front, it is simply reassembly with very little left to tidy up. Just think my �3000 budget won't be enough for the front and rear stuff, though it should be, as the rear isn't as complicated and expensive... More parts up front to re�lace and repair than in the rear.
The rear needs new shocks and springs (my brain says so). New bearings in the wishbones and input as well as output shafts, new u-joints in the prop and drive shafts, new cage brackets and some bushes and of course wheel bearings and brake discs and pads. Give the cage a sandblast, paint it with POR15, same as a few other rear suspension parts, refit new seals into the diff (which is just leaking badly but doesn't male any nasty sounds) fill it with some fresh fluid and that would be done.
Final thing to do would be buy 4 new tires and get my polished lip Lattice rims recut and painted (paimting I can do but not the surface machining).
Boy, I am soooooo looking forward to driving her 2019. I've has a few 'wet' dreams - sounds weird but hey, it is my dream car!
As I did them a few years ago, the A bank valve cover had warped. I removed it and it wasn't warped anymore... So that made me a bit happier.
Just now need my intakes blasted (again after some kind mice peed all over them), reassemble the throttle bodies, screw them to the intakes, set them up with the pedastal, get the fuel hoses and lines done (galvanized and new rubber with crimped ferrules), screw the injectors back in place, and get the belt drive all sorted and THEN I can have some welding done followed by some spraying and a few little bits and boby in the engine bay followed by reinstalling the engine after adding some new stainless steel downpipes andh eatshields, wiring it all up and setting the TPS up correctly, wiring the injectors with a diferent loom style, getting my radiator recored, installing all the air con stuff again (after overhauling the A6 compressor), getting a new oil cooler and piping (mine is all bodged too many times), doing all the water hoses up and then topping oilandatf up to see if she'll start again.
If she does and the idle is stable and she runs well, I'll then be turning her around, jacking up the rear and doing the rear axle as well as fuel tank and piping! Yay!
And when THAT has been done, then the sunroof is coming out, new windscreen, new headlining, and the last few little rust spots. And THEN, hopefully THEN it is 2019, roundabout october and I can get my 2- or 2 grade with an H numberplate and I'll be one really happy chappy!
But as you can see, my list is long. But from here onwards, at least at the front, it is simply reassembly with very little left to tidy up. Just think my �3000 budget won't be enough for the front and rear stuff, though it should be, as the rear isn't as complicated and expensive... More parts up front to re�lace and repair than in the rear.
The rear needs new shocks and springs (my brain says so). New bearings in the wishbones and input as well as output shafts, new u-joints in the prop and drive shafts, new cage brackets and some bushes and of course wheel bearings and brake discs and pads. Give the cage a sandblast, paint it with POR15, same as a few other rear suspension parts, refit new seals into the diff (which is just leaking badly but doesn't male any nasty sounds) fill it with some fresh fluid and that would be done.
Final thing to do would be buy 4 new tires and get my polished lip Lattice rims recut and painted (paimting I can do but not the surface machining).
Boy, I am soooooo looking forward to driving her 2019. I've has a few 'wet' dreams - sounds weird but hey, it is my dream car!
The following users liked this post:
orangeblossom (03-01-2017)
#163
03-01-2017, 05:12 PM
Veteran Member
Wait until you price Timken bearings for the rear end, I did and they were eye wateringly expensive over $100 each. I ended up using Japanese NSK I bought the whole lot for not much more than 1 Timken bearing.
I think the way are working through this you'll have a fantastic and reliable car when it's on the road.
I think the way are working through this you'll have a fantastic and reliable car when it's on the road.
The following 3 users liked this post by warrjon:
#164
03-02-2017, 01:41 AM

Veteran Member
Daim
Your dedication and hard work is an absolute example to us all! y the way, D Manners have bearings a great deal cheaper than Warrjon's Tmken ones were. they have three prices, OEM 30 quid a pop, substitute, 12, and el cheapo 8. These are the 12 quid ones, and I think if you call them they will be the same make as OEm but direct from the supplier, not via JCP:
Jaguar Partno_C19066#_OUTER WHEEL BEARING ALL I.R.S. MODELS_David Manners Group with Alts
Greg
Last edited by Greg in France; 03-02-2017 at 01:47 AM.
The following users liked this post:
Daim (03-02-2017)
#165
03-02-2017, 03:12 AM
Thanks guys...
@ Warren
Nothing can shock me... Not after seeing the price of the output shaft bearings in the X308... �600 without taxes PER SIDE. Made by SKF specifically for the X308 and X100 differentials. NO other bearing has the same shape, size, diameter...
@ Greg
Yeah, I saw those bearings... I wouldn't trust an �8 bearing in an area I can't get to easily. I mean, on the front? Who carse! That is easily accessed compared to the rear. But with the rear hubs and co, I'd def. want a good bearing. Though a good brand, like Timken, would be great. But if it is "only" SKF, that doesn't hurt me either...
SNG has bearings ranging from �25-�42 (3 different price ranges)... Seems all correct though. The two higher priced ones (�35 and �42) are both Timken. The �25 one is Japanese, but there is no name visible... So possibly NSK? I don't know...
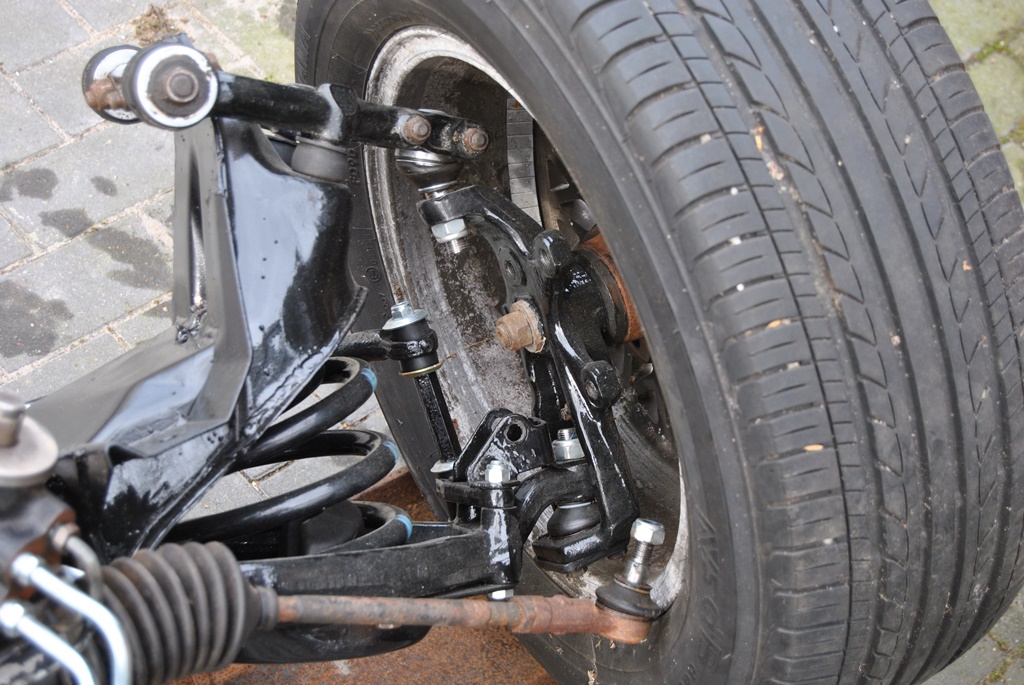
Speaking of wheel bearings, I have yet to change the front wheel bearings. I wanted to do them, when I fit the front brakes again (which would be AFTER doing the rear axle, as if I fit them earlier, they'll have to be replaced then too).
With the front bearings, as I have never really done these "non-pressed-in-bearings" before, I've noticed that the stub axle has a little metal ring on it and the bearing inside seems to have exposed *****. So I assume the metal ring has stuck to the shaft? Any way to remove that easily without damaging the stub axle? And if it means taking the stub axle off...
@ Warren
Nothing can shock me... Not after seeing the price of the output shaft bearings in the X308... �600 without taxes PER SIDE. Made by SKF specifically for the X308 and X100 differentials. NO other bearing has the same shape, size, diameter...
@ Greg
Yeah, I saw those bearings... I wouldn't trust an �8 bearing in an area I can't get to easily. I mean, on the front? Who carse! That is easily accessed compared to the rear. But with the rear hubs and co, I'd def. want a good bearing. Though a good brand, like Timken, would be great. But if it is "only" SKF, that doesn't hurt me either...
SNG has bearings ranging from �25-�42 (3 different price ranges)... Seems all correct though. The two higher priced ones (�35 and �42) are both Timken. The �25 one is Japanese, but there is no name visible... So possibly NSK? I don't know...
Speaking of wheel bearings, I have yet to change the front wheel bearings. I wanted to do them, when I fit the front brakes again (which would be AFTER doing the rear axle, as if I fit them earlier, they'll have to be replaced then too).
With the front bearings, as I have never really done these "non-pressed-in-bearings" before, I've noticed that the stub axle has a little metal ring on it and the bearing inside seems to have exposed *****. So I assume the metal ring has stuck to the shaft? Any way to remove that easily without damaging the stub axle? And if it means taking the stub axle off...
#166
03-02-2017, 06:25 AM
Veteran Member
The sub axle should be smooth. If yours has a ring about 4mm deep and 12mmm wide, then that is the inner bearing-to-axle part of the bearing stuck on. You can drift it off and then inspect the axle surface. Any slight wear you can feel a finger nail hit, replace the stub. Not that difficult, rig up a steel pipe against the upright over the stub, level with the middle of the thread on the outside eng, loosen the huge bolt behind the upright that holds the stub in its taper, and then using a stack of wide washers as required to get the stub pulling against pipe length, turn the nut on the outside end of the stub and screw it up tight to pull the stub outwards against the pipe. When under a bit of force, whack the sub good and hard and it should ping out of the taper in the upright.
Greg
Greg
The following users liked this post:
Daim (03-02-2017)
#167
03-02-2017, 07:15 AM
#168
03-02-2017, 03:58 PM
Veteran Member
NSK are good quality and worth a little more, my car had Timken from the factory which is why I priced them.
The bearings are cup and cone, the cone goes on the stub axle and the cup goes in the hub. I used a screw driver and carefully tapped the cup out of the hub from behind. The cone was loose on the axle but I replaced my axle and the cone just fell off.
Putting back together the cones lightly pressed on the axle I used a piece of pipe with the axle mounted in the upright in a vice and tapped them on.
To reinstall the cup in the hub without a press I ground the outside of the old cup so it was a loose fit in the hub and used the old cup and a hammer to install the new cup.
The following 2 users liked this post by warrjon:
Daim (03-03-2017),
Greg in France (03-03-2017)
#169
03-03-2017, 02:17 AM
#170
03-03-2017, 03:46 AM
Veteran Member
#171
03-03-2017, 03:52 AM
Okay, so I have to separate the cone from the bearing, tap it onto the stub axle and then put the rest into the hub and then onto the car?
Sorry to sound dumb, but I have never done these kind of bearings (no "oldschool" bearings, just the modern, sealed units which are pressed into the hub), so that is something new for me...
Sorry to sound dumb, but I have never done these kind of bearings (no "oldschool" bearings, just the modern, sealed units which are pressed into the hub), so that is something new for me...
#172
03-03-2017, 04:36 AM
Veteran Member
Daim
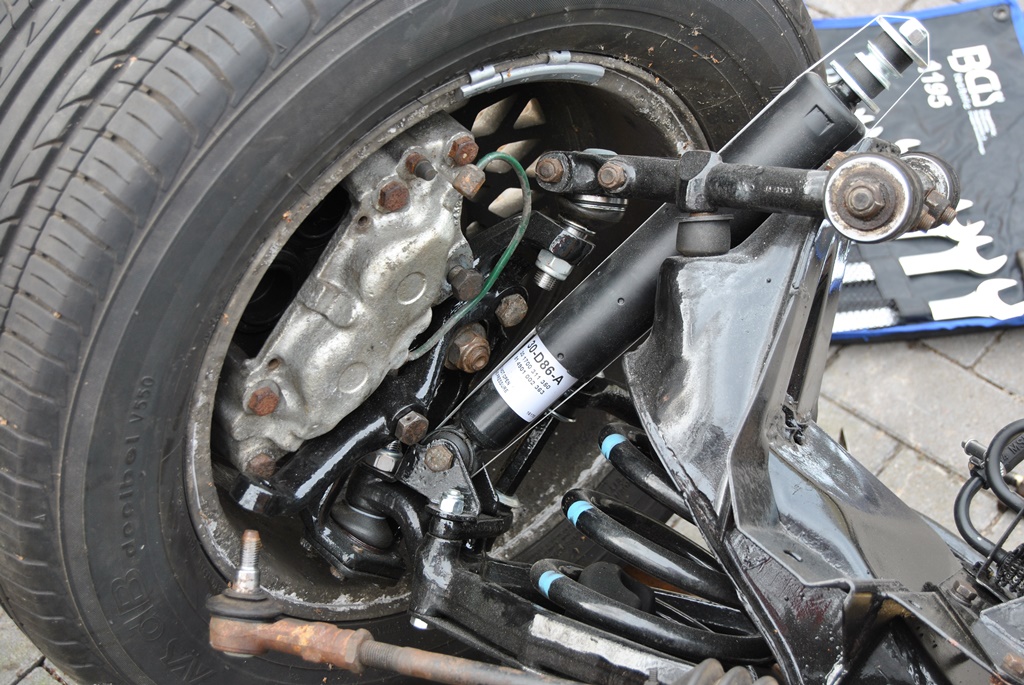
For the front wheels:
Pull off the hub. The bits of bearing left on the stub can be carefully drifted off with a brass drift.
The bits of bearing in the hub have to be drifted out carefully with a steel drift. There are two indentations each side of the hub inner for this purpose, these bits will be tight in the hub casting.
The new bearings will come apart properly and the outer has to be installed into the hub, as Warren mentioned using the old bearing outer as a pusher is a good plan if you do not have a press.
Be sure to install them in the hub the correct way round, so that the cone shape of the bearing will be pointing so you can install the bearing once it is in the hub!
The bit of the bearing on the stub will slide on relatively easily. The pics show the inner bearing being assembled onto the stub axle, and the outer shows both parts. Ignore the extra piece in the lathe guy's hand.
Greg
#173
03-03-2017, 05:49 AM
#174
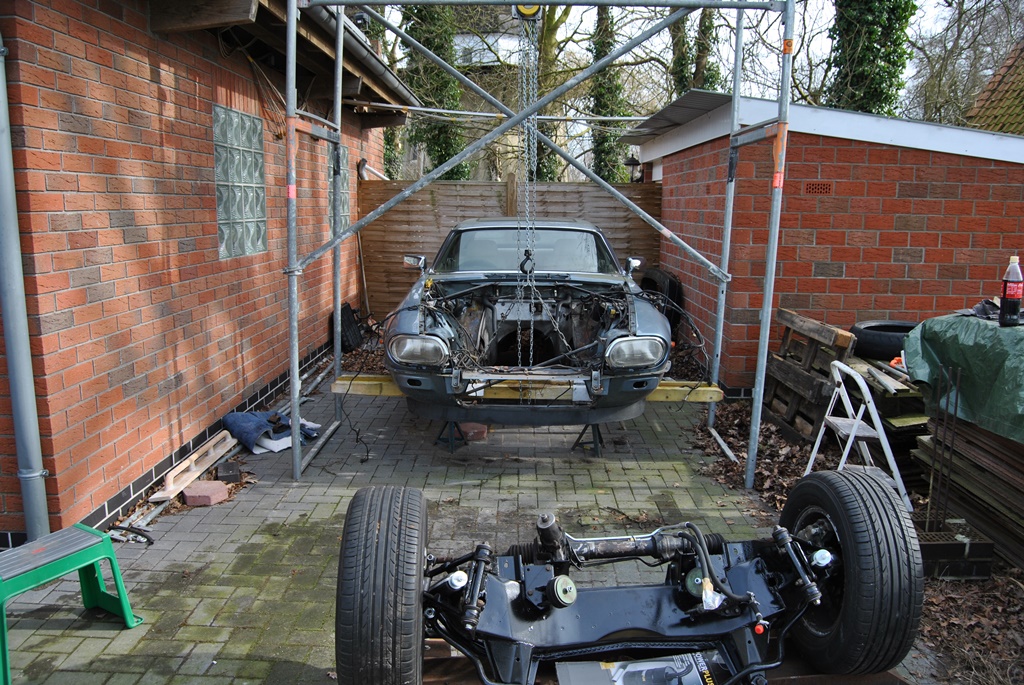
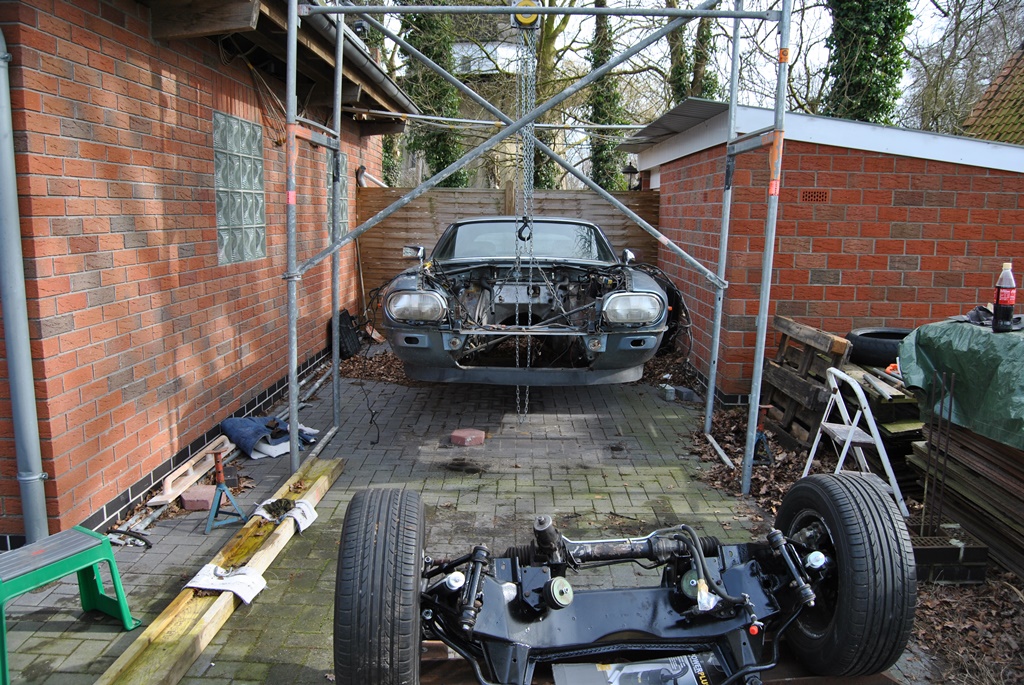
03-04-2017, 01:54 PM
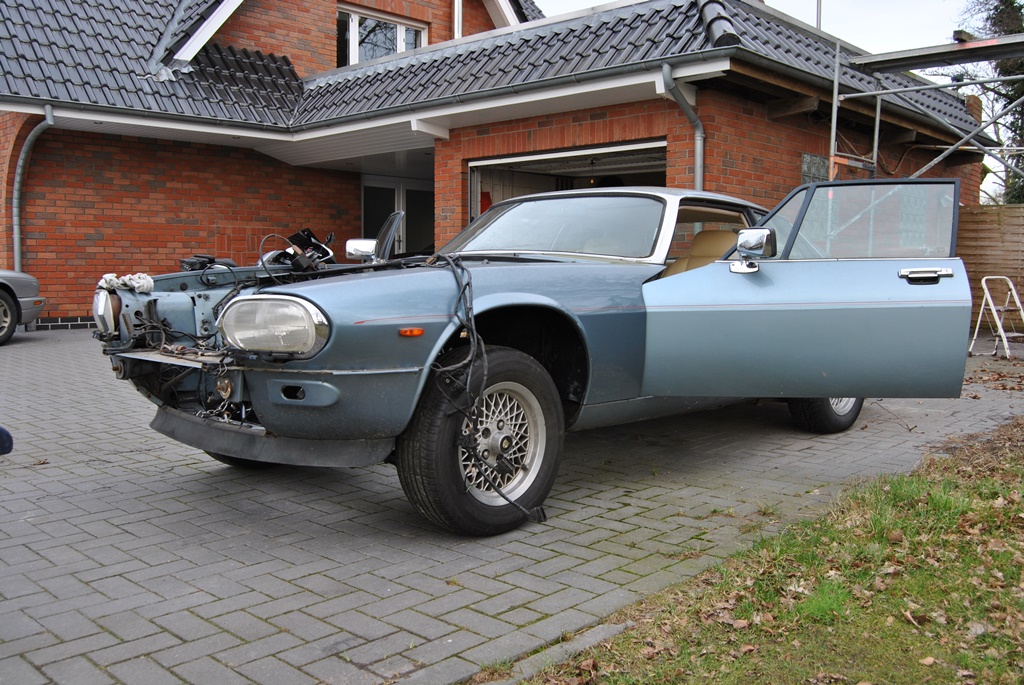
Well, she is on her four own wheels again! After the weather forecast said it should be 16�C and therefore a spell of spring, I decided it was time to install the front axle (for a little while  ).
).
Lifted the car, connected everything up again and let the car down. Lifted the rear off of the ramps (wouldn't roll down due to the steapness of them) and then rolled her forwards. Even like this, she has all that grace... Matching "Grace, pace and space!"
So, next step for the body is to say goodbye for a little while... A few rust repairs in the engine bay need to be addressed to...


). Lifted the car, connected everything up again and let the car down. Lifted the rear off of the ramps (wouldn't roll down due to the steapness of them) and then rolled her forwards. Even like this, she has all that grace... Matching "Grace, pace and space!"
So, next step for the body is to say goodbye for a little while... A few rust repairs in the engine bay need to be addressed to...
The following users liked this post:
Doug (03-04-2017)
#175
03-04-2017, 02:20 PM
Veteran Member
Hey Daim
That wood work is easily restored. Used a heat gun and the resin comes off easily. A light sane with fine paper 600g, then 2 pack polyurethane varnish. I brushed on about 5 coats then sanded back with 320g to get rid of all the brush marks. Then sanded with continually finer paper. Then wet sand with 600 to 2000g then polish.


That wood work is easily restored. Used a heat gun and the resin comes off easily. A light sane with fine paper 600g, then 2 pack polyurethane varnish. I brushed on about 5 coats then sanded back with 320g to get rid of all the brush marks. Then sanded with continually finer paper. Then wet sand with 600 to 2000g then polish.


#176
03-04-2017, 02:25 PM
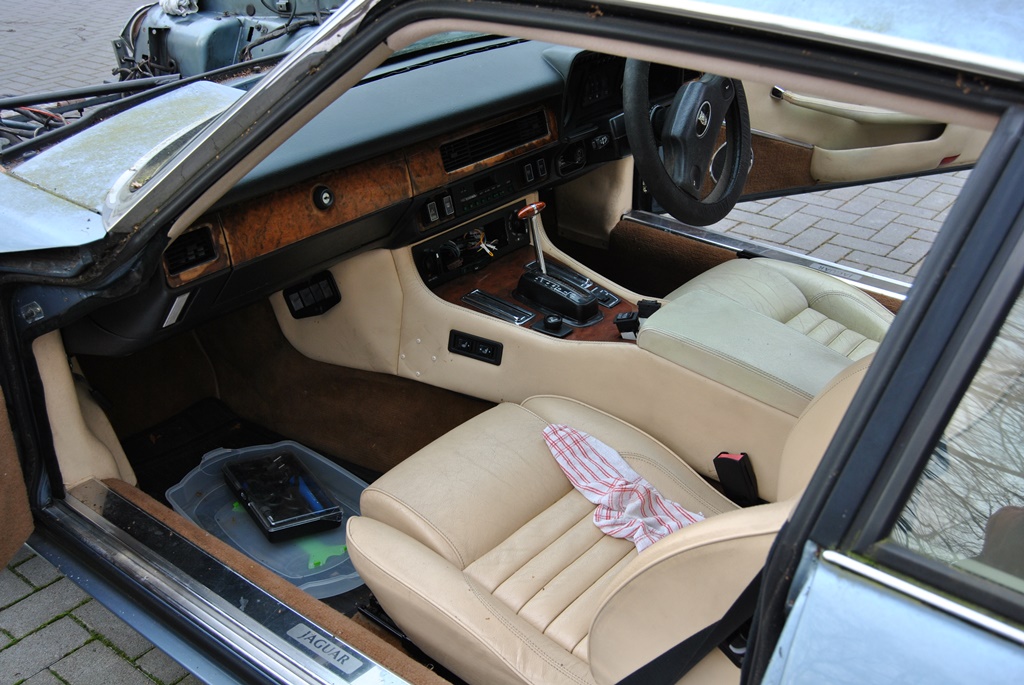
Thanks for the tips Warren.
I'll be leaving that for when the car is running again. All the wood needs some work done. The varnish is chipping off on the driver's side. The ski slope has cracked (I don't know if surface or middle).
Something I just noticed today: the wood work in the doors is not only mirrored in itself but also with the other car side... Never noticed that before but then, I only have driven the car about 600 miles since I bought it in 2013
#177
03-10-2017, 10:59 AM
The future of this project is secure now... Signing a new contract on Monday. Yay! New job, quite well paid, 'bout time! Means more cash to poor into a currently bottomless pit
Btw.: I took the front carpets out. Driver's side was rather wet, passenger side sloghtly damp. No rust holes but a bit of rust on the drivers side. Seems like the windscreen seal (already in my cars boot) is now leaking. No problem though. Remove rust, use POR15 to project the sirface and done...
Btw.: I took the front carpets out. Driver's side was rather wet, passenger side sloghtly damp. No rust holes but a bit of rust on the drivers side. Seems like the windscreen seal (already in my cars boot) is now leaking. No problem though. Remove rust, use POR15 to project the sirface and done...
The following users liked this post:
warrjon (03-10-2017)
#178
03-10-2017, 05:10 PM
Veteran Member


The following users liked this post:
paydase (03-12-2017)
#179
03-11-2017, 06:17 AM

Veteran Member
Hi Daim and mates,
Just wanting to tell you I'm impressed by your work and by the sharing spirit of the colleagues' advices to sort out issues.
I am a regular aficionado of your thread(s) but a silent reader cuz I am still in a learning curve and not yet DIY as you are, by far.
Go on, and wish you can put your cat soon on the road again!
Last edited by paydase; 03-11-2017 at 06:20 AM.
The following users liked this post:
Daim (03-11-2017)
#180
03-11-2017, 06:31 AM
I think I will actually follow your advice and take the wings off prior welding, to see if there is actually a hole there. Would be a waste of effort and time simply removing them afterwards again...
My windscreen seal is really dry. You can touch it and it crumbles away... So I assume it will have a little bit of rust behind it... I hope not but I guess it will be like that.
My creedo:
ALWAYS EXPECT THE WORST AND YOU WON'T BE DISSAPPOINTED!
Hi Daim and mates,
Just wanting to tell you I'm impressed by your work and by the sharing spirit of the colleagues' advices to sort out issues.
I am a regular aficionado of your thread(s) but a silent reader cuz I am still in a learning curve and not yet DIY as you are, by far.
Go on, and wish you can put your cat soon on the road again!
Just wanting to tell you I'm impressed by your work and by the sharing spirit of the colleagues' advices to sort out issues.
I am a regular aficionado of your thread(s) but a silent reader cuz I am still in a learning curve and not yet DIY as you are, by far.
Go on, and wish you can put your cat soon on the road again!
Keep your head up! Nothing can be as bad as it sounds 