When you click on links to various merchants on this site and make a purchase, this can result in this site earning a commission. Affiliate programs and affiliations include, but are not limited to, the eBay Partner Network.
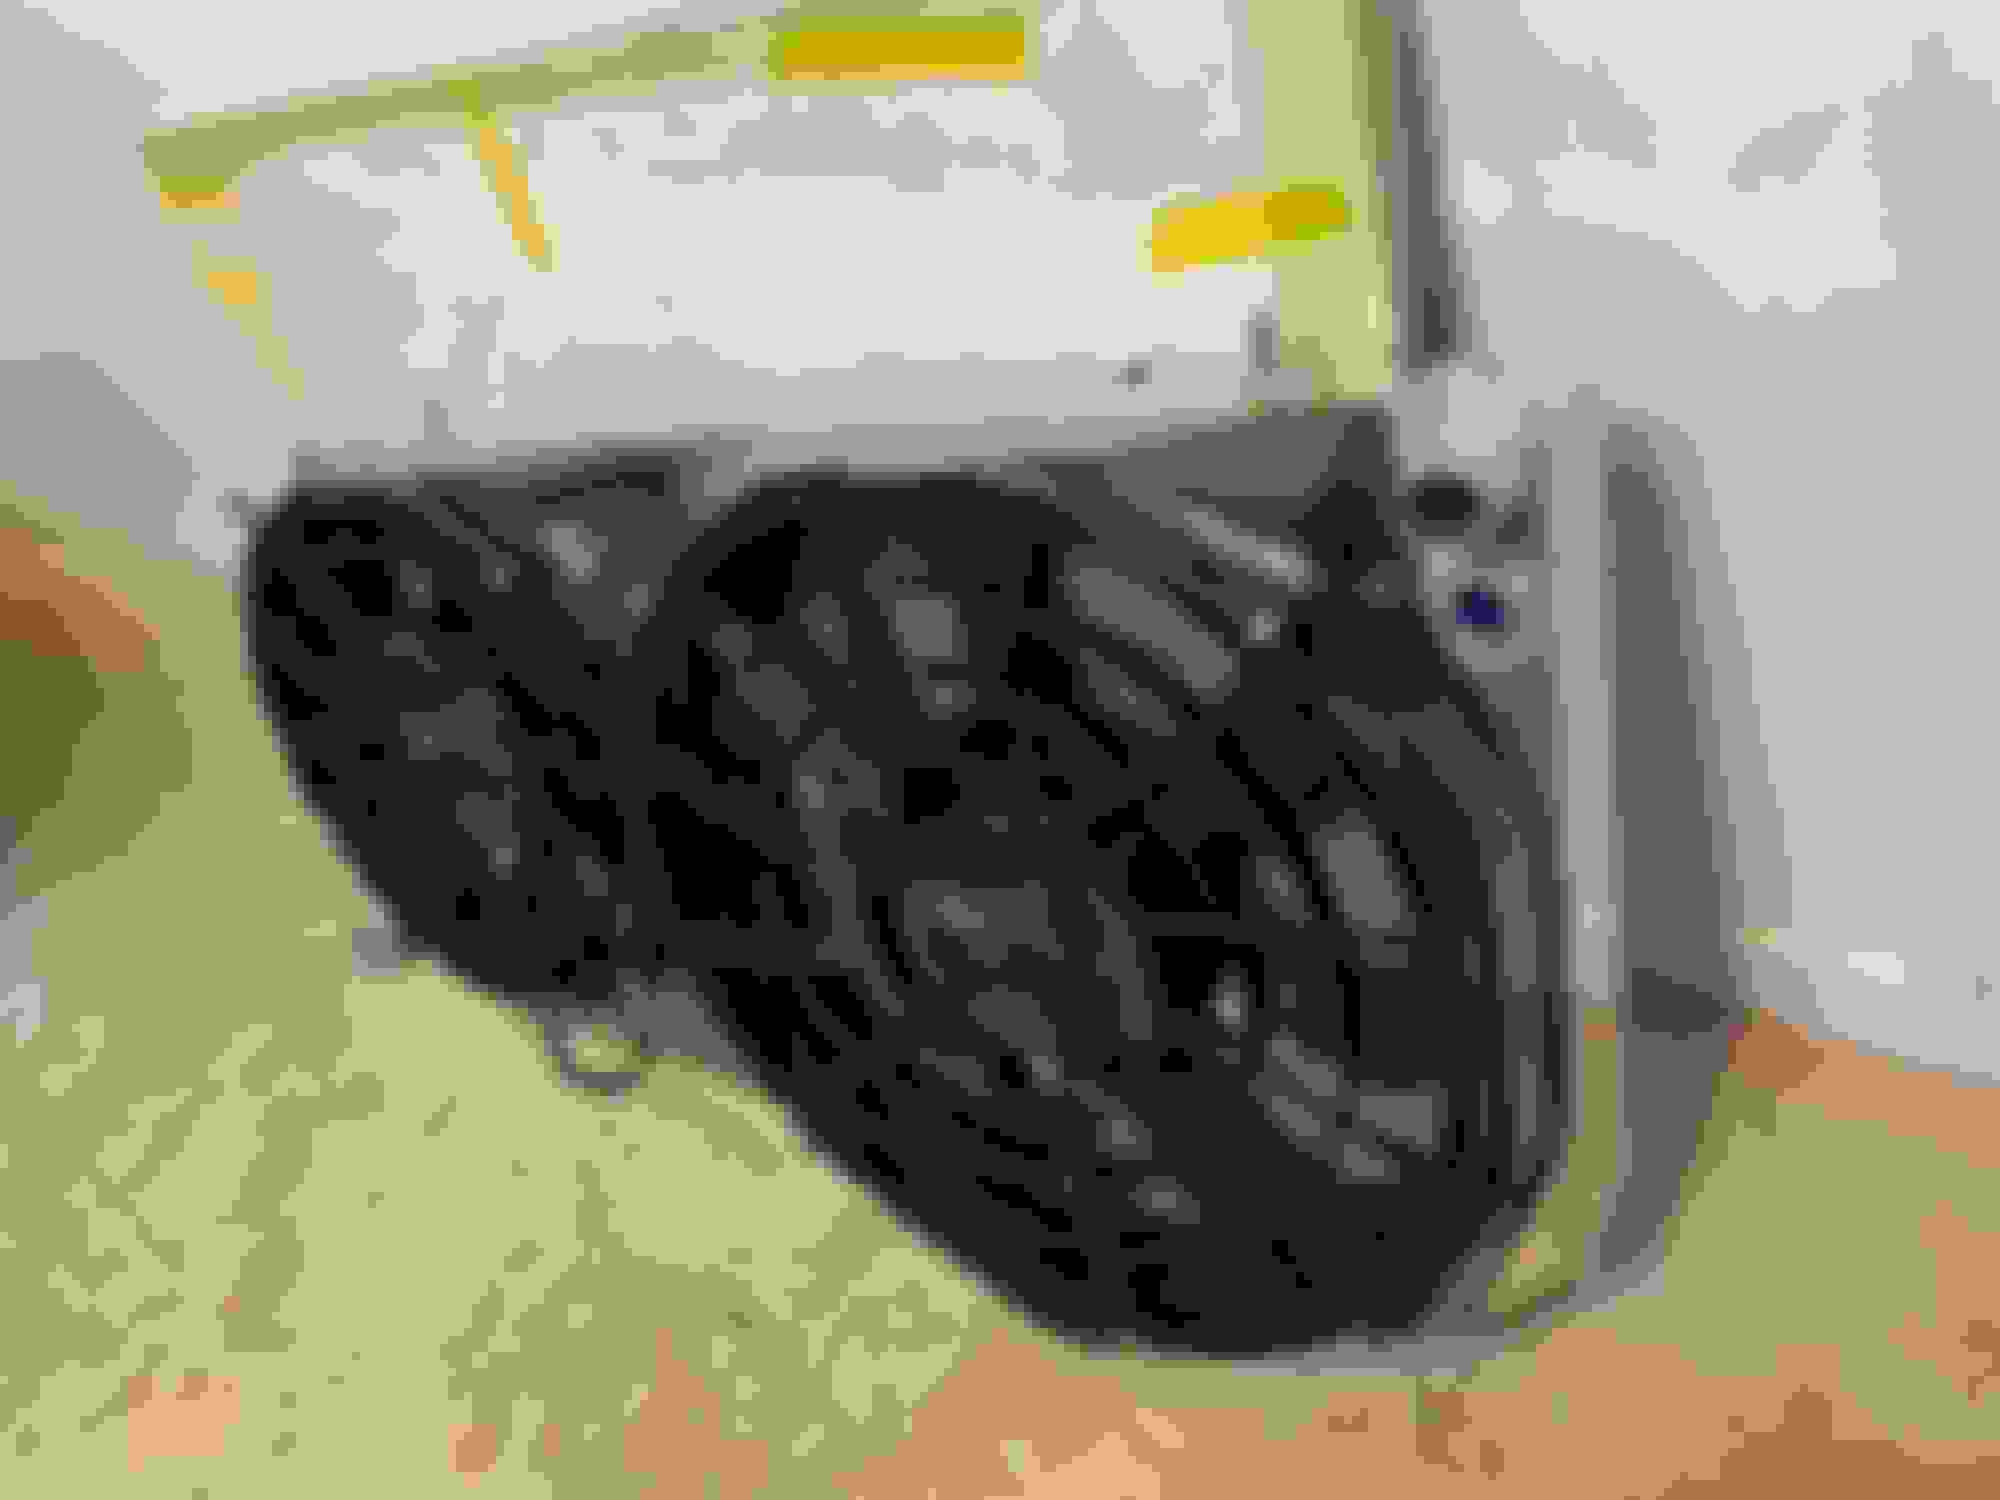
So, dual fan set up. These are from an X-Type. Simple signal wire from ECU... I would bet my pinky toe that the signal is simply a direct resistance info stream from the stype CTS based on coolant temps
They are the exact fans I have on my car and they work great. I couldn't get the resistor pack to work standalone though, so I just connected both fans to relays & have the cycling on/off via a simple temperature controller, with the sensor on the radiator return elbow on waterpump. I do have a separate fan controller that I was going to try & use to run them in a ~1/3 speed mode when the AC is working (when it's fixed that is) but haven't fitted it yet.
Ha! Ain't that sumpthin!
So, are you willing to be a guinea pig?
You know where this is going, 😂
I could be wrong but I'm guessing (as the day has gone on I am thinking I'm wrong) that maaaaybe the fans control module reads and interpretes the resistance values coming from the CTS and translates that in a PWM fan speed? Could it be possible?
It could and even if it didn't it is very easy to create a 0-5VDC pwm signal using it. The wiring diag from the donor would tell us whether it reads the sensor itself or if the ECU provides it, I suspect the ECU provides a PWM signal as it potentially reads other sources such as AC enable ?? - and even if you stick to the double stat just firing relays trying to make the module do the job would make a fun little project and be quite useful for many that follow us looking for such options. I'll see if I can pick something up cheap of E-Bay and see what it takes.
In time I will fully document mine but it is still way too beta for public consumption and I still want to do some experiments to confirm ideas - also far too mad scientist - functional but very 'not' pretty ...
Edit : Found a diagram, it looks like this is almost certainly a pwm signal from the ECU, looks like an output will be based on AC pressure sensor and temperature, quite how it triggers the fans I'm not sure I have no experience of the X-Type so perhaps they both run together. I have yet to find one cheap enough to take a punt on ....
Last edited by BenKenobi; 08-05-2022 at 04:01 PM.
Reason: Did some digging
I'm at a house on the water.
My car is 200miles away.
I guess I need something to do, lol
What do y'all make of this?
Check this out on Amazon
NOYITO Voltage to Frequency Module 0-10V to 0-10KHz Signal Conversion Module https://a.co/d/ch5MSiv
On the subject of variable speed fans and controllers, spal have their brushless fans and with the controllers actually in there temp sensors, I.e they the sensor varies the fan speed according to the water temp , 3 diff temp range sensors available, with this setup you do not need any relays, wiring is simplified imho, they have an additional separate input wire for manual overide or for ac etc, you can chuck a simple pentometer on this override circuit so fan does not operate at full speed for ac.
I have just installed this setup and it is quite neat to see the fan start up in low speed an watch it vary speed up and down all at the low speed range automatically, rather than the old. Au fan falcon setup I had which was quite noisy. Course basic system is relatively expensive. Time will tell on the longevity of the sensors. I have used a 16inch and 12 inch fan both 500w, so far only have seen one come on at low speed, but is winter here.
Attached is a pic of the basic wiring control scheme showing know relays and the temp ranges of the different sensors available.
+ some pics of my new setup
note I’d did not do this change because I had overheating probs but rather because I wanted to tidy up the front of engine, old wiring, old relays, removal of noisy electric fans, noting I also converted back to a 1 &1/2 past rad system from a single past system to tidy up the front as well.
it�s the mold the for the shroud, made up of mdf board, foam and builders bog. After I mocked up the shape. Thanks
Alright. Thanks for the answers, Shan... I have a lot to learn,,, then there's YouTube, lol. Is what it is!
MY PROJECT: Back to the drawing board.
As it turns out (maybe the universe is telling me something?) the Derale Fan showed up, was broken on delivery. It's going back in the mail today for a return as is the controller. 200$ to put towards something else.
I'm in the market for a SPAL fan. But there are LOTS of choices - even at the 16inch design. Lots.
Like you said Greg,,, I need to spend some money - shake the piggy bank.
I'm interested in the brushless ideas mentioned by Shan - but would like to know a little more about the powering of the fans, the sensors and the set up. I don't really want an OFF/ON only set up with the large fan. Even a Spal 2 speed with relays would be ok - if it exists. Internet information is all over the map.
Verily I say unto you: "There is more joy in heaven over one sinner that repenteth than over ninety and nine just men!".
Good decision all round JJJ. I thought that the SPAL kit with built in controller in Shaneb's Post number 45 above seemed pretty good. Providing a SPAL fan draws 25 amps or so, and is 16 to 17 inch diameter, it will do the job, allied with a 11 to 12 inch SPAL to replace the OEM electric
Last edited by Greg in France; 08-10-2022 at 01:11 AM.
Verily I say unto you: "There is more joy in heaven over one sinner that repenteth than over ninety and nine just men!"
Ha! I love it when ya get all biblical, on a Brotha!
We'll see how it goes. I am very interested in this PWM device and the company who sells them. Northern Radiator. "Northern�s part number is Z18350" $200smakers directly from the company. $60 or so, this way.
So I dug all of the old stuff out of the car yesterday. Mech Fan, all pulley assembly stuff, shroud, rad cover etc. Believe it or not it took less than 1.5 hours. I'm REALLY good at taking things apart, lol. I just throw the parts over my shoulder, it's like a cartoon.
Anyways, something happened that has made me hit the PAUSE button... As SOON as I started unbolting the carrier for the fan pully (I think EVERY fastener runs thru the water pump plate) it started pouring water/coolant. The damn gasket seal broke. I didn't expect that. It was an interesting bit of figuring to get the bolts and 1 nutt back in place needing makeshift spacers. When I snugged things back up, the leak stopped. But under pressure and heat???
So, now I'm thinking (danger Will Robinson), do I really need to remove and reseal/reset the entire damn water pump? What would you do??? Also, please see photo below and questions in the description...
The rad looks pretty darn good. Lots of stuff caught between the AC rad and the coolant rad. How does that happen I wonder? The rads will be coming out for sure for cleaning AND for another reason.
I have a problem with the cross brace under the rad. Rust. I need to get in there and give it the treatment - it's just a matter of time before something serious needs to happen with this. I don't think I can do it now.
Taking crude measurements for the 12in fan, the opening seems smaller than 12inches... Is there cutting that needs to happen to fit the 12inch fan in the OE shroud? Is it possible? I may just SPLIT the shroud and using the larger half for the 16/17 inch and pin the 12inch directly to the rad like some have done... What say you?
There were 4 bolts holding the fan pully assembly which also PINNED the WP casing to the block... BUT I could find ANYTHING to fit this 5th bolt slot. And, there was nothing there. What is this 5th bolt hole???
I think your pump will be OK JJJ. Just ensure the spacered nuts are tight. Worked for me.
The 12 inch SPAL will not fit easily into the OEM shroud, if at all. Just see if you can make it work somehow, a nice indoor job...
I am not a fan of fixing the fan directly to the rad, but many do and it seems to do no harm. It DOES make the fan super-efficient though, so if all else fails, do it!
The crud between the rads is a known XJS fault, and greatly impairs cooling, also blow out the fins on the oil cooler when fixing this problem. Interestingly, since I have had no mechanical fan and no shroud, plus the extra bumper slot, just the fans both mounted about 3/4 inch from the rads, I have had NO build up in that gap, no idea why. Maybe at speed the bumper creates a low pressure spot behind it that sucks up crud, leaves etc, which the better airflow from the slot prevents being formed?
Last edited by Greg in France; 08-26-2022 at 09:47 AM.
I'm a bit exhausted after today,,, see if this makes any sense.
Was awesome to see/hear/feel the fans ramp up as the car got warmer. The fan remains on at high RPMs when I turn off the car BUT the controller has a "force off at key off" option (if I'm reading the directions correctly) that I intend to rig up tomorrow. See photo below.
I think the high RPMs at car off must have to do with the placement of the temp sensor (described better below)... The sensor report HOT for too long and this can't be good for the battery... But there is a solution to this...
The 12 inch fan is wires as the OE small fan was. Used the old wiring.
Force OFF with a provided diode??? I don't understand how a diode connected to a keyed ignition power source would work. OPEN to a lesson if someone would offer an explanation.
Need to add two inline fuses as soon as possible!!!
I'll just say,,, and it's just a feeling, there are weak links in the set up.
1. The sensor for the controller is the size of a quarter/�25 cent US coin. On it's working side is a small piece of 3m adhesive. It is glued/stuck right above the large lower outlet to the pump hose on the bottom LH side of the radiator. If it holds, great! If it lets loose, trouble.
2. The controller is AMAZINGLY small. The controller gets hot. And, it's a controller, I mean, it can fail and I'll worry about that til the next ice age. The thing says it can handle 40amps and that BOTH fans can be wired to it, but I'm not sure how I feel about that.
3. I mounted the fans directly to the rad. The coverage is impressive. The straight shot zip tie style holders I am NOT to impressed by, and I fear they will fail. As the fans sit on the rad they definitely feel secure, I have to say, but with BUMPS and driving over time, I wish I had fasteners that felt a little more permanent, if you know what I mean? I used 8 of these little push thru style zip ties... it's the BS button zip style fasteners that I'm not so impressed by.
Anyways. It looks great in there. I think I can now access and change all belts from above (including alternator belt), which I intend to do tomorrow, 10x more easily than before this.
I still have some neatening and buttoning up to do of wiring. I intend to see if it's possible to mount the controller outside of the engine bay. There is a space in the area just above where my charcoal canister used to live. I will have to remove the UPPER section of fenderliner tomorrow to see if it looks like an area that stays dry. I am open to ideas for this (everything really!).
I may try to rig up a small PC cooling fan to the controller to keep it as cool as possible. Just hook it up to an ignition source.
I filled all gaps between the fans and the rad with a type of one sided adhesive weather strip. Completely sealed up the space between the fans and the inner rad face. We'll see if the material holds up. It's pretty severe in there. I don't really trust these button style zip tie things. Just don't. I "offset" the large fan so that no 2 zip ties were supported by ONE set of cross tubes - of that makes any sense...? SUPER SMALL CONTROLLER... How is this possible? Diode in center - does that mean if this wire is connected to a key powered circuit, controller will NOT allow fan to run at car shut off?
Well it will work for a while but I share your opinion of the zip tie mounts - they're a bad idea long term though I'm sure some have used them for years without issues - me I wouldn't use them.
On the fan thing off when the ignition is off is what you need if you aren't adding an auxilliary pump - running the fans on after shut down is of no benefit to the cooling system whatsoever without circulation but it does help push the air around under the hood - hope those heatsinks have a gap at the rear ...
Can't tell much about the controller from that image but all it does is provide a PWM type voltage at a guess, still needs to handle current though and how happy it will be under a V12 hood is anyones guess.
Well,,, "success" was short lived. I just went out to walk and get a sandwich from the pizza shop on the corner. Walked by the car "NORMAL",,, came back to find the 16inch fan running FULL blast for no apparent reason. Cold car, key off. Crazy.
WEnt under the hood, unplugged the fan, closed her up and ate my sandwich... Can't make it up. Makes NO sense....
JJJ
The round ended zip ties: I had to fit a fan to a friend's car and this was the only way it could be done (for reasons not needed to explain here). Like you I did not trust those round ended ties.
So what i did was to take two top quality nylon zip ties, take a steel washer about 1/2 inch diameter with a small hole in the centre that would NOT let the head of the zip ties through, stick a piece of neoprene rubber to the washer, feed the zip tie through the two with the head on the steel side. Then poke the zip through the radiator, and repeat the process on the other side, and use the head of the second zip tie to lock the first one, cutting off all but about an inch of the one used to lock the first.
Repeat four times per fan.
Never a worry thereafter.
As to the controller, as I have myself experienced, but as you are now finding out, NOTHING works well or reliably to control the fans except the Grant Francis setup. These modern, electronic gizmos just cannot handle the conditions under the V12 hood. If you want the diagram on controlling the main fan, and adding a cabin switch, I will post it.

 08-05-2022, 01:11 PM