XJS ( X27 ) 1975 - 1996 3.6 4.0 5.3 6.0

6.7L V12 build

Thread Tools
 
Search this Thread
 
  #81  
Old 12-10-2016, 04:07 PM
Daim's Avatar
Veteran Member
Join Date: May 2014
Location: Bremen, Germany
Posts: 5,906
Received 2,181 Likes on 1,584 Posts
Default

Only one position... I like to hear that!

Domyou know, out of your mind, if the front crank seal must be replaced on the steel sleeve? All pictures and items I find of the front seal, all show a steel 'tube' in the middle...!?
 
  #82  
Old 12-10-2016, 04:46 PM
warrjon's Avatar
Veteran Member
Thread Starter
Join Date: May 2010
Location: Vic Australia
Posts: 4,638
Received 2,576 Likes on 1,712 Posts
Default

Yes the front crank seal comes in a kit with the rubber seal and the sleeve. Good idea to replace it while your engine is out, they ALL leak with age. Mine is leaking quite badly but I'm not going to replace it as the engine will be replaced.
 
  #83  
Old 12-10-2016, 05:05 PM
Daim's Avatar
Veteran Member
Join Date: May 2014
Location: Bremen, Germany
Posts: 5,906
Received 2,181 Likes on 1,584 Posts
Default

Is the sleeve something just to 'carry' the ring until it is fitted or is the fsleeve installed at the same time?
 
  #84  
Old 12-10-2016, 06:21 PM
warrjon's Avatar
Veteran Member
Thread Starter
Join Date: May 2010
Location: Vic Australia
Posts: 4,638
Received 2,576 Likes on 1,712 Posts
Default

It stays there.

Have a read of this from Bernard Embden, he did a very good write up on how to replace it.

Replacing The Front Crankshaft Seal
 
The following 3 users liked this post by warrjon:
Daim (12-11-2016), Greg in France (12-12-2016), Jonathan-W (12-12-2016)
  #85  
Old 12-11-2016, 04:29 AM
Daim's Avatar
Veteran Member
Join Date: May 2014
Location: Bremen, Germany
Posts: 5,906
Received 2,181 Likes on 1,584 Posts
Default

Warren, gracie mille!

Seems like the AJ26 version with a spacer... Now I know what I'm looking at... Cheers again!
 
  #86  
Old 12-11-2016, 04:51 AM
warrjon's Avatar
Veteran Member
Thread Starter
Join Date: May 2010
Location: Vic Australia
Posts: 4,638
Received 2,576 Likes on 1,712 Posts
Default

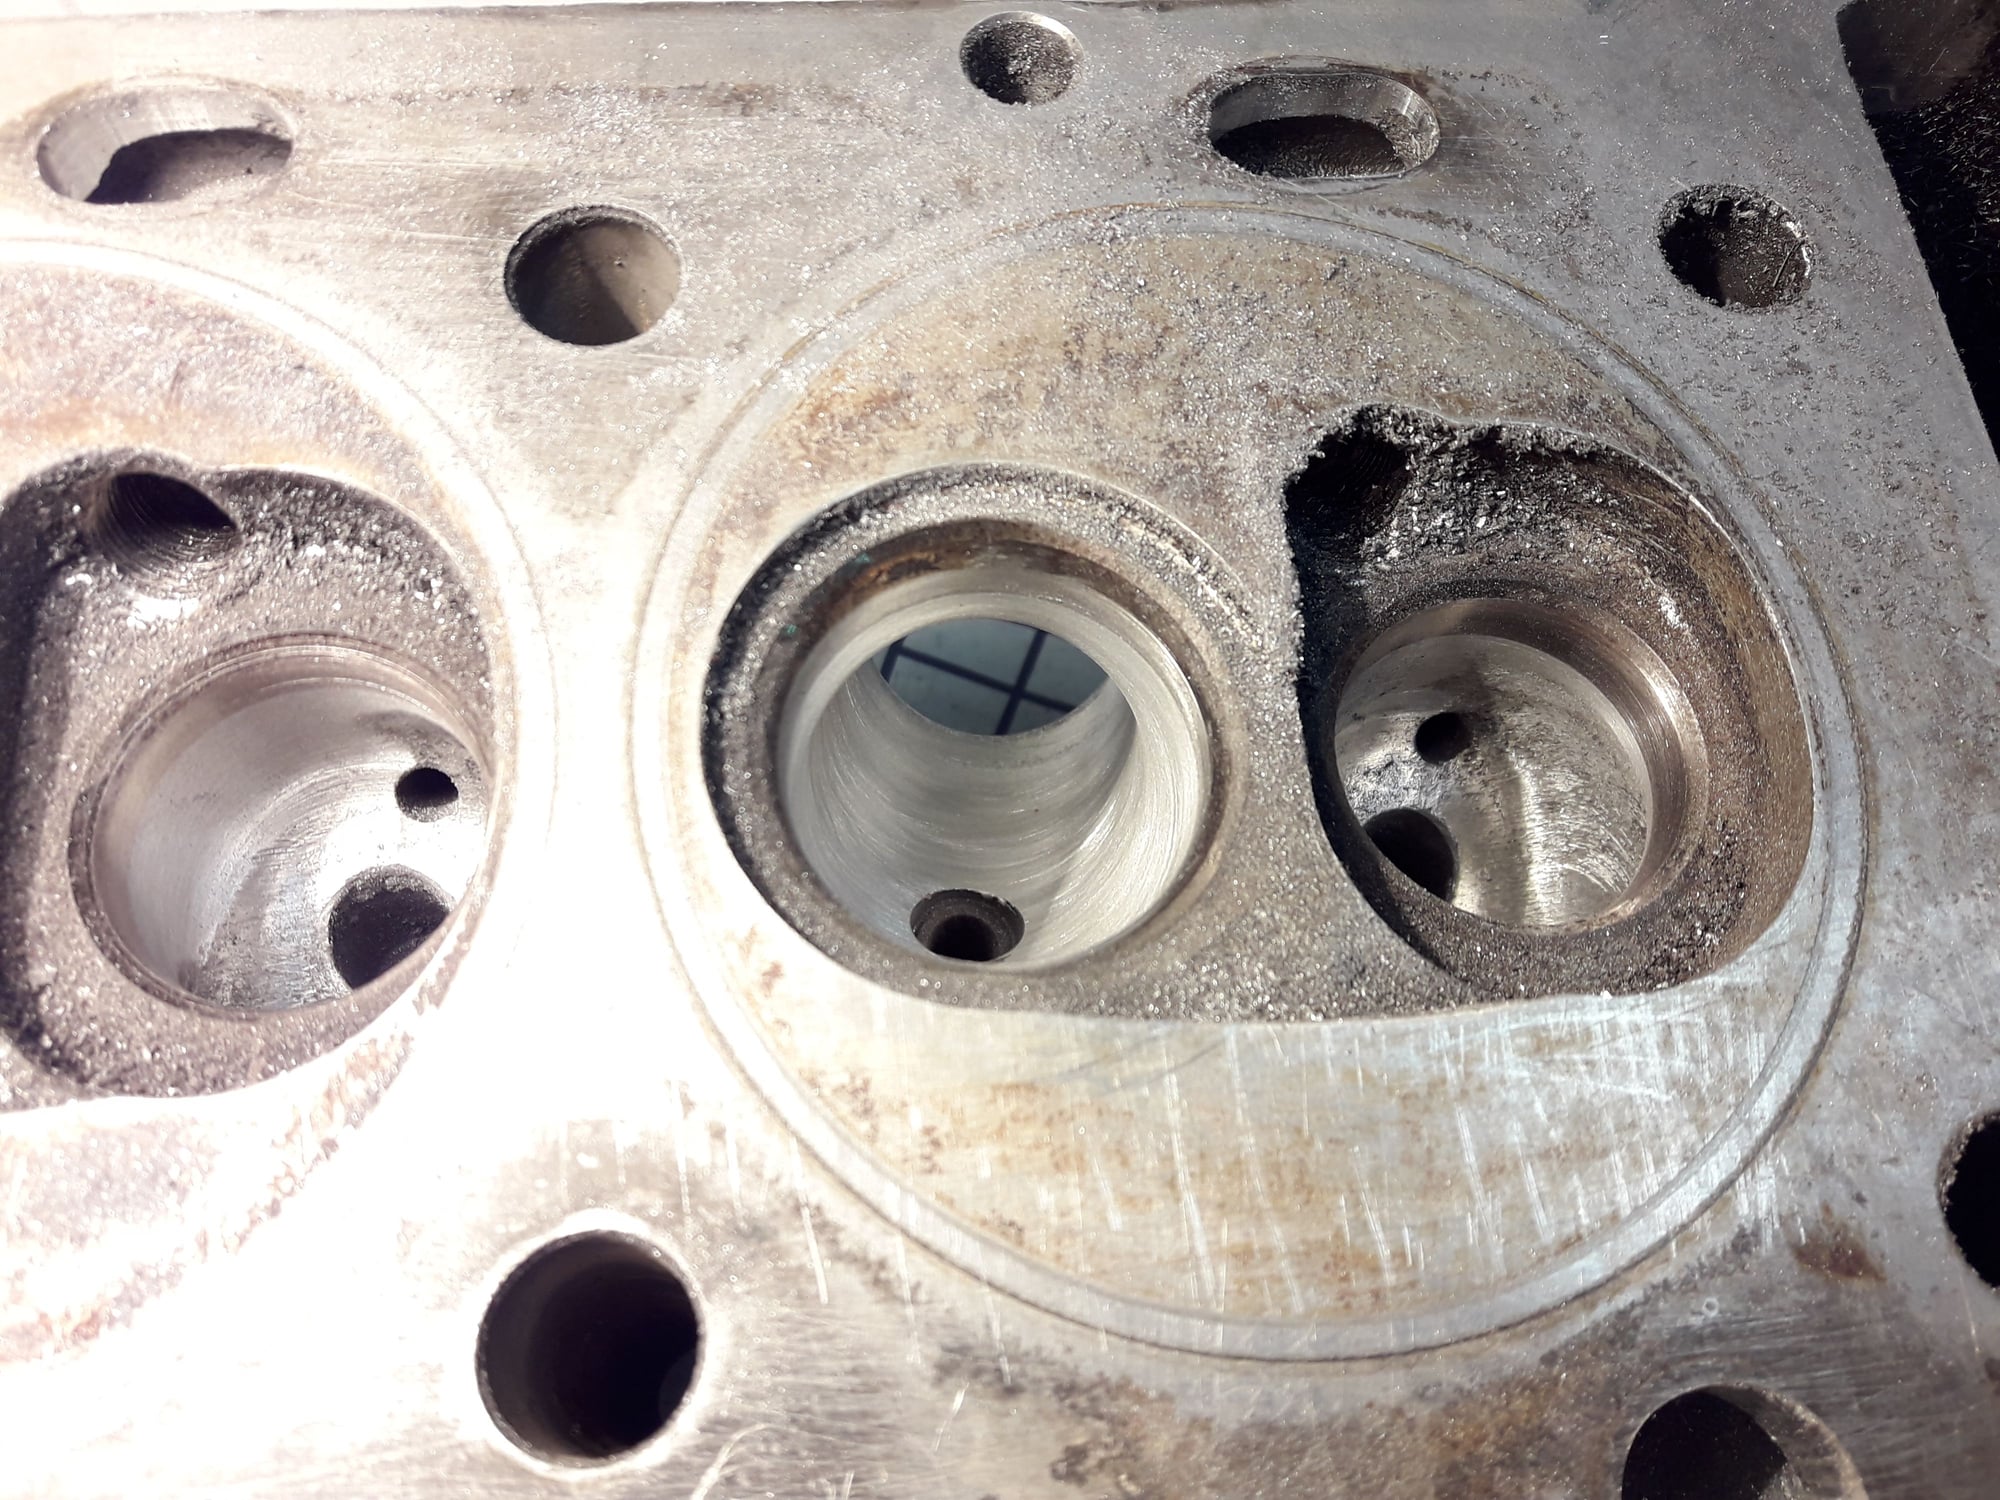
Made up a couple of templates today to assist in getting each chamber as close as possible to the same.

This clear perspex template took hours to get exactly right.


It's hard to see in this pic but the perspex is in place.


Chambers marked up ready for grinding.

 
The following 7 users liked this post by warrjon:
Daim (12-11-2016), FerrariGuy (07-01-2017), Greg in France (12-12-2016), JagZilla (12-12-2016), Jonathan-W (12-12-2016), ronbros (12-11-2016), xjsv12 (12-15-2016) and 2 others liked this post. (Show less...)
  #87  
Old 12-11-2016, 05:16 AM
Daim's Avatar
Veteran Member
Join Date: May 2014
Location: Bremen, Germany
Posts: 5,906
Received 2,181 Likes on 1,584 Posts
Default

Great idea! And they look professionally done... Though I doubt a pro would do it that way to that extent of precission!
 
  #88  
Old 12-12-2016, 12:35 AM
xjr5006's Avatar
Senior Member
Join Date: May 2013
Location: UK
Posts: 179
Received 264 Likes on 119 Posts
Default

Just received a TWR v12 6.7L to sort out as its got problems, I'll post some pics when its all opened up.
 
The following 5 users liked this post by xjr5006:
Daim (12-14-2016), Greg in France (12-12-2016), Jonathan-W (12-12-2016), ronbros (12-12-2016), xjsv12 (12-15-2016)
  #89  
Old 12-14-2016, 12:23 PM
ronbros's Avatar
Veteran Member
Join Date: Jul 2010
Location: Austin tx and Daytona FL.
Posts: 7,362
Received 1,236 Likes on 943 Posts
Talking

Originally Posted by xjr5006
Just received a TWR v12 6.7L to sort out as its got problems, I'll post some pics when its all opened up.
.


great idea , post a few specs also, like bore/ stroke, chamber pix anything relevant to the few go faster guys?

thx ron
 
  #90  
Old 12-14-2016, 05:02 PM
melhookv12's Avatar
Senior Member
Join Date: Feb 2015
Location: Uk
Posts: 377
Received 91 Likes on 70 Posts
Default

Originally Posted by warrjon
Made up a couple of templates today to assist in getting each chamber as close as possible to the same.

This clear perspex template took hours to get exactly right.


It's hard to see in this pic but the perspex is in place.


Chambers marked up ready for grinding.

are these the heads you are using or just dummy ones ?
 
  #91  
Old 12-14-2016, 10:40 PM
warrjon's Avatar
Veteran Member
Thread Starter
Join Date: May 2010
Location: Vic Australia
Posts: 4,638
Received 2,576 Likes on 1,712 Posts
Default

These are the heads that will be going on the engine.
 
  #92  
Old 12-14-2016, 10:49 PM
warrjon's Avatar
Veteran Member
Thread Starter
Join Date: May 2010
Location: Vic Australia
Posts: 4,638
Received 2,576 Likes on 1,712 Posts
Default

All 12 chamber roughed out. About 20hrs work in them so far.

I'm waiting on the new valves to arrive and they will be ceramic coated before heading off to the machine shop. Once the head is planed and the valve seats re-cut I'll cc the chambers and match them up.

 
The following 3 users liked this post by warrjon:
Jonathan-W (12-15-2016), ronbros (12-15-2016), xjsv12 (12-15-2016)
  #93  
Old 12-15-2016, 03:29 AM
xjsv12's Avatar
Veteran Member
Join Date: Nov 2012
Location: Moscow Russia
Posts: 1,082
Received 354 Likes on 214 Posts
Default

Hi Warren
Are you rounded ports?
This hard work is really help
 
The following 2 users liked this post by xjsv12:
FerrariGuy (07-01-2017), ronbros (12-15-2016)
  #94  
Old 12-15-2016, 10:11 AM
Jonathan-W's Avatar
Veteran Member
Join Date: Aug 2014
Location: Pensacola Florida USA
Posts: 1,858
Received 366 Likes on 294 Posts
Default

Originally Posted by xjsv12
Hi Warren
Are you rounded ports?
This hard work is really help
do you use a bottle brush hone to do that ?
 

Last edited by Jonathan-W; 12-15-2016 at 10:14 AM.
  #95  
Old 12-15-2016, 10:16 AM
Jonathan-W's Avatar
Veteran Member
Join Date: Aug 2014
Location: Pensacola Florida USA
Posts: 1,858
Received 366 Likes on 294 Posts
Default

Originally Posted by warrjon
All 12 chamber roughed out. About 20hrs work in them so far.

I'm waiting on the new valves to arrive and they will be ceramic coated before heading off to the machine shop. Once the head is planed and the valve seats re-cut I'll cc the chambers and match them up.

wow... might print and frame that! beautiful!
 
  #96  
Old 12-15-2016, 10:31 AM
Daim's Avatar
Veteran Member
Join Date: May 2014
Location: Bremen, Germany
Posts: 5,906
Received 2,181 Likes on 1,584 Posts
Default

Originally Posted by warrjon
All 12 chamber roughed out. About 20hrs work in them so far.

I'm waiting on the new valves to arrive and they will be ceramic coated before heading off to the machine shop. Once the head is planed and the valve seats re-cut I'll cc the chambers and match them up.

Looking good mate!

Stupid question: how do you 'cc' it? With water or some kind of fluid or with sand or so?
 
  #97  
Old 12-15-2016, 11:04 AM
melhookv12's Avatar
Senior Member
Join Date: Feb 2015
Location: Uk
Posts: 377
Received 91 Likes on 70 Posts
Default

Originally Posted by warrjon
These are the heads that will be going on the engine.

Looks like they could do with a skim to clean them up?? Is that in the plans. ?
 
  #98  
Old 12-15-2016, 11:34 AM
xjsv12's Avatar
Veteran Member
Join Date: Nov 2012
Location: Moscow Russia
Posts: 1,082
Received 354 Likes on 214 Posts
Default

Originally Posted by Jonathan-W
do you use a bottle brush hone to do that ?
I 'll put pics tomorrow
 
  #99  
Old 12-15-2016, 12:45 PM
melhookv12's Avatar
Senior Member
Join Date: Feb 2015
Location: Uk
Posts: 377
Received 91 Likes on 70 Posts
Default

Originally Posted by melhookv12
Looks like they could do with a skim to clean them up?? Is that in the plans. ?

just read your other post.
I'll get my coat !!
 
  #100  
Old 12-15-2016, 01:00 PM
xjsv12's Avatar
Veteran Member
Join Date: Nov 2012
Location: Moscow Russia
Posts: 1,082
Received 354 Likes on 214 Posts
Default

Originally Posted by melhookv12
just read your other post.
I'll get my coat !!

all parts will be cleaned twice or thrice


Quick Reply: 6.7L V12 build


All times are GMT -5. The time now is 10:00 AM.