89 XJS V12 rebuild
#41
 06-09-2012, 09:36 AM


Veteran Member
Join Date: Jul 2010
Location: Austin tx and Daytona FL.
Posts: 7,362
Received 1,236 Likes
on
943 Posts
nice to see a TRUE labor of love , warrjon!! i thought that modifications were not legal in OZ. whats up with that?
might another approach to sub frames(and RUST) be just make them out of Stainless Steel, and TIG weld it together!!!!
and i must ask you WHY so much reengineering of the front wheel bearings?
my car is 33yrs old and no problems with axiel play in them.
THX anyway, keep up the good work.
ron
might another approach to sub frames(and RUST) be just make them out of Stainless Steel, and TIG weld it together!!!!
and i must ask you WHY so much reengineering of the front wheel bearings?
my car is 33yrs old and no problems with axiel play in them.
THX anyway, keep up the good work.
ron

#43
06-09-2012, 05:51 PM
nice to see a TRUE labor of love , warrjon!! i thought that modifications were not legal in OZ. whats up with that?
might another approach to sub frames(and RUST) be just make them out of Stainless Steel, and TIG weld it together!!!!
and i must ask you WHY so much reengineering of the front wheel bearings?
my car is 33yrs old and no problems with axiel play in them.
THX anyway, keep up the good work.
ron
might another approach to sub frames(and RUST) be just make them out of Stainless Steel, and TIG weld it together!!!!
and i must ask you WHY so much reengineering of the front wheel bearings?
my car is 33yrs old and no problems with axiel play in them.
THX anyway, keep up the good work.
ron
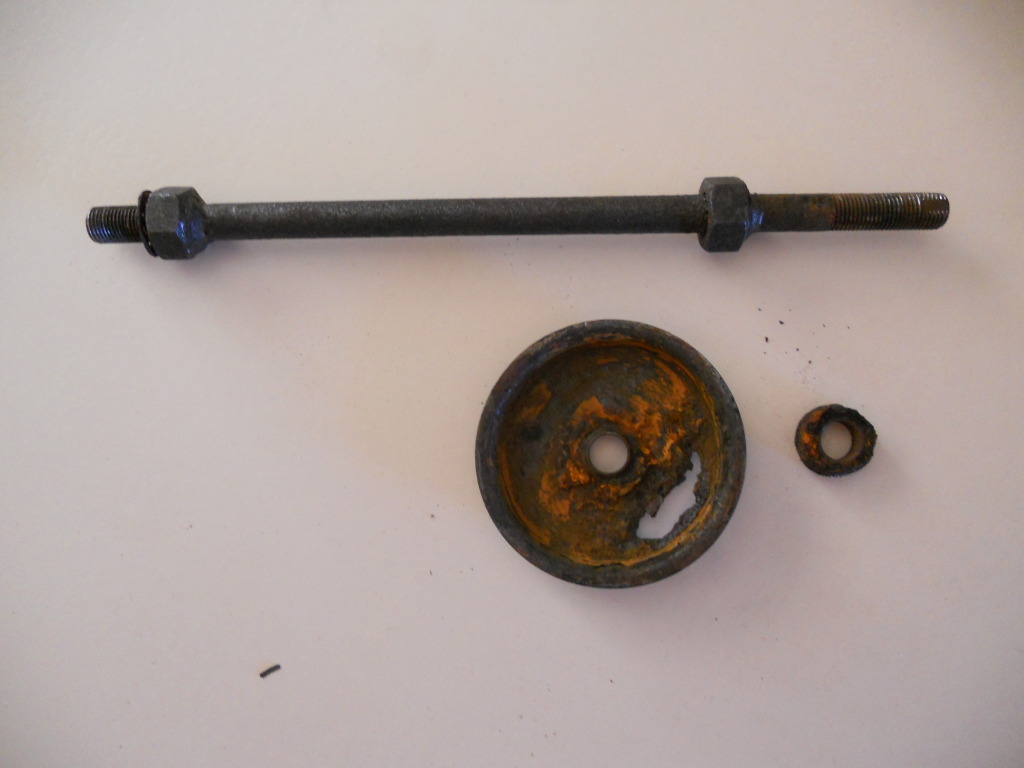
It's probably overkill for what will essentially be a road car. My reason for making these was the original bearings had spun on the stub axle, necessitating new axles, I came to the conclusion that as the bearings were a slip fit on the axle without a spacer to hold them they could spin again.
And I need to justify my lathe, lol
#44
06-11-2012, 03:21 AM
#45
07-26-2012, 06:09 AM
I decided to roll the lips on the guards to accept larger tyres, to my dismay the LH guard split - well you can see from the pic the rust when I just touched it with the grinder, BOY I am glad I bought a rust free car, can't imagine what a rust bucket would be like.
I didn't take photos of the cut out - any way I did cut the metal out and weld in new inner and outer.
My aim is remove all of the bog (bondo for you Americans).
DSCN0034.jpg?t=1343249960
Before being file finished
DSCN0035.jpg?t=1343249279
After File finished
DSCN0036.jpg?t=1343249292
I didn't take photos of the cut out - any way I did cut the metal out and weld in new inner and outer.
My aim is remove all of the bog (bondo for you Americans).
DSCN0034.jpg?t=1343249960
Before being file finished
DSCN0035.jpg?t=1343249279
After File finished
DSCN0036.jpg?t=1343249292
Last edited by warrjon; 07-26-2012 at 06:15 AM.
#46
07-26-2012, 06:15 AM
Veteran Member
#47
07-26-2012, 06:19 AM
#48
07-26-2012, 06:26 AM
Also getting Charice ready for a new coat of paint - and yes the rear end is out of the car again I was not happy with the job so out it came I should have it back in hopefully next week.
DSCN0040.jpg?t=1343249012
DSCN0040.jpg?t=1343249012

#50
07-27-2012, 10:44 PM
I found a bogy repair on the LH front guard above the headlight where it was full of bog and starting to rust above the headlight mount. All rusty metal cut out and I am in the process of welding in a new bit.
#52
07-28-2012, 06:58 PM
I didn't take a photo of this before I ground out the bog but you can see from the pic it's been repaired and not very well.
DSCN0044.jpg?t=1343512339
Cut out ready for new metal
DSCN0046.jpg?t=1343512079
New piece welded in this was a PITA with multiple curves
DSCN0047.jpg?t=1343512194
DSCN0049.jpg?t=1343511927
DSCN0050.jpg?t=1343511936
Almost finished just needs final grinding and the headlight box bracket welded back on
DSCN0051.jpg?t=1343512057
Last edited by warrjon; 07-28-2012 at 07:01 PM.
#53
09-09-2012, 04:54 PM
Time I though for an update. I have been toiling away cutting my TRW front and rear bumper covers to bits in order to make them fit. These were new and supposedly made from original moulds.


New homemade stainless steel and aluminium bumber mounts- these will never rust.

Old mount
I also bout this 6.0L engine for my next years project.


New homemade stainless steel and aluminium bumber mounts- these will never rust.

Old mount

I also bout this 6.0L engine for my next years project.
Last edited by warrjon; 09-05-2013 at 04:21 AM.
#55
09-09-2012, 10:46 PM

Veteran Member

#56
09-10-2012, 01:34 AM

Veteran Member

I notice that the cross pipe on the 6 litre has no filler spout, unlike the 5.3. Could you tell me where the header tank feeds into the coolant water system please, on the 6 litre?
I have a possible project for the winter to re-do these arrangements on my 5.3, and would like to know for that reason.
Thanks
Greg
#57
09-10-2012, 03:07 AM
#59
09-10-2012, 04:16 PM
The rear bar was PITA, it was never going to fit without major surgery. I ended up having to cut it into 6 pieces. Then line it all up screw it in place with bits of wood and then fiberglass it back together. Atleast now it fits really well.
Ripples across the top of the bar without the sides pulled in.


Ripples across the top of the bar without the sides pulled in.
#60
09-10-2012, 11:31 PM

Senior Member
Warren whoever you are you have too much time on your hands my friend... So many cars to restore why the XJ?
The rear bar was PITA, it was never going to fit without major surgery. I ended up having to cut it into 6 pieces. Then line it all up screw it in place with bits of wood and then fiberglass it back together. Atleast now it fits really well.
Ripples across the top of the bar without the sides pulled in.
Ripples across the top of the bar without the sides pulled in.