89 XJS V12 rebuild
#61
 09-12-2012, 03:09 AM

I have always wanted an XJS V12 and this only started out with a basic I'll fix a few mechanical issues and giver her a tidy up and it just went from there. You know I may as well fix this and that while I am at it.
I love my XJS and will never sell it, in fact my daughter wants it. Over my dead body - Oh thats exactly when she will get it.
#62
09-21-2012, 11:07 PM


#63
04-01-2013, 04:52 AM
Been a while since my last update. Finally have the car painted. 2 pack ISO free painted in my garage. I am very pleased with the results, a little orange peel and some dust. I plan on clear coat so she will be wet sanded which will remove any peel and dust.
The bonnet here has already been wet sanded with 800 ready for clear

Hibuild primer

2 pack epoxy primer (nasty stuff)

Stripping to bare metal what a terrible job must it must be done. I want to remove as much plastic filler as I can.

The bonnet here has already been wet sanded with 800 ready for clear
Hibuild primer
2 pack epoxy primer (nasty stuff)
Stripping to bare metal what a terrible job must it must be done. I want to remove as much plastic filler as I can.
#64
04-01-2013, 09:47 AM

#65
04-01-2013, 02:26 PM
You do not wet sand metallic before clear. Mine is not metallic it's a solid colour and very glossy so it needs to be wet sanded before clear.
#66
04-02-2013, 03:25 AM
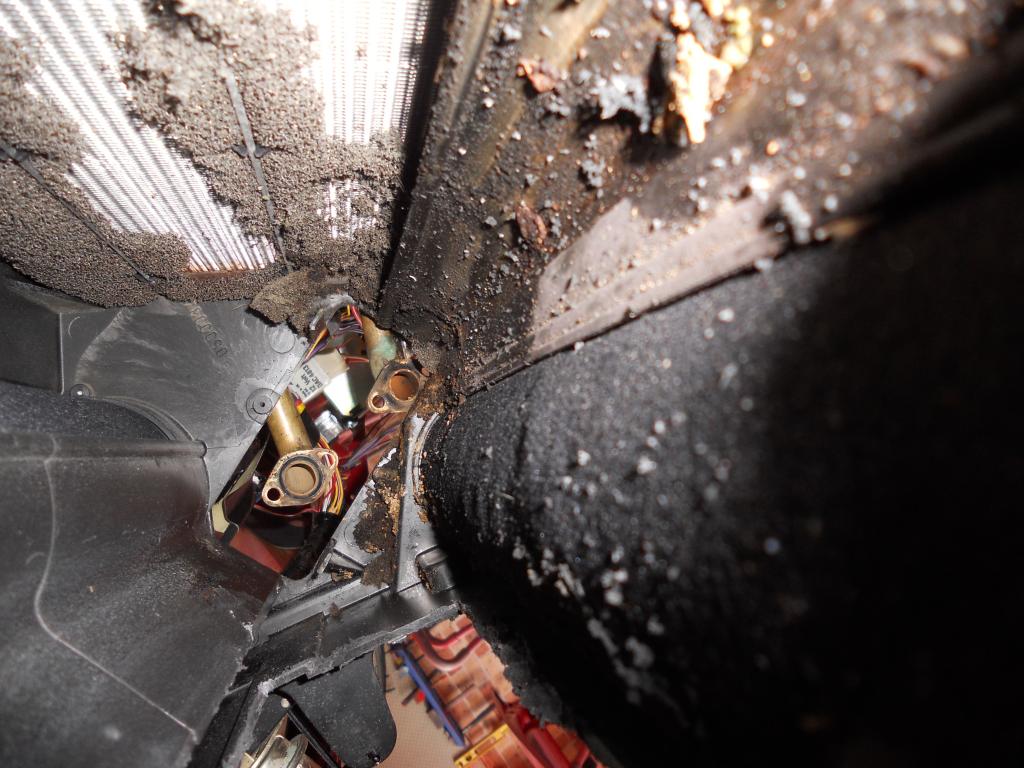
Rebuilding the AC - The heater core had leaked and all of the connectors were either of full of old coolant or welded together. Getting the heater core out in a RHD drive car requires the removal of the steering column. Although I did get old one out from the left I ended up damaging the fins with one of the heater pipes, not an issue this core is destined for the bin.
I replaced All of the connectors under the AC unit about 6 in total, hopefully this will fix my AC issues when it is functional.
New heater core ordered hopefully will arrive tomorrow

HMMMM me thinks this has been leaking somewhat

I ended up cutting hole in the front of the heater unit to allow access to clean the inside. I will patch this with a piece of plastic.


x
I replaced All of the connectors under the AC unit about 6 in total, hopefully this will fix my AC issues when it is functional.
New heater core ordered hopefully will arrive tomorrow
HMMMM me thinks this has been leaking somewhat
I ended up cutting hole in the front of the heater unit to allow access to clean the inside. I will patch this with a piece of plastic.
x
The following users liked this post:
Sarc (08-31-2013)
#67
04-20-2013, 12:23 PM
Warrjon
I notice that the cross pipe on the 6 litre has no filler spout, unlike the 5.3. Could you tell me where the header tank feeds into the coolant water system please, on the 6 litre?
I have a possible project for the winter to re-do these arrangements on my 5.3, and would like to know for that reason.
Thanks
Greg
Warrjon,
Thanks for the info in your blog, I have been following if for a while now. I noticed you where rolling your fenders to fit wider rubber. What size are you planning on running in the back? By my research the widest i have seen with no modification are 255 width on 8" rims with 33mm offset. I just purchased a set of the 16" x 8" lattice wheels with 33 mm offset. My plan is to run 255/50-16" in the rear, and put the widest (up to 255) in the front that I can. I have seen 245 placed in the front with 7" wide and 33mm offset but not 255 in the front.
Thanks!
#68
04-21-2013, 02:52 AM
Thanks for the info in your blog, I have been following if for a while now. I noticed you where rolling your fenders to fit wider rubber. What size are you planning on running in the back? By my research the widest i have seen with no modification are 255 width on 8" rims with 33mm offset. I just purchased a set of the 16" x 8" lattice wheels with 33 mm offset. My plan is to run 255/50-16" in the rear, and put the widest (up to 255) in the front that I can. I have seen 245 placed in the front with 7" wide and 33mm offset but not 255 in the front.
Thanks!
Thanks!
I am planning on 17x8 15mm offset with 245 front and 17x9 40mm offset with 275 rear.
#69
04-21-2013, 08:54 PM
Just a note, with the 16X8 33mm lattice wheels don't requre a spacer due to the center piece sticking out so far. These wheels actually have 1/4" more room then the original 15"x6.5" 28.5mm offset lattice wheels. I am only concerned with rubbing on the inside. Worst case I can always get a spacer.
#70
04-21-2013, 10:19 PM

Senior Member
Do you think you will have any rubbing on the rear with the 275? You will have to let me know once you get it together.
Just a note, with the 16X8 33mm lattice wheels don't requre a spacer due to the center piece sticking out so far. These wheels actually have 1/4" more room then the original 15"x6.5" 28.5mm offset lattice wheels. I am only concerned with rubbing on the inside. Worst case I can always get a spacer.
Just a note, with the 16X8 33mm lattice wheels don't requre a spacer due to the center piece sticking out so far. These wheels actually have 1/4" more room then the original 15"x6.5" 28.5mm offset lattice wheels. I am only concerned with rubbing on the inside. Worst case I can always get a spacer.
#71
04-22-2013, 03:37 AM

#73
04-23-2013, 04:32 PM
#74
08-29-2013, 10:29 AM
Well if you want to get radical about it...for my purpose built S that I raced eight years in SCCA I went to the good old english roller and fabricated the flares. Requires enlarging the wheel well body. see here: https://www.facebook.com/jon.frey.568?fref=ts
#76
08-30-2013, 04:00 AM
Update
I ended up repainting the car 3 times, this is what happened to my red after it was Clear coated. BTW I used all the same brand paint in this video.
VIDEO0011_zps24904a88.mp4 Video by warrjon | Photobucket
It is repainted after this video now and after a wetsand and buff looks pretty good. Just need to paint the TWR bars put them on and put it all back together.
I'll take some pics over the weekend and post
#78
08-30-2013, 05:00 PM
Paint was 2 pack ISO free by HiChem here in Australia. It's been very frustrating and has taken me 9 months longer than planned. Stripping the car a second time was a real PITA,
#79
08-31-2013, 06:32 AM
I think this is where you went wrong, I would not go very far from: PPG, BASF, DuPont and such.
I used PPG Deltron and ended up with one little cloud of slight darkness, where my ex-painter did not lay enough paint there. One would have to really look for that area, or be pointed to notice, yet it makes me very upset.
I used PPG Deltron and ended up with one little cloud of slight darkness, where my ex-painter did not lay enough paint there. One would have to really look for that area, or be pointed to notice, yet it makes me very upset.
#80
08-31-2013, 04:31 PM
I painted this in my garage so did not want use 2K paint with isocyanate. If I was doing it again I would set up my garage and use the better 2K paint. Too late now, I want to get the car on the road. I will most likely repaint it in a couple of years. I won't need to pull all the windows out as the jams and frames have been stripped and painted so it will be a sand, mask and paint.
Anyway the engine is the next project, I have that 6.0L V12 sitting in the shed screaming for some work. That and a 7speed sequential gearbox.
Anyway the engine is the next project, I have that 6.0L V12 sitting in the shed screaming for some work. That and a 7speed sequential gearbox.