Alternator re location
#1
 12-19-2013, 06:13 AM


Colleagues
Next year at same stage I will replacing my 5.3 v12 with a rebuilt 5.3 I have sitting in the shed waiting to be built. One thing that will be scrapped from this motor is the air pump, its not needed and in a car my age prior to 86 is not required. This is simply to tidy up that engine bay that is one of the most awful sites on the earth!
I have read articles of putting a Chev alternator in place of the air pump where all the brackets fit.
my question as I have two fully working motors can I use my original alternator instead of the chev one? Will the brackets and tightener's work with it?
One other thing is there an AC pump that I can use instead of that old huge GM lump that sits in the middle of the valley now, the quest is to to tidy up the mess that lies underneath the bonnet.
#2
12-19-2013, 07:35 AM

Veteran Member
Join Date: Mar 2008
Location: Pacific Northwest USA
Posts: 24,821
Received 10,871 Likes
on
7,150 Posts
Alternator: I don't know
AC Compressor: I think Sanden makes a modern, more compact replacement for the old A6 compressor. Naturally you'll need new hoses and you might have to fabricate some new brackets...as I doubt any vendor has on-the-shelf hardware for the conversion on a Jag V12.
Also, you can buy a modern, aluminum replacement for the A6. Lighter, supposedly more efficient, direct fit...but it won't be any smaller.
Cheers
DD
#3
12-19-2013, 08:37 AM
Senior Member
You can see the arrangement in this photo
(CLICK PHOTOS TO MAKE THEM MUCH LARGER)
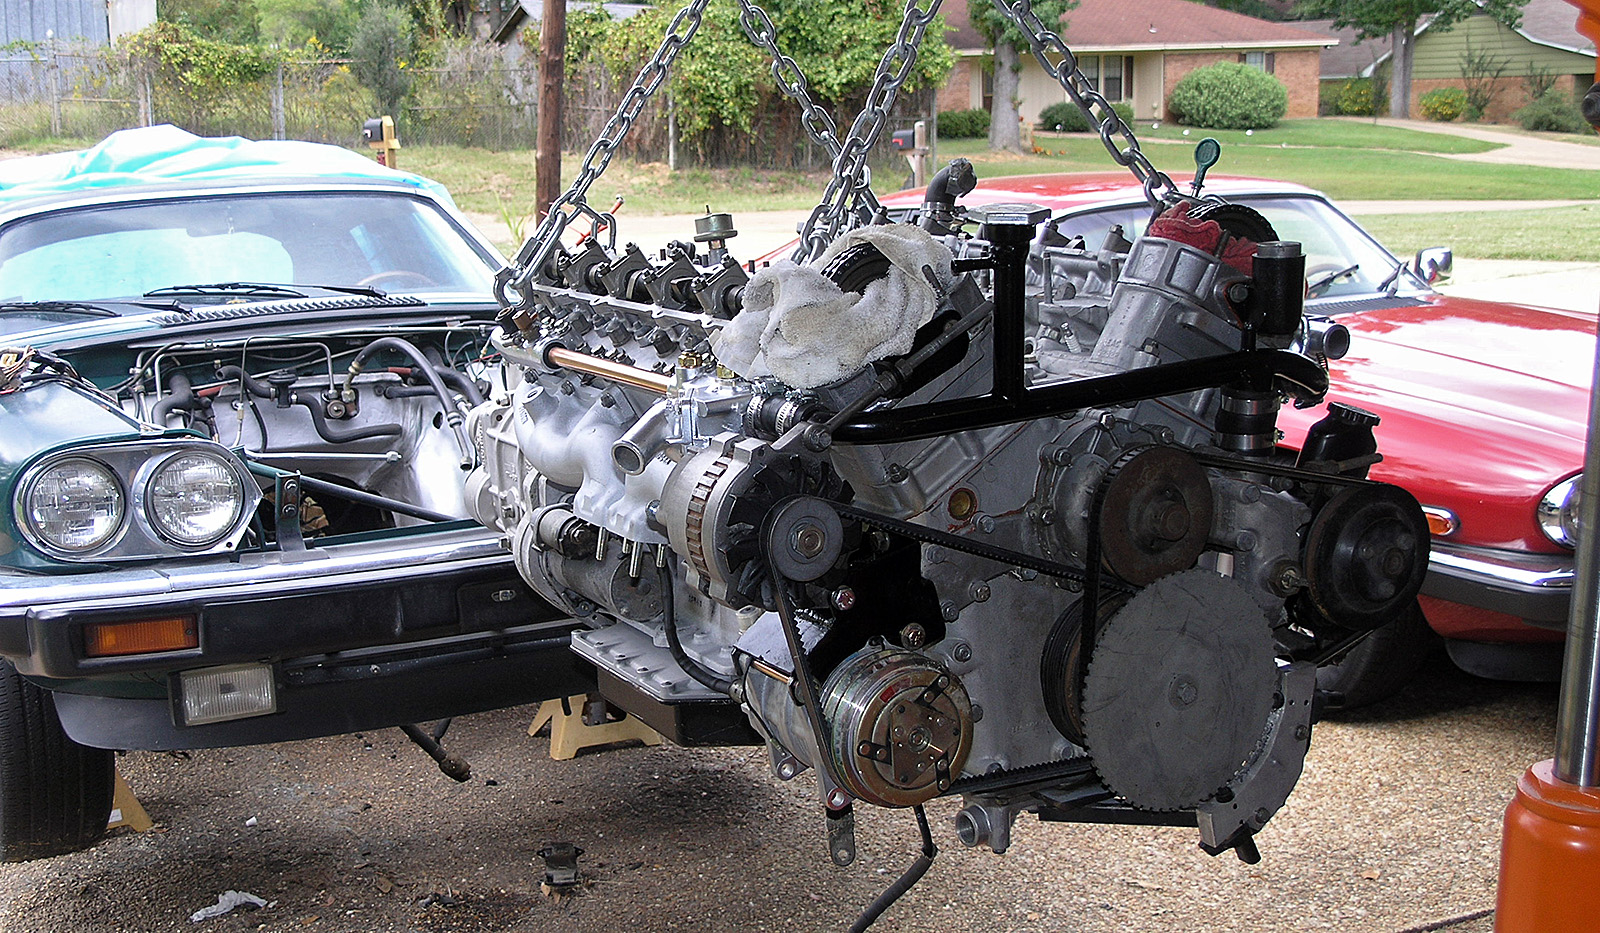
And the effect it has on engine bay appearance in this photo
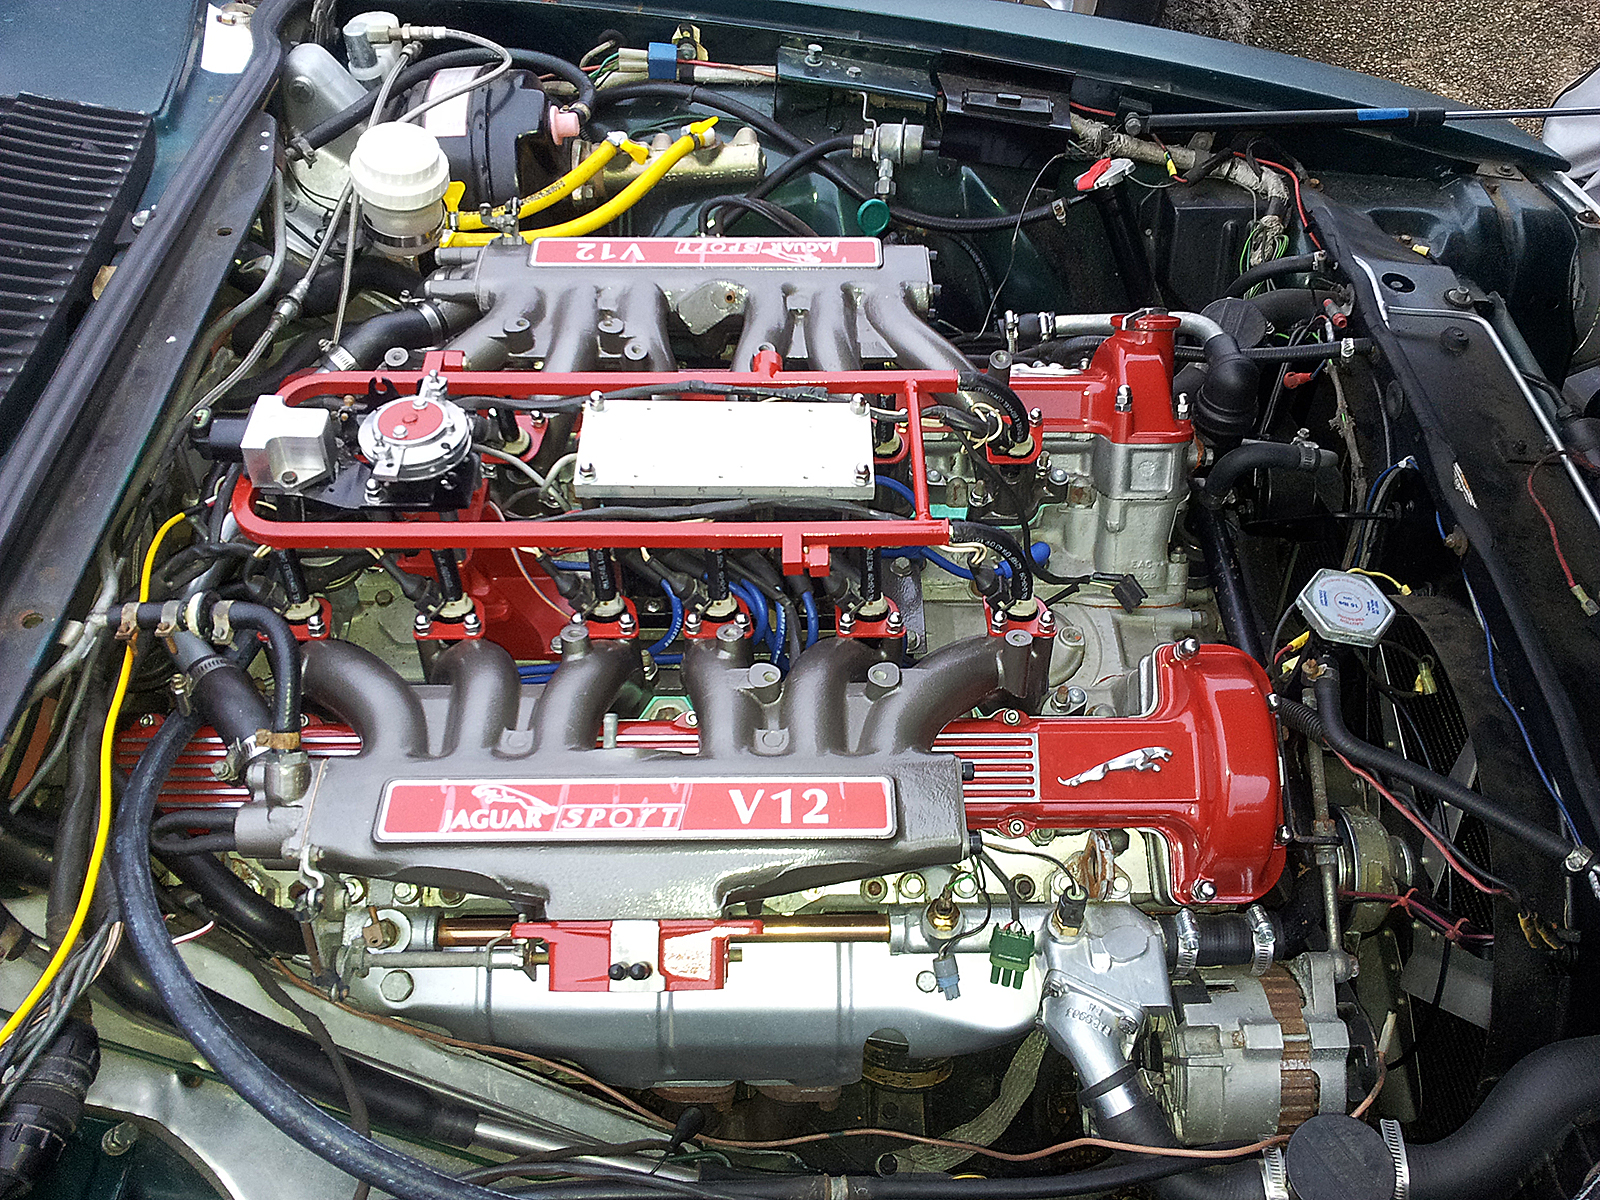
I had to fab up a bracket in order to put them both where they are. I have not yet fired up the motor, nor plumbed & wired the compressor. I may find that I need to add an idler pulley in order to increase the belt contact area on the compressor pulley.
#4
12-19-2013, 11:51 PM
Thanks for the replies gentlemen, Scott I do like were you have put the AC pump, makes for a very neat valley indeed and easy to work on.
As far as the AC pump goes what model did you use? sandan make a few different sorts.
Ill have to see how the original alternator is bracketed up, just seems like a waste when you have two fully functioning one's not to use them first.
A little of topic what ignition system do you have running? the big toothed cog in the first pic gives it away.
Last edited by Katoh; 12-20-2013 at 12:38 AM.

#6
12-20-2013, 07:39 AM

#7
12-20-2013, 08:10 AM
Senior Member
Thanks for the replies gentlemen, Scott I do like were you have put the AC pump, makes for a very neat valley indeed and easy to work on.
As far as the AC pump goes what model did you use? sandan make a few different sorts.
Ill have to see how the original alternator is bracketed up, just seems like a waste when you have two fully functioning one's not to use them first.
A little of topic what ignition system do you have running? the big toothed cog in the first pic gives it away.
As far as the AC pump goes what model did you use? sandan make a few different sorts.
Ill have to see how the original alternator is bracketed up, just seems like a waste when you have two fully functioning one's not to use them first.
A little of topic what ignition system do you have running? the big toothed cog in the first pic gives it away.
The trigger wheel is part of my Electromotive TEC-1 engine management system (controls fuel and ignition). If you take a second look at the engine bay photo, you will also notice the 2 coil packs stacked atop each other, where the distributor used to be, in the Vee (the top coil pack is inverted, so that the aluminum base is what you notice). I have a buddy who is going to make a custom panel which will cover that coil pack base, and visually tie it in with the rest of the motor. Also, if you look directly behind the throttle pedestal, you will notice an odd-shaped aluminum block. It houses the Electromotive fast idle valve body.
The link BigD posted is definitely worth a look. That car belongs to Ian Hissey. I've corresponded with him in the past, and I've admired his XJS work for many years.
Last edited by JagZilla; 12-20-2013 at 08:35 AM.
Trending Topics
#8
12-20-2013, 12:40 PM
Yes I've looked at the link thanks. Two ideas I've always wanted to do were put the A/C where yours is now located, mount a bigger alternator (mine has Bosch 75), probably install the new style starter, and repaint the engine compartment (guess that's actually 4 ideas).
If I can just figure out how to get the V12 lifted out (separate post) I'll be able to move forward...
Thanks!
John
1987 XJ-S V12
63,000 miles
If I can just figure out how to get the V12 lifted out (separate post) I'll be able to move forward...
Thanks!
John
1987 XJ-S V12
63,000 miles
#9
12-20-2013, 03:55 PM
Veteran Member
You could look at using an AC compressor off a 6.0L these use the smaller Ford compressor and different mount.
I like the setup better. I do think you will need an idler between the compressor and alternator. I think I will plagiarizer this for my new setup.
I like the setup better. I do think you will need an idler between the compressor and alternator. I think I will plagiarizer this for my new setup.
#10
12-20-2013, 05:07 PM
Veteran Member
Vintage Air - Basics of Air Condiotioning YOUR Street Rod
While you have everything out I would ditch the XJS condenser and install a parallel flow, I think one from a Commodore will fit with some mods to the oil cooler and mounts.
The following users liked this post:
Katoh (12-20-2013)
#11
12-20-2013, 06:17 PM
For the sake of appearance alone I agree, getting the compressor off the top of the engine is the way to go. Very very neat appearance.
Fortunately or not, depending on your point of view, where I live we have no vehicle inspection program...air pump is long gone. So a bigger alternator will go where the air pump use to be, compressor where the alternator use to be.
My wife is right...I'll never be done with this car :-)
Thanks,
John
#12
12-20-2013, 07:25 PM
My 89 Aus delivered has no Air pump. I didn't know the air pump came to Aus... My car has an idler pulley there.
The link BigD posted is definitely worth a look. That car belongs to Ian Hissey. I've corresponded with him in the past, and I've admired his XJS work for many years.
Fortunately or not, depending on your point of view, where I live we have no vehicle inspection program...air pump is long gone. So a bigger alternator will go where the air pump use to be, compressor where the alternator use to be.
My wife is right...I'll never be done with this car :-)
My wife is right...I'll never be done with this car :-)
#13
12-20-2013, 07:41 PM
Veteran Member
We have no inspections either where I am, the only sticking point maybe will be that the car is on classic plates and modifications are sometimes scrutinised. I don't see to much of a problem its not like I'm putting in a SBC or something stupid like that. My project will happen how fast I'm not sure but will get there.
#14
12-20-2013, 07:52 PM
Veteran Member
Join Date: Mar 2008
Location: Pacific Northwest USA
Posts: 24,821
Received 10,871 Likes
on
7,150 Posts

#15
12-20-2013, 08:19 PM
One of the greatest days in Canberra is when they disposed of the compulsory over the pitts inspections every year, now they do a random type checks on the road every blue moon or so. with the classic plates I just take a form in from the club registrar with the club membership to get rego again. $90 a year opposed to $950 is a huge saving for something only driven every fortnight if lucky. Even comprehensive insurance only cost's me $120 for the year, because of the classic plates, go figure?
How the heck can they determine 2mm what a crock!
How the heck can they determine 2mm what a crock!
#16
12-21-2013, 03:08 AM

Veteran Member
#17
12-22-2013, 11:07 AM
Senior Member
Thanks Greg. I've always hated the way the A/C hose runs along the top of the motor, further cluttering up what has the potential to be a stunning looking motor. I want to keep the hoses out of sight as much as possible. I plan to have a hose/line made up which will run as a hard line, along the firewall to the right side of the car, where it will dive downward then turn forward. At that point, the rubber portion of the hose will run along the side of the engine block (inside a heat resistant sleeve), to the compressor. Running the other hose to the condenser connection from there will be easy. There is actually a huge gap between the exhaust manifold/downpipes and the engine block, so there will be more than enough room for this hose.
#18
02-12-2019, 10:49 PM

Hi Scott,
I truly do want to thank you for your post. I finally got to see what the A/C Mod and the Altenator relocation looks like. I to am a fan of Ian Hissey's work. Yours looks just as impressive. And since you're a little closer to me than Ian (I'm in Texas) , I could really use a little guidence to finish my Jag. I'm not sure of the rules on sharing contact info but I'd like to give you mine and then egt your advice, if you have time. Either way thanks for your post.
I truly do want to thank you for your post. I finally got to see what the A/C Mod and the Altenator relocation looks like. I to am a fan of Ian Hissey's work. Yours looks just as impressive. And since you're a little closer to me than Ian (I'm in Texas) , I could really use a little guidence to finish my Jag. I'm not sure of the rules on sharing contact info but I'd like to give you mine and then egt your advice, if you have time. Either way thanks for your post.
#19
02-13-2019, 01:08 AM
Veteran Member
#20
02-14-2019, 03:07 AM
Senior Member