Cherry Blossom - Restoration 1990 XJS V12
#2381
Hi Greg & Duke
Cheers! to both of you
I'm feeling a little bit lost now having got that far but also a sense of achievement that is really off the scale, though still more work to do to put it back and way more satisfying than replacing an In-Tank Fuel Pump or changing the Spark plugs
Duke me thinks its your turn now (Lol) How did you get on at the Car Show? Did the Brakes hold up ok? if so that sounds like a really good fix you came up with
#2382
Rebuilding The Cage Of 'The Ice Princess'
'Never Finish One Job Before You Start Another'
Some of you may remember that sometime before 'Lockdown' I had to drop The IRS of my other Car 'The Ice Princess' quite simply because the running gear was a total basket case and was in just as bad condition as the IRS that I've just removed from '50 Shades' My Grey XJS'Never Finish One Job Before You Start Another'
So if you want to catch up on that Saga or missed it the first time round here is the Thread: Dropping The Cage of 'The Ice Princess'
And so what happened next?
Well since you may be asking or not as the Case maybe, I dragged it into the Garage and then forgot all about it where it stayed on the 'Back Burner' until now and though this might seem like a heinous crime which in fact it probably is, I sort of felt I had a good excuse
Because at the time in question, it was a beautiful Summer and we still had my other Car 'Cherry Blossom' to go out in, so we did!
As Summer in the UK or at least 'Top Down Weather' only seems to last for a few short weeks, so it was a case of going out to enjoy the Sunshine while we can and then of course 'Cherry Blossom' went on the 'Blink' with a Brake Problem up to the point where all of my Cars have no broken down
And so I am trying to fix them as fast as I can, where the Cage on '50 Shades' is very nearly ready to go back in and so as far as this Summers concerned, She is my best hope, as one way or another the 'Lockdown' seems to really have affected everything as some of the places where I get Parts have not been open as usual
Where to make matters worse if the could get worse, my daily driver the Merc broke down as well, where I had to replace all the Rotors and the Calipers for the MOT Test and so as far as Cars are concerned, it seems to have been one problem after another and as for the Weather, its either been raining or freezing cold or both!
So rather than sit around idling doing nothing much that cannot wait, I'm running two different projects both at the same time or multitasking as the GF calls it, which is apparently something that no one can do quite as well as She can and since that does seem to be true, I am not going to argue because I am not quite that Stupid!
So as its Freezing Cold today, I can work in the Garage rebuilding the Cage of 'The Ice Princess' but then if the Sun starts Shining again, then I will be back outside to continue work on '50 Shades' My Grey XJS
The only difference this time is that I am ahead of the game and have already ordered all the Parts I am going to need, so no excuse for not making a bit of a flying start when they arrive
Which will include rebuilding two more of those rear Calipers, which it seems has turned out to be something I can do in record time! as when I did the last one, it only took me Four Hours! to get one Piston in, instead of about Four Minutes when you watch a Professional doing it on YouTube
And so listening to the dulcet tones of 'don't give up your day job' from the GF then if I can do them in less time this time then I will call that a result!
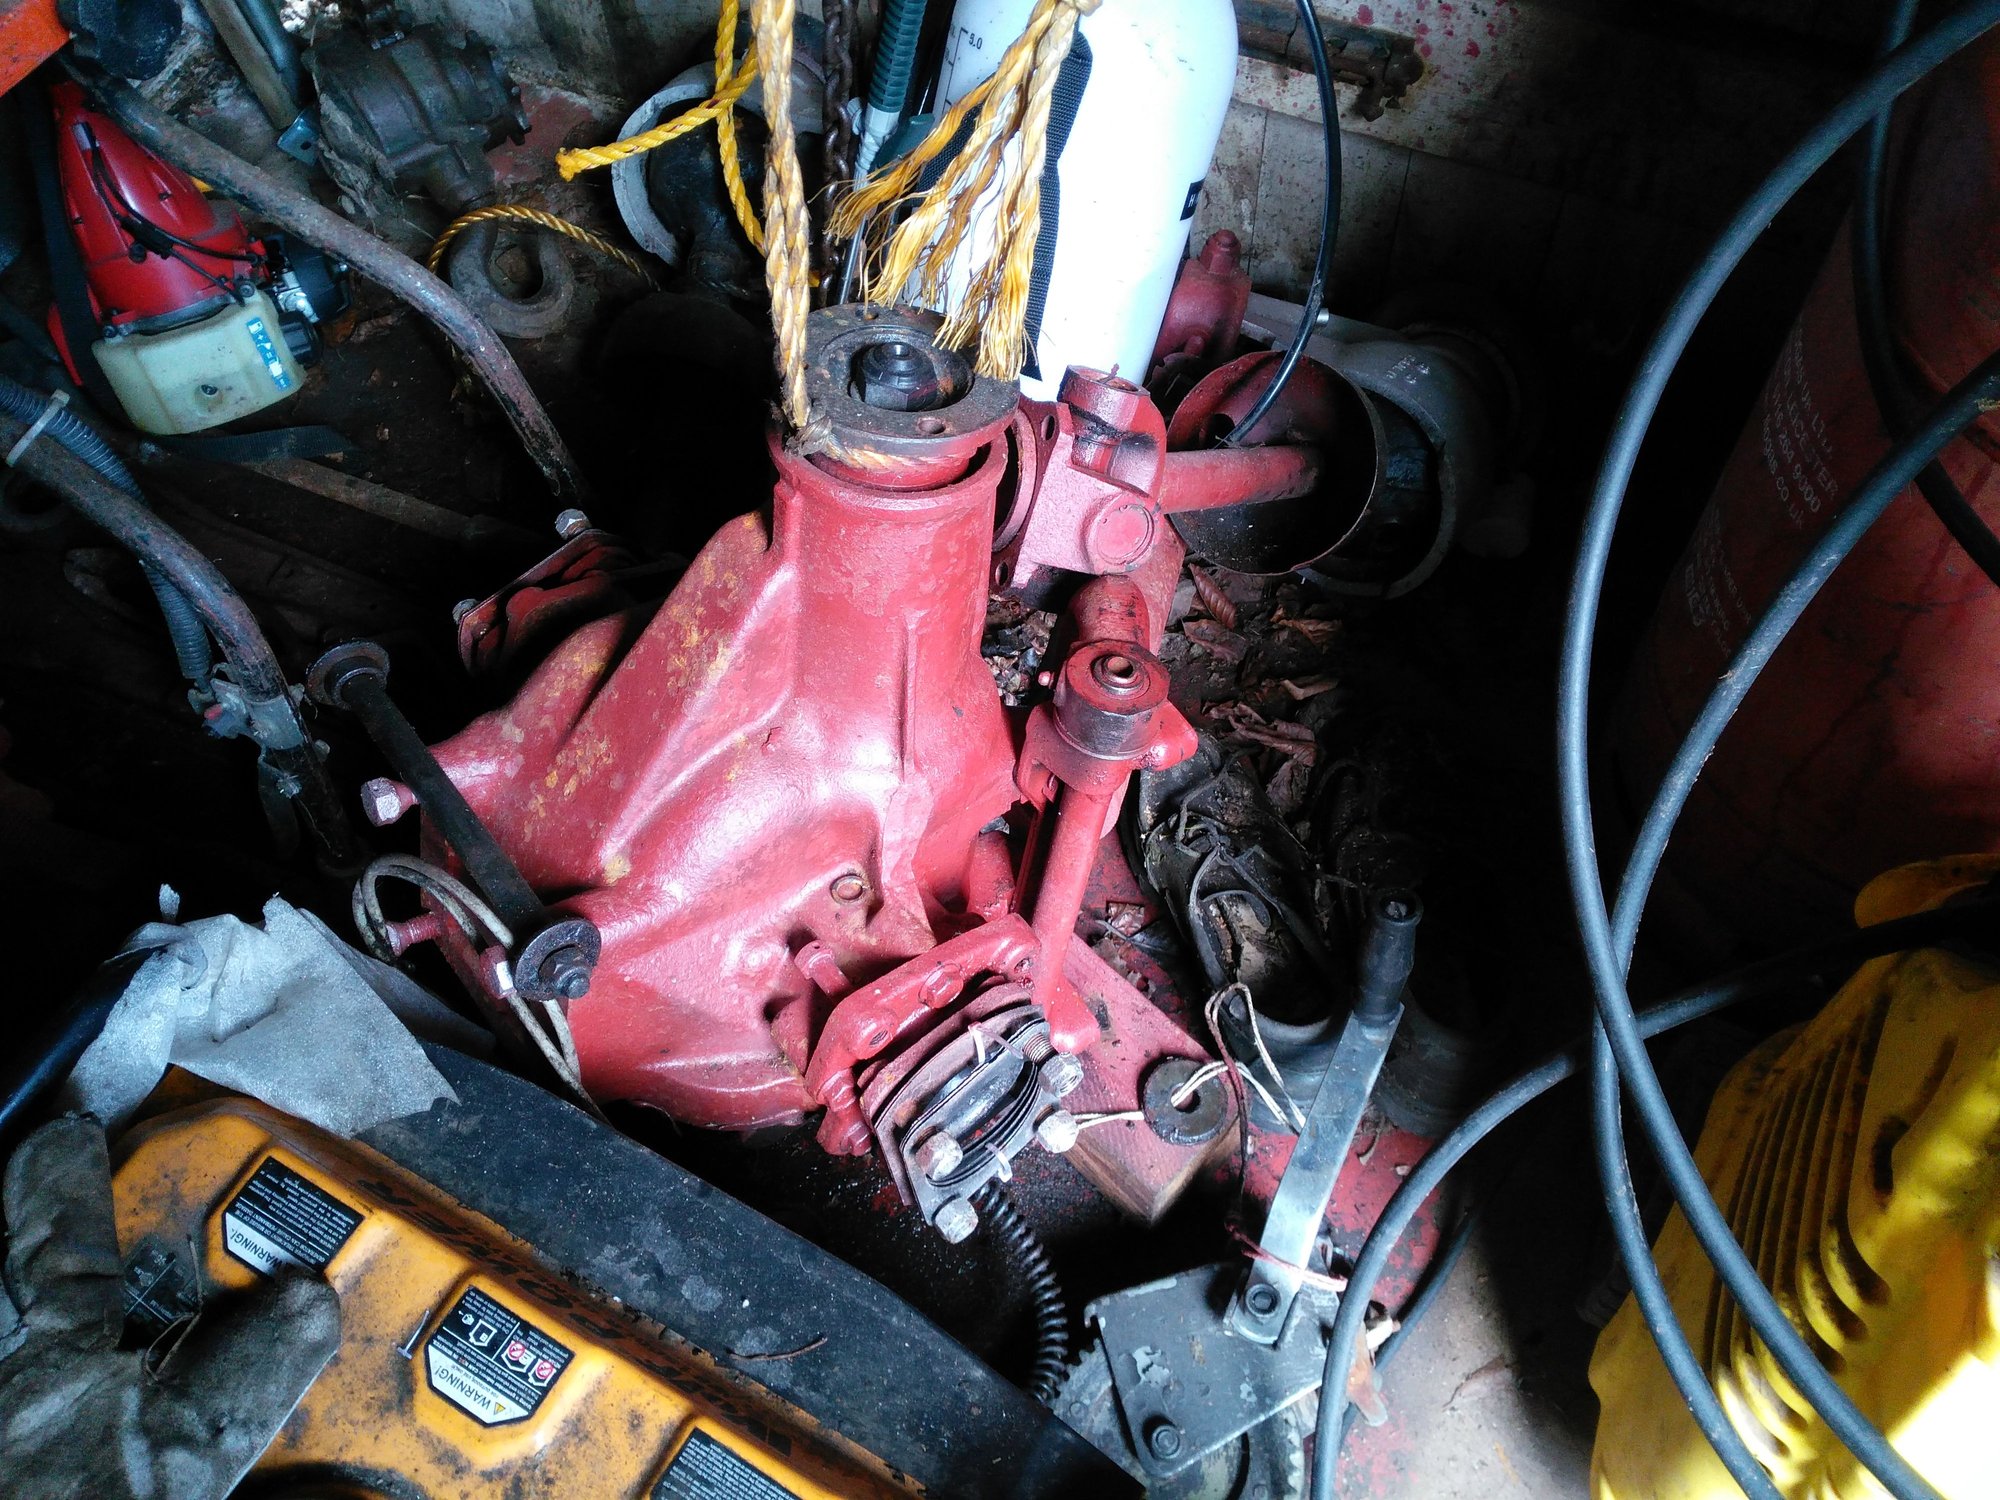
Cage Fighter! 'The Sequel' Rebuilding the Cage of 'The Ice Princess' when its too Cold to work outside as it is today
#2383
Removing The Cage From '50 Shades' My Grey XJS
Mission Creep Crept In
Having got the IRS of '50 Shades' My Grey XJS looking as nice as could be, I wasn't going to bother cleaning up the underside that I couldn't see, at least not at this stage of the games, as it will no doubt lose its shine when its time to move it back under the CarMission Creep Crept In
Except I came all over a bit OCD and decided I just couldn't leave it like that and so I turned the Cage upside down for a degrease and a Powerwash and also going to put some new nuts on the Cage, which I can get from my local nut and bolt factor, as I really want to try and make a job of it without cutting corners
Then all I need are the Propshaft Bolts and then with luck it won't be long before we're good to go, where at this point I can also say that removing the Propshaft Bolts was for me the hardest part of the process at least so far
Simply because there is not enough room to get a Ring Spanner on them and so I had to use an Open Ended Spanner, which is a bit of a Nightmare as the Bolts on the Propshaft are so tight that you have to hit that Spanner with a FBH which promptly flies into the distance sometimes to be never to be seen again
So if anyone has any tips on that, I would be pleased to hear them, as perhaps I should have made a Spanner just to do that job, as they will need to go back as tight as when I took them off
As for the Cage on 'The Ice Princess' the first thing I'll be putting on, are the Shims and the Rotors and then I'll rebuild the Calipers with new Pistons as I did before though hopefully maybe a little bit quicker this time, as after all I have had the Practice!
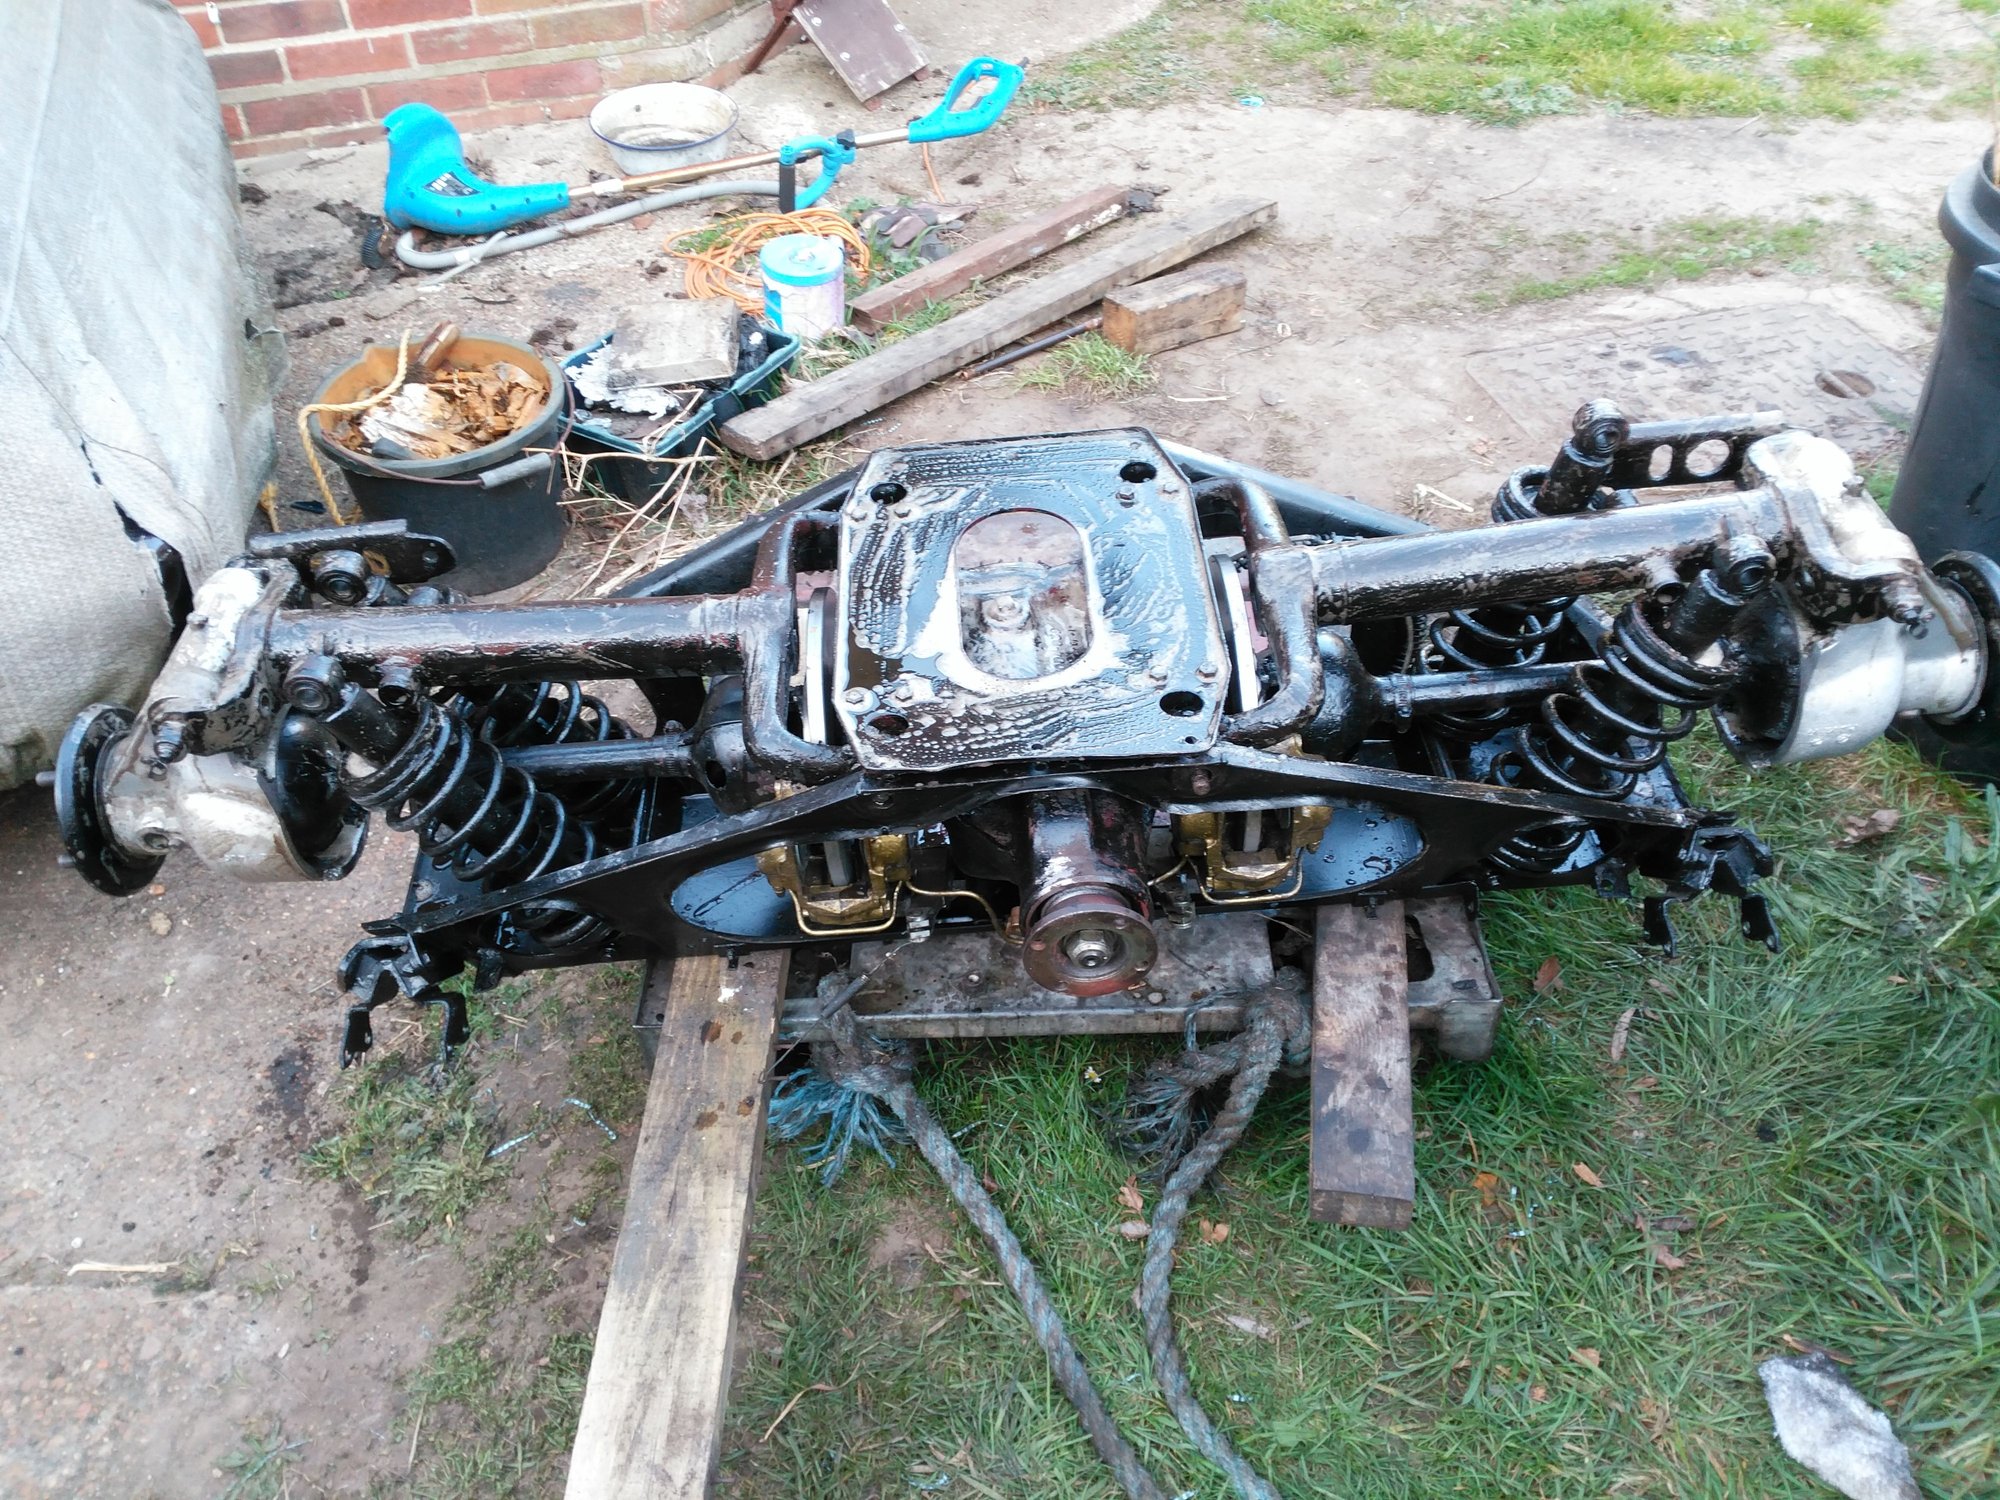
Degreasing the underside of the IRS on '50 Shades' My Grey XJS

Having a Blast with my High Pressure Power Washer
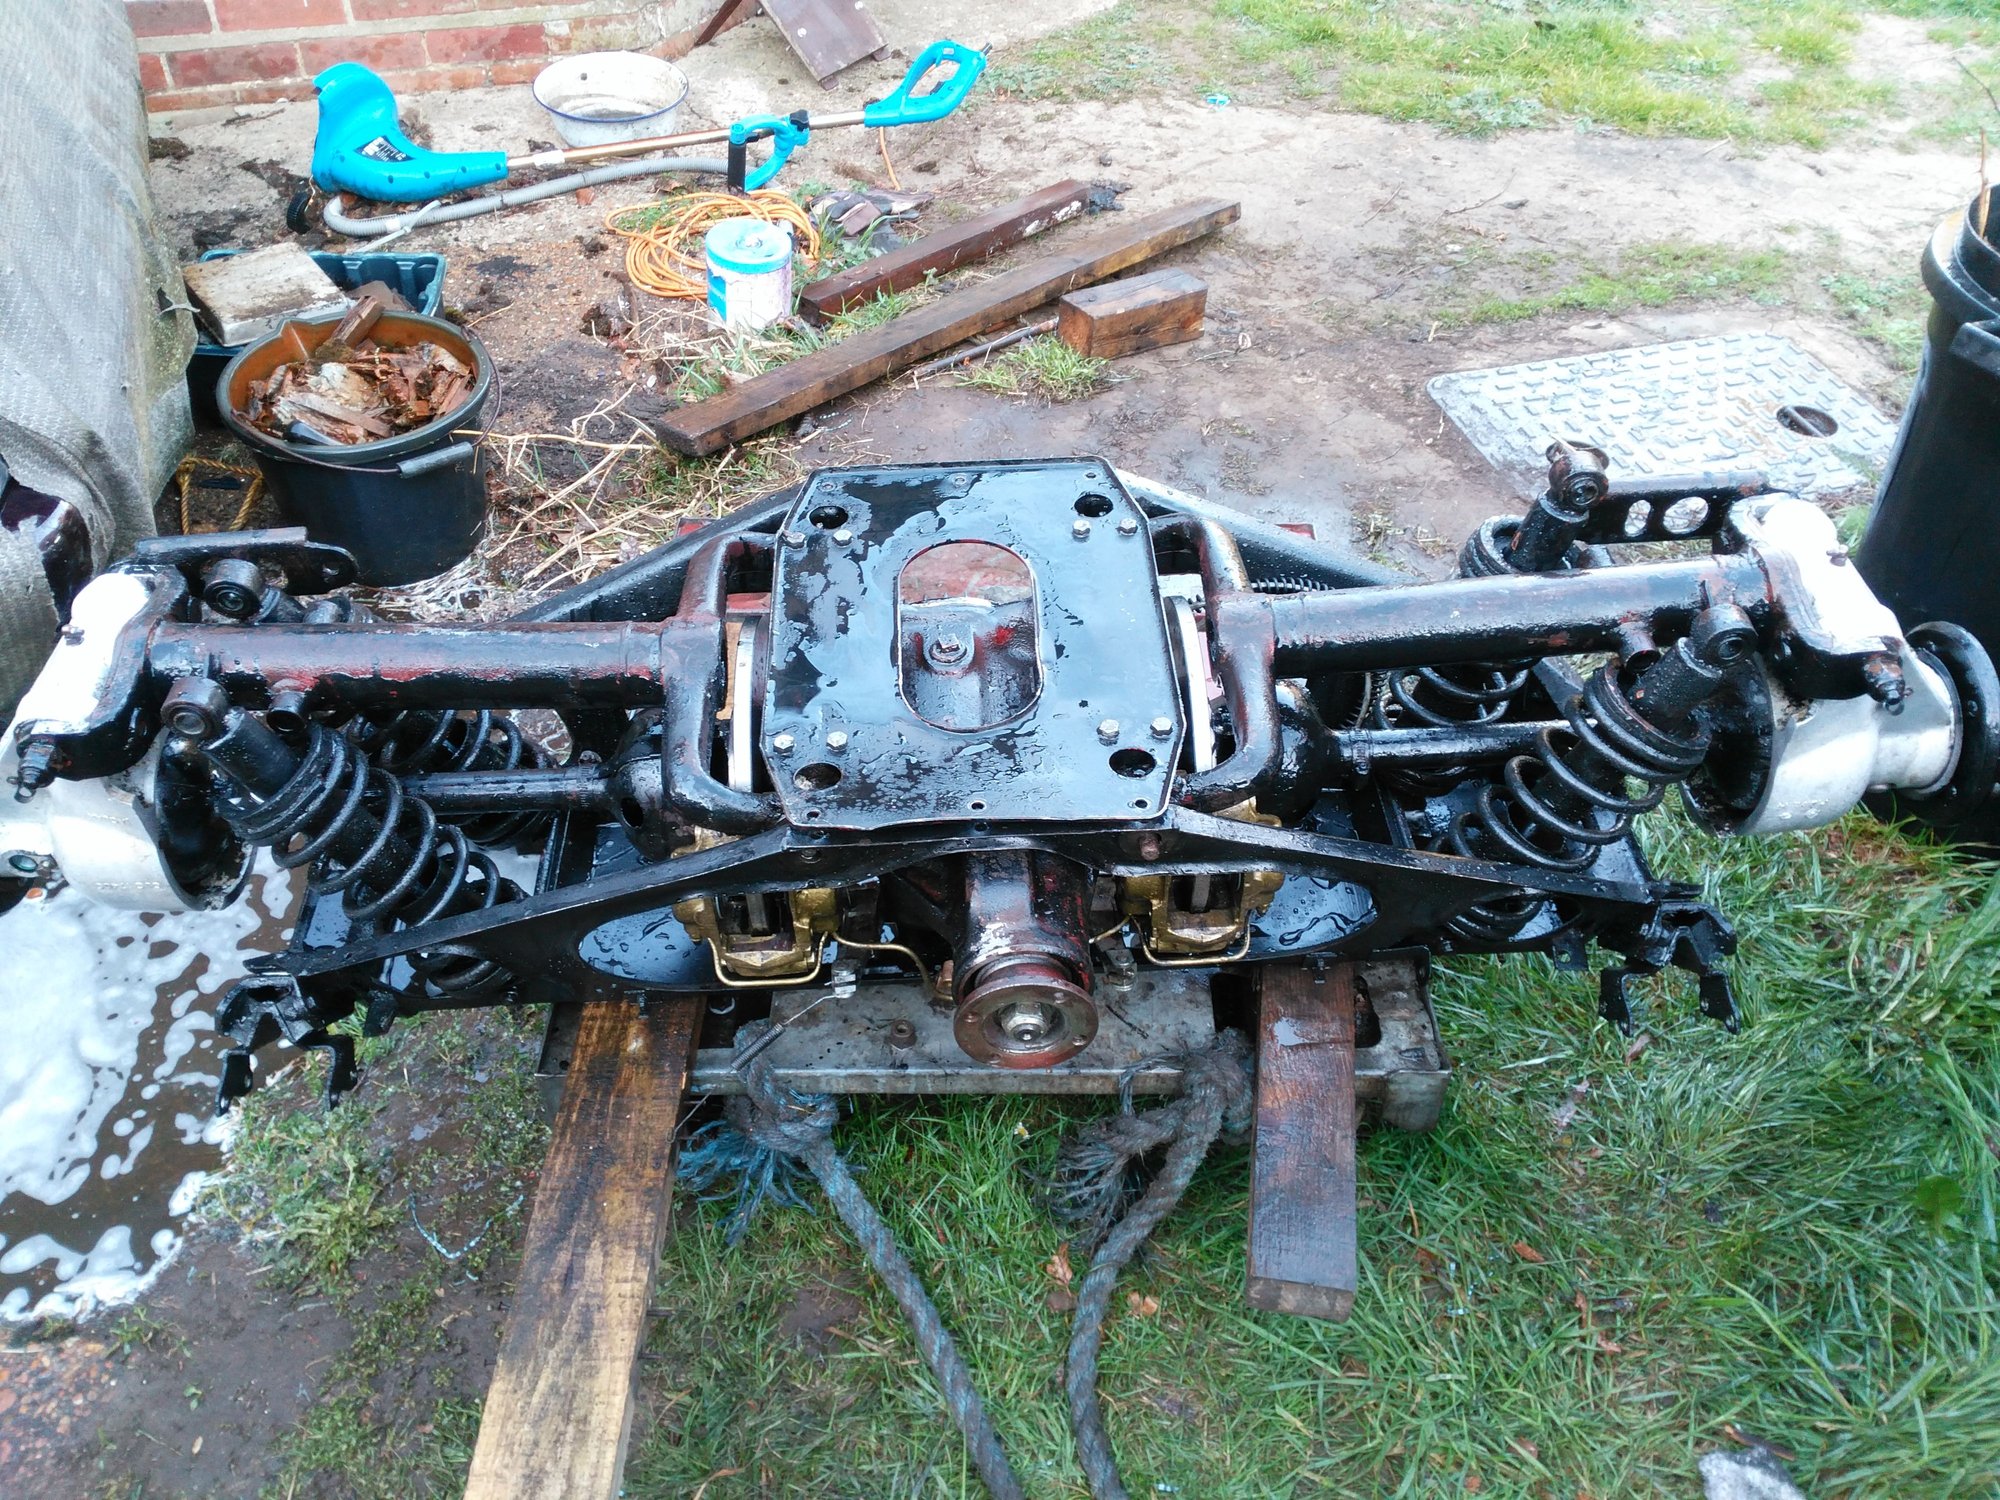
Just got to let it Air Dry then sand it down and paint it
#2384
Alex
The propshaft to diff bolts can just be undone/done up as follows:
The propshaft to diff bolts can just be undone/done up as follows:
- get a ratchet, a short extension and a short socket on from the propshaft side, this allows the ratchet head to be forward enough to align just well enough on the bolt head. the bolts need to go in from the front to the back
- use the open ender on the nut just to hold it, not to turn it.
The following users liked this post:
orangeblossom (04-16-2021)
#2385
Hi Greg
Cheers!
I knew you would have the answer, as undoing the Propshaft Bolts was for me the hardest part of the job though as for the Condition of the Second Cage, it looked just as bad as the first one before I cleaned it up and gave it some Primer
The Handbrakes on the Second Cage also look so bad, that I may have to leave it soaking in the 'Mixture' for some time, as its seized completely solid and won't move but at least if I am able to get one of my Cars on the road, then I will be very happy with that at least for this year
The following users liked this post:
Greg in France (04-16-2021)
#2386
'Never Finish One Job Before You Start Another'
Rebuilding The IRS On 'The Ice Princess'
Part: 2
Rebuilding The IRS On 'The Ice Princess'
Part: 2
Since some of the Parts for the IRS on 'The Ice Princess' turned up today, I thought I ought to make a start on that which would be fitting New Rotors, as the Old ones were completely shot away
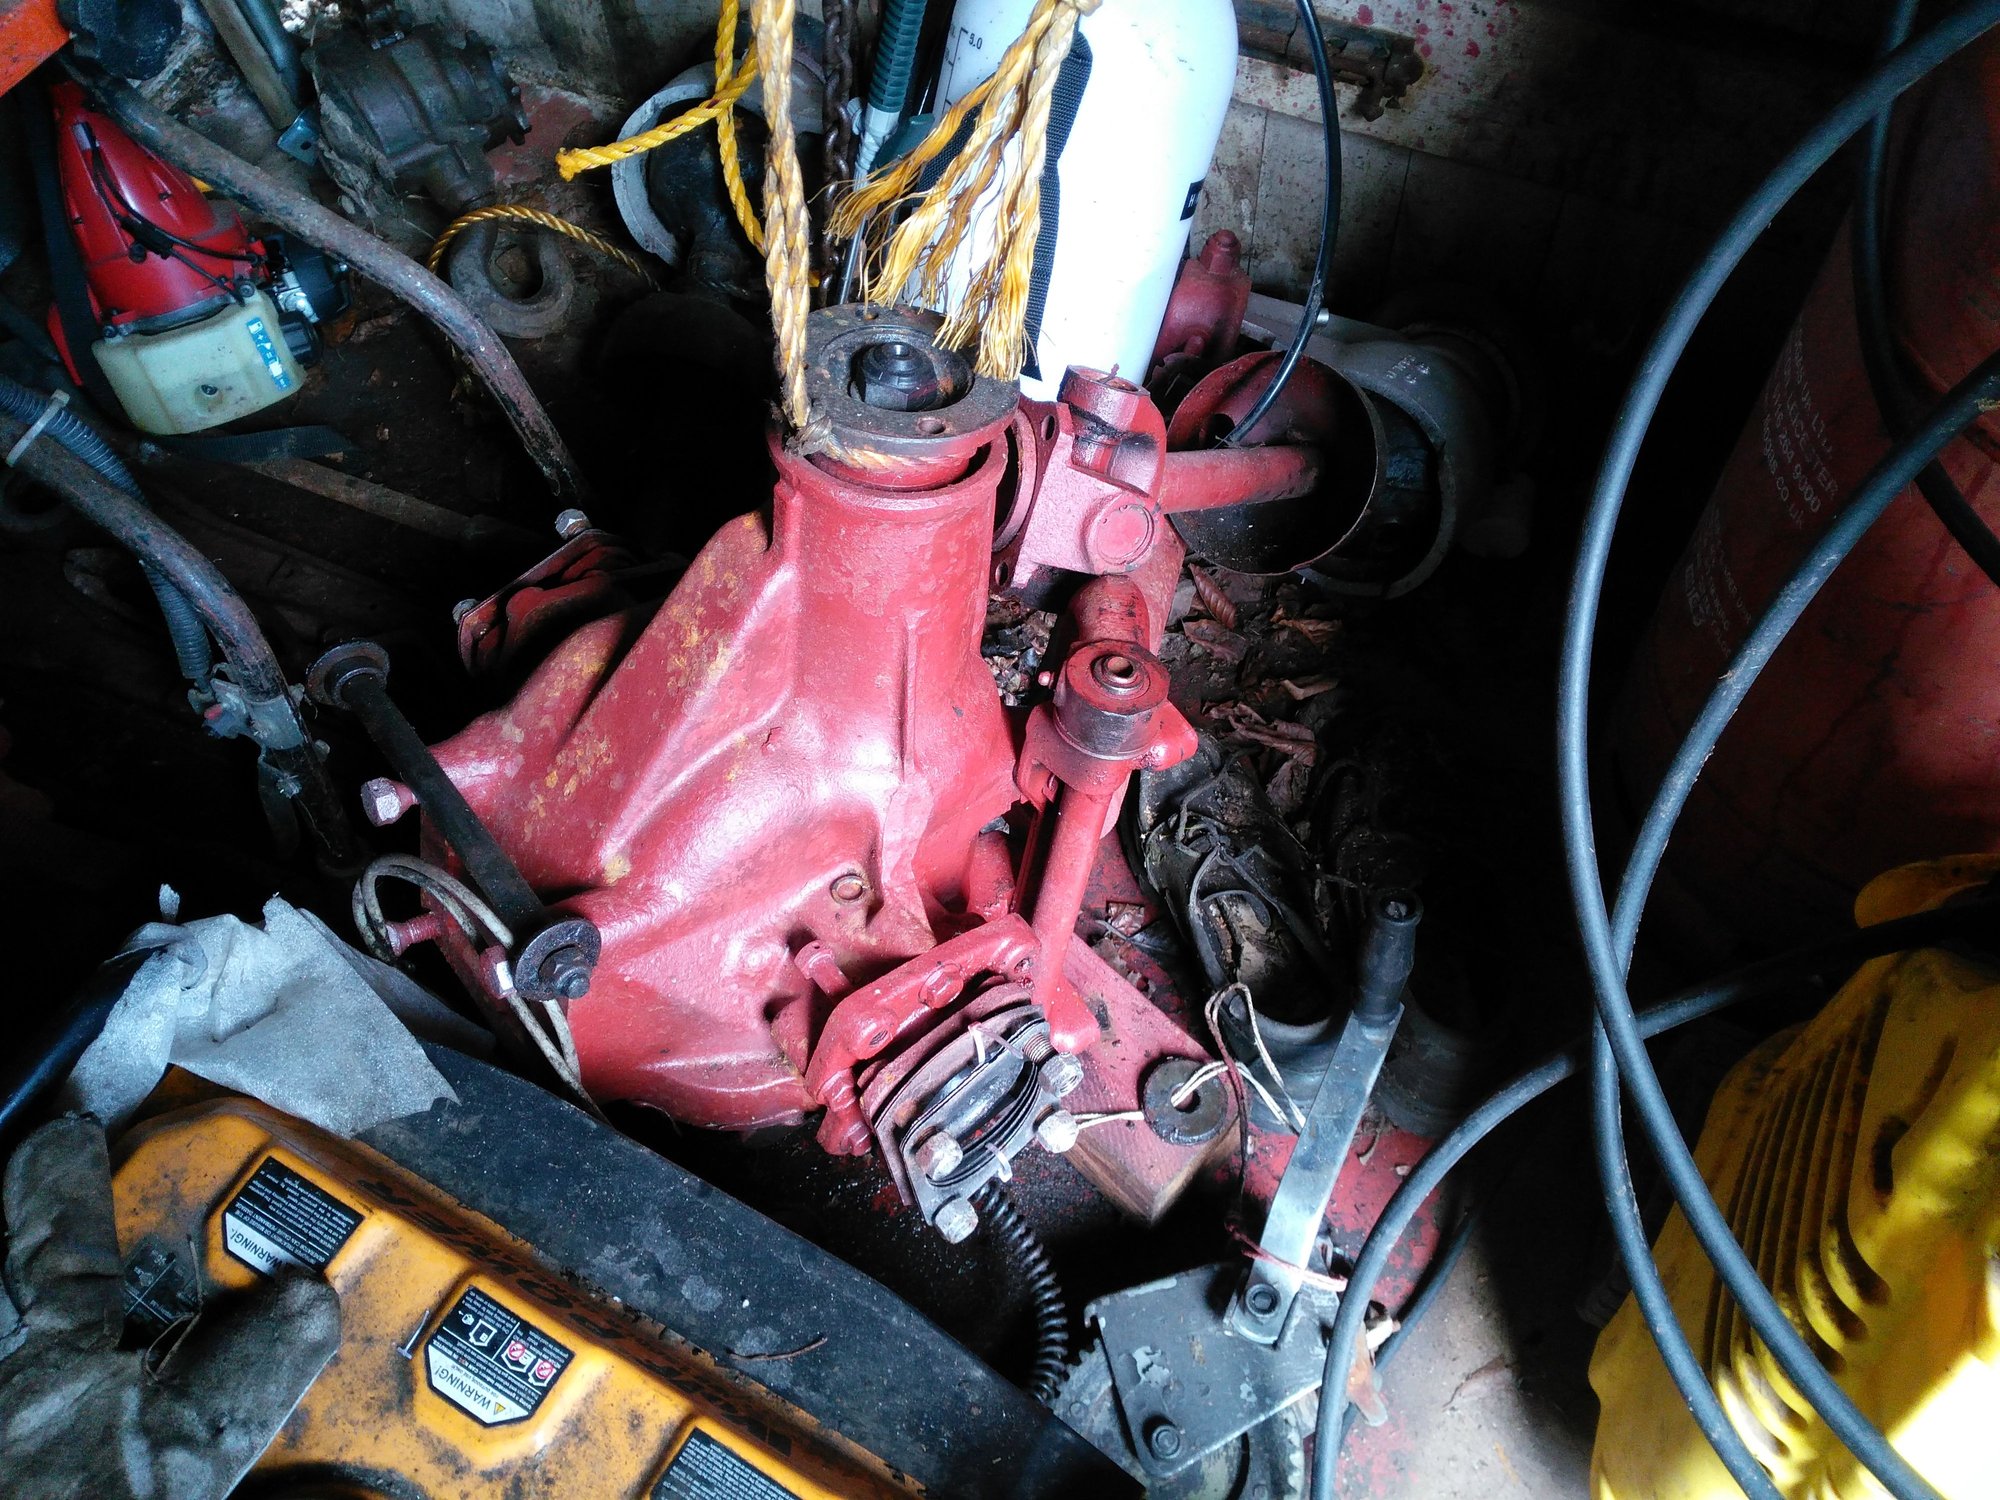
Before I start I've just got to sort this tangled IRS mess out
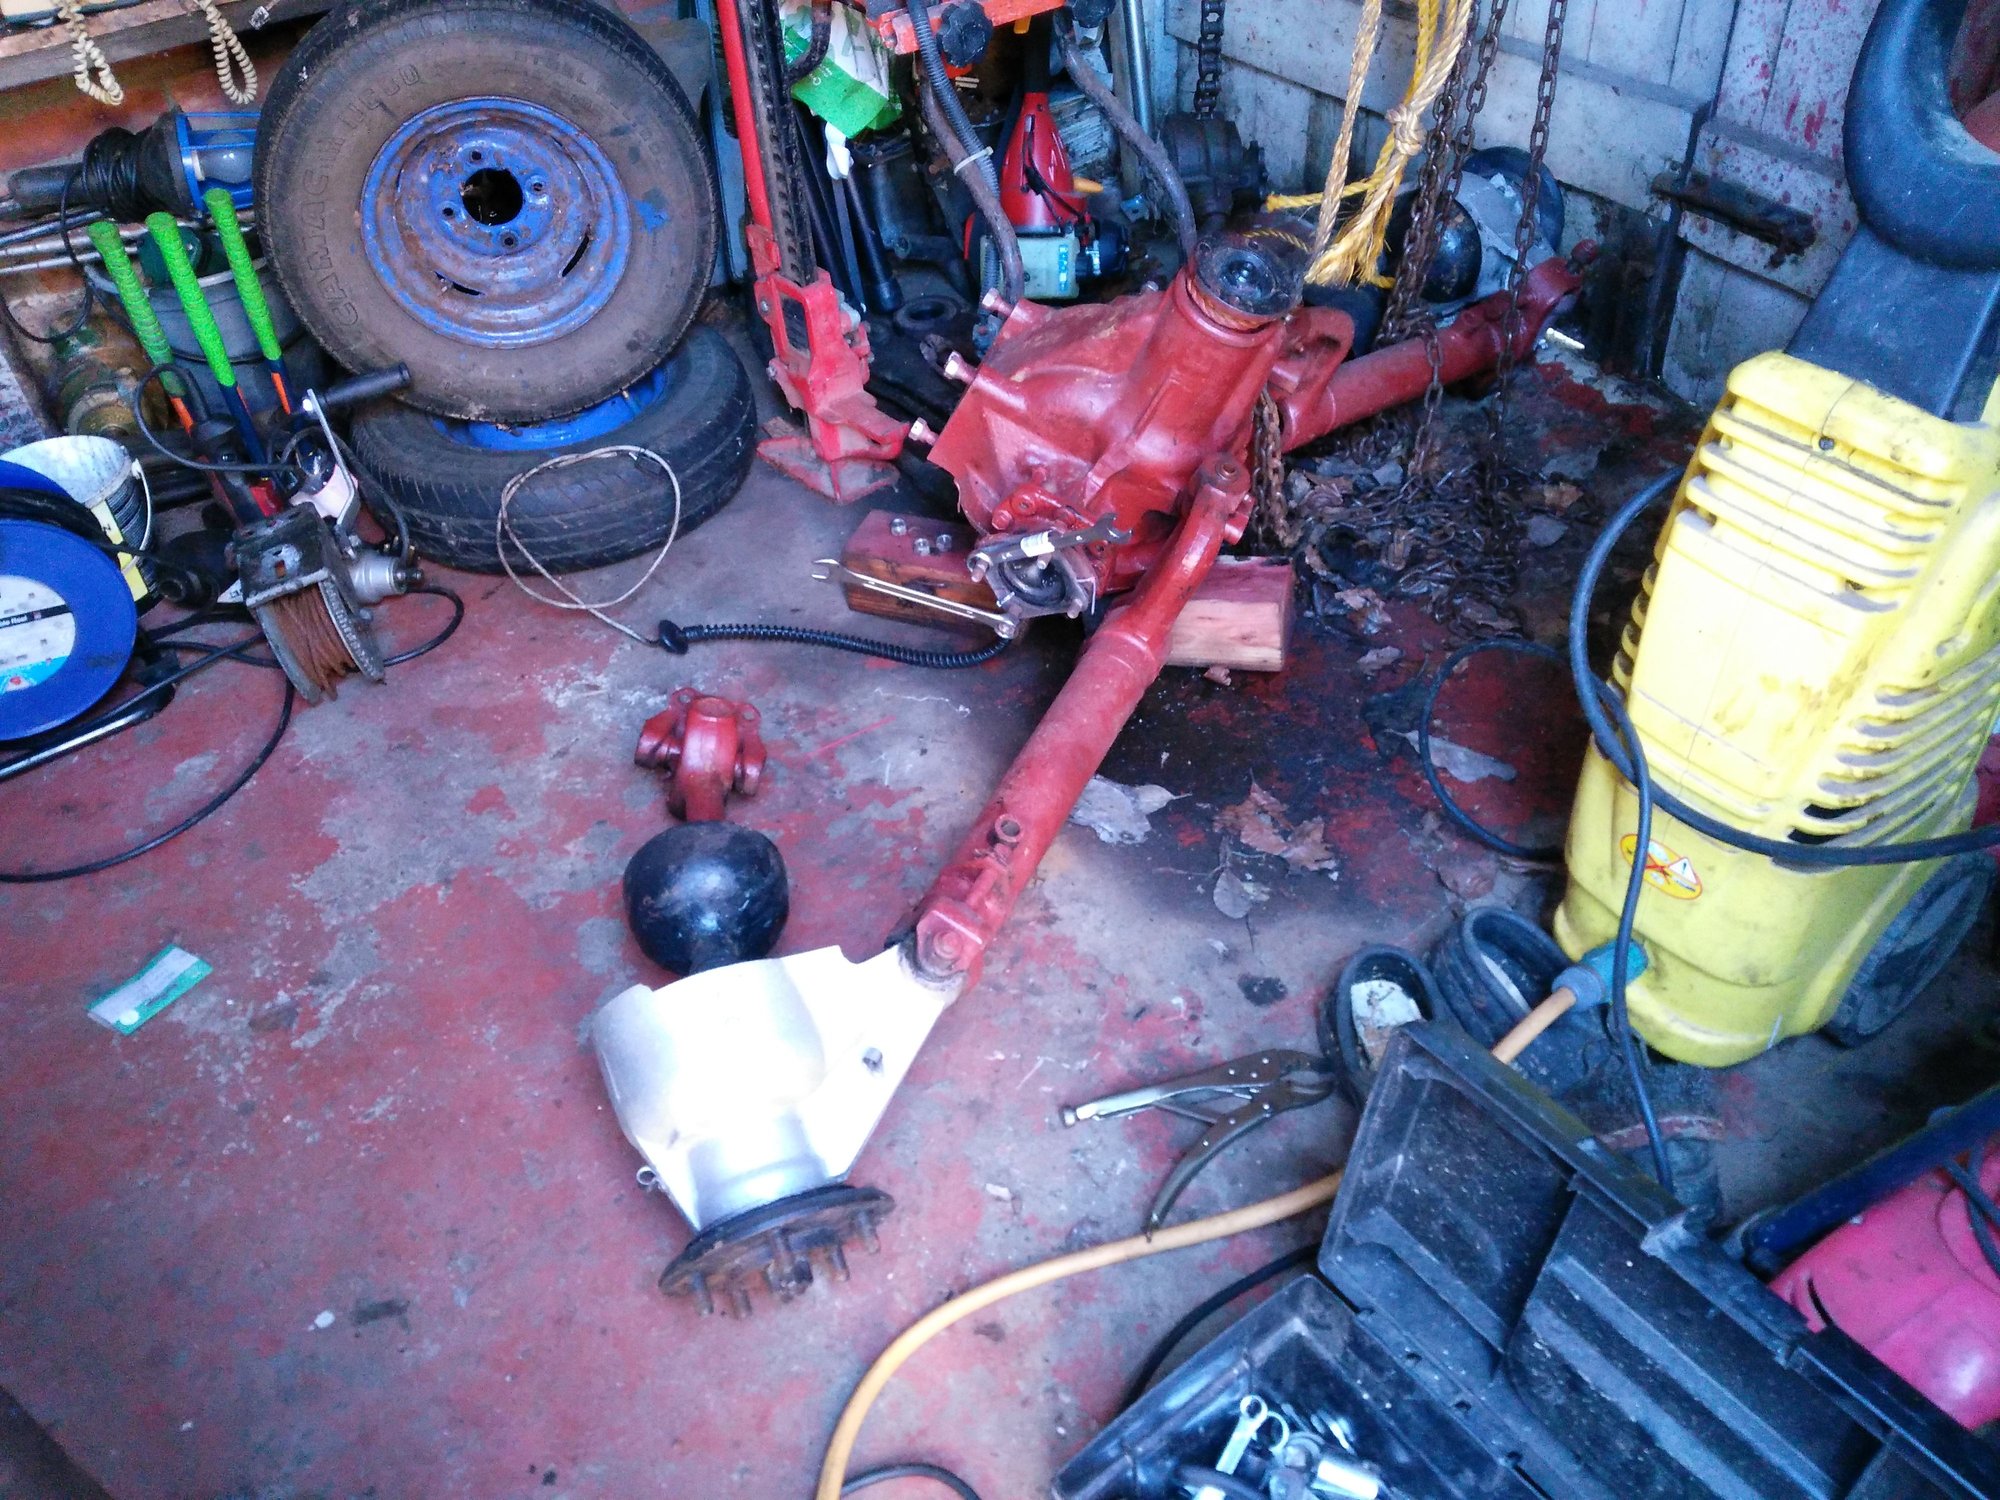
As you can see its all over the place but it shouldn't take long to put the New Rotors on
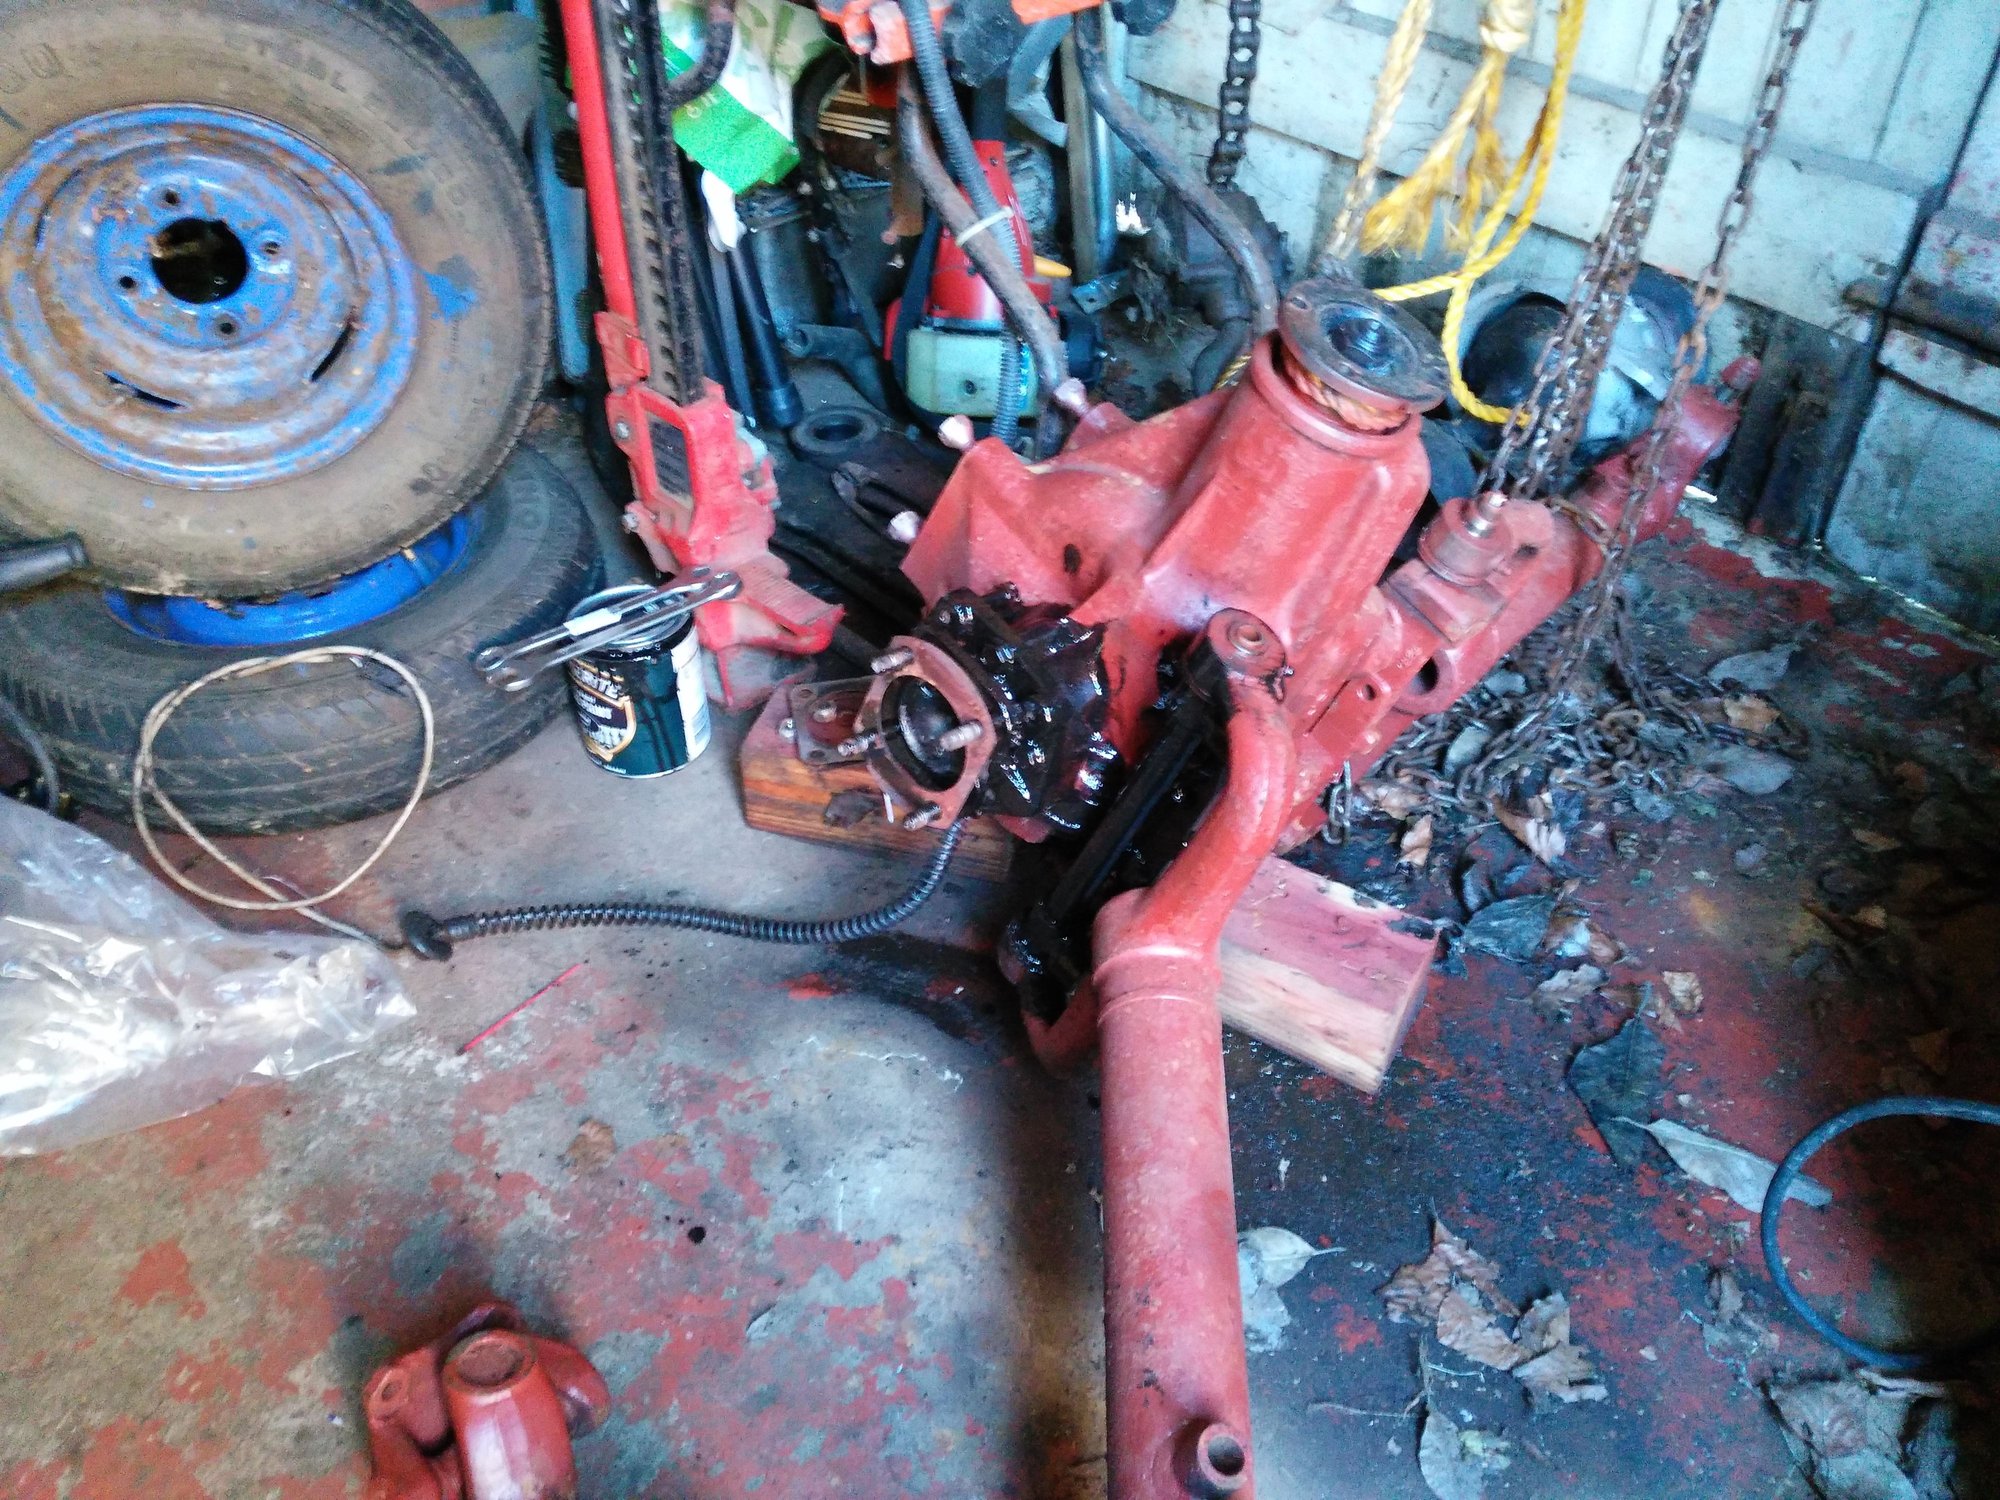
The First job was to put on the Shims which I'd kept in separate bundles so I'd know how they went back and also put some paint around a hard to get to area when the Solid Steel Rotors were on
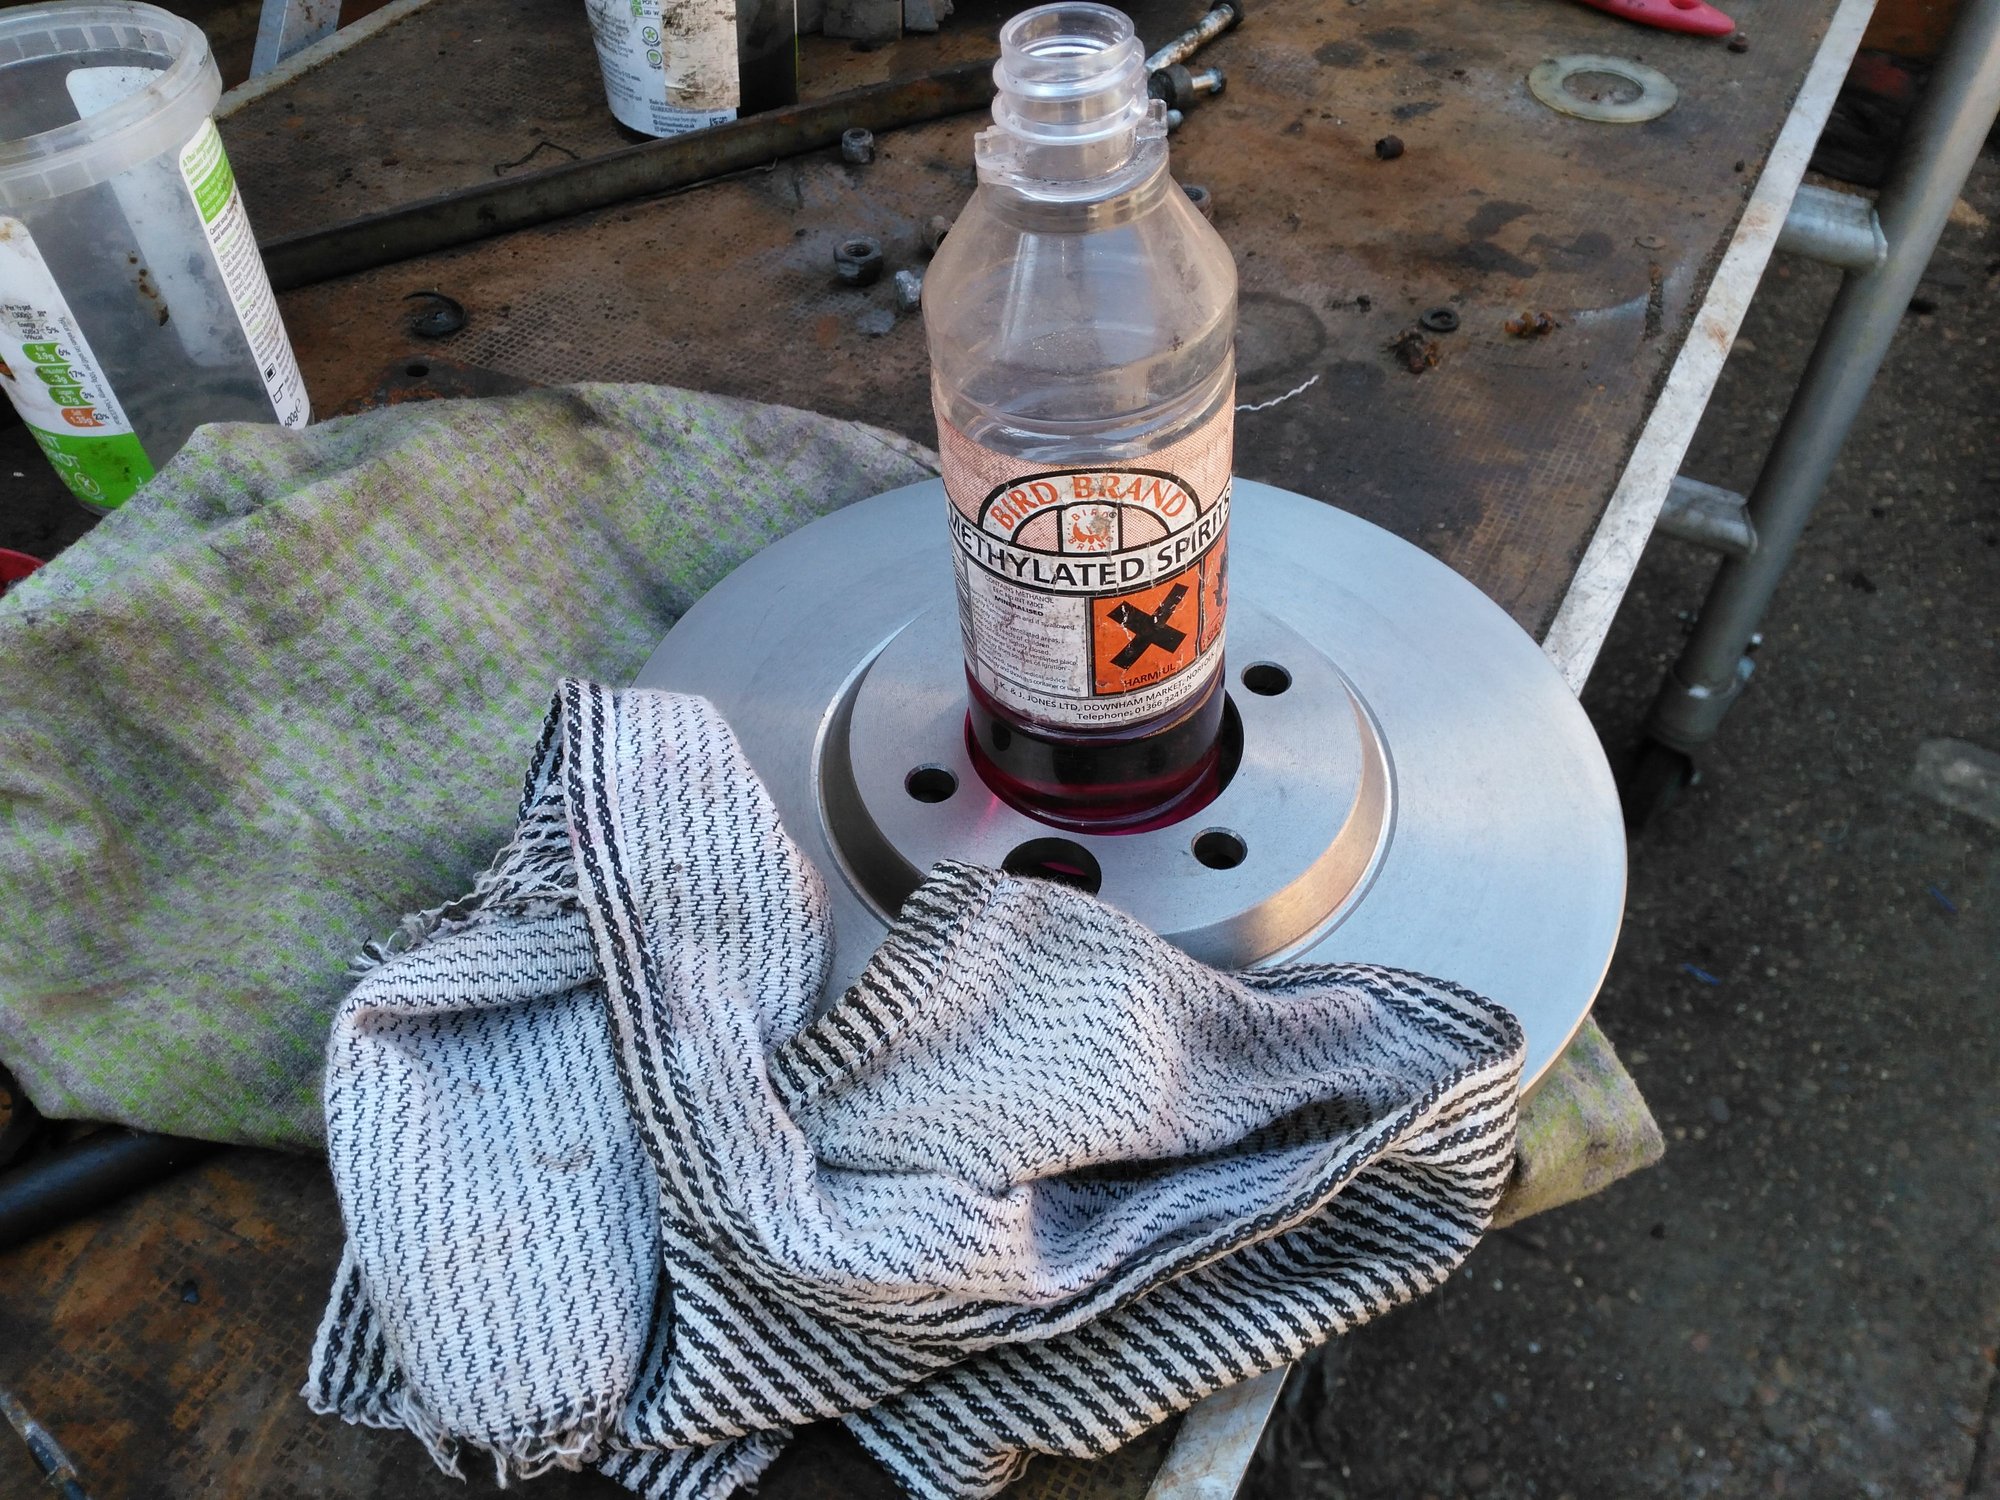
Degreasing the Brand New Rotors with some Solvent
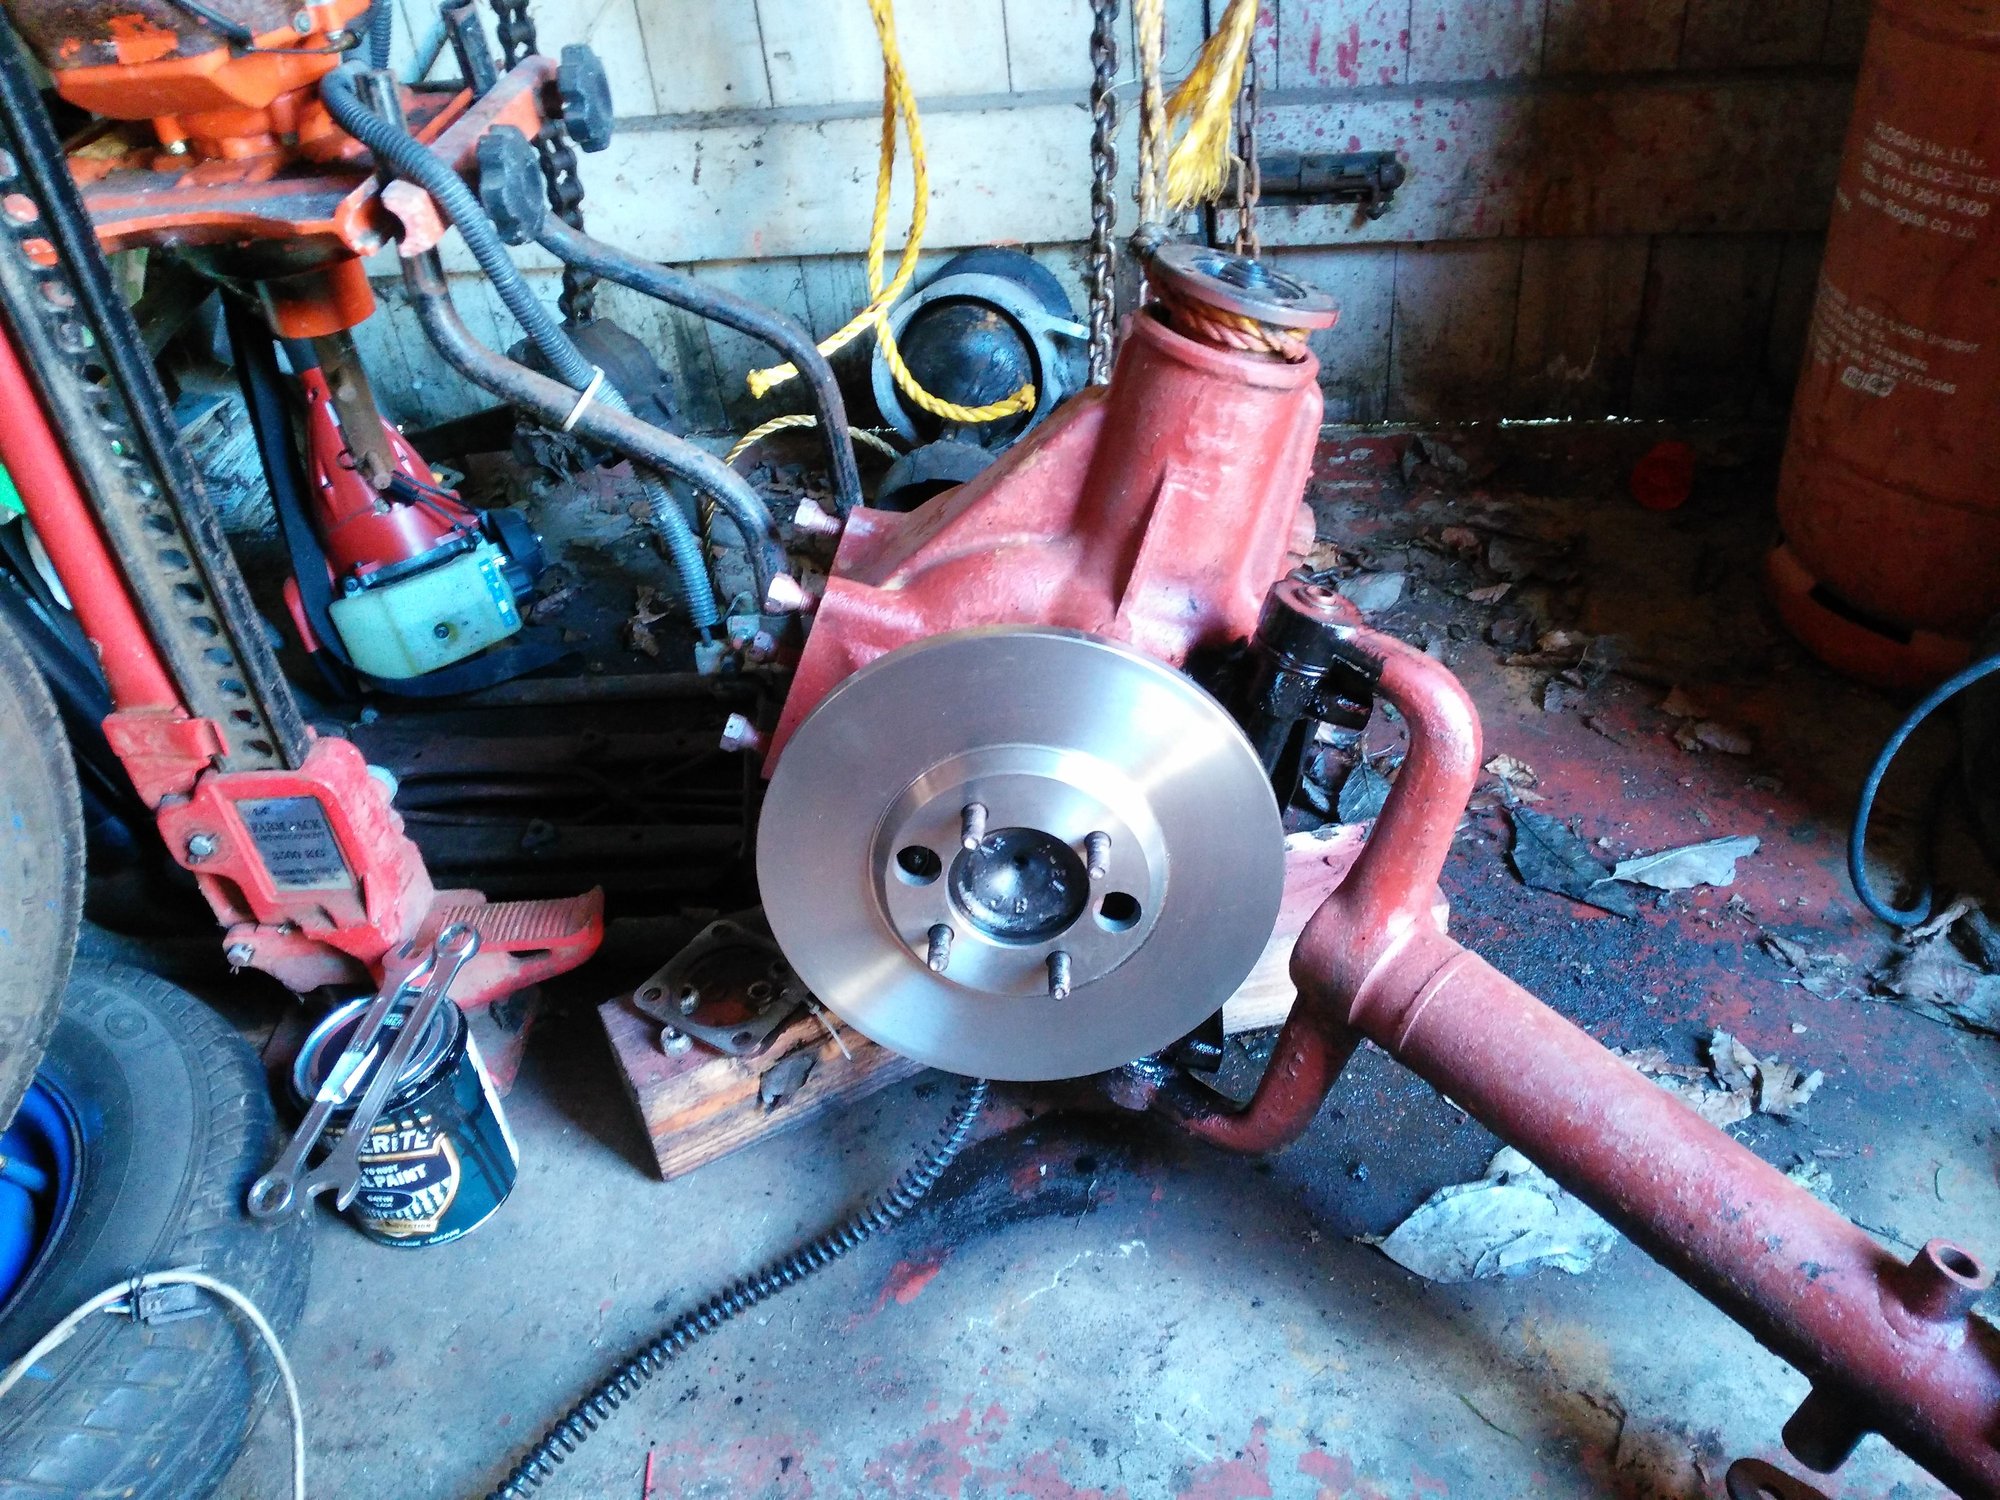
Looking good already with just one Rotor on
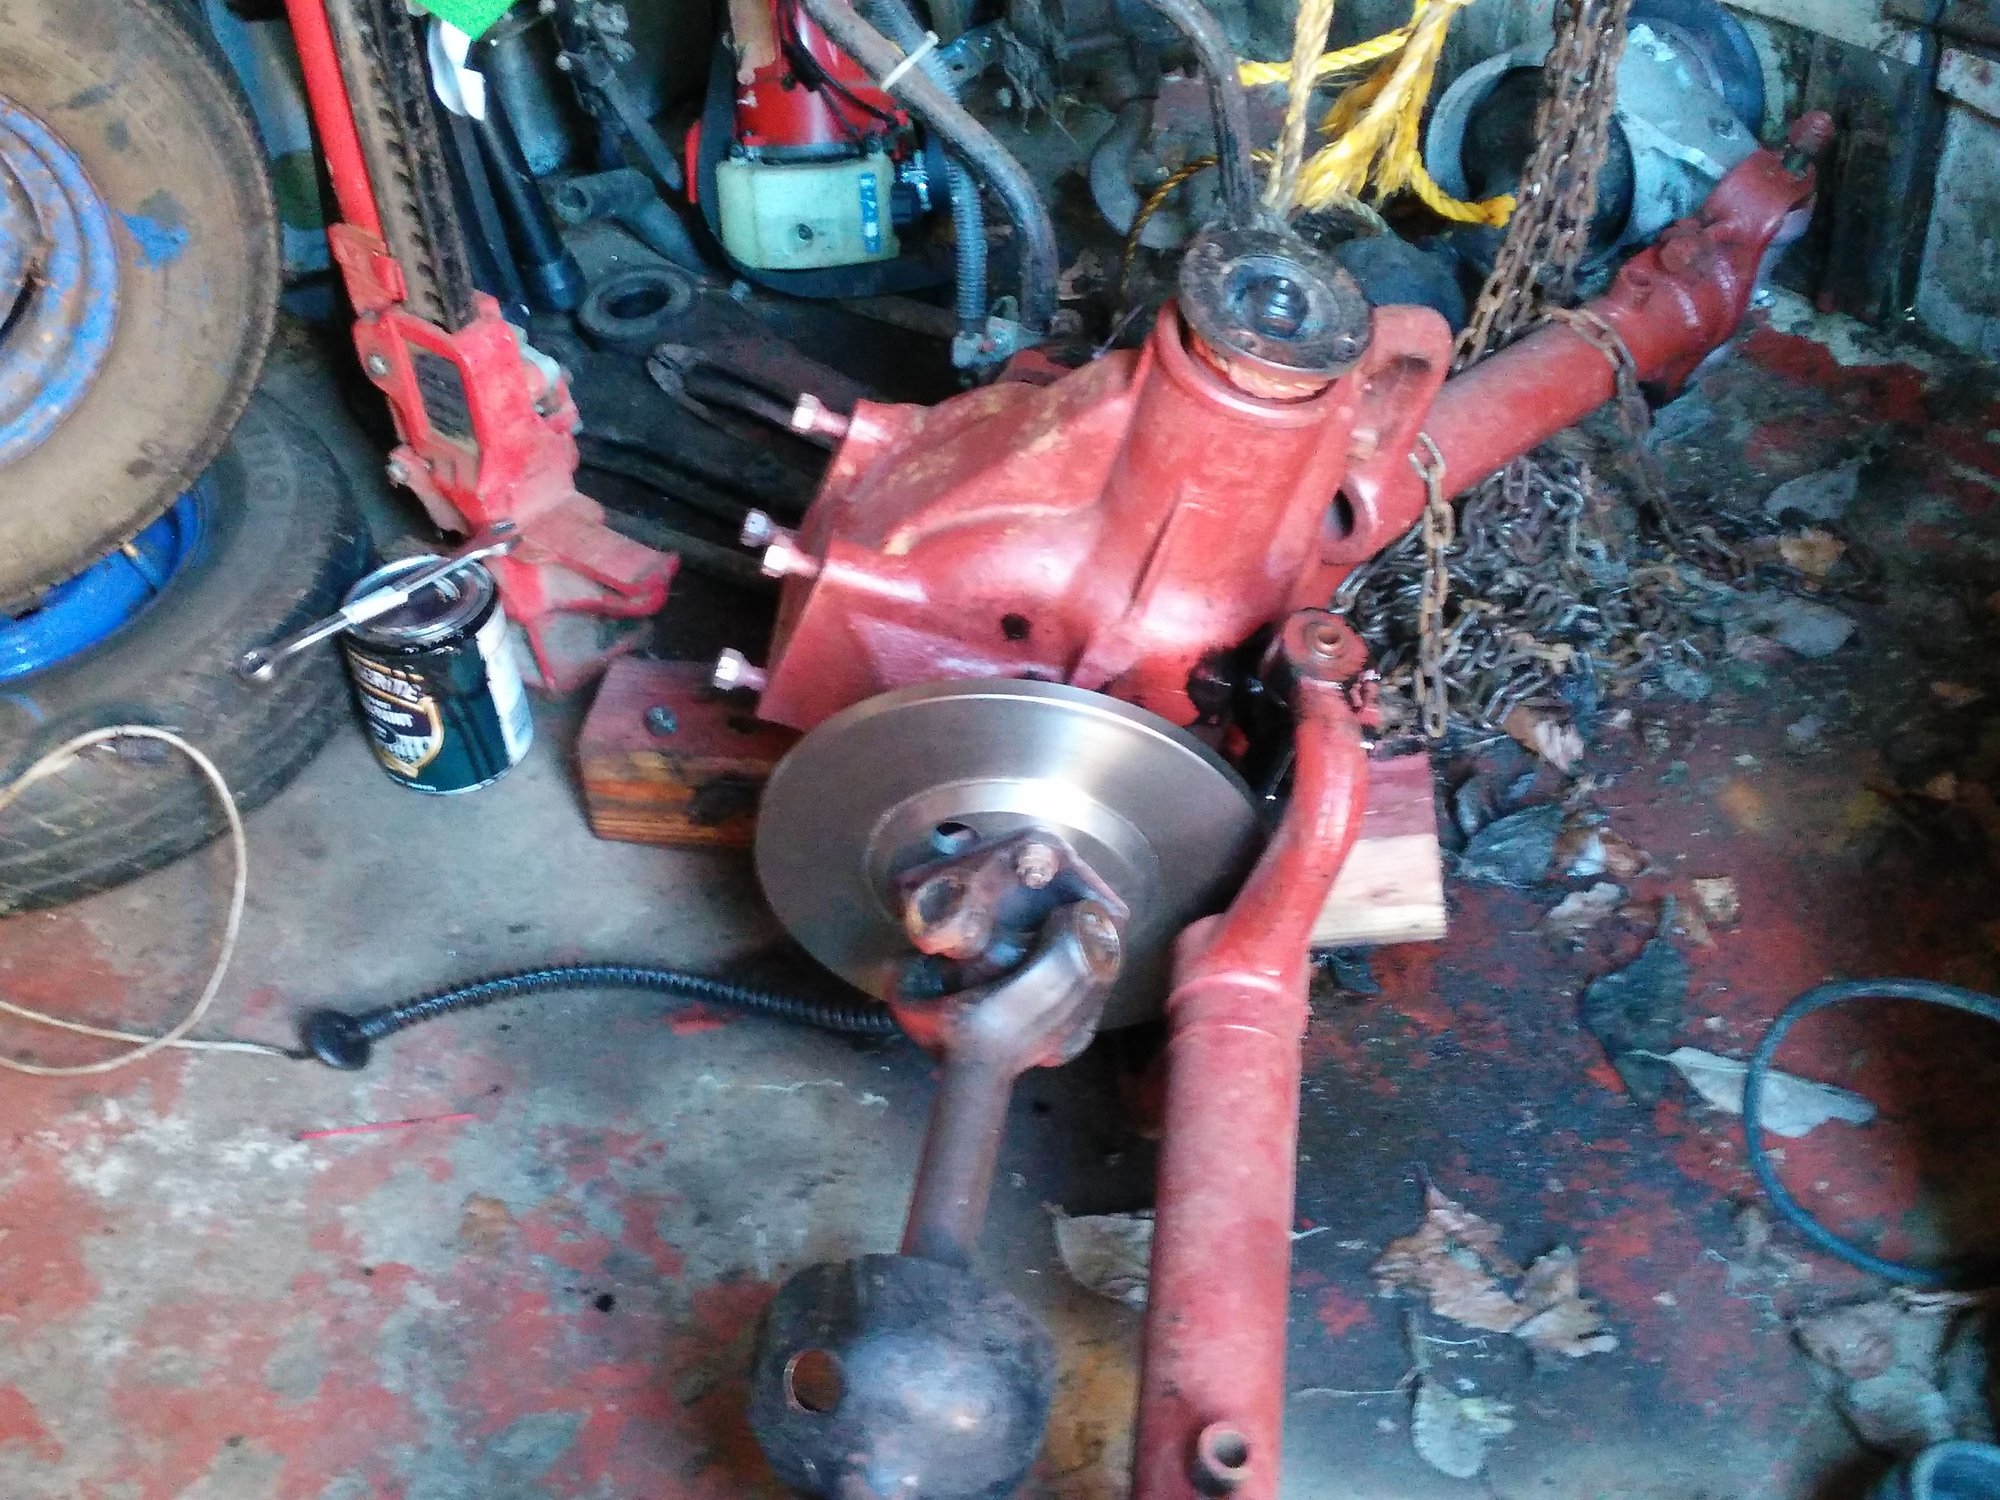
Connecting up the Driveshaft is a very easy job with just 4 Locknuts which will be replaced with New ones when I fit the Calipers which I will also be rebuilding
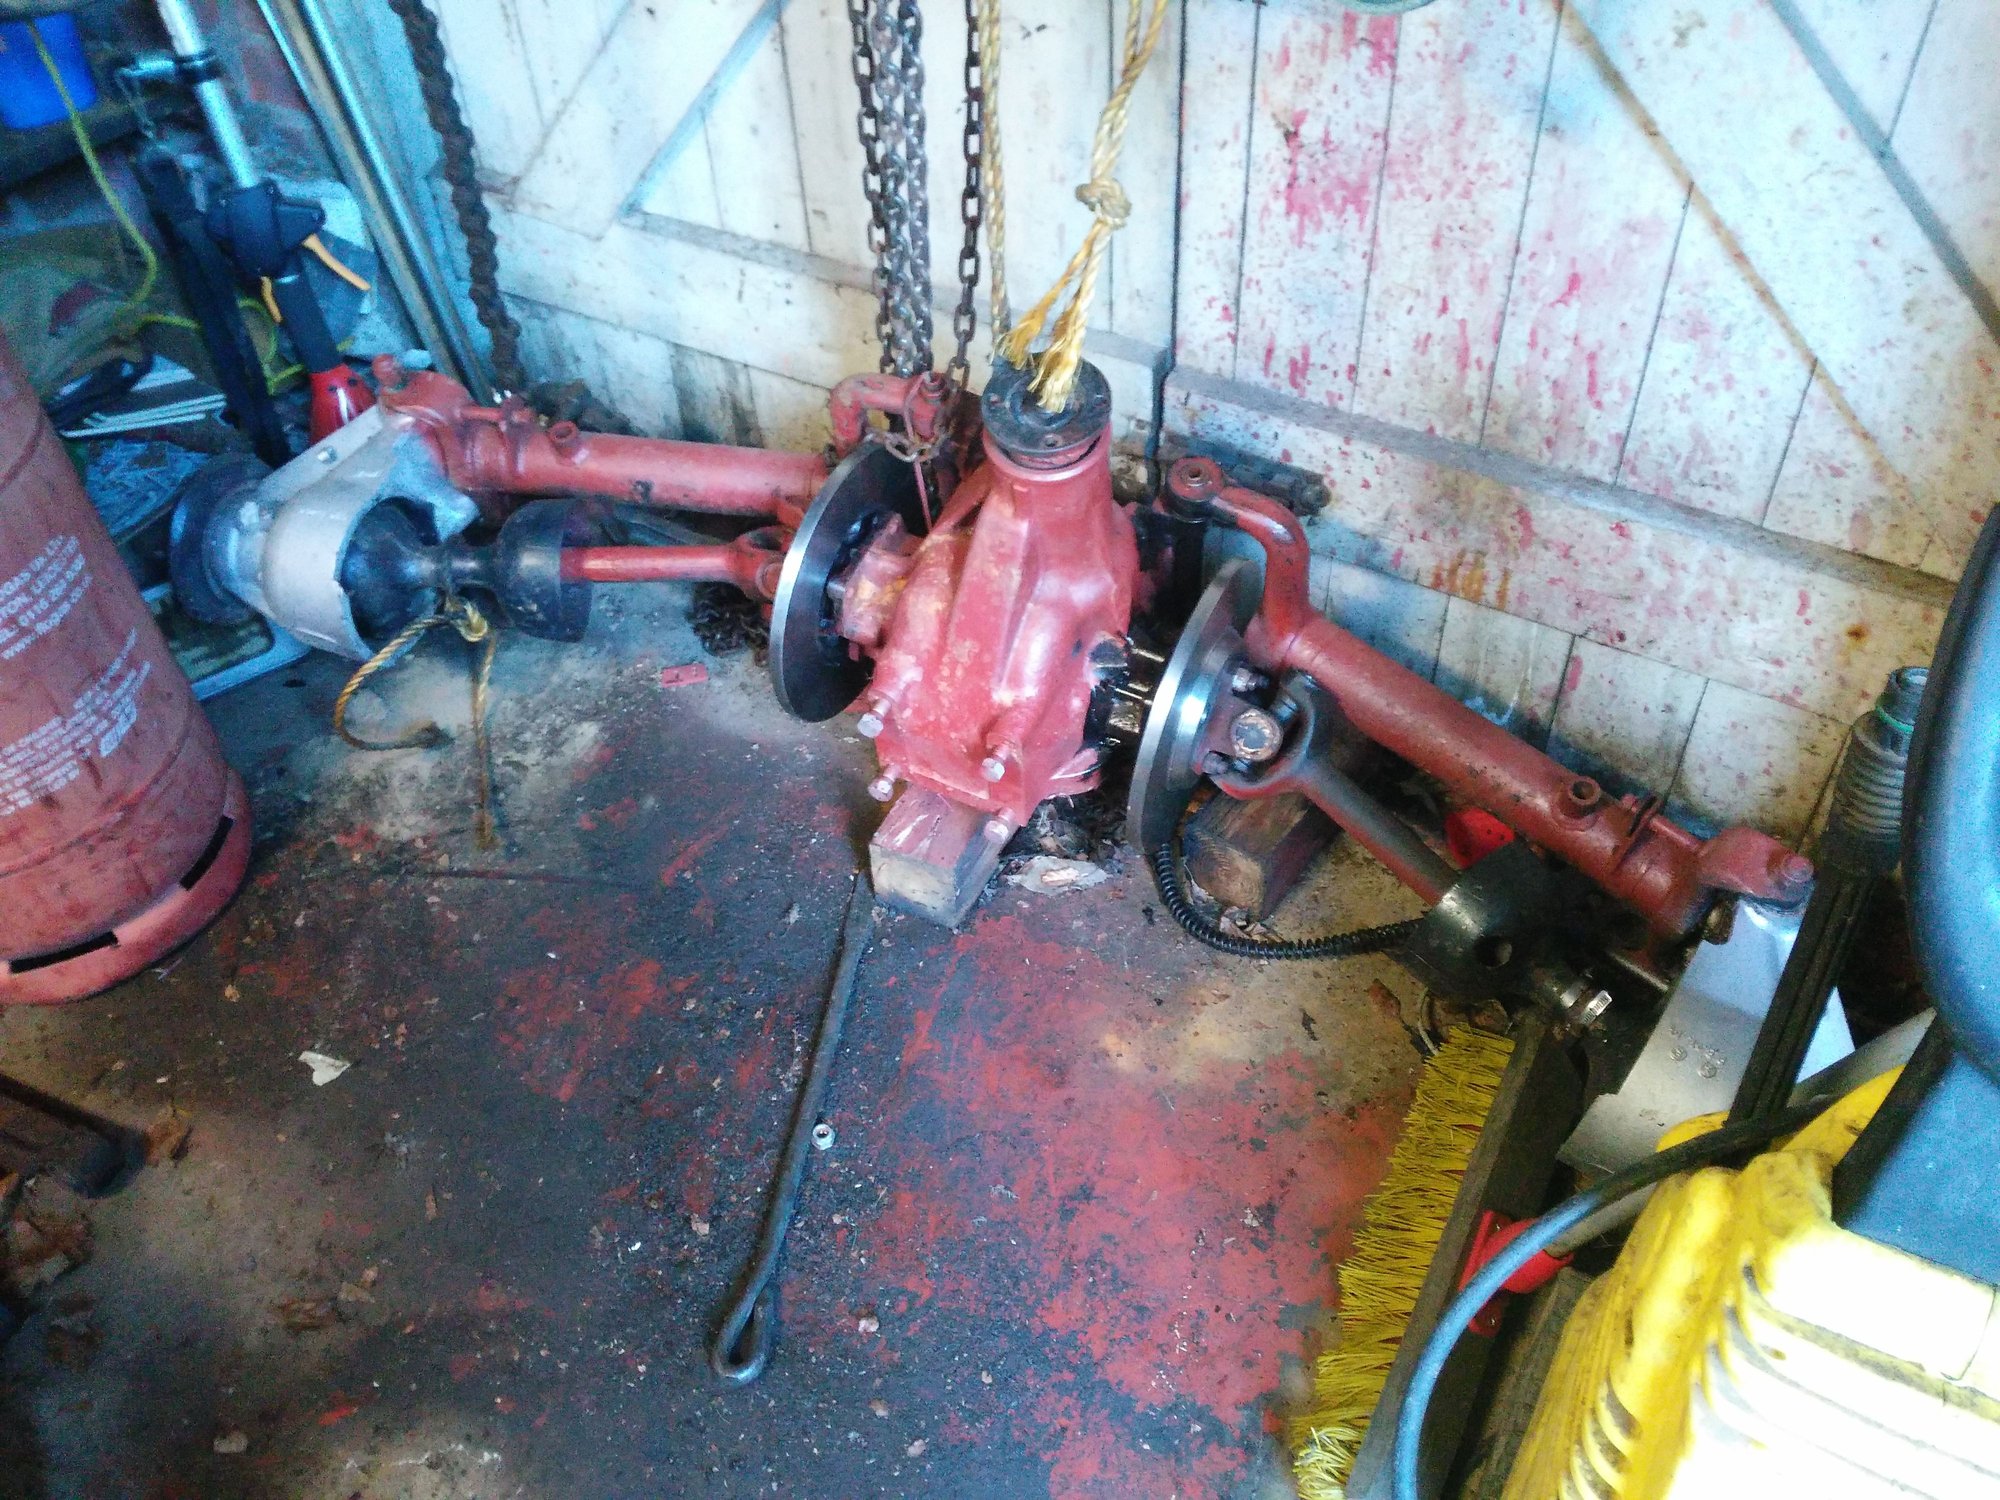
There's nothing like New Rotors to start to turn an Ugly Duckling into a Beautiful Swan and it only took 2 hours to do and so the next job will be rebuilding the Calipers which will have to wait until I get time, as when the Parts arrive for '50 Shades' My Grey XJS I need to get that one finished in time for the Summer
Last edited by orangeblossom; 04-17-2021 at 05:50 AM.
The following 2 users liked this post by orangeblossom:
Dukejag (04-27-2021),
Greg in France (04-17-2021)
#2387
The following users liked this post:
orangeblossom (04-17-2021)
#2389
How To Test The Crank Position Sensor (CPS) Of A Jaguar AJ16 Engine
'I wasted £56 so you don't have to'
It happens to the best of us, as having tried every trick in the Book or all that you can think of my 6 cyl AJ16 Engine still refused to start which is when I turned to the Forum in order to get some ideas'I wasted £56 so you don't have to'
Where there seemed to be something of a growing consensus, that the Crankshaft Sensor on my AJ16 Engine might need replacing, which was all well intentioned and well meaning advice, where in point of fact I was thinking the very same thing myself
As the Crank Sensors on these Cars are not unknown to go flaky at the drop of a hat, where having tried everything else this seemed to be the last throw of the dice where not knowing how to Test it or have the Equipment to do so, I decided to bite the bullet and order a new one
Which on my part turned out to be a Very Expensive Mistake to the Tune of £56 although I believe the price has increased considerably since then, where with the benefit of hindsight which is always a wonderful thing, I should have bought a DVM (Digital Volt Meter) and learned how to Test the Crank Position Sensor
These DVM's are everywhere for around £10 and once you have learned how to use one, are simply invaluable for doing all sorts of Tests on the Wiring of your XJS but my knowledge of Auto Electrics at the time in question was so bad that I didn't even know how to switch it on, let alone doing a Test on anything
And so with me it really was a question of both Trial and Error, as well as learn as you go, which Started off by Testing the Voltage in the Batteries of my Electric Clock and though that sounds so simple, which of course it is all I can say in my defence is that you have to go and Start somewhere and then pick it up as you go
Where one of the Questions that keeps cropping up on the Forum more recently than I can ever remember is how on earth do you do a Test on the Crank Position Sensor in the hope of Saving yourself a wasted Shed Load Of Money, if it turns out the Crank Sensor is not the cause of your Non Starting Problem
That I feel is now more important than ever, with some Crank Sensors now costing in the region of £150! which is not exactly peanuts even for a Jag, where having had a few PM's about this, rather than having to make a post that would no doubt eventually get lost in the Mists of Time
I thought I would make a Copy here, so if anyone has a problem with their CPS or thinks it may be faulty then I can send them a link, in the hope of Saving them money and getting them back on the road as soon as possible
Where although this Test is primarily for the 6 cyl engine (in this guide) Testing the Crank Position Sensor on a V12 engine is almost exactly the same except that there is Three Wires instead of just the Two and so I will do an update on that as soon as time allows
And so in order to Start the process you will need a DVM Meter, which as I've said are available almost everywhere for about £10 as an el-cheapo one will do the job, almost every bit as well as an expensive version
Where of course the Second thing that you would need is a 'Crank Position Sensor' in order to have something to do the Test on, where on the assumption that you have a CPS to hand and also a DVM Meter, to Start the Test this is what you do
Though before I continue 'Top Tip' cut yourself a couple of 1/4 in pieces of small bore Plastic Hose to go over the Probes of the Meter, so you are effectively turning those pointed Probes on the Meter into a 'Make Shift' Plug, or you could end up climbing the Walls of Frustration trying to keep those Probes in place
'Ask me how I know' or rather don't!
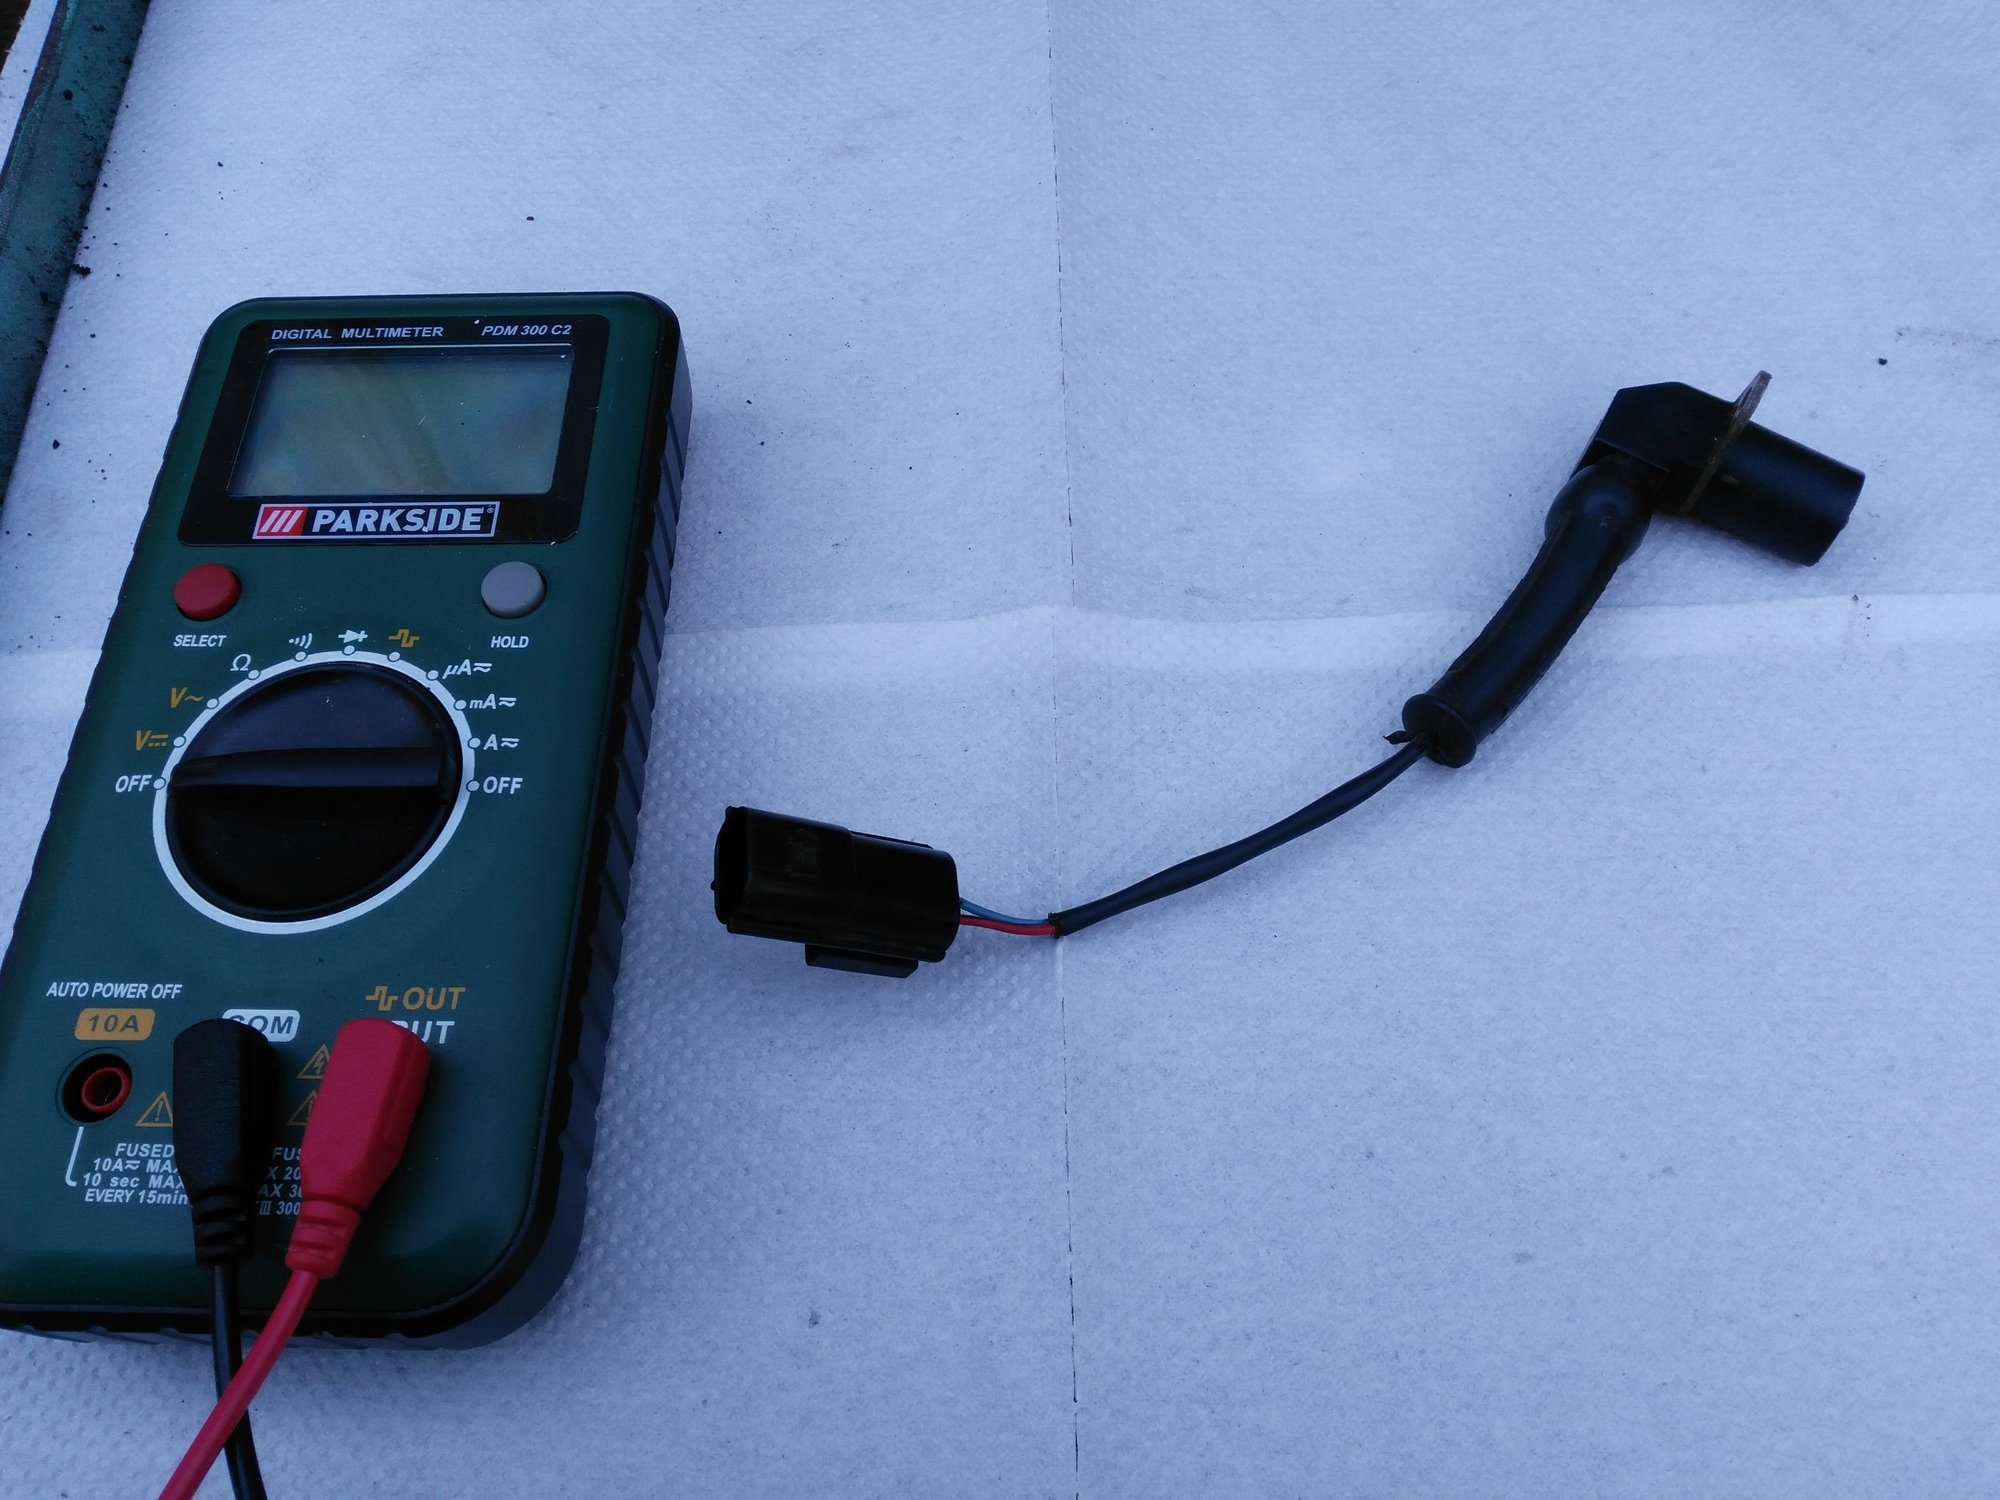
Step one: Take one DVM Meter and attach the Probes to the Meter as Shown in the Photo and of course also have a Crank Position Sensor that needs Testing
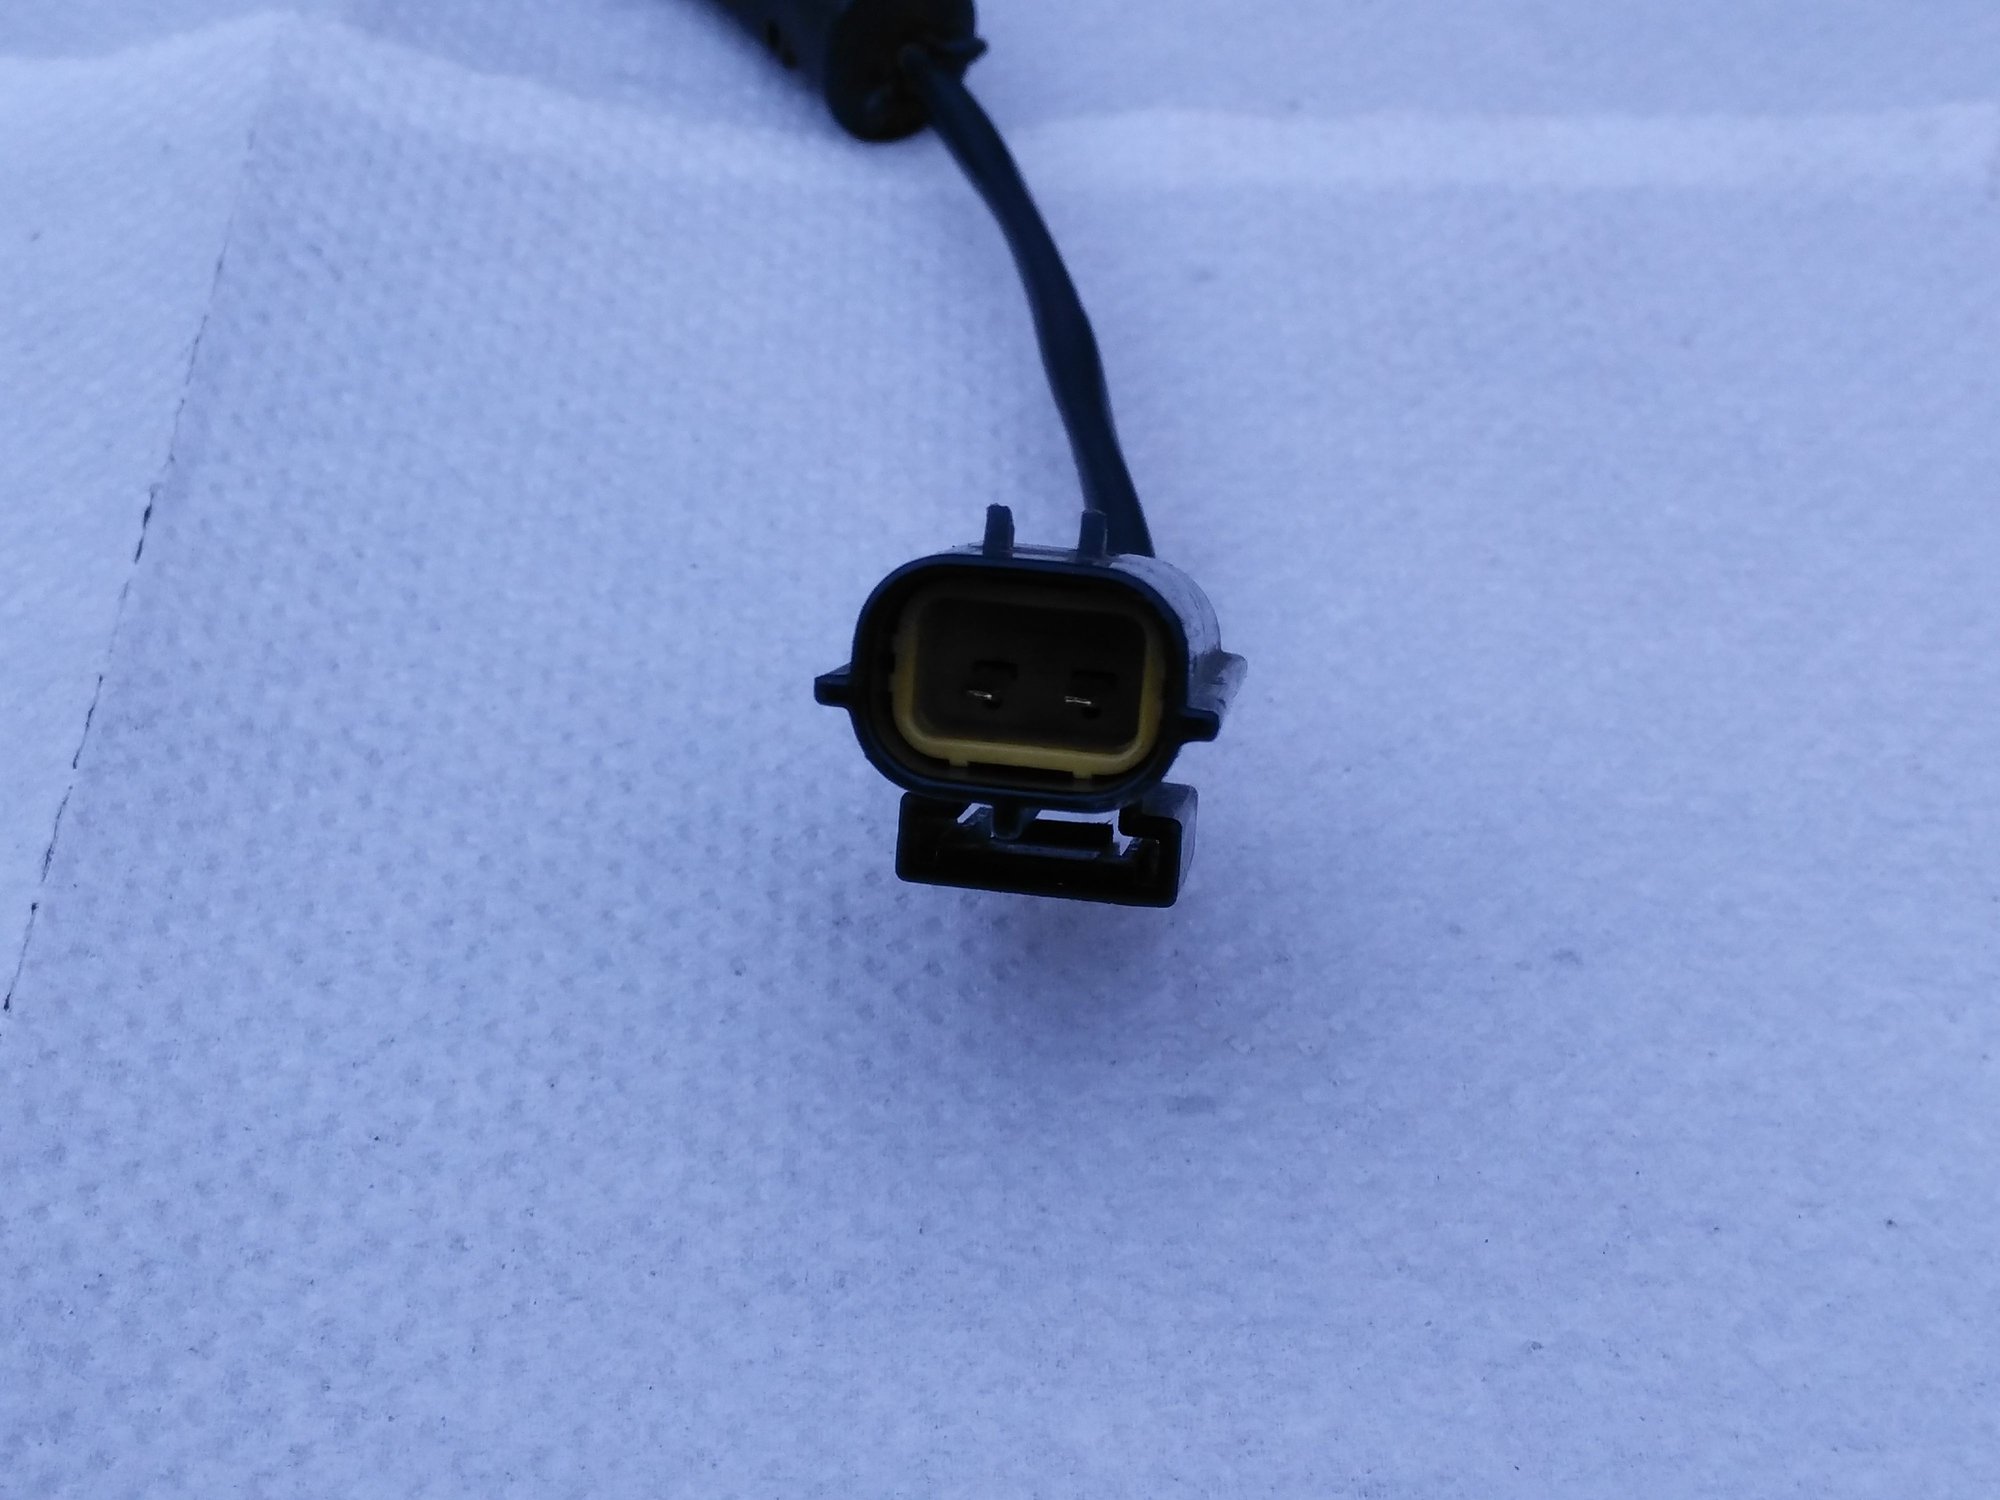
This is the Typical 2 Pin Plug of a Crank Position Sensor and you can tell by the Coloured wires which one is Positive+ and which one is Negative- although if you got them the wrong way round it wouldn't really matter as you are Testing Resistance measured in Ohms
Where what you are looking for is around 150 - 300 Ohms though if there is no Resistance then that is a good indication that you either need new batteries in your Meter or your Crank Sensor is dead
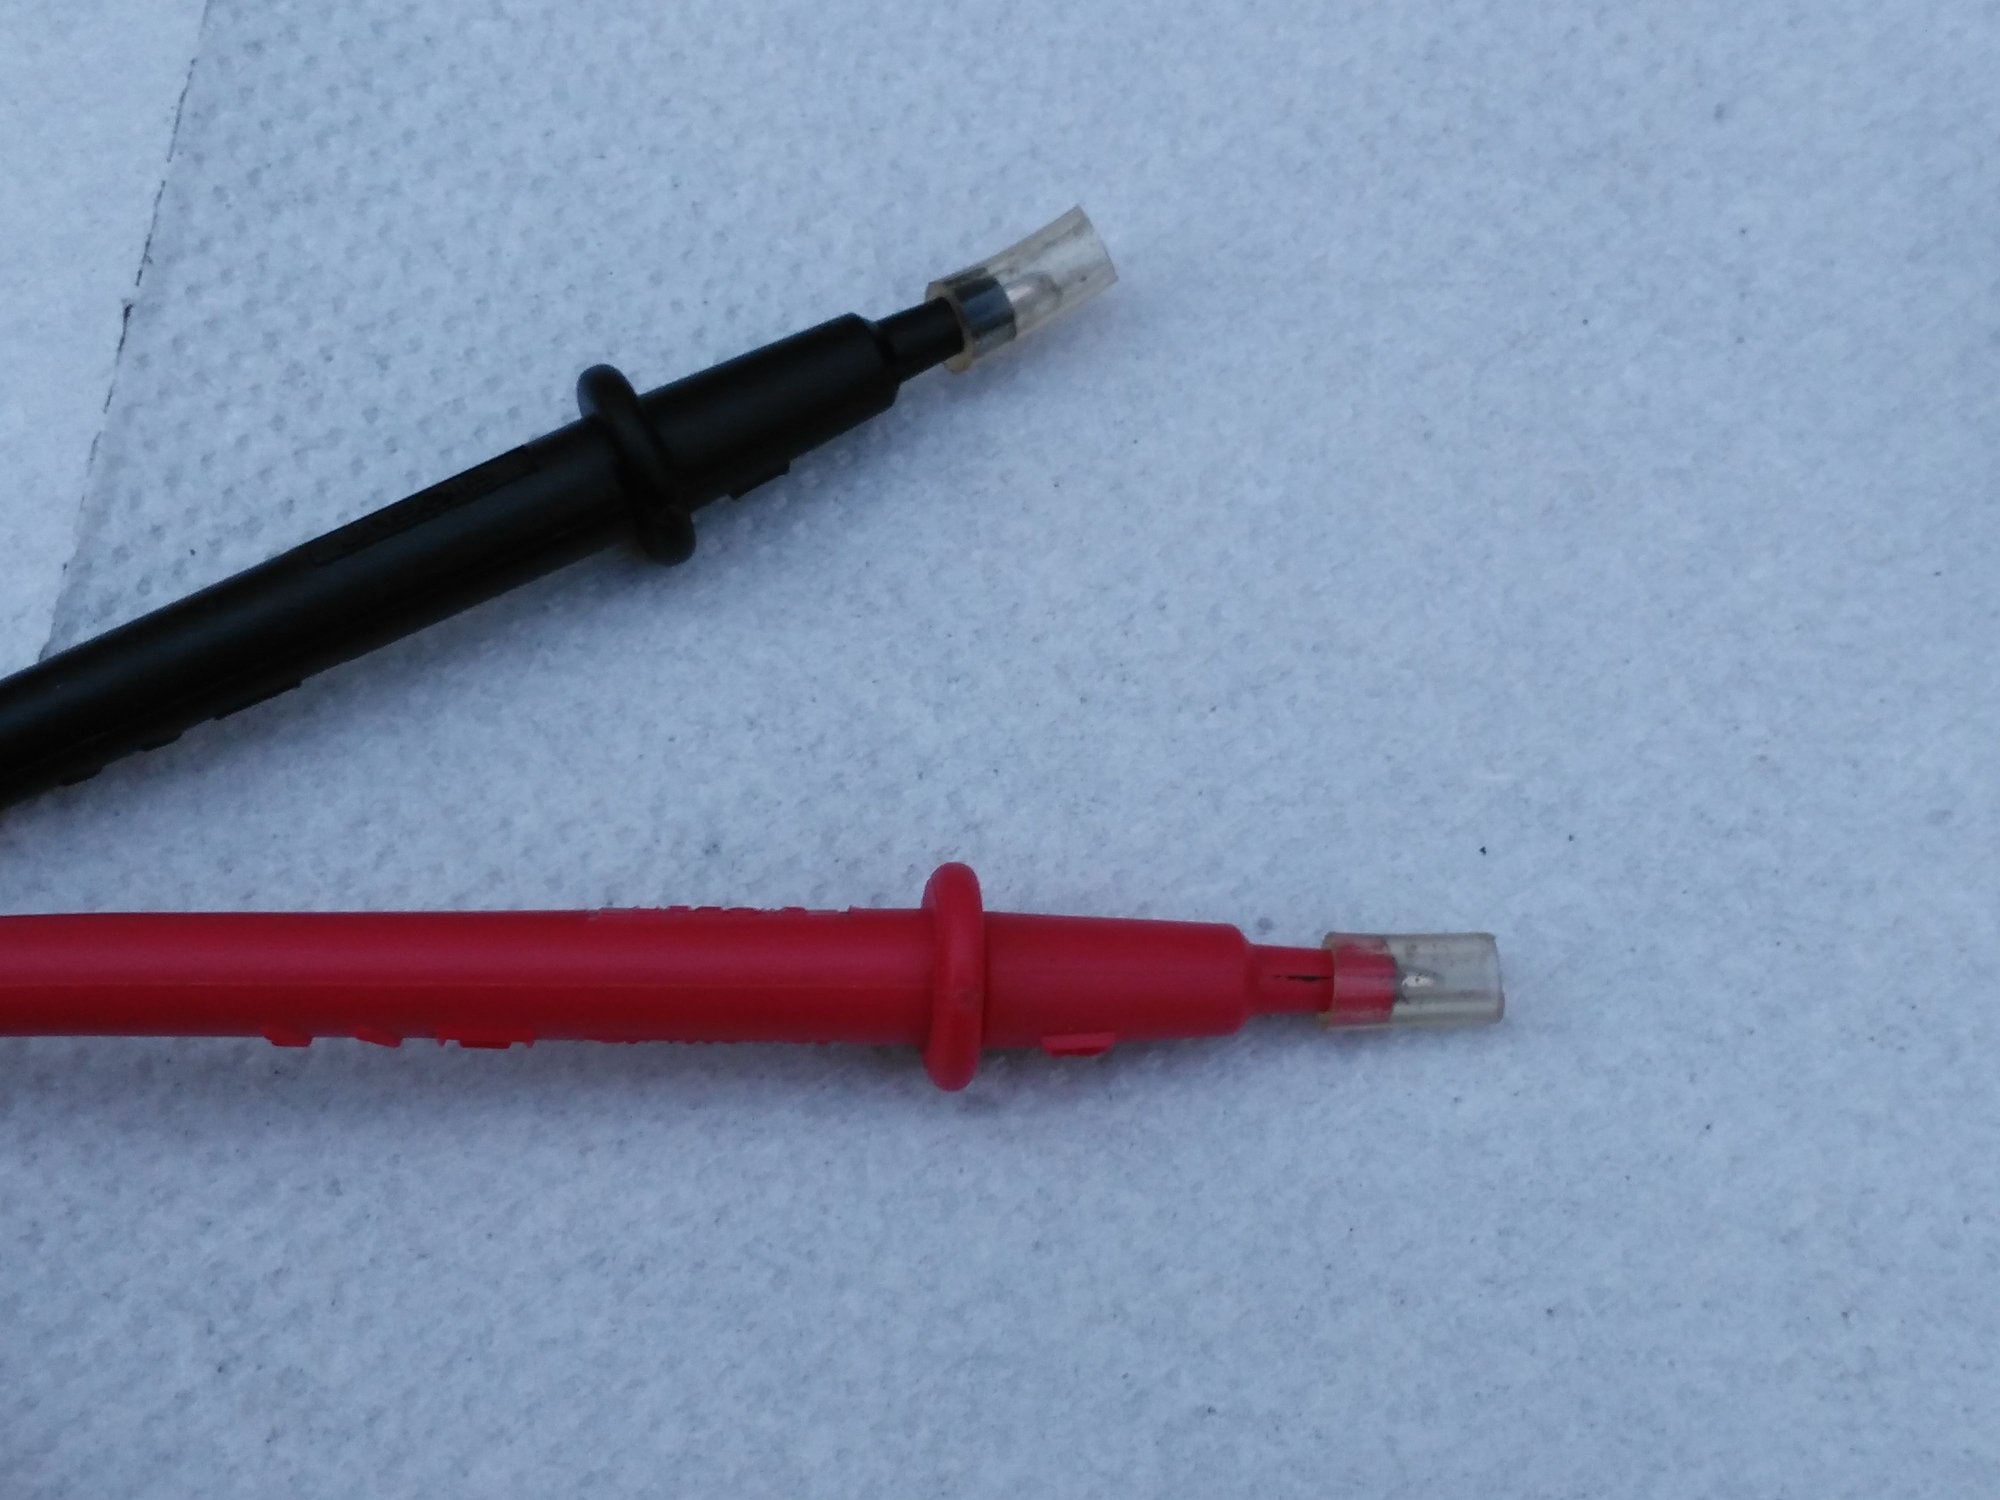
'Top Tip' a Couple of pieces of Polythene Tube will turn those hard to hold Pointy Probes into a Make Shift Plug (you can thank me later)
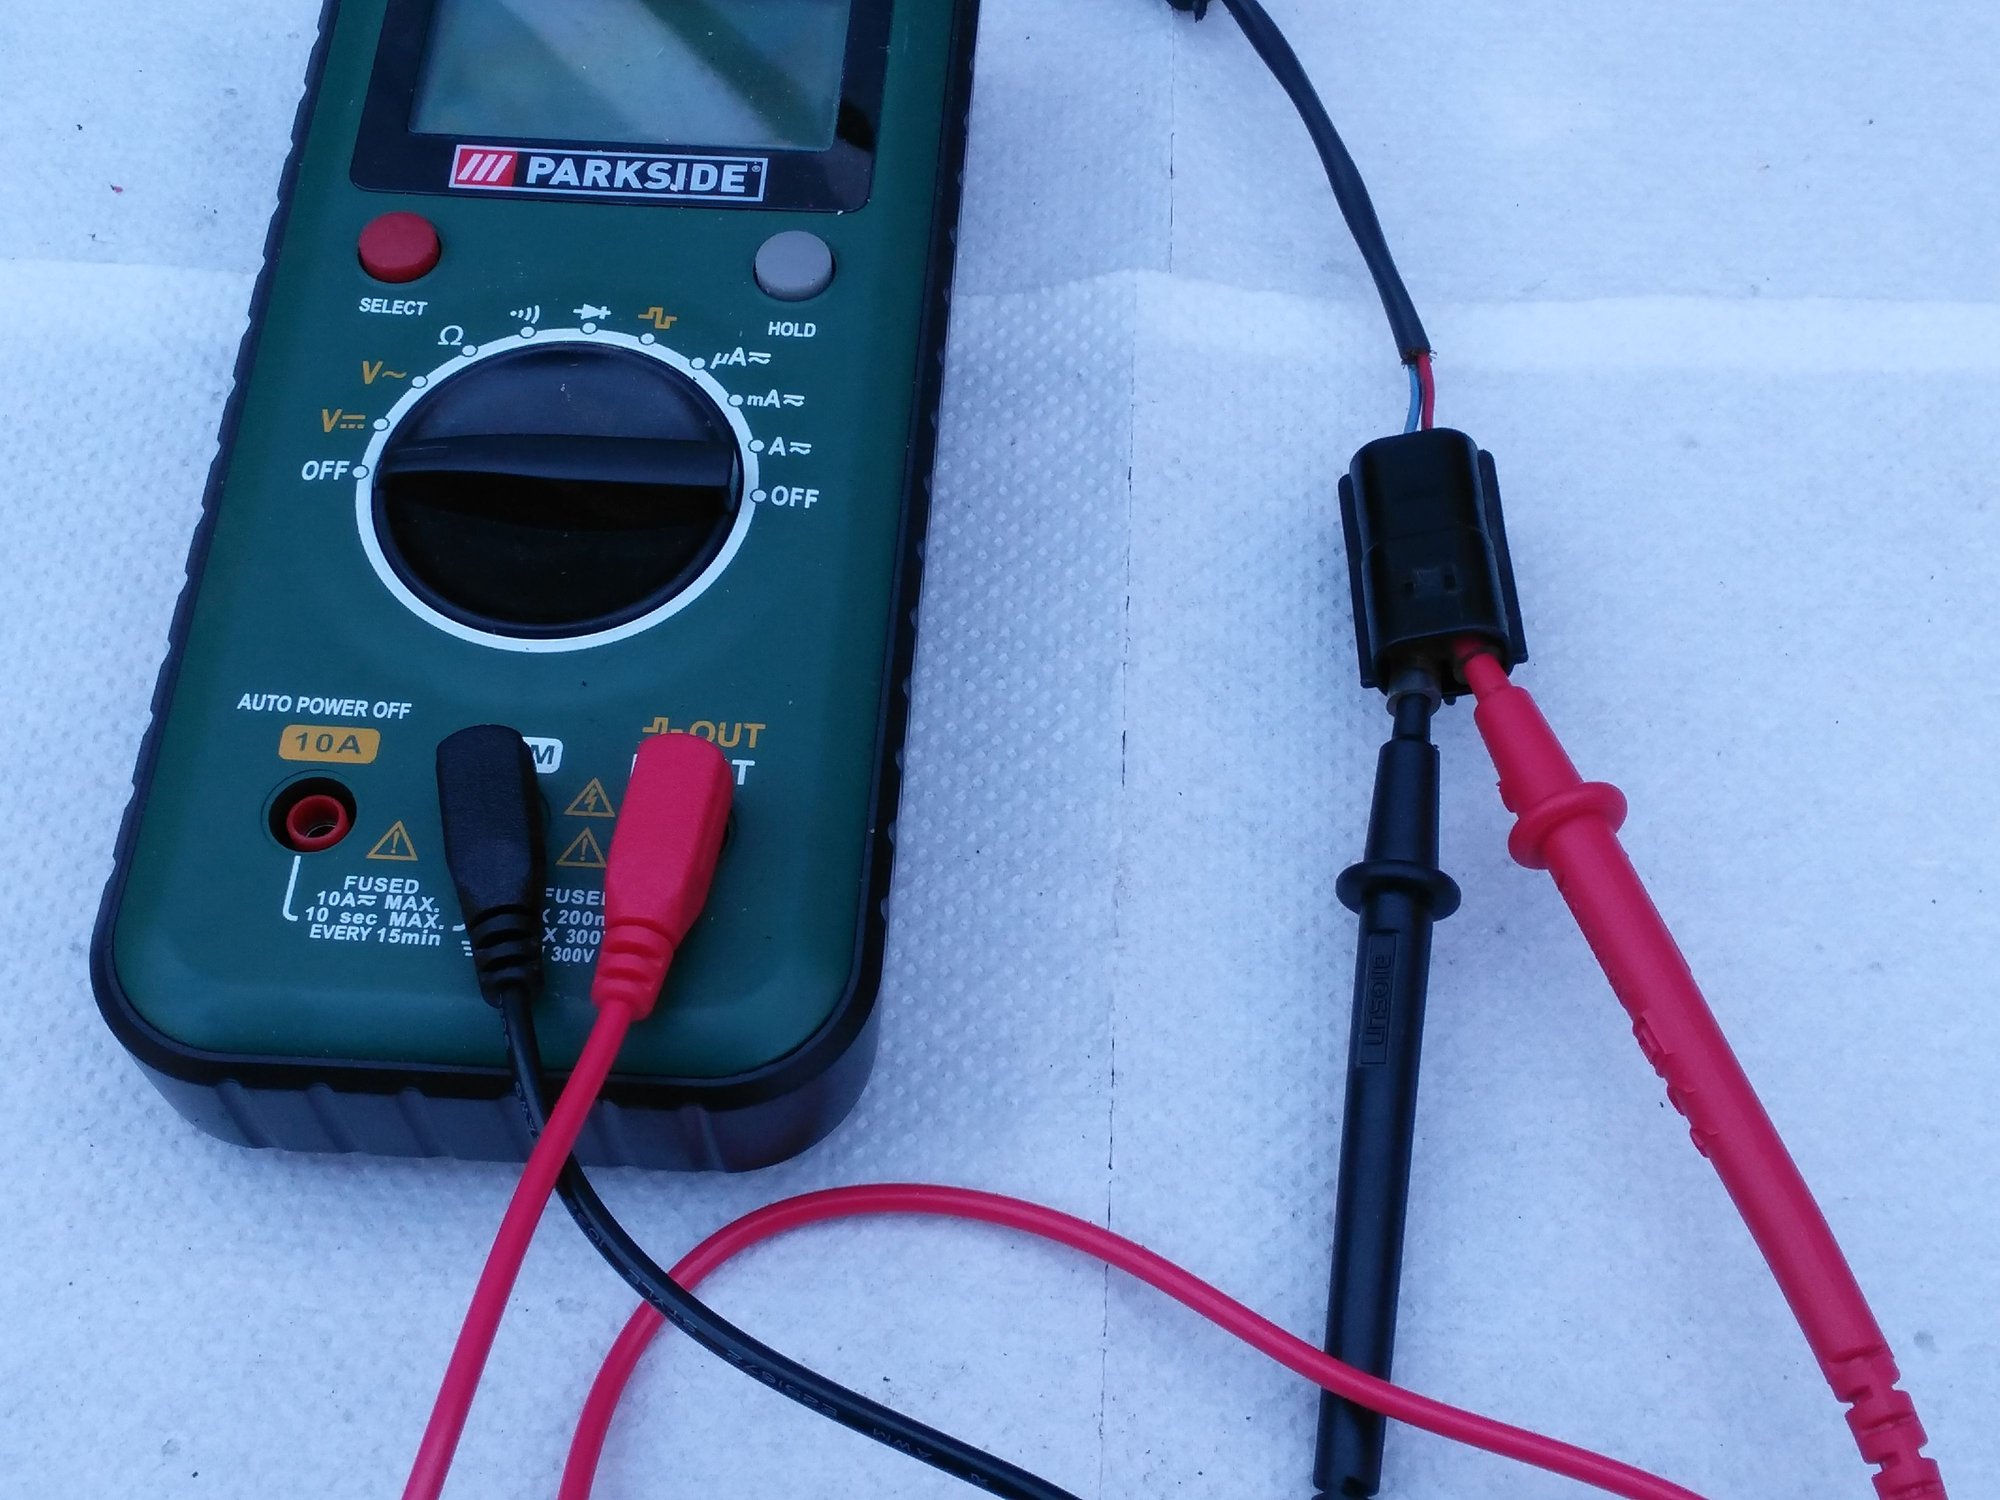
Next: Plug the Probes into the Plug on the Crank Shift Sensor (you may have to jiggle them a bit to make electrical contact when you Switch the Meter ON)
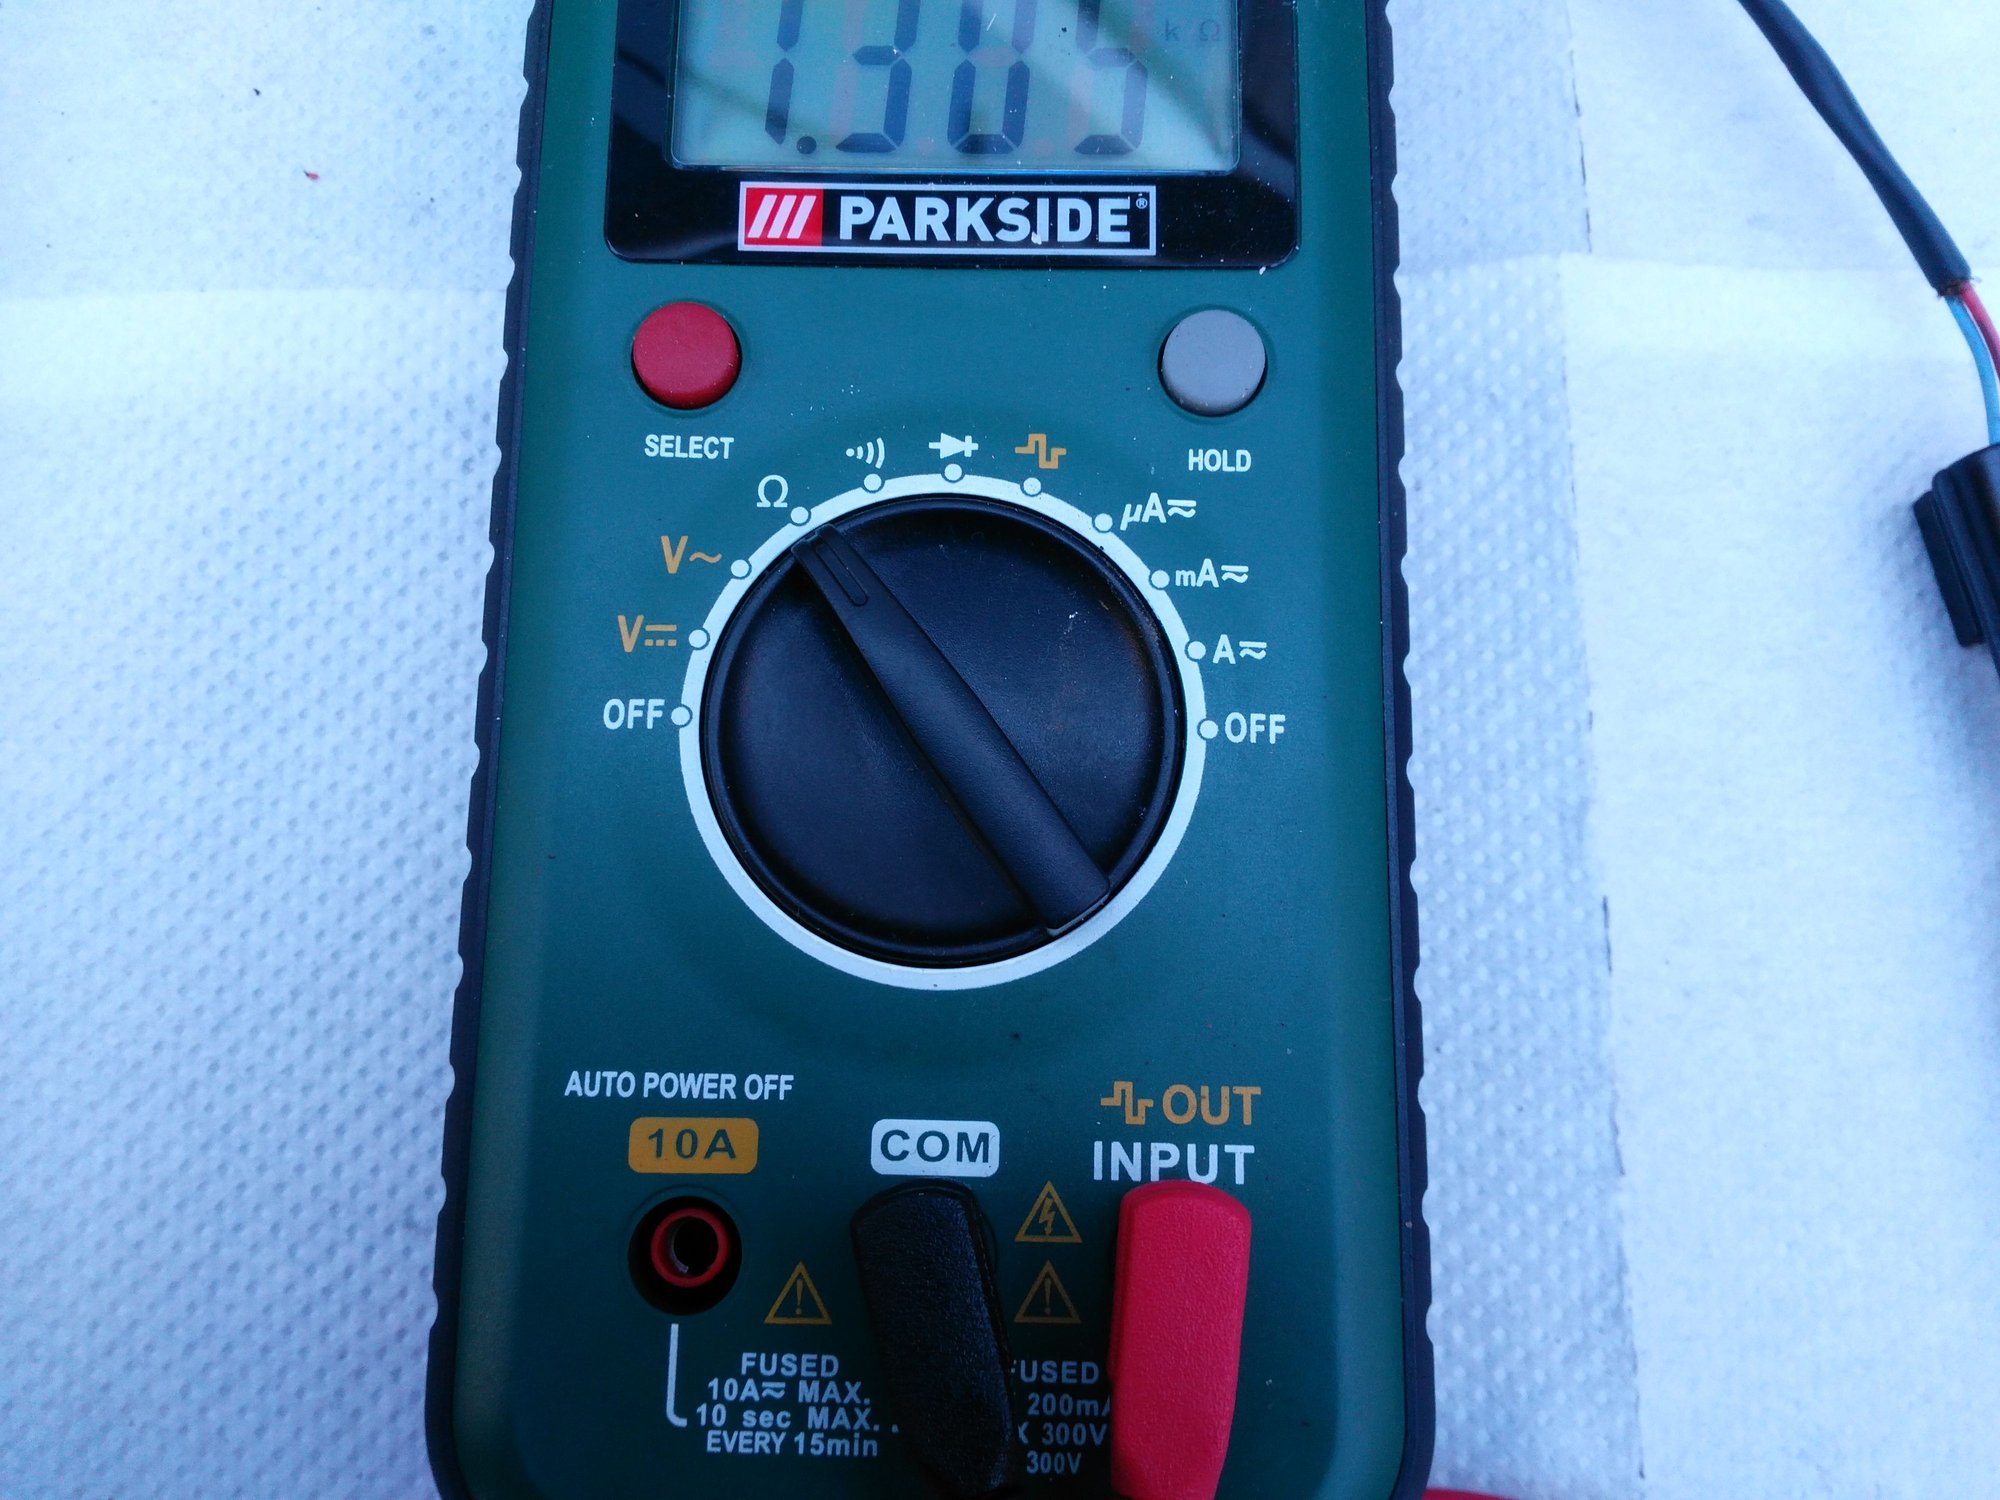
Set the Meter to Ohms which is that upside down horse shoe 'Thingy' Symbol at which point you should get a reading but if not 'Jiggle' the Wires in the Make Shift Plug
As you can see the Reading on this Crank Position Sensor is 'Bang on the Money' and if I had known how to Test it like this then I could have saved myself £56!
Where as this Crank Position Sensor still has a Perfect Reading or as near enough as makes no difference on a Car that's over 20 years old then this one will be going in the 'Glove Box' as a Spare which I can change by the side of the road in just a couple of minutes and will also be a lot cheaper than a 'Tow Truck'
I'm also doing a Video of another interesting different Test that you can try to follow later though hopefully this will help someone get their Car Running Again
#2390
#2391
Hi Greg
In order to be 100% you probably need something like a Sine Wave Generator but since not many people have got one of those, the Ohm Resistance Meter Test is a well known DIY method of Testing these that is easy to do and gives a very good indication of the state of your Crank Position Sensor
As if you don't get a reading, then your CPS is probably 'Toast' and if I had done this Test myself when my Car wouldn't Start, I could then have saved myself the Cost of buying a New CPS that at the time in question was around £56 and also quite possibly double that price now
As the Test with the Meter on the actual CPS that some were indicating as the possible cause of my No Start Problem indicates that this CPS was Good and as such unlikely to need to be replaced at this 'stage of the game'
The following 2 users liked this post by orangeblossom:
Dukejag (04-27-2021),
Greg in France (04-23-2021)
#2392
Removing The Cage From '50 Shades' My Grey XJS
Now All Done And Dusted And Ready To Go Back Into The Car
Even I cannot believe I'm finally saying that, as at last the IRS is ready to go back into the Car apart from Adjusting the Handbrake and Torquing down the 4 Bolts on Top of the IRS Cage and then securing those with Stainless Steel WireNow All Done And Dusted And Ready To Go Back Into The Car
It does feel like I've been on quite a journey but I would rather take my time and hopefully not have made too many mistakes along the way, in the hope that when I put it back, if I'm lucky it might even work!
Although I don't know how difficult that part is going to be, although removing the Cage was easier than I thought and so I've somehow got to try and find an easy way of dragging it back underneath the Car myself and then somehow getting it onto a Jack to lift it up into the space that it came out of
So I'm not making any predictions of how long that's going to take but at least the fine Weather is going to help me do that
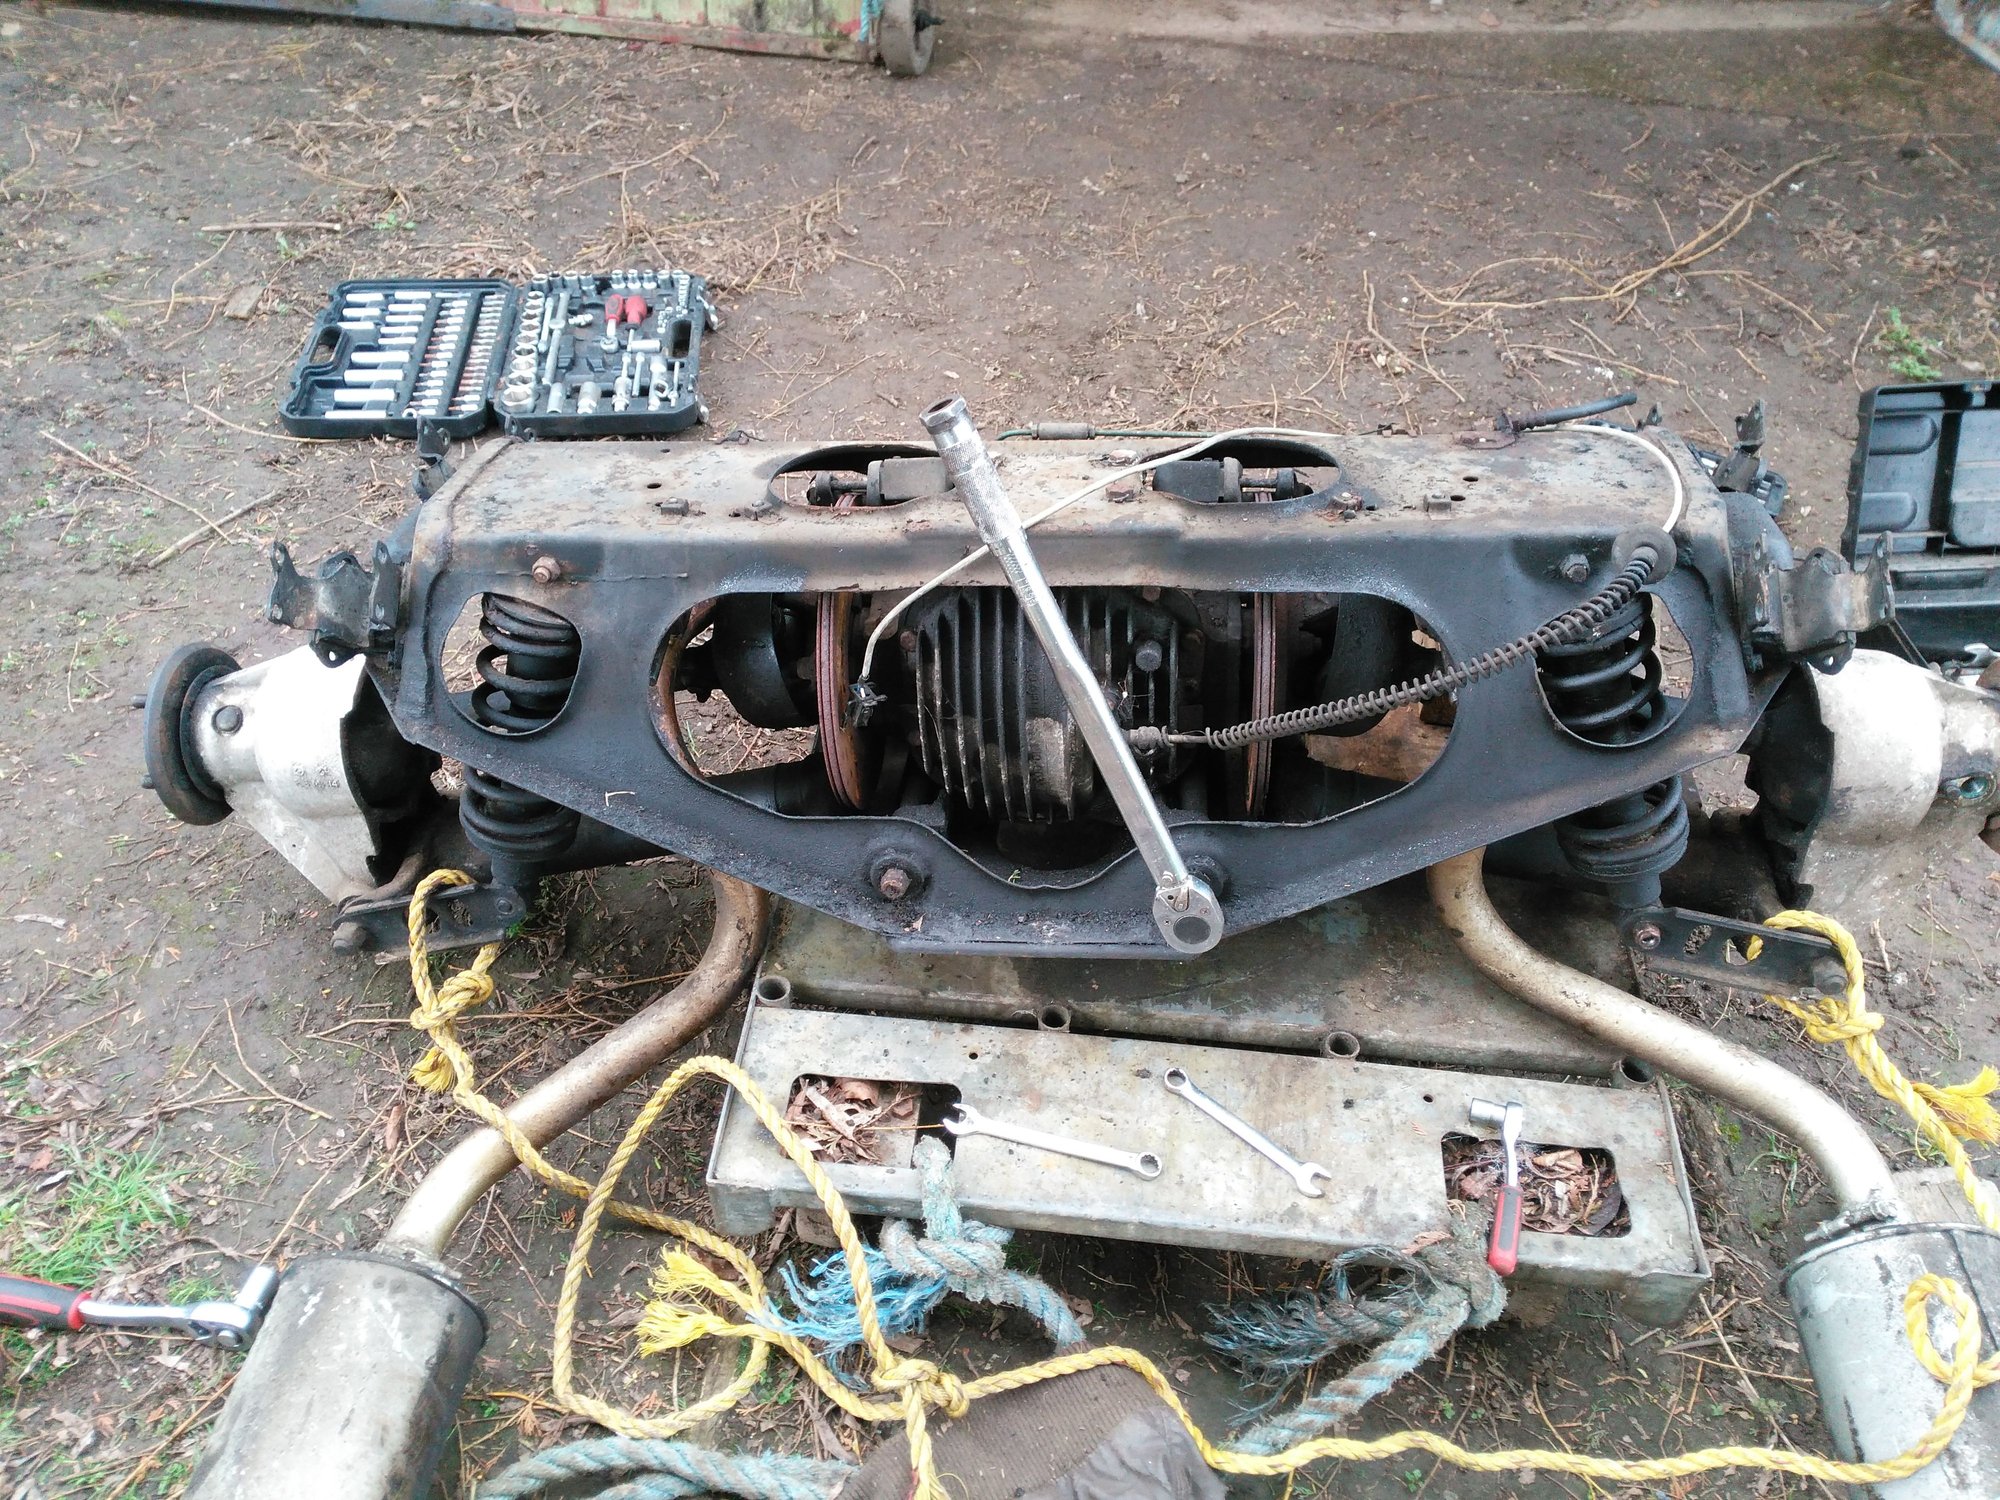
Looking a little bit fit for Scrap at the moment and I don't think those Rotors have ever been changed in the life of the Car
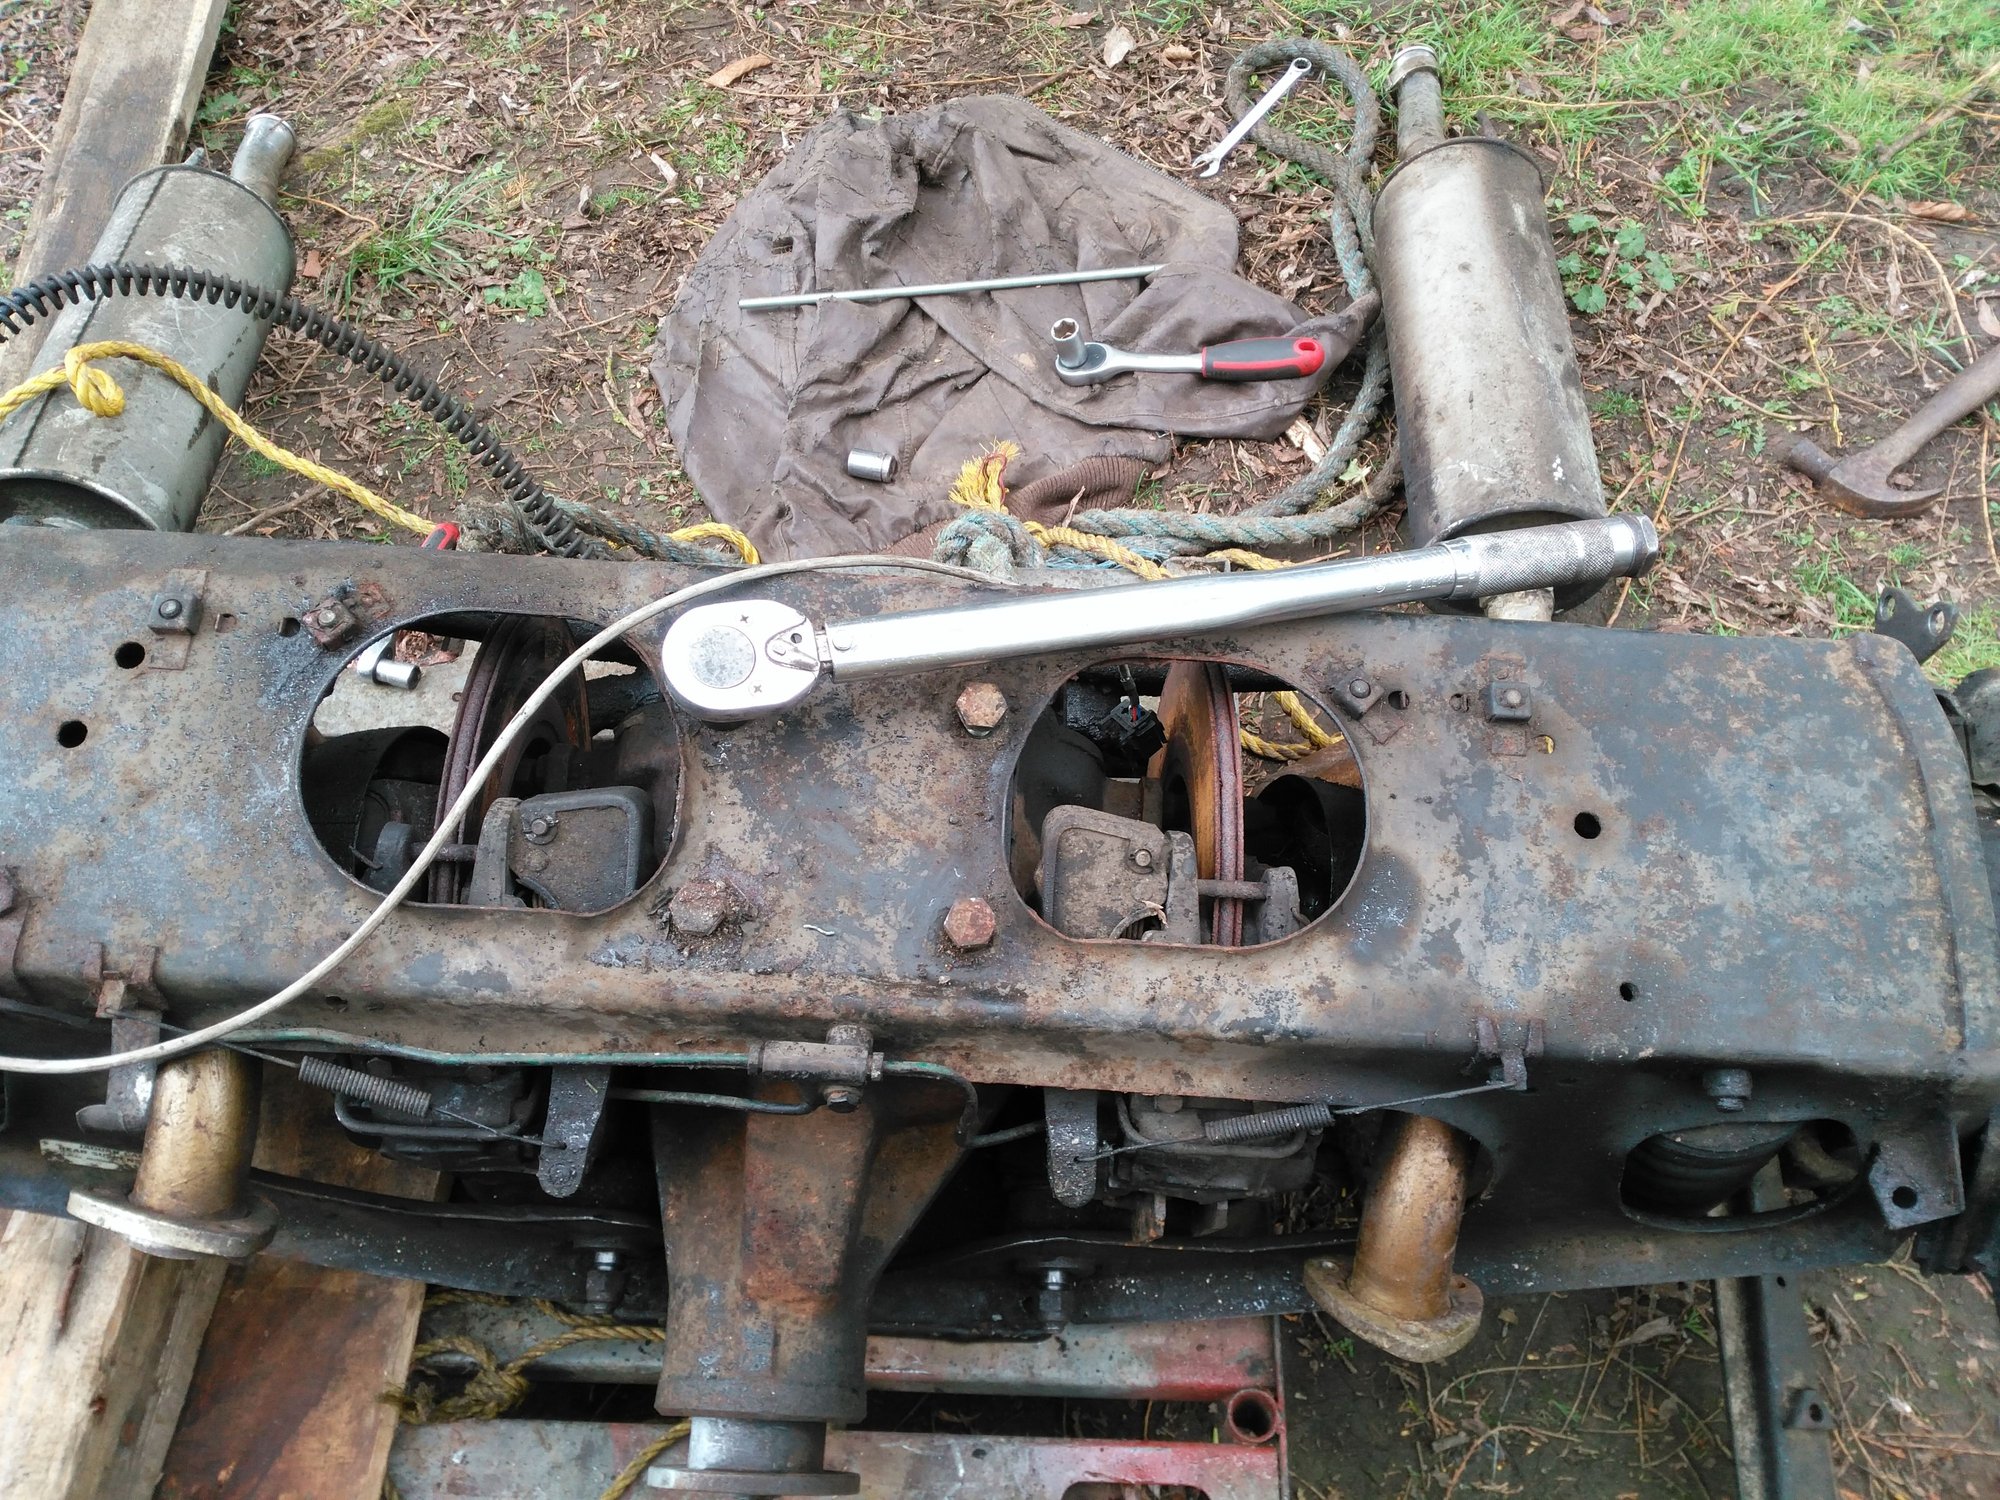
Which ever way you look at it there's a lot of work to do
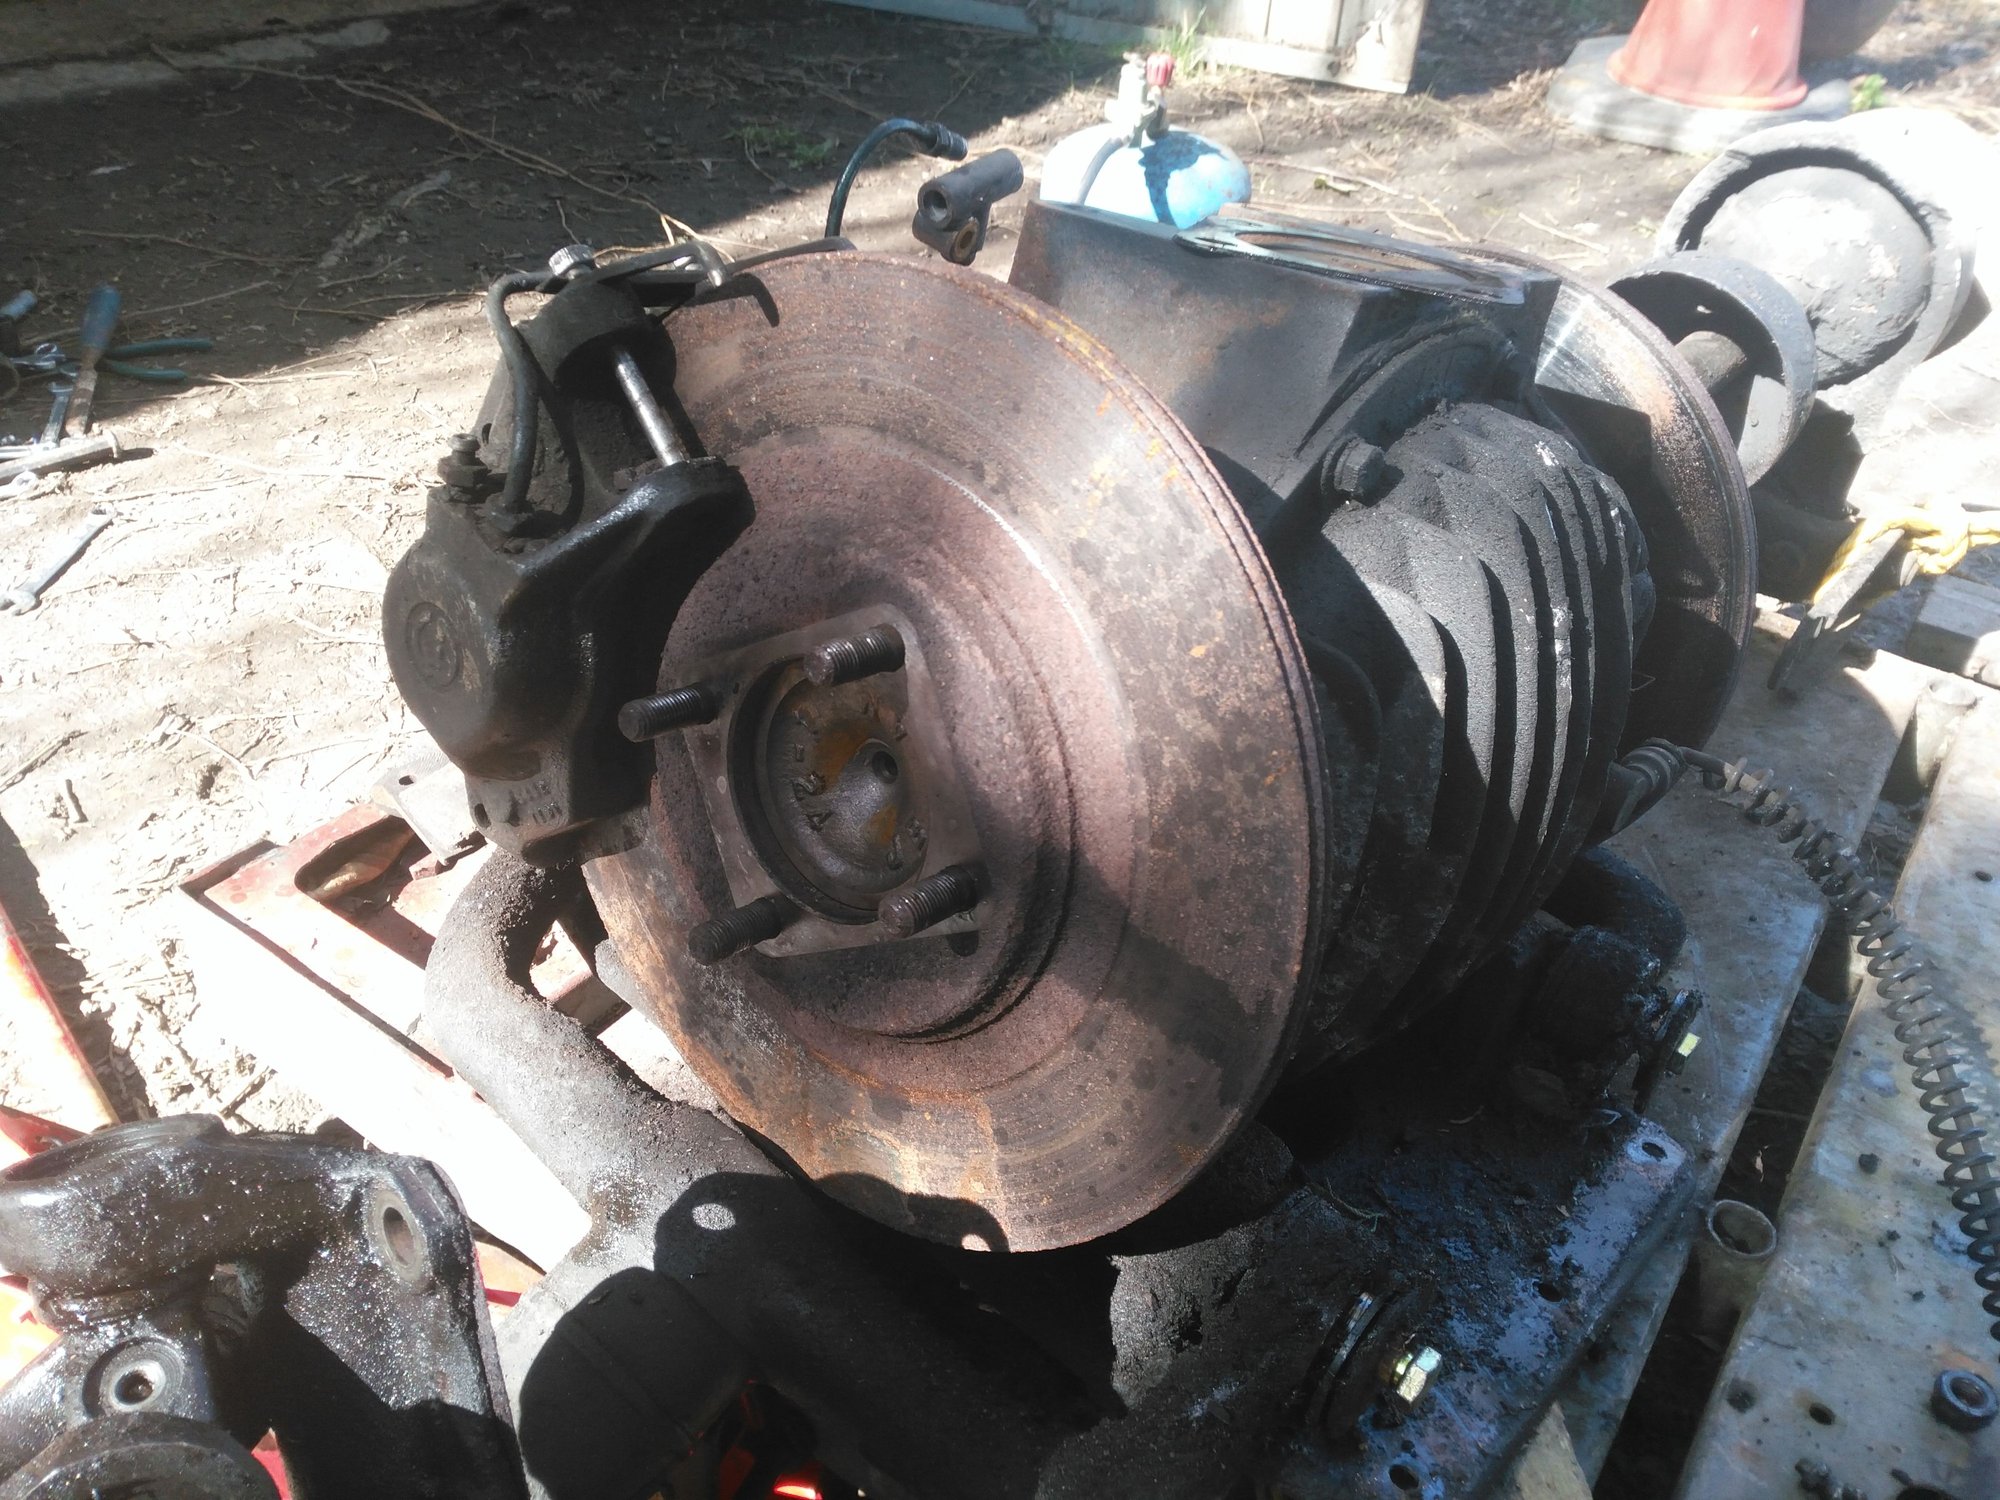
I think this could take longer than I thought!
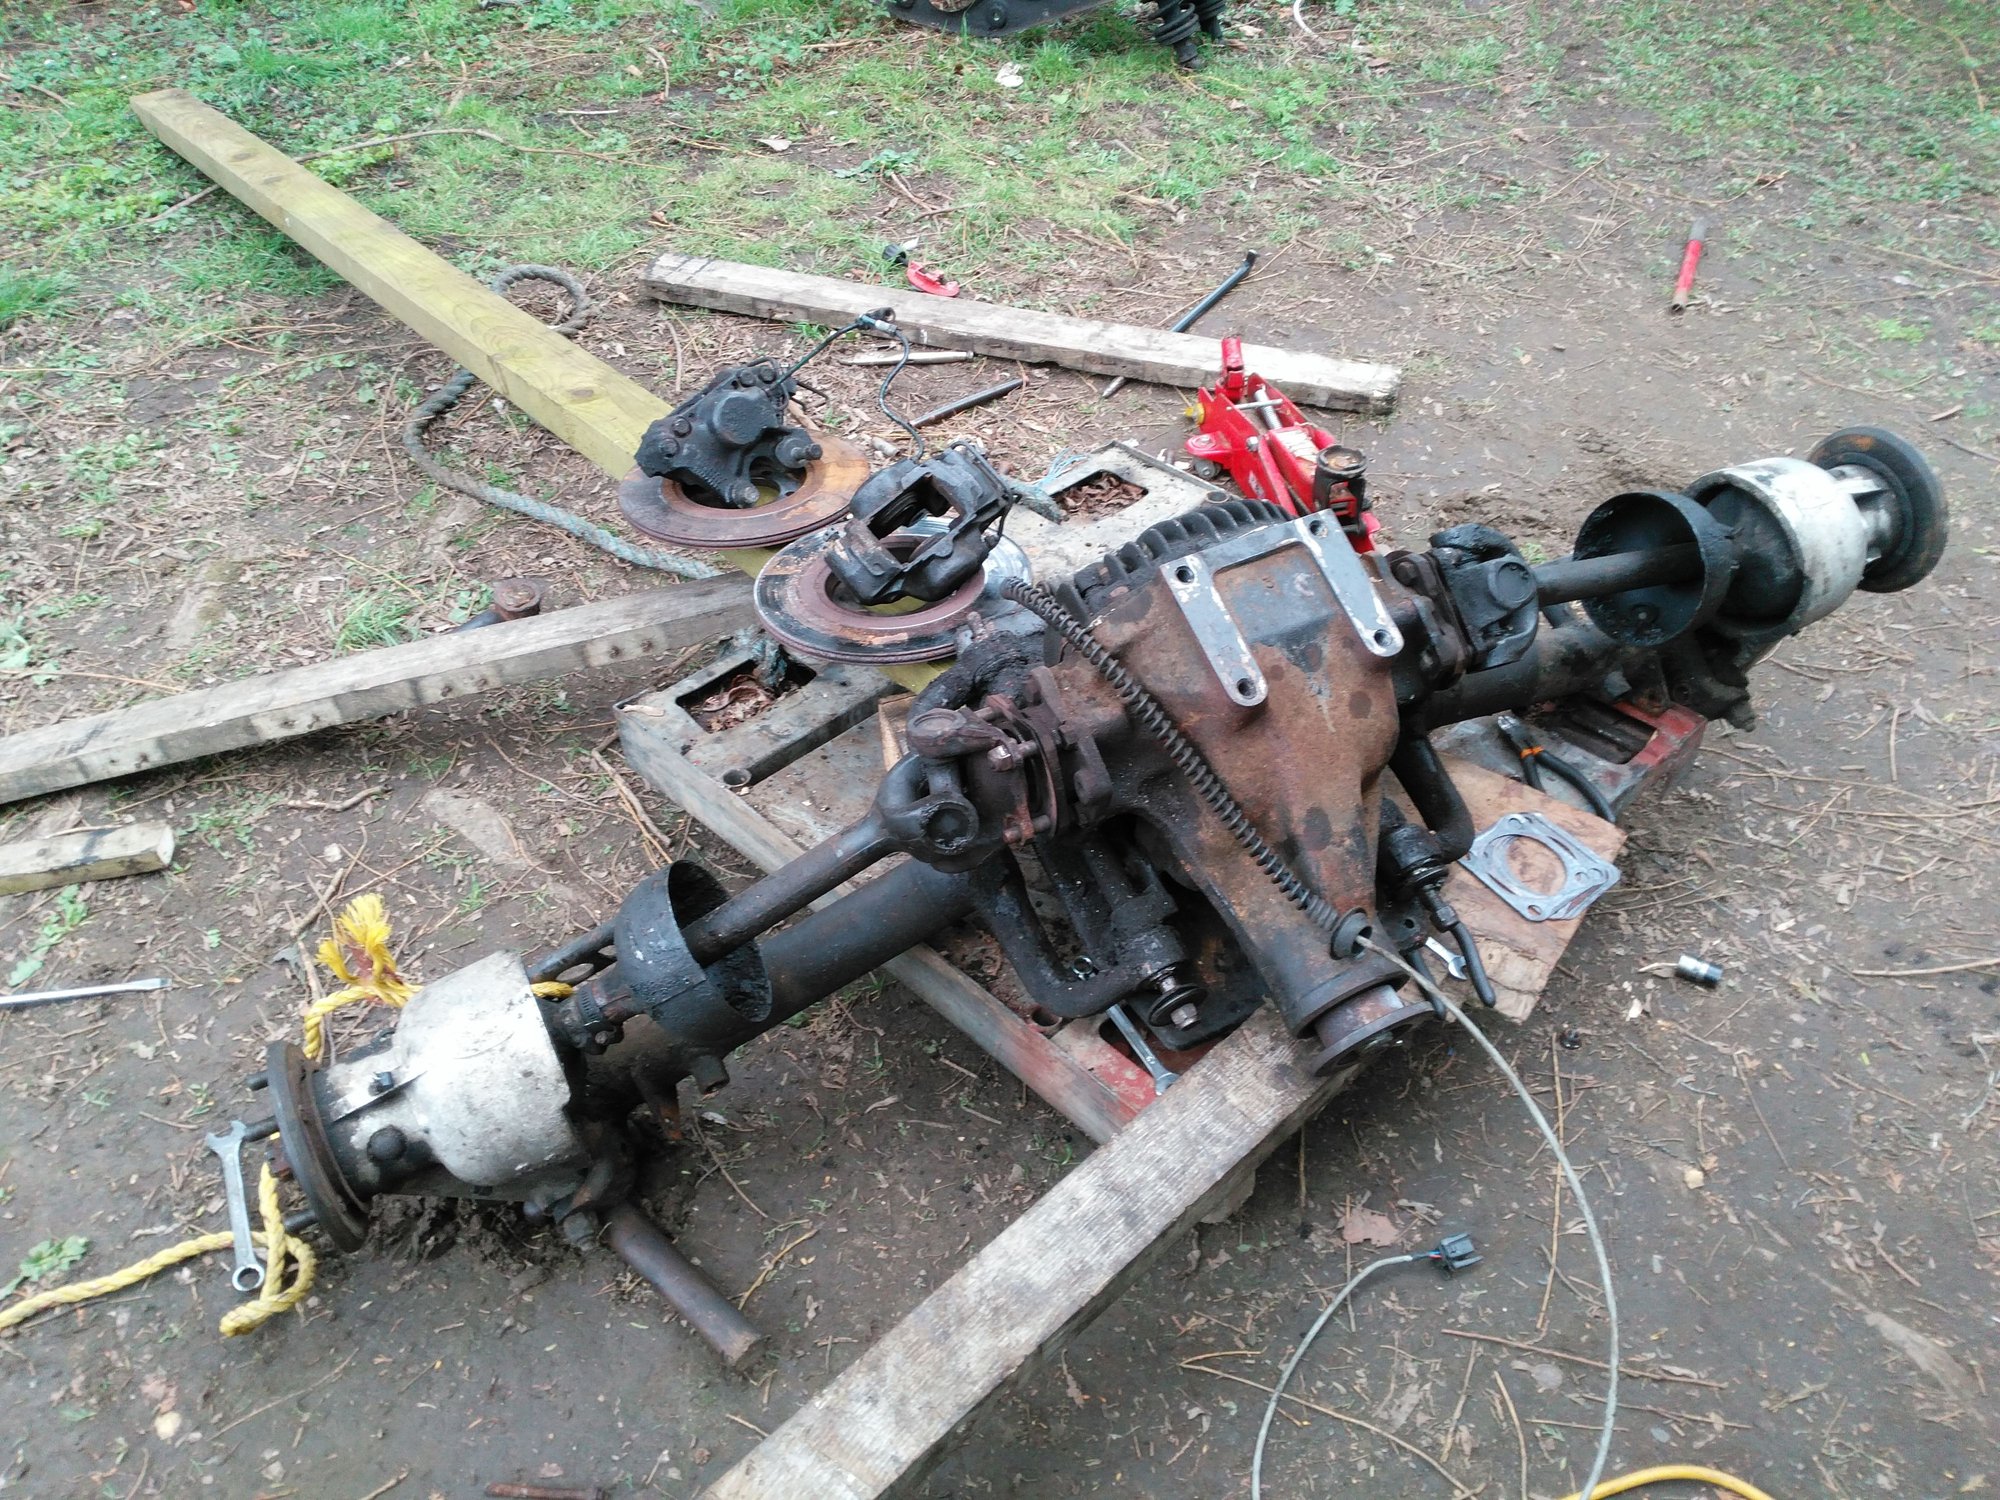
Even with the Cage removed it looks a Basket Case
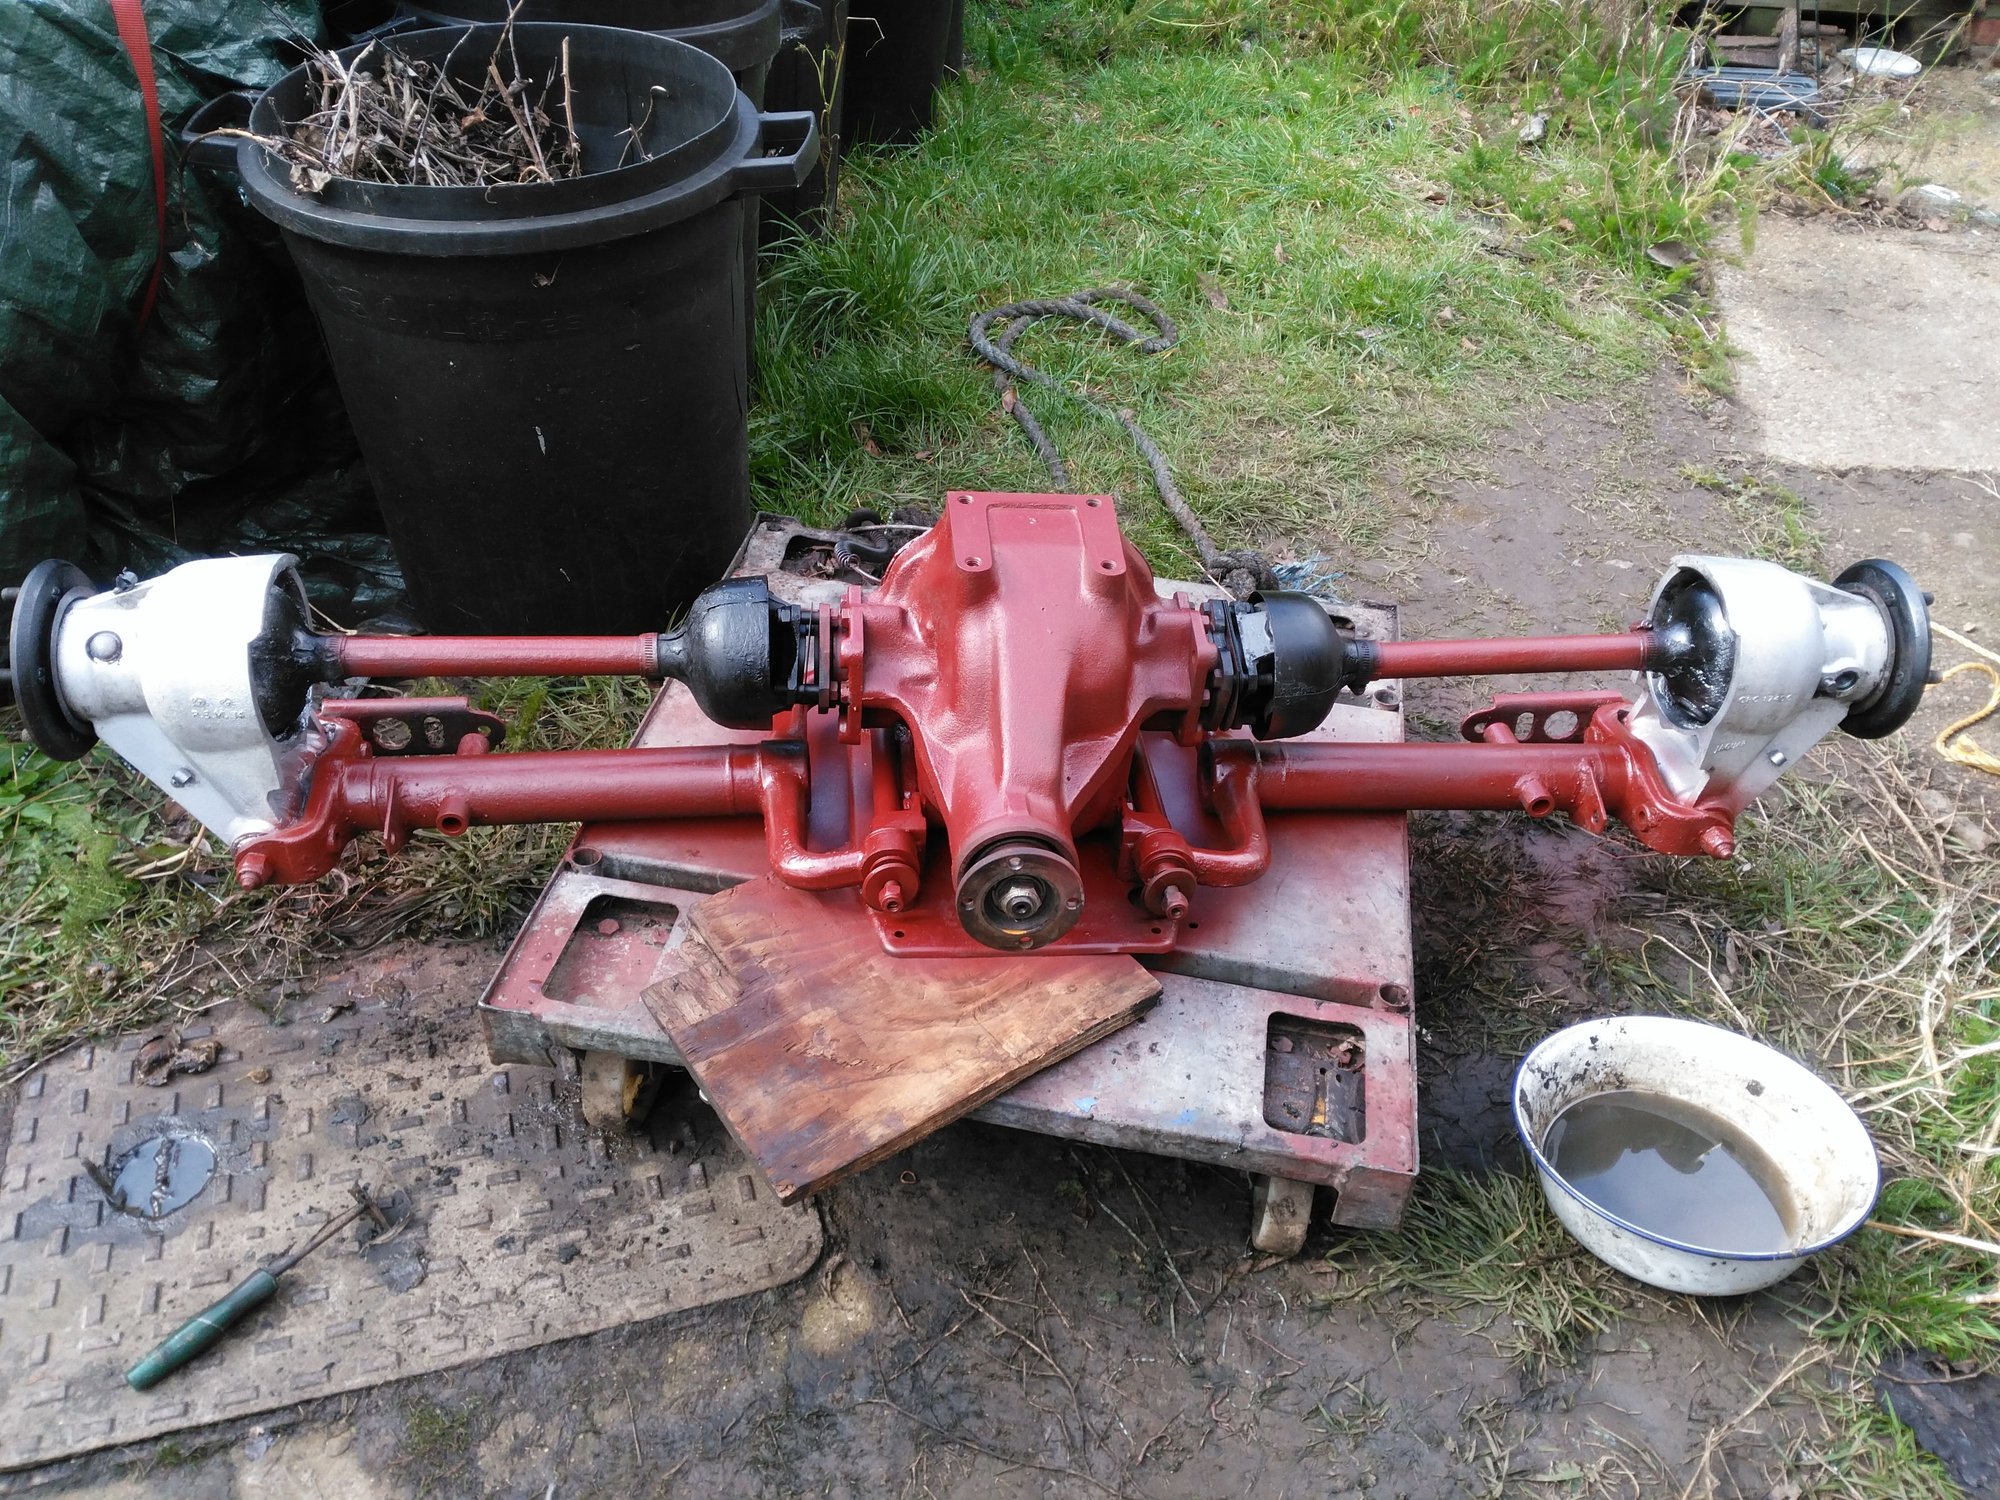
Looking better already after a good clean
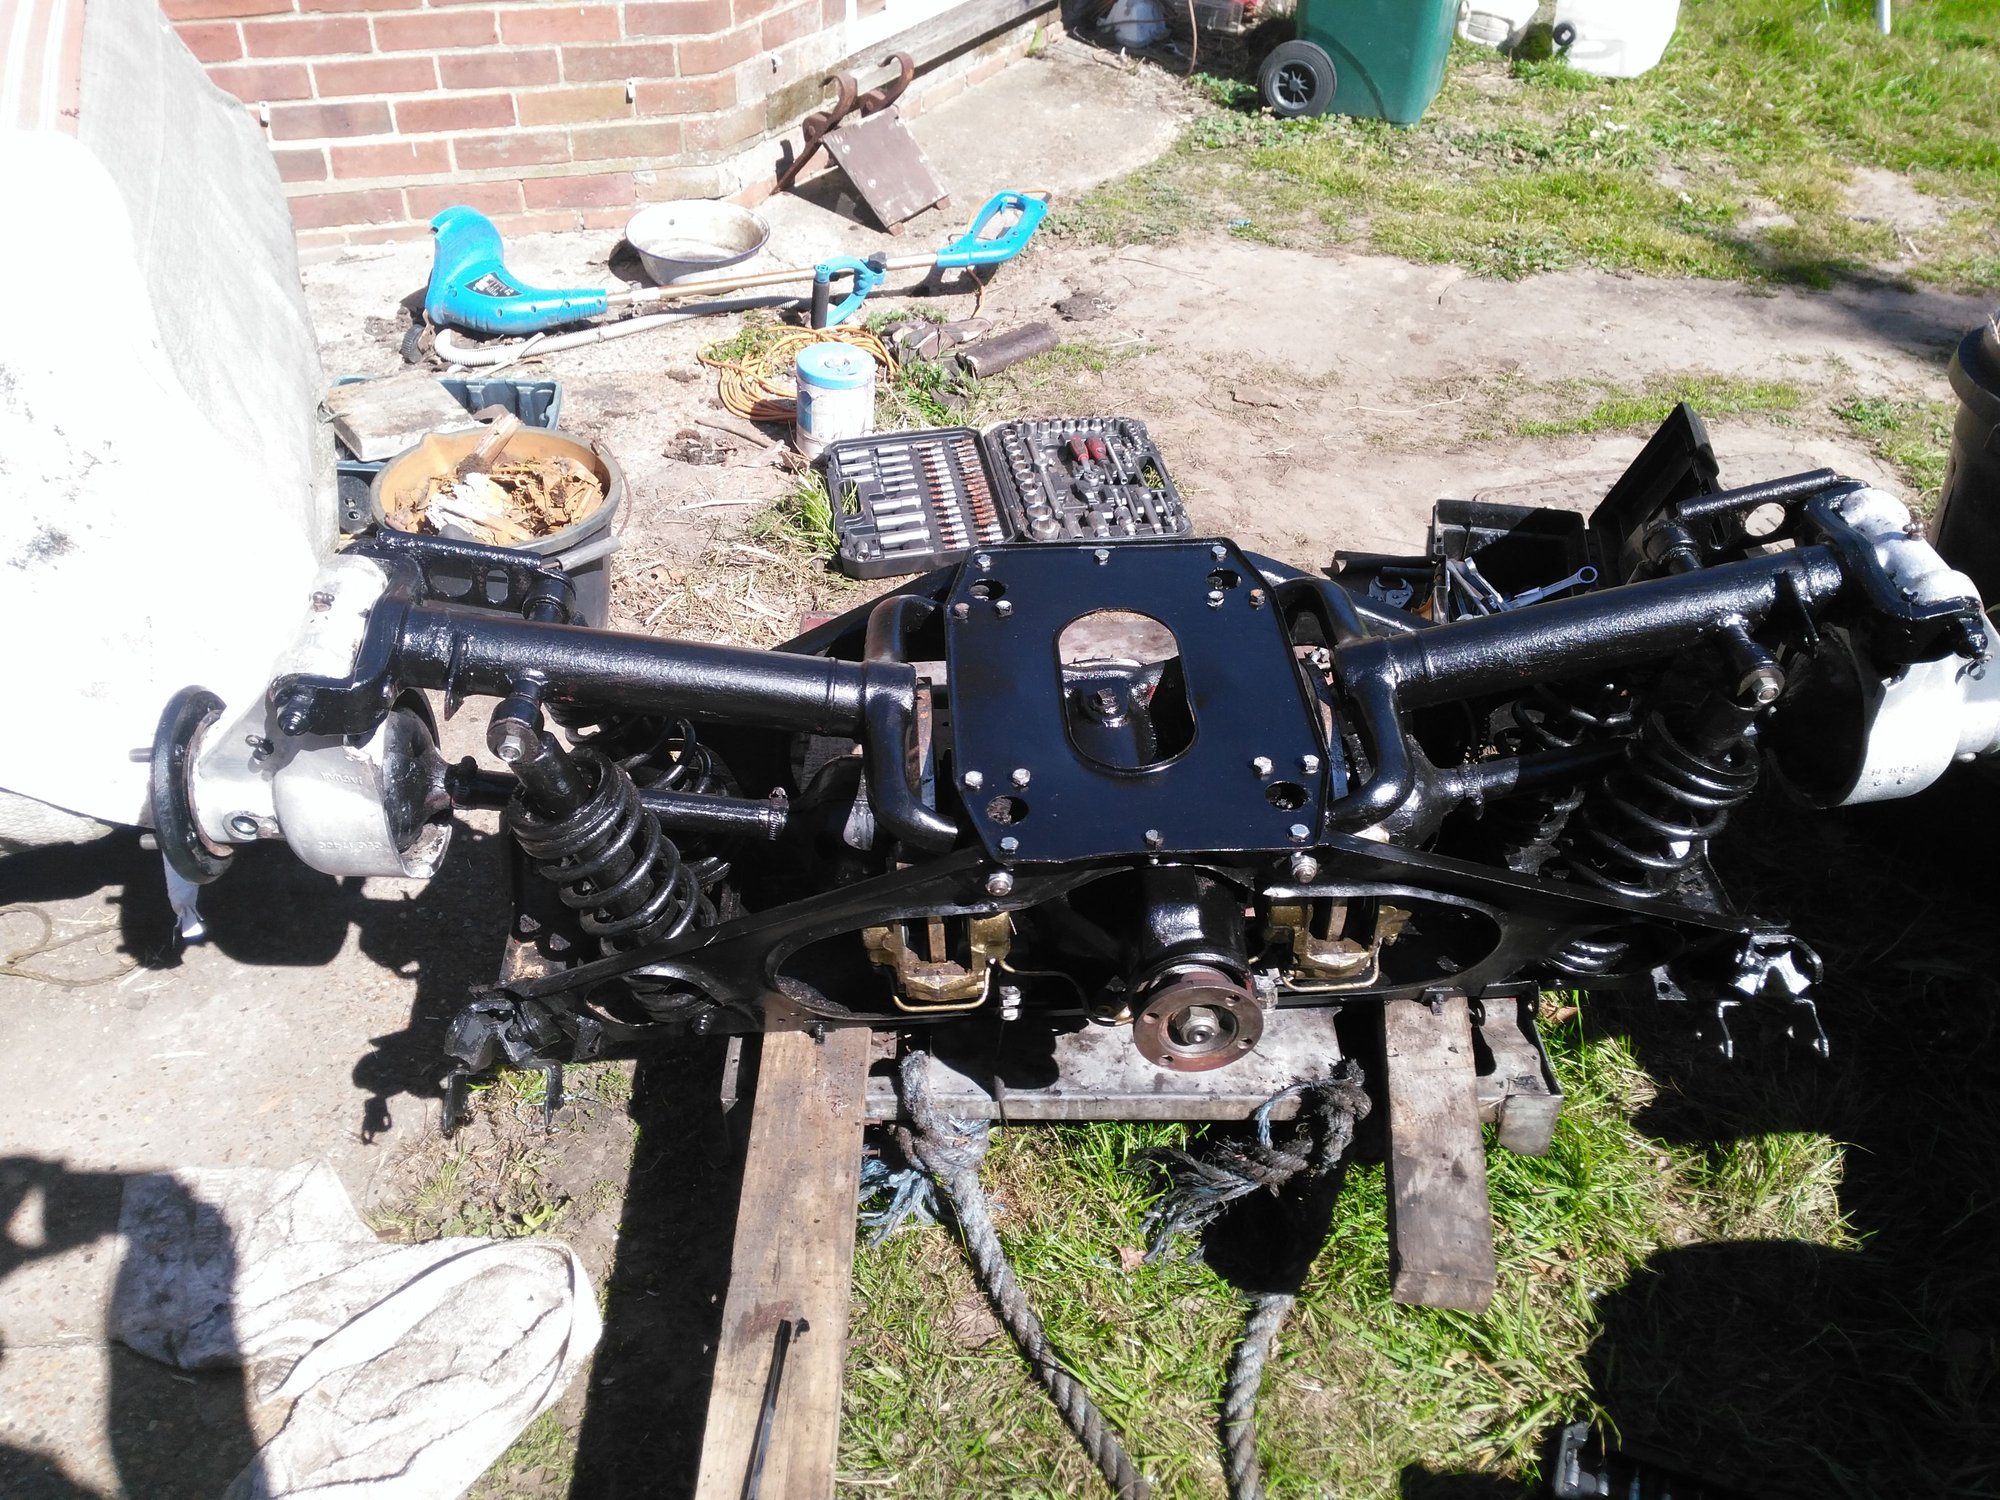
Almost there!
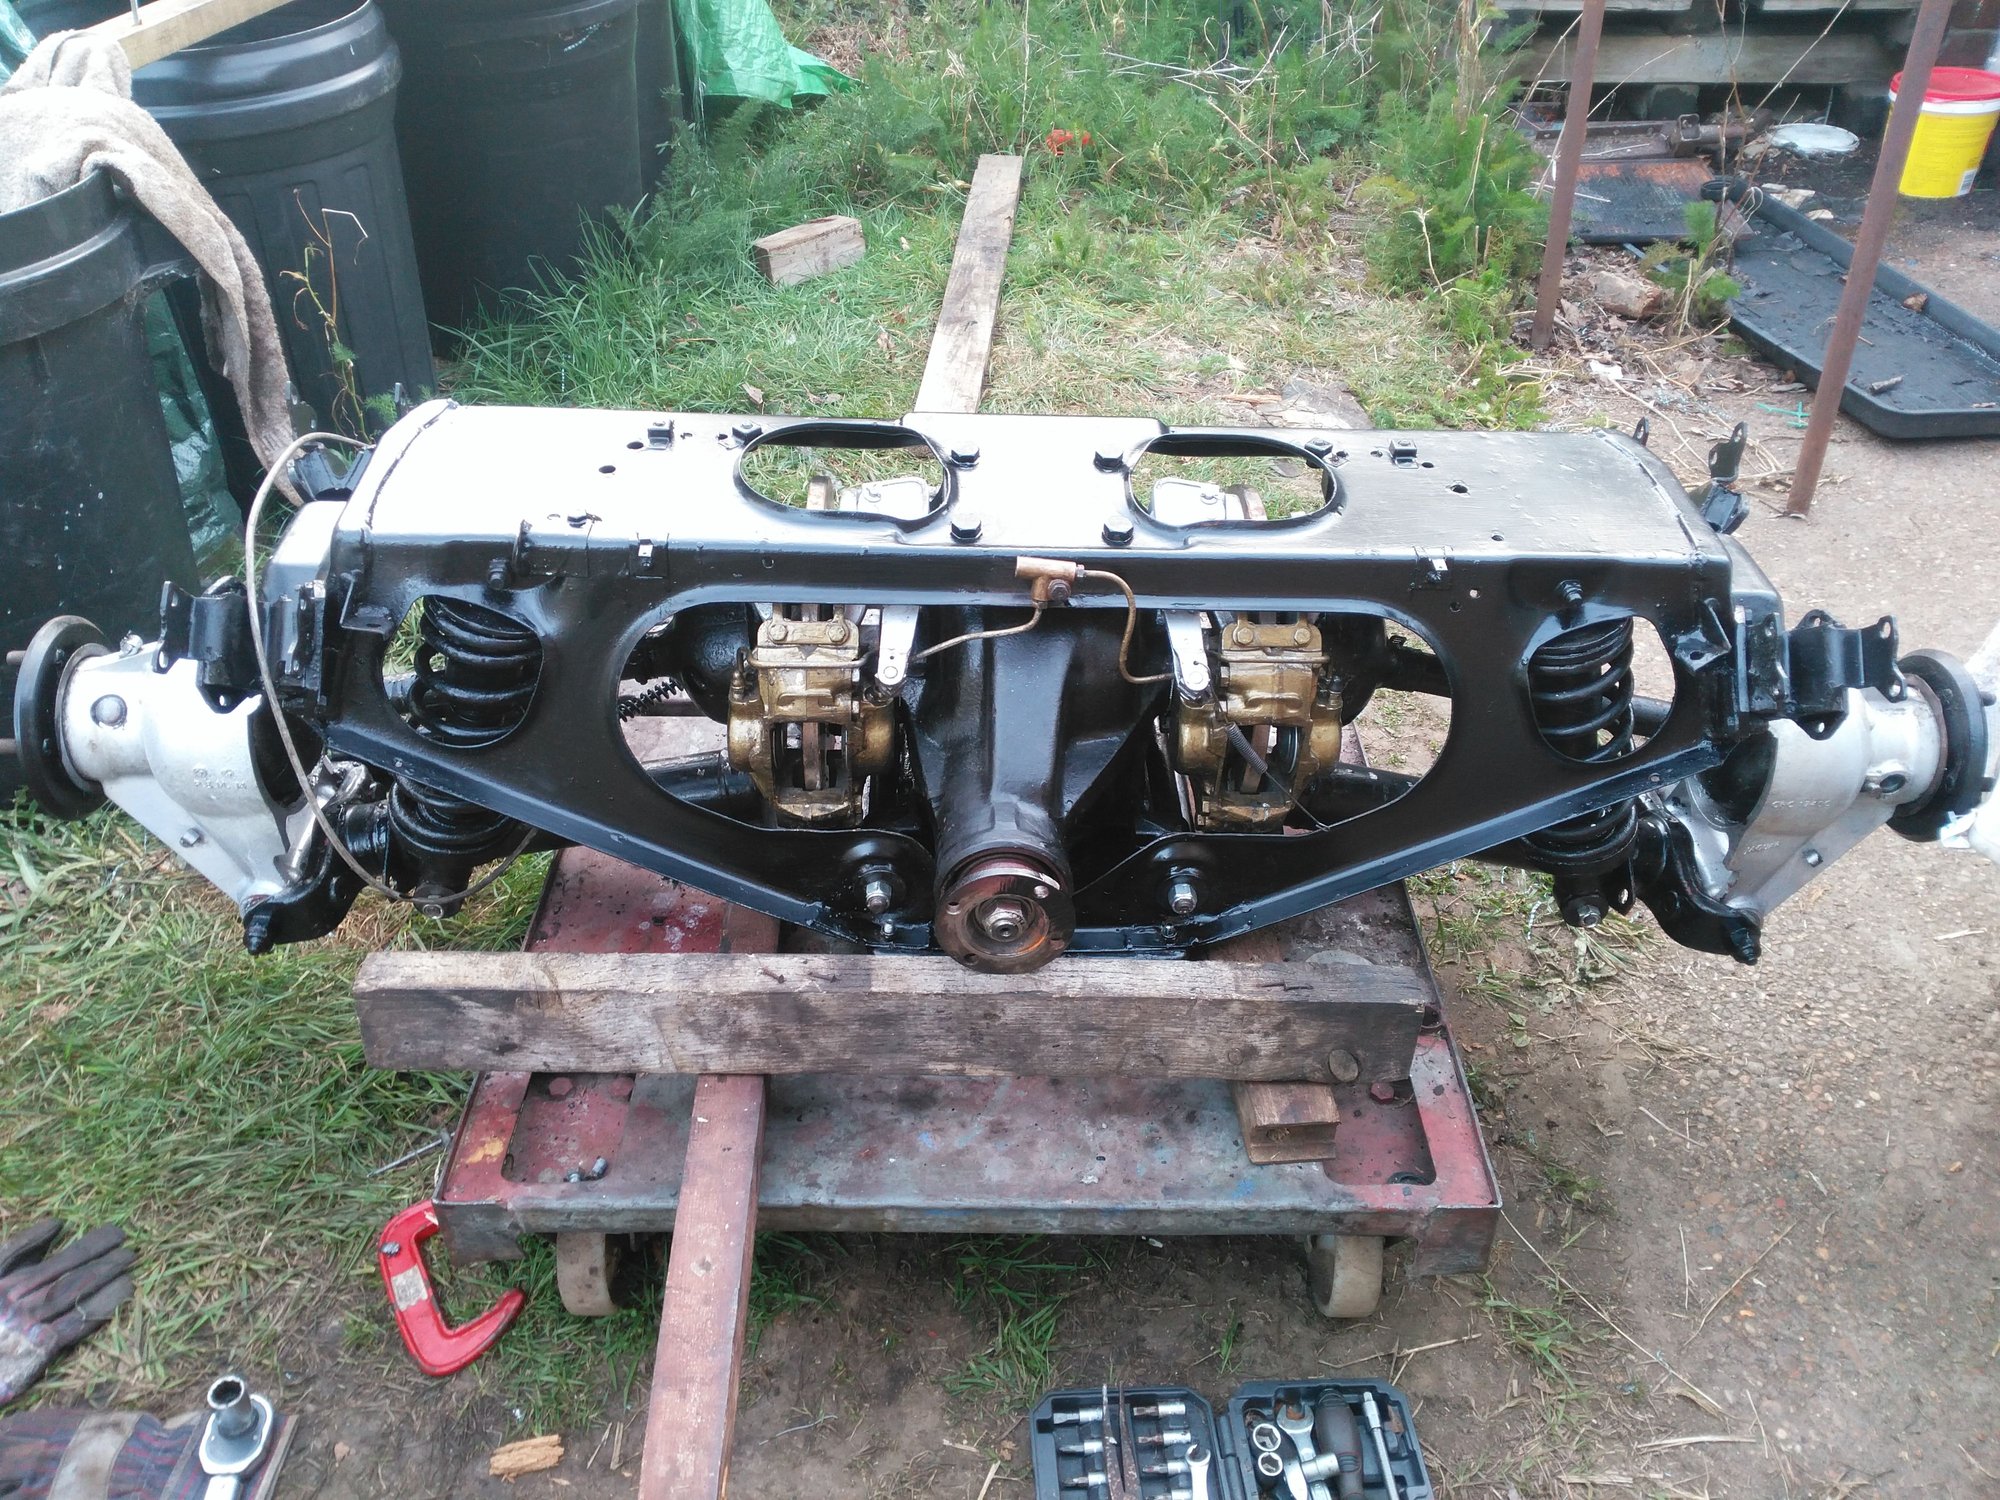
All done now and ready to go back
The following users liked this post:
Greg in France (04-24-2021)
#2393
Removing The Cage From '50 Shades' My Grey XJS
Tidying Up Some Loose Ends
Being a Saturday I should have known that I wouldn't be getting much done, what with things like Shopping to do and people unexpectedly dropping in and holding things up and so I thought I would instead tie up a few loose ends, in the hope of avoiding 'Mission Creep' later onTidying Up Some Loose Ends
Where the first Job on that list was to Torque down, then Locktite and Wire the Four Big Bolts on the Top of the IRS Cage
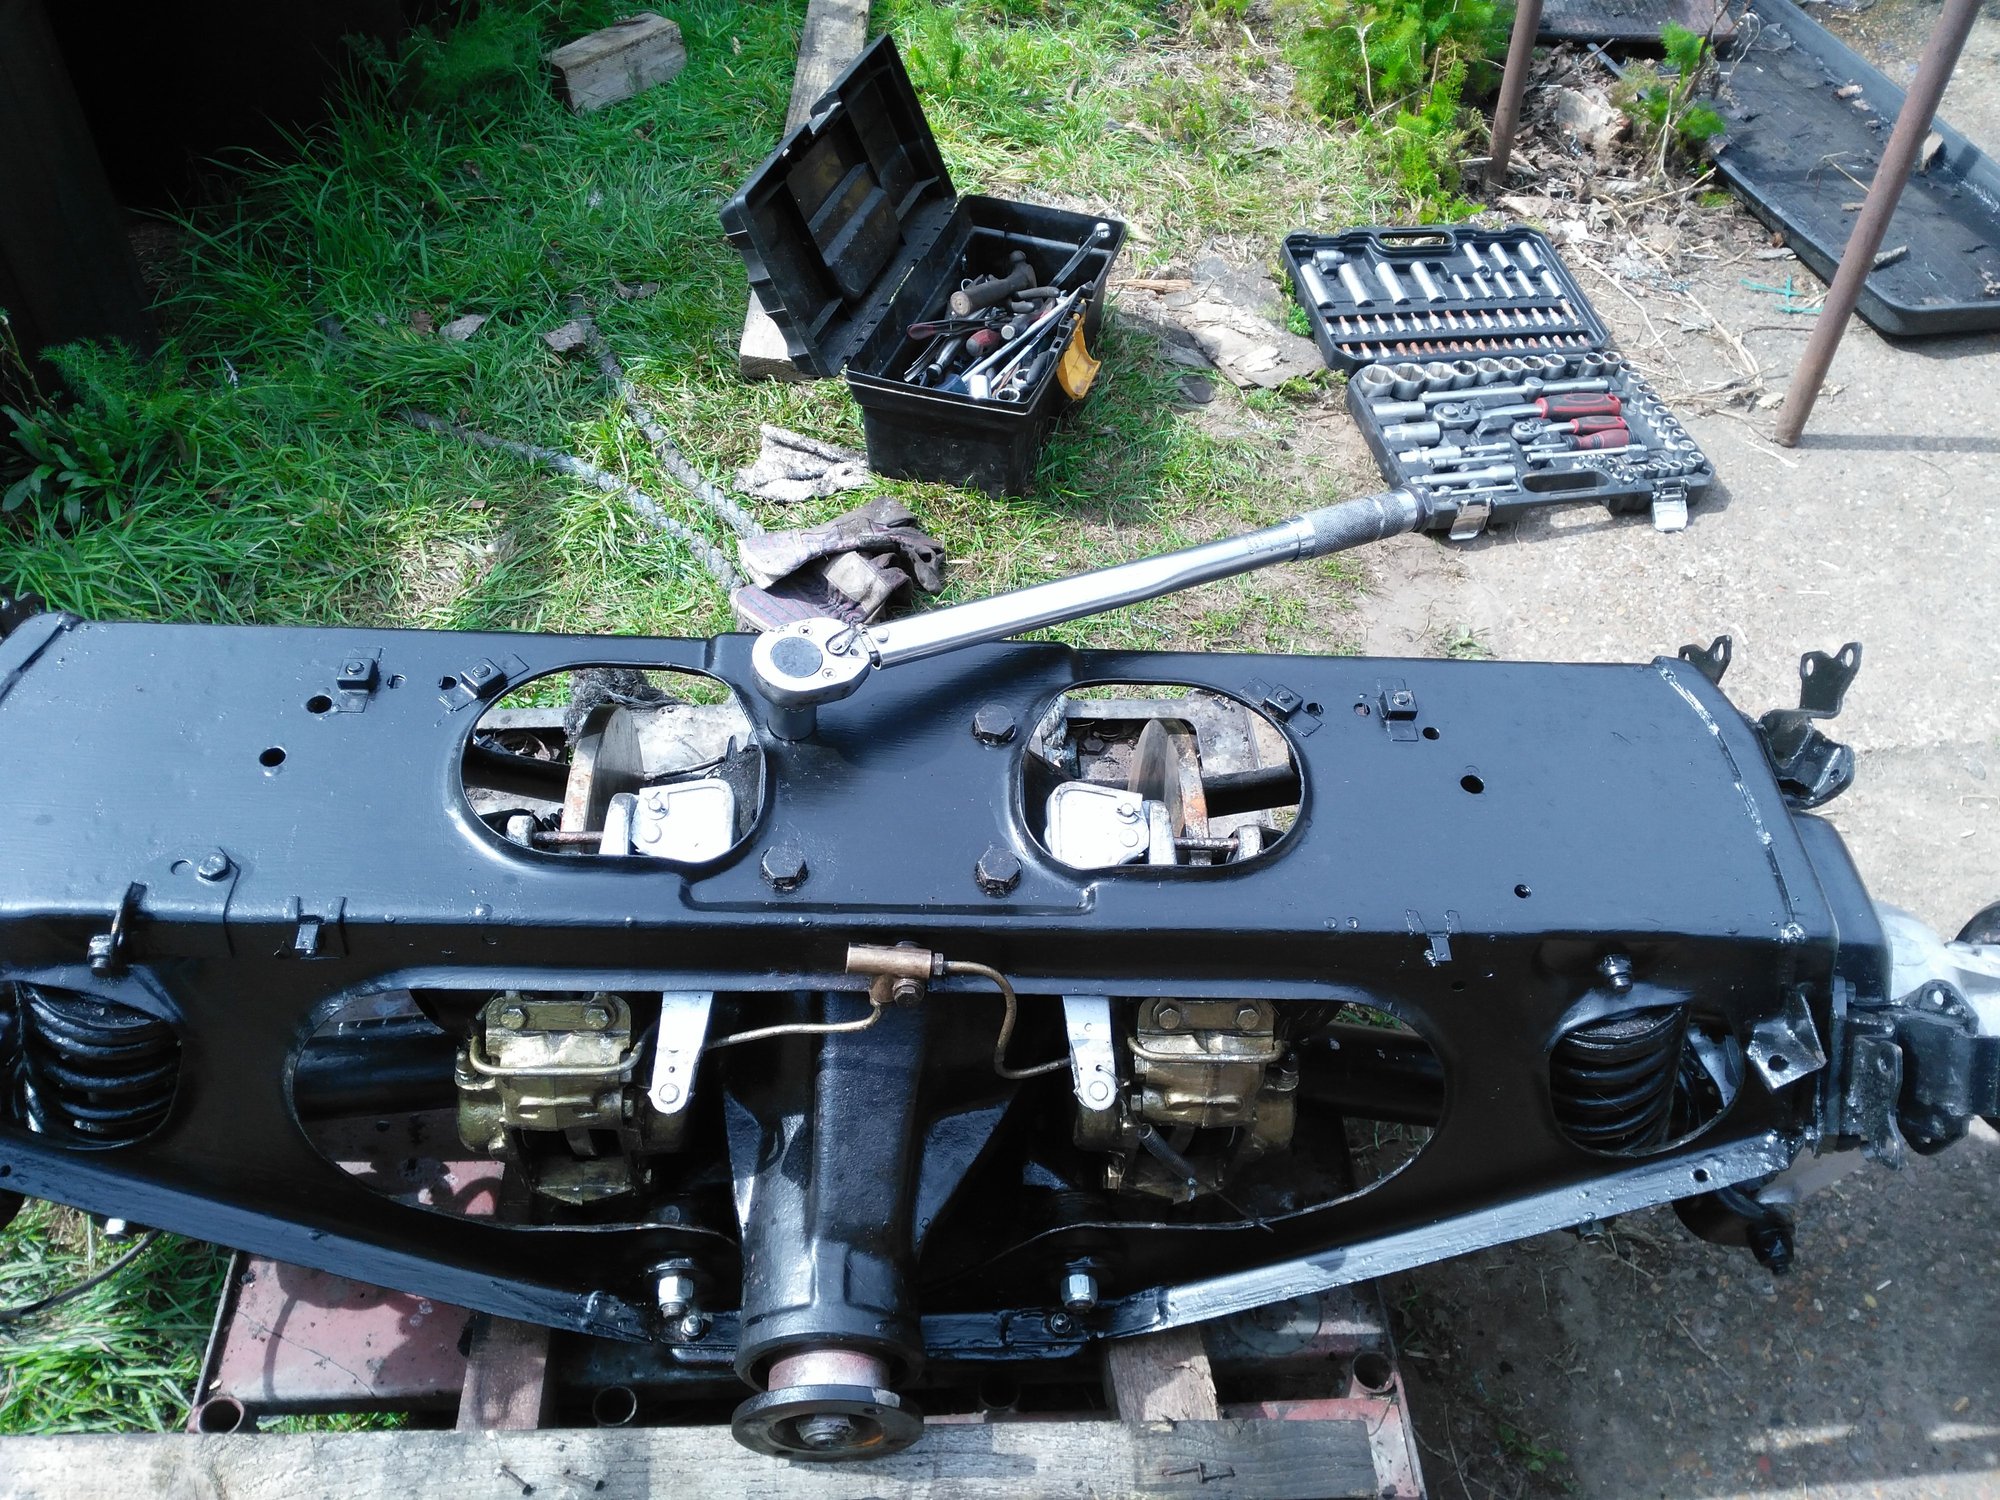
Torquing down the Four Big Bolts on the Top of the IRS Cage where hopefully I had done something right as the Bolt Holes all lined up nicely
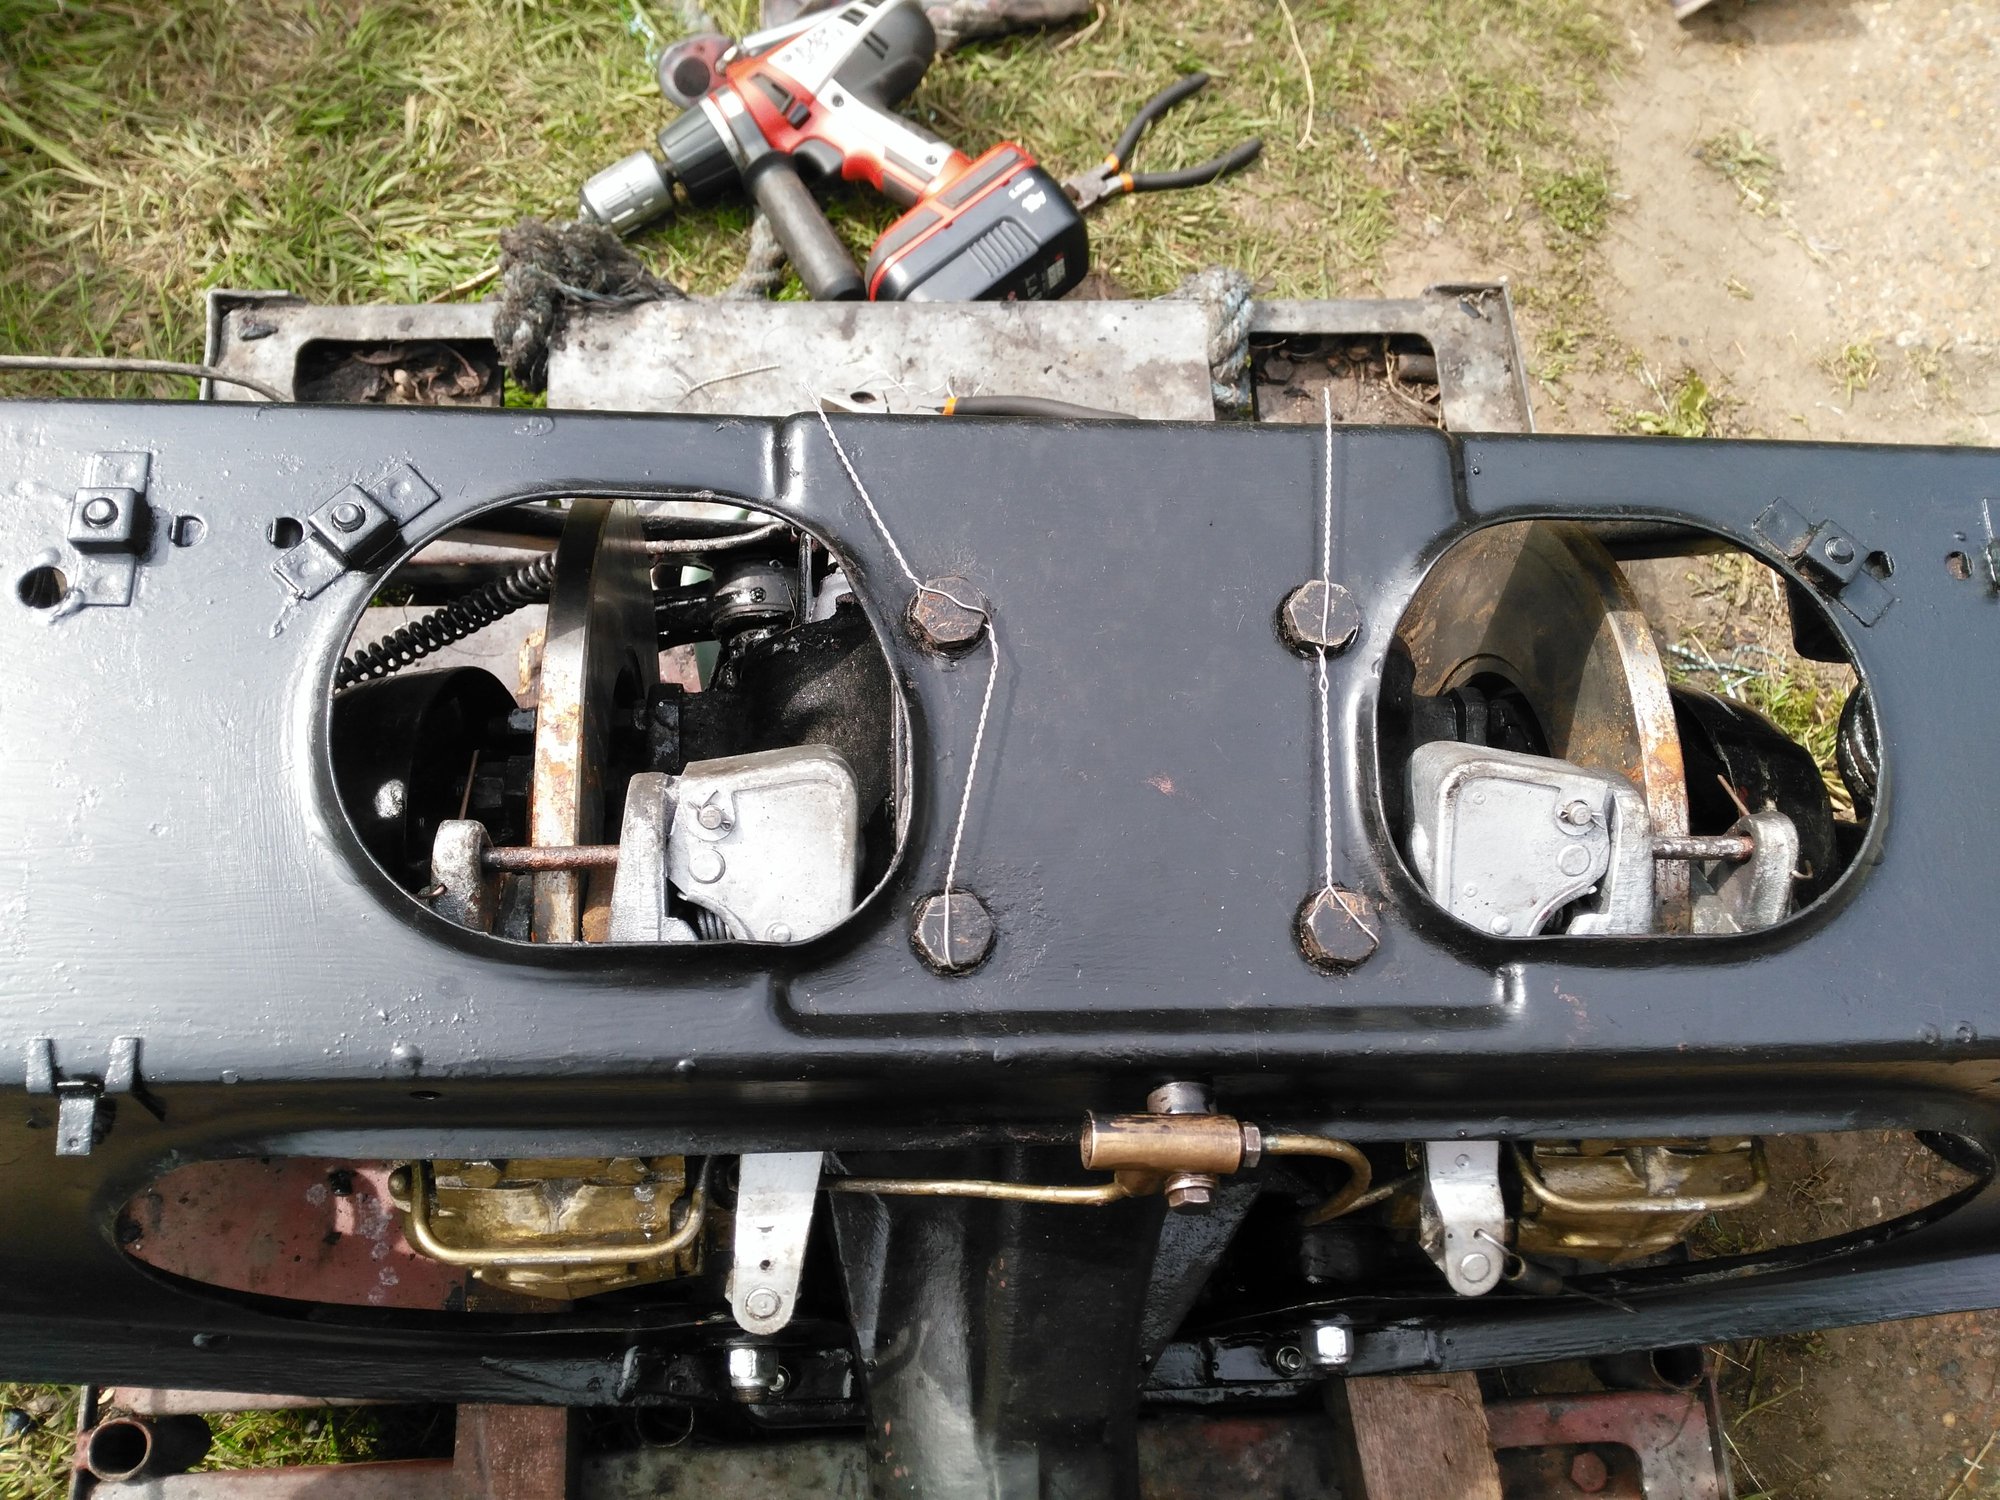
Wiring Up The Cage Bolts with a method suggested by 'Paul' (ptjs) which worked an absolute treat and further more Wiring Bolts is very Therapeutic and Relaxing!
Next on the List were the Trailing Arms so after Sanding them down I gave them some Paint, so they are also ready to go on
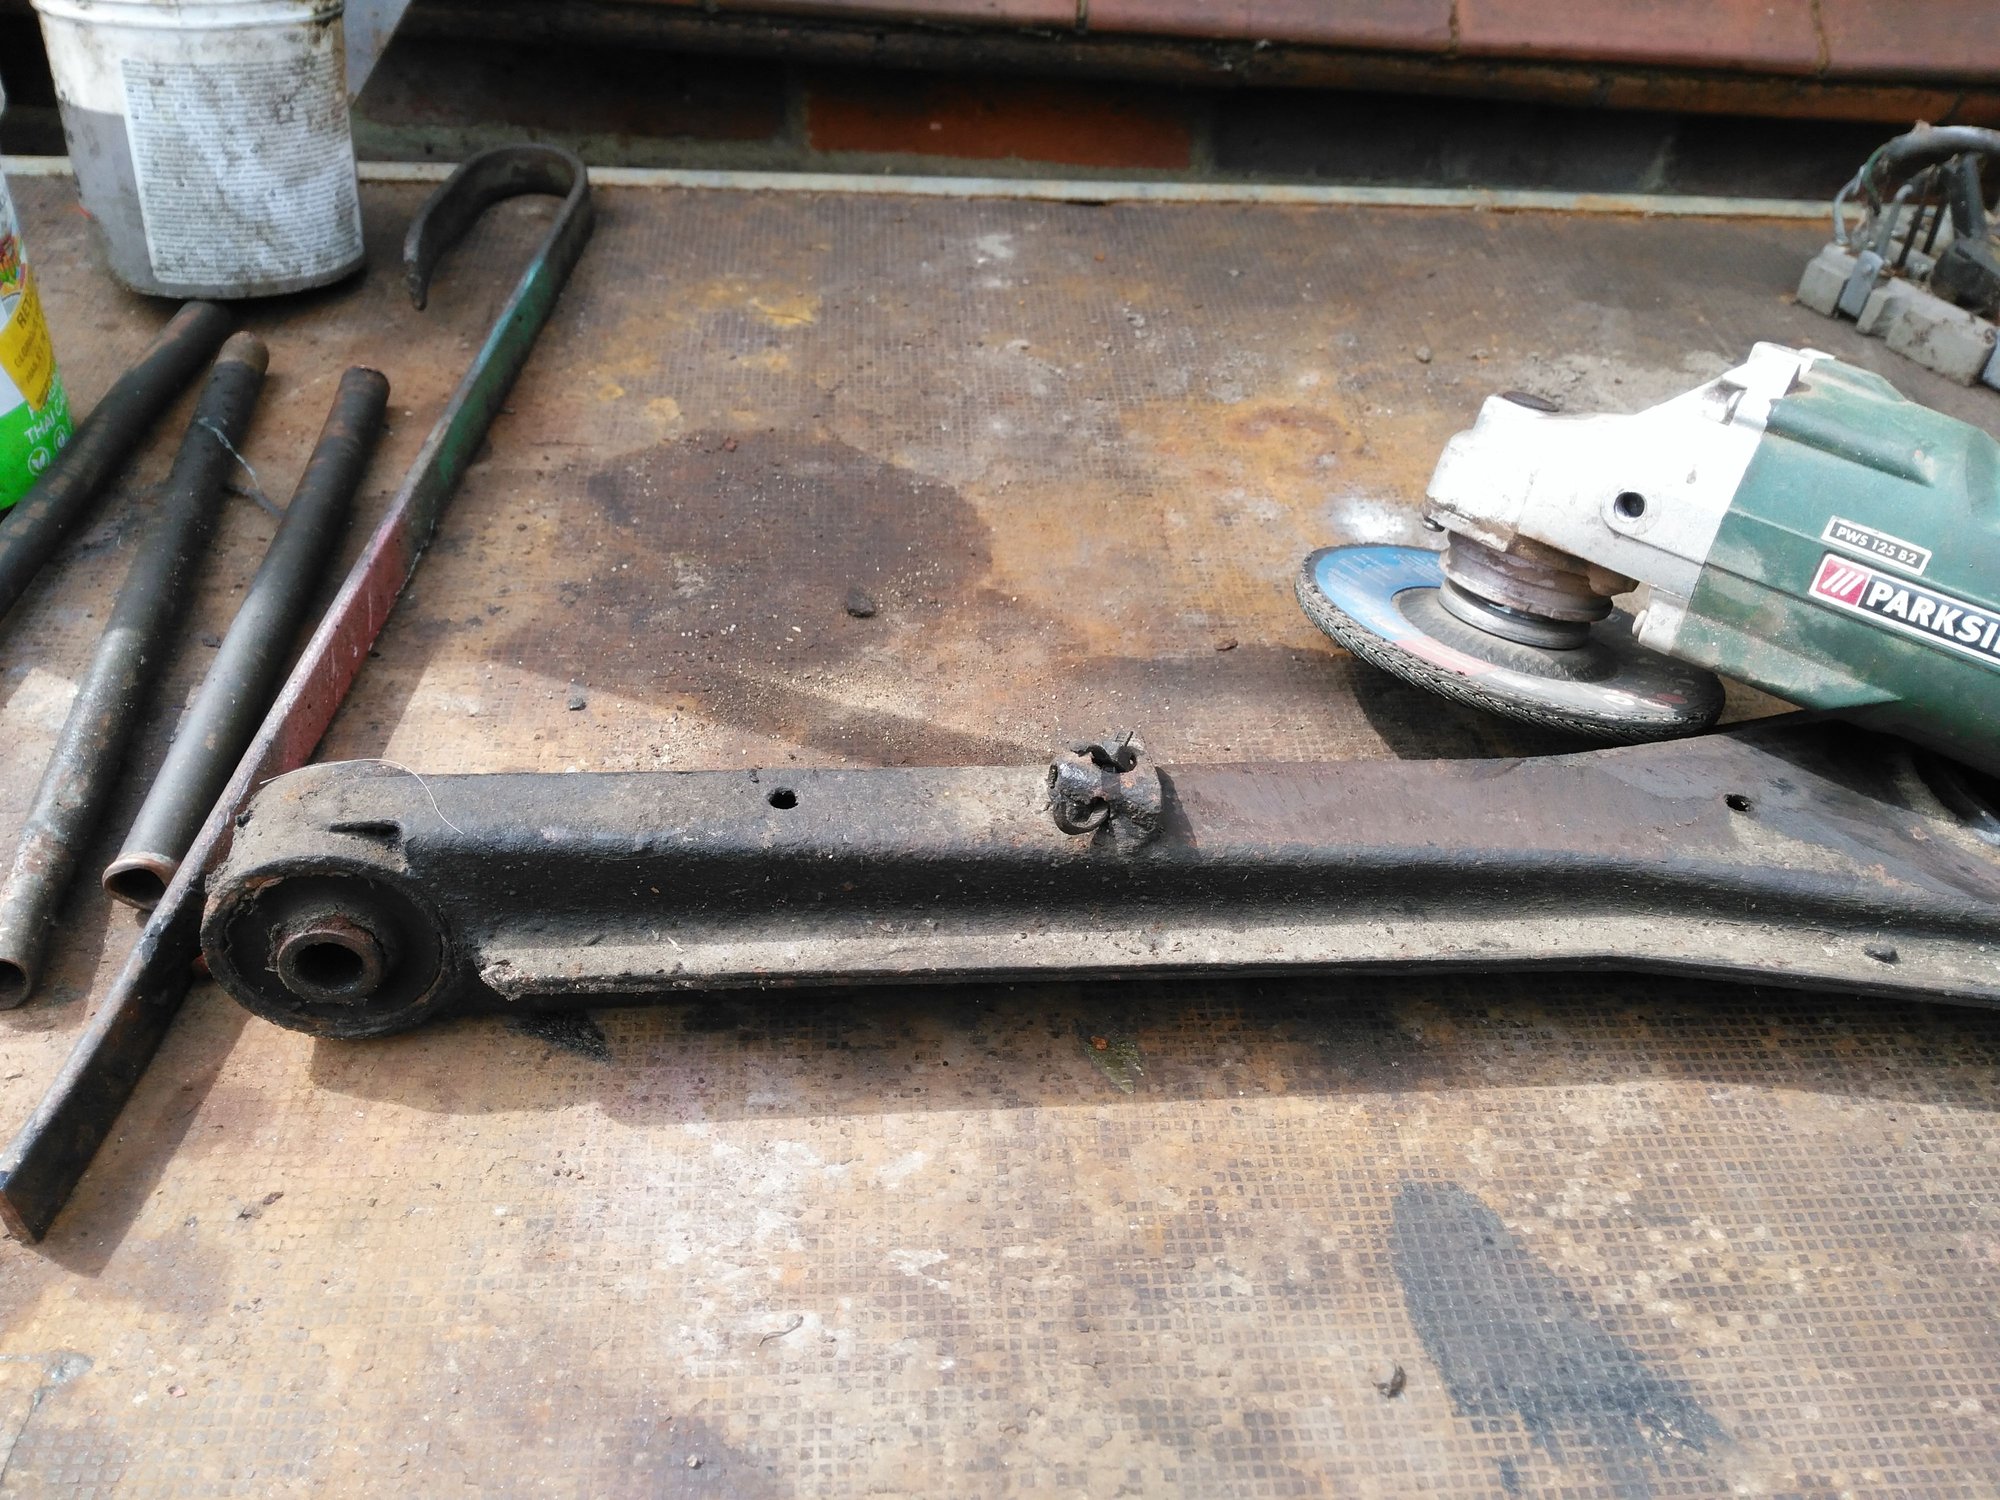
Sanding down the Trailing Arms before applying Paint
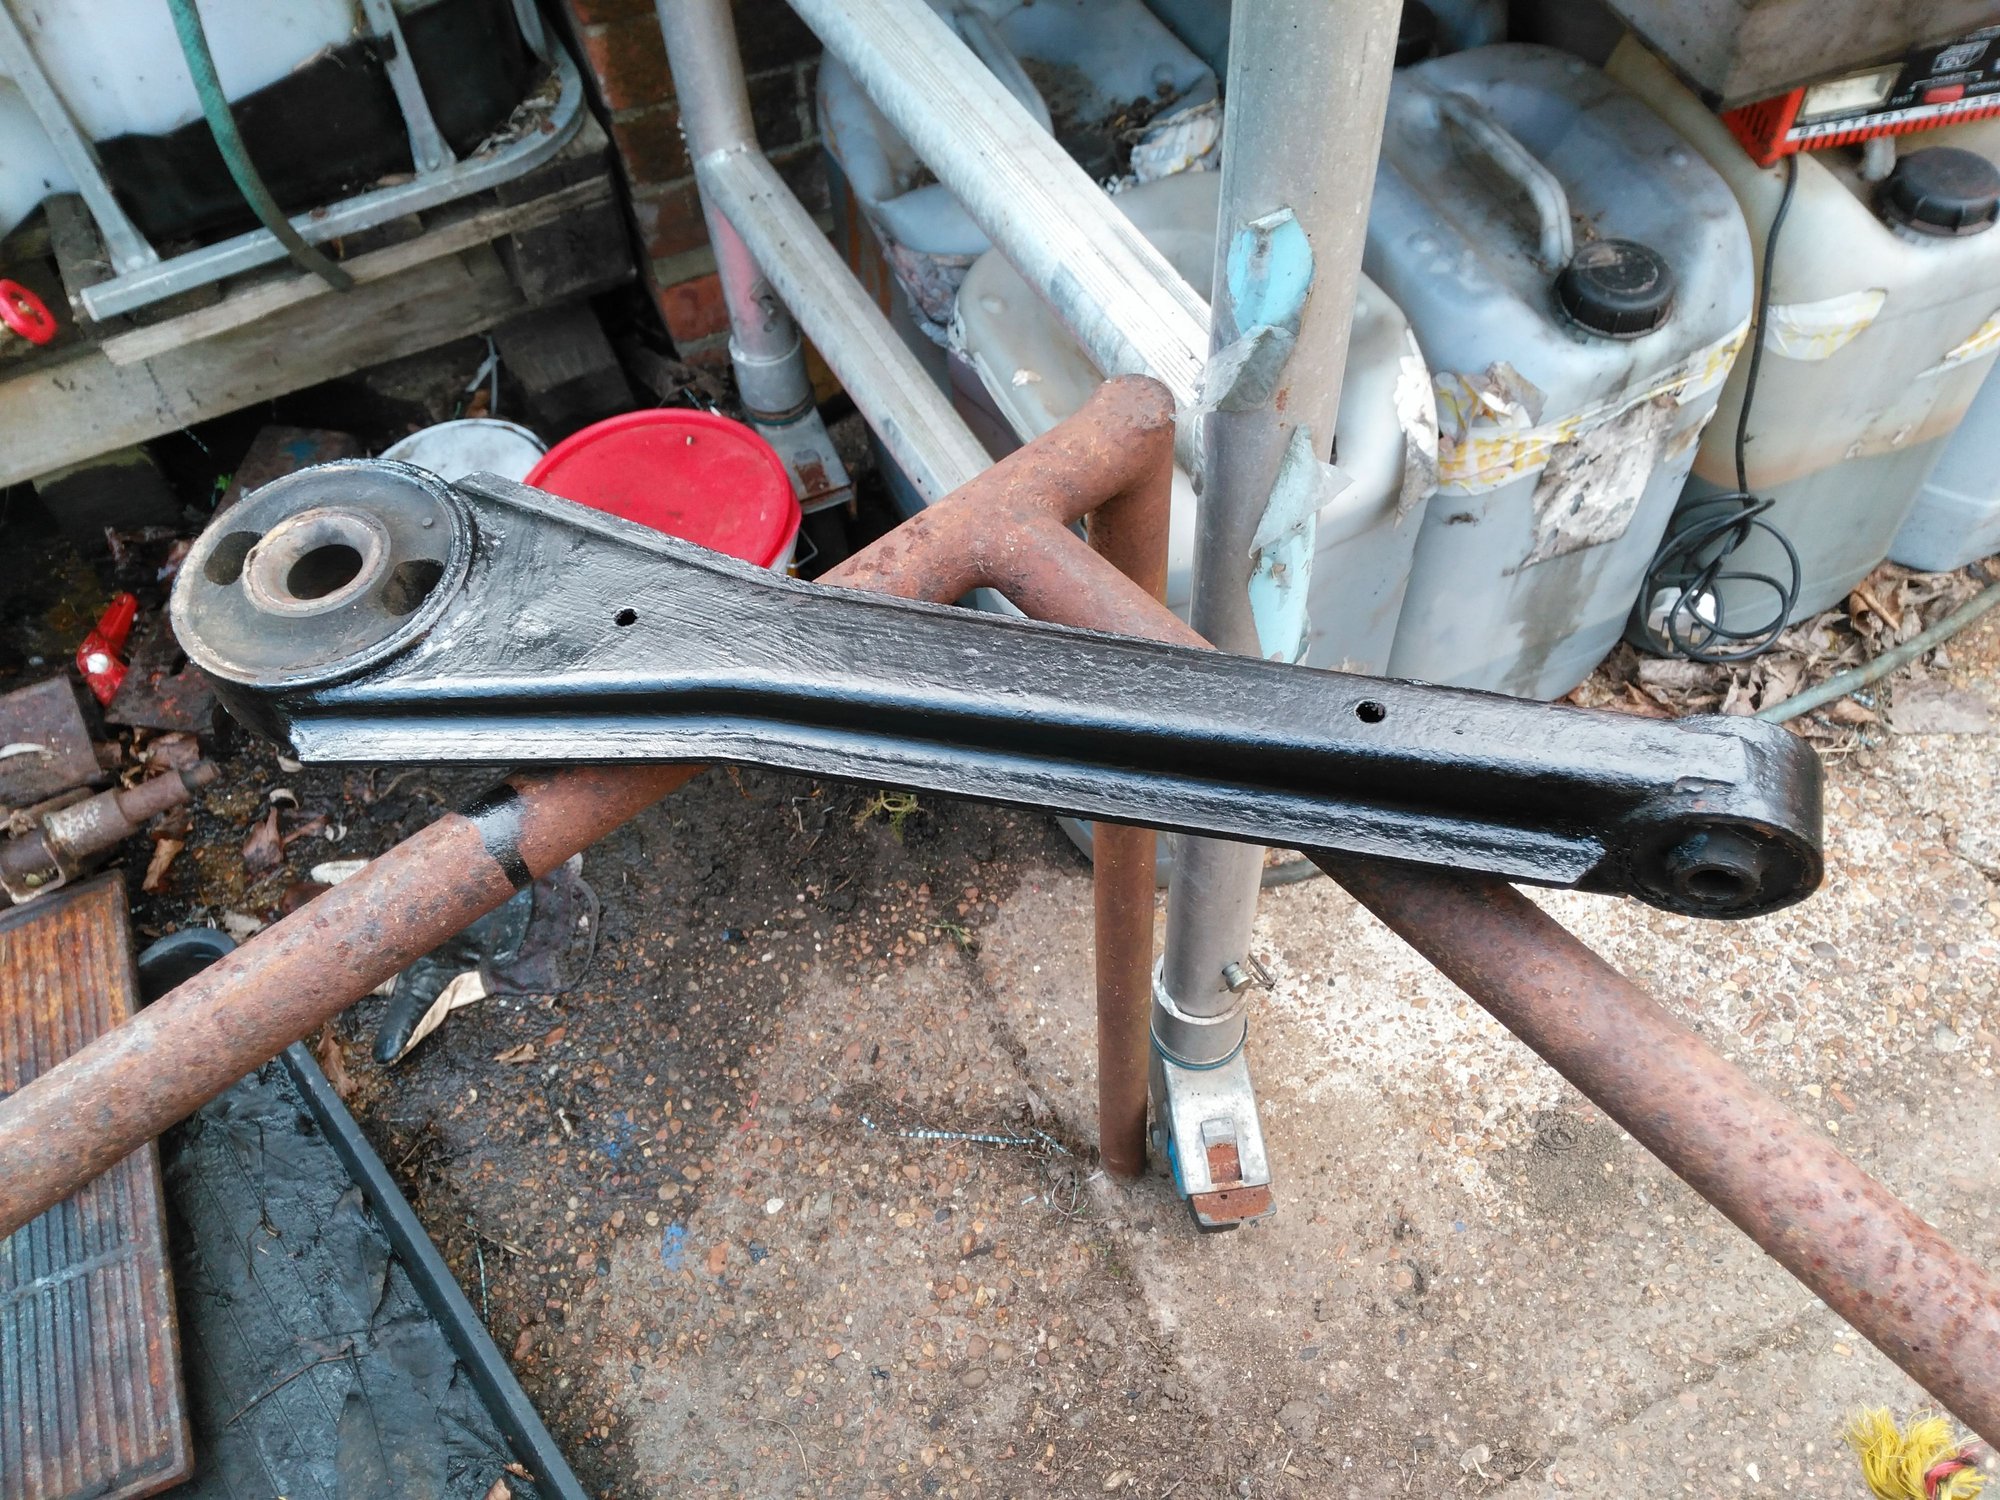
Trailing Arms Painted and already to go on
That really is just about it at least for the moment, except for a Super Scary Job I'm not looking forward to doing and just in case you're wondering and even if your not, putting back the Cage would not be it
As the Job that is really Freaking me out and building up in my mind, is disconnecting the Rear Brake Pipe from the Flexy that wouldn't undo the last time I tried it and so in order not to waste time I just cut that Flexy Brake Pipe off and then I clamped it shut because I really did not want to get Air in the System
Although some time Tomorrow I will have to try once more to undo that hard to undo Connection between the Flexy and the Hard Brake Pipe at the rear of the Car, where unless I'm very careful I could wring that connector off that Pipe, which would leave me with an absolute Mountain to Climb even though I've got the right size Spanners
Ideally I would like to apply some heat, except the 18 gallons of 5 Star which would be just over my head, has somehow got me thinking that a naked Flame in that Area may not be the best idea that I ever had, though looking back on my Career I have probably done a lot worse but somehow have still lived to tell the tale
Maybe a Heatgun would be just a little bit Safer, although if there are no further updates from me then I think it would be fairly safe to assume that this was not such a really good idea either!
The following users liked this post:
Dukejag (04-27-2021)
#2394
Good work OB!
If you've got a press or similar, now is a great time to press out those large bushes and turn them around 90 degrees to put the air spaces at the side rather than in the line of longtitudinal movement. That's the way it was done on the XJR-S and helps to keep the back end more stable. It's free and improves the car.
Cheers
Paul
The following 2 users liked this post by ptjs1:
Dukejag (04-27-2021),
orangeblossom (04-24-2021)
#2395
Hi Paul
Cheers!
And although I don't have a press I know someone who does and since I've also got a Spare Set of Trailing Arms off my other Car, where the Bushes are completely shot away, it might be a good idea to buy some New Bushes as they are not that expensive and then get the Spare set refurbed and swap them over
BTW You'r Locking Wire Hack worked a treat but since I didn't have any dowel rod, instead I used a 1/4 inch Flat Wood Drill, which by way of a bonus had an OEM hole in the Blade in just the right place
Just got to get that Hard Brake Line separated from the Flexy and I bought 2 X 15mm Spanners which will hopefully do it without wringing the fitting off the pipe
The following 3 users liked this post by orangeblossom:
#2396
Paul, OB
As you both know, I always add my caveat to the "turn the bush sideways" mod! I did it on mine and it made the rear "bunny hop" or "porpoise" a bit on smooth straight tarmac. I had to return them to normal. Even Madame noticed the problem straight away. Now I am very ride-conscious, and dislike the factory sports pack suspension on the XJS, so maybe on a different setup it would not happen.
As you both know, I always add my caveat to the "turn the bush sideways" mod! I did it on mine and it made the rear "bunny hop" or "porpoise" a bit on smooth straight tarmac. I had to return them to normal. Even Madame noticed the problem straight away. Now I am very ride-conscious, and dislike the factory sports pack suspension on the XJS, so maybe on a different setup it would not happen.
The following 2 users liked this post by Greg in France:
orangeblossom (04-25-2021),
ptjs1 (04-25-2021)
#2397
Hi Greg,
Yes, I've always been intrigued why you didn't get on with the rotated radius arm bushes. I did mine based on the perceived wisdom of the benefits, when the back end was redone with the Gaz shocks, new springs and bushes etc. So, I guess it's difficult for me to tell exactly which bit contributes what to the handling. I didn't want to compromise the ride, hence the adjustable shocks, but I did want to take out anything that gave vagary to the direction of the wheels, hence the poly steering bushes etc. The radius arms are interesting because of the way they articulate and help control both up / down and fore/aft movement of the axle.
BUT, the key thing is that Madame is happy! So there's the answer!
As an aside (apols to OB's thread), It's "Drive It Day" here in the UK today, where everyone takes out their classic car to help raise awareness and promote the movement and interests of allowing classic cars to be driven on UK roads. Normally supported by car clubs, of course today is just everyone driving around separately or just parking their car on the driveway. So I'm just about to take the convertible out for its first run in a LONG time! Fluids all checked and topped, coolant pre-heater plugged in and doing its job, tyres checked, ready to roll in 30 mins!
Cheers
Paul
The following 3 users liked this post by ptjs1:
#2398
Paul
Enjoy the day, let's hope normality gets re-established this summer.
As to the rear end, as you no doubt know it is a requirement of the rear axle geometry and also a handling characteristic that the bush flexes. This being because the axle's up and down movement would not be possible with a solid radius arm, and that the slight toe-in imparted to one of the the rear wheels (I seem to remember it is the outside one, but I am not certain) on cornering makes for a degree of failsafe cornering characteristics.
I fully respect anyone else's choice to harden up the bushes, and I am glad your own experience of the various mods you have done works well for you, and none of the below applies to your own case, I hasten to add!
I am really responding about this topic because there is a great deal of misinformation and confusion out there about XJS handling, and how to fix or improve it. Many people forget that returning the car's suspension to the correct OEM setup should always be the starting point; otherwise mods get done which either disguise or otherwise adversely affect a setup that is not working as intended by the factory.
In my experience a wandering rear end in a road-going car, assuming the OEM bushes and cage mounts are in good order, is far more likely to be though worn wishbone/hub outer fulcrum bearings, or loose dog bones/bad inner fulcrum bearings, than anything to do with the radius arm bushes.
On my car it suddenly stopped tracking perfectly through long fast bends and a reading of the Great Palm indicated the outer fulcrum bearings. I replaced these and the handling returned to perfect again.
The following 2 users liked this post by Greg in France:
orangeblossom (04-25-2021),
ptjs1 (04-25-2021)
#2399
Removing The Cage Of '50 Shades' My Grey XJS
Nightmare But We Got There!
'Why is it some of the smallest jobs seem to take forever to do'
As for the 'to do list' on '50 Shades' My Grey XJS this was one I really wasn't looking forward to which on Paper sounded so simple like all these simple jobs to, which was to finish removing the old flexible rear Brake Pipe from underneath the CarNightmare But We Got There!
'Why is it some of the smallest jobs seem to take forever to do'
Which wouldn't undo so I cut it right through with the Bread Knife and as such had to leave the rest behind the end of which I clamped with Locking Pliers because I didn't want the Brake Fluid to run out and get Air in the System and when that happens we all know what a total PIA job Bleeding The Brakes can be on an XJS
Though having rebuild the IRS Cage at least as far as Rotors and Caliper were concerned, I also bought a brand new OEM Flexible Brake Pipe for the Rear Brakes, where as such come what may the old one had to come out
The only problem being that where the Flexy joins the Hard Line as just previously mentioned this connection just would not undo for which the 'Rust Bug' in the UK has lots to answer for where to make matters worse if they could get worse I even bought Two Spanners which were the perfect size to do this job
Where the last thing that I wanted to do was accidentally break the connector off, which would have meant making a new Hard Line Brake Pipe and that would also have delayed the refitting of the Cage and so today was the day I decided to try and undo that fitting again, though as before it simply wouldn't budge!
It was now becoming clear that what this fitting needed was some Heat! but with 18 gallons of gas just above my head, I had to do a bit of a risk assessment where on a Scale of 1-10 it came out as an 11 where just one Spark could easily have set the whole thing off
But that never stopped me before and it won't stop me know, though on the Plus side I sort of thought that I might have the perfect tool for the Job, in the form of a miniature Heat Gun, that didn't have a naked flame as such although I don't think so!
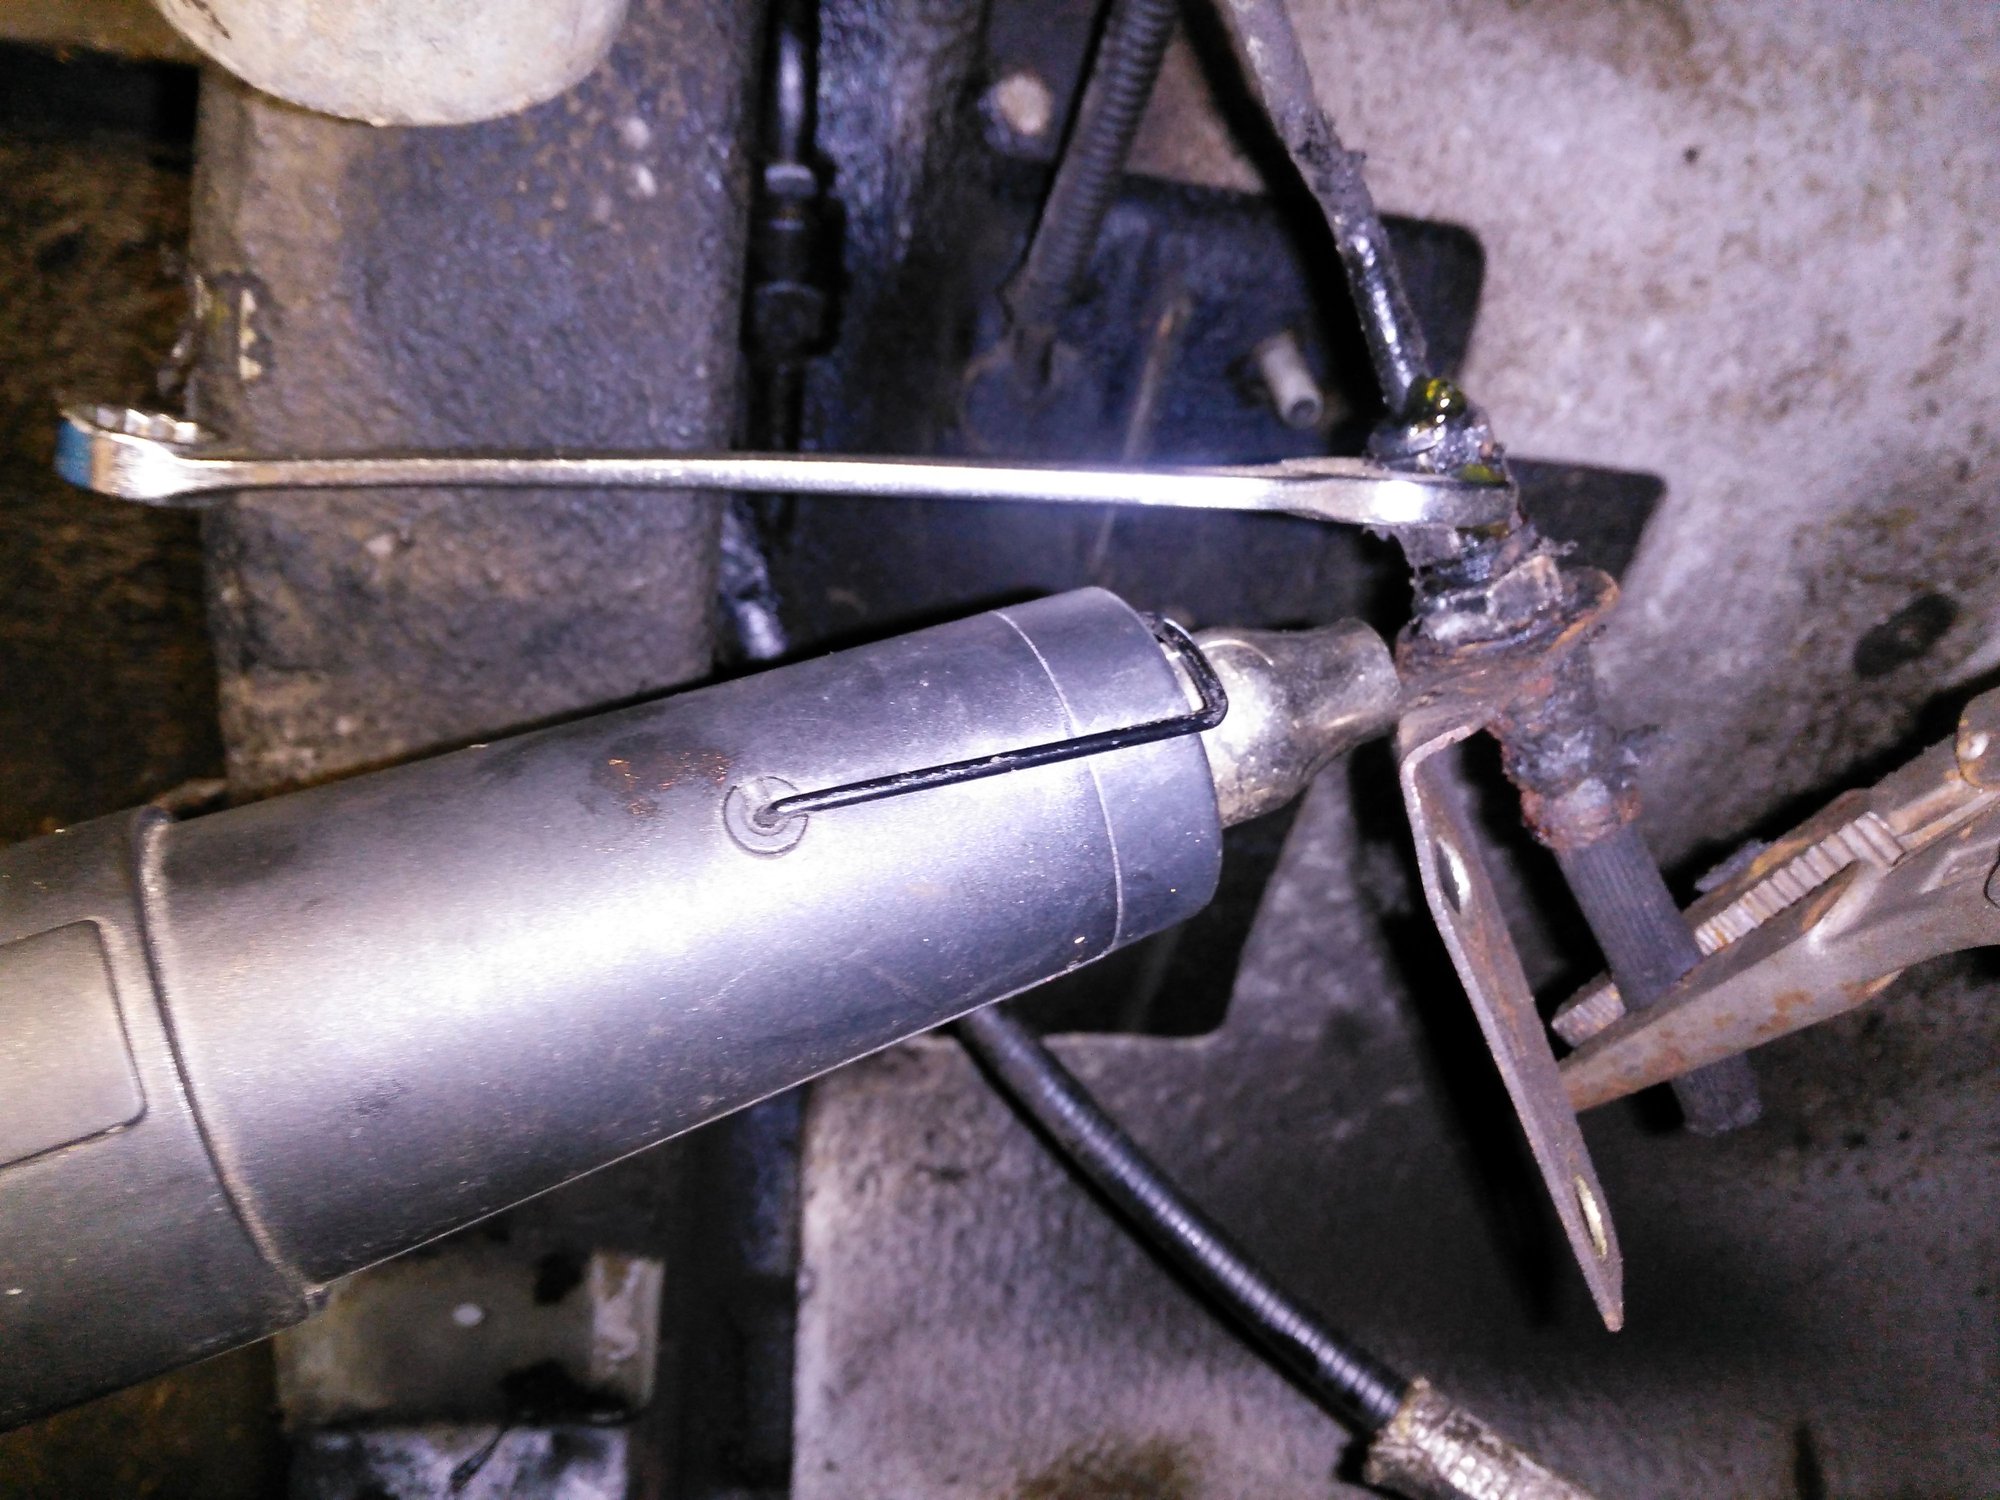
Ten Minutes in with the Heat Gun and nothings gone Bang! which was a bit encouraging to say the very least!
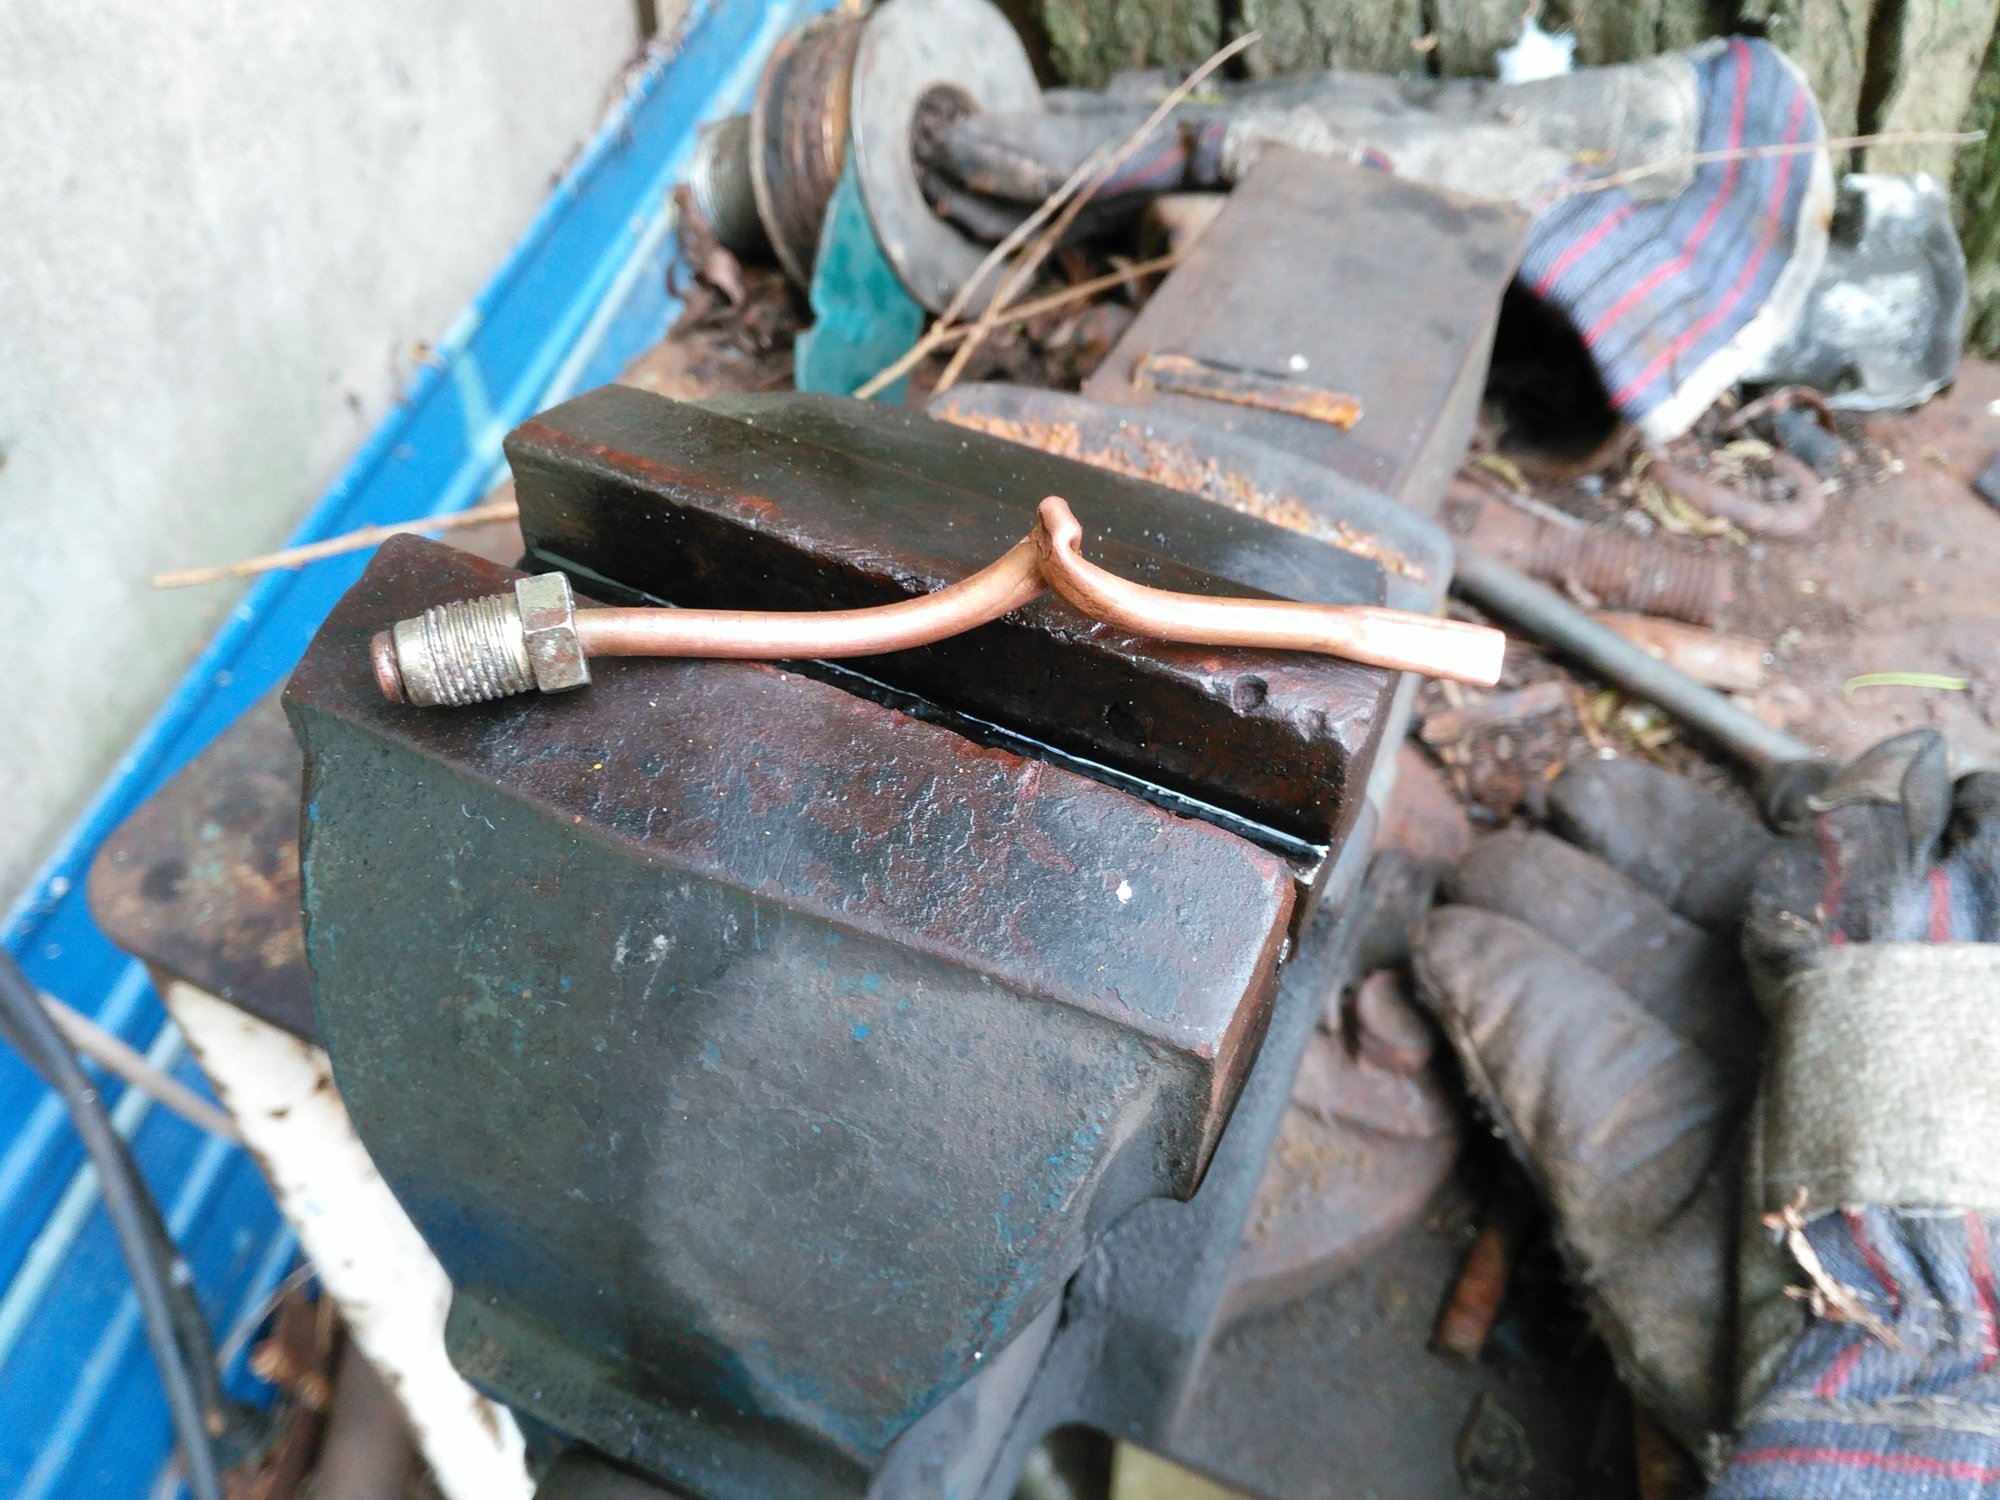
Having got the connection undone, I then used this pipe so I could seal the Hard Line up in the hope it would be easier when it came to Bleeding the Brakes
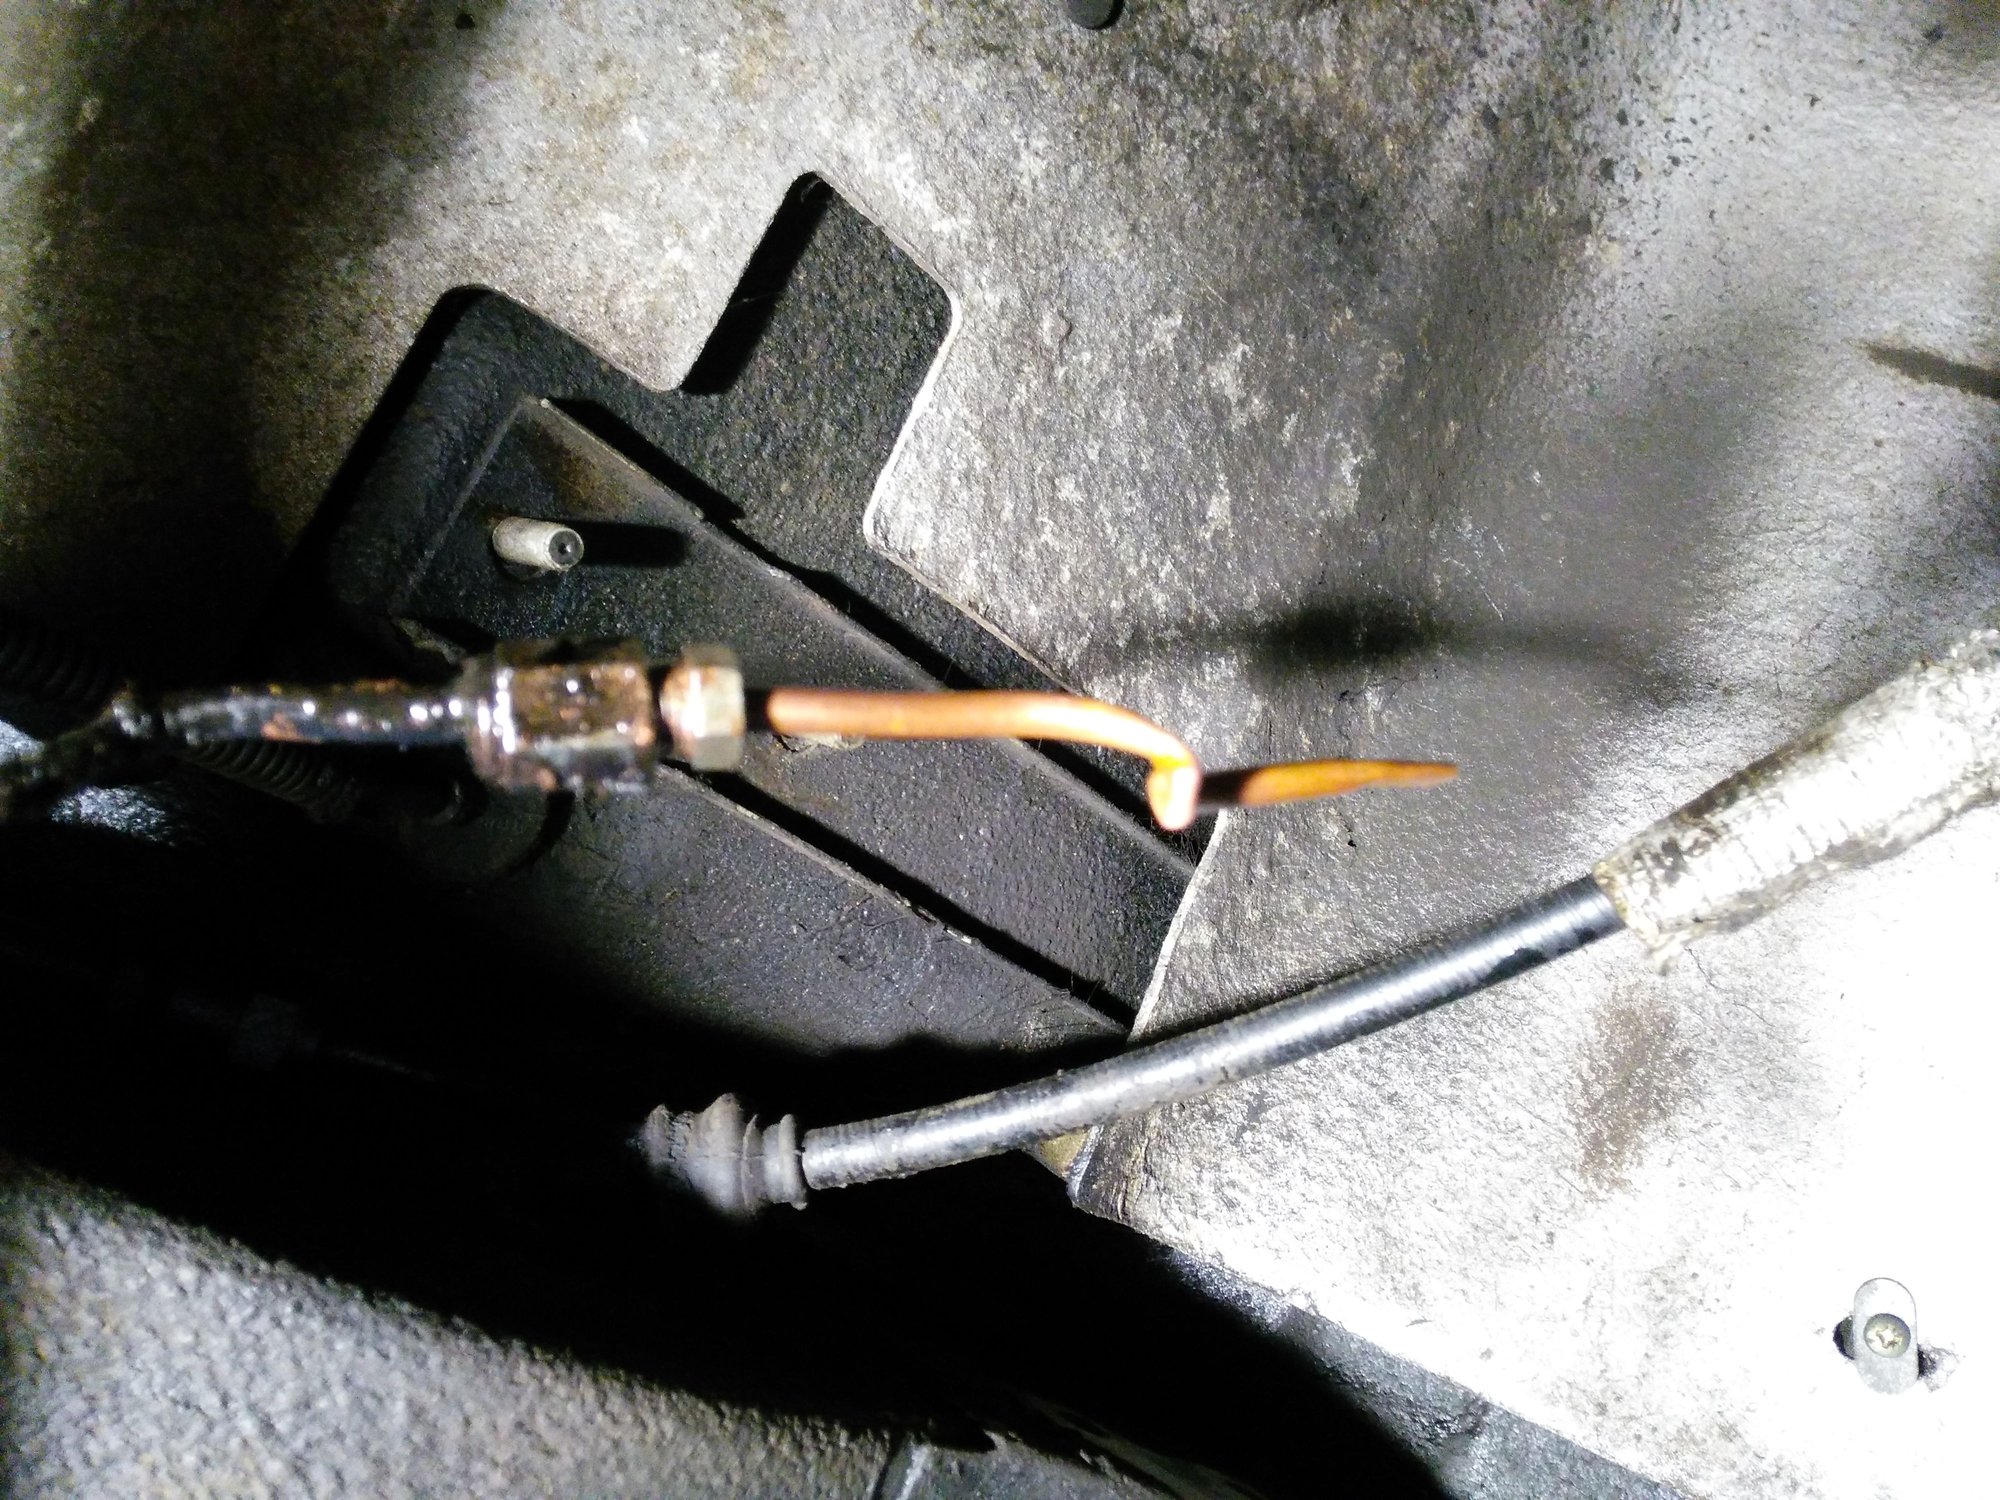
Hard Line Sealed to prevent any loss of Brake Fluid and to try and prevent any Air from getting in the System as Bleeding the Brakes on an XJS is a bit of a PIA
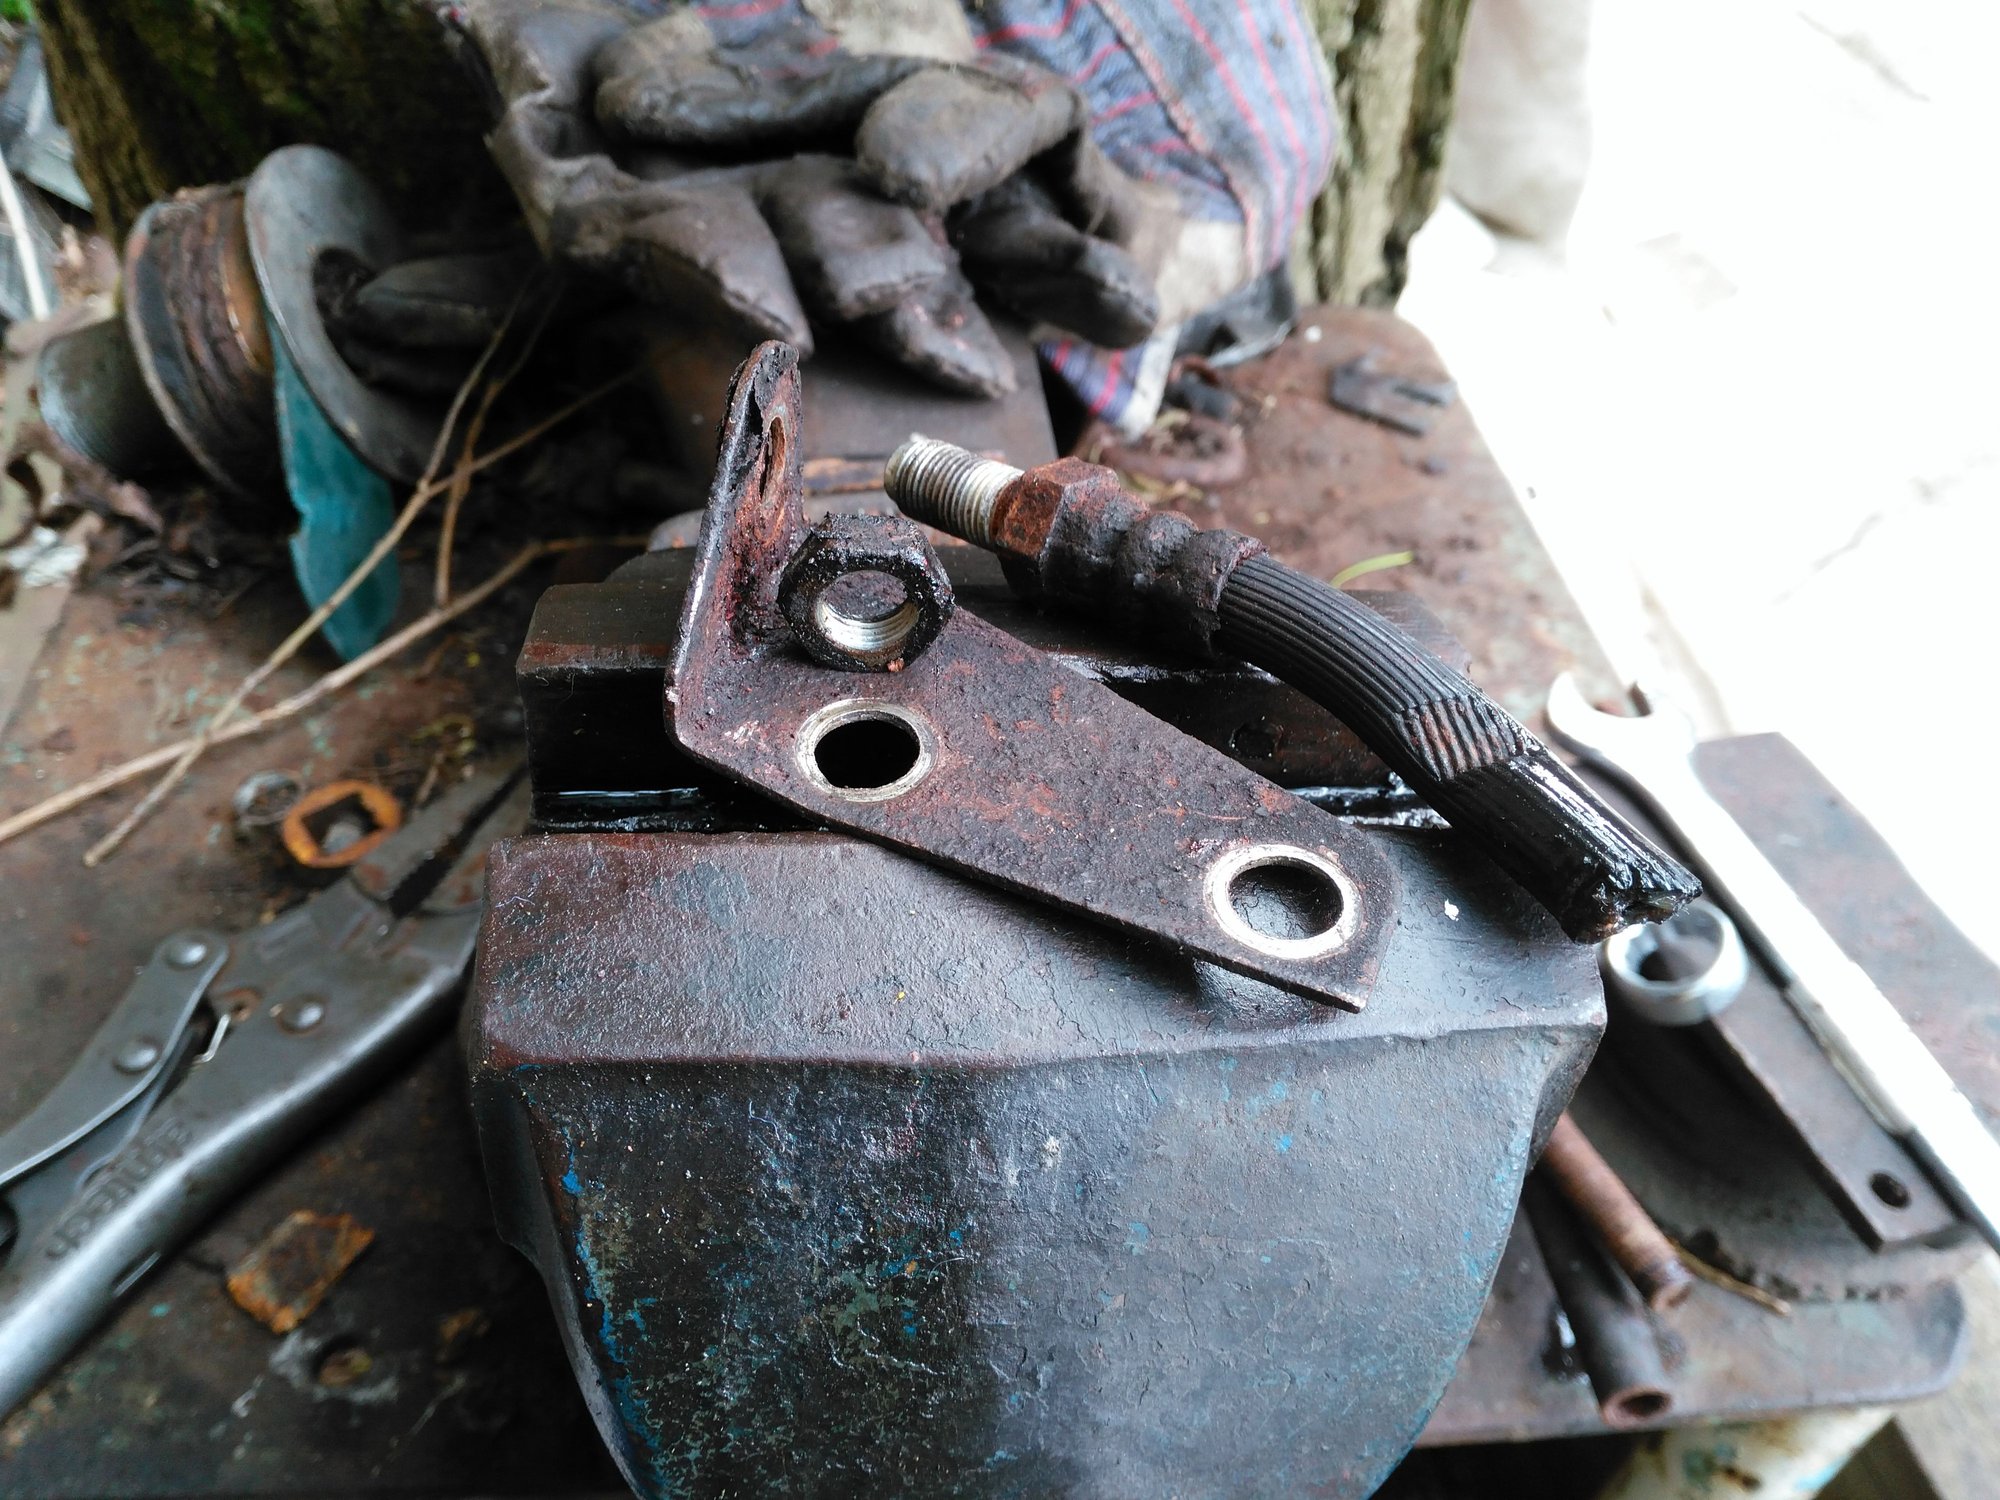
At last I was able to take that Flexy off together with the Bracket that bolts it onto the Cage
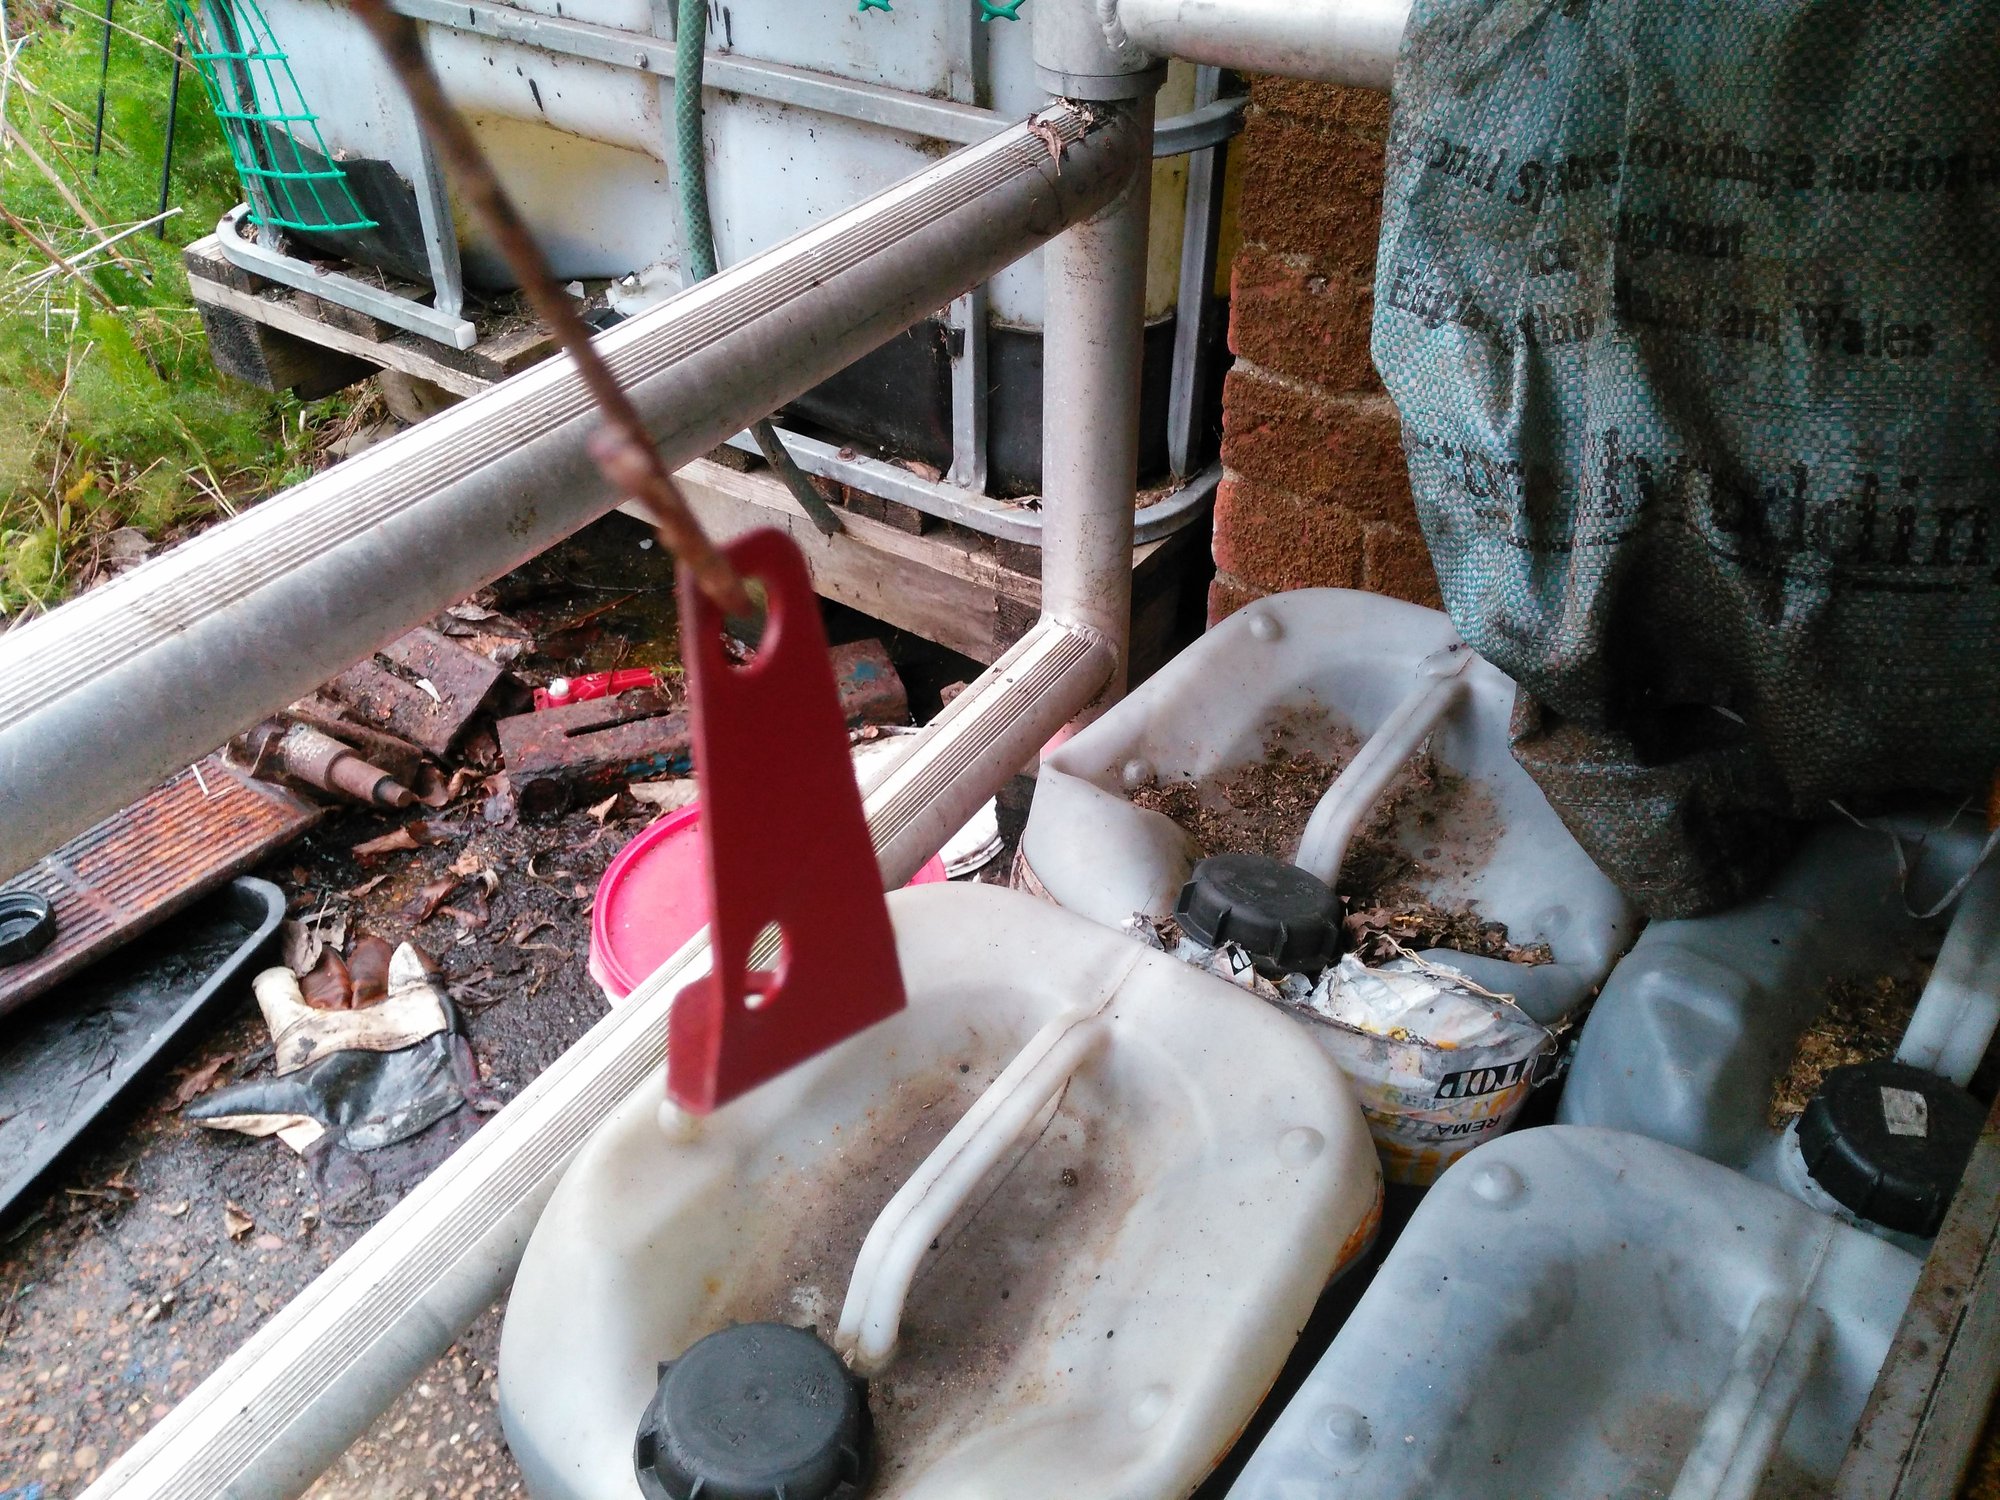
Bracket Primed and ready for Top Coat
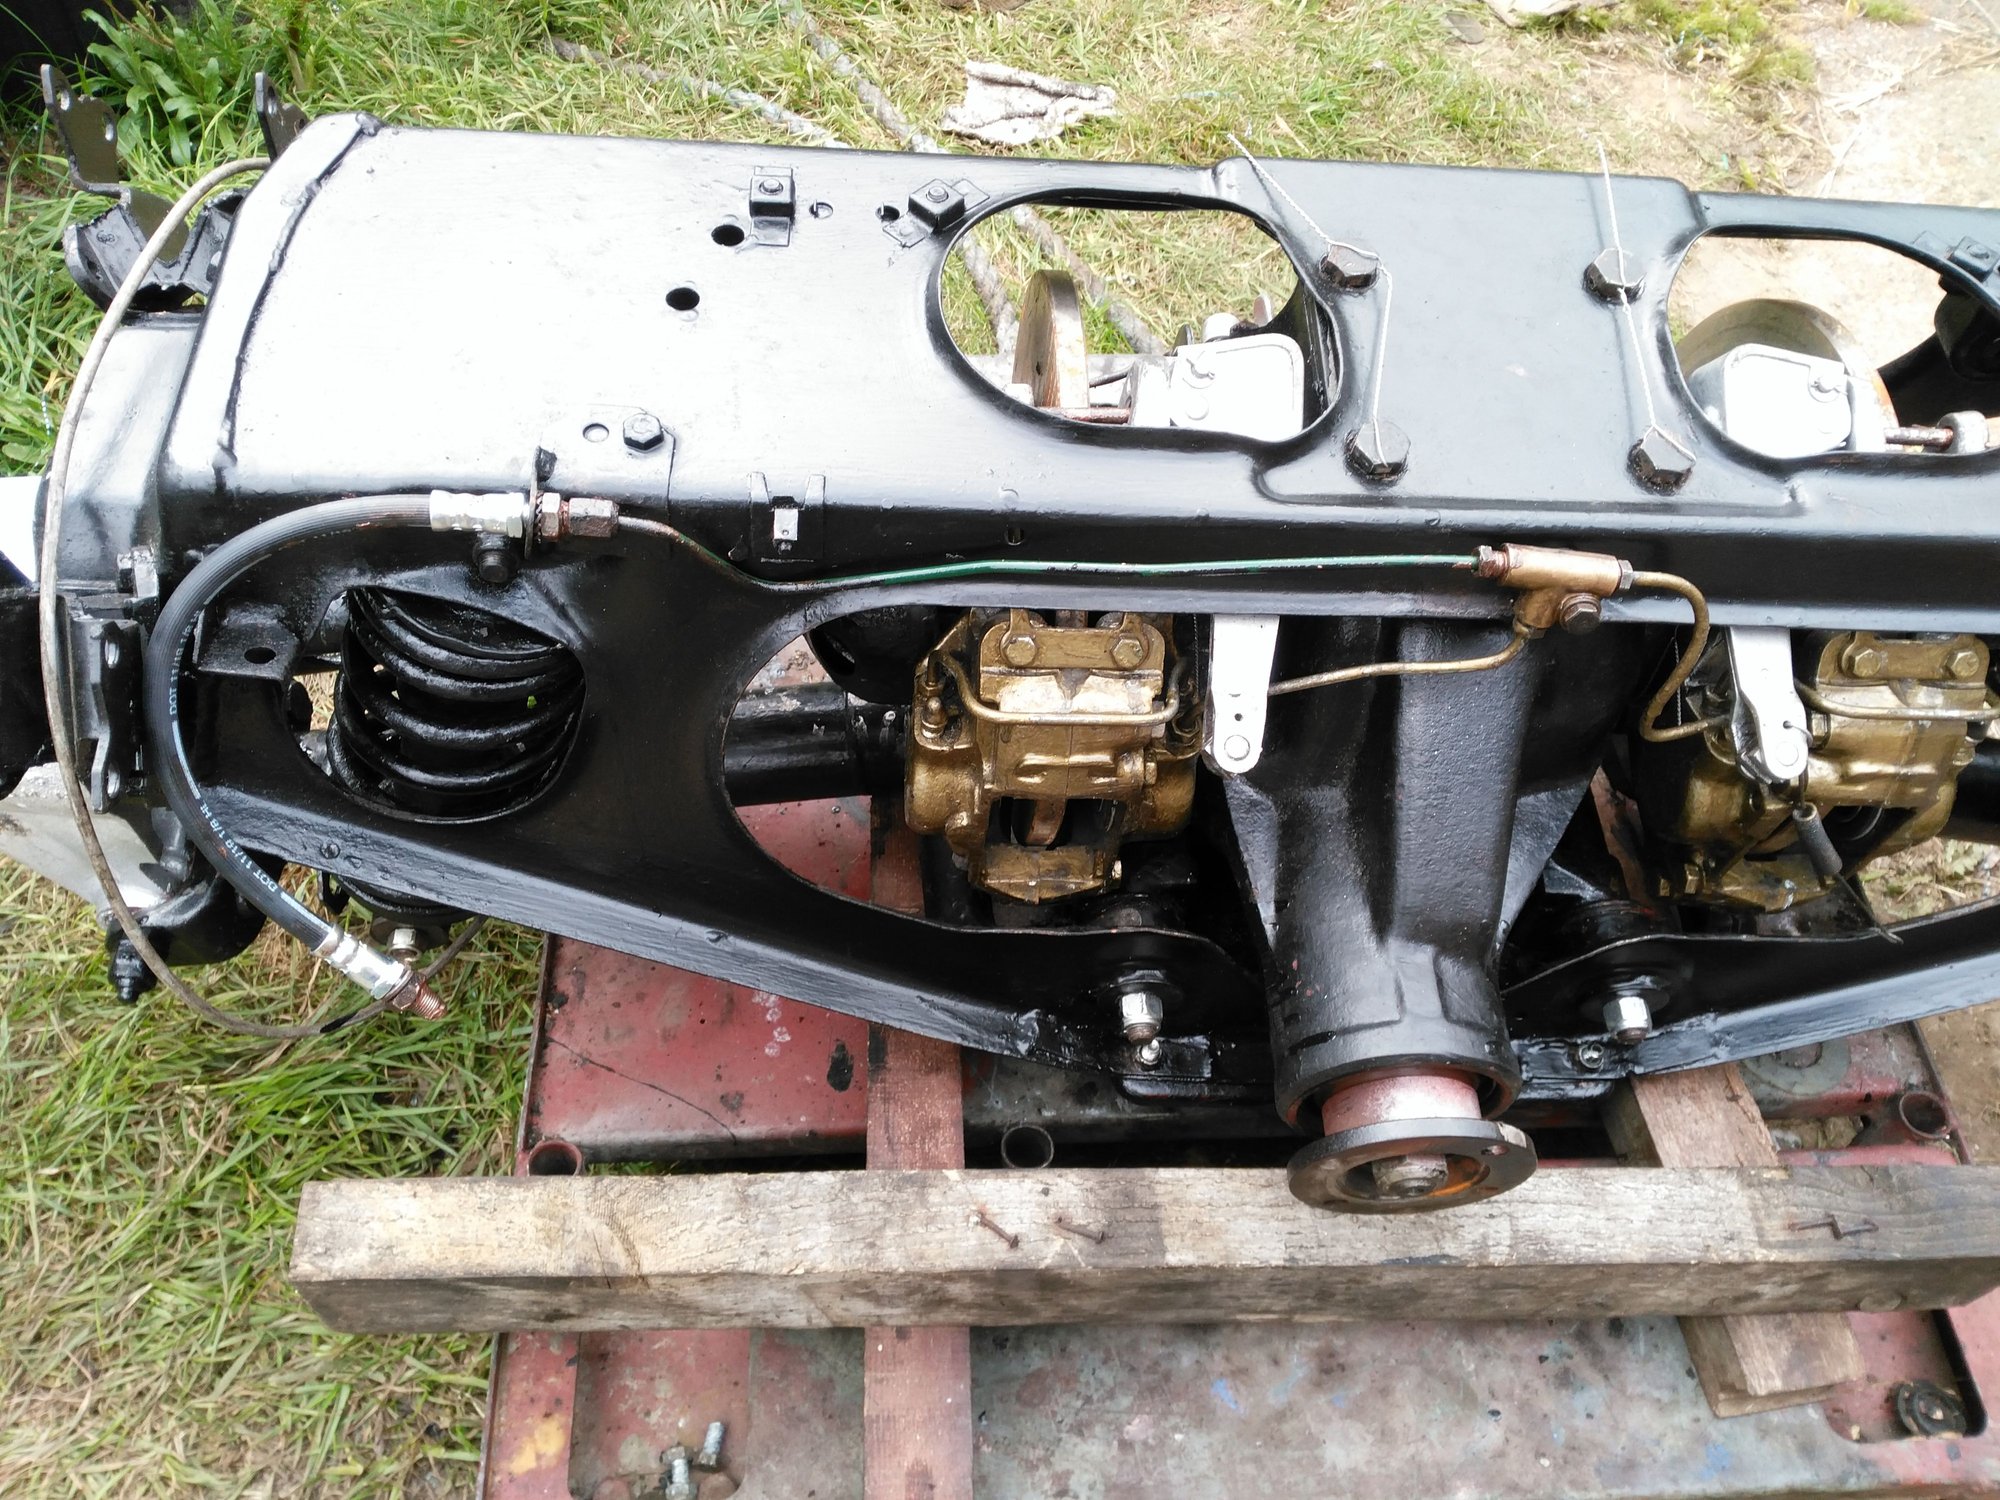
Trial Fitting the New Flexy Brake Pipe onto the Cage, with Copper Grease in abundance, as I don't want to have to go through that Nightmare again!
The Weather was Cold and Windy and not exactly ideal for refitting the Cage but with a couple of hours to spare before it was time for Tea I had an idea for making a Set of Custom Axle Stands from the Old Brake Rotors that I took off the XJS
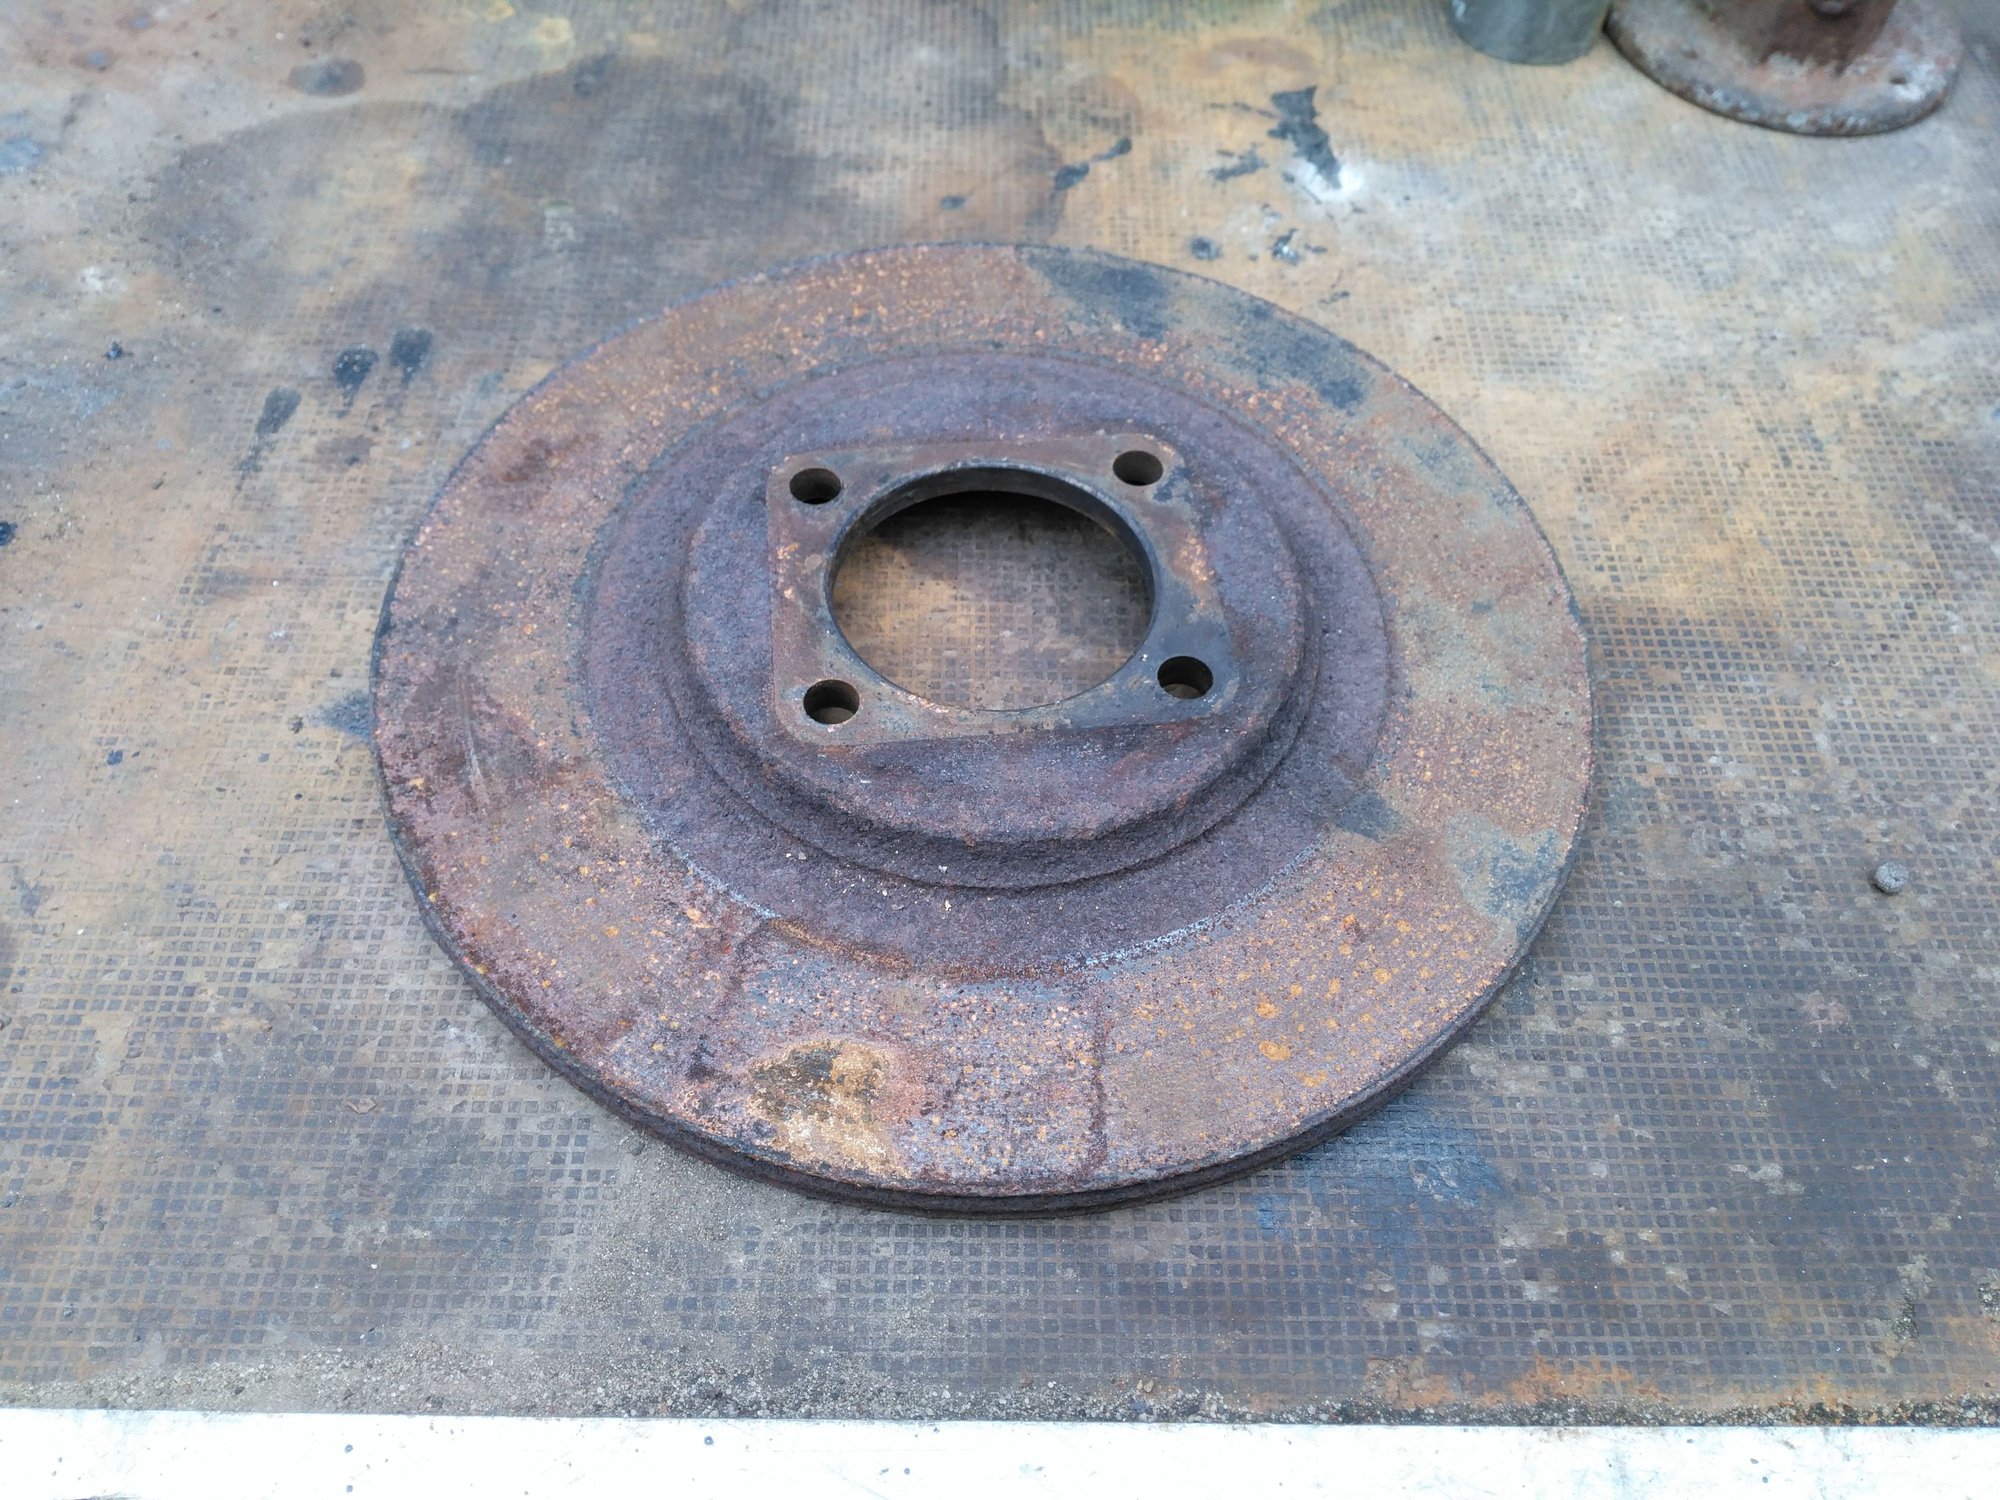
Take one old XJS Rotor
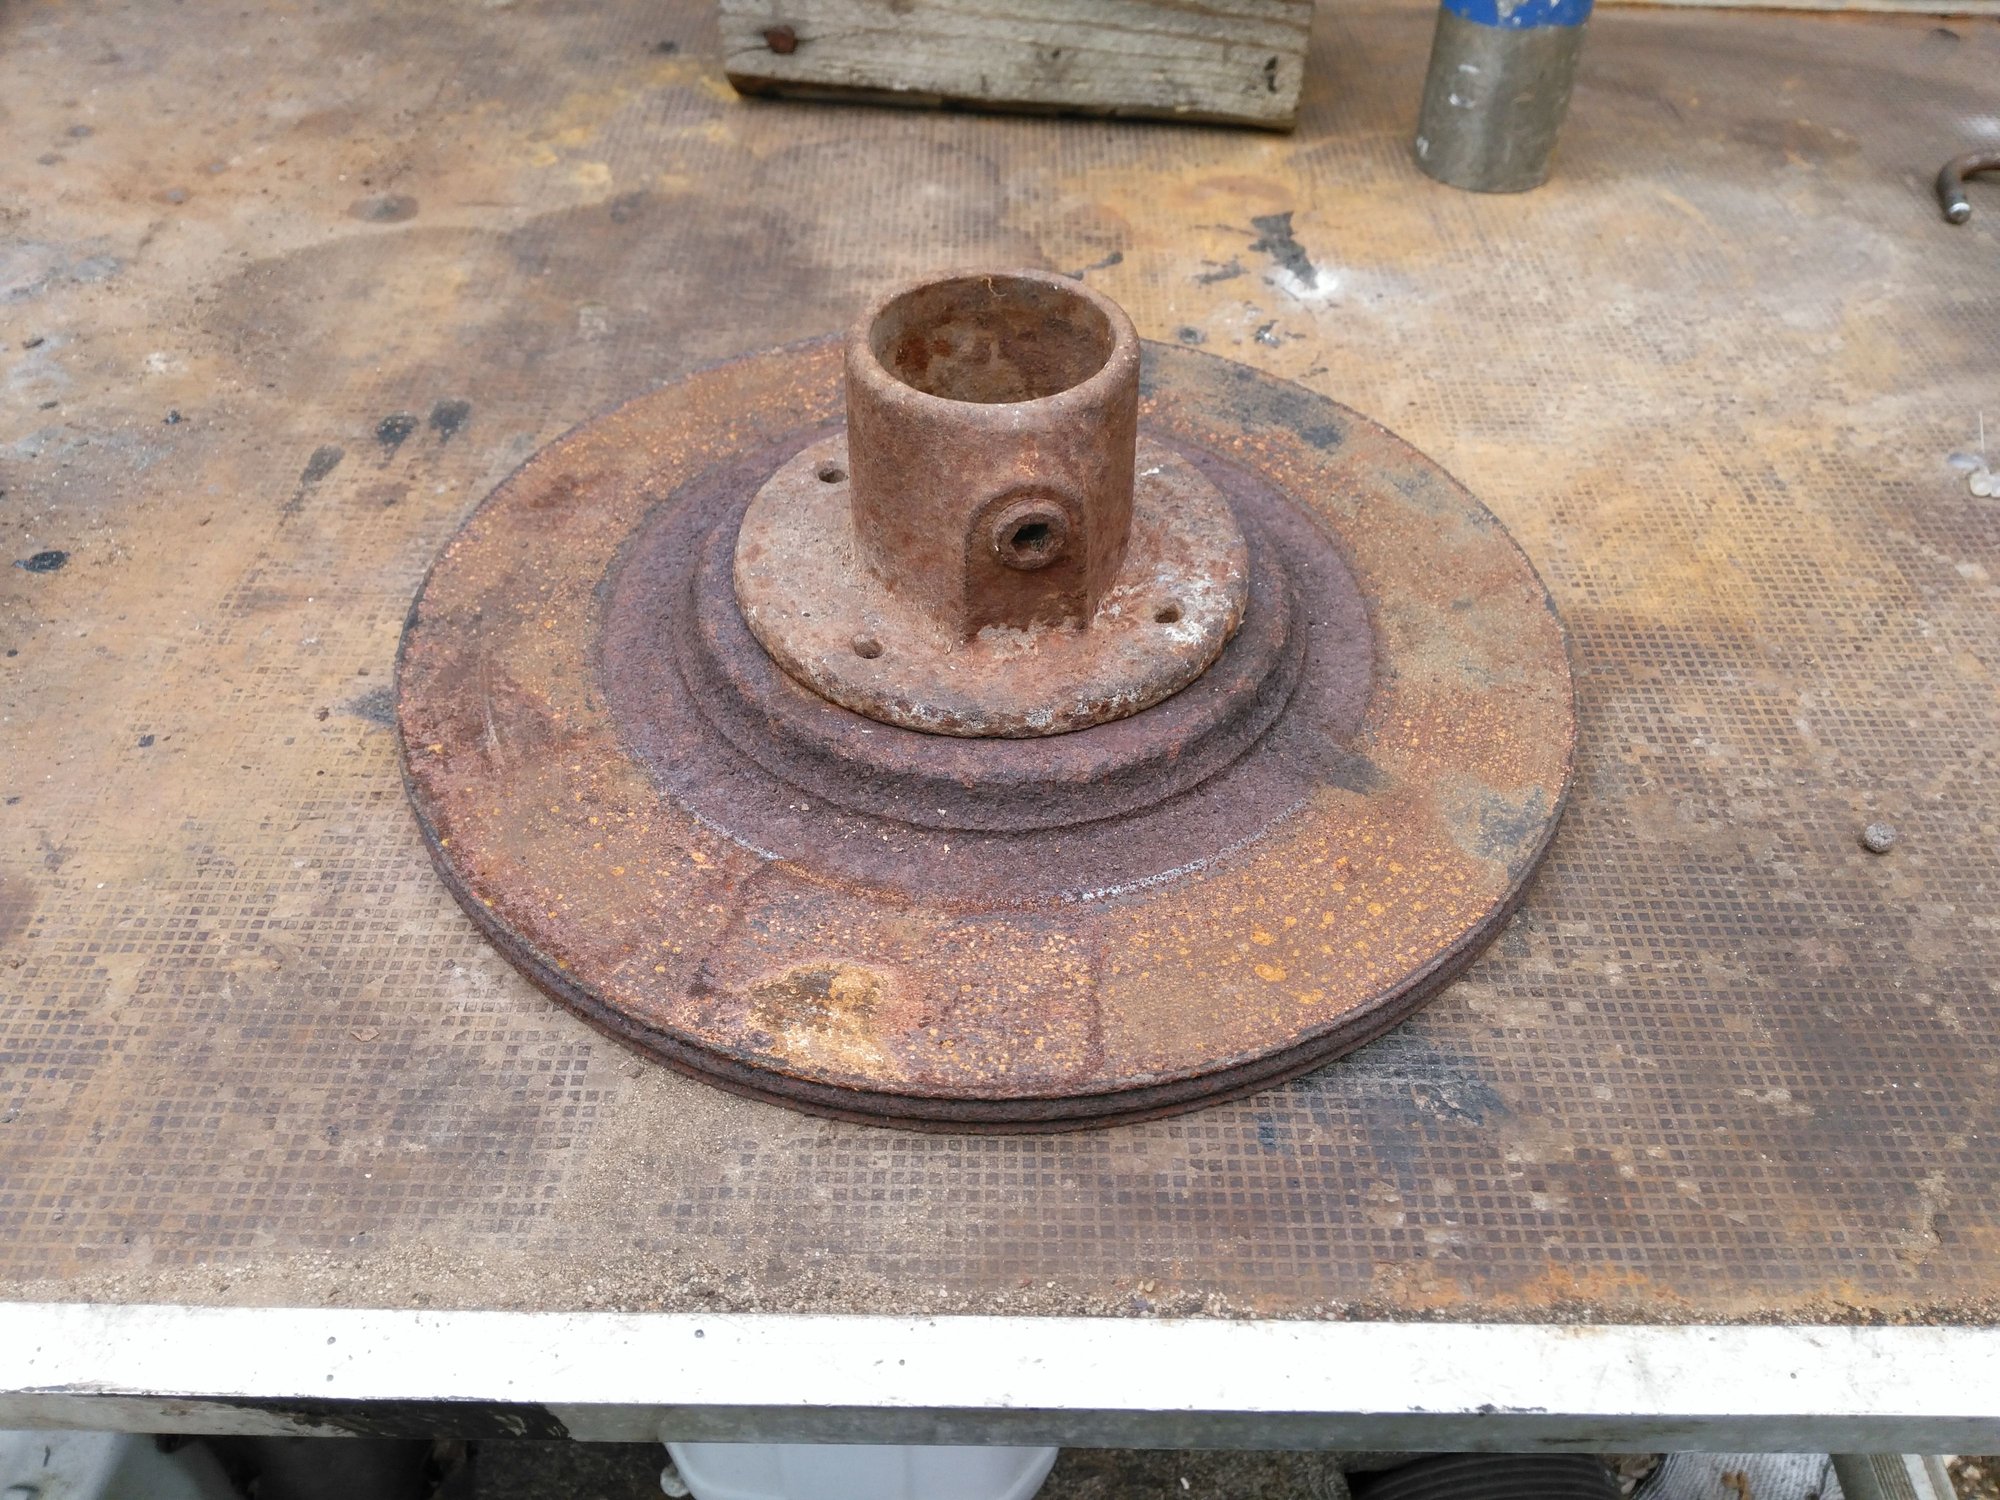
Take one No 8 Key Clamp Fitting that I found in the Shed
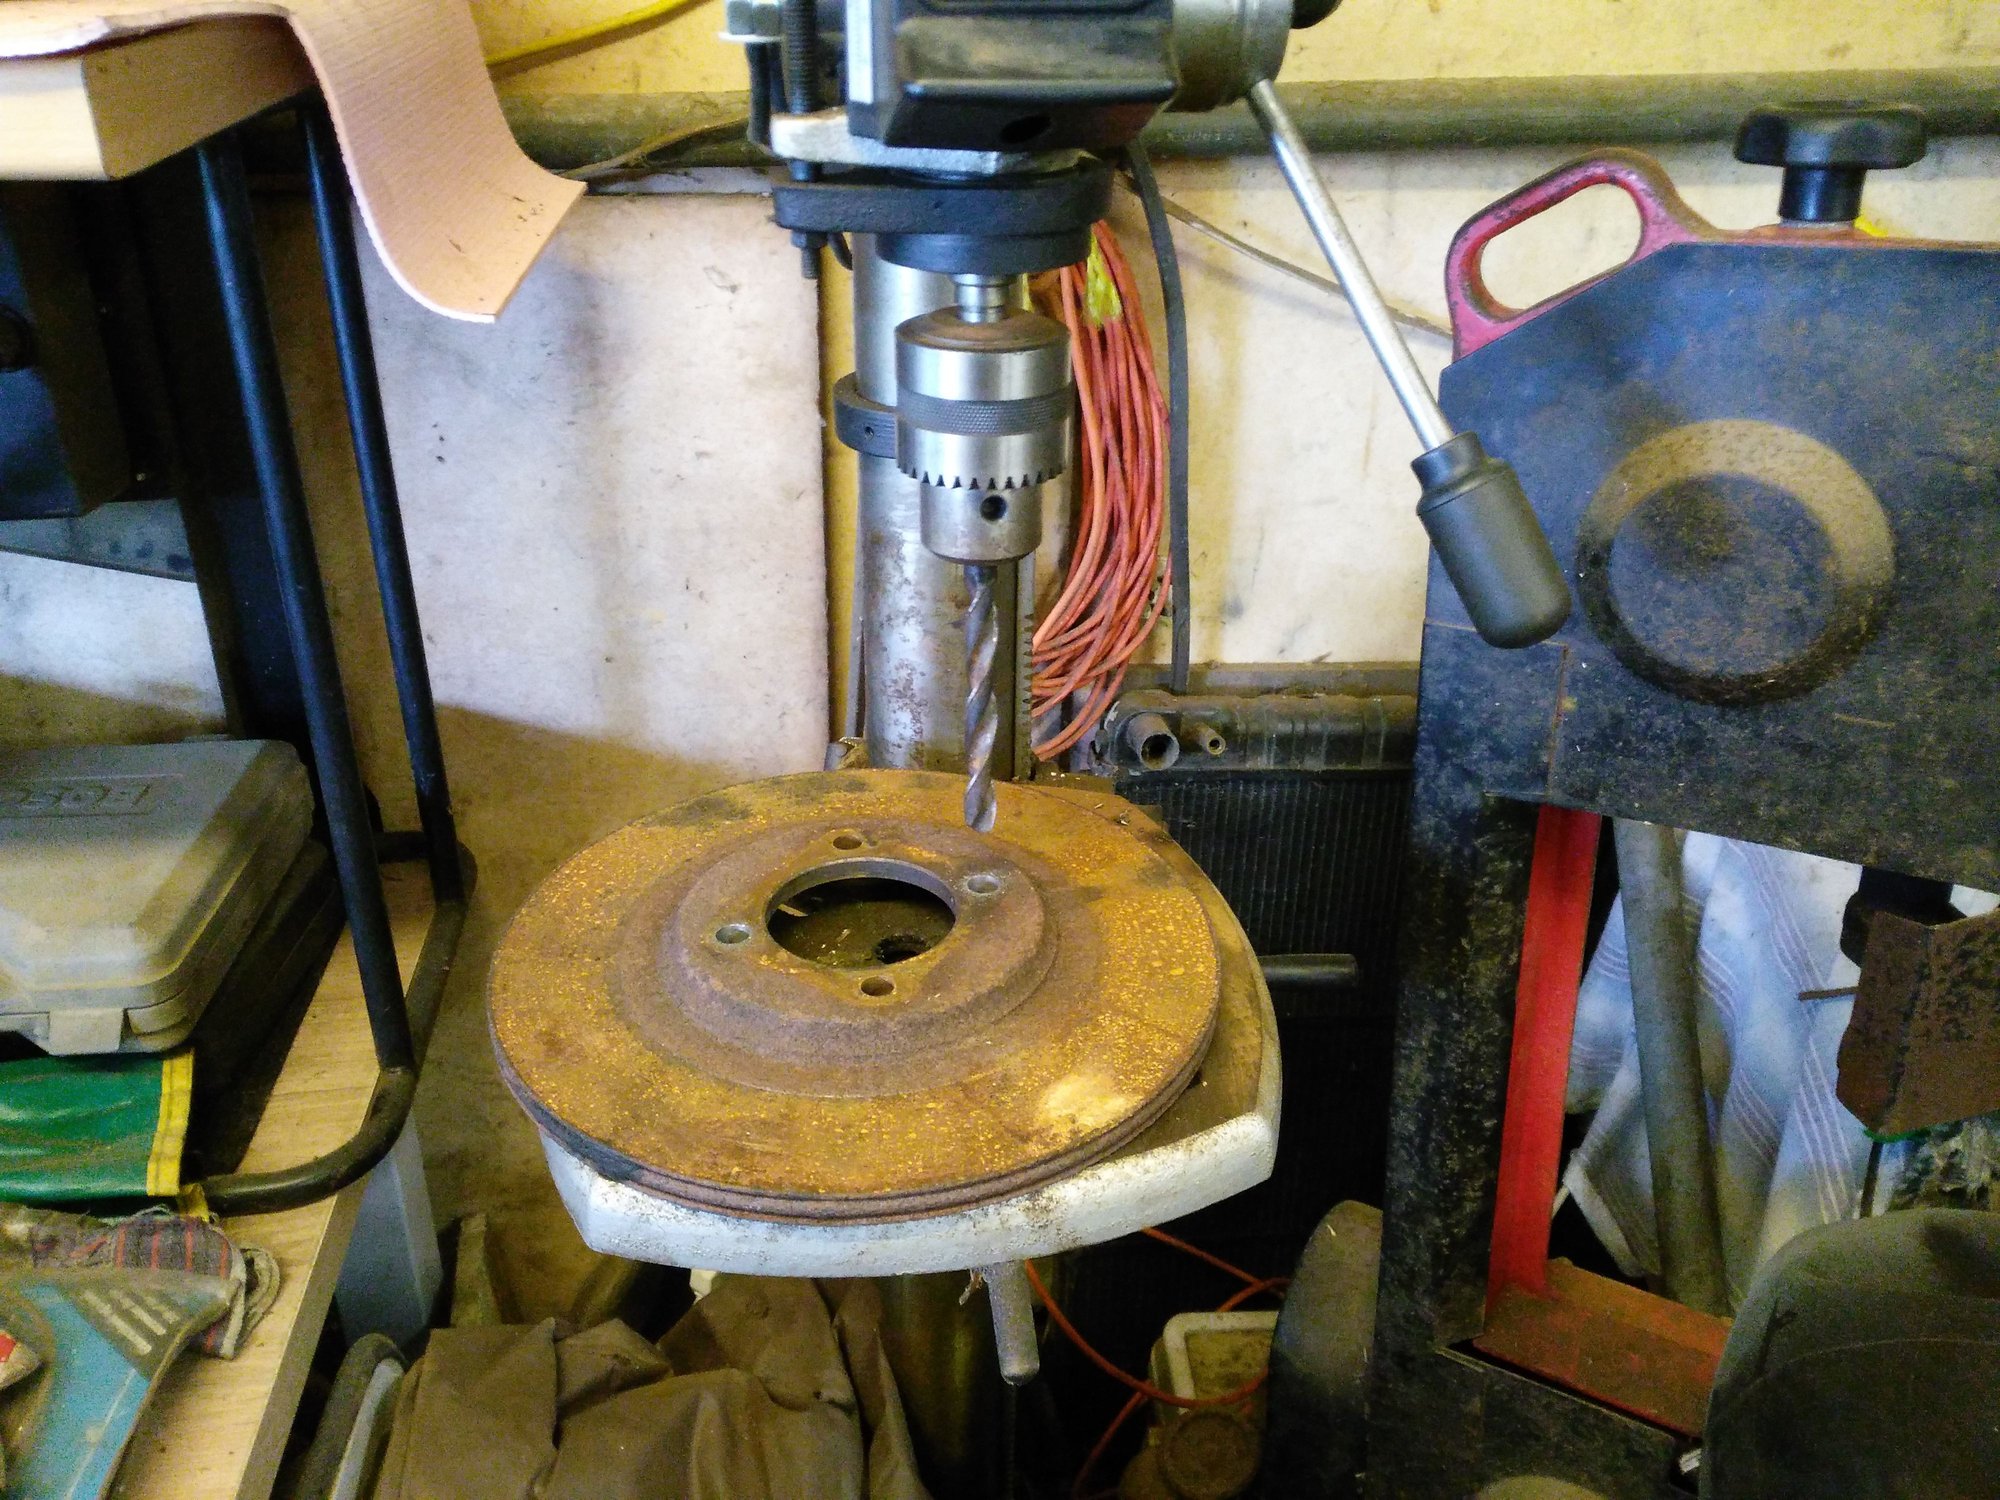
Drill Bigger Holes on the Rotor
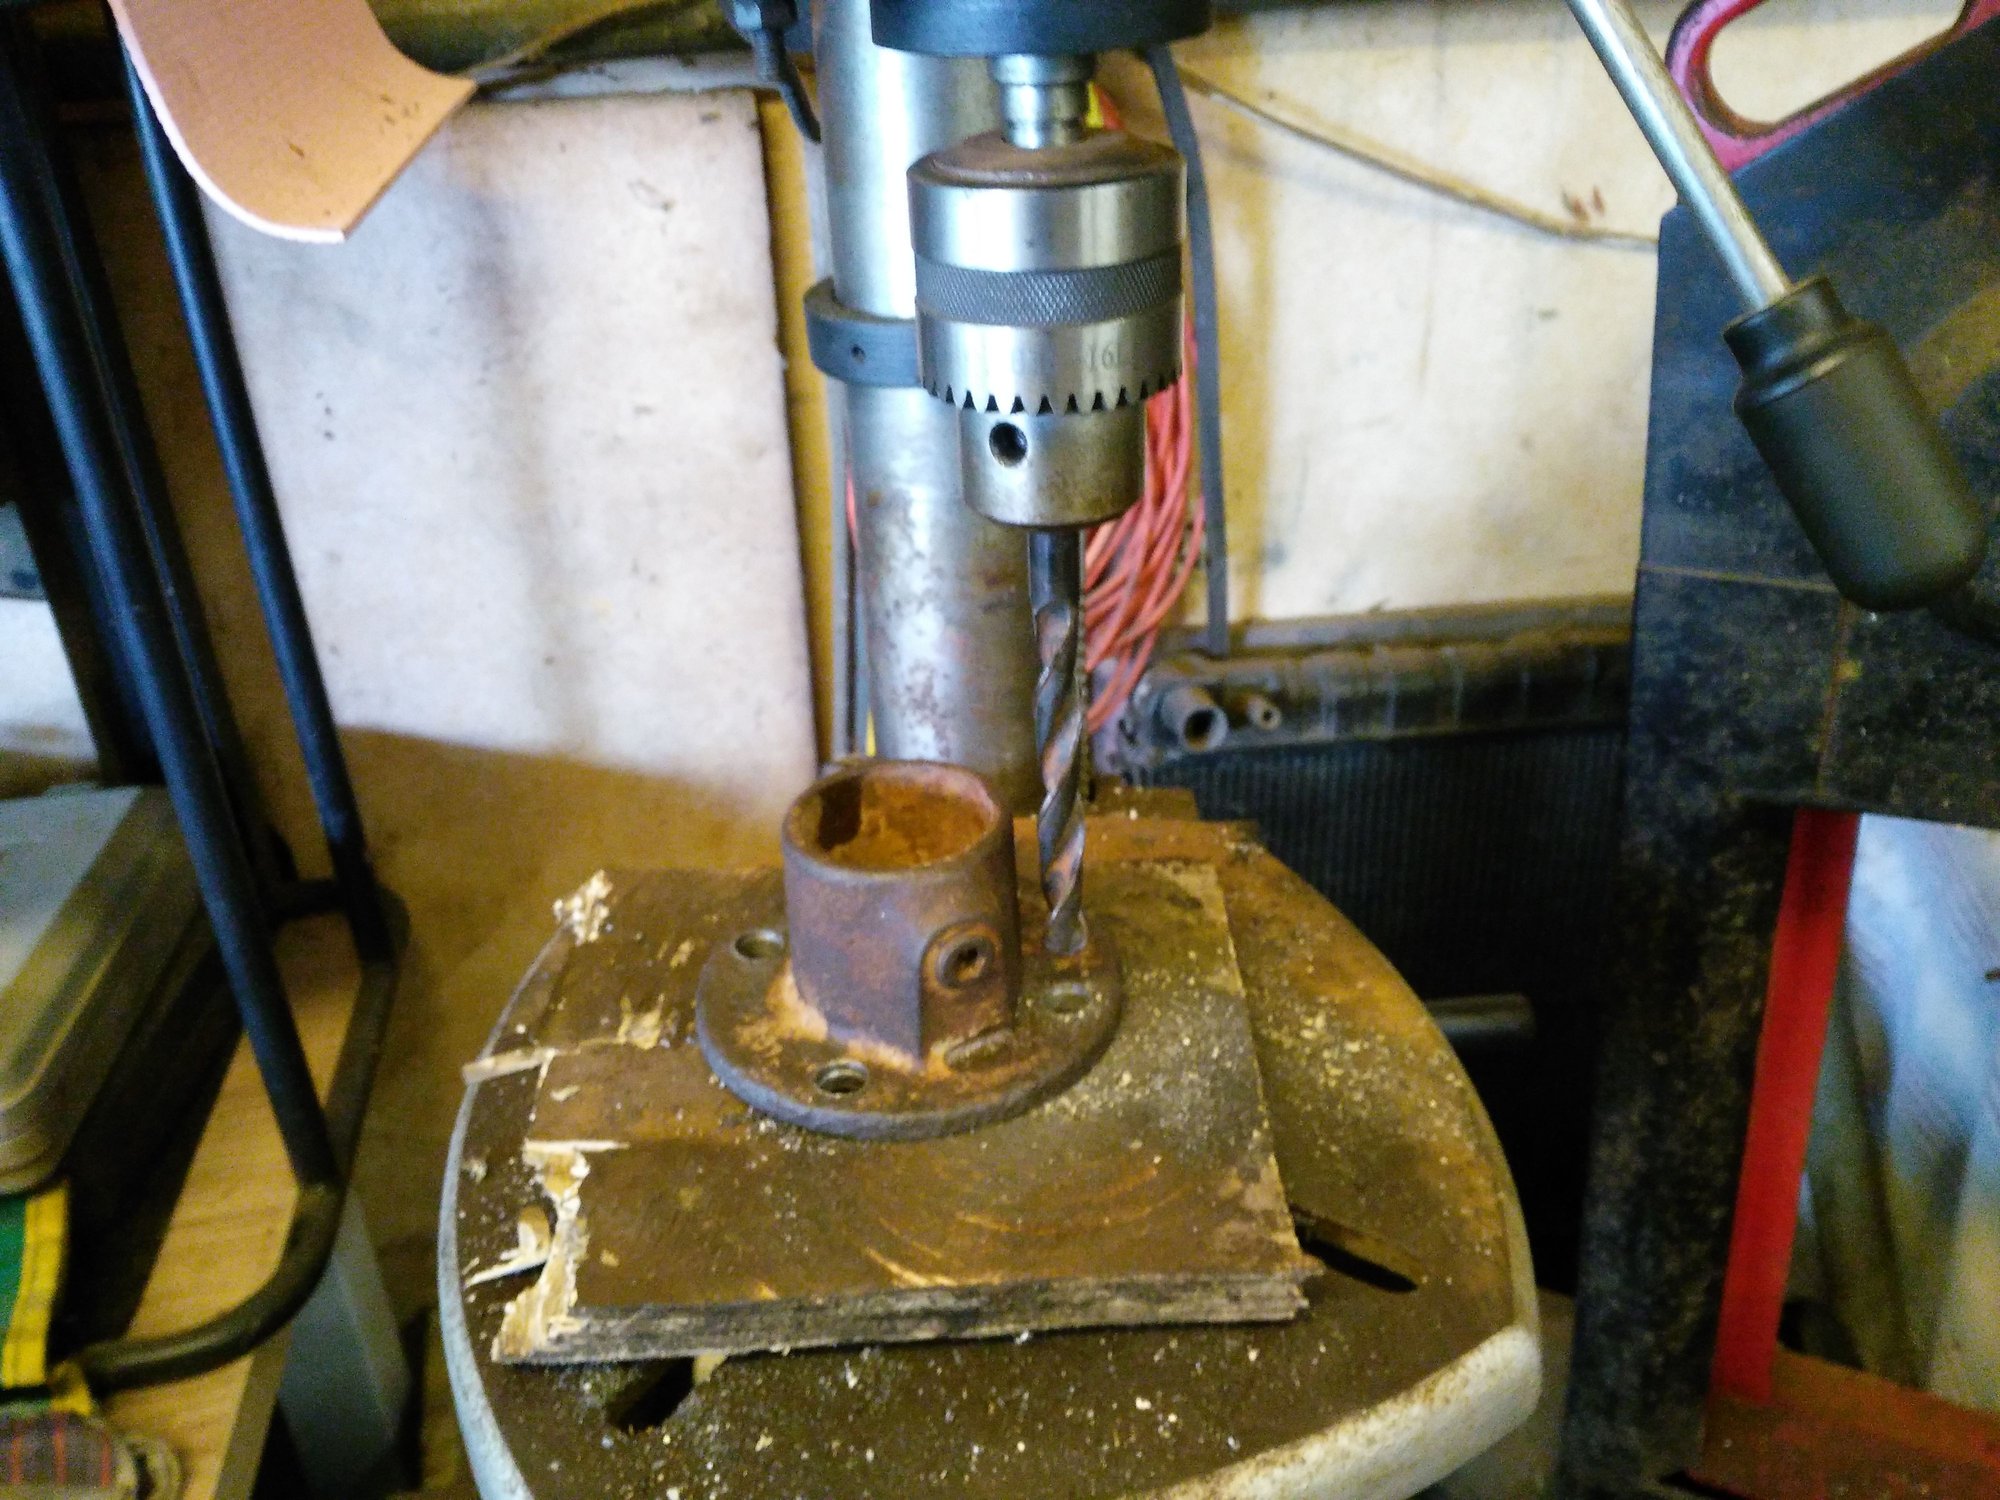
Drill Bigger Holes in the No 8 Key Clamp Fitting
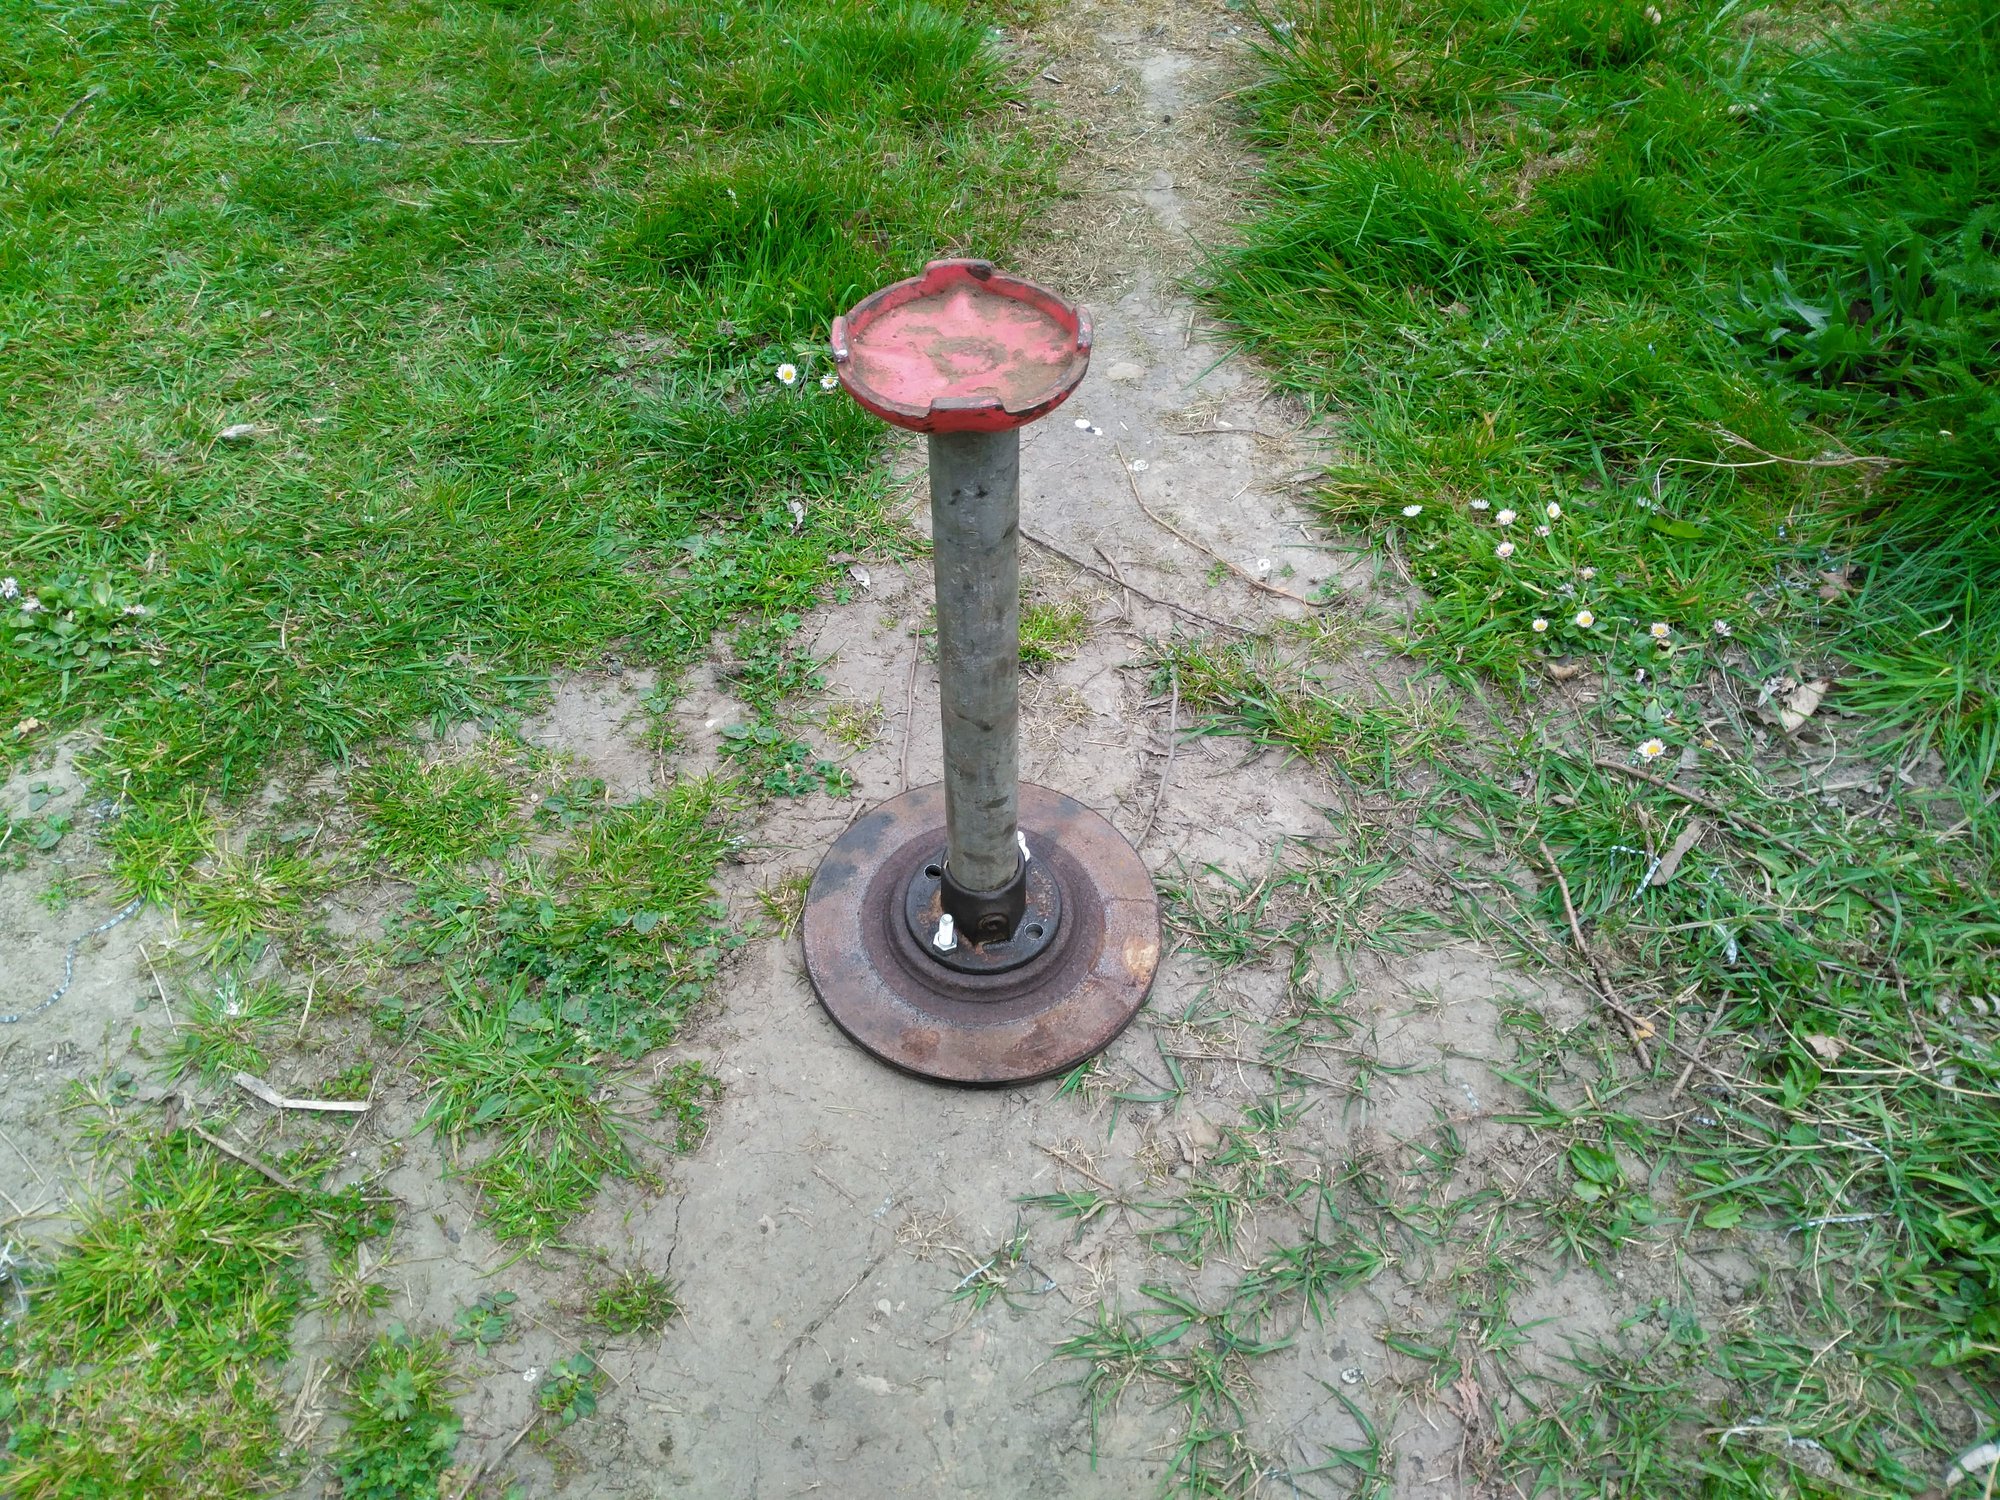
Cut a piece of Scaffold Pole to length
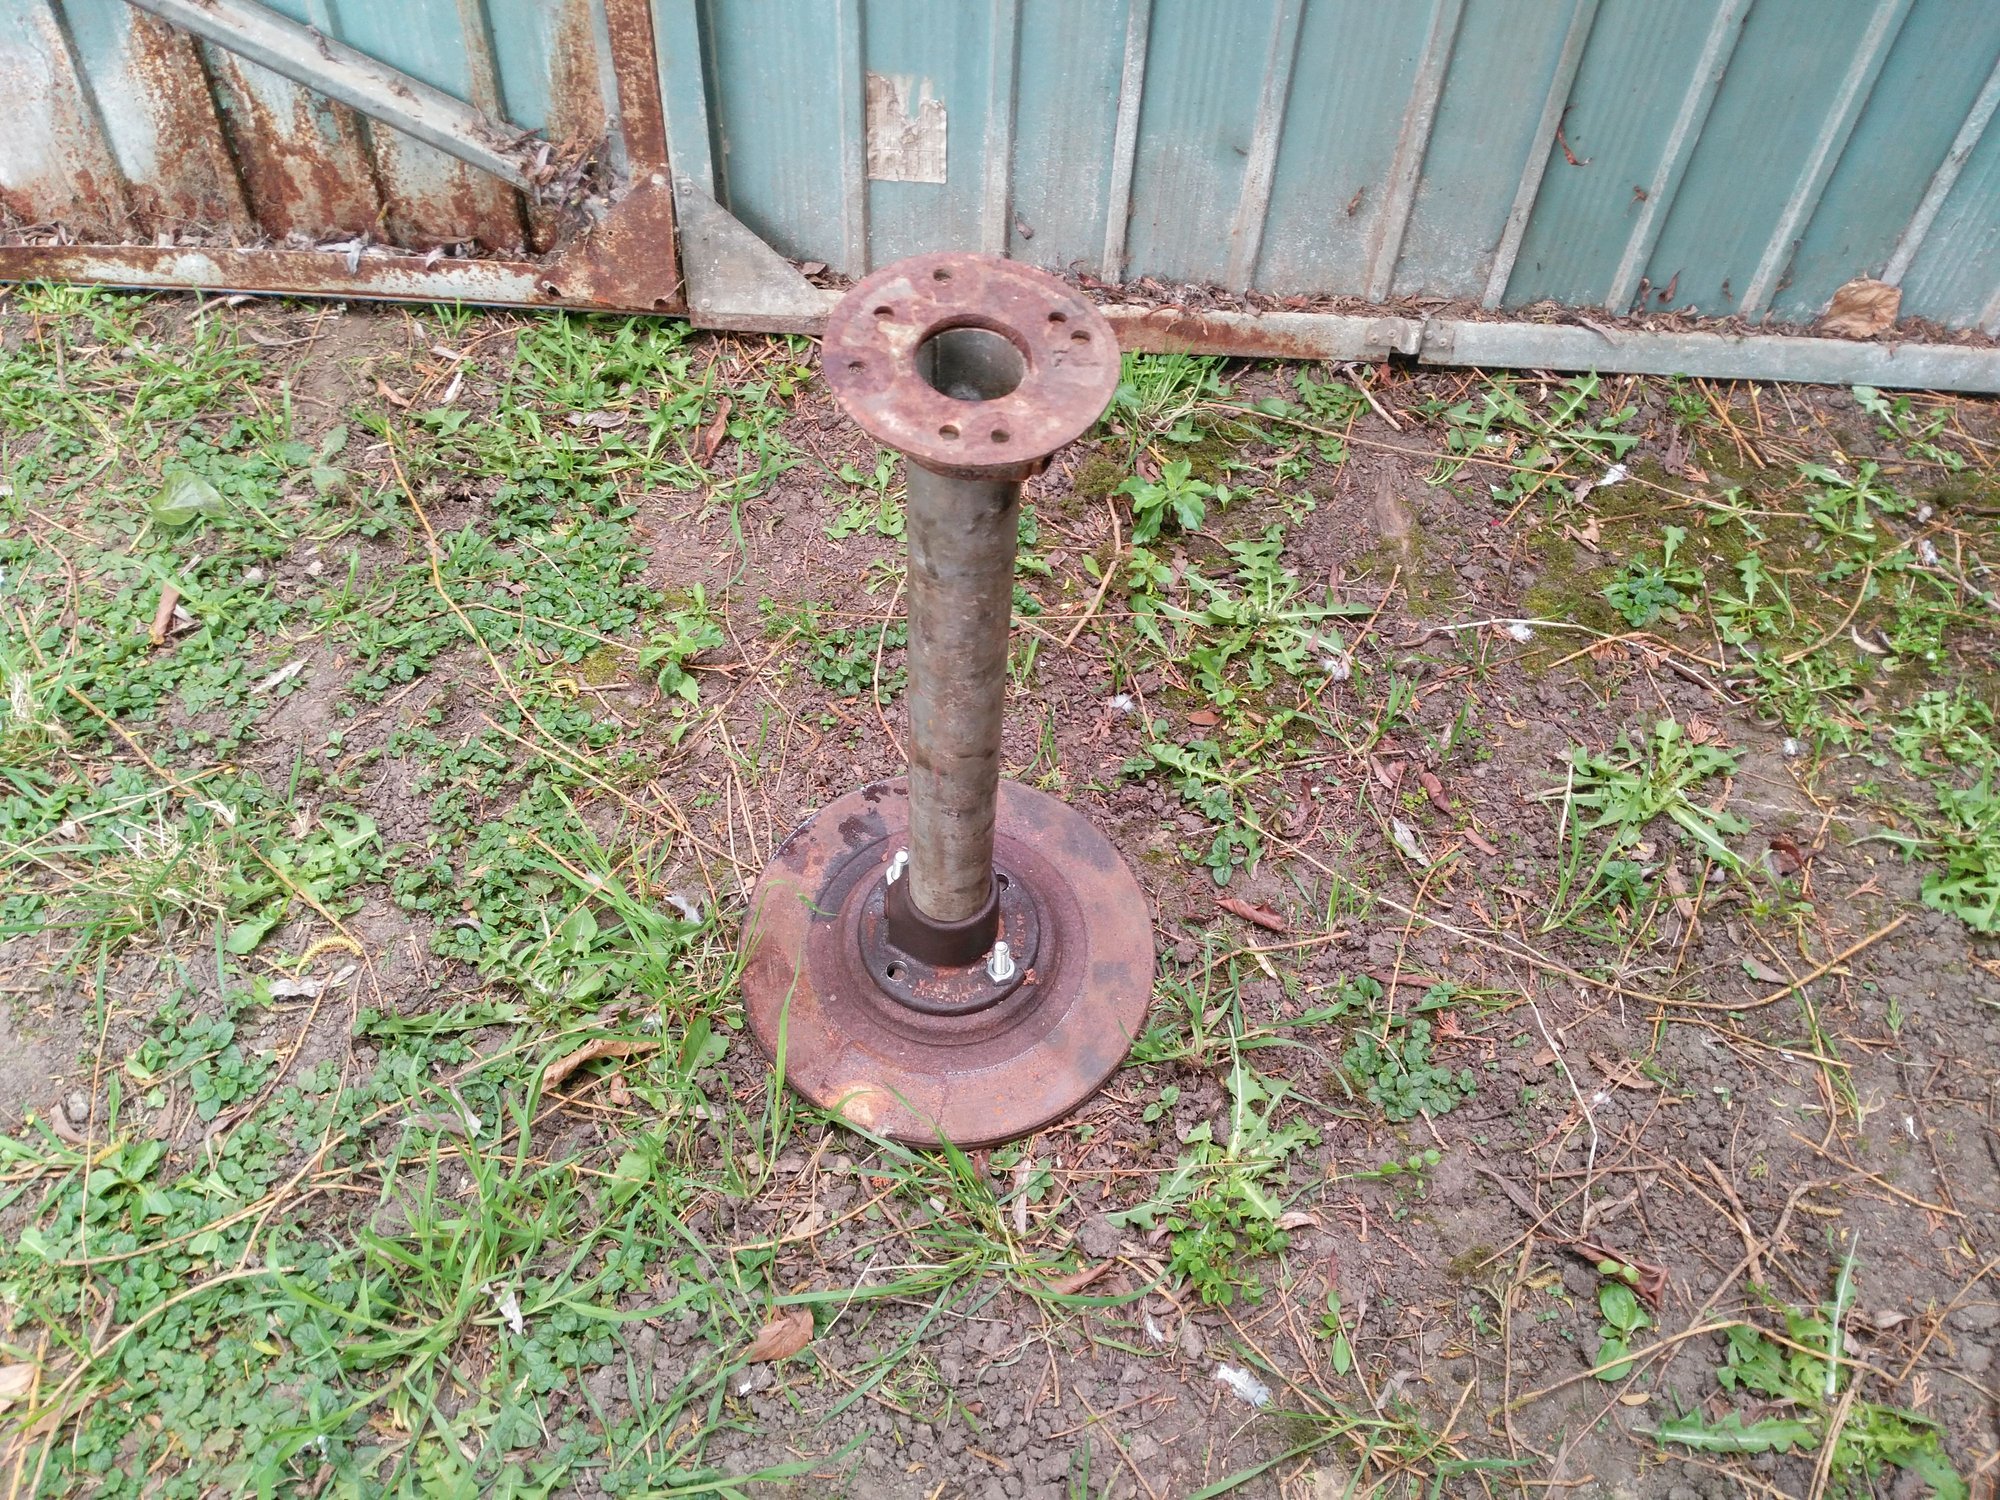
Add Your Choice of 'Topping' where these will be used as Fail Safes for when I put the Cage Back in my XJS as soon as we get a really nice day whenever that will be!
Last edited by orangeblossom; 04-25-2021 at 04:01 PM.
The following 2 users liked this post by orangeblossom:
Dukejag (04-27-2021),
Greg in France (04-26-2021)
#2400
Removing The Cage Of '50 Shades' My Grey XJS
Putting The Cage Back In
With all the Mechanical Refurb now out of the way, it was finally time to put the Cage back in and though I'm sure that there are many ways of doing this I put the Cage on a set of 'Slave Wheels' and then rolled it under the CarPutting The Cage Back In
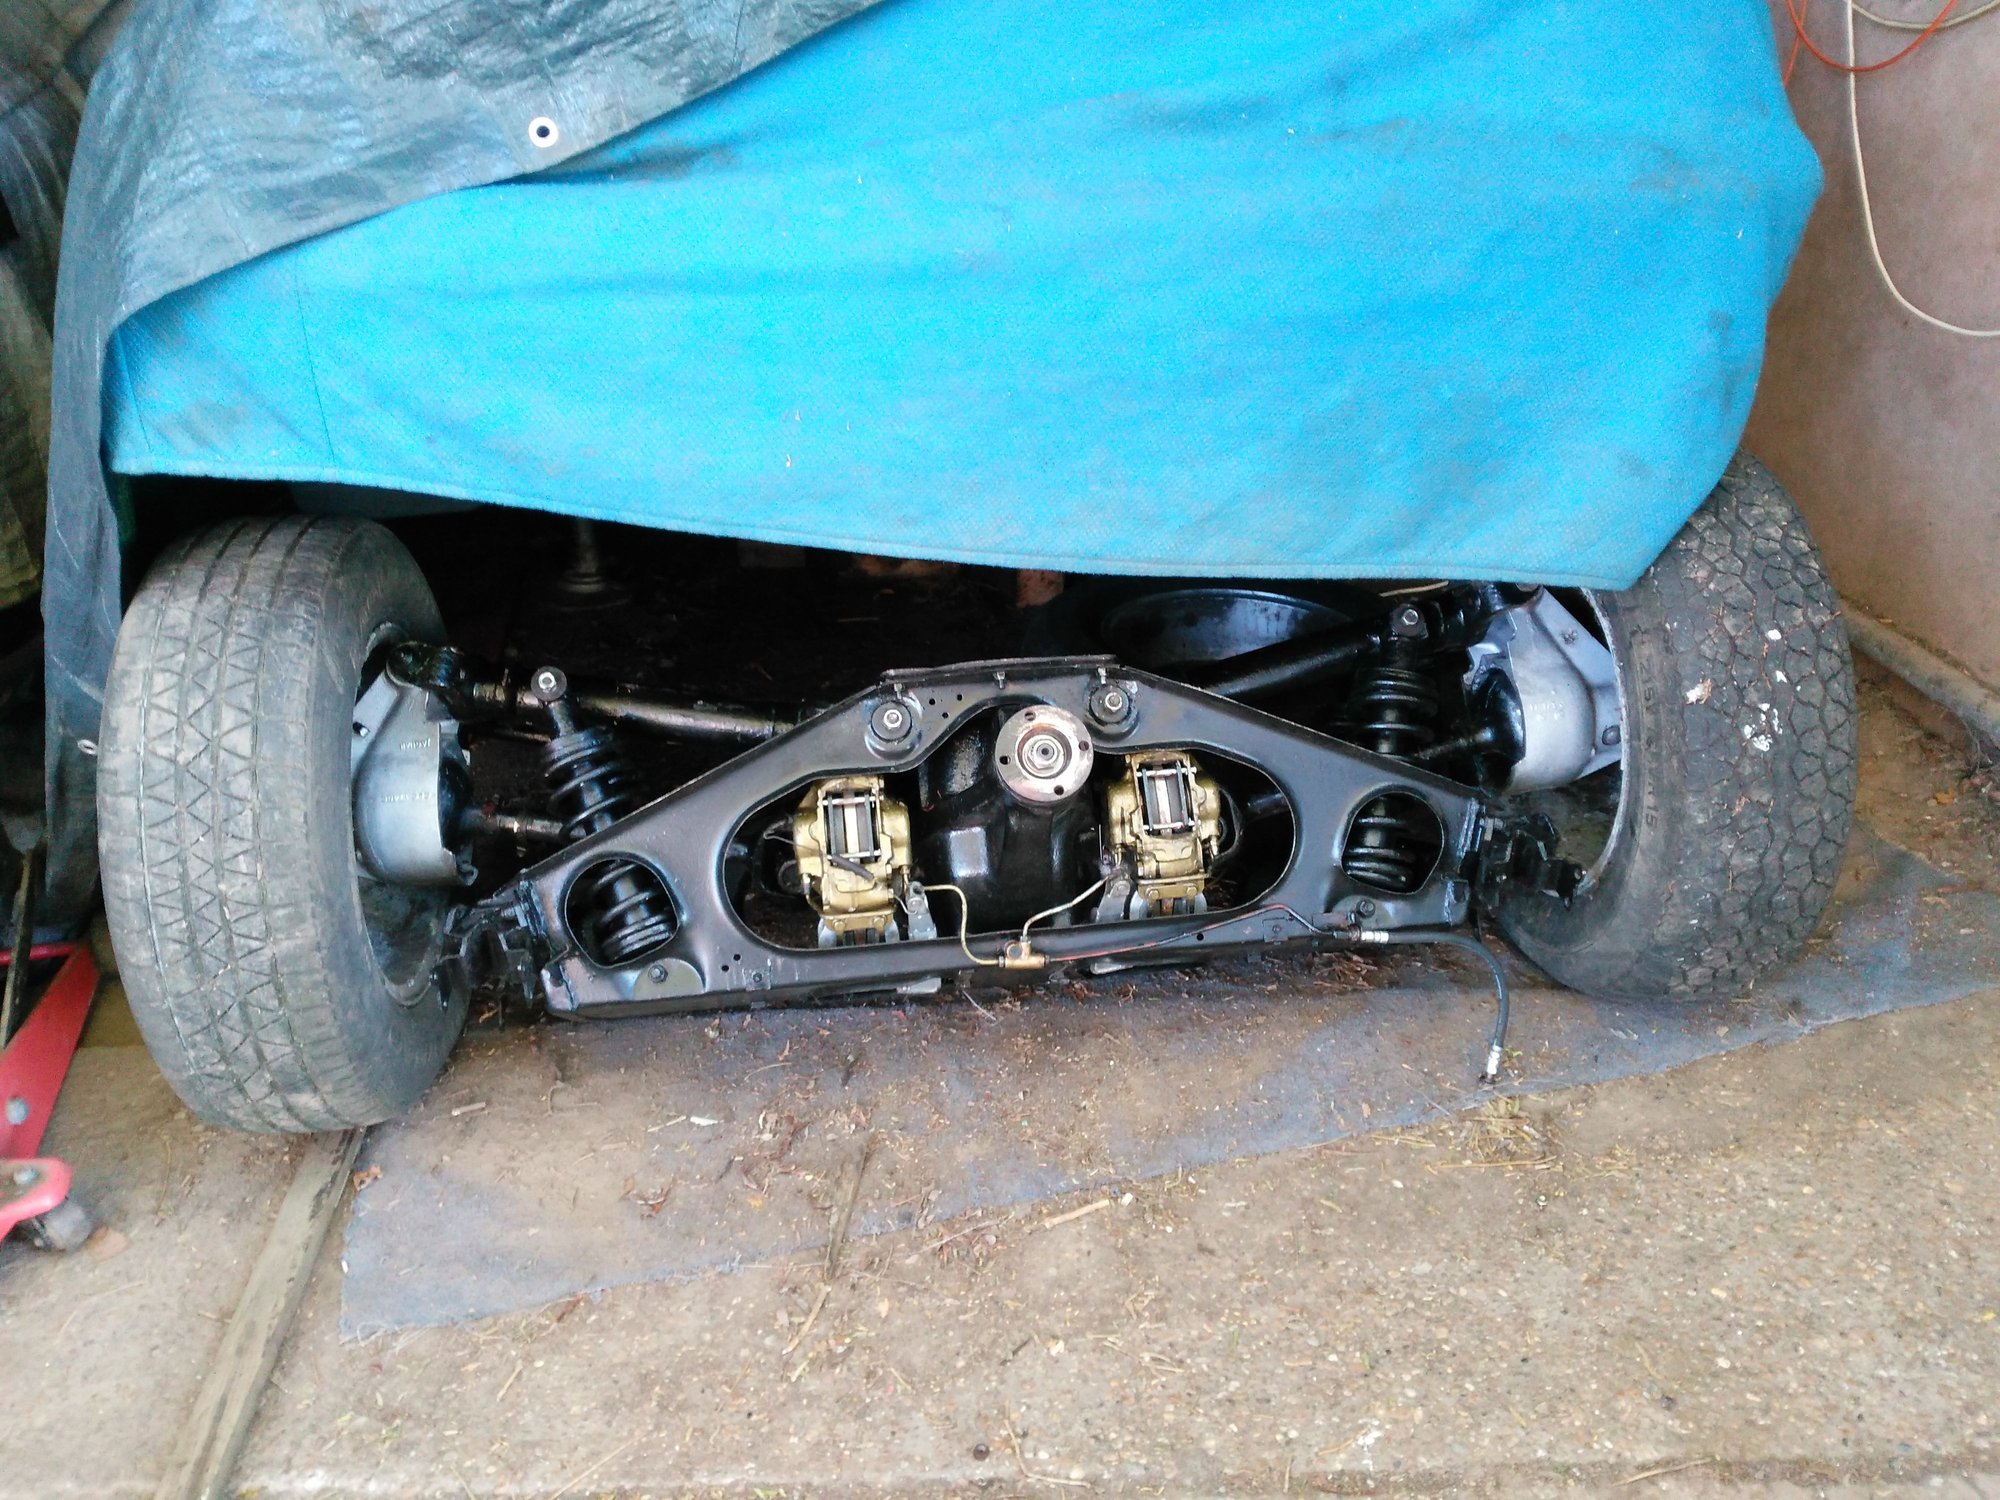
It didn't really matter that it was upside down as I had to turn it on its side to get it under the Car with the aid of a Jack
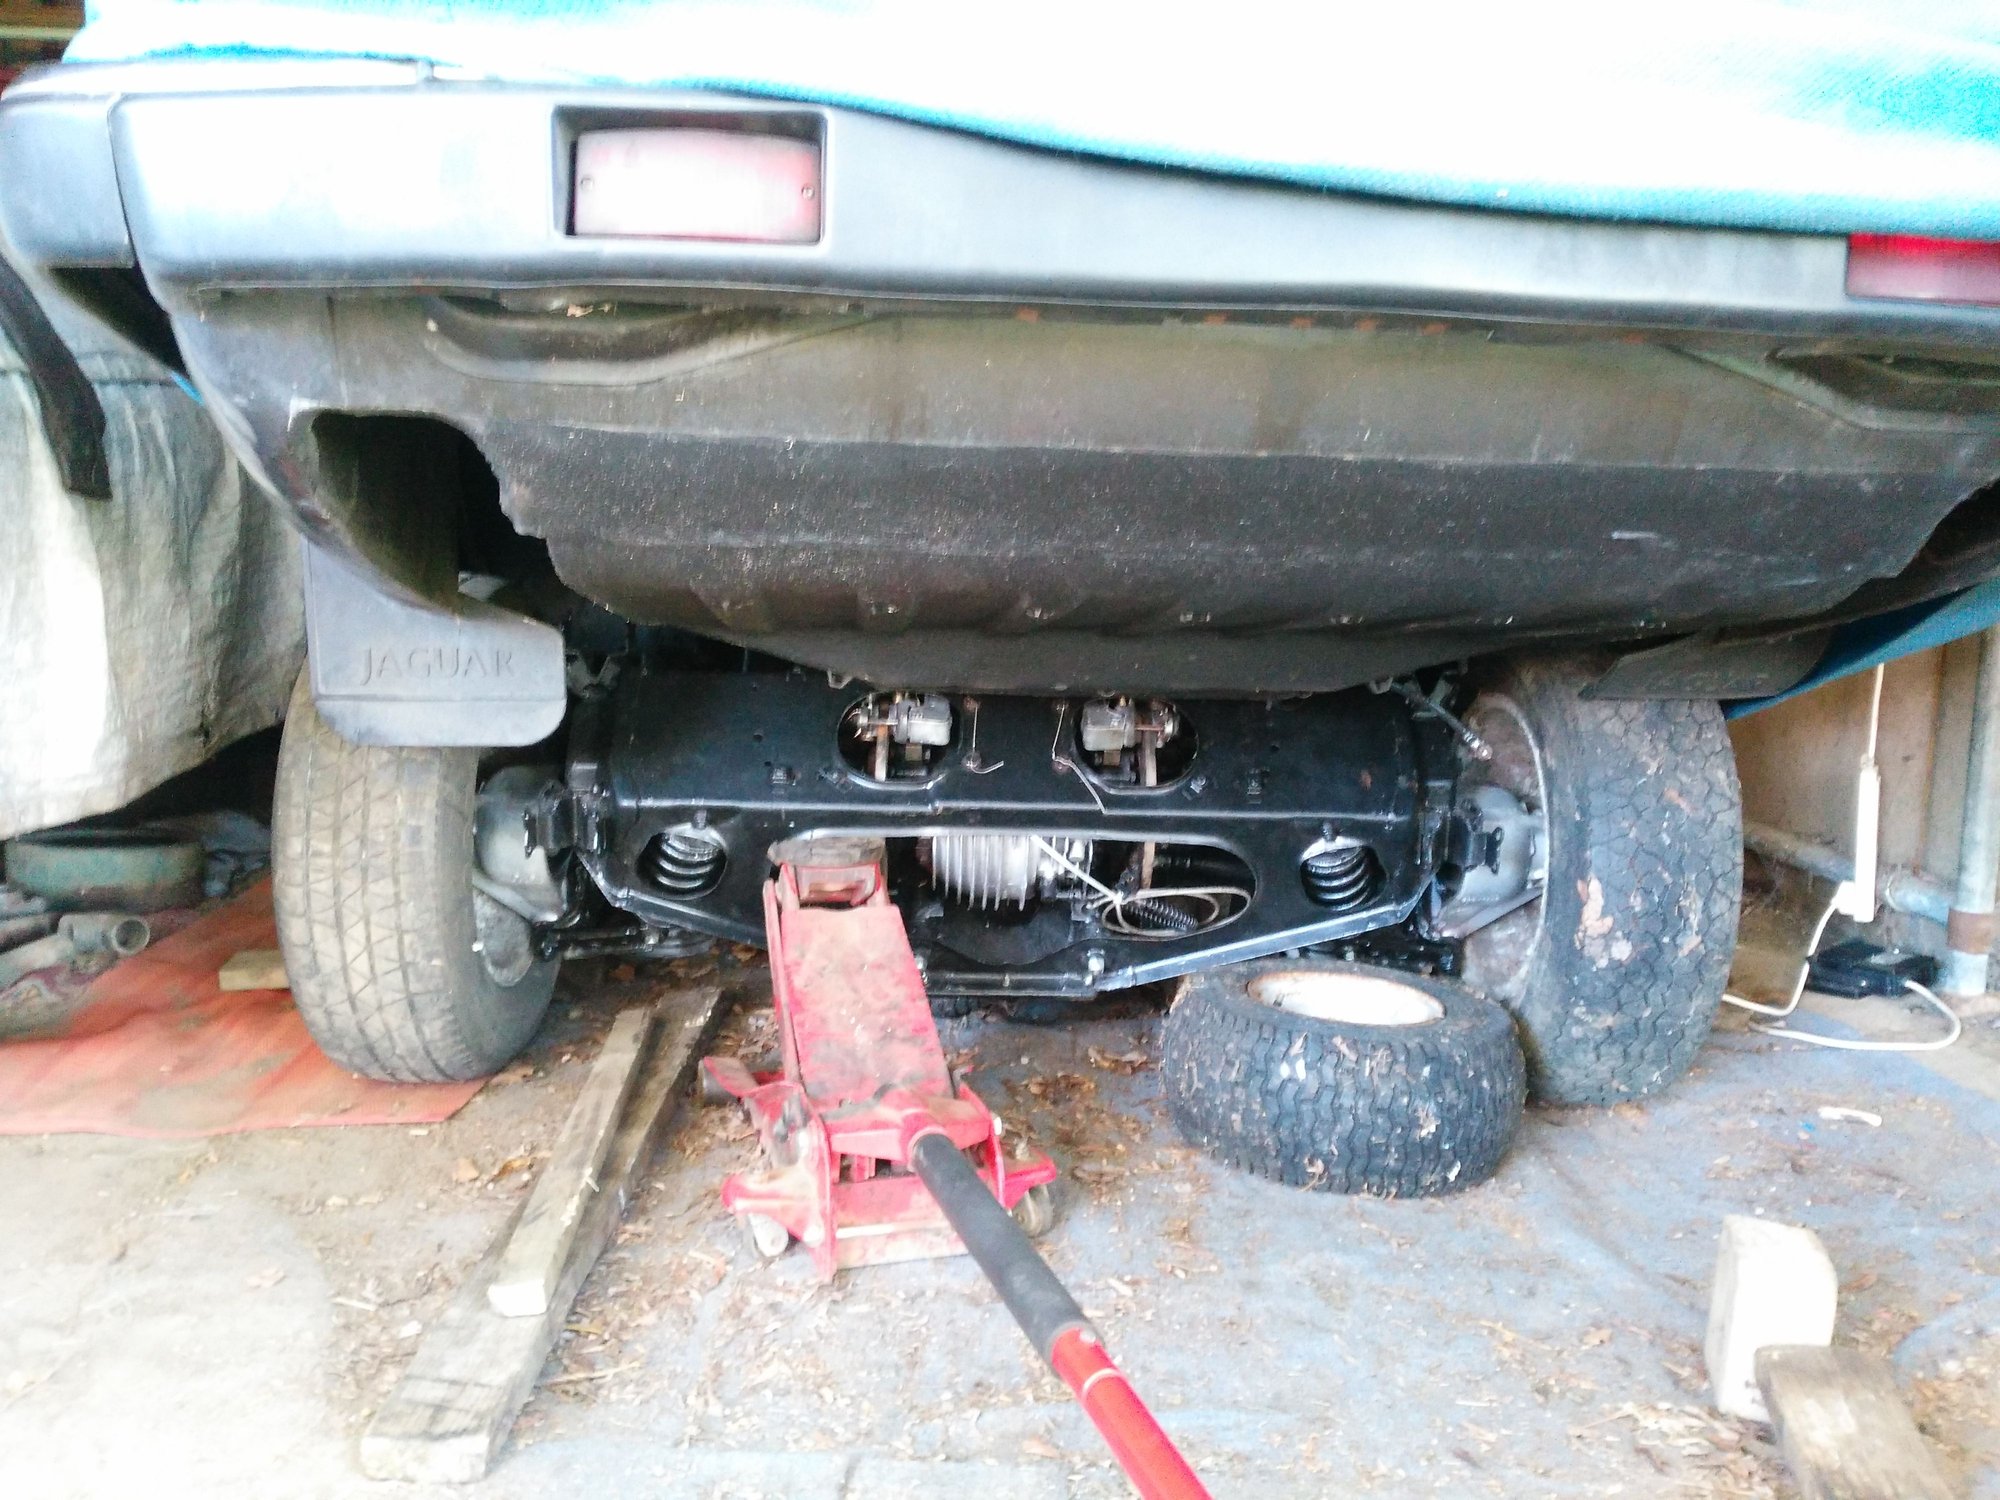
Once 'The Cage' was under the Car I used a Jack to straighten it up and then once having done so, used the Jack to jack it back into position and then I followed 'Greg's' advice and just put Screwdrivers into the bolt holes as a temporary measure to line it up for the bolts, which I hope to be doing Tomorrow
I'm really enjoying this project which is nowhere near as difficult as I thought it might be, so not much more to do now, except reconnect the 'Speedo Wire' and also the Pipe for the Brakes as well as connecting the mechanical Hand Brake and put the Exhaust back on followed by the Trailing Arms and then we should be done!
Apart from hoping and praying that everything's going to work, which may require a bit of help from 'The Jaguar Gods'
The following 2 users liked this post by orangeblossom:
Dukejag (05-03-2021),
Greg in France (04-28-2021)

