When you click on links to various merchants on this site and make a purchase, this can result in this site earning a commission. Affiliate programs and affiliations include, but are not limited to, the eBay Partner Network.
For those of you that have been following my "AAV bolt Snapped Off" thread, I seem to keep falling further and further down the rabbit hole on this repair. I came out to the garage today to find that the front end of the water rail somehow rolled off of my workbench and landed on the thermal vacuum switch attached to it, breaking off the two fittings. I ordered a replacement, but it turned out to be the wrong part and I can't seem to find the right one.
On one end it is connected to the overrun valve on the B bank manifold. On the other it runs off to what I think is a check valve, and then to a mess of vacuum lines that I think have to do with emissions control.
I could:
1. Drill out and tap the water rail to accept the incorrect valve
2. Keep searching for the correct part (so far to no avail)
3. Gut the emissions vacuum lines
Now, the PO of my car already removed the whole air injection system so my car already couldn't pass a smog inspection (that's why it's registered in Tennessee), so removing as much of the emissions lines in the engine bay seems like an attractive option to simplify things around the engine and to solve this new broken valve issue. Has anyone done this? How far can I go? What do I need and what can I do away with? Or should I just leave it alone and go with option 1 or 2?
Here are are some of the vacuum lines I’m talking about.
I think that might be part of the fuel vapour cannister purge system. You can get rid of it all if you have no registration problems without it, and just leave the to-air outlet in front of the LHS rear wheel open - which is what UK spec cars have. You will see the pipe running from this small-bore outlet to the cannister, along the bottom of the car's LHS., quite near the fuel return line.
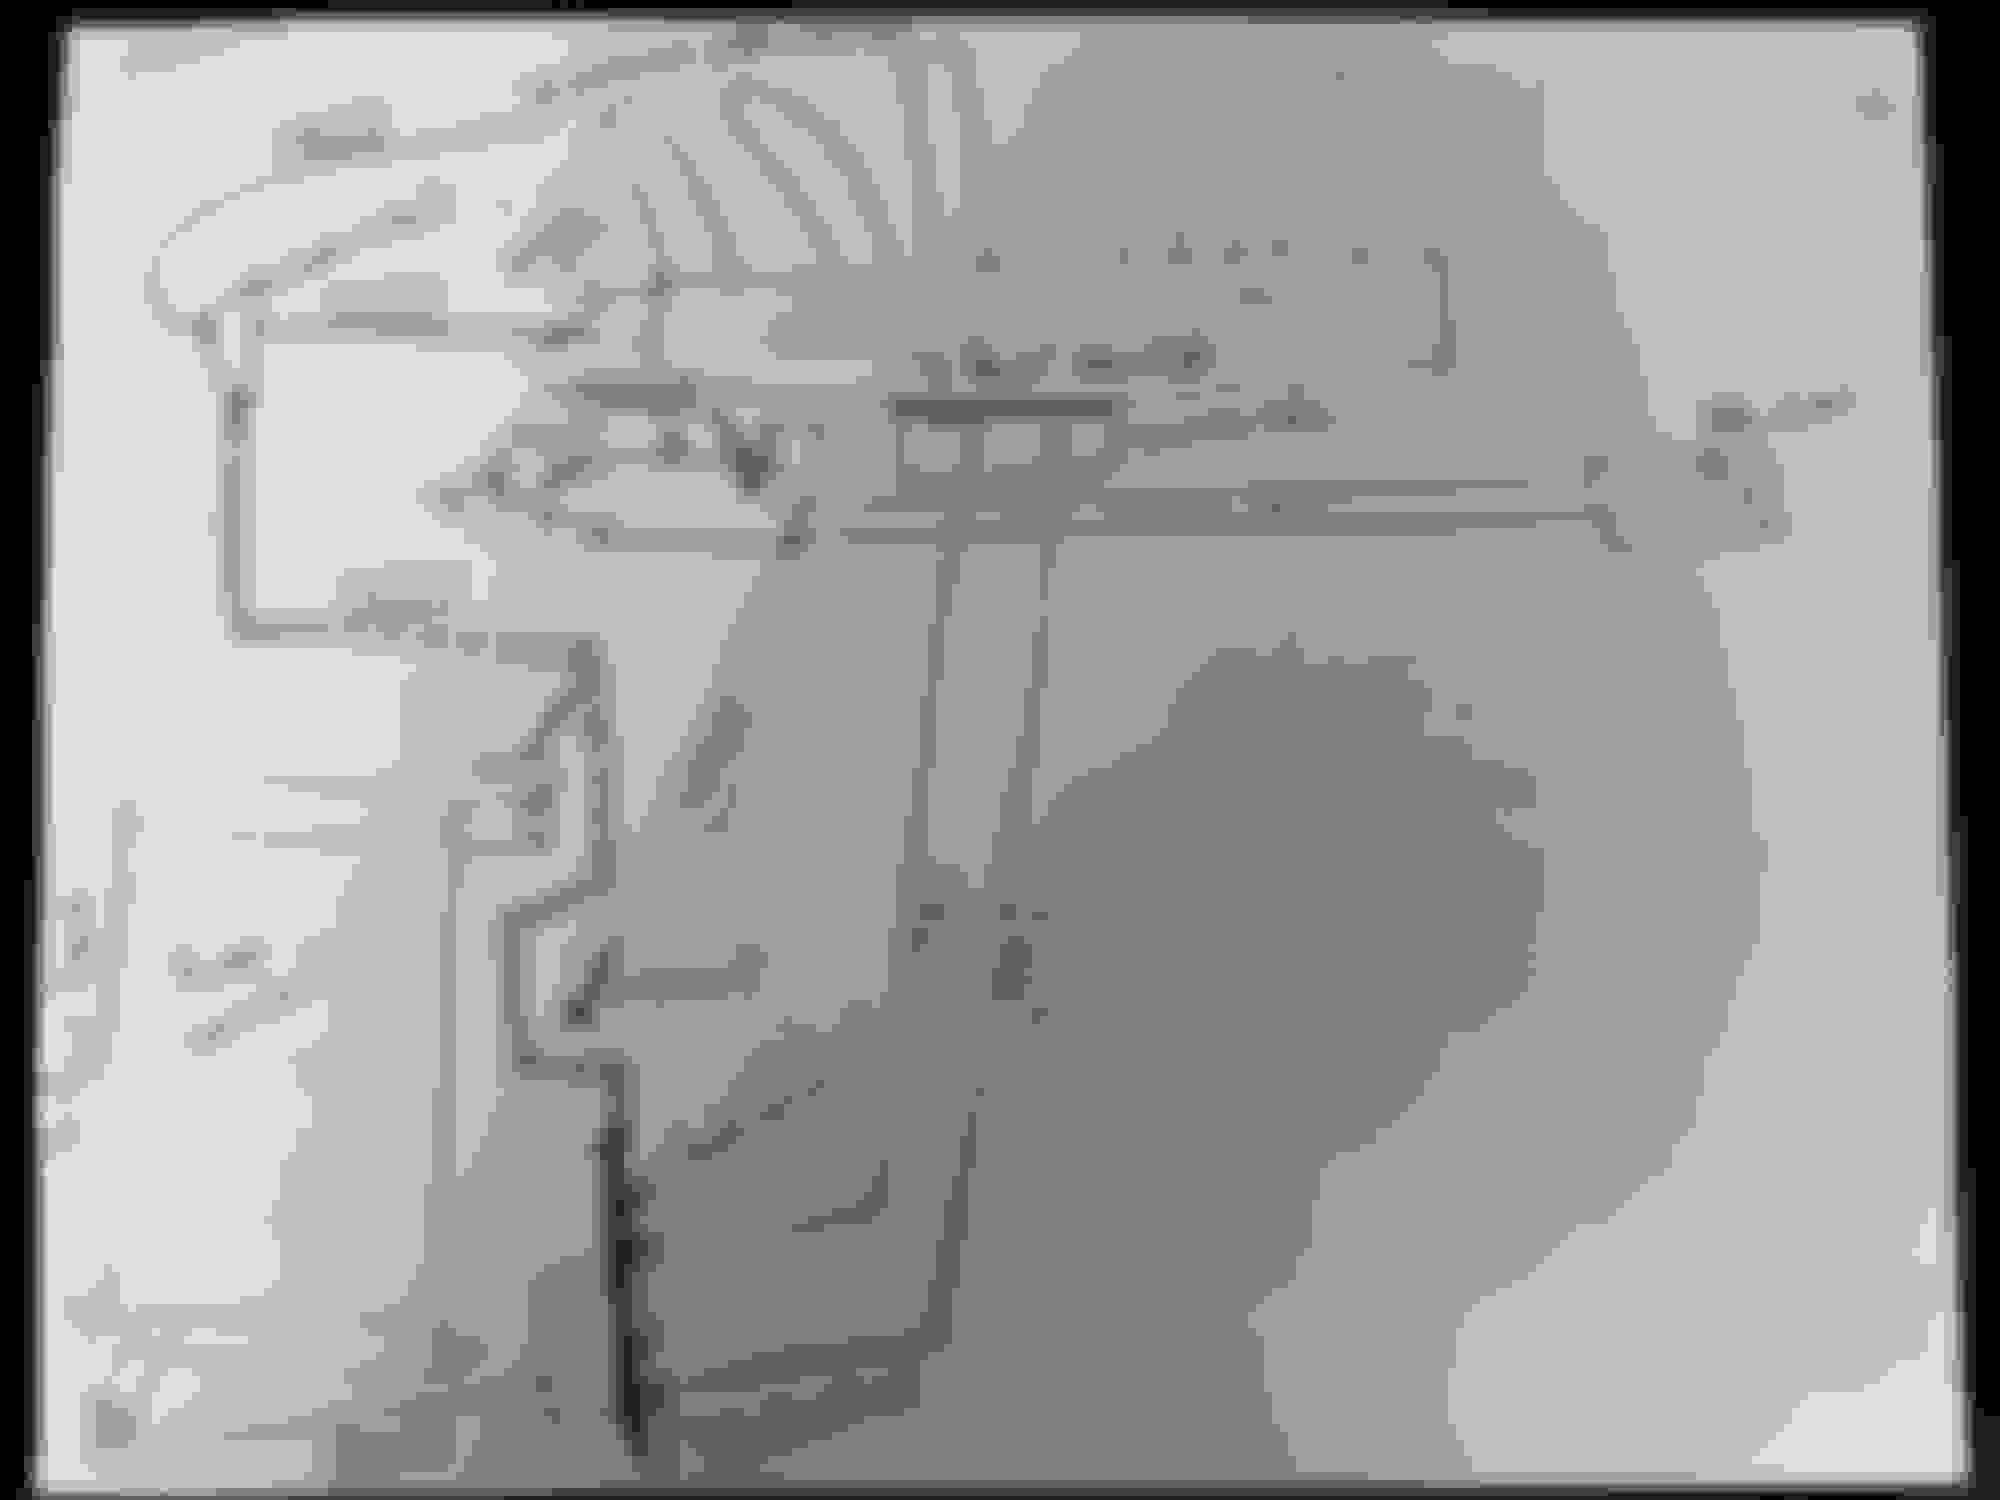
Sorry for the delay, my computer crashed and I lost everything so that's been FUN. Anyway here's what i plan on removing but I need to know what should be plugged off and what should be left open to the air. I am the LAST person that should be drawing but here's my best shot. I realize it may be more confusing than helpful.
I know I'll need to plug off the two ports on the throttle body, but I don't know whether to block off the port on the overrun valve or run it somewhere else. I also don't know what to plug or leave open on the fuel vapor canister. Maybe I should remove the fuel vapor canister altogether and just put a filter on the line that goes to the fuel tank? Any insight is welcome.
P.S. The hose that went to that thermal vacuum switch that i was so worried about breaking? Well guess what, the other end of the hose is blocked off with a screw!
Rip off fuel vapor system, delete or disassemble and plug overrun valves (later deleted by Jaguar) you can remove the crank vent contraption to like Grant always suggests. I've done this no harm less clutter and crap in the engine.
I will be fitting a coolant filter in the dead space left by the cannister which is tidy, you can leave the metal tube open ended there Im certain its the part that goes back to the fuel tank, and will act like a tiny air way.
Ditch the smog pump to if you can that helps air flow through the enginebay.
I plan on doing this today (400miles from home, with a week oft) and I have just ONE question... What do I do with the line that's coming from the tank? Cap it and be done?
I've had my tank out to seal a leak in the earliest days and I swear I did not disconnect or reconnect, nor do I remember an inlet outlet at the tank for tubing that runs from the tank to the front of the beast... Anywho, I want it out and all that mess associated with it in the front LH corner of the engine bay cleaned up.
The line from the tank exits the boot just forward of the LHS rear wheel arch. You will find a thin diameter pipe just there, attached to a flexible running forward under the car to the vapour cannister. I would just pull off the flexible and get rid of everything forward of it. You MUST leave the end of the thin pipe OPEN as it is the tank breather. This is how all UK spec cars are, OEM.
The line from the tank exits the boot just forward of the LHS rear wheel arch. You will find a thin diameter pipe just there, attached to a flexible running forward under the car to the vapour cannister. I would just pull off the flexible and get rid of everything forward of it. You MUST leave the end of the thin pipe OPEN as it is the tank breather. This is how all UK spec cars are, OEM.
HellO Greg... Thank you...
Ok, I got you!
But first my shame... Earlier in the year in a quest to put an end to fuel smell in the car generally and boot (slight but annoying) I went in and pulled lots out of the boot actually searching for that thin, long, steel flexible steel pipe. I capped it. I didn't know what it was and where it was to be connected either in the boot or where it went off to at the other end. All I know is that when I had the tank out long ago I could find no place for it and I just tucked it in and replaced the tank. At the time I felt like I still had a million miles to go before I got to where I am today,,, driving her regularly...
In the last fuel smell chase I drilled the 1/64 hole in the cap and also found that the gas tank cap (the bolt in chrome style with the lock) clearly had a small vent hole in it under the sprung rubber flat rubber seal that enclosed the cap neck connection... I was pleased to find this.
Anyways, I successfully removed the canister and all related hoses. Capped all of what vacuum ports that opened up. Car idles and runs exactly as it had before, maybe better.
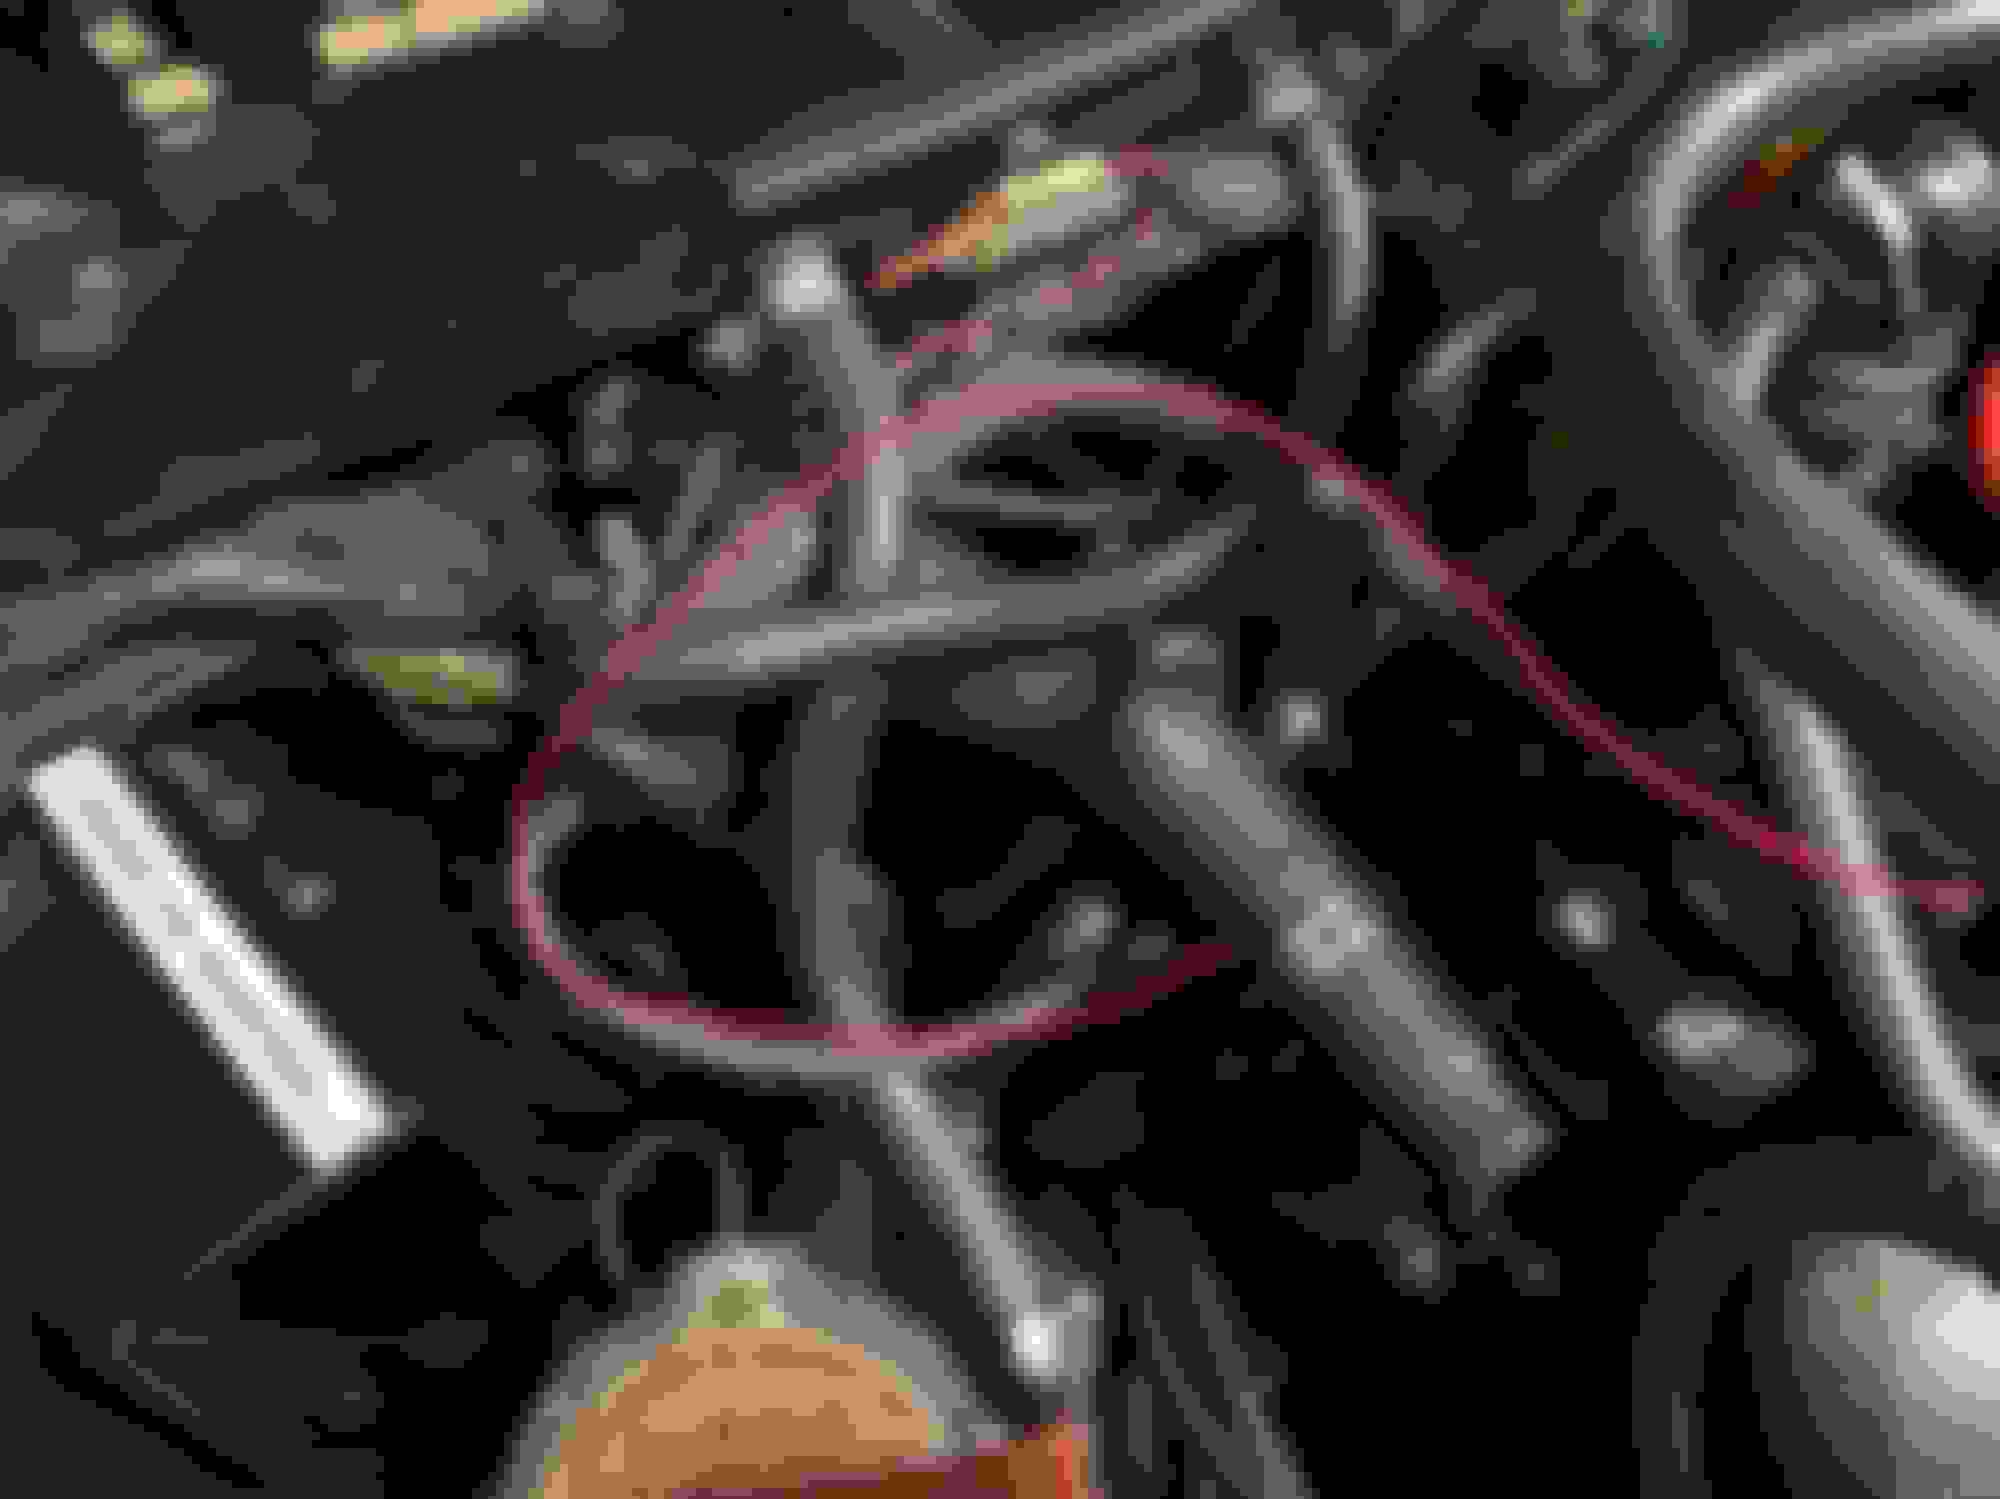
NOTE: The canister had NO line coming into it from the rear and the tank. In fact, I couldn't find a hose, tube or any kind of a line coming from the tank leading to the canister at the front of the car at all. There was a 90degree plastic vacuum driven/controlled valve with a capped tube coming off it on the canister. Circled in red. Would that be the connection point for the vacuum draw taking the vapors from the tank?
Anyways. I'm pretty happy with the results, so far. Sorry for the black back drop. Makes things hard to make out. And the empty space with no lines come from the tank. Less I'm missing something.
 01-31-2019, 02:11 AM