When you click on links to various merchants on this site and make a purchase, this can result in this site earning a commission. Affiliate programs and affiliations include, but are not limited to, the eBay Partner Network.
i have twisted and thereby ruined the main return line during removal of the ‘over the IRS’ line, where I wanted to change the rubber hose section.
Am I right when I conclude, that it will be an engine out job to replace it in one piece ?
It goes under the floor, then up along the exhaust behind a heat shield, and then it continues up to the engine bay behind 2 other heat shields. It looks like the shields need to be removed to change the line, and they do not look removable with engine mounted ?
Where would you place the inevitable joint ?
The fuel tube from engine bay until around rear edge of the doors looks very clean and thereby good to use again.
The good part of this: I found a pin hole in the small steel tube section from rubber section to boot, so my boot fuel smell just might go away with new lines...
replacing fuel lines with aluminum ,light weight, plus 13MM inlet, 12mm return!
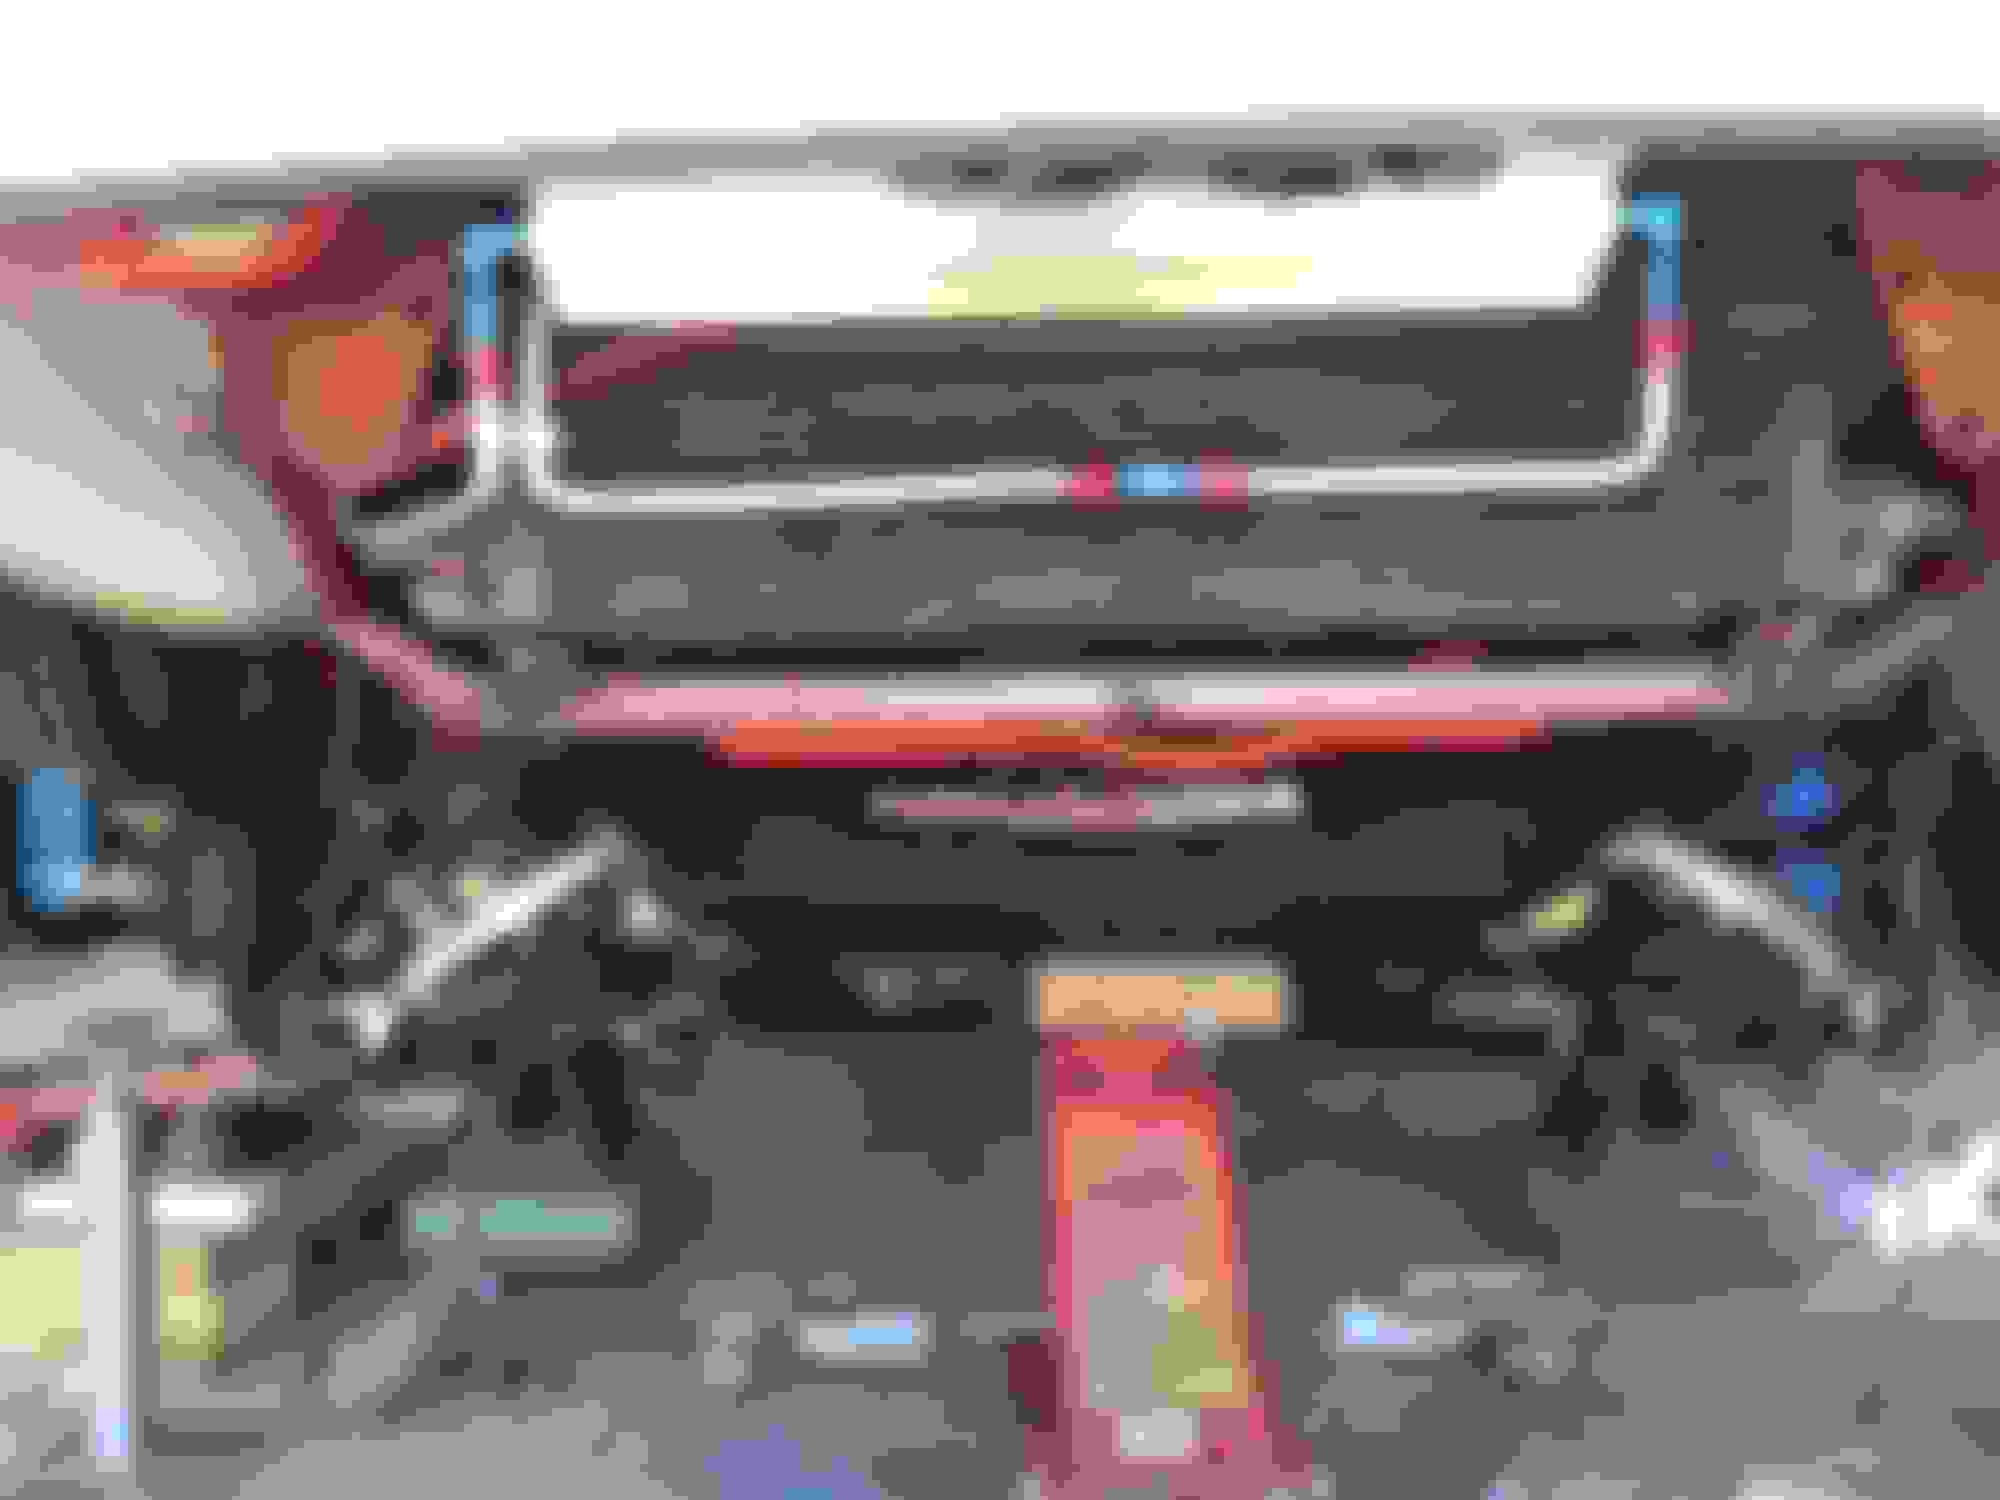
Nice Ron. Engine is out as expected...
it looks like you’re following the seam along the chassis further forward than original avoiding to place the line right next to exhaust. How is your routing from the stage on the photo and up to fuel rail ?
Leo
New lines are still available, I think. The return line is in two parts: Engine bay to rear wheel arch (solid line ending in compression joint). Over the rear axle to boot rear corner (solid and flexible, compression joint each end). If the engine bay to rear axle is good until near the rear axle join, then I suggest you cut it there and do the join with a brass fuel/brake-fluid type compression connector to another piece of steel pipe. Make the join to the over rear axle pipe by re-using the compression fitting on the mangled end of the cut off bit.
If you must remove the entire engine bay to rear axle piece, then proceed as follows:
tie a long piece of string/poly cord to the engine bay end of the pipe
carefully pull through the old pipe and the string, leaving plenty of string in the engine bay
attach string to new pipe and jiggle it through - it WILL go through but has to go through two holes in the body so takes a bit of doing. This does not, repeat not need the engine out to be done.
The slight perforation in the over-axle pipe is pretty common, as the pipe gets a blasting from stones, grit etc. It is a good plan to encase the steel part behind the wheel with a piece of flexible pipe cut longitudinally, then slipped over and cable-tied to the steel. This protects the steel from abrasion.
Thanks Greg. That's very good news, but I think I will stick with the cut and join strategy I thought was the only way forward without lifting out the engine.
I have bought Cunifer 3/8" line and will be reusing as much of the hardware as possible and of course make a proper support on each side of the additional joint.
I have just broken the RH feed tube at the joint nut where it comes out from the boot as I tried to get the nut free.
Remaining wall thickness was paperthin, and I think it's more from corrosion than abbrasion as it was thin all way round.
My car is 42 years old and has always been in the cold and wet Northern Germany and Denmark. It has been garaged the last 30 years, but it does get used in the wet now and then...
Nice Ron. Engine is out as expected...
it looks like you’re following the seam along the chassis further forward than original avoiding to place the line right next to exhaust. How is your routing from the stage on the photo and up to fuel rail ?
Correct me if I’m wrong, the over axle fuel return is similar to the supply on the other side. There is a joint and I see no reason why you would have to take the engine out. You may depending on the area you’ve twisted things have to put a joint in but that’s it. Your local hydraulic pipe repair shop will most likely help you out at reasonable cost. Hope this helps.
Correct me if I’m wrong, the over axle fuel return is similar to the supply on the other side. There is a joint and I see no reason why you would have to take the engine out. You may depending on the area you’ve twisted things have to put a joint in but that’s it. Your local hydraulic pipe repair shop will most likely help you out at reasonable cost. Hope this helps.
The damaged part is the rear end of the long tube starting in engine bay and ending in front of the IRS, where it connects to the over axle return line. The over axle part is going to be replaced as well, but that is due to corrosion.
Use AN6 fittings. Cut the pipe to get rid of the damaged bit. You can either join a new bit of hard pipe or use flexible braided hose.
Here I have joined the hard lines with AN6 fittings to make getting the pipe in and out possible without having to remove the radiator. This is 3/8 aluminium fuel/oil pipe for the trans cooler
Thanks
AN6 looks like the solution. My local car stuff shop only had them in stock with AN6 in one end and some tube thread in the other end. I would like to find something like the one you have used to join the lines under the cooler.
No experience with AN6: will they work with a semi hard copper tube ? (CuNiFer is what I have bought)
pic of my under car front, cooler with AN6 fittings , they are very good aircraft quality ,as warrjon says , also the full injector lines some AN8 size!
 02-10-2019, 08:40 AM