Going to do the steering rack bushings... will this work?
#21
 04-22-2018, 12:53 PM

Veteran Member
Thanks, next time I may ditch them.
I managed to shove it in there and get it all lined up using a round drift and lots of grunting. Quite accomplished feeling! Really snug at all three mounting points. So much better than it was. I could move the rack by hand. Now it�s rock solid.
Can�t wait to go for a drive! But first these sway bar bushes...
#22
04-22-2018, 07:33 PM

I just replaced my steering rack bushes with neoprene two-piece bushes. I did mine in-place. I�d assembled a bearing removal tool using threaded rod, a slightly less than bushing sized socket and an socket larger than the bush to press it into.
Once I got in there reality and obstructions vetoed my plan. I puzzled it over for a bit and then solved it in shade-tree mechanic style.
First I drove the center sleeve out with a round drift. On two of mine I could just press it out with my fingers they were so badly worn. Then, using a cold chisel on the small exposed edge of the outer sleeve, I folded the sleeve inward at one point along its circumference, then again 90 degrees away, then drove the sleeve again between the two folds and the sleeve just pops out the back side. Easy peasy and not a scuff on the housing. Took about two minutes per.
I have a question about the shims I hope someone can answer for me.
There is a large shim/ 3 sided box frame that rides inside the double bush side mounting. What is the purpose of this? My new bushes are a mild force fit in the housings without any shims and I can�t imagine how to keep/get this box shim in place while installing with the new bushes. Do I have to sort this or can I put the box shim in my �stuff I�ll keep but don�t need� crate?
#23
04-23-2018, 03:21 PM
Veteran Member
Well let me be completely honest. It would need to be a lot of beer and a heavy money bag! This chore was doable, but certainly tedious. Everything is so tightly packed and there are so many obstacles in between you and the things you need to disconnect. Once the rack was down it was easy to install the new bushes, but everything was just as tricky to install as it was to remove. The column u-joint was particularly tricky.
Satisfying as can be once done though! I'll have to re-learn driving her, its so different. Tight, smooth and steady steering even over uneven surfaces. I only wish I'd done this repair months ago rather than stressing and giving the wheel a white-knuckle death grip.
Satisfying as can be once done though! I'll have to re-learn driving her, its so different. Tight, smooth and steady steering even over uneven surfaces. I only wish I'd done this repair months ago rather than stressing and giving the wheel a white-knuckle death grip.
#24
04-23-2018, 04:08 PM
Well let me be completely honest. It would need to be a lot of beer and a heavy money bag! This chore was doable, but certainly tedious. Everything is so tightly packed and there are so many obstacles in between you and the things you need to disconnect. Once the rack was down it was easy to install the new bushes, but everything was just as tricky to install as it was to remove. The column u-joint was particularly tricky.
Satisfying as can be once done though! I'll have to re-learn driving her, its so different. Tight, smooth and steady steering even over uneven surfaces. I only wish I'd done this repair months ago rather than stressing and giving the wheel a white-knuckle death grip.
Satisfying as can be once done though! I'll have to re-learn driving her, its so different. Tight, smooth and steady steering even over uneven surfaces. I only wish I'd done this repair months ago rather than stressing and giving the wheel a white-knuckle death grip.
#25
04-24-2018, 12:39 AM

Veteran Member
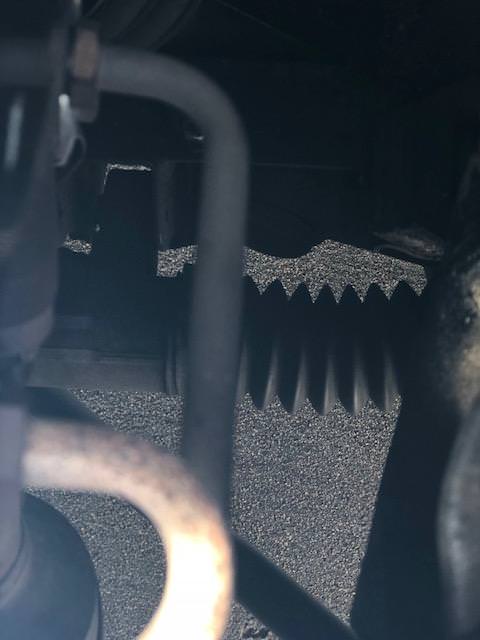
Is the gap on the other side of the bushing in the picture normal? I can't see how that helps at all... on my car I smashed 4 copper washers into those gaps and wrapped a clamp around them until I can get superflex bushings and time to replace them properly.
Anyways I swear it stiffened up the steering.
Anyways I swear it stiffened up the steering.
#26
04-24-2018, 07:57 AM


Veteran Member
Join Date: Mar 2008
Location: Pacific Northwest USA
Posts: 24,920
Received 10,979 Likes
on
7,211 Posts
Not normal.
Jaguar used washers to take up the gap (#3) in illustration below
https://www.jaguarclassicparts.com/u...ings-5-3-litre
All the aftermarket bushing kits I've seen are designed so that separate washers are not needed
Cheers
DD
#27
04-24-2018, 03:47 PM
Veteran Member
Is the gap on the other side of the bushing in the picture normal? I can't see how that helps at all... on my car I smashed 4 copper washers into those gaps and wrapped a clamp around them until I can get superflex bushings and time to replace them properly.
Anyways I swear it stiffened up the steering.
Anyways I swear it stiffened up the steering.
All three bushes that I received were identical. I'm not sure why this one mounting location is slightly larger than the other two bush mounts.
#29
04-26-2018, 03:12 AM
I think I'm just going to buy a rebuilt rack and replace it and bushings. From reading and researching I think I have a bigger problem than just bushings. Once going down the road the steering wheel has to be rotated what feels like inches to straighten the car out. Usually it finally hits a stronger resistance once the wheel is turned to the right a bit. If the car starts drifting right though... then I have to turn the wheel a couple inches to the left till it hits resistance and can be straightened out. It's like a couple inches of a zero resistance zone in the steering. Which makes for an awful driving experience. With car not moving and moving the steering wheel back and forth it feels linear.. I'd hate to put all the work in and find out it's the steering gear and needs to be redone. Or is this the jag bushing syndrome?
#30
04-26-2018, 04:08 AM

Veteran Member
As has been repeatedly mentioned, you have the classic symptoms of rack bush failure. There is nothing else in the system that can cause it. The rack body, once the OEM bushes fail, can move almost half an inch, extreme to extreme, before the actual steering rods start push the steering arms. The Great Palm describes this very clearly. Fix the bushes and be thankful! There are lots of more difficult things that will require your attention in due course!
#31
04-26-2018, 08:04 AM
Veteran Member
Join Date: Mar 2008
Location: Pacific Northwest USA
Posts: 24,920
Received 10,979 Likes
on
7,211 Posts

#32
04-26-2018, 09:00 AM

Senior Member
Just my 2 cents worth. I changed my rack bushings along with all the others. I dropped the entire front suspension and went through it over the winter. Thats not much harder than replacing them under the car. Anyway I found it easier to burn the rubber out of the old bushings with a propane torch. Then remove the outer sleeve by cutting through with a hacksaw blade and small chisel and punch.
#33
04-26-2018, 03:43 PM
As has been repeatedly mentioned, you have the classic symptoms of rack bush failure. There is nothing else in the system that can cause it. The rack body, once the OEM bushes fail, can move almost half an inch, extreme to extreme, before the actual steering rods start push the steering arms. The Great Palm describes this very clearly. Fix the bushes and be thankful! There are lots of more difficult things that will require your attention in due course!
#34
04-27-2018, 05:51 AM
Veteran Member
Once going down the road the steering wheel has to be rotated what feels like inches to straighten the car out. Usually it finally hits a stronger resistance once the wheel is turned to the right a bit. If the car starts drifting right though... then I have to turn the wheel a couple inches to the left till it hits resistance and can be straightened out.
I consider this repair to belong with fuel hoses and dizzy lubrication on the do-it-now-before-it�s-too-late List.
#35
04-27-2018, 06:46 AM
Veteran Member
Not sure if the correct size will be in that kit - but you can improvise with sockets if you had to.
Also you'll want to check the housing where the bushing sits in. I've seen many in the past there they crack at the bottom. Make sure these aren't cracked. Used to work at an independent for a few years, ended up making braces to weld in for added strength.
Also you'll want to check the housing where the bushing sits in. I've seen many in the past there they crack at the bottom. Make sure these aren't cracked. Used to work at an independent for a few years, ended up making braces to weld in for added strength.
#36
04-27-2018, 06:53 AM
Veteran Member
I pulled my rack completely (3 times and not a lot O fun) the last time I did what's described below. But, I think, of you remove oil filter, undo the steering column knuckle from rack, using the tie rods to hold and support the weight of the rack, without taking it all down, what I did below can be done with the rack pulled as low as you can get it with hoses still connected. If not, certainly can be done with hoses disconnected... I hate the hoses!
For mine,,, don't make fun of me, I pushed a large screwdriver thru the rubber of the bushing. Applied some heat, pushed out the metal center. Ripped it out, old bushes were going in the bin. Put a hacksaw blade into the cavity, went in the direction of the THICKEST part of the bush housing or cylinder in the rack (towards the rack body if i recall)and slowly and level-ly ran the HAND saw thru the bushing case/shell until thru. It popped right out with only the smallest scratch in the rack frame. Later polished it out with some soft steel wool.
This gave me approximately a 16th extra inch. Could actually hear it when the bush casing gave way to give me the extra space, saw got a little hung up, pinched. A 16th, the width of the saw, is a BIG 16th in that situation....
I'm risky like that!
whatever ya do,,, good luck.
Last edited by JayJagJay; 04-27-2018 at 07:09 AM.
#37
04-27-2018, 06:16 PM

Senior Member
Well I just joined this club today. I was contemplating an alignment because I have some drift on the road and some uneven braking at times. This afternoon I popped the hood and started down the right side of the engine where I have a perfect view of the rack bushing from above on the 6cyl and then had the wife move the steering wheel with the engine on. Well, the entire rack slides a good 1 1/2" left to right over a shiny metal space where I presume a rubber bush should be. So thanks for this thread, I'll be following it.
#38
04-27-2018, 06:23 PM
Veteran Member
Hmm. I'd be interested to hear what others say, but and inch and a half is a LOT. My experience is that the space between the rack itself and the cradle (the framework that holds the rack in place on the subframe) shouldn't be as big or roomy as all that. Even with a completely worn bush... Shoot, missing even. For me, it was hard to force the old school black rubber bushes into the rack subframe cradles (sorry I don't know the right word) and the bushes are maybe a little less or more than a quarter inch on either side.
interested in what other folks think about that.
interested in what other folks think about that.