
Guide to replacing Rochester valve 1992-94
#1
 04-15-2018, 09:03 PM


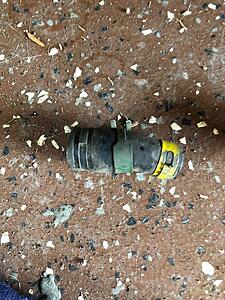
Did this job today replacing the Rochester valve with the inexpensive AC Delco version of the part. The Delco number at Napa is 214-552 at the price is around $30. You will also need about four inches of 3/8" fuel hose to complete the connections.
I had a terrible fuel smell in my cabin, more prominent with the top down for some reason and a large amount of vacuum in my gas tank when I would remove the cap. This lead me to a stuck valve.
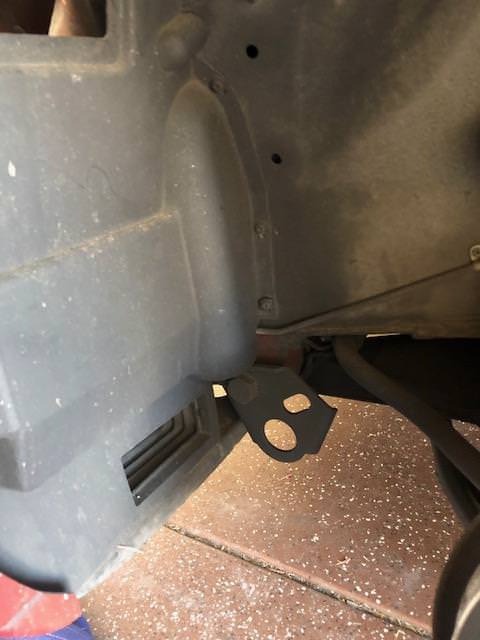
1. Remove drivers side front tire
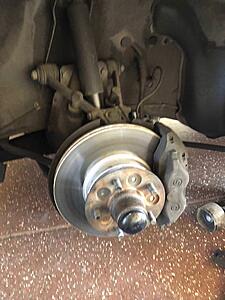
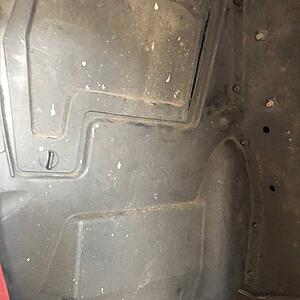
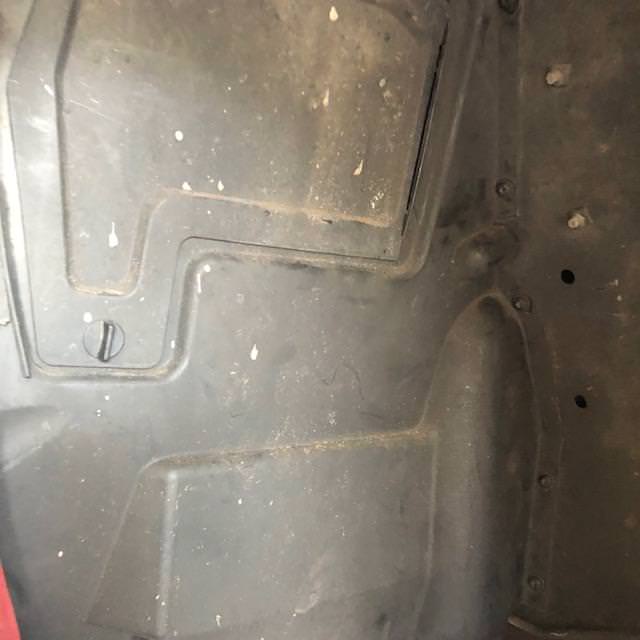
2. Remove upper access/inspection panel
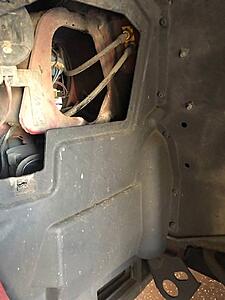
3. Remove the five Phillips head screws on the inner splash panel, the two on the bottom below the brake cooling duct; the spruce pin on the inner fender lip, and the plastic pin securing the brake cooling duct to the splash panel.

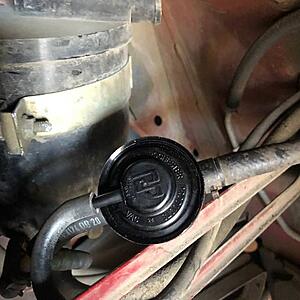
4. You now have access to the valve which you can see Jaguar installed by using reducers on both the tank side and the canister side. Why? I have no idea.
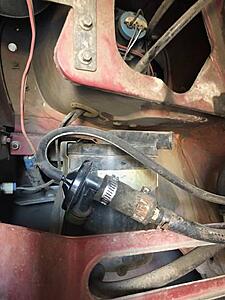
5. Disconnect the valve from the tank side rubber reducer. Be careful here, I had fuel backed up in my line and it spilled on the floor, so I wouldn't be having a smoke while doing this.
6. Disconnect and remove the canister side reducer. We wont be reusing this.
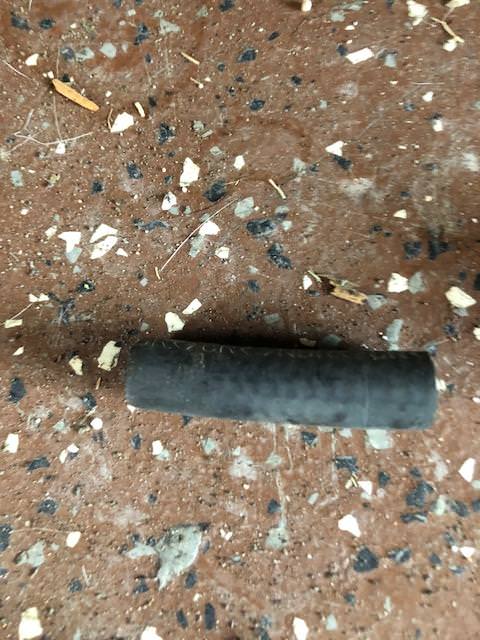
7. Cut a piece of 3/8th fuel hose (you can get this from any parts store) about 4 inches long.
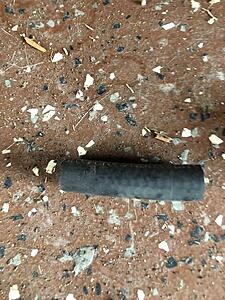
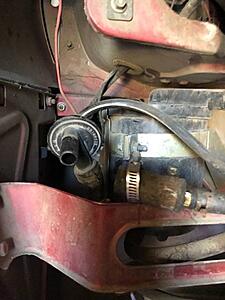
8. Install the 3/8th piece you cut between the canister and the valve to the side marked "canister" on the valve. Install the tank side of the valve directly to the line you removed the large reducer from and connect the vacuum line.
9. Replace the splash guard and inspection panel and your done.
No more fuel smell for me, and the "woosh" from my fuel cap is gone. I do suspect that my canister is about done for though. I can pass air through it, and my lines were free of charcoal but I noticed it rattles a bit when you tap it.
I had a terrible fuel smell in my cabin, more prominent with the top down for some reason and a large amount of vacuum in my gas tank when I would remove the cap. This lead me to a stuck valve.
1. Remove drivers side front tire

2. Remove upper access/inspection panel

3. Remove the five Phillips head screws on the inner splash panel, the two on the bottom below the brake cooling duct; the spruce pin on the inner fender lip, and the plastic pin securing the brake cooling duct to the splash panel.
4. You now have access to the valve which you can see Jaguar installed by using reducers on both the tank side and the canister side. Why? I have no idea.

5. Disconnect the valve from the tank side rubber reducer. Be careful here, I had fuel backed up in my line and it spilled on the floor, so I wouldn't be having a smoke while doing this.

6. Disconnect and remove the canister side reducer. We wont be reusing this.

7. Cut a piece of 3/8th fuel hose (you can get this from any parts store) about 4 inches long.
8. Install the 3/8th piece you cut between the canister and the valve to the side marked "canister" on the valve. Install the tank side of the valve directly to the line you removed the large reducer from and connect the vacuum line.

9. Replace the splash guard and inspection panel and your done.
No more fuel smell for me, and the "woosh" from my fuel cap is gone. I do suspect that my canister is about done for though. I can pass air through it, and my lines were free of charcoal but I noticed it rattles a bit when you tap it.
The following 6 users liked this post by Time-Pilot:
92/93 XJS (09-28-2021),
Brewtech (05-11-2021),
Dleit53 (05-24-2021),
Doug (04-15-2018),
Greg in France (04-16-2018),
and 1 others liked this post.
#2
05-10-2021, 11:00 AM

Thanks for the information post, I just wanted to add one more thing�.
Take apart, and inspect first� It could save you thirty five dollars.
it could be a severed vacuum hose instead of the Rochester Valve.
live and learn.
Take apart, and inspect first� It could save you thirty five dollars.
it could be a severed vacuum hose instead of the Rochester Valve.
live and learn.
Did this job today replacing the Rochester valve with the inexpensive AC Delco version of the part. The Delco number at Napa is 214-552 at the price is around $30. You will also need about four inches of 3/8" fuel hose to complete the connections.
I had a terrible fuel smell in my cabin, more prominent with the top down for some reason and a large amount of vacuum in my gas tank when I would remove the cap. This lead me to a stuck valve.
1. Remove drivers side front tire

2. Remove upper access/inspection panel

3. Remove the five Phillips head screws on the inner splash panel, the two on the bottom below the brake cooling duct; the spruce pin on the inner fender lip, and the plastic pin securing the brake cooling duct to the splash panel.

4. You now have access to the valve which you can see Jaguar installed by using reducers on both the tank side and the canister side. Why? I have no idea.

5. Disconnect the valve from the tank side rubber reducer. Be careful here, I had fuel backed up in my line and it spilled on the floor, so I wouldn't be having a smoke while doing this.

6. Disconnect and remove the canister side reducer. We wont be reusing this.

7. Cut a piece of 3/8th fuel hose (you can get this from any parts store) about 4 inches long.

8. Install the 3/8th piece you cut between the canister and the valve to the side marked "canister" on the valve. Install the tank side of the valve directly to the line you removed the large reducer from and connect the vacuum line.

9. Replace the splash guard and inspection panel and your done.

No more fuel smell for me, and the "woosh" from my fuel cap is gone. I do suspect that my canister is about done for though. I can pass air through it, and my lines were free of charcoal but I noticed it rattles a bit when you tap it.
I had a terrible fuel smell in my cabin, more prominent with the top down for some reason and a large amount of vacuum in my gas tank when I would remove the cap. This lead me to a stuck valve.
1. Remove drivers side front tire
2. Remove upper access/inspection panel
3. Remove the five Phillips head screws on the inner splash panel, the two on the bottom below the brake cooling duct; the spruce pin on the inner fender lip, and the plastic pin securing the brake cooling duct to the splash panel.
4. You now have access to the valve which you can see Jaguar installed by using reducers on both the tank side and the canister side. Why? I have no idea.
5. Disconnect the valve from the tank side rubber reducer. Be careful here, I had fuel backed up in my line and it spilled on the floor, so I wouldn't be having a smoke while doing this.
6. Disconnect and remove the canister side reducer. We wont be reusing this.
7. Cut a piece of 3/8th fuel hose (you can get this from any parts store) about 4 inches long.
8. Install the 3/8th piece you cut between the canister and the valve to the side marked "canister" on the valve. Install the tank side of the valve directly to the line you removed the large reducer from and connect the vacuum line.
9. Replace the splash guard and inspection panel and your done.
No more fuel smell for me, and the "woosh" from my fuel cap is gone. I do suspect that my canister is about done for though. I can pass air through it, and my lines were free of charcoal but I noticed it rattles a bit when you tap it.
#3
05-10-2021, 12:00 PM


Veteran Member

#5
05-18-2021, 06:47 AM
Veteran Member
#6
05-31-2021, 01:01 PM
Veteran Member
Can confirm. The valve should be rotated. The hose connecting the charcoal can should be tied to the "TANK" side of the AC Delco valve, and the hose coming from the gas tank should be connected to the "CAN" side of the valve. That top part of the AC Delco valve, the one that has the vacuum line port on it, rotates, so you can easily switch it around without having to monkey around with the hoses in the car.
#7
09-25-2021, 12:11 PM
Veteran Member
I have to rescind my last post. I�m not sure if the valves are reversed or not. What I did to my valve was wrong and led to fuel smells in my trunk.
Heres the definitive way to test which way is which.
Blow through both of the larger ends. One side will let you blow through after apply some
pressure. That is the side that attaches to the hose from the gas tank.
The other end will allow you to blow a tiny amount of air under heavy pressure, but significantly less than the other side. That end goes to the hose with the charcoal canister.
The 1/4 hose attaches to the small end.
Dont know how I botched it, but thought I would share.
The following users liked this post:
Jsquared (02-13-2024)

Thread
Thread Starter
Forum
Replies
Last Post
Currently Active Users Viewing This Thread: 1 (0 members and 1 guests)