When you click on links to various merchants on this site and make a purchase, this can result in this site earning a commission. Affiliate programs and affiliations include, but are not limited to, the eBay Partner Network.
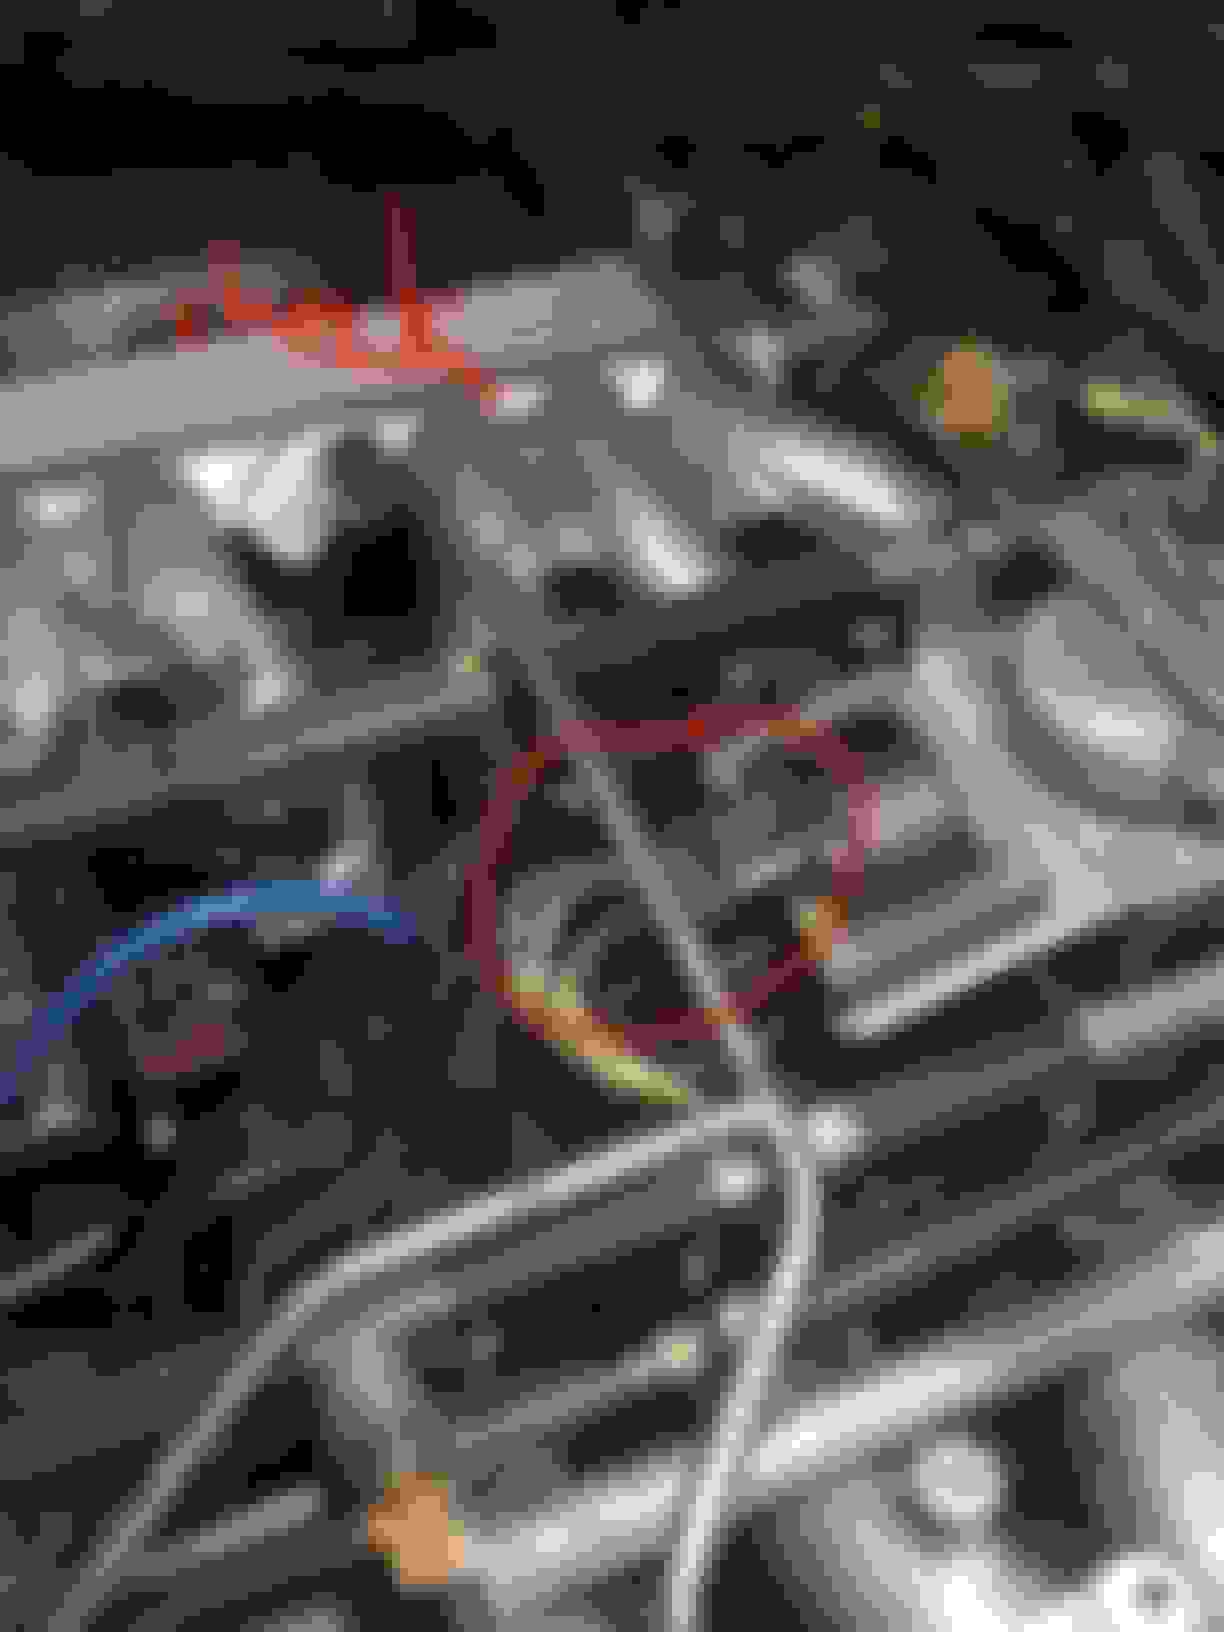
Okay so last time I ran it, the car died on me while pulling into my driveway, I was able to jump the car and get it running again, I probably let it idle for a good 5 minutes and then parked it in the garage. later that night I wiped down the engine bay being very careful with a wet rag. Next day I had someone come take a look at the car to help me work on the fuel issue, tried starting the car and it wouldn't start. So far I have tried jumping and also hooking the battery from my other car directly and it still wouldn't start. Took off the cruise control to check HT spark plug wires and one wire on 2B is damaged. Tried taking spark plug out but they are seized on there, waiting on getting some WD40 to soak them and hopefully get them out. Checked the set of 3 wires going into each ignition coil and they get power/signal. I can hear the fuel pump working. Pulled the boot connector going from the ignition coil to the distributor and stuck a screwdriver in there to see if I could get spark, didn't see anything. Is there any fuses that I can check that would cause a no start? I would like to get the car started before I start renewing the engine with new parts. Thank you. I added some photos to help follow along
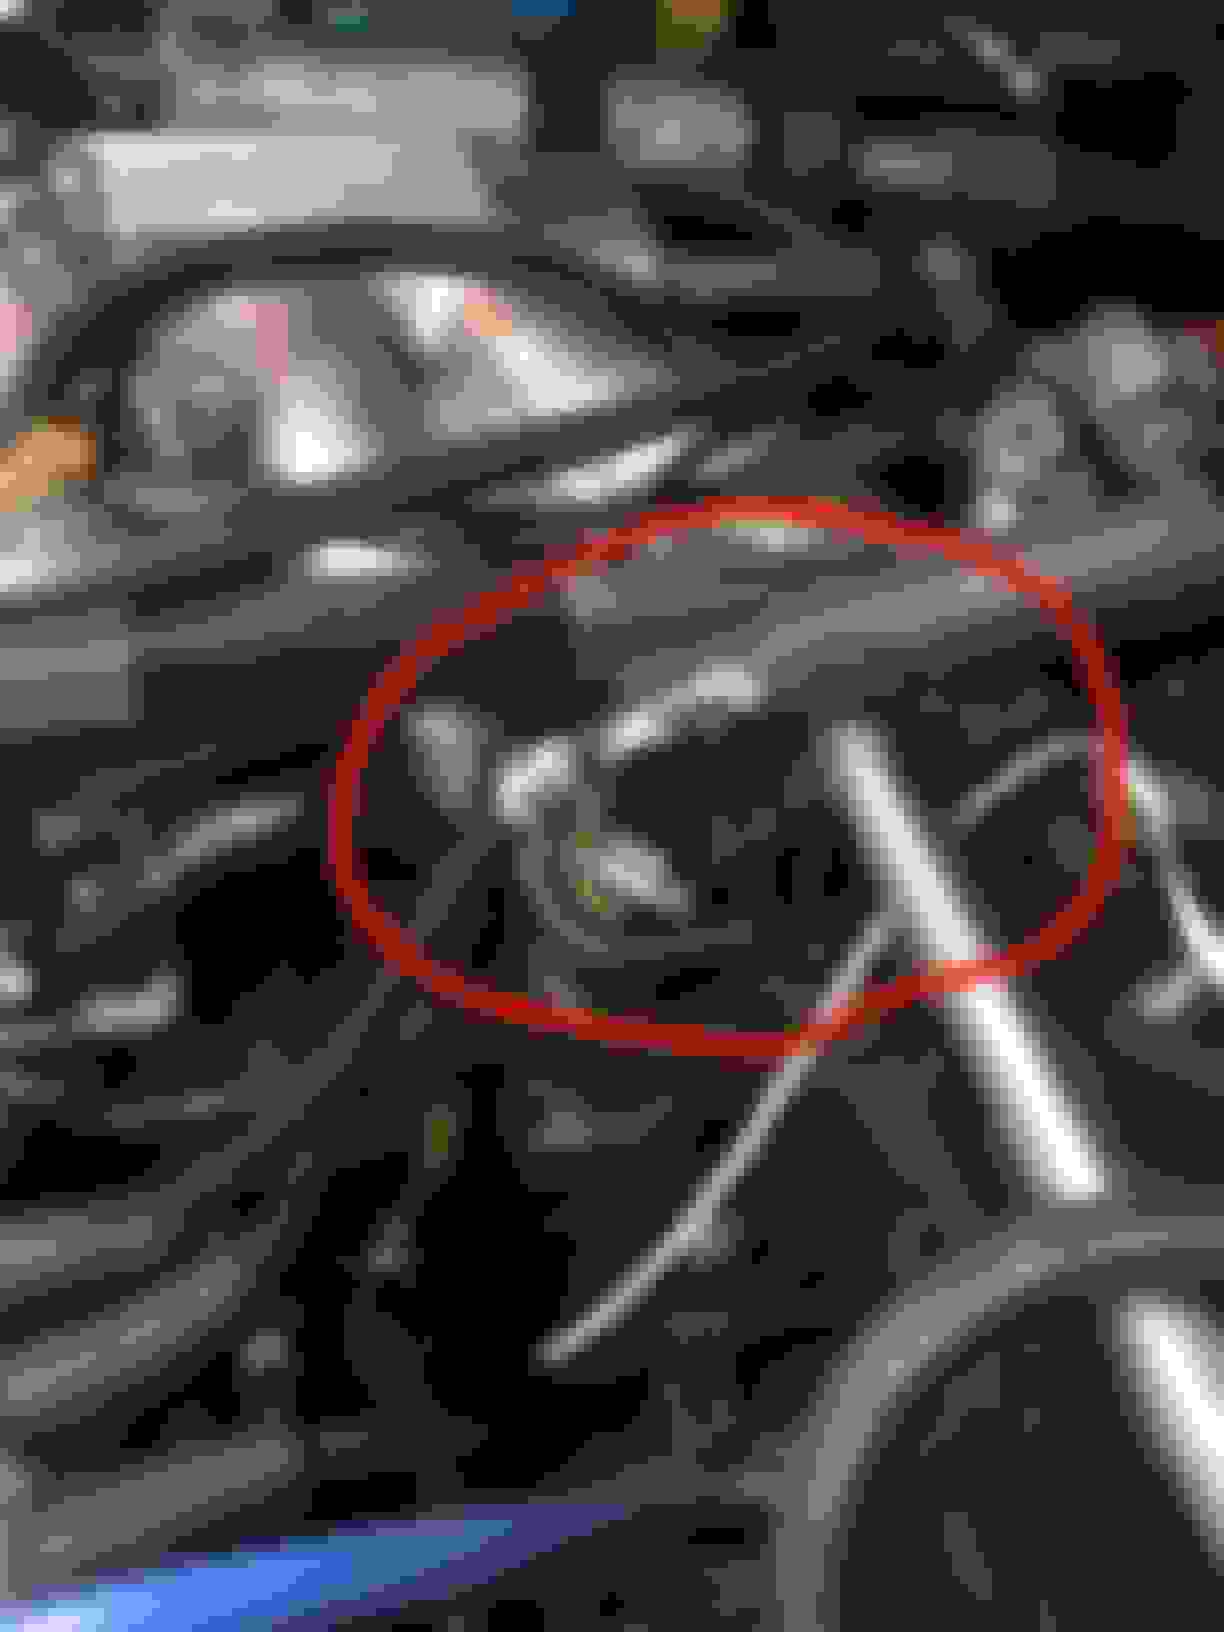
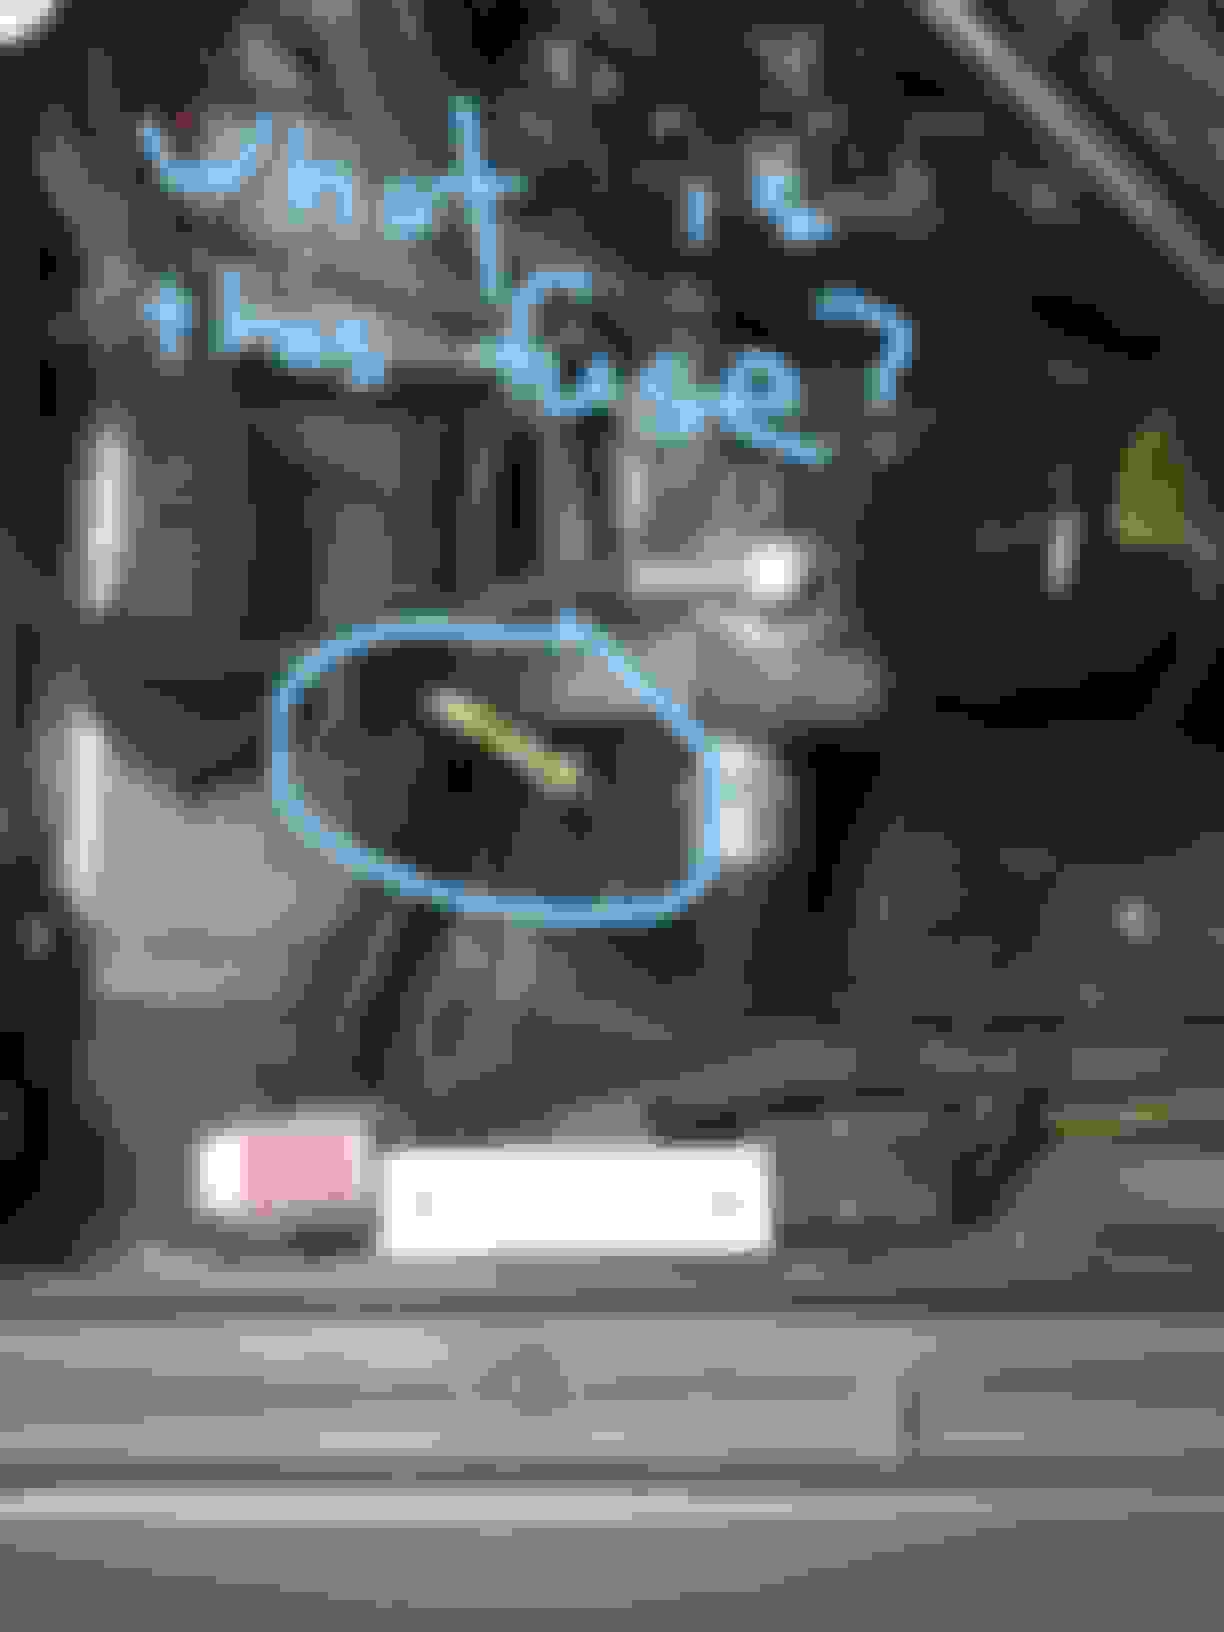
Checked these wires, all had power, signal with the ignition on Checked these wires, all had power, signal with the ignition on Where can I purchase new connectors for these, to redo them. Don't know if that broken piece at the end is affecting connection. Damage I saw for Spark plug wire Engine Bay Re-did the ski-slope in some fabric, some side projects. What is this fuse? Didn't get continuity on it when checking the fuse inside.
Not trying to blow my horn, well maybe just a little. Check out my latest blog posts. I have three installments on changing the plugs on my XJS. You said that you have jumped the battery to try to start. Is the starter spinning the motor? I might have missed you saying that. Find any old loose spark plug and pull an easily reachable plug lead. Connect the plug to the lead and lay it on the motor. Crank and see if there's a good spark at the gap. If there's a good spark than it probably isn't essential to pull the plugs at this point. In my case I probably didn't have to change the plugs at all as it was all due to the CTS, which had failed. Good luck.
Okay so last time I ran it, the car died on me while pulling into my driveway, I was able to jump the car and get it running again, I probably let it idle for a good 5 minutes and then parked it in the garage. later that night I wiped down the engine bay being very careful with a wet rag. Next day I had someone come take a look at the car to help me work on the fuel issue, tried starting the car and it wouldn't start. So far I have tried jumping and also hooking the battery from my other car directly and it still wouldn't start. Took off the cruise control to check HT spark plug wires and one wire on 2B is damaged. Tried taking spark plug out but they are seized on there, waiting on getting some WD40 to soak them and hopefully get them out. Checked the set of 3 wires going into each ignition coil and they get power/signal. I can hear the fuel pump working. Pulled the boot connector going from the ignition coil to the distributor and stuck a screwdriver in there to see if I could get spark, didn't see anything. Is there any fuses that I can check that would cause a no start? I would like to get the car started before I start renewing the engine with new parts. Thank you. I added some photos to help follow along
Checked these wires, all had power, signal with the ignition on Checked these wires, all had power, signal with the ignition on Where can I purchase new connectors for these, to redo them. Don't know if that broken piece at the end is affecting connection. Damage I saw for Spark plug wire Engine Bay Re-did the ski-slope in some fabric, some side projects. What is this fuse? Didn't get continuity on it when checking the fuse inside.
It's for the AC System and should have (I think) a 10amp fuse...
Okay so last time I ran it, the car died on me while pulling into my driveway, I was able to jump the car and get it running again, I probably let it idle for a good 5 minutes and then parked it in the garage. later that night I wiped down the engine bay being very careful with a wet rag. Next day I had someone come take a look at the car to help me work on the fuel issue, tried starting the car and it wouldn't start. So far I have tried jumping and also hooking the battery from my other car directly and it still wouldn't start. Took off the cruise control to check HT spark plug wires and one wire on 2B is damaged. Tried taking spark plug out but they are seized on there, waiting on getting some WD40 to soak them and hopefully get them out. Checked the set of 3 wires going into each ignition coil and they get power/signal. I can hear the fuel pump working. Pulled the boot connector going from the ignition coil to the distributor and stuck a screwdriver in there to see if I could get spark, didn't see anything. Is there any fuses that I can check that would cause a no start? I would like to get the car started before I start renewing the engine with new parts. Thank you. I added some photos to help follow along
Checked these wires, all had power, signal with the ignition on Checked these wires, all had power, signal with the ignition on Where can I purchase new connectors for these, to redo them. Don't know if that broken piece at the end is affecting connection. Damage I saw for Spark plug wire Engine Bay Re-did the ski-slope in some fabric, some side projects. What is this fuse? Didn't get continuity on it when checking the fuse inside.
For the spark plug wire. It's TOAST... Replace it for now with any wire you can find that will make due and fit. There are bigger fish to fry... Get her going ...
For the coil wires (what I would do and have done) until you get the proper, propers, go on eBay and search "Jaguar XJS salvage/parts". As you find parts cars scroll down half way through the page and write a message asking the SELLER if they have XY and Z part. Copy and paste the first message and go back and paste it into a NEW message to every seller you come across.
Check the contacts of the the spark/ignition amplifiers (see photo below) it on the front of the engine bay... Unscrew and reseat. The seating is essential - heat sink. Check, clean and reseat all of the GROUND CONNECTIONS at the front two 2 corners of the engine bay and THE TWO at the fire wall. And like another member said remove ONE spark plug and plug the plug into the spark plug wire and test until you find your sparking problem...
Remove the distributor cap and inspect... Clean or replace rotor --- mine disintegrated when I grabbed it. You DON'T need to remove all wires to do this.
To splice in new coil wires (and follow the lines - do them one by one) I used a product like this to splice wires for my XK8 coils just yesterday. A heat gun might be in your future anyways, so spring now. A heat gun is what is used to run the solder in these connectors. Makes like super easy.
Just going back to my earliest post - I realized EVERYTHING in the V need to come out and slowly and carefully replaced. Completely replacing thing that needed complete replacing.
im guessing unburned fuel is pouring into the engine on one side. I could be (and often am) wrong...
you'll find these, 2 of them, on the shelf over the radiator. They're important. Check wiring, unplug and replug.
Not trying to blow my horn, well maybe just a little. Check out my latest blog posts. I have three installments on changing the plugs on my XJS. You said that you have jumped the battery to try to start. Is the starter spinning the motor? I might have missed you saying that. Find any old loose spark plug and pull an easily reachable plug lead. Connect the plug to the lead and lay it on the motor. Crank and see if there's a good spark at the gap. If there's a good spark than it probably isn't essential to pull the plugs at this point. In my case I probably didn't have to change the plugs at all as it was all due to the CTS, which had failed. Good luck.
When I jump and try to start the car the mechanical fan (big fan RH side) spins the engine. Im not very good at automotive stuff excuse my lack of knowledge, but with that fan turning im assuming the starter is working, please correct me if im wrong. I will check out your blog thank you.
For the spark plug wire. It's TOAST... Replace it for now with any wire you can find that will make due and fit. There are bigger fish to fry... Get her going ...
For the coil wires (what I would do and have done) until you get the proper, propers, go on eBay and search "Jaguar XJS salvage/parts". As you find parts cars scroll down half way through the page and write a message asking the SELLER if they have XY and Z part. Copy and paste the first message and go back and paste it into a NEW message to every seller you come across.
Do you know where to purchase the proper male connection? I would rather buy it brand new now if they are available
Originally Posted by JayJagJay
Check the contacts of the the spark/ignition amplifiers (see photo below) it on the front of the engine bay... Unscrew and reseat. The seating is essential - heat sink. Check, clean and reseat all of the GROUND CONNECTIONS at the front two 2 corners of the engine bay and THE TWO at the fire wall. And like another member said remove ONE spark plug and plug the plug into the spark plug wire and test until you find your sparking problem...
I have tried switching the two ignition amplifiers, car still didn't start. I put them back in there original positions for now. The compound to transfer heat, is there a product you recommend? The compound currently on there originally is all dried up. Also how do you recommend cleaning electrical connectors/ground points? I was going to buy some electrical contact cleaner and spray it. Anything else other than that?
Originally Posted by JayJagJay
Remove the distributor cap and inspect... Clean or replace rotor --- mine disintegrated when I grabbed it. You DON'T need to remove all wires to do this.
I'm hesitant to do this, because I have never done it before and don't want to mess anything up. What should I watch out for? I know I read something about messing up the timing? Please advise. Thanks!
Do you know where to purchase the proper male connection? I would rather buy it brand new now if they are available
I have tried switching the two ignition amplifiers, car still didn't start. I put them back in there original positions for now. The compound to transfer heat, is there a product you recommend? The compound currently on there originally is all dried up. Also how do you recommend cleaning electrical connectors/ground points? I was going to buy some electrical contact cleaner and spray it. Anything else other than that?
I'm hesitant to do this, because I have never done it before and don't want to mess anything up. What should I watch out for? I know I read something about messing up the timing? Please advise. Thanks!
I am trying to track down a set of the coil wires and plugs for you now. I should hear from the guy tomorrow. He says he has them on a scrapper... In the mean time, use the internet to see what you can track down. I looked briefly and couldn't find anything BRAND NEW. I'll look again.
Do the basic tests as described to check for spark.
Sand paper or a Dremel tool to clean up ALL grounds and any electrical connections for that matter.
If you can and want to buy a whole set of plug wires that sounds awesome. Me,,, at the time in the early days,,, having everything perfect was not as important as seeing what I had and figuring out whether or not continuing to buy more parts made sense... I wanted to work out the bugs, get her running and then adding slooooowly to the process.
If it's a Marelli ignition I think you will find 2 Phillips screws at the base of the distributor... You will not mess up the timing unless you do something crazy. Leave the wires and plugs in place and see what's going on under the distributor.
To me it looks like you might have to pay attention to getting power to the coils. Those wires, the plugs going to the coils look pretty rough.
I don't know enough about the ignition system beyond the larger and major bits and pieces to speak expertly to it. But the guys here are great and will chime in...
If you drove it 2hours,,, then it died,,, you're in an ok place. Just a good list of issues to begin looking into.
And,,, if the fan is turning and it's a mechanical belt driven fan, that means that the starter is turning the ENTIRE engine over from back to front. The fan is attached to the main crank shaft by means of a belt and pully wheel at the front of the engine. That's good.
Take your time and buckle in. Read the "HOW TO START A V12" by Grant Francis in the sticky TOP section of the forum page... Big help there.
Great site! Yup, I think those are the ones... Get em,,, or send an email to the folks there to confirm...
I see a few things her I NEED,,, lol. 2 years later. This is a sloooow process,,, even IF money grows on trees in your neck of the woods. Very few parts will be found at AutoZone. When I go into a big box Auto center the all get confused and start drinking rum, lol
Unfortunately i haven�t found the money tree yet lol. I was a little worried but it looks like most of these ignition parts I will be needing can be purchased on rock auto after market pretty cheap compared to oem products
Unfortunately i haven�t found the money tree yet lol. I was a little worried but it looks like most of these ignition parts I will be needing can be purchased on rock auto after market pretty cheap compared to oem products
Right! Yes!
I didn't know it when I first started out but, patience, learning, a willingness to seek guidance and a good sense of humor is what my XJS needed most from me. And a willingness to DIY-myself.... Much more than money. I was surprised to learn that most everything (except a few things) can be gotten relatively inexpensively... The worked for experience and wisdom about these machines on this forum is a gift!
The whole process has become a joy. In my idle time I think about jobs that need doing, I plan, gather my bits, ask questions - and am getting better at executing. A true and serious hobby.
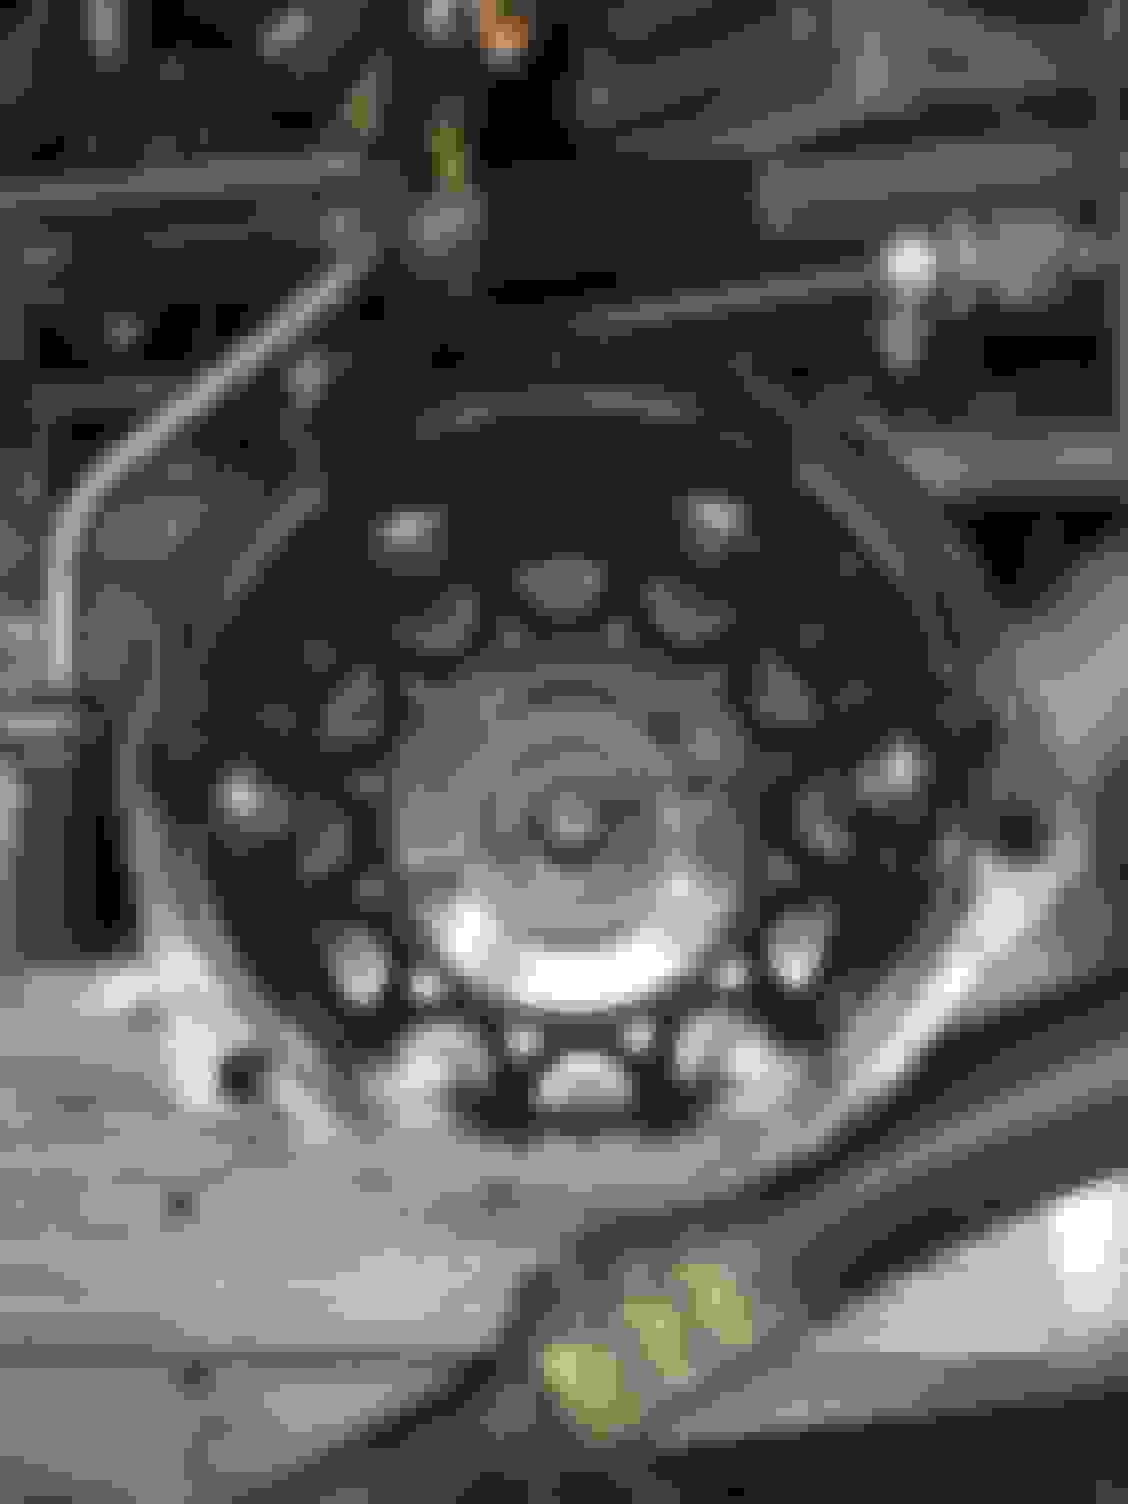
Okay I disassembled some more parts on the jag here are the pictures, I�m not sure what I am exactly looking for but in my un-experienced opinion the Distributor cap looks good and the rotor looks good, didn�t remove the rotor from the car. Am I suppose to be able to rotate the rotor? and then it springs back while still in the car? If so I am unable to rotate the rotor at all.
Engine is extremely dirty built up old oil EVERYWHERE (weird because I don�t see any visible leaks), i�m trying my best to clean it, broke the passenger side hose that connects to the distributor. What part is that? looks like the other end of it routes to a part that sits under the fuse box on the drivers side (left) Didn�t get a good look at the part but it didn�t connect to anything it felt like.
What should I replace while I have the car in this state? Thank you, I have about 8 months to get this car driving again.
Rotor
Inside Distributor CAp Filthy Engine after cleaning out tons of old built up oil broken hose that connects to the distributor
To me, as best as I can see, the distributor looks good... Someone will correct me if I'm wrong but the hose you're referring to that connects to the distributor is a cooling type of fresh air draw hose and IT should lead to the rear of the engine, around the LH cylinder block and valve cover and connect to a much larger hose that comes off the back of the air filter housing between the air filter and the AAV. The AAV is involved in idle control,,, and I don't think you have to worry much about ANY of that now. Not just yet, anyway, lol...
Suggestions I have - you'll see a bunch of places where the fuel injection harness and it's associated wires going to the individual fuel injectors are bolted to the top O the engine block IN the VEE... If you remove the fasteners where it's tied to the engine block it will allow you to pull the entire FInjection wire harness out of the VEE... In this, you can inspect the harness AND remove it from the furnace of the VEE. What many find is that the wires in the harness are cooked and cracked and shorting in different areas along the the valley aka VEE. Later, it will be much easier to zip tie the harness to the fuel rail OUT of the furnace of the VEE,,, where it is still very easy to connect the individual fuel injectors... Sounds like a lot,,, but it is not and a good measure at this stage.
You are on the right track...
I hope that someone else will chime in here and help you with your spark problems... I am unsure about the amount of sprung PLAY in the rotor... Also, if you turn out the two small bolts that connect the rotor to the (don't know the word) you can get a look at what is going on underneath... I think there are some vitals underthere, too...
Brother,,, alllllll of this is needed and necessary XJS 101 stuff. The revival. You are on a good track.
So,,, I remember when I just FACED it and decided to pull EVERYTHING out of the VEE... It was so so worth it... Like on a Porsche 928,,, a top end refresh! Much much needed,,, and cheap. Later, I replaced the plugs and individual fuel injectors... FYI, leave all old plugs in so alll the crap doesn't wash into the cylinders thru the plug holes... Takes LOTS of water.
Rotor completely removed
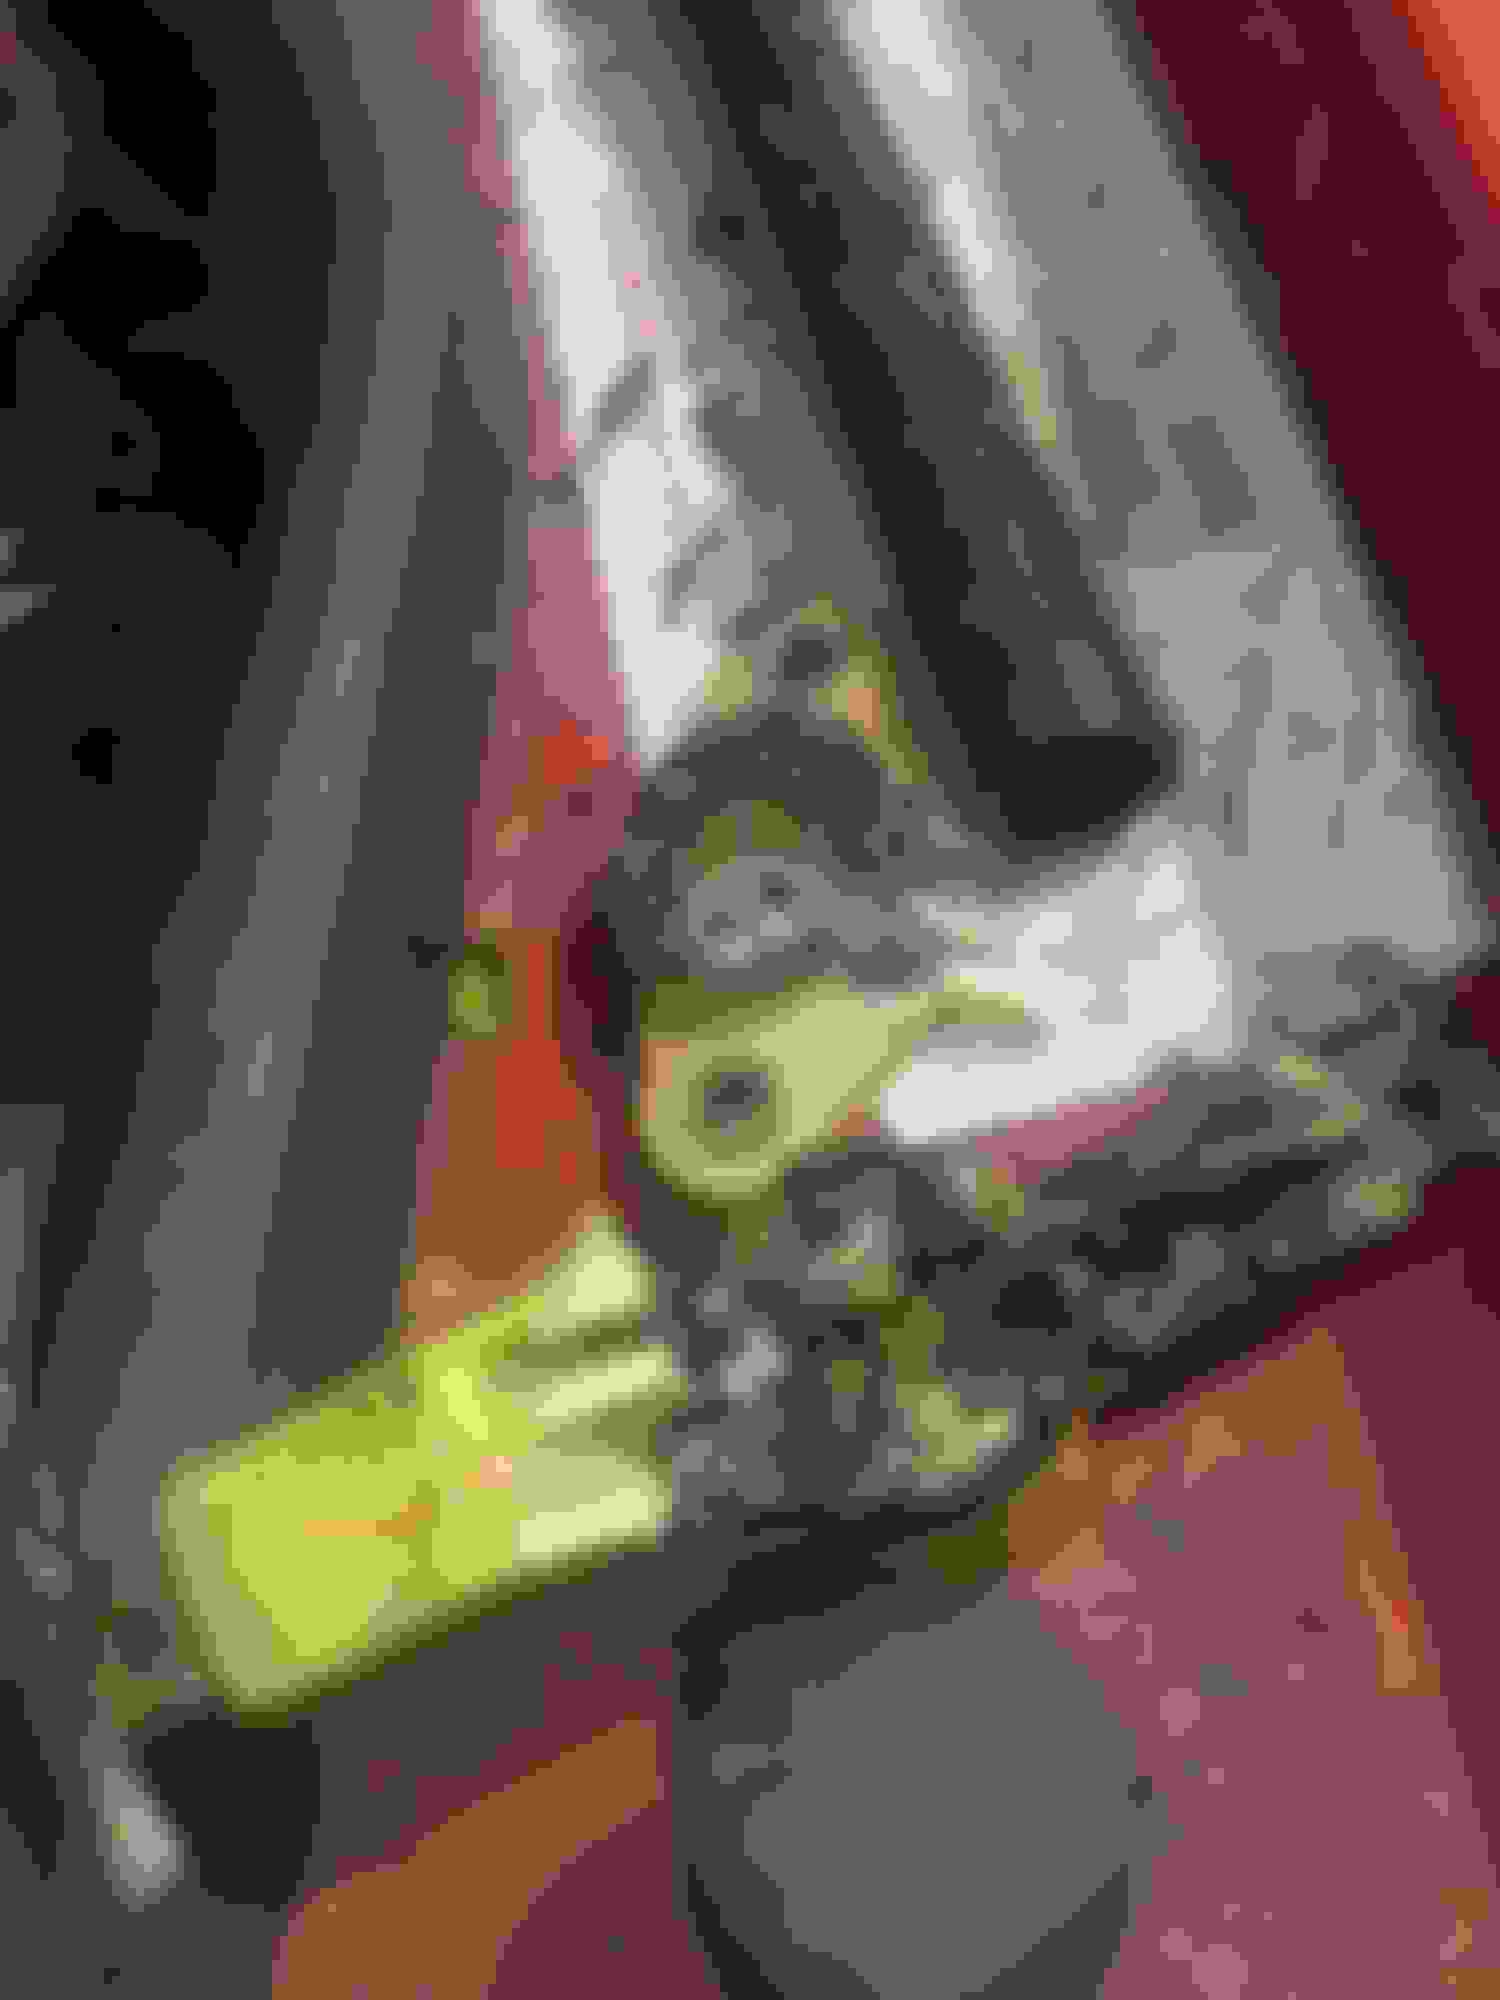
Check out the picture below. This "resistor pack" is MUCH to do with the FI system... Found under the hood to the RH side of the radiator behind where the headlights would be mounted on the opposite side.... There is a good bunch of info on the resistor pack in this thread. https://www.jaguarforums.com/forum/x...sistor-134745/
does anyone know where I can purchase a new connector? The one shown In This picture plugging into the resistor pack? I have a couple of recessed pins that I believe is not making correct connections causing an open reading in pin 30 to 31/32 on the ECU in the boot. Thanks
So: It looks like you removed the (square tubed) fuel rail, fuel injectors and all associated wiring.
Then you cleaned it with water (as in like soap & water)? I thought I was told the black hole of death would envelop me if I used water on cleaning this engine?
Finally, can you tell me what the ROUND tube structure that is still attached in your "before" photo (but removed in the "after" photo) is? That's been bugging me for a while....
Thanks,
Brad
Hey Brad... Thanks.
I would never use a power washer... Tooooo many fiddly electronics. With care, a small cup and lots of reusable rags, I slowly cleaned the area. I left the distributor cap covering the sensitive areas of the ignition system.
The cylindrical tube was one of the first things to go in my slow and long process of getting cherrypie back to life. It is a pain item, very much in the way, and not so needed.... Its a blower system that pushes air into the intake system. Pressured by an appliance that is driven by a belt on the RH hand side and front of the engine. There is a tube that feeds it back - a tube that runs along or near the underside of the engine and then reemerging up in the area of the rear of the engine and engine bay - showing up as the cylindrical tubing you see that runs across the top amidst the fuel injection, capstan and ignition wires. Anyways, yes,,, find some bolts that will fit into the holes left by the small/skinny vertical tubes coming off the large horizontal tube, put a dab of red RTV on the tips of the bolts for sealing, and then drive them a few turns into the hole left in the intake. That's what I did. I do intend on going back and doing things a little neater than I had initially. I also removed the blower (much later) and the associated belt. This will leave you with the problem of figuring out HOW to run the AC Compressor. LOL,,, I ain't got no answers for that, yet. haha... I have heard people say that they just "gut" the blower appliance so they can use the pulley in workings with the AC belt. But, yeah, I tossed the pulley and am looking for solutions to run the AC compressor now. I've heard folks say one can measure the travel of a belt from the crank pulley wheel and come straight up to run the AC compressor. I think I will be trying that.
does anyone know where I can purchase a new connector? The one shown In This picture plugging into the resistor pack? I have a couple of recessed pins that I believe is not making correct connections causing an open reading in pin 30 to 31/32 on the ECU in the boot. Thanks
Im sorry Brother, I doint know... Can you send some pictures of what you're looking at and MAYBE I or folks here can come up with some ideas... I dont have that problem NOW,,, but very much could in the future. Helping you will be helping me,,, no doubt about it.
Im sorry Brother, I doint know... Can you send some pictures of what you're looking at and MAYBE I or folks here can come up with some ideas... I dont have that problem NOW,,, but very much could in the future. Helping you will be helping me,,, no doubt about it.
Im looking for this connector circled in the picture if anyone knows where I can find it. I have a recessed pin on the connector that i think is causing and Open Circuit from pin 30 to 3/1/32 on LUcas ECU in the trunk. Haven't had a chance to mess with the car but hopefully over the holidays I'll have all the parts ready to install.

 11-05-2019, 09:28 PM