When you click on links to various merchants on this site and make a purchase, this can result in this site earning a commission. Affiliate programs and affiliations include, but are not limited to, the eBay Partner Network.
my first maintenance package.. am I missing anything?
I'm finally done (I think) purchasing my first big bulk parts order for a week of maintenance.
Here's where I've landed for now.
Front end:
- rebuilt rack to replace leaking rack (from Buy Auto Parts)
-poly bushings (Moss Auto)
- bushings
- control arms
- upper from am autoparts on eBay. nonpoly
- lower from rare parts. oem metastatic
- sway bar
- 8 rod bearings fro am autoparts
- 2 mounts from Moss motors
- brakes
- pads Dynamic Friction via Rock Auto. 5000 series low metallic
- flexible hose x 2 Centric via Rock Auto
*just realized I forgot to buy rotors. might source locally
- shocks
- haven't purchased yet.. still looking at options.
Belts:
- all four from Continental via Rock Auto
Cooling:
-OEM rubber hose kit from Moss Auto
- 2 thermostats + housing from Rock Auto
- will pull Rad and have it serviced locally
- electric fan has some minimal damage to it. will replace
Fuel:
-Fuel injector rebuild kit from eBay.
- fuel filter
Air:
- Just filters for now. researching upgrade options
- rear differential limited slip diff only
- transmission fluid + filter
- brake fluid dot 4 only
- coolant
I will be using the following for reference:
- original service manual
- post purchase worksheet
- experience in a book
- living with a classic channel
- this great forum
Still need to do:
- rear end. saving for next time
- general electrical upkeep/new wiring
- this will take some more time researching, as electrical is not my strongest area of expertise.
- some small cosmetic issues
- faulty passenger window (I removed door panel, window works but is binding up.. possibly due to vapor barrier)
- the smaller windows will not move. passenger is stuck up, and drivers is down
Ok, so that's what I have so far. For anyone reading, if you have any comments or critiques or advice, please share. This is my first rodeo with a jag.
Other more knowledgeable guys will chip in, I'm sure. Here's a couple of thoughts:
- Make sure you're absolutely comfortable with the procedures, and have the appropriate equipment, to work on the front suspension. There is a huge amount of stored energy in the springs. Also don't buy cheap springs, otherwise you will never get the ride height correct.
- DO NOT push back the caliper pistons to withdraw the pads, without first loosening the bleed nipples and attaching a pipe to allow the fluid to escape. You must not push fluid back to the ABS valve block.
- Make sure you have the Teves, not Jaguar, procedure to bleed the rear brakes when you change the fluid. PM me if you don't have this.
- Draining the auto fluid by dropping the sump only removes a small % of the total fluid in the system. If you can't access the equipment to do a pressure flush, do the following. Unless there's a drain plug on your sump, drain the fluid by sucking / syphoning out the dipstick. Refill. Run the car for 10 miles. Drain & refill again. Drive it. Drain & refill again. Drive it. Only now should you then do a sump removal and filter change.
Replace all the fuel supply and return hoses with top quality EFI hose; Gates Barricade or equivalent. There are short hoses on each injector, and a couple on each side for the 2 fuel pressure regulator. There are hoses on each side above the rear cage also….easier when the cage is out.
Plan on cleaning the PCV system, both the valve (if not replacing) and the screen separator.
Stay away from Monroe front shocks, seals creak badly ( I have had 2 warranty replacements on right, and one on left).
Mechanical fan blade if you still have the yellow one; fan clutch for sure.
Ball joints ? Wheel bearings and stub axles?
Oh, and the cradle mounts (6shooter at front, sandwich mounts at the rear) on the front, 4 mounts at rear. Radius arm bushings on the rear suspension.
All the rubber parts are suspect after 40+ years.
Last edited by RGK20m3; 02-13-2024 at 08:33 AM.
Reason: More thoughts
Other more knowledgeable guys will chip in, I'm sure. Here's a couple of thoughts:
- Make sure you're absolutely comfortable with the procedures, and have the appropriate equipment, to work on the front suspension. There is a huge amount of stored energy in the springs. Also don't buy cheap springs, otherwise you will never get the ride height correct.
yes, absolutely. I work as an engineering technician / fabricator in very large, expensive, and dangerous robotics systems. following procedure and best practices is top priority. I was not planning on replacing the springs for now, as they look to be in good shape.
- DO NOT push back the caliper pistons to withdraw the pads, without first loosening the bleed nipples and attaching a pipe to allow the fluid to escape. You must not push fluid back to the ABS valve block.
duly noted, thank you!
- Make sure you have the Teves, not Jaguar, procedure to bleed the rear brakes when you change the fluid. PM me if you don't have this.
I do not have a copy of that, I will send PM
- Draining the auto fluid by dropping the sump only removes a small % of the total fluid in the system. If you can't access the equipment to do a pressure flush, do the following. Unless there's a drain plug on your sump, drain the fluid by sucking / syphoning out the dipstick. Refill. Run the car for 10 miles. Drain & refill again. Drive it. Drain & refill again. Drive it. Only now should you then do a sump removal and filter change.
again, noted and thank you very much for this tip.
Good luck
Paul
thanks for your input paul. much appreciated. sending PM for Teves documentation.
Replace all the fuel supply and return hoses with top quality EFI hose; Gates Barricade or equivalent. There are short hoses on each injector, and a couple on each side for the 2 fuel pressure regulator. There are hoses on each side above the rear cage also….easier when the cage is out. yes sir, it's at the top of my list.
Plan on cleaning the PCV system, both the valve (if not replacing) and the screen separator. this was not a part of the plan.. it is now, thank you.
Stay away from Monroe front shocks, seals creak badly ( I have had 2 warranty replacements on right, and one on left). kyb grey front shocks will likely be my choice.
Mechanical fan blade if you still have the yellow one; fan clutch for sure. blade looks good and not yellow, but will add the clutch to my parts list.
Ball joints ? Wheel bearings and stub axles? ball joints and wheel bearings were replaced the weekend I purchased it, as I could tell the wheel bearings were going.
Oh, and the cradle mounts (6shooter at front, sandwich mounts at the rear) on the front, 4 mounts at rear. Radius arm bushings on the rear suspension.
All the rubber parts are suspect after 40+ years. not touching rear end this round but I will add mounts for the front.
thank you very much for your input! much appreciated and noted.
If you've replaced the wheel bearings, I would politely suggest that you check that you've set them as per the proper procedure. XJS front wheel bearings are not set up as per more modern cars. They are designed to have an amount of float which often confuses MoT testers who believe they are worn.
I was maybe cruising along too fast, but when I got to the distributor, which I read needed to be removed for spark plugs, I started messing about with the adjuster screw thinking it was apart of the mounting.. I quickly realized it wasn't and stopped messing about.. I noticed there was already a paint mark on the piece, so I went ahead and removed as it looks like I can get it back to where it was from photos, but I'm wondering if I shot myself in
the foot with the adjustor screw.. I've already found the Greg documents for adjusting the timing.. I'm just curious if there's anything else I need to look out for. The small plastic gasket was brittle and broke.. I'm assuming that is a necessary replacement. I'm just hoping I can slide it in and everything is in the right spot.. should I test for anything else while I have it out?
I don't think you need to remove the distributor to remove the spark plugs. Maybe the cap needs to come off, but not more than that. But as you have it off its very important that you don't rotate the engine before you put it back in. You'll be fine if the rotor goes back in the orientation it was in before it came out. You'll need to redo the timing, but that's not the end of the world. Its good you have it out though, it needs to be serviced. The mechanical advance seizes up, so you'll want to clean everything up and get that free.
A couple of XJS specific stuff that is adjacent to the work you�re already doing:
Since you�re taking the radiator out and probably replacing all the belts and hoses, it only takes a few minutes more to change the front main crank seal. They always leak.
There are small plastic bushings for the accelerator linkage to pivot� the one that opens the butterfly valve on each side of the engine� they are usually missing. Good and cheap to replace.
Your auxiliary air valve probably needs work or replacement. if the car had a consistent, high idle, or the idle screw on the auxiliary, air valves is already fully turned in, It�s probably past its prime.
The kickdown switch should be actuated by the accelerator cable, but often accelerator cable has stretched and never trips the switch. Good time to tighten it up.
You already have the injectors off, so might as well takeoff the intake manifolds so you can replace the cam cover gaskets and the half moon seals in the rear under the cam cover gasket.
thanks for the advice y'all.. the more I dig in the more I realize she's gonna be down for a little while.. I won't be surprised if I end up pulling the engine.
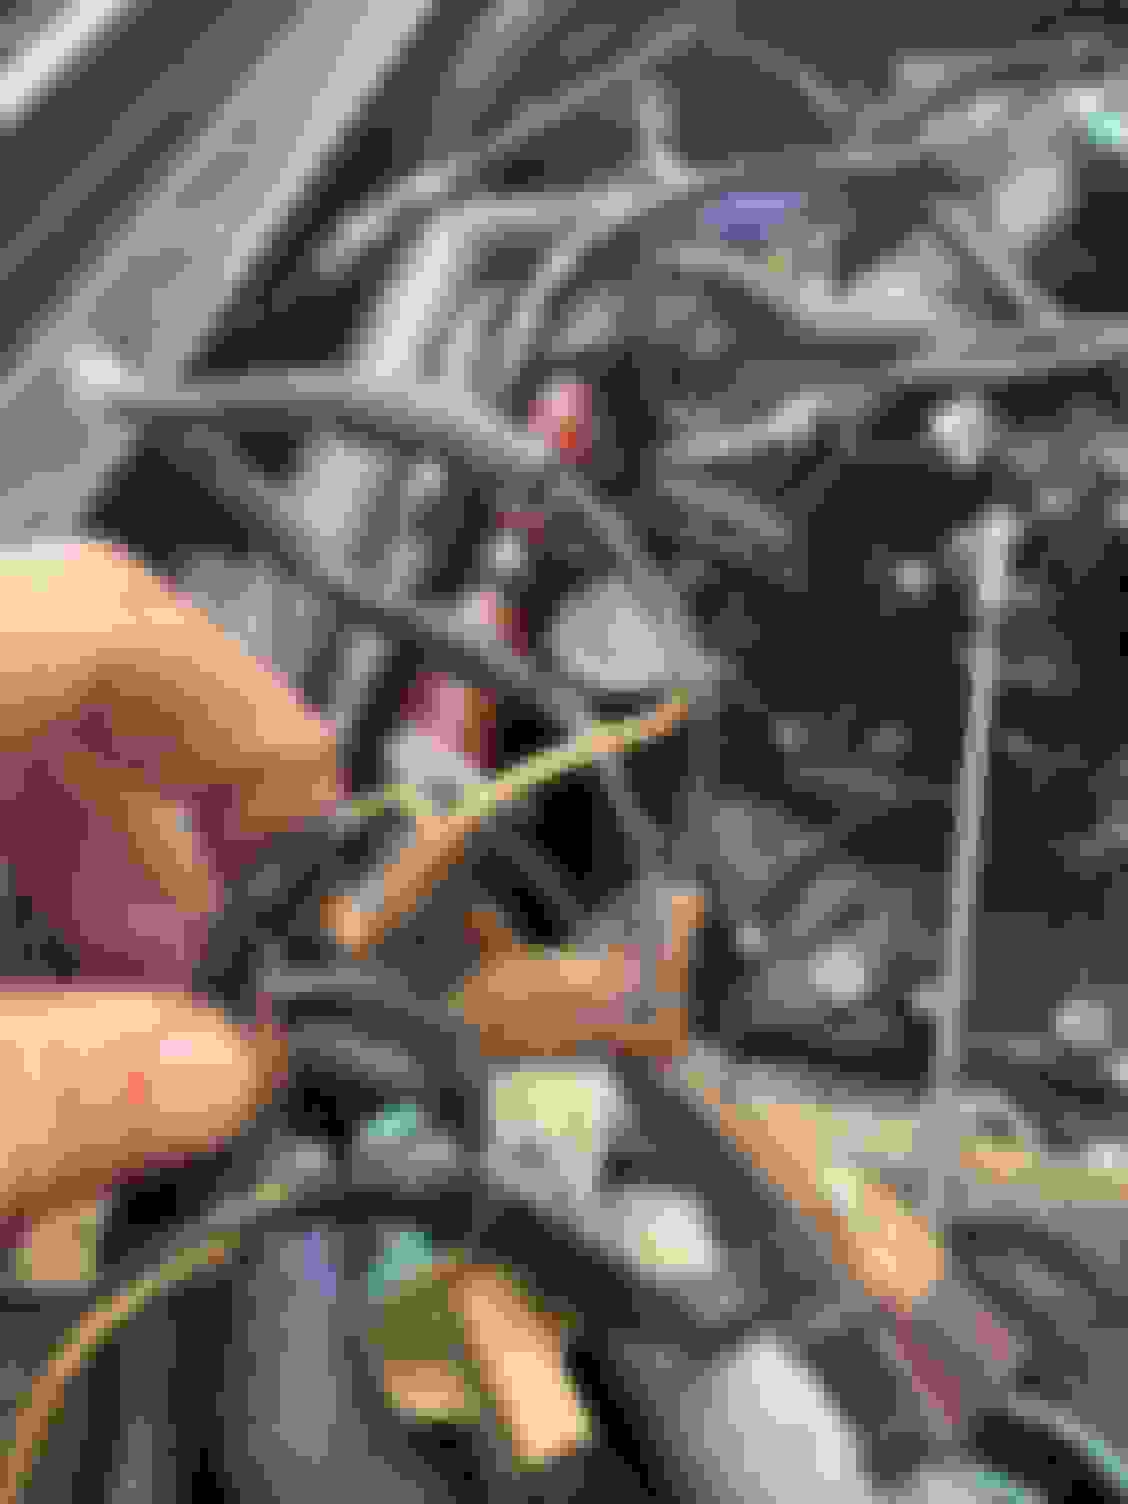
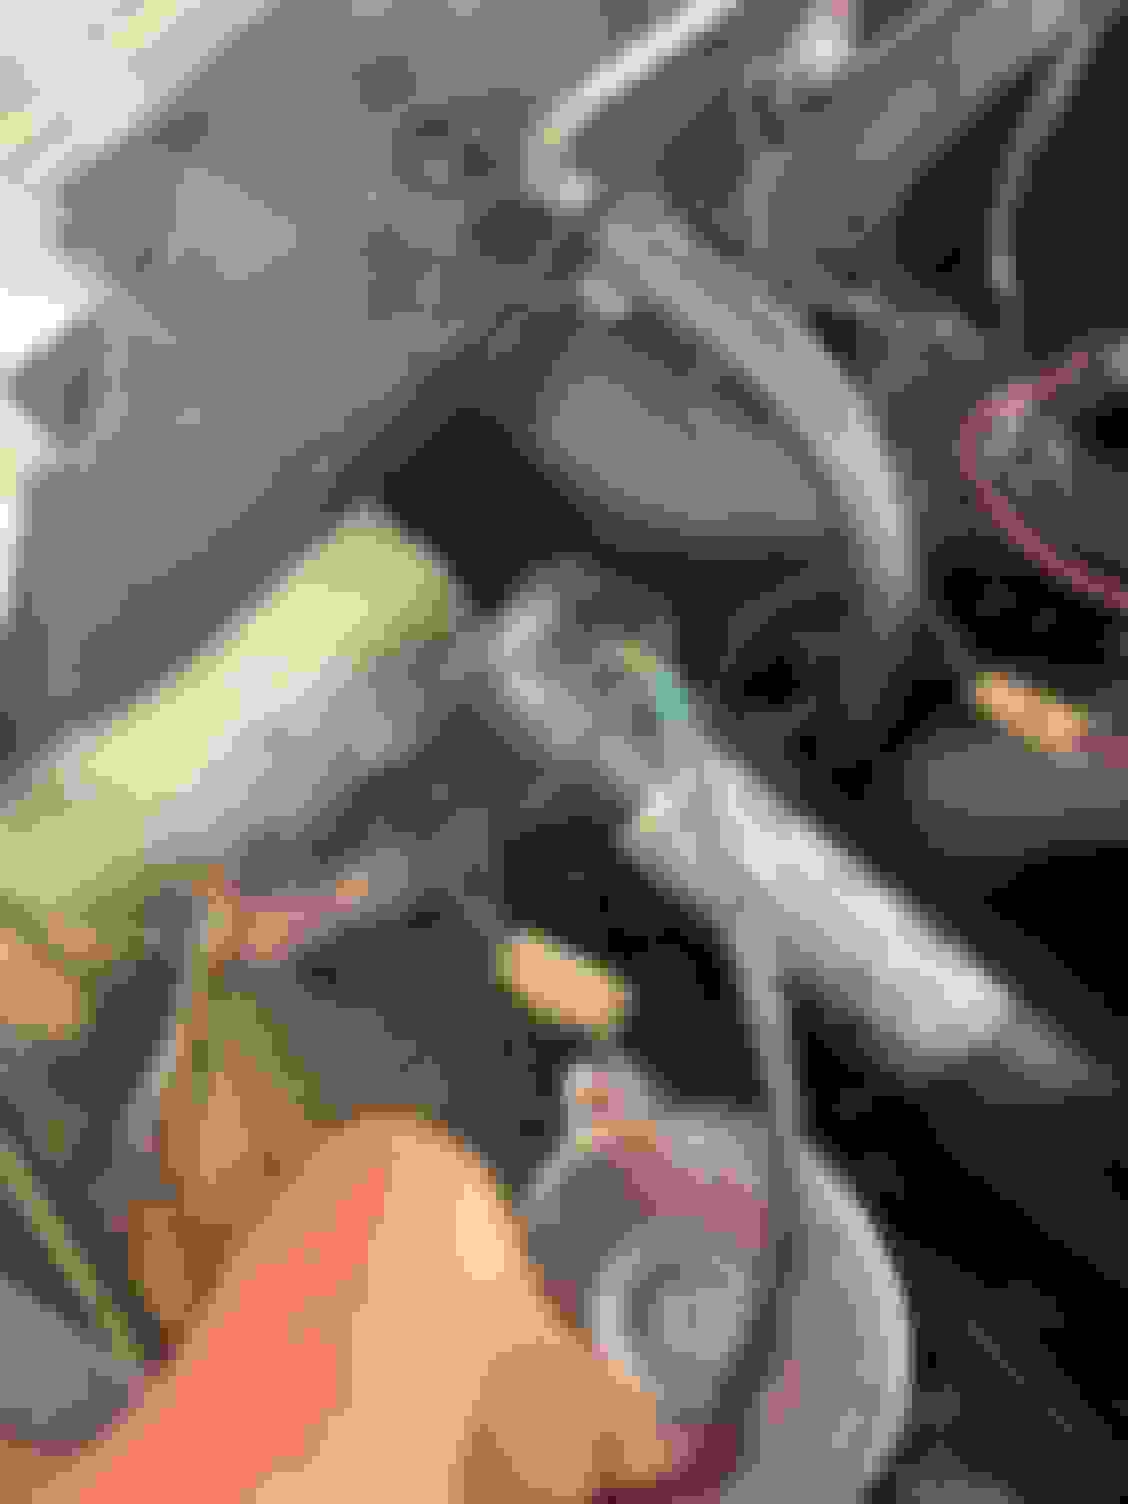
some electrical oddities discovered along the way:
this connector is to what appears to be the pressure switch next to the accumulator? possible bad connection leading to my ABS light.
these little spade connectors are almost completely severed
running down the drivers side into the firewall..I'm sure that's supposed to be connected to something.
There are small plastic bushings for the accelerator linkage to pivot… the one that opens the butterfly valve on each side of the engine… they are usually missing. Good and cheap to replace.
mine are currently equipped with missing bushings.. I noticed in another thread that there was a Jag community member named John who sells (or sold) teflon bushings with little clips for easy, no removal installation.. I haven't been able to find those specific ones.. do you have a link to purchase those or something comparable? there's a few options online, but I'd like to buy the ones that are most recommended.
edit: found the jagimprover eBay store.. I will probably buy these for the future, but will be looking for a suitable replacement in the meantime.
Supplementary air valve or extra air valve. Goes into the back side of the RH air filter housing. You'll likely need a new grommet.
As for the stray wire shown a couple postings back, is it solid green? Or green with a tracer color? Green/white, perhaps?
Cheers
DD
thank you for that link, that is a great diagram.. I've been looking at different ones from the book, Moss, etc, but that is the first one I've seen that has that nice of a parts description.
As far as the wire, yes it appears to be solid green.
thank you for that link, that is a great diagram.. I've been looking at different ones from the book, Moss, etc, but that is the first one I've seen that has that nice of a parts description.
As far as the wire, yes it appears to be solid green.
gogobrent,
That's Jaguar's parts website. Always use that one before going elsewhere. I'm not sure why everyone doesn't start there when looking for part numbers etc.
I also forgot to send you the Teves bleeding procedure which I'll do tonight. I'll also send you the Teves 32 Continuity Tests, and the Error Code Blink Test routine, which may help you pin down the cause of the light,
the plugs that came out of the engine from the previous service (about 4k miles ago) were NGK TR5IX.
the entire service, completed on 09/2018, included:
Symptom: No start
- tested both ignition and fuel systems in vehicle. Pulled five spark plugs and tested gas. Found all plugs pulled to be carbon covered and one spark plug cracked. Determined that the gas was expired and not igniting. Drained the tank and fuel system of all expired gas, and replaced with new gas, and was able to get the car to run. We then did an induction service to clean up the carbon build up throughout the intake track.
BG Induction Service
Fuel pressure regulator, remove and replace x2
Coolant temp sensor, remove and replace
Spark plugs
Distributor cap, rotor, spark plug wire set, remove and replace
remanufactured distributor from Engel Imports
Synthetic oil change
10w-30
Fuel injector connector, replace one
Starter assembly, remove and replace
So this thing had some decent service pretty recently, but I decided to go by the book, and change what was recommended. Probably could have skipped spark plug wires and distributor cap, but I went ahead and ordered it just in case something happened along the way..
I'm mostly curious about the spark plug selection. (They were gapped to .040, with a lot of them reading .042-.043) I've included a pic below.

 02-12-2024, 12:37 PM