paint repair carried out
#1
 03-22-2015, 01:58 PM


well , after two and a half years after being painted i needed to do some repairs
the main issue is that i had a six inch long paint ' blister ' under the topcoat ( no lacquer ) behind the drivers side black vent cover behind the rear side window, this blister appeared not long after being painted and could have been contamination,water or some other issue that made it lift, but lift it did , i didnt take any action to start with as it was still sealed , but towards the end of last summer the blister split open exposing the undercoat , now i had to take action , i tried ' filling ' with some mixed paint but that was unsuccessful , and so i called in my brother who paints cars for a living ( but did not originally do mine as there was no space at his place of employment )
he decided that the only way was to carefully cut out the blister, and use some ultra fine body filler known as Dolphin Glaze to make up the surface , prime and apply the same paint as the car was originally painted with , as i have a couple of litres of it from when the job was done, just for this type of repair ( same batch and all that )
the picture below was taken after the filler was applied, and shaped to the finished result and primer applied, i didn't take any earlier pictures as i was keeping him in coffee and danish pastries , and bacon and mushroom butties.....
IMG_2277 by MyPix on Talk Photography
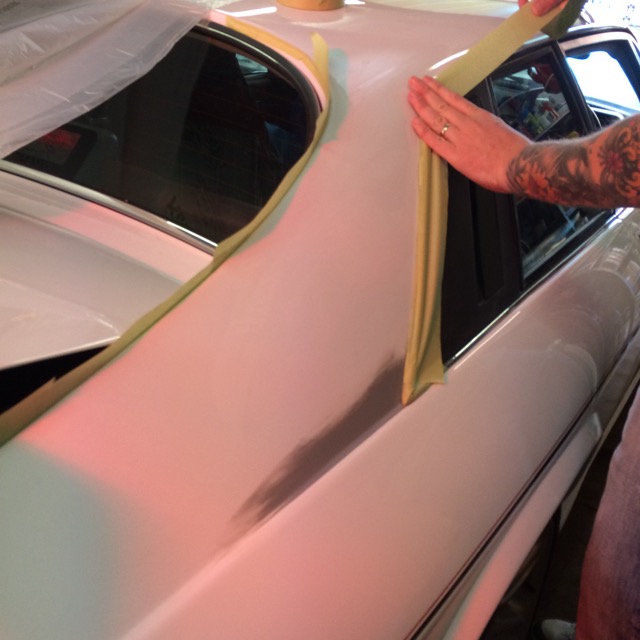
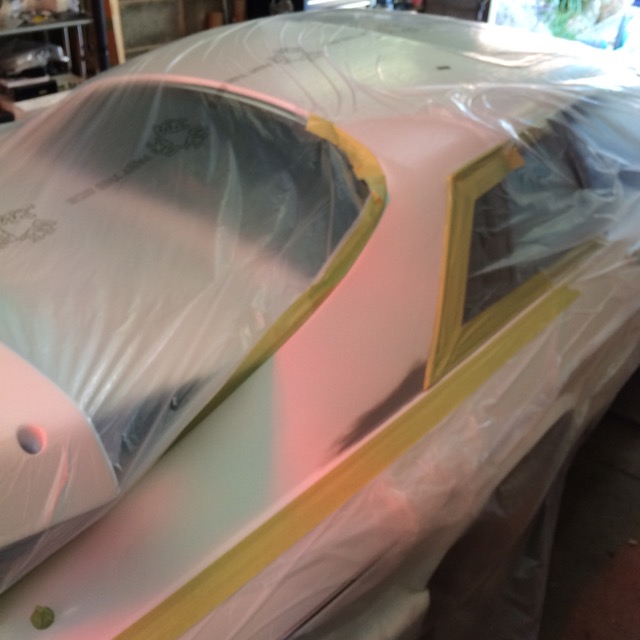
all masked up and smoothed back again the surface was keyed to apply the top coat, this will be soft edged to the surround and masked to the swage line in the body ,
IMG_2280 by MyPix on Talk Photography
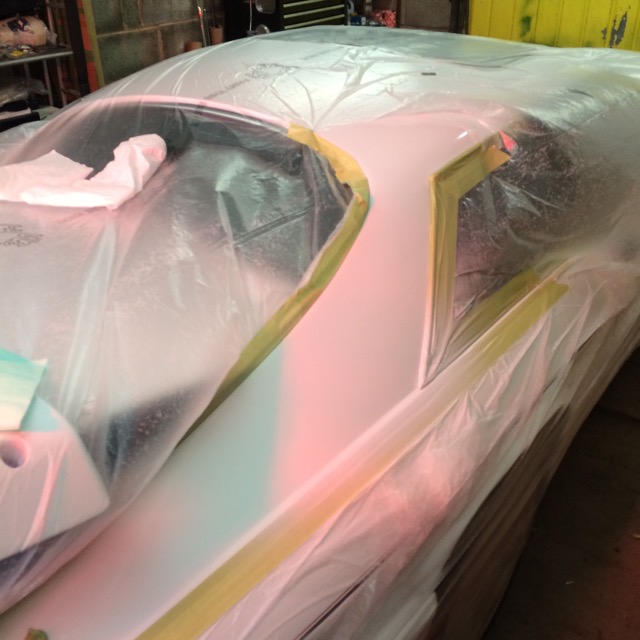
then a 50% paint to thinners 2K mix of paint was applied in several light coats by his expert hand, flashing off the paint in between
IMG_2283 by MyPix on Talk Photography
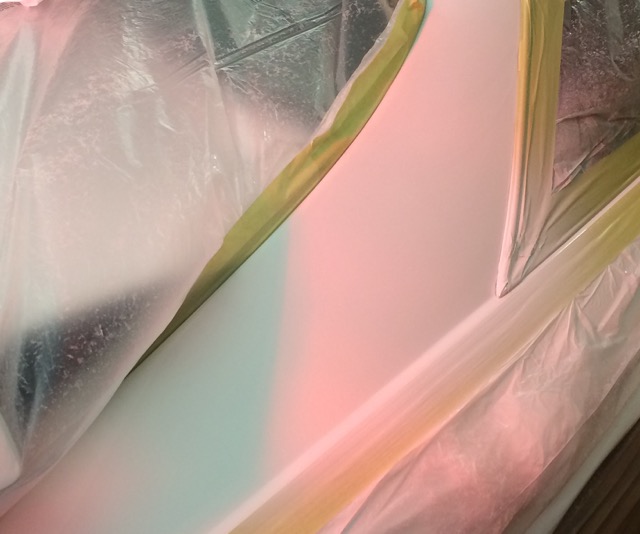
a close up of the now finished and curing paint
IMG_2284 by
MyPix on Talk Photography
this was left overnight with my infrared heater helping it to dry ,
BB
the main issue is that i had a six inch long paint ' blister ' under the topcoat ( no lacquer ) behind the drivers side black vent cover behind the rear side window, this blister appeared not long after being painted and could have been contamination,water or some other issue that made it lift, but lift it did , i didnt take any action to start with as it was still sealed , but towards the end of last summer the blister split open exposing the undercoat , now i had to take action , i tried ' filling ' with some mixed paint but that was unsuccessful , and so i called in my brother who paints cars for a living ( but did not originally do mine as there was no space at his place of employment )
he decided that the only way was to carefully cut out the blister, and use some ultra fine body filler known as Dolphin Glaze to make up the surface , prime and apply the same paint as the car was originally painted with , as i have a couple of litres of it from when the job was done, just for this type of repair ( same batch and all that )
the picture below was taken after the filler was applied, and shaped to the finished result and primer applied, i didn't take any earlier pictures as i was keeping him in coffee and danish pastries , and bacon and mushroom butties.....
IMG_2277 by MyPix on Talk Photography
all masked up and smoothed back again the surface was keyed to apply the top coat, this will be soft edged to the surround and masked to the swage line in the body ,
IMG_2280 by MyPix on Talk Photography
then a 50% paint to thinners 2K mix of paint was applied in several light coats by his expert hand, flashing off the paint in between
IMG_2283 by MyPix on Talk Photography
a close up of the now finished and curing paint
IMG_2284 by
MyPix on Talk Photography
this was left overnight with my infrared heater helping it to dry ,
BB
The following users liked this post:
orangeblossom (03-25-2015)
#2
03-22-2015, 01:59 PM
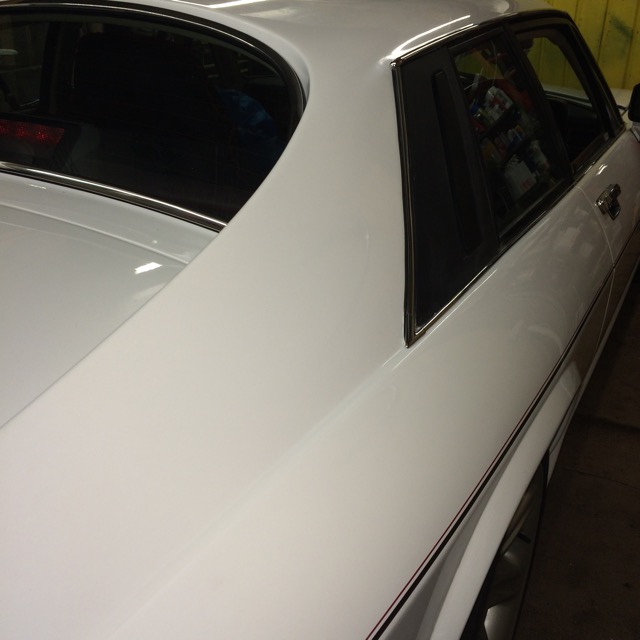
i can live with this , what do you think ?
IMG_2286 by MyPix on Talk Photography
the actual finish is slightly more glossy than the rest, this will be left to cure for several weeks before e being flatted back and then polished blending in a very small masking line on the swage line, but i can't complain , there was no way i could live with bubbled split paint
BB
#3
03-22-2015, 06:17 PM
looks great.
for a proper repair your clear should be taken out to the nearest body seams witch unfortunately for that spot would end up covering a lot of the car. when you wet sand and buff out the repair take care not to take any more material off the edge of the overlap than absolutely necessary as thinning out the edge of the overlap will make it more prone to failure.
for a proper repair your clear should be taken out to the nearest body seams witch unfortunately for that spot would end up covering a lot of the car. when you wet sand and buff out the repair take care not to take any more material off the edge of the overlap than absolutely necessary as thinning out the edge of the overlap will make it more prone to failure.

#6
03-25-2015, 02:40 AM
thanks for the comments lads
just to point out, there is no clear coat on her at all , this was a wet on wet 2k white on white high gloss finish
machine polished , so the blending was quite easy
the paint will be left for a few weeks to fully harden and then a light machine polish to blend in ,
at the end of the day its always going to be noticed if looked for, but its a far better option than living with a defect that would let in the weather and dirt
BB
The following 2 users liked this post by Brake buster:
Ezrider (03-25-2015),
orangeblossom (03-25-2015)
#7
03-25-2015, 02:45 AM
Veteran Member
thanks for the comments lads
just to point out, there is no clear coat on her at all , this was a wet on wet 2k white on white high gloss finish
machine polished , so the blending was quite easy
the paint will be left for a few weeks to fully harden and then a light machine polish to blend in ,
at the end of the day its always going to be noticed if looked for, but its a far better option than living with a defect that would let in the weather and dirt
BB
just to point out, there is no clear coat on her at all , this was a wet on wet 2k white on white high gloss finish
machine polished , so the blending was quite easy
the paint will be left for a few weeks to fully harden and then a light machine polish to blend in ,
at the end of the day its always going to be noticed if looked for, but its a far better option than living with a defect that would let in the weather and dirt
BB
Nice job, She looks great!

Thread
Thread Starter
Forum
Replies
Last Post
jagent
XJ6 & XJ12 Series I, II & III
8
09-12-2015 09:10 AM
Currently Active Users Viewing This Thread: 1 (0 members and 1 guests)