
project fuel tank replacement
#1
 05-16-2015, 02:44 PM


as eluded to in another thread, my new project has begun
i have had intermittent issues with fuel starvation , this manifests its self on long smooth roads and i get a stall or a stutter in the engine, i traced the fault to the fine mesh filter on the end of the pickup tube in the sump tank getting blocked up with fine debris from the fuel tank , funny thing is, on bouncy city streets or undulating lanes, this issue doesn't arise, probably from the fuel being bounced around keeping any debris suspended in the fuel rather than clinging ( sucked onto ) the pick up tube filter
so , i decided to find a replacement tank , i have been looking for years, missed a few on ebay for various reasons, but last week my luck was in and a new old stock one came up on ebay , it had actually been fitted to a car, but never got back on the road, the tank came with the sump tank and the fuel sender to , and everything was in great condition ,
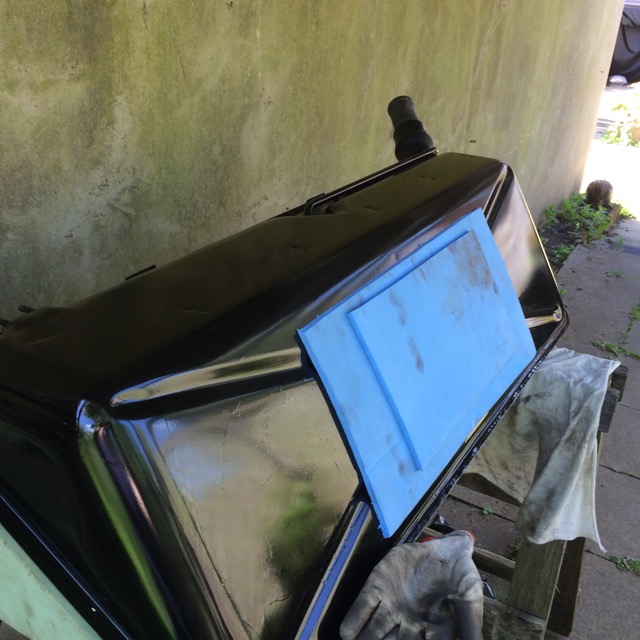
I stripped everything down , and decided to paint the tank before installing it into the car , for added protection and to give it a longer life , a bit of rubbing back with some wet and dry , and masking off, and sprayed with hammerite smooth black paint, a few runs , but hey , its all hidden , lol
the side foams were glued back on today , and i test fitted a new breather pipe for the sump , it was bought years ago , but as my own breather pipe nut has rounded off and stuck solid , i decided not to fit it, and risk damaging my old tank
below is the pic of the new tank , all painted up and ready to fit
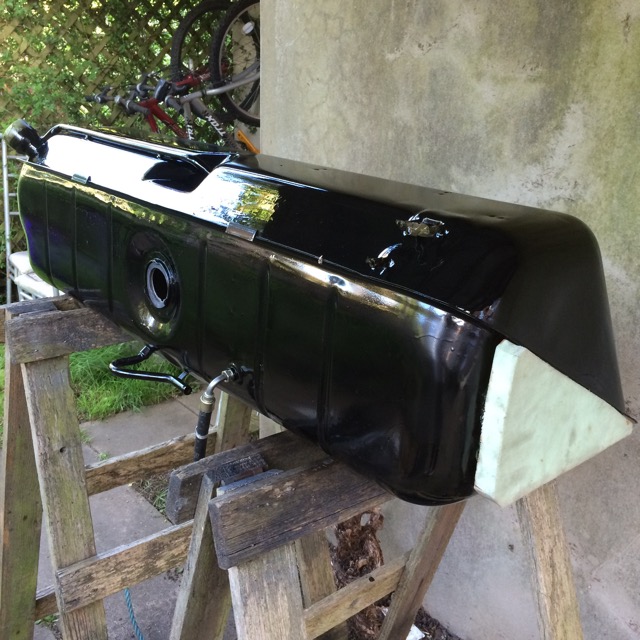
IMG_2449 by MyPix on Talk Photography
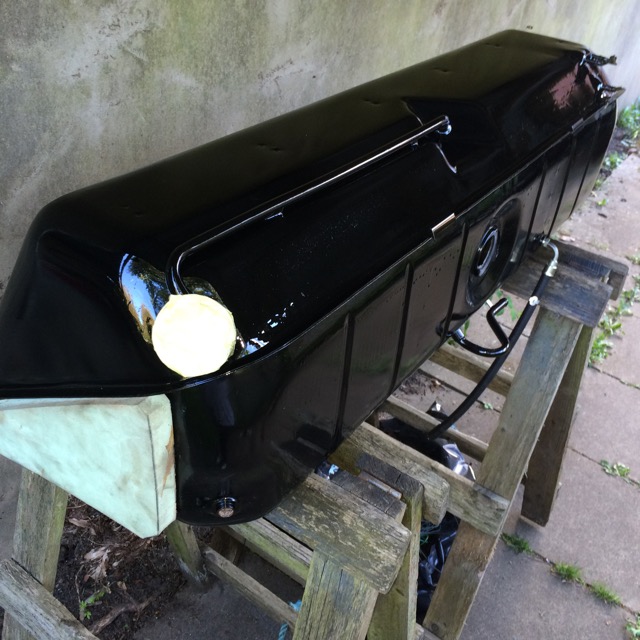
IMG_2454 by MyPix on Talk Photography
i have some new rubber seals for the tank sender unit, they are the same as the seal for the pickup tube in the sump , this pic shows the interior with the new seal waiting for my original sender , unless i find a new one ,as can be seen , practically zero corrosion inside
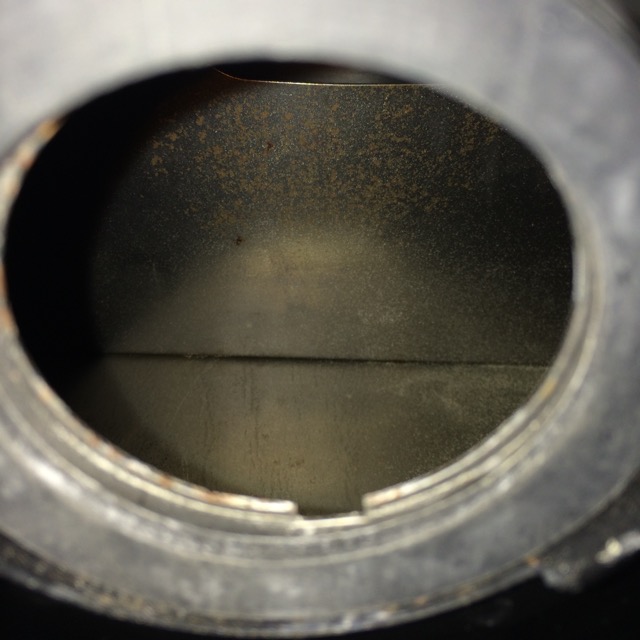
IMG_2453 by MyPix on Talk Photography
removing the tank sender or sump tank pickup locking ring is really simple, just get a tool to hold to one of the three tangs, and give a firm tap anticlockwise, the ring will move and come away from the device, and then pull from the tank the rubber seal will be behind that
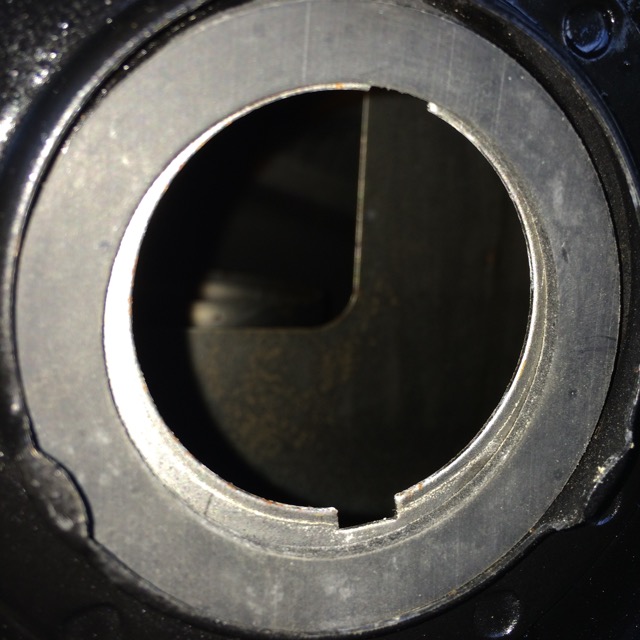
IMG_2451 by MyPix on Talk Photography
just got to find a few weekends strung together to complete the project
BB 8)
i have had intermittent issues with fuel starvation , this manifests its self on long smooth roads and i get a stall or a stutter in the engine, i traced the fault to the fine mesh filter on the end of the pickup tube in the sump tank getting blocked up with fine debris from the fuel tank , funny thing is, on bouncy city streets or undulating lanes, this issue doesn't arise, probably from the fuel being bounced around keeping any debris suspended in the fuel rather than clinging ( sucked onto ) the pick up tube filter
so , i decided to find a replacement tank , i have been looking for years, missed a few on ebay for various reasons, but last week my luck was in and a new old stock one came up on ebay , it had actually been fitted to a car, but never got back on the road, the tank came with the sump tank and the fuel sender to , and everything was in great condition ,
I stripped everything down , and decided to paint the tank before installing it into the car , for added protection and to give it a longer life , a bit of rubbing back with some wet and dry , and masking off, and sprayed with hammerite smooth black paint, a few runs , but hey , its all hidden , lol
the side foams were glued back on today , and i test fitted a new breather pipe for the sump , it was bought years ago , but as my own breather pipe nut has rounded off and stuck solid , i decided not to fit it, and risk damaging my old tank
below is the pic of the new tank , all painted up and ready to fit
IMG_2449 by MyPix on Talk Photography
IMG_2454 by MyPix on Talk Photography
i have some new rubber seals for the tank sender unit, they are the same as the seal for the pickup tube in the sump , this pic shows the interior with the new seal waiting for my original sender , unless i find a new one ,as can be seen , practically zero corrosion inside
IMG_2453 by MyPix on Talk Photography
removing the tank sender or sump tank pickup locking ring is really simple, just get a tool to hold to one of the three tangs, and give a firm tap anticlockwise, the ring will move and come away from the device, and then pull from the tank the rubber seal will be behind that
IMG_2451 by MyPix on Talk Photography
just got to find a few weekends strung together to complete the project
BB 8)
The following 3 users liked this post by Brake buster:
#2
05-16-2015, 02:44 PM
so, the task in hand ,
take this out, and put the other one back in , lol
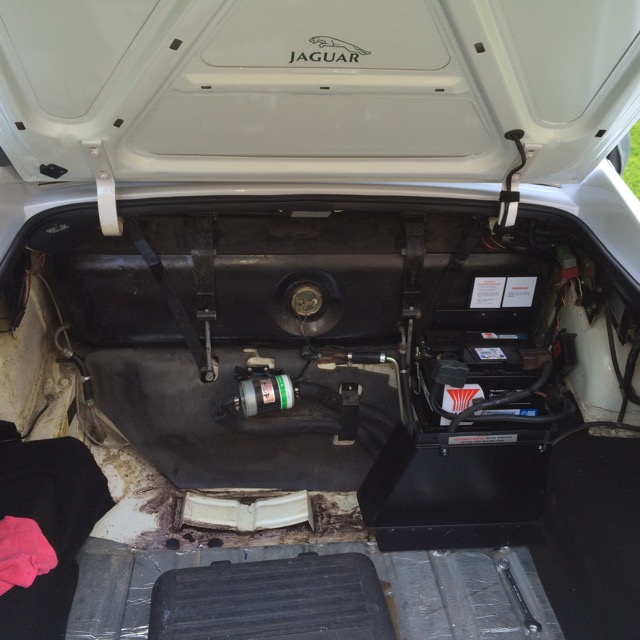
IMG_2465 by MyPix on Talk Photography
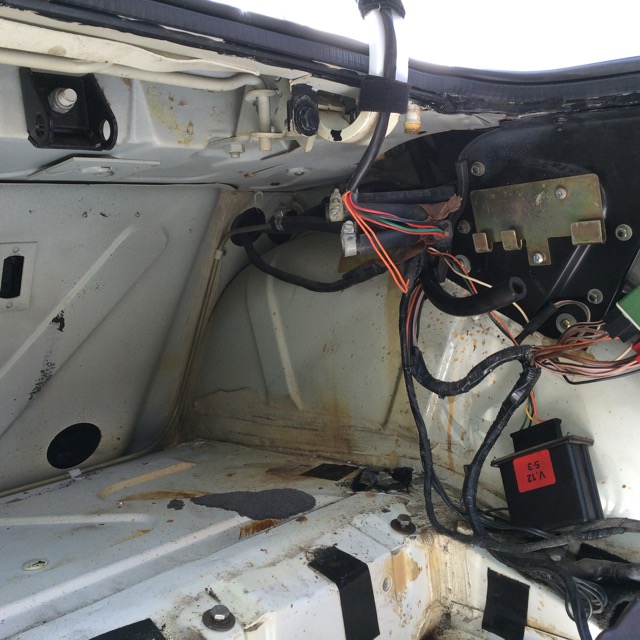
untangle this lot :roll:
IMG_2469 by MyPix on Talk Photography
figure out how i can put these back on :shock:
IMG_2470 by MyPix on Talk Photography
should get most of it done tomorrow, but may be held back by refurbishing the brackets etc, and i have a new return pipe ordered from the net to turn up next week , then all the pipes will be brand new
BB
take this out, and put the other one back in , lol
IMG_2465 by MyPix on Talk Photography
untangle this lot :roll:
IMG_2469 by MyPix on Talk Photography
figure out how i can put these back on :shock:
IMG_2470 by MyPix on Talk Photography
should get most of it done tomorrow, but may be held back by refurbishing the brackets etc, and i have a new return pipe ordered from the net to turn up next week , then all the pipes will be brand new
BB
The following 2 users liked this post by Brake buster:
darrhel (05-17-2015),
orangeblossom (05-21-2015)
#3
05-16-2015, 02:45 PM
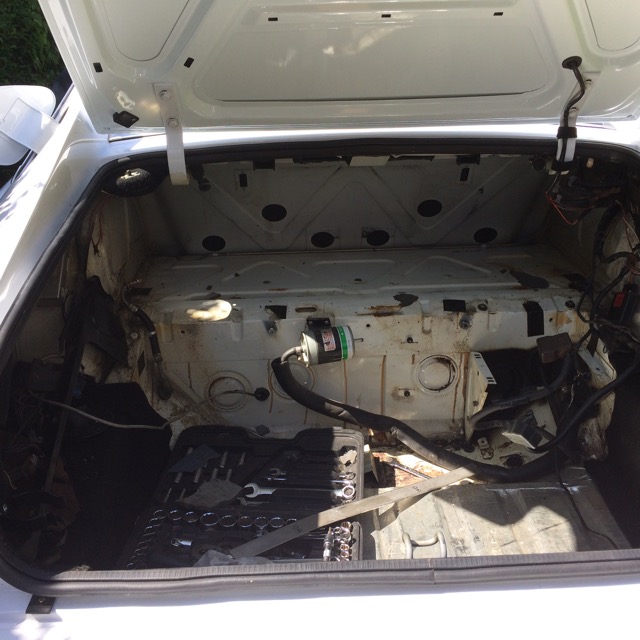
so , today has been a long day , and i must admit its been a struggle , leaning over the car all day has done for my back and knees, but it needed to be done
i ran the car to as low a fuel load as possible, and then drained the rest this way , i cut the swirl pot vent tube and with some pipe clamps decanted the rest into the jug , four and a half gallons later it was empty :roll: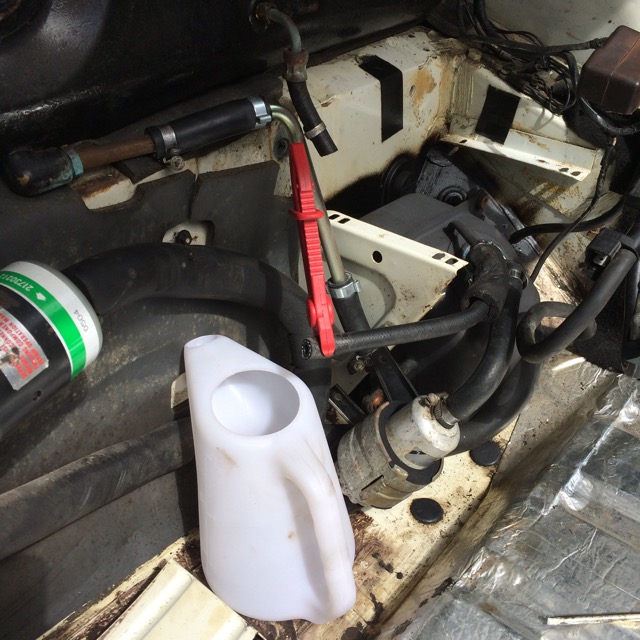
IMG_2474 by MyPix on Talk Photography
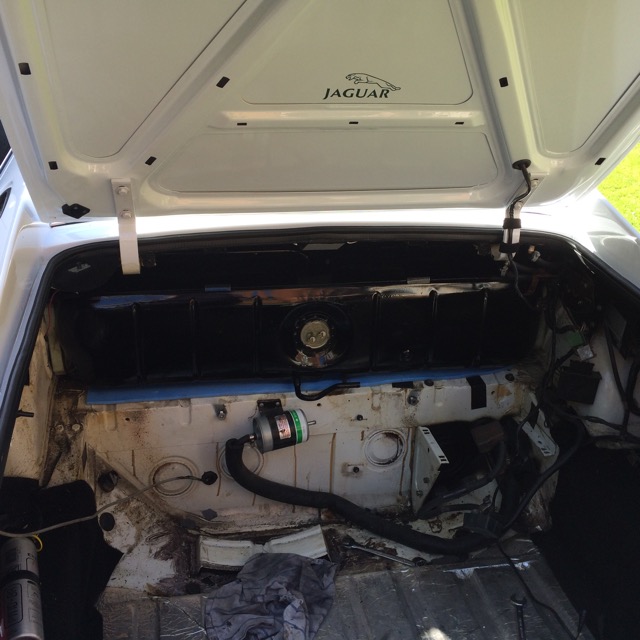
then all the brackets, vent tubes , filler tube and everything else stopping the tank from coming out was removed , then i pulled the tank
IMG_2475 by MyPix on Talk Photography
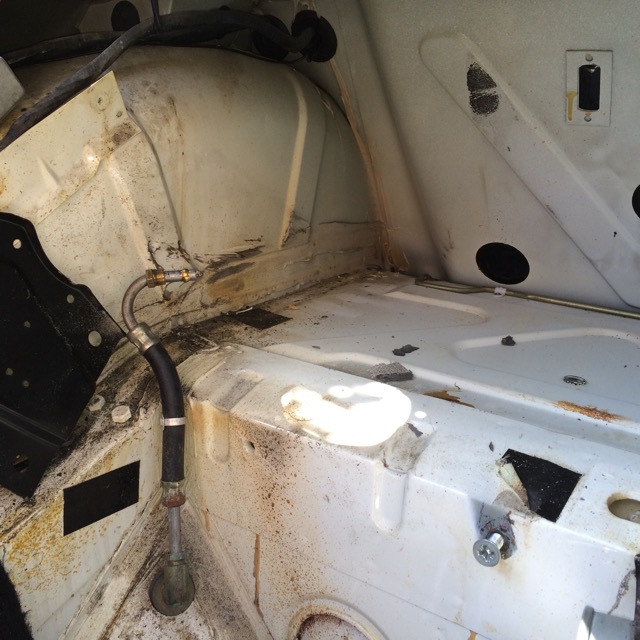
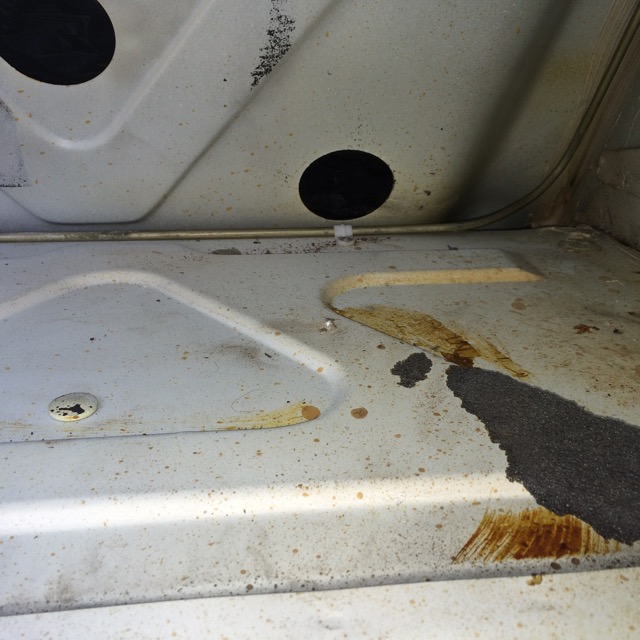
with the tank out i could inspect the internal bodywork, and to my great relief it is totally rot free ,
IMG_2477 by MyPix on Talk Photography
IMG_2478 by MyPix on Talk Photography
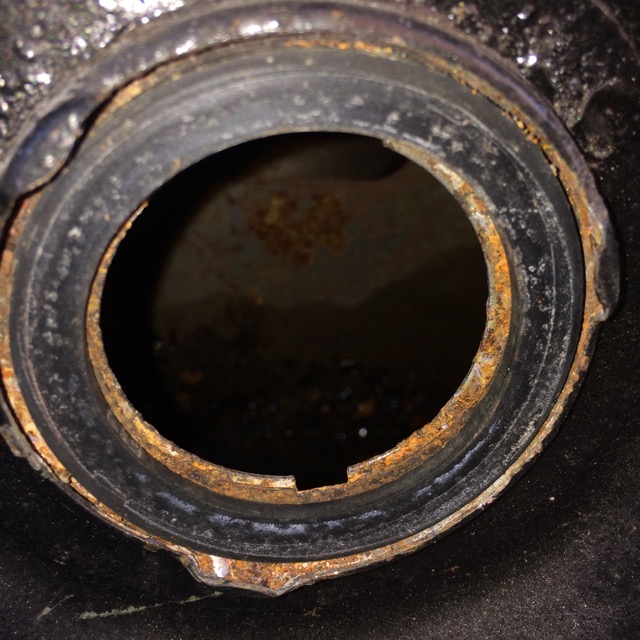
then i spotted the legendary ' rivet ' , you know, the one that wears a hole in the bottom of the tank :roll:
IMG_2476 by MyPix on Talk Photography
here it is.....damage to the tank....
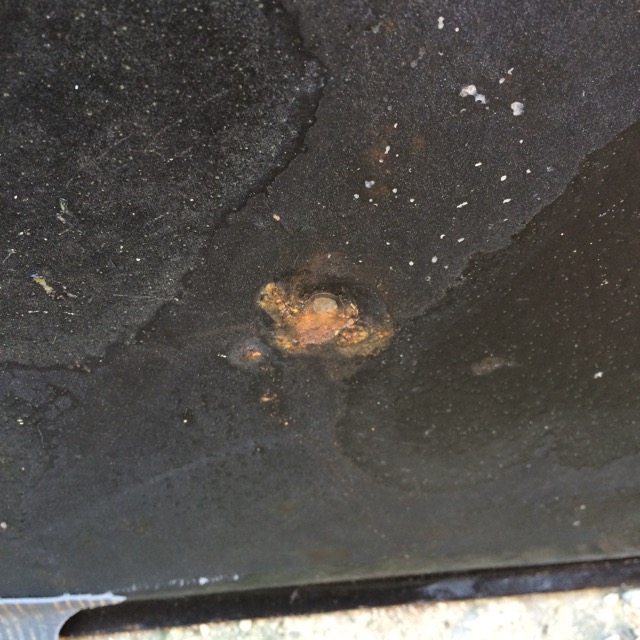
IMG_2479 by MyPix on Talk Photography
i then added some foam to my new tank , in a similar way to the original ,
IMG_2480 by MyPix on Talk Photography
and then put it into the car
IMG_2482 by MyPix on Talk Photography
i then refitted the filler tube and seals
IMG_2483 by MyPix on Talk Photography
and put all the bracing straps back after refurbishing them all
IMG_2484 by MyPix on Talk Photography
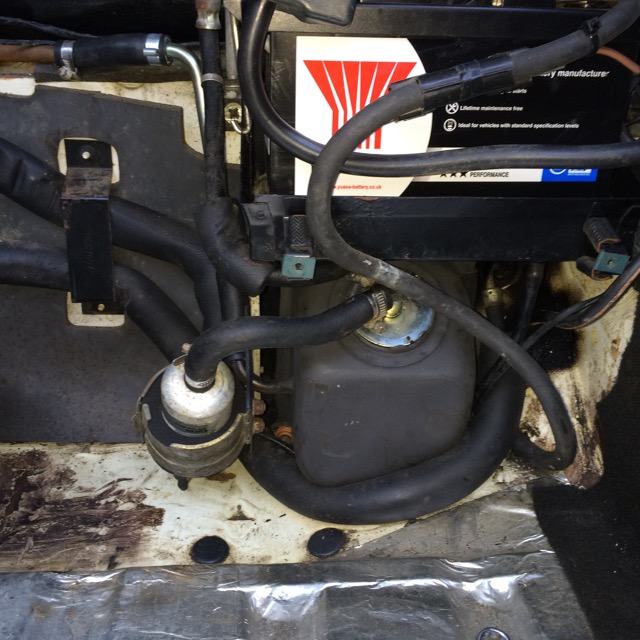
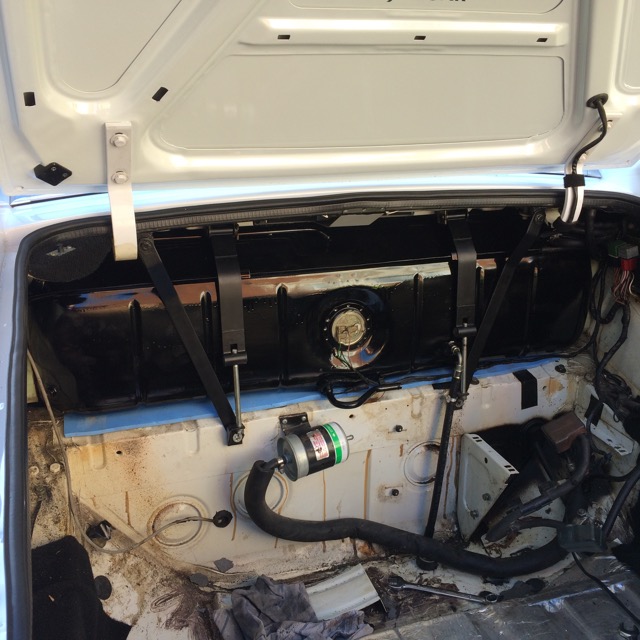
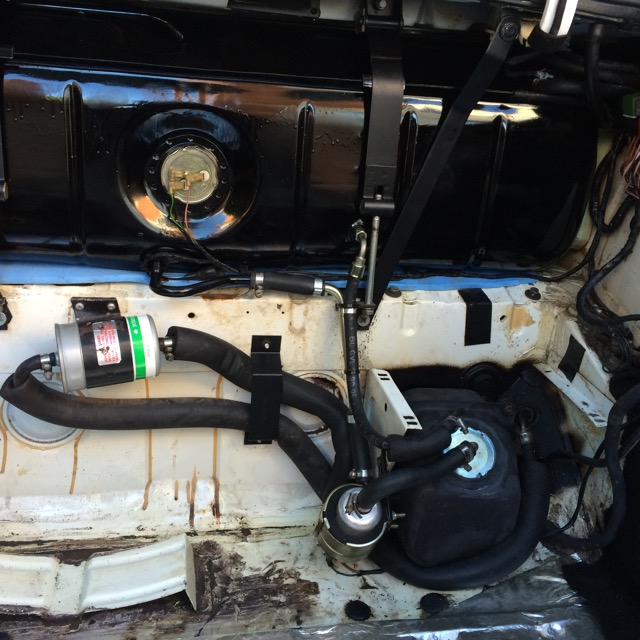
the swirl pot got all new pipework and a new fuel pump was installed
IMG_2489 by MyPix on Talk Photography
a few more bits and pieces and that was enough for today ( 10.00 -19.30 )
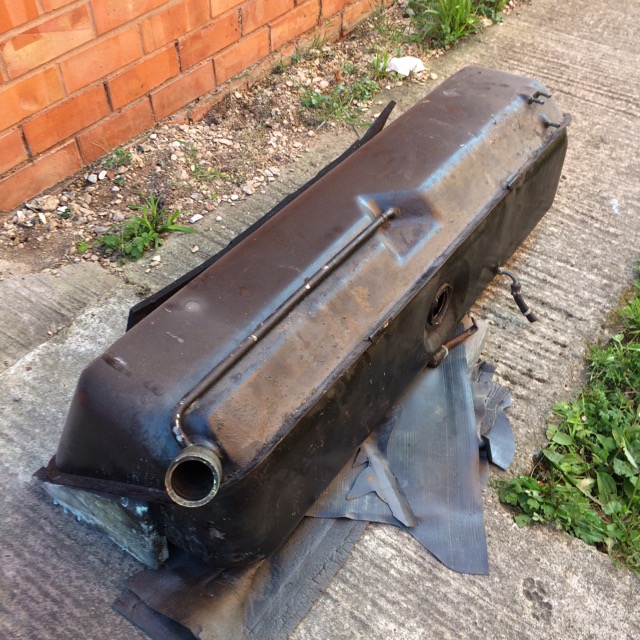
here is the old tank , what a state, i found that it had been out before, and painted black over the original olive colour, but totally rotten inside , needed to be done
IMG_2485 by MyPix on Talk Photography
IMG_2487 by MyPix on Talk Photography
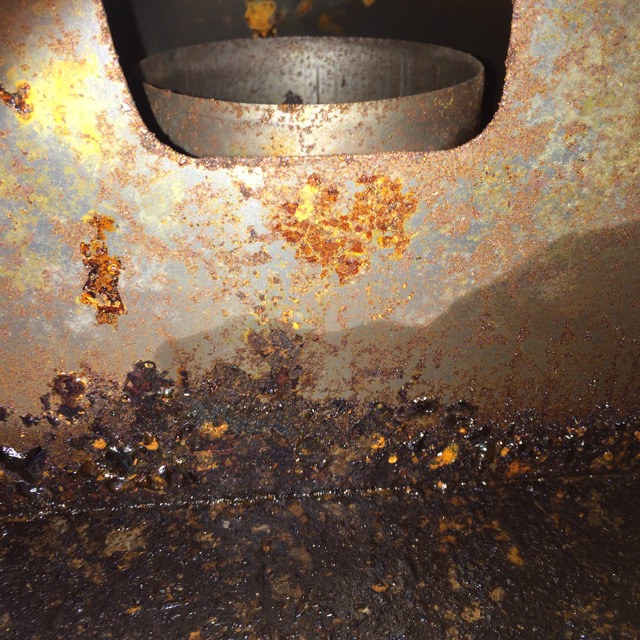
IMG_2488 by MyPix on Talk Photography
off to the Eastern ( UK ) JEC show tomorrow , so hopefully a relaxing day
BB
i ran the car to as low a fuel load as possible, and then drained the rest this way , i cut the swirl pot vent tube and with some pipe clamps decanted the rest into the jug , four and a half gallons later it was empty :roll:
IMG_2474 by MyPix on Talk Photography
then all the brackets, vent tubes , filler tube and everything else stopping the tank from coming out was removed , then i pulled the tank
IMG_2475 by MyPix on Talk Photography
with the tank out i could inspect the internal bodywork, and to my great relief it is totally rot free ,
IMG_2477 by MyPix on Talk Photography
IMG_2478 by MyPix on Talk Photography
then i spotted the legendary ' rivet ' , you know, the one that wears a hole in the bottom of the tank :roll:
IMG_2476 by MyPix on Talk Photography
here it is.....damage to the tank....
IMG_2479 by MyPix on Talk Photography
i then added some foam to my new tank , in a similar way to the original ,
IMG_2480 by MyPix on Talk Photography
and then put it into the car
IMG_2482 by MyPix on Talk Photography
i then refitted the filler tube and seals
IMG_2483 by MyPix on Talk Photography
and put all the bracing straps back after refurbishing them all
IMG_2484 by MyPix on Talk Photography
the swirl pot got all new pipework and a new fuel pump was installed
IMG_2489 by MyPix on Talk Photography
a few more bits and pieces and that was enough for today ( 10.00 -19.30 )
here is the old tank , what a state, i found that it had been out before, and painted black over the original olive colour, but totally rotten inside , needed to be done
IMG_2485 by MyPix on Talk Photography
IMG_2487 by MyPix on Talk Photography
IMG_2488 by MyPix on Talk Photography
off to the Eastern ( UK ) JEC show tomorrow , so hopefully a relaxing day
BB
Last edited by Brake buster; 05-16-2015 at 02:48 PM.
The following 2 users liked this post by Brake buster:
darrhel (05-17-2015),
orangeblossom (05-21-2015)
#4
05-16-2015, 05:10 PM

Veteran Member
Join Date: Jul 2010
Location: Austin tx and Daytona FL.
Posts: 7,362
Received 1,236 Likes
on
943 Posts
looks like my old tank ,rusty junk,pumps, lines , filters, regulators, and a full set of injectors,ETC.
so my fix is pictured, works great and never any problems in 20yrs! plastic tank 20gallons, stainless pump, nice quick change filter, aluminum lines and anodized Aero-quip fittings and connections.
custom adjustable stainless fuel regulator!
i'm kinda a do it right the first time guy, and to hell with the cost.
The following 3 users liked this post by ronbros:
#5
05-21-2015, 02:44 PM
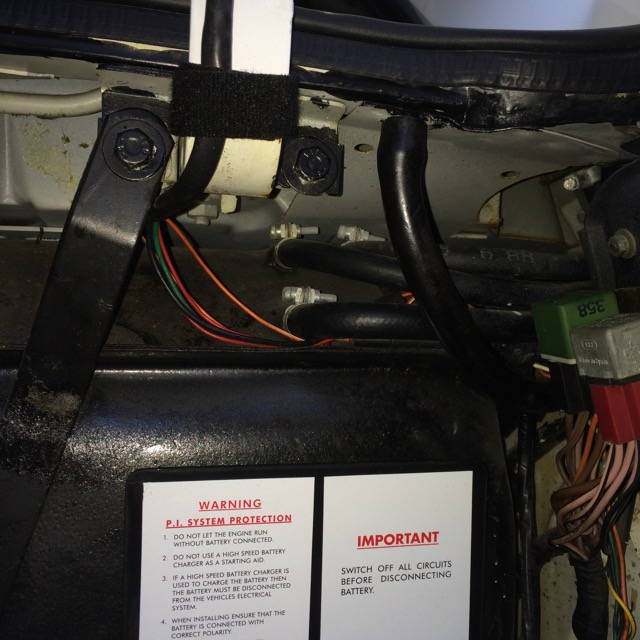
so last night i spent an hour fitting the full return pipe that came in the post , and fitted the battery tray that also supports the swirl pot
i then decided to put the removed petrol back into the tank and checked for any leaks , fortunately there weren't any and i put the car to bed for the night
when i got back from work today i opened the boot and for the first time in ownership i wasn't met with a face full of petrol fumes, just a slight smell of fresh paint :mrgreen:
i connected the battery and turned the car to position two on the ignition , the new fuel pump span into life and cut out when the pressure was up , i turned back the key and then to pos two , and the pump span up again , all was good and no leaks from the now pressurised system and i carried over the key to start the car, no hesitation what so ever and she sprang into life , great :mrgreen:
time to put al the trim back its surprising how much there is , but it all goes back and looks quite good again
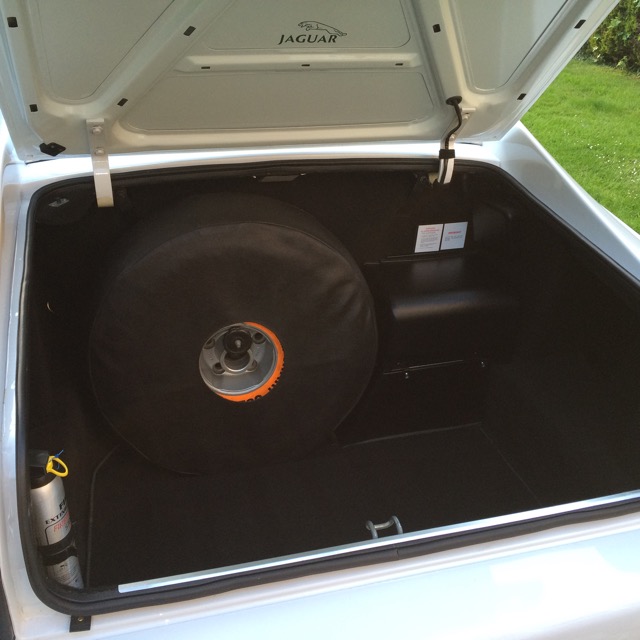
IMG_2504 by MyPix on Talk Photography
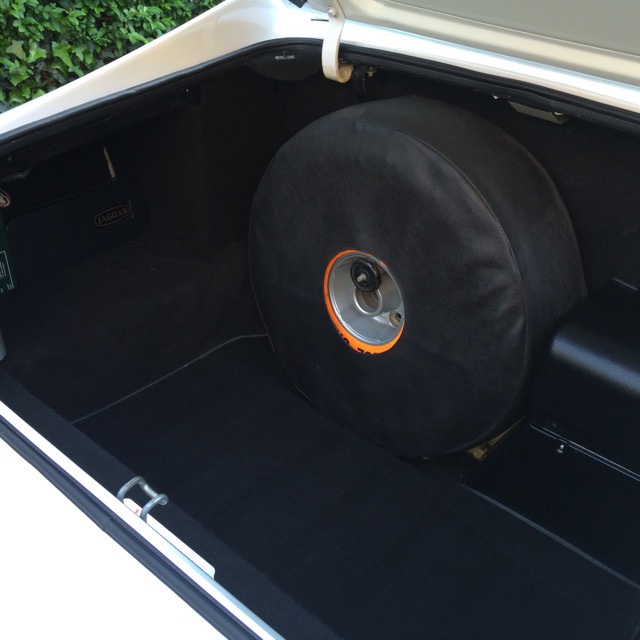
IMG_2505 by MyPix on Talk Photography
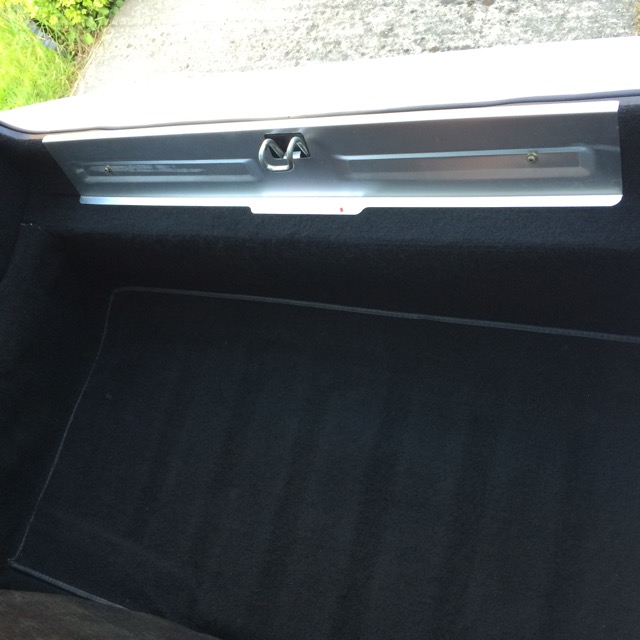
IMG_2507 by MyPix on Talk Photography
what do you think ??
just got to throw a load of junk in the boot and go for a drive so it can all bounce around
job done.................. 8)
BB
i then decided to put the removed petrol back into the tank and checked for any leaks , fortunately there weren't any and i put the car to bed for the night
when i got back from work today i opened the boot and for the first time in ownership i wasn't met with a face full of petrol fumes, just a slight smell of fresh paint :mrgreen:
i connected the battery and turned the car to position two on the ignition , the new fuel pump span into life and cut out when the pressure was up , i turned back the key and then to pos two , and the pump span up again , all was good and no leaks from the now pressurised system and i carried over the key to start the car, no hesitation what so ever and she sprang into life , great :mrgreen:
time to put al the trim back its surprising how much there is , but it all goes back and looks quite good again
IMG_2504 by MyPix on Talk Photography
IMG_2505 by MyPix on Talk Photography
IMG_2507 by MyPix on Talk Photography
what do you think ??
just got to throw a load of junk in the boot and go for a drive so it can all bounce around
job done.................. 8)
BB
The following 4 users liked this post by Brake buster:
#6
05-22-2015, 01:34 AM

Veteran Member
#7
06-06-2015, 11:16 PM

Trending Topics
#8
06-07-2015, 12:10 AM

Veteran Member
On top of the Fuel Tank is what looks like a Nylon Cap, which is called the evaporator.
If you pulled the Fuel Tank far enough back to take that off, then you could siphon the fuel out through that.
If you haven't got the Special Tool to turn the ring to get that off, you could try (gently) tapping the ring round, with a piece of 'Hard Wood'
#9
06-07-2015, 03:53 AM
Veteran Member
#10
06-07-2015, 07:33 AM
Veteran Member
There is no fuel pressure detector in the ECU/electronic system.
Greg
The following users liked this post:
orangeblossom (06-07-2015)
#11
06-07-2015, 08:48 AM

Veteran Member
Join Date: Mar 2008
Location: Pacific Northwest USA
Posts: 24,920
Received 10,979 Likes
on
7,211 Posts
Sure.
People use that method all the time.
If you have an HE V12 you'll need to ground the orange wire at the pump relay. With this done the pump run continuously with the key 'on'.
Cheers
DD
The following 2 users liked this post by Doug:
Klarion (06-08-2015),
orangeblossom (06-07-2015)
#12
06-07-2015, 08:50 AM
Veteran Member
Join Date: Mar 2008
Location: Pacific Northwest USA
Posts: 24,920
Received 10,979 Likes
on
7,211 Posts

Thread
Thread Starter
Forum
Replies
Last Post
Currently Active Users Viewing This Thread: 1 (0 members and 1 guests)