When you click on links to various merchants on this site and make a purchase, this can result in this site earning a commission. Affiliate programs and affiliations include, but are not limited to, the eBay Partner Network.
Is it possible to change the upper and lower ball joints without removing the spring or releasing the energy stored within?
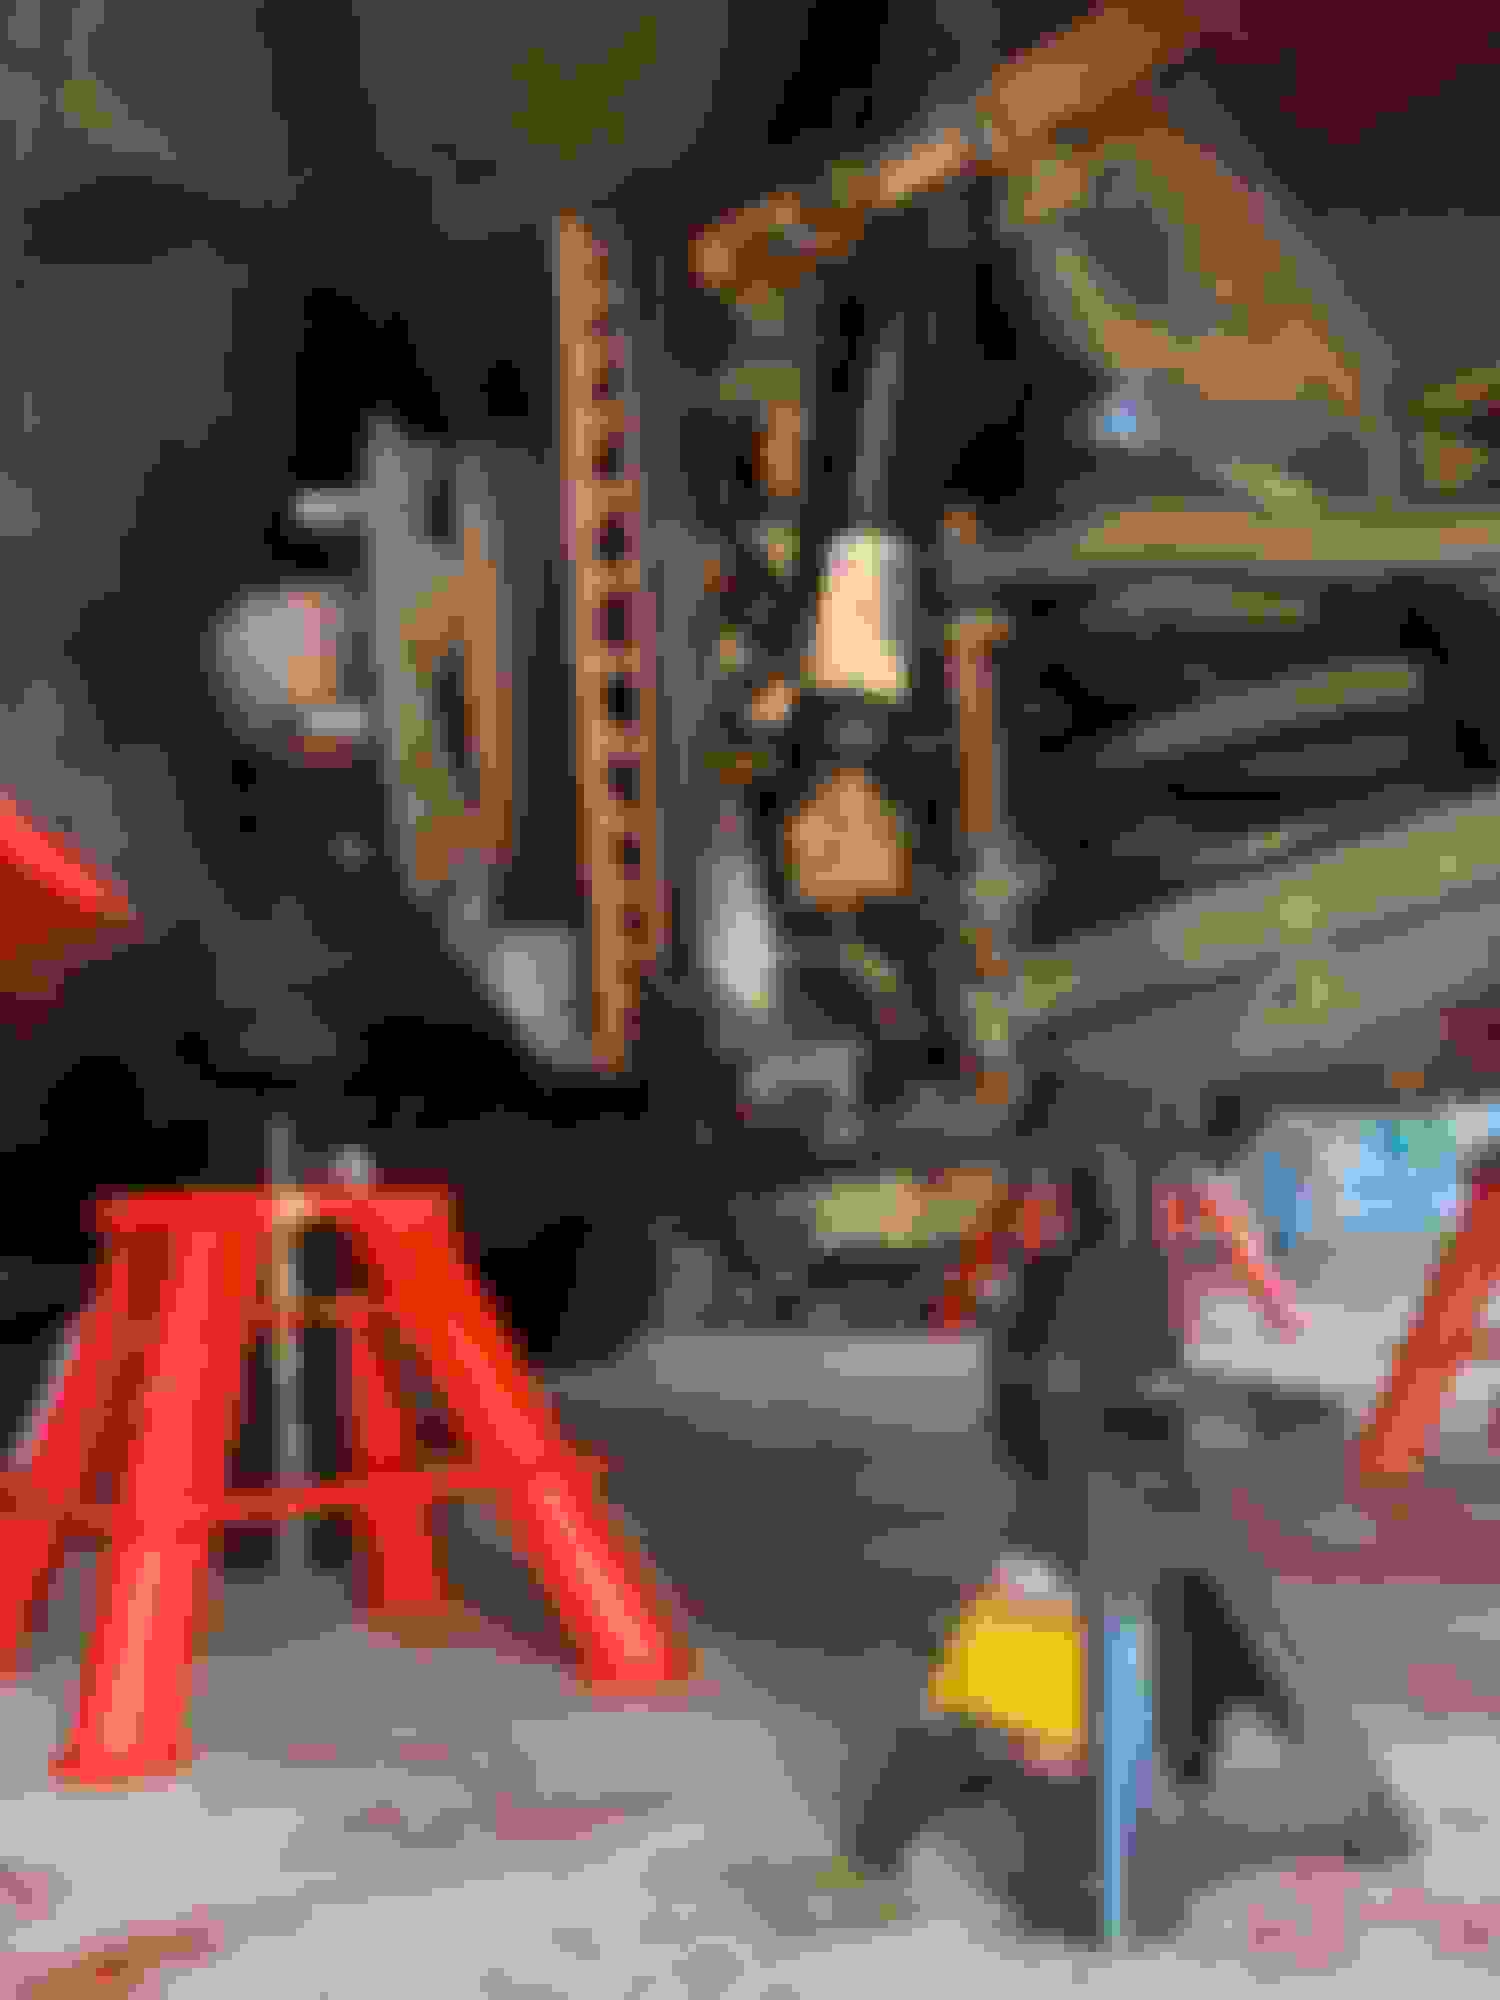
My thought was to partially compress the spring by supporting the spring pan with jack stand as shown in the photo below. Note that the weight of the car is supported by the red stands on the jacking points. I used a jack to raise the spring pan an inch or so before putting the black jack stand in place, so the spring is not fully extended.
I wanted to get some feedback from this forum before I do something stupid.
Is it possible to change the upper and lower ball joints without removing the spring or releasing the energy stored within?
My thought was to partially compress the spring by supporting the spring pan with jack stand as shown in the photo below. Note that the weight of the car is supported by the red stands on the jacking points. I used a jack to raise the spring pan an inch or so before putting the black jack stand in place, so the spring is not fully extended.
I wanted to get some feedback from this forum before I do something stupid.
Thanks in advance.
Thats the way I do it. In fact that's the only way really to do it. With the jack under the lower you control the spring. The upper and spindle are just hanging there
Top balljoints, yes, as described above, but note Grant's wise advice. The bottom ones are not SAFELY changeable with the spring in place, in my view. It is very difficult to remove the lower balljoint from the lower wishbone without a great deal on wrenching and bashing, I have found; and I would not want to do that with a compressed spring in there.
Last edited by Greg in France; 08-02-2020 at 01:40 AM.
I am with Greg there, that front spring is dangerous, and respect is demanded.
Way back, when I did the UPPERS, coz you cannot get anything in there as Greg stated,
I have used the might of the spring to release the upper taper.
Jack the car up, on the jacking points, support the car, undo the upper joint nut NO MORE than 2 turns. Some have released the taper at that point, some have not. This will cause the upper joint taper to release, and the nut being still on the taper, nothing will fly apart. It may need a small whack with a BFH. Once cracked,, simply jack up and secure the spring pan with the 2nd jackstand, so that those acorn bump stops are well clear the pads on the cradle, and remove the upper balljoint etc and reassemble.
LOWERS:
With the jackstand now supporting the spring pan, then you will need to get a large steel drift rod down onto the top of the lower balljoint pin, after releasing that nut about 2 turns also, and BEAT it until it releases, and they can be TIGHT. The weight of the hub etc will aid you somewhat, The jackstand under the spring pan creates a solid structure that allows the WHACK to go through the balljoint. Once released, undo the nut and the top arm and the hub/brakes/etc will drop down, releasing the lower balljoint pin from the wishbone. The lower wishbone is secure with the jackstand under it, and is quite safe.
Apologies for any confusion this may have caused earlier, as I got confused, it happens sometimes now, and thanks to Greg in France, who got on the Batphone, and pointed out my blunder.
Last edited by Grant Francis; 08-02-2020 at 04:45 AM.
Reason: CRAFT moment
There are a number of different ways to approach this job.
First I'll mention that nobody is more afraid of compressed springs than I am. I've dealt with I-don't-know-how-many suspension overhauls and, to this day, I still get the heebie-jeebies. Sometimes,fear is what helps keep us safe.
Personally, I leave the spring in place and use a floor jack under the lower control arm. The cup of the floor jack engages the the spring pan very well, better than a jack stand, IMO. Plus, I've found that being able to raise/lower the arm can be helpful during the job, depending on the tools you are using. And, when time comes to out it all back together, your floor jack is already there !
For absolute safety you'd remove the spring. But, when you think about it, removing the spring is a bit risky in and of itself. No matter how you slice it, you're dealing with a compressed spring.
Now, a bit of nanny-ism, if the group will tolerate it for moment.
Only once have I had a close call with a compressed spring, many many years ago. It was helping a pal and one of us made a false move. The details are forgotten except this: we had been struggling with a suspension overhaul all day and the "false move" occurred after about ten hours of hard work. I am 110% convinced that fatigue was the primary contributing factor. Looking back...to the extent that my memory will allow....I think every major screw-up or close-call that I've encountered has occurred at the end of the day. For several years now I've made it a personal policy to tackle high-risk or complicated jobs in the morning, when I'm rested and thinking clearly.
Of course all of that sort of thing comes down to the individual. I get that. But, it's something I feel quite strongly about, especially as I get older, so I felt compelled to mention it.....even though it may come off as being a bit too preachy for some.
By the way, speaking of safety, I love those massive 4-leg jack stands. Where did you get them ?
Cheers
DD
Doug, I got them at Summit Racing after my other jack stands were recalled by Harbor Freight for a defect with the ratcheting pawl. I decided to replace them a pin style jack stand and found these online. They�re made in China by a company called Sunex.
100% agree Doug. I never tackle difficult jobs until something inside says "Do it now, you are ready". This always means, for me, that I am (i) rested and (ii) have got my head round the task properly, and my subconscious is saying i have!
Further to Grant's points above about the LOWER balljoint: Once the spring pan is supported by the axle stand or floor jack, BEFORE you whack to nut-loosened bottom balljoint, you will find getting a good whack on the bottom balljoint loosened nut is not very easy (see the pic in post 1 if you do not see what I am driving at). Therefore I suggest (having ensured all is solid, car handbrake engaged, in Park, wheels chocked etc) then:
1) undo the top balljoint from the top wishbone arms (if you do not do this, and somehow manage to get enough access the whack the bottom balljoint loosened nut, then you MUST undo the four fixing nuts that hold the balljoint to the upright, Otherwise you are just whacking a bolted-in component).
2) this allows you to swing the upright and hub assembly outwards
3) this gives decent access to the bottom balljoint nut
4) then whack the balljoint nut, and it might need a few GOOD whacks with a lump hammer
Once loosened, the hub/upright and balljoint will drop down from the wishbone as a unit, but just a couple of mm depending upon how much you have loosened the nut. It can then be unbolted from the upright and replaced.
Last edited by Greg in France; 08-02-2020 at 09:42 AM.
100% agree Doug. I never tackle difficult jobs until something inside says "Do it now, you are ready". This always means, for me, that I am (i) rested and (ii) have got my head round the task properly, and my subconscious is saying i have!
Agree entirely! I always try to listen to that little voice that says "Are you sure?"
I�ve gotten stuck on the first upper ball joint. I managed to crack it, but now I can�t get the nut off the pin. The nut has reached a section of thread that is fairly corroded, now the pin just free spins when I turn the nut. I tried cutting off the gaiter so I could grab the pin with pliers while I turned the nut, but this didn�t work.
So I moved on to cracking the outer and inner bolts while I pondered this. I got the inner bolt to crack, but now I think I�ve rounded the heads on the outer bolt.
Just so I'm clear, you had a wrench on the bolt head side while loosening the corresponding nuts? (insert punchline here)
I sounds like you were simply trying to remove the nuts without using a wrench to keep the bolt from spinning. This is a two hand/two wrench job. (sockets work too)
Ok, I�ve gotten both upper bolts cracked now. Just need to use an extension on the socket wrench to get in on the nut properly.
Still stuck on the lower retaining but on the upper ball joint. Holding the pin still with hand pliers hasn�t worked, thinking of trying a pair of vise grips next.
If you can re-tighten the outer bj nut you can press the spindle back onto the tapered stud. then clean u the rusty threads with a wire brush and rust remover and a die if you have one. I like using an impact to drive the nuts out fast and once off, you can reinstall them for bashing
but now i have a balljoint press and i do not need a hammer much unless it sticks
Thanks to @Aarcuda�s suggestion, I bashed the ball joint back into the socket and tightened the retaining bolts, which gave enough resistance that with a few choice words and a couple of Hail Marys I was finally able to get the lower retaining nut off!
You can see the corroded threads at the bottom that gave me fits, even though I liberally applied PB Blaster and let them soak overnight
A huge +1 on the Sunex jack stands. I bought the taller set to hold the car up while I dropped the rear cage a couple of weeks ago. They are bulletproof.
I didn�t even consider the risk of those stands giving out or moving. They�re worth every penny.
100% agree Doug. I never tackle difficult jobs until something inside says "Do it now, you are ready". This always means, for me, that I am (i) rested and (ii) have got my head round the task properly, and my subconscious is saying i have!
Further to Grant's points above about the LOWER balljoint: Once the spring pan is supported by the axle stand or floor jack, BEFORE you whack to nut-loosened bottom balljoint, you will find getting a good whack on the bottom balljoint loosened nut is not very easy (see the pic in post 1 if you do not see what I am driving at). Therefore I suggest (having ensured all is solid, car handbrake engaged, in Park, wheels chocked etc) then:
1) undo the top balljoint from the top wishbone arms (if you do not do this, and somehow manage to get enough access the whack the bottom balljoint loosened nut, then you MUST undo the four fixing nuts that hold the balljoint to the upright, Otherwise you are just whacking a bolted-in component).
2) this allows you to swing the upright and hub assembly outwards
3) this gives decent access to the bottom balljoint nut
4) then whack the balljoint nut, and it might need a few GOOD whacks with a lump hammer
Once loosened, the hub/upright and balljoint will drop down from the wishbone as a unit, but just a couple of mm depending upon how much you have loosened the nut. It can then be unbolted from the upright and replaced.
Maybe my hammer isn't big enough, but I found a gear puller to be the tool for the job.
I�ve gotten stuck on the first upper ball joint. I managed to crack it, but now I can�t get the nut off the pin. The nut has reached a section of thread that is fairly corroded, now the pin just free spins when I turn the nut. I tried cutting off the gaiter so I could grab the pin with pliers while I turned the nut, but this didn�t work.
So I moved on to cracking the outer and inner bolts while I pondered this. I got the inner bolt to crack, but now I think I�ve rounded the heads on the outer bolt.
Any suggestions?
I remember it was difficult to hold those bolts with a wrench or socket. It helped when I took socket (and I think wrench) to the grinder. It made wrench edges sharp and they could grab those rounded bolt's heads.
As to using stand to support spring - when I did the same I felt safer using pile of bricks with piece of wood on top as support. I also took heavy chain and made few loops around spring and lower wishbone and secured it that way just in case.
 08-01-2020, 04:22 PM