Rescue's Official Build Thread - 88 XJS V12 Oct 12 2019
#561
Coming in VERY late as usual.
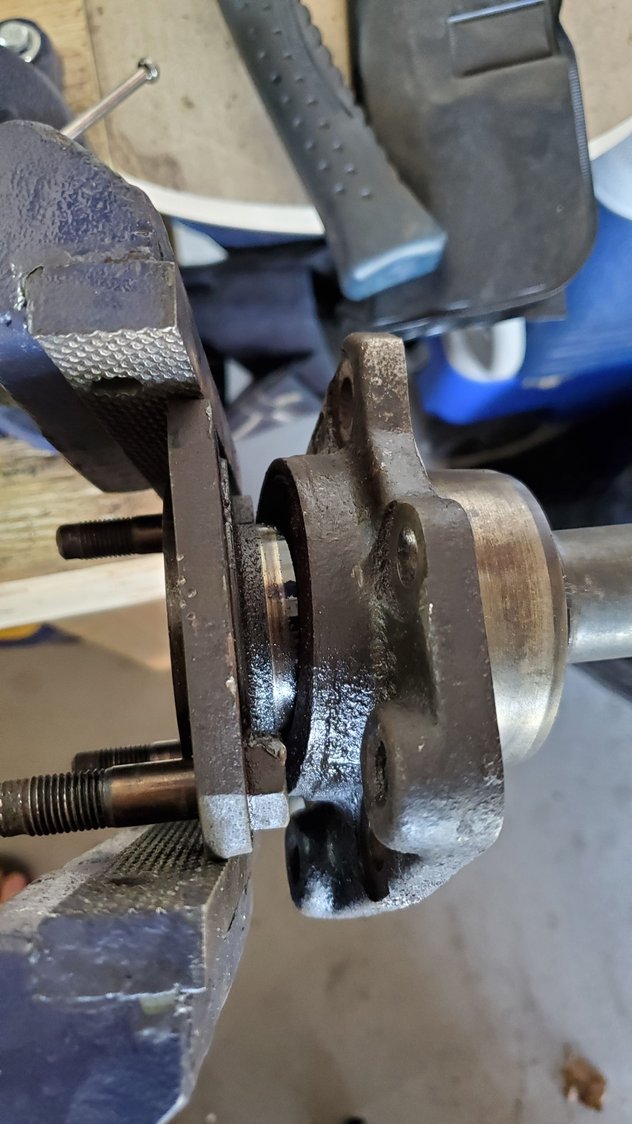
The output shaft WILL NOT move within its 5 bolts housing. Unless the bearing, and nut inside are knackered.
These output assemblies are assembled with a BIG nut and lock tab on the inside, once the pre-load of the output shaft bearings (inside the 5 bolt casting) is set with the collapsible spacer.
If you have a broken halfshaft retaining bolt, the output shaft assembly will need to come out of the diff, the locktab released, the BIG nut undone, and then VERY CAREFULLY drive the shaft out of the bearings and spacer. SFH and a lump of wood, is all that is needed for the actual shaft removal from the casting.
Good time to do the output shaft seals/s as this dismantle is required for a $4 seal.
You might be lucky, and assemble it with the old sleeve/spacer, however I never was, and a new collapsible spacer, and resetting of the pre-load was always way quicker than messing with old stuff.
The following users liked this post:
Greg in France (06-05-2020)
#562
#563
Coming in VERY late as usual.
The output shaft WILL NOT move within its 5 bolts housing. Unless the bearing, and nut inside are knackered.
These output assemblies are assembled with a BIG nut and lock tab on the inside, once the pre-load of the output shaft bearings (inside the 5 bolt casting) is set with the collapsible spacer.
If you have a broken halfshaft retaining bolt, the output shaft assembly will need to come out of the diff, the locktab released, the BIG nut undone, and then VERY CAREFULLY drive the shaft out of the bearings and spacer. SFH and a lump of wood, is all that is needed for the actual shaft removal from the casting.
Good time to do the output shaft seals/s as this dismantle is required for a $4 seal.
You might be lucky, and assemble it with the old sleeve/spacer, however I never was, and a new collapsible spacer, and resetting of the pre-load was always way quicker than messing with old stuff.
The output shaft WILL NOT move within its 5 bolts housing. Unless the bearing, and nut inside are knackered.
These output assemblies are assembled with a BIG nut and lock tab on the inside, once the pre-load of the output shaft bearings (inside the 5 bolt casting) is set with the collapsible spacer.
If you have a broken halfshaft retaining bolt, the output shaft assembly will need to come out of the diff, the locktab released, the BIG nut undone, and then VERY CAREFULLY drive the shaft out of the bearings and spacer. SFH and a lump of wood, is all that is needed for the actual shaft removal from the casting.
Good time to do the output shaft seals/s as this dismantle is required for a $4 seal.
You might be lucky, and assemble it with the old sleeve/spacer, however I never was, and a new collapsible spacer, and resetting of the pre-load was always way quicker than messing with old stuff.
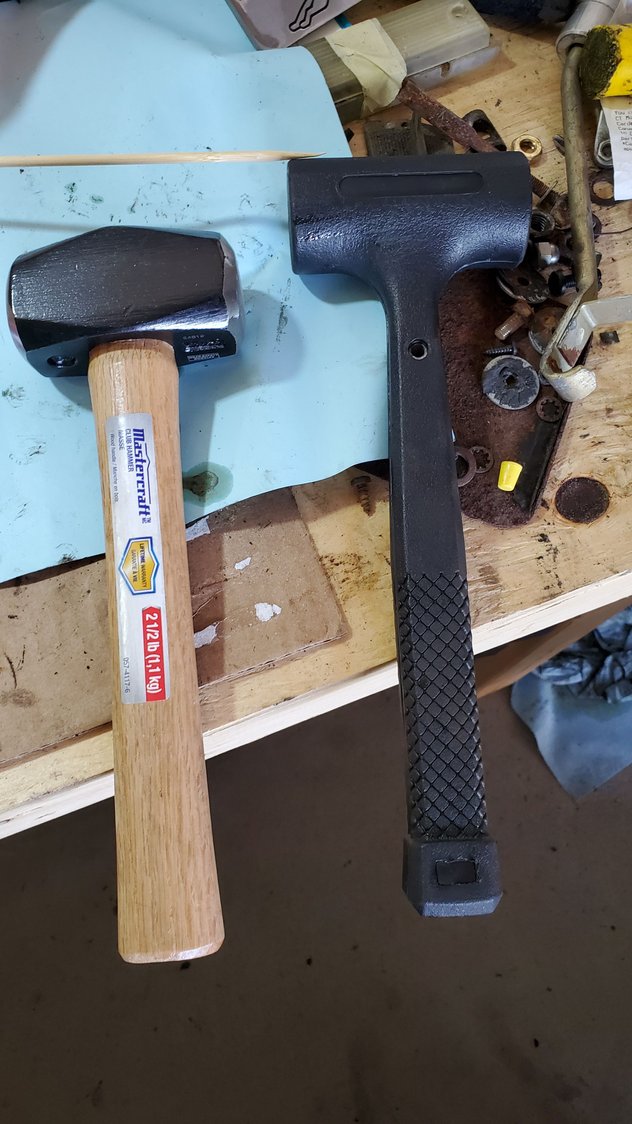
Ya thats the plan. Maybe I was just being to light on the little rubber hammer. This isn't the first time I've need to hammer something out but dont have a proper hammer. Gonna grab a 1.5lb dead blow hammer on my way home from work.
I took great care in counting the number of turns and making markings before disassemble so I can get everything exactly back to the way it was. If everything goes perfect. But its a jag so probably not lol.
We are almost getting back to some normalcy at work so now things are gonna slow down.
Luckily I'm off after 0900 today but my buddies leaving for a new posting on Monday so there's lots of drinking to be hand this afternoon and tomorrow. Maybe Sunday as well lol.
Once I get this bolt replaced i just gotta slap the rest together and get that IRS. Which reminds me I gotta borrow a lift again lol
Last edited by Rescue119; 06-05-2020 at 05:25 AM.
The following users liked this post:
Grant Francis (06-05-2020)
#564
Now I understand where you are at.
Once that large nut and locktab are removed, the actual shaft should just "tap" out.
Some of mine had needed a slightly heavier whack, but certainly NOT a bashing time. The main culprit on those of mine was the collapsible space binding on the shaft, hence the 99% need of a new spacer.
The inner most bearing usually just slides off, and the outer most can be the tight one.
Dont skip the seal, both sides, while that cradle is out, its a shiiit load of work later for 2 el-cheapo seals, and 2 spacers.
Last edited by Grant Francis; 06-05-2020 at 07:38 AM.
The following users liked this post:
Greg in France (06-05-2020)
#565
The following 3 users liked this post by Rescue119:
#566
#567
#568
#569
The following users liked this post:
Greg in France (06-05-2020)
#570
So I've been looking but I can't find anything really about metlocs nuts. Is it a UK term? What makes them special? What makes them lock?
#571
#572
I think like or similar to these.
https://www.finditparts.com/products...BoCYKwQAvD_BwE
https://www.finditparts.com/products...BoCYKwQAvD_BwE
#573
Exactly. They are single use officially, but I have reused once or twice them without any problems. They use a slight metal interference, instead of nylon, to lock the nut. hence they are heatproof and will not loosen when things in the area (exhaust/brakes/diff) start getting hot.
I'm so excited to get everything back together and see if when I turn the key it explodes or not lol.
#574
#576


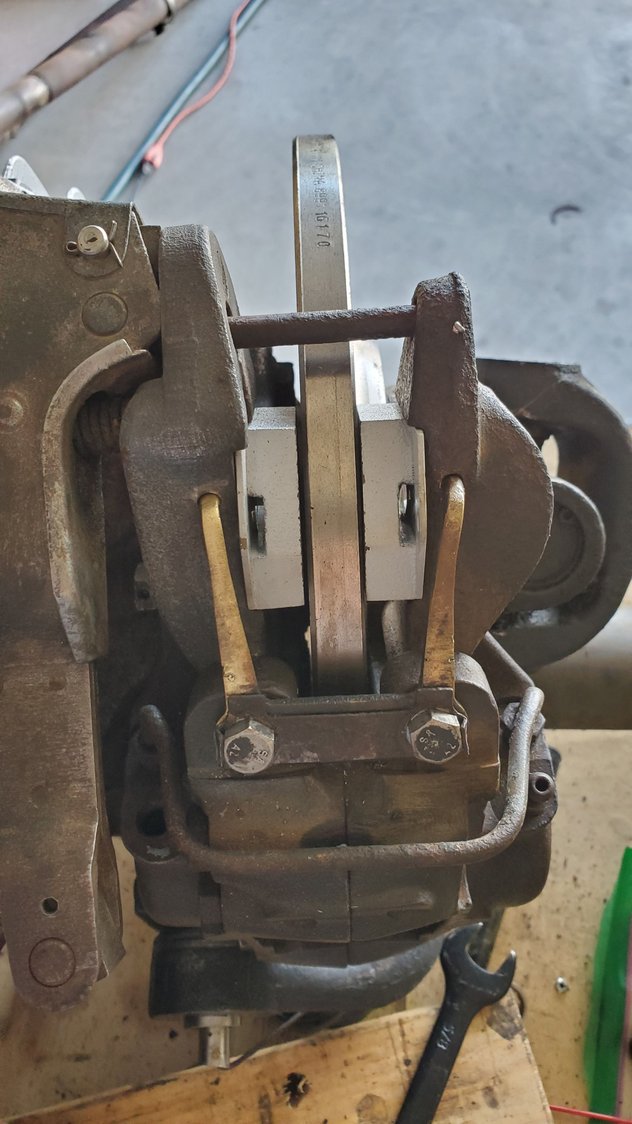
I guess I can't adjust them until after I get the rest of the stuff together right? The passenger side one looks like the pads are a little further away than the driver side one.
Anyone know how much the should be off the disc off hand? I know they are self adjusting but I dont know how that screw at the top (one with pin through it) for the adjusting works. I've been googleing but can seem to get a straight answer.
#577
I guess I can't adjust them until after I get the rest of the stuff together right? The passenger side one looks like the pads are a little further away than the driver side one.
Anyone know how much the should be off the disc off hand? I know they are self adjusting but I dont know how that screw at the top (one with pin through it) for the adjusting works. I've been googleing but can seem to get a straight answer.
Anyone know how much the should be off the disc off hand? I know they are self adjusting but I dont know how that screw at the top (one with pin through it) for the adjusting works. I've been googleing but can seem to get a straight answer.
My understanding is that unless the e brake and ALL it components are working in harmony, are clean and right adjusted from the outset, the auto adjust is - well, you'd be lucky.
#578
You can and must adjust them before the axle goes back. Adjustment is simple:
- remove split pin from that large screw-head
- turn screw head clockwise until the pads just touch the disc
- reinsert slit pin.
#579
Rescue
You can and must adjust them before the axle goes back. Adjustment is simple:
You can and must adjust them before the axle goes back. Adjustment is simple:
- remove split pin from that large screw-head
- turn screw head clockwise until the pads just touch the disc
- reinsert slit pin.
When i turn the screws it sounds like a racheting sound. I know there's a racheting system in there. Like click click click.
It also looks like those brass? Tangs are forcing the pads outward. Is that their job as well. Right now I have them about 1/16 off the disc. Until I get those nutz in I can't fully adjust it but now Iay least I have an idea.
Anywas im off to a BBQ for the evening. Cheers
The following 2 users liked this post by Rescue119:
Dukejag (06-07-2020),
Greg in France (06-07-2020)
#580
The clicking you hear is the pad auto adjustment mechanism in the casing of the caliper arm ratcheting up so it holds the pads closer. All normal. The idea is that as the pads wear, eventually more inward movement of the caliper arms clicks over the ratchet, thus not allowing the arms to retract quite as far as before. The brass arms are to spring-load the caliper arms outwards, otherwise the arms/pads would flop against the disc and squeak all the time!
In effect the self adjustment ratchet has the same effect on the mechanism as your turning the screw head does. It is really doing up a ratcheted nut on the other end of that screw. People make the mistake of thinking that this mechanism adjusts the entire system; it does not, it only adjusts the pad to disc clearance. The free play on the lever must also be adjusted at the cable adjuster behind the driver's seat in the sill under the carpet, as I mentioned in my last post.
And finally, when you come to refit the cable to the calipers, you may well find it too short, when it was not when you removed it. Do not ask me why, but this works to get the correct length back: Ask Madame to get in the driver's seat, and press the lever button in, meanwhile you are under the car with a pair of grips pulling for all you are worth on the cable; then ask Madame, still pressing the button, to pull the lever up and down a few times, you still pulling on the cable. This returns the cable to where it should be, length-wise.
The following users liked this post:
Dukejag (06-07-2020)


