Rescue's Official Build Thread - 88 XJS V12 Oct 12 2019
#61
The following users liked this post:
Lucielle (10-25-2021)
#62
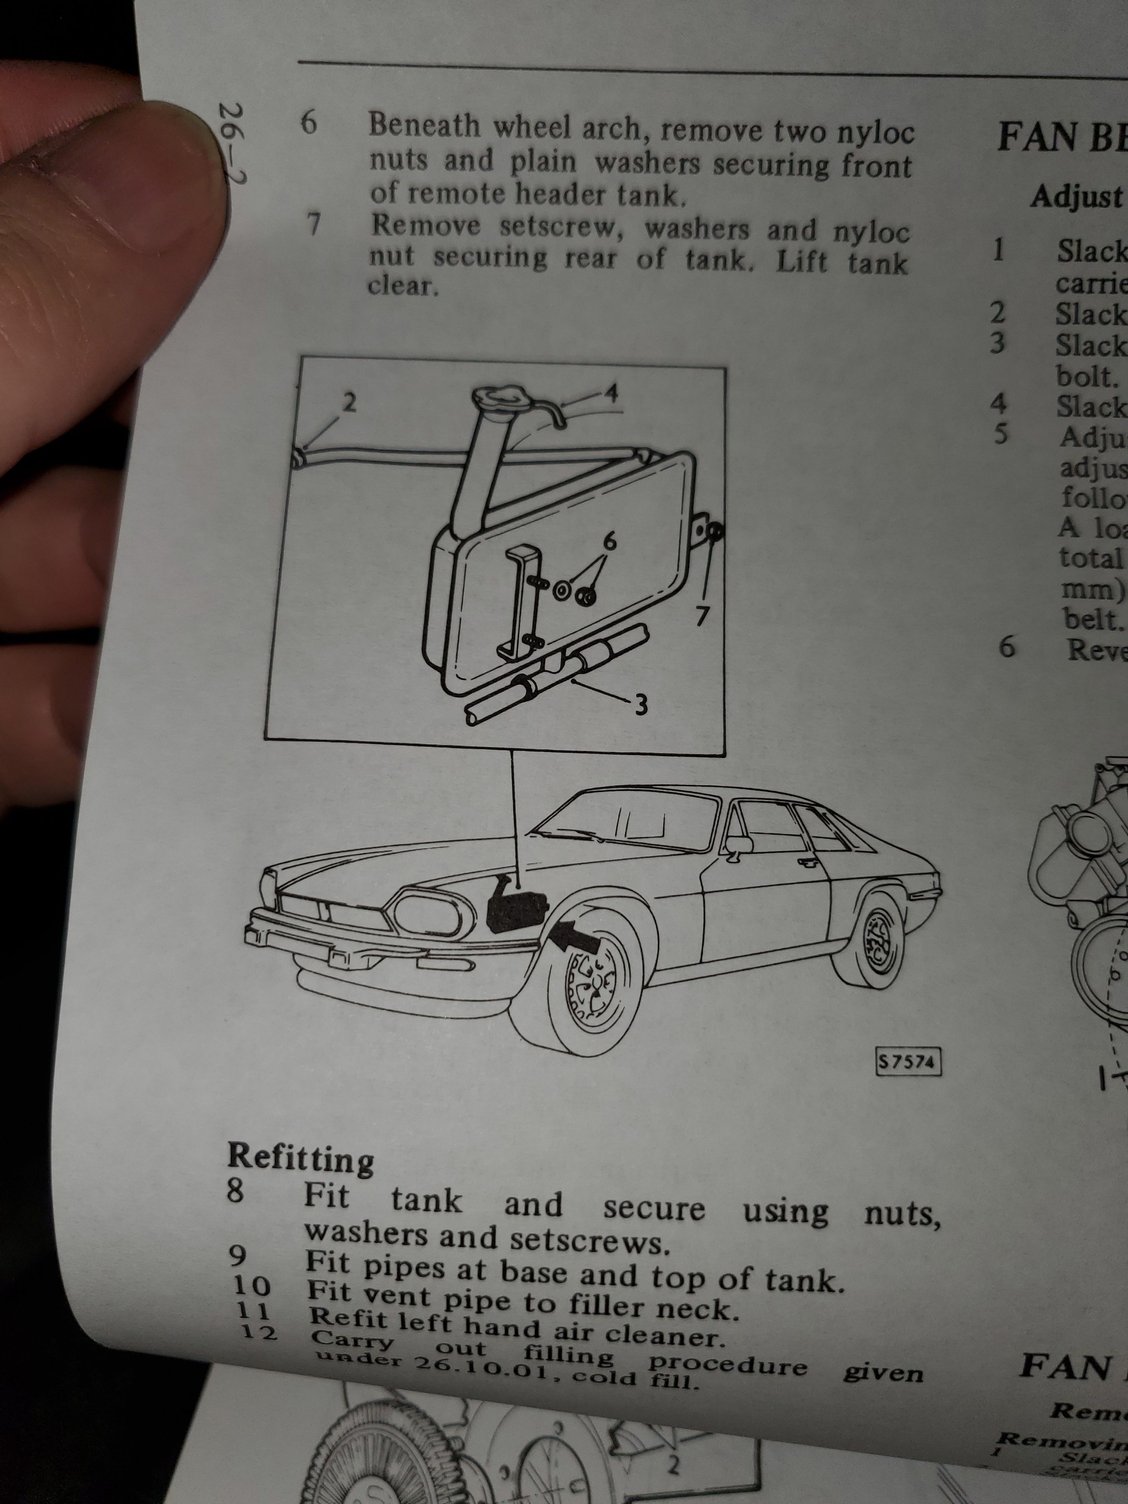
So how can I check the rad fluid level then? Is there a sight somewhere. Or do I wait till its pouring out that overflow?
#63
And here is Doug's procedure: https://www.jaguarforums.com/forum/x...3/#post1560803
For now, you might just want to top it up, once you change theremostats you'll want to flush and bleed the entire system. Basically, you can fill (slowly) the crossover pipe at the front of the engine. Add fluid slowly to allow the air to burp. Don't just fill the header tank at the left side inner fender.
Just this summer we went through the proper thermostats, take a look through the archives
Last edited by Jagboi64; 10-17-2019 at 06:07 PM.
The following users liked this post:
Lucielle (10-25-2021)
#64
[QUOTE=Rescue119;2141241...So it's the other box underneath the LHS air filter then lol. Thanks.
[/QUOTE]
Unfortunately, I suspect the one you're referring to is the power steering reservoir!
See the thread referenced to by Jagboi64. , The Jaguar XJS HE coolant system is very complicated using a hidden expansion bottle. It's a complicated filling and bleeding procedure made worse by the height of the components in the engine bay. It really has to be done properly.
Good luck
Paul
The following users liked this post:
Lucielle (10-25-2021)
#65
Here is the official bleeding procedure, see the link in the post: https://www.jaguarforums.com/forum/x...6/#post1879923
And here is Doug's procedure: https://www.jaguarforums.com/forum/x...3/#post1560803
For now, you might just want to top it up, once you change theremostats you'll want to flush and bleed the entire system. Basically, you can fill (slowly) the crossover pipe at the front of the engine. Add fluid slowly to allow the air to burp. Don't just fill the header tank at the left side inner fender.
Just this summer we went through the proper thermostats, take a look through the archives
#66
Unfortunately, I suspect the one you're referring to is the power steering reservoir!
See the thread referenced to by Jagboi64. , The Jaguar XJS HE coolant system is very complicated using a hidden expansion bottle. It's a complicated filling and bleeding procedure made worse by the height of the components in the engine bay. It really has to be done properly.
Good luck
Paul
See the thread referenced to by Jagboi64. , The Jaguar XJS HE coolant system is very complicated using a hidden expansion bottle. It's a complicated filling and bleeding procedure made worse by the height of the components in the engine bay. It really has to be done properly.
Good luck
Paul
#67
#68
#69
If the vac line is off then it would only upshift at redline. That won't affect shifting from park or reverse. From under the car try moving the shift lever at the transmission manually and see if it goes through all the detents. Also make sure that the cable actually can move in it's sheath and it isn't rusted to the outer housing. I pulled a cable one time and the inner portion had rusted so the cable just kinked rather than move the shift lever on the transmission. I put it in a bucket and did the battery charger de-rusting technique and that removed enough rust to allow it to work again.
I think there is also an anchor point for the shift cable to the transmission case. This will all be on the left side of the transmission.
I think there is also an anchor point for the shift cable to the transmission case. This will all be on the left side of the transmission.
Last edited by Jagboi64; 10-17-2019 at 10:41 PM.
The following users liked this post:
Lucielle (10-25-2021)
#70
If the vac line is off then it would only upshift at redline. That won't affect shifting from park or reverse. From under the car try moving the shift lever at the transmission manually and see if it goes through all the detents. Also make sure that the cable actually can move in it's sheath and it isn't rusted to the outer housing. I pulled a cable one time and the inner portion had rusted so the cable just kinked rather than move the shift lever on the transmission. I put it in a bucket and did the battery charger de-rusting technique and that removed enough rust to allow it to work again.
I think there is also an anchor point for the shift cable to the transmission case. This will all be on the left side of the transmission.
I think there is also an anchor point for the shift cable to the transmission case. This will all be on the left side of the transmission.
#72
The following users liked this post:
Lucielle (10-25-2021)
#73
#74
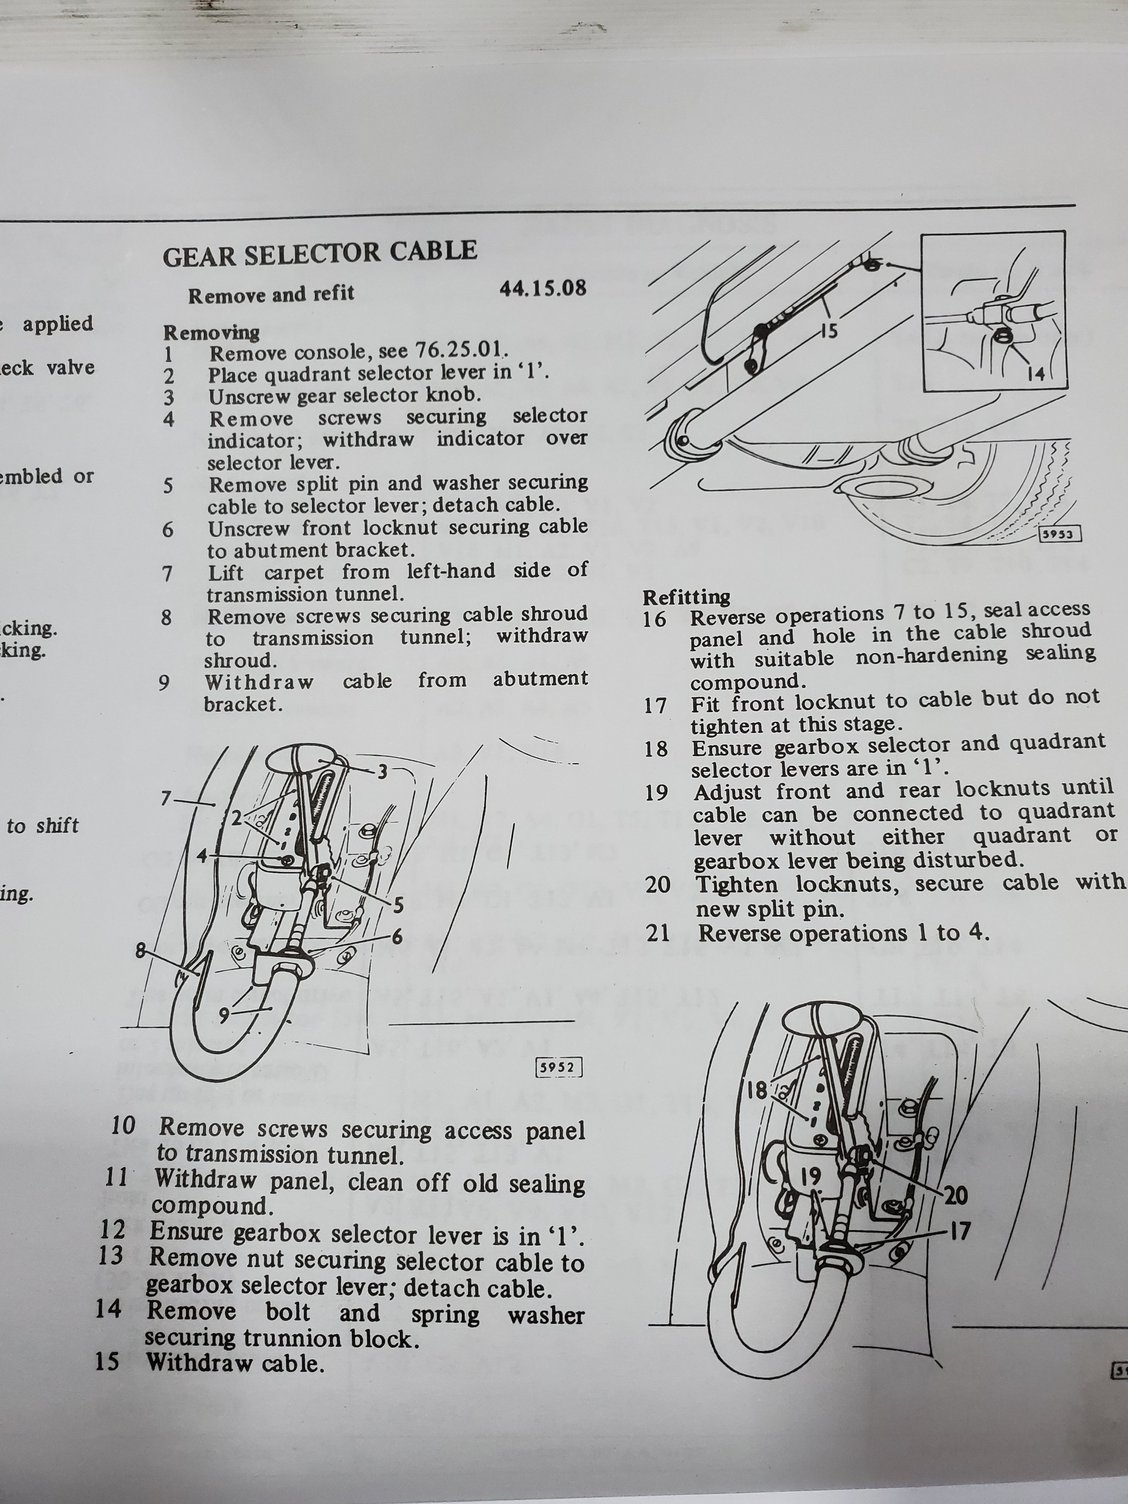
The trunion is a block of metal that the inner cable goes through. It's the anchor point for the outer sheath of the shift cable to the transmission body. Follow it back from the end at the transmission and you'll see it. I think it's a single bolt that holds it to the transmission case.
It's labelled 14 in the top right of the diagram you posted, with the leading line showing it just rearward of part 15.
It's labelled 14 in the top right of the diagram you posted, with the leading line showing it just rearward of part 15.
#75
The trunion is a block of metal that the inner cable goes through. It's the anchor point for the outer sheath of the shift cable to the transmission body. Follow it back from the end at the transmission and you'll see it. I think it's a single bolt that holds it to the transmission case.
It's labelled 14 in the top right of the diagram you posted, with the leading line showing it just rearward of part 15.
It's labelled 14 in the top right of the diagram you posted, with the leading line showing it just rearward of part 15.
But I should be able to access it from the access port?
#77
Join Date: Mar 2008
Location: Pacific Northwest USA
Posts: 24,865
Received 10,920 Likes
on
7,174 Posts
#78
#79
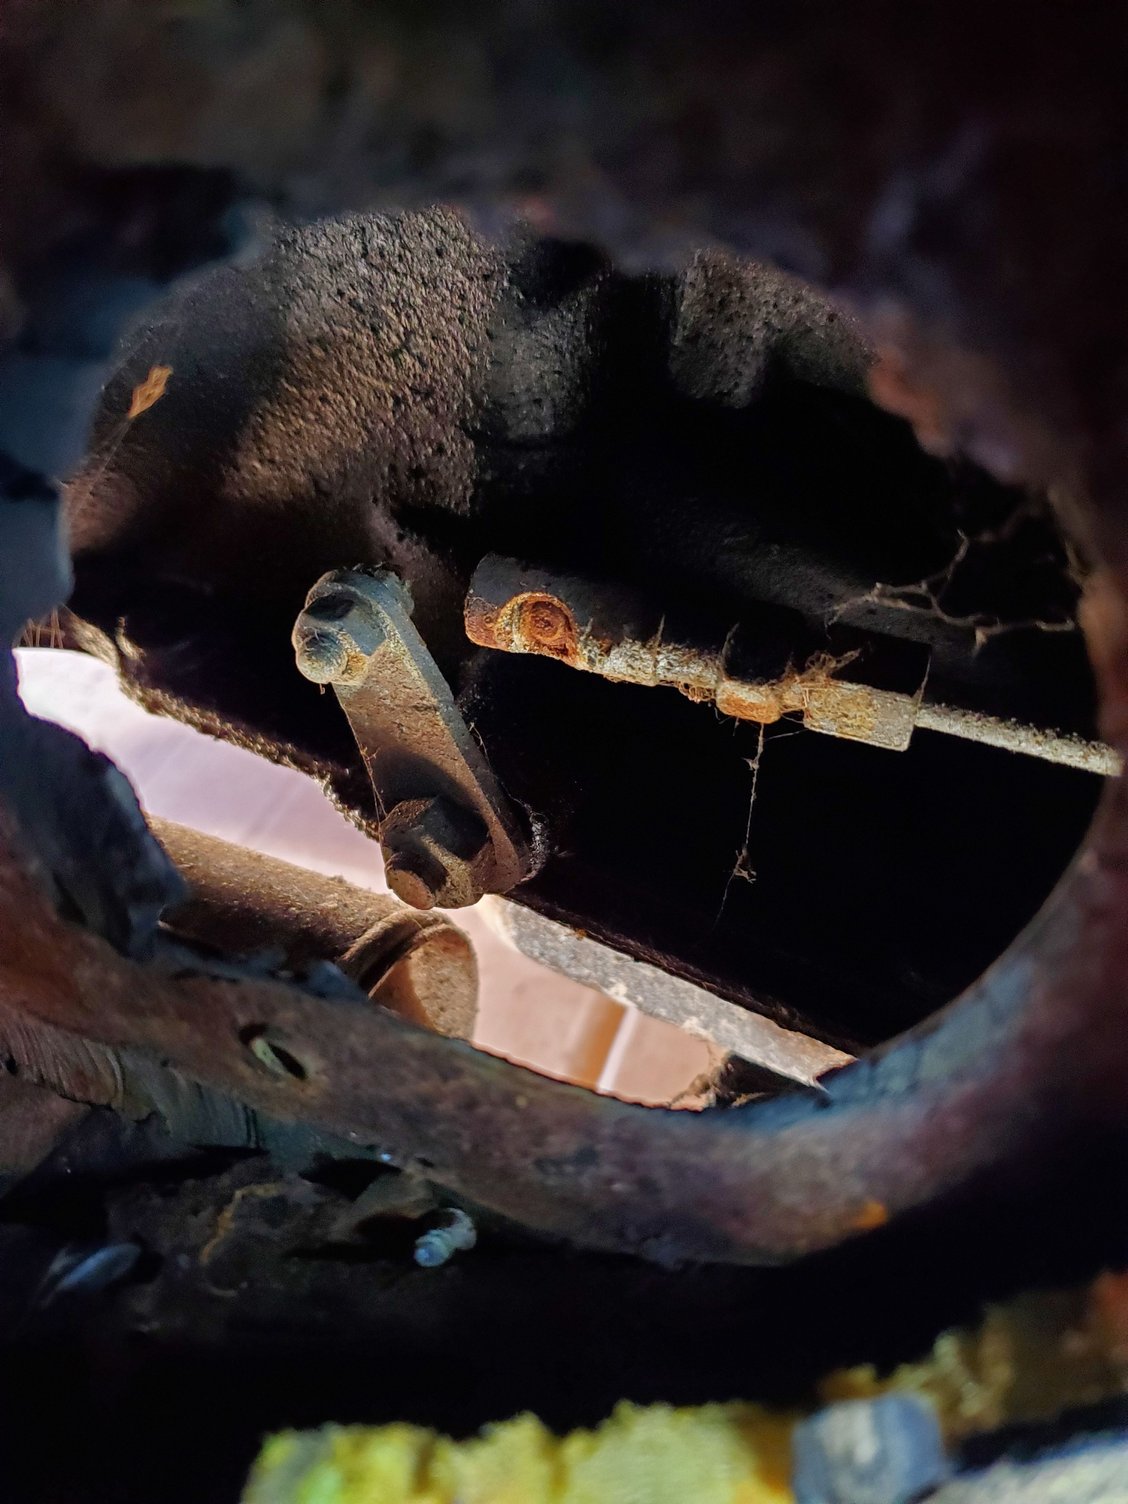
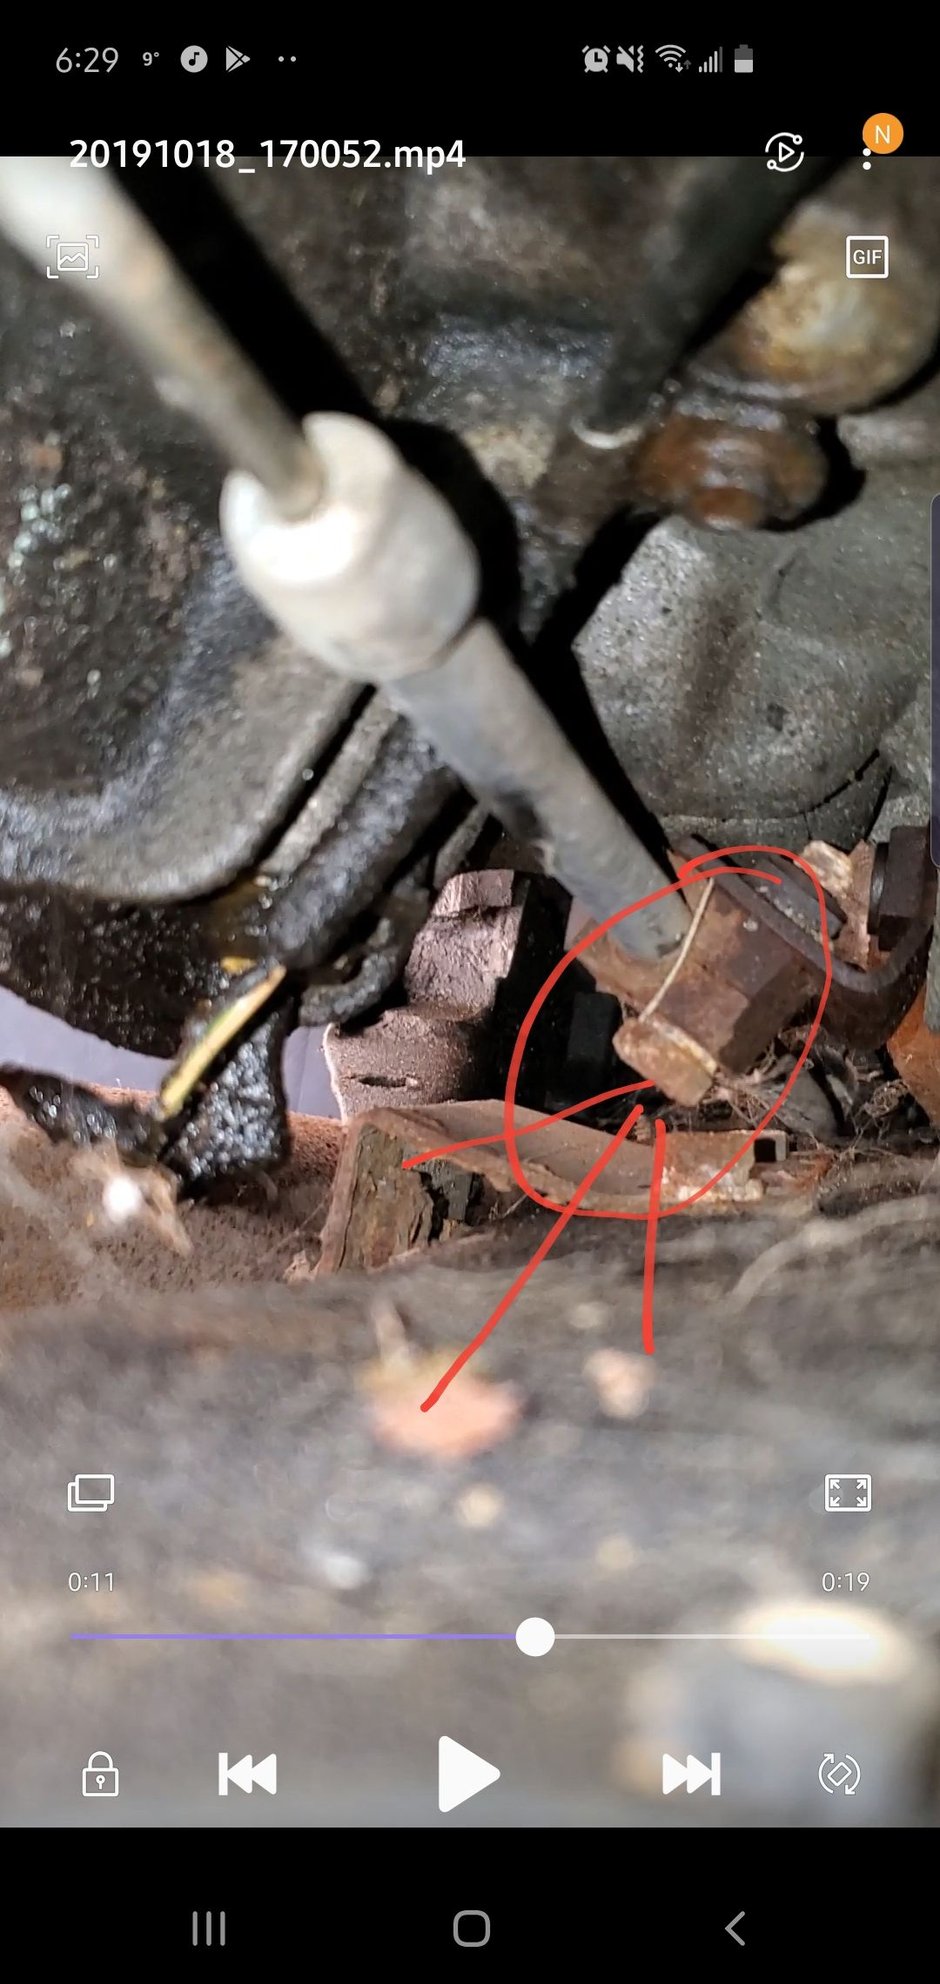
I noticed that pivot that the cable attaches to was snapped off and the end is in the cable. Looks like a mini trailer hitch ball, you'll need that piece too. I have no idea if you might be able to find something similar at a junkyard from a GM car/truck with the TH400 transmission.
#80
It's a technique for partially reversing rusting by a chemical method, rather than just mechanically removing rust. Great for things like the shift cable, where you don't have access to mechanically remove rust.
Basic procedure to to use a non conductive container that is big enough for your parts. I typically use a plastic 5 gallon bucket, or some of the storage containers in the housewares section of a department store also have useful containers. Important thing is that it doesn't conduct electricity, so no metal containers.
Fill the container with water and add either washing soda or baking soda to the water at about 1 tablespoon per gallon. You'll often find washing soda in the cleaning products section of the store, or with soaps and detergents. Amount isn't critical, this isn't a super precise exercise. Add enough water to cover the part you want derusted.
Next you need a piece of scrap steel that is the sacrificial terminal. Iron ions will be taken from this piece and travel to the rusted piece we want to restore, so over time this piece of steel be become degraded. Surface area is important, so I use pieces of sheet metal. Make sure it's free of paint or oil/grease, as the metal needs to be electrically conductive. The larger the surface area, the faster the process will work.
You also need a battery charger, ideally 5-10 amp. Preferably not one of the "smart" chargers, I have an old fashioned RV style charger with an amp meter. A little trickle charger won't have enough power to do the job. Clip the negative lead to the part to be cleaned, and the positive to the sacrificial piece of metal. Keep the positive charger clip out of the solution, as it can be eroded too. The negative can be in the solution.
Immerse both the part to be cleaned and the sacrificial piece in the solution, and make sure they don't touch each other. The electricity flows through the solution, allowing an ion exchange between the pieces, and it tends to mostly work on a "line of sight", so if you are cleaning a piece of sheet metal you might need to turn it partway through the process so both sides have a chance to face the sacrificial piece of steel. The washing/baking soda allows the electricity to flow through the water.
Turn the power on, and you'll see hydrogen bubbles soon coming up from the part. You might also get a rusty foam on the water surface after a while. This is normal. I use the highest power setting and see how many amps I draw. As the derustign proceeds, the current will taper off. It will probably take a few hours, and the part to be cleaned will turn greyish black. When it does that, it's done as much as it can do. Turn the power off and remove the part, making sure though this process that the metal parts do not touch, otherwise you'll short out your battery charger. Remove the part when it's done, otherwise it will rust again in the water.
When you have removed the parts I use a scothbrite pad to clean off the black deposit where possible, and then I lightly oil the parts if applicable to prevent flash rusting. Or paint them.
That's it, it's a simple process to do, and has worked well for me. I was able to get a pair of side cutters working again after they had invariantly been left in the rain and rusted in place. After the derustign bath and some penetrating oil the jaws opened and closed smoothly again.


