
XJS Shooting Brake!! (pics)
#281
 01-03-2016, 03:59 AM

Veteran Member
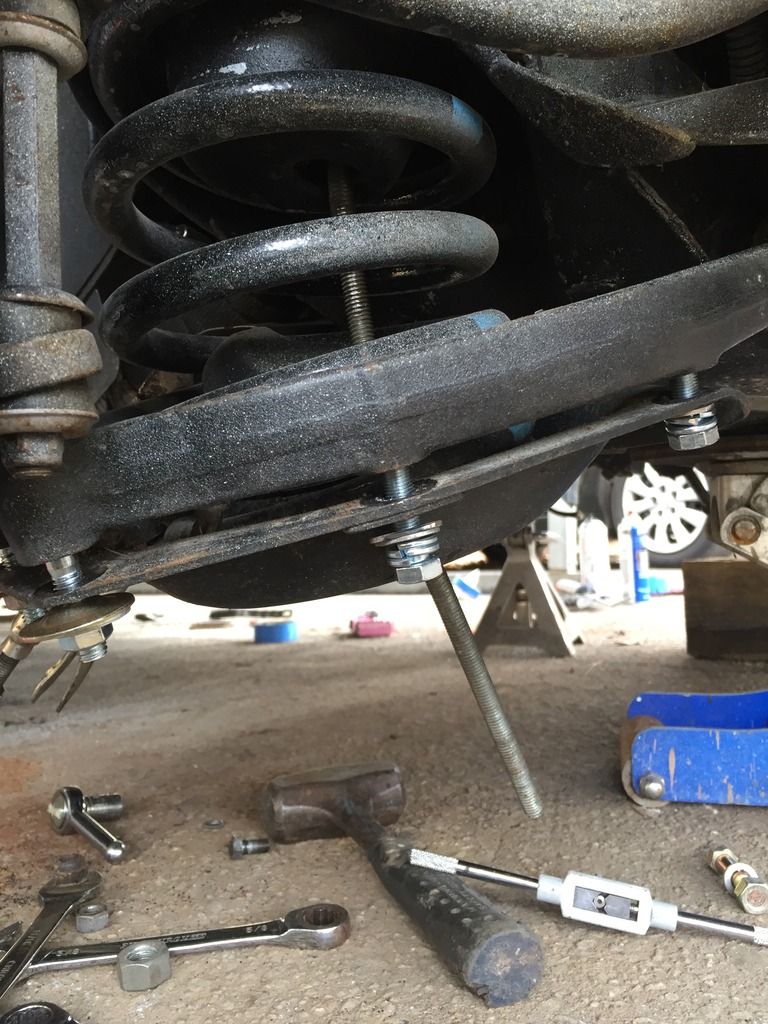
In prep for new tires and my painted wheels I decided to lower the front end. I used flat aluminum bar stock, 1" wide, 3 pieces total which resulted in an approximate 10 mm thickness:

The 3 pieces of aluminum were placed between the a-arm and the spring bottom plate:
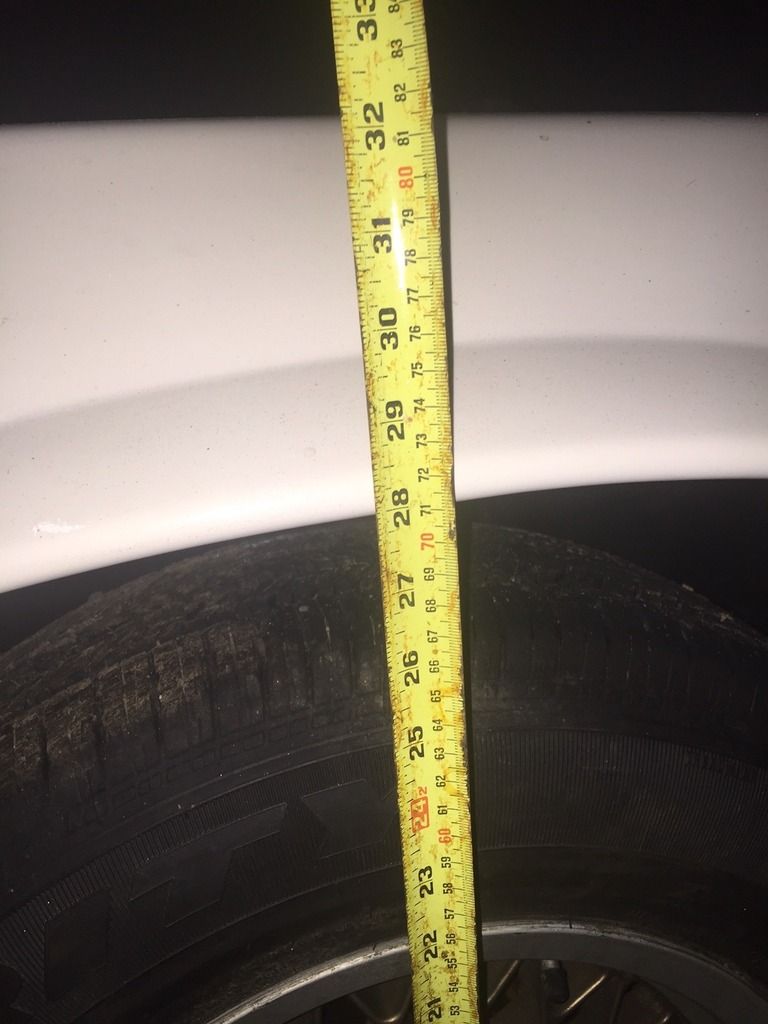
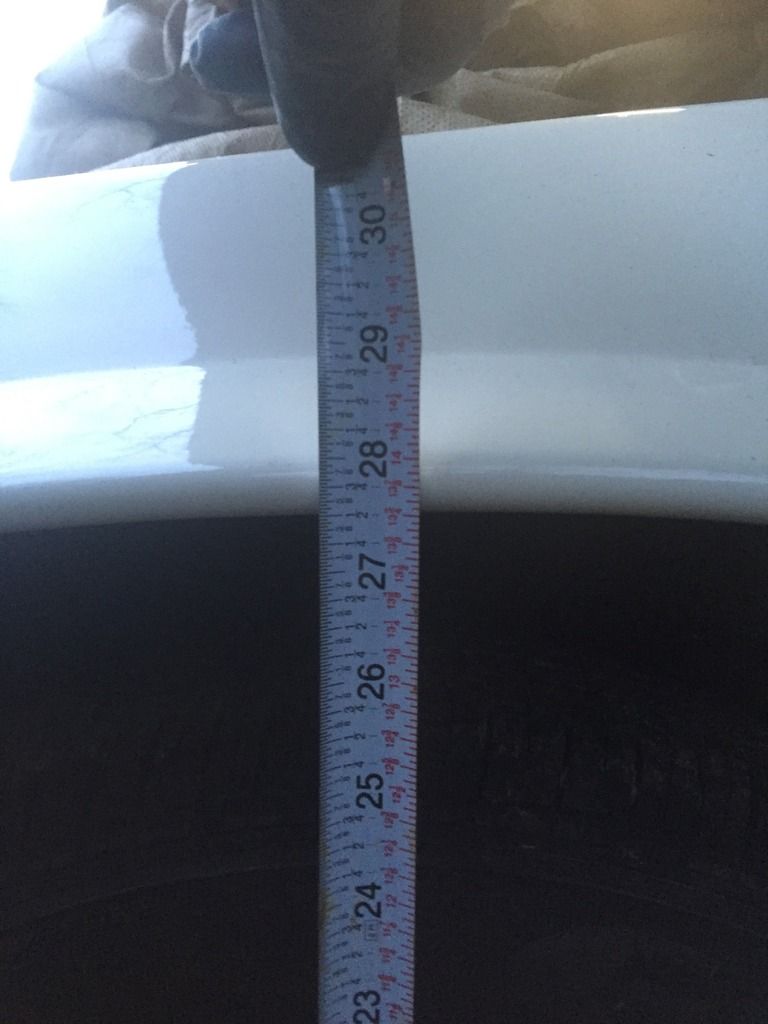
Original measured height was 28" and reduced to 27 1/2" after adding spacers.
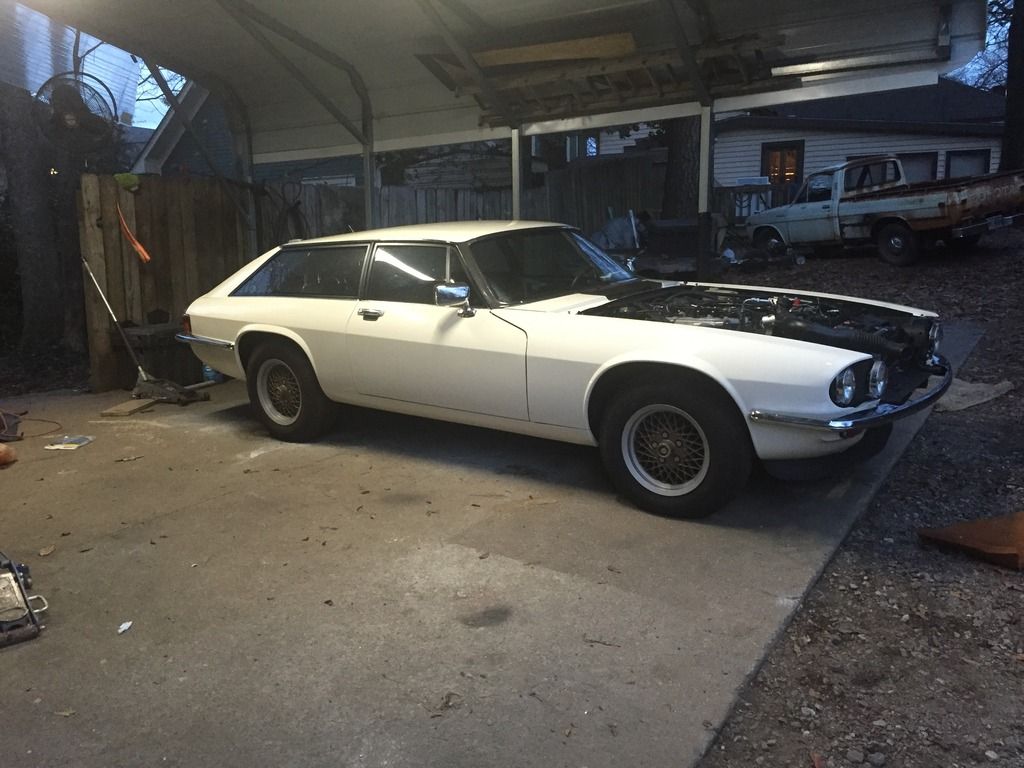
The final product:

The 3 pieces of aluminum were placed between the a-arm and the spring bottom plate:

Original measured height was 28" and reduced to 27 1/2" after adding spacers.


The final product:

NEEDS MOAR LOWA!

The XJ-S looks fantastic, when the top of the wheels (rubber) are slightly in the wheel wells...
 Mine has that look already
#282
01-03-2016, 04:48 AM

Veteran Member
Andy
The car looks superb and looks much better when it is lower. It looks like you have put studs into the lower wishbone in place of the bolts, great idea. Have you already removed all the OEM plastic packers from the springs top and bottom?
Just a note of caution, do not want to be a wet blanket, but the ally spacers will gradually spread and thus loosen the spring pan fixings once you start using the car; when you have time, I think steel ones would make better long term packing.
Congratulations on a superb vehicle. I have never seen before a non-professionally done conversion that looks as if the factory did it.
Greg
#283
01-03-2016, 05:09 AM
Andy
The car looks superb and looks much better when it is lower. It looks like you have put studs into the lower wishbone in place of the bolts, great idea. Have you already removed all the OEM plastic packers from the springs top and bottom?
Just a note of caution, do not want to be a wet blanket, but the ally spacers will gradually spread and thus loosen the spring pan fixings once you start using the car; when you have time, I think steel ones would make better long term packing.
Congratulations on a superb vehicle. I have never seen before a non-professionally done conversion that looks as if the factory did it.
Greg
The car looks superb and looks much better when it is lower. It looks like you have put studs into the lower wishbone in place of the bolts, great idea. Have you already removed all the OEM plastic packers from the springs top and bottom?
Just a note of caution, do not want to be a wet blanket, but the ally spacers will gradually spread and thus loosen the spring pan fixings once you start using the car; when you have time, I think steel ones would make better long term packing.
Congratulations on a superb vehicle. I have never seen before a non-professionally done conversion that looks as if the factory did it.
Greg
The plastic OEM spacers are gone when I rebuilt the suspension.
I actually chose aluminum because I thought it might bend/conform better in the space between A-arm and spring pan, spreading the surface area contact. (On the stock A-arm the spring pan doesn't sit flat up against it, there is a small perch around each bolt hole). It never occurred to me that aluminum might deform that much but I appreciate that feedback. Looks like we have an experiment on our hands!
Another experiment I'd like to create is to package this as a kit!
#284
01-03-2016, 05:34 AM
Veteran Member
Andy, I found this out the hard way when I once used ally spacers to set up a car door hinge! After about a week the door was all over the place again. As far as the spacers conforming to the pan, do not worry, as basically the metal between flange bolts (perch or no perch) is doing nothing for the strength of the join. In fact a steel spacer sitting each "perch" on the wishbone bolthole will be just as good as an entire length. For perfection and best possible strength, you could always weld them to the pan. Once you are happy with the height, may I suggest cutting down the fixing bolts? The reason being that a stack of washers between the pan and the bolt head is another potential source of unwanted play and eventual fatigue failure.
A kit sounds interesting, but how will you package up all the superb skill you have shown to go with the kit?!!
Greg
A kit sounds interesting, but how will you package up all the superb skill you have shown to go with the kit?!!
Greg
Last edited by Greg in France; 01-03-2016 at 05:37 AM.
#285
01-03-2016, 01:57 PM
Andy, I found this out the hard way when I once used ally spacers to set up a car door hinge! After about a week the door was all over the place again. As far as the spacers conforming to the pan, do not worry, as basically the metal between flange bolts (perch or no perch) is doing nothing for the strength of the join. In fact a steel spacer sitting each "perch" on the wishbone bolthole will be just as good as an entire length. For perfection and best possible strength, you could always weld them to the pan. Once you are happy with the height, may I suggest cutting down the fixing bolts? The reason being that a stack of washers between the pan and the bolt head is another potential source of unwanted play and eventual fatigue failure.
A kit sounds interesting, but how will you package up all the superb skill you have shown to go with the kit?!!
Greg
A kit sounds interesting, but how will you package up all the superb skill you have shown to go with the kit?!!
Greg
https://www.jaguarforums.com/forum/x...nt-end-155541/
#286
01-06-2016, 05:43 PM

The following users liked this post:
Jonathan-W (01-07-2016)

#288
01-07-2016, 10:00 AM

Veteran Member
Join Date: Jul 2012
Location: Walnut Creek, California
Posts: 6,796
Received 2,399 Likes
on
1,880 Posts
Andy:
That is indeed an impressive piece of work. Kudos.
I agree with the use of steel strap in lieu of alloy. But, a lot depends
on which alloy. Some are softer than others. But, firmly clamped,
distortion might take a couple of decades, I dunno .
Yeah, my ace machinist/fabricator son is fussy about fasteners.
Malleable vs brittle dependant on application. Stretch vs locking devices, etc.
The idea of the split washer is somewhat twofold. Added friction as it is flattened on tightening. And a bit of a bite by the sharp edge.
If not new or nearly new, both are lost and they are mere spacers, ie a flat washer. Son says "nuts", useless at best....
Carl
#290
01-08-2016, 04:31 AM
I could stand to drop it a little more. But! I still have to install the entire interior, the rear wood floor, the stereo, amp and subwoofer, the hood as well as fill the gas tank. AND, I'm thinking that once its driven some, and the suspension moves around then it will settle yet.
#291
01-08-2016, 07:36 AM
Veteran Member
#292
01-09-2016, 08:01 PM
Senior Member
I could stand to drop it a little more. But! I still have to install the entire interior, the rear wood floor, the stereo, amp and subwoofer, the hood as well as fill the gas tank. AND, I'm thinking that once its driven some, and the suspension moves around then it will settle yet.
Jess
#293
01-10-2016, 08:35 AM
Veteran Member
What a beauty! Mate, you've done a really nice job! And that back end looks like it was supposed to be there! As if Jaguar should really have added a shooting brake to the line up in the 80ies.
What ever you do, don't tint those windows and make sure the interior is up to as higher notch as the exterior!
This is for me the best thread in the XJS section of 2015 (and so far 2016!)!!!
What ever you do, don't tint those windows and make sure the interior is up to as higher notch as the exterior!
This is for me the best thread in the XJS section of 2015 (and so far 2016!)!!!
#294
01-11-2016, 05:17 AM
I haven't aimed them yet and also, unfortunately, can't compare to stock because I never drove the car with stock headlights. Also, I'm comparing them to my schema for headlights that has been created by all my other cars that have HID.
So, with those enormous caveats in mind-they seem all right.
I mostly bought them for aesthetics of glass.
The following users liked this post:
JessN16 (01-13-2016)
#295
01-14-2016, 08:30 PM

Junior Member
Join Date: Jan 2016
Location: Oakville
Posts: 1
Likes: 0
Received 0 Likes
on
0 Posts
Hi there, new to this forum but I've been following this thread for months, checking in daily looking for updates. From the metal work to leather work (two perfect parallel stitches on the armrest!), your work is really fantastic!
I must ask, since you are not entirely pleased with the rear bumper overriders relative to the tail lights and emblems, any thoughts on flipping over the bumper?
I must ask, since you are not entirely pleased with the rear bumper overriders relative to the tail lights and emblems, any thoughts on flipping over the bumper?
#296
01-15-2016, 05:35 PM
Hi there, new to this forum but I've been following this thread for months, checking in daily looking for updates. From the metal work to leather work (two perfect parallel stitches on the armrest!), your work is really fantastic!
I must ask, since you are not entirely pleased with the rear bumper overriders relative to the tail lights and emblems, any thoughts on flipping over the bumper?
I must ask, since you are not entirely pleased with the rear bumper overriders relative to the tail lights and emblems, any thoughts on flipping over the bumper?
The bumperettes are only finished on the "top" side, on the lower edge their fit is not as tight.
This is just one example of a situation where I have the thought "On my next one..."
Appreciate the compliment!
#297
01-15-2016, 05:40 PM
[QUOTE
This is for me the best thread in the XJS section of 2015 (and so far 2016!)!!![/QUOTE]
Excellent! I am glad to contribute to an interesting thread. Sometimes when I've fallen into a gumption trap (Robert Pirsig, Zen and the Art of Motorcycle Maintenance) I search the web for car builds to build back my gumption. Hope this thread does that for someone else.
#298
01-16-2016, 07:48 AM
Rear side panels, quarter panels completed.
They follow the factory form mostly, however you will see an additional seam just above speaker level, at the front of the panel. I added this seam to allow some flexibility in installing the largest piece.
I also cut the panel in half, directly at the armrest level and then reattached the panels after upholstering the halves.

Last edited by bullittandy; 01-16-2016 at 06:16 PM.
#299
01-16-2016, 11:26 AM
Veteran Member
#300
01-16-2016, 06:25 PM
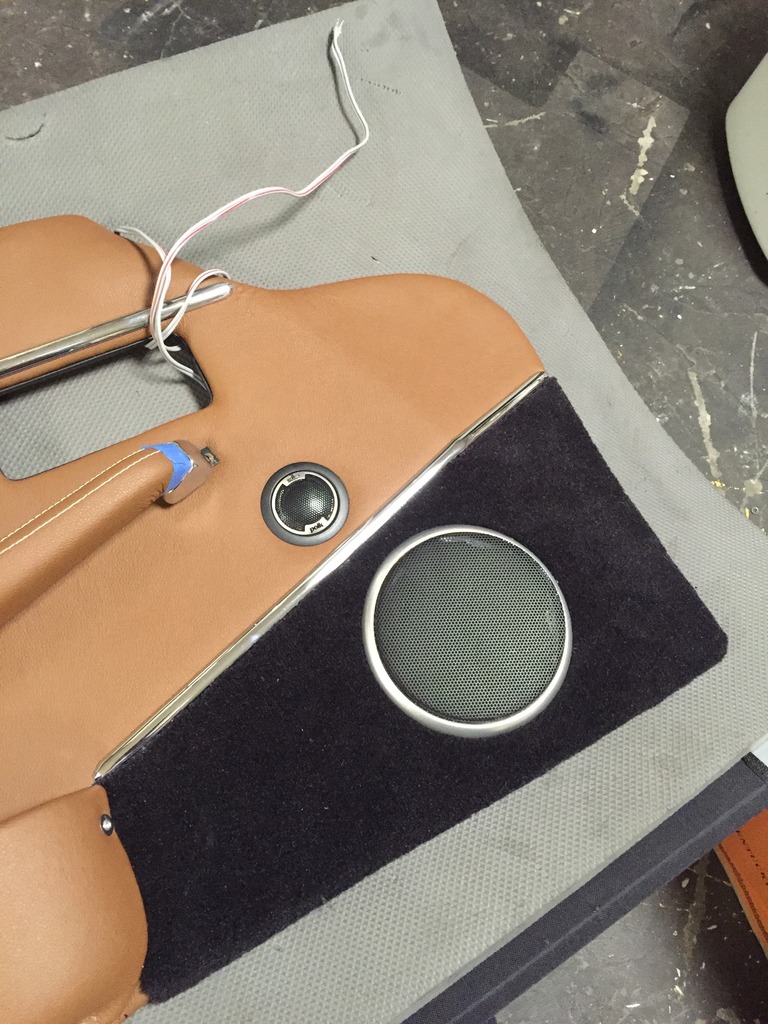
Polk 5.25" components installed with a 2 channel amp powering them. Rear speakers will simply run off head unit.
Front speakers are mounted on the door. I cannot think of a worse set up than the factory system of mounting to flimsy door panels. I cut a square of MDF to fill in the square hole on sheet metal of door and then cut a new hole for Polk speaker to mount to the MDF. I bought universal 5.25" speaker grills and painted them to match the tweeters.
I mounted the crossovers in the kick panel areas on both sides. I had to run an extra speaker wire through through the rubber tubing where factory wires go because the tweeter and woofer have their own independent wiring from the cross over. I used the factory speaker wire that was already there for the tweeter on door panel.
The tweeter are mounted in an area where the door is scalloped so that they will not contact anything behind.
Enjoy!

