
XJS Shooting Brake!! (pics)
#41
 07-05-2015, 11:03 PM


I like what you're doing! Can I suggest you beef up both the C pillar and roof rail from the original roof back? I'd even be tempted to drop the new C pillar right through to the boot floor extensions and pick up the box section there.
It would also look excellent with a vinyl or really long Webasto roof.
It would also look excellent with a vinyl or really long Webasto roof.
#42
07-06-2015, 03:32 AM
I like what you're doing! Can I suggest you beef up both the C pillar and roof rail from the original roof back? I'd even be tempted to drop the new C pillar right through to the boot floor extensions and pick up the box section there.
It would also look excellent with a vinyl or really long Webasto roof.
It would also look excellent with a vinyl or really long Webasto roof.
#43
07-06-2015, 03:35 AM
Also thinking about covering roof in a skin of carbon fiber...
#45
07-07-2015, 06:59 PM
Here is a picture of the back of the new Chevy roof skin-the small squares are sheet metal patches glued (using 3M 8115 panel adhesive) to the roof to support the hatch hinges.
Matching the elevation between the cross bar, roof skin and hatch hinges was difficult and required multiple trial fits.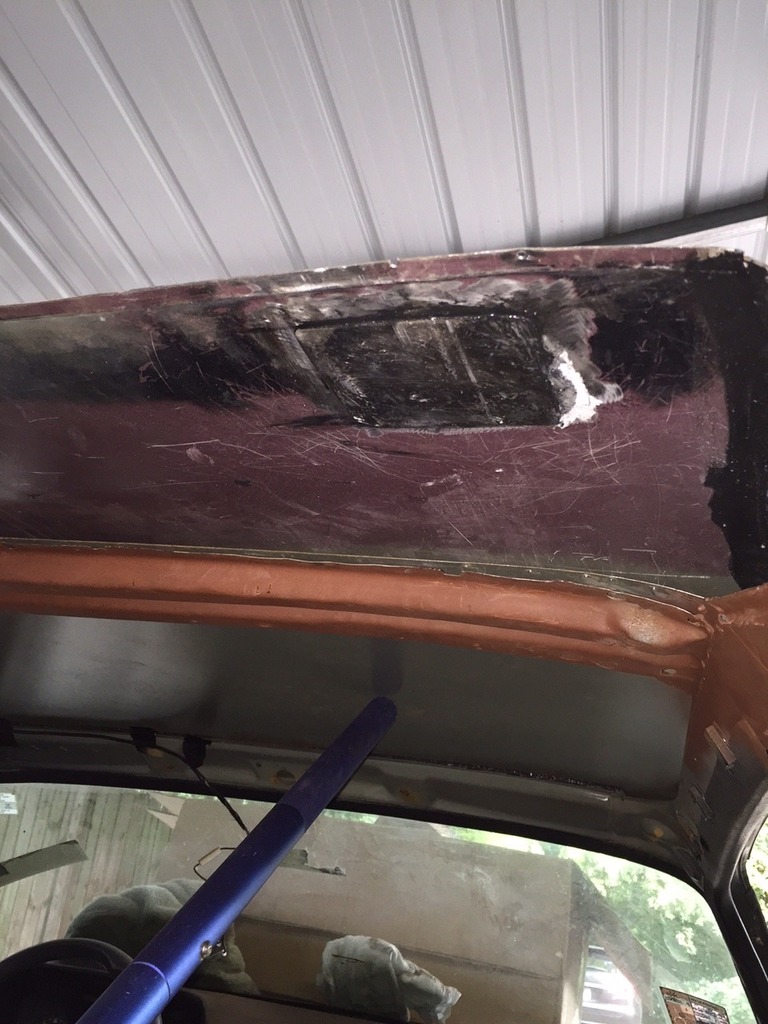
Matching the elevation between the cross bar, roof skin and hatch hinges was difficult and required multiple trial fits.

#46
07-07-2015, 07:02 PM

#47
07-07-2015, 07:11 PM
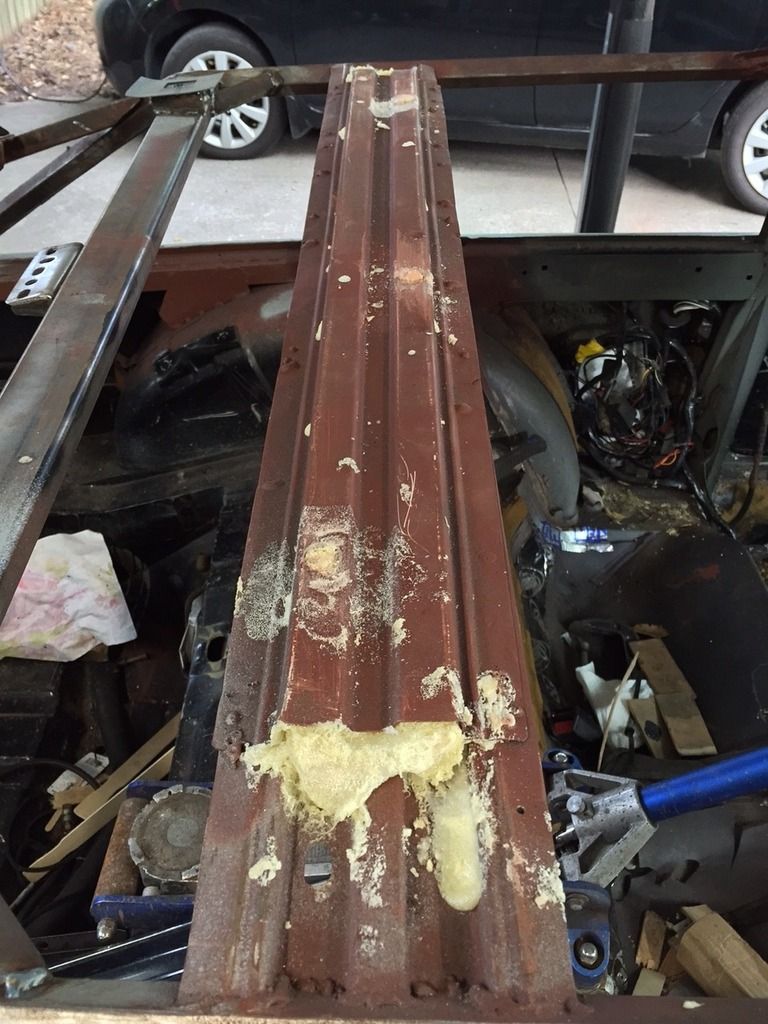
This is the roof brace from a Chevy cargo van, (actually two roof braces welded together) that serves as a support for the window frame as well as a support for the roof skin. The yellow foam you see is 2-part polyurethane foam that is super rigid and increases the rigidity of the metal structure.

#48
07-11-2015, 06:51 PM

#49
07-11-2015, 06:59 PM

#50
07-11-2015, 07:00 PM

#51
07-12-2015, 06:32 PM
I like that you did a bonded joint on the turret skin, I had visions of warpage and lots of heat shrinking after you welded it.
I've been playing with epoxies to bond parts to bodies lately, great success.
I REALLY wish you hadn't started this thread, as I have a parts XJS in the yard that could easily end up being modified in some way, and I am just crazy enough to do it.
I've been playing with epoxies to bond parts to bodies lately, great success.
I REALLY wish you hadn't started this thread, as I have a parts XJS in the yard that could easily end up being modified in some way, and I am just crazy enough to do it.
Last edited by Typhoon; 07-12-2015 at 06:35 PM.
#52
07-13-2015, 04:31 AM
I like that you did a bonded joint on the turret skin, I had visions of warpage and lots of heat shrinking after you welded it.
I've been playing with epoxies to bond parts to bodies lately, great success.
I REALLY wish you hadn't started this thread, as I have a parts XJS in the yard that could easily end up being modified in some way, and I am just crazy enough to do it.
I've been playing with epoxies to bond parts to bodies lately, great success.
I REALLY wish you hadn't started this thread, as I have a parts XJS in the yard that could easily end up being modified in some way, and I am just crazy enough to do it.
Re: that parts car, All you need is a hatch from a 280Z and this thead...
#53
07-13-2015, 05:28 AM
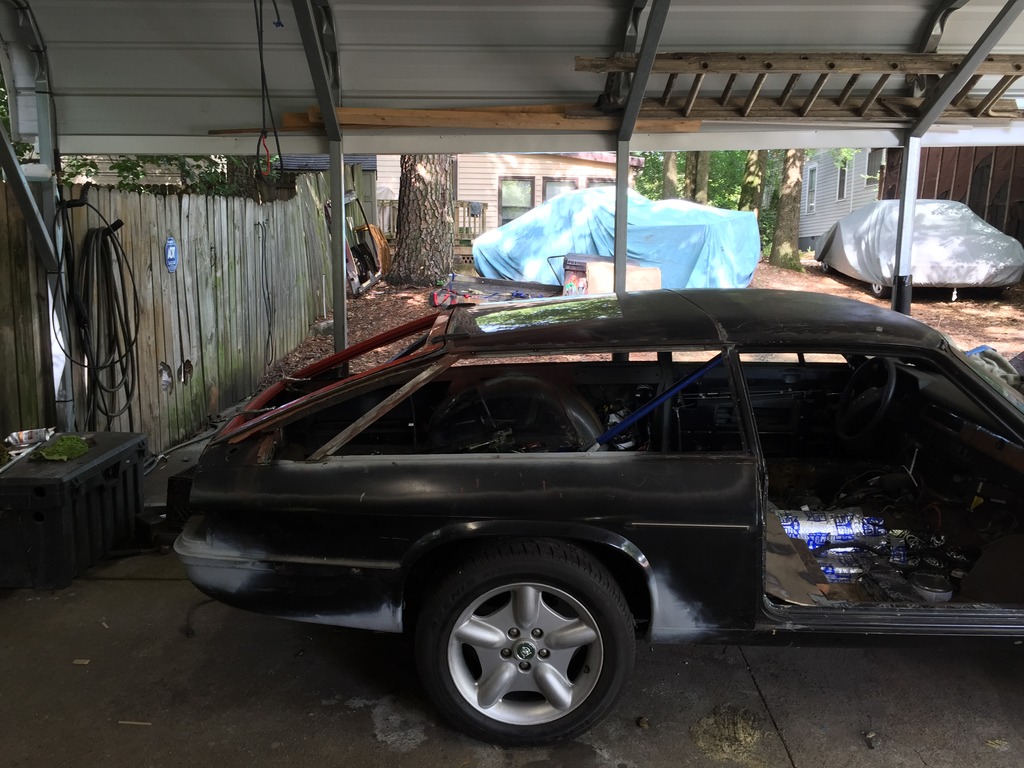
Notice the slope down of roof as it extends back as well as the flattening of the roof. This was inadvertent, dictated by the shape of the 280Z hatch but I'm really liking it. From the rear the roof and side windows have a gentle tumblehome that was deliberate and looks excellent as well. We'll see if the shape holds up after paint...

#54
07-13-2015, 08:09 AM

I think the profile looks very good. The slight slope of the roof helps it to have a less boxy appearance.
You spoke about the paint scheme earlier. If this were my car I would paint the entire car the same color. I would not paint the roof differently. I feel that a single color will provide a more integrated look and will appear as something that Jaguar would have done.
Your making great progress. Keep it up!
Mark
#55
07-14-2015, 08:44 PM
I was thinking more along the lines of a glass hatch and sacrificing the buttreses, think A70/ late'80's Supra hatch.
I bonded fibreglass lower quarter panel extensions onto my XJS with some boat building epoxy adhesive, it was impressive. Perfect consistency and as you say, when you clamp the join down, you get a perfect seam filler fillet with a finger in a glove.
I chose a fibreglass lower quarter extension as they were readily available and with the epoxy protecting the bonded seams to steel, I never have to worry about corrosion in this area again.
#56
07-15-2015, 04:55 AM
I was thinking more along the lines of a glass hatch and sacrificing the buttreses, think A70/ late'80's Supra hatch.
I bonded fibreglass lower quarter panel extensions onto my XJS with some boat building epoxy adhesive, it was impressive. Perfect consistency and as you say, when you clamp the join down, you get a perfect seam filler fillet with a finger in a glove.
I chose a fibreglass lower quarter extension as they were readily available and with the epoxy protecting the bonded seams to steel, I never have to worry about corrosion in this area again.
I bonded fibreglass lower quarter panel extensions onto my XJS with some boat building epoxy adhesive, it was impressive. Perfect consistency and as you say, when you clamp the join down, you get a perfect seam filler fillet with a finger in a glove.
I chose a fibreglass lower quarter extension as they were readily available and with the epoxy protecting the bonded seams to steel, I never have to worry about corrosion in this area again.
Its funny that you used a boat building epoxy because I noticed on the boat building forums they are much more amenable to glueing different substrates together (wood, metal fiberglass etc).
I glued a couple of scrap pieces of metal together with some left over 3M 8115 and with poor prep on steel I had a hard time separating them with a chisel hammered between them.
I think you could probably glue the Earth together with this stuff.
#57
07-15-2015, 05:40 PM
I finished up my welding and cleaned up some edges and sprayed some SummitRacing Epoxy primer to seal up the bare metal, 3M panel adhesive and old paint. I chose black primer to match the original paint and see how the shape of the roof looks. I am very happy with the result thus far. (Ruby and Sophie modeling)


#58
07-15-2015, 05:57 PM
The following users liked this post:
bullittandy (07-16-2015)
#59
07-15-2015, 06:08 PM
The following users liked this post:
bullittandy (07-16-2015)
#60
07-15-2015, 10:22 PM
 can't wait to see this car finished! What is the next step?
The following users liked this post:
bullittandy (07-16-2015)