iPod connectivity for $120.00 and 2 hrs labor!
#1
 01-21-2013, 09:05 PM


I purchased my 07 Jag XK two months ago. My only disappointment has been the inability to connect my iPod. I have searched this and other forums for a solution. Most were either expensive or of poor quality. I purchased an iSimple model IS77 WIRED FM modulator and 2 antenna wire adaptors for a total of 120.00. You could probably find them cheaper on line. With average mechanical skills the installation can be accomplished in about 2 hours. It took me longer as I took a lot of pictures.
Start by removing the spare tire access cover and the rear plastic trim piece held by 4 torx head bolts (T-30). The passenger side panel is held by 2 �push bolts� and has one electric connection to a courtesy light.
Inside the car the passenger side rear seat bottom can be removed by lifting the front edge up. The center section is also removed by lifting up. Then the plastic trim piece just behind the console can be removed. Lift the rear edge up and pull backwards.
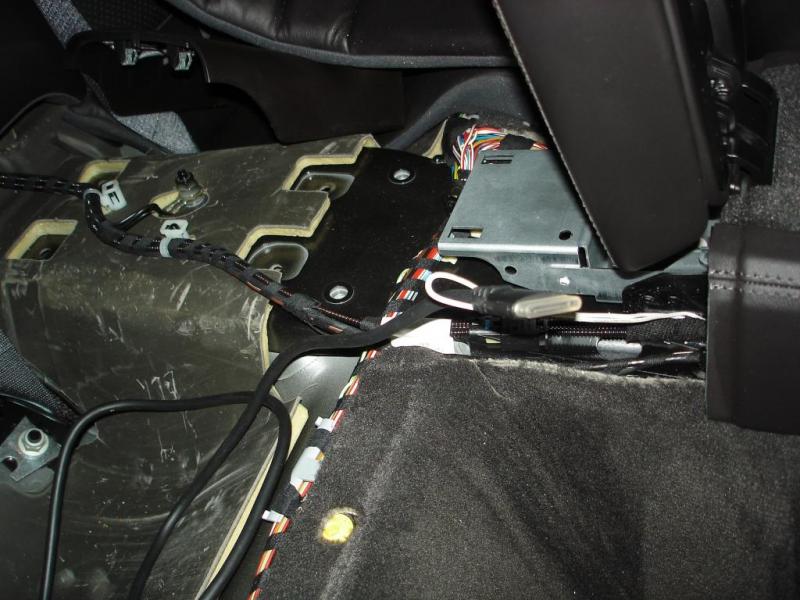
Then route the iPod cable as indicated by the red arrow into the rear seat area. A coat hanger wire may help.


Next remove the rubber mat floor of the console. You will see square shaped holes which allow you to route the cables. I used a coat hanger to fish wires through.

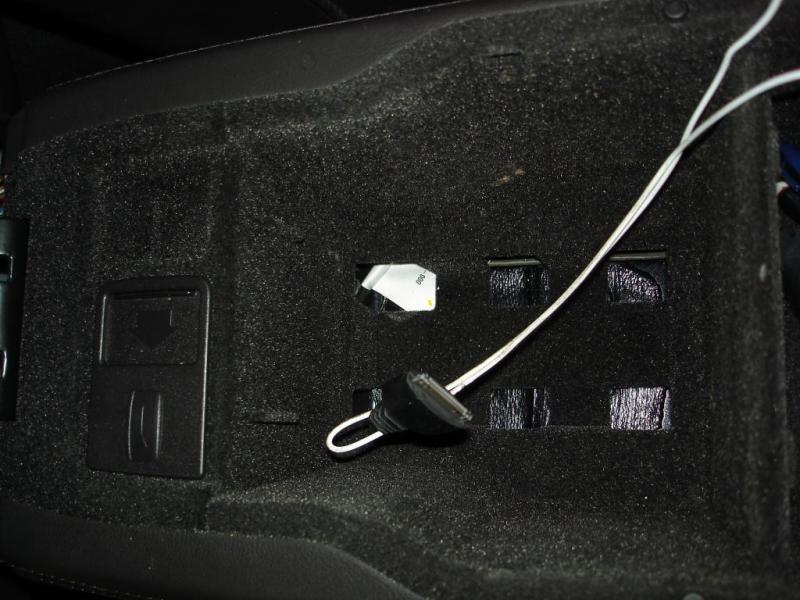
I installed the switch on the front of the console. It requires a hole slightly larger than � inch. I drilled a � hole and enlarged it with a dremel tool. Make SURE you drill the hole about 1 � inches below the upper edge. This allows room to route the cable through the hole and have room to push the switch in to place.

The switch wires need to be lengthened by about 2 feet. I cut and soldered wire in the middle and heat shrunk the connections. This gives you enough length to route the wires back into the trunk area. A coat hanger helps fish the wires through.


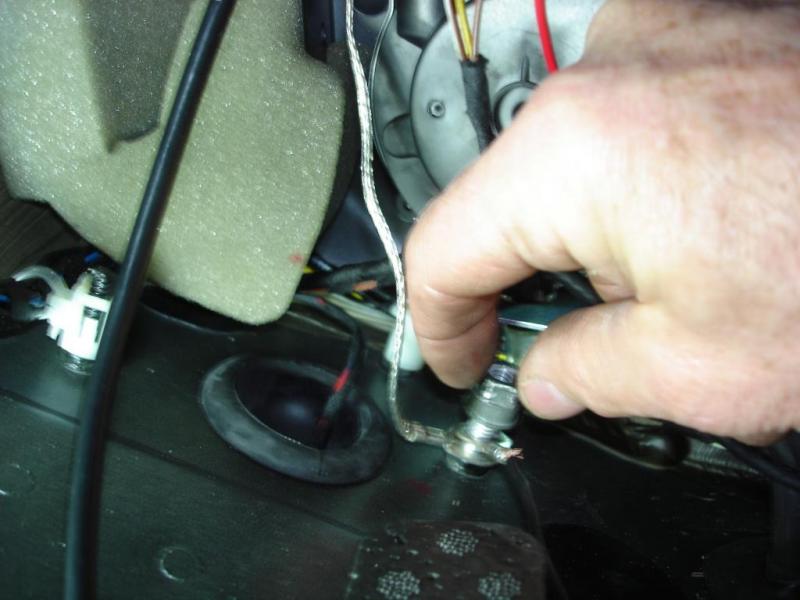
Next we will use the antenna wire adaptors to convert the factory fittings to �old style�male/female connectors. First locate the antenna wire and separate the connection by pushing down on the ridged area seen next to my fingernail.


Here are the adaptors connected to the factory antenna wires. Now the adaptor ends can connect to the main harness of the iSimple device.
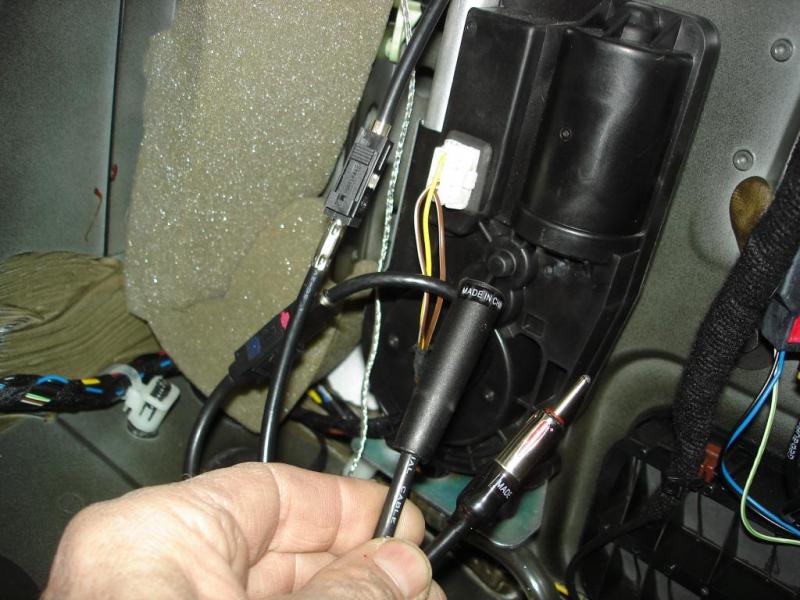

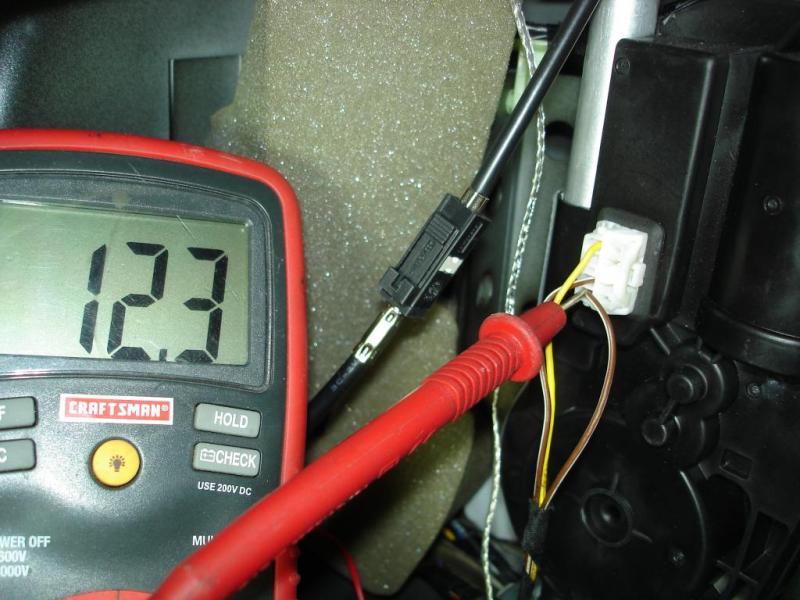
Next we need to provide power and ground. The lower brown/white wire in the antenna assembly is a hot 12 volt wire. I carefully stripped back some of the insulation and soldered the red wire to it. Then tape the connection.

The ground is right next to the antenna assembly. I soldered an eyelet to the black ground wire and shared the ground with the antenna (13mm nut)
I mounted the unit in the space next to the Navigation DVD unit using Velcro. Then button everything up with zip ties to the factory harness to prevent rattles. Final install looks �factory�.


I selected 89.7 on the module and set one of my presets for this frequency. There is a red sticker on the module warning you that you may need to tune in the module but I didn�t need to. I am no Audiophile but the music sounds great to me!! I tried to keep this brief but I have lots more pictures. If something is not clear please ask.
Start by removing the spare tire access cover and the rear plastic trim piece held by 4 torx head bolts (T-30). The passenger side panel is held by 2 �push bolts� and has one electric connection to a courtesy light.
Inside the car the passenger side rear seat bottom can be removed by lifting the front edge up. The center section is also removed by lifting up. Then the plastic trim piece just behind the console can be removed. Lift the rear edge up and pull backwards.
Then route the iPod cable as indicated by the red arrow into the rear seat area. A coat hanger wire may help.
Next remove the rubber mat floor of the console. You will see square shaped holes which allow you to route the cables. I used a coat hanger to fish wires through.
I installed the switch on the front of the console. It requires a hole slightly larger than � inch. I drilled a � hole and enlarged it with a dremel tool. Make SURE you drill the hole about 1 � inches below the upper edge. This allows room to route the cable through the hole and have room to push the switch in to place.
The switch wires need to be lengthened by about 2 feet. I cut and soldered wire in the middle and heat shrunk the connections. This gives you enough length to route the wires back into the trunk area. A coat hanger helps fish the wires through.
Next we will use the antenna wire adaptors to convert the factory fittings to �old style�male/female connectors. First locate the antenna wire and separate the connection by pushing down on the ridged area seen next to my fingernail.
Here are the adaptors connected to the factory antenna wires. Now the adaptor ends can connect to the main harness of the iSimple device.
Next we need to provide power and ground. The lower brown/white wire in the antenna assembly is a hot 12 volt wire. I carefully stripped back some of the insulation and soldered the red wire to it. Then tape the connection.
The ground is right next to the antenna assembly. I soldered an eyelet to the black ground wire and shared the ground with the antenna (13mm nut)
I mounted the unit in the space next to the Navigation DVD unit using Velcro. Then button everything up with zip ties to the factory harness to prevent rattles. Final install looks �factory�.
I selected 89.7 on the module and set one of my presets for this frequency. There is a red sticker on the module warning you that you may need to tune in the module but I didn�t need to. I am no Audiophile but the music sounds great to me!! I tried to keep this brief but I have lots more pictures. If something is not clear please ask.
The following 7 users liked this post by DenverDDS:
amcdonal86 (01-21-2013),
CleverName (05-17-2013),
Hailers (01-31-2013),
jchou (10-11-2013),
mij86 (02-17-2018),
and 2 others liked this post.
#2
01-21-2013, 09:14 PM
Veteran Member
The following users liked this post:
DenverDDS (01-21-2013)

#4
01-31-2013, 05:40 PM

I installed this today and it works Great. About $60 bucks for the ISimple from Amazon and I had one of the antenna adapters but had to buy the other from Best Buy for $19.00 'cause I wanted it today not next week.
NO static at all. Much better than that Belkin outfit I tried before this. No comparison at all b/t the two.
NO static at all. Much better than that Belkin outfit I tried before this. No comparison at all b/t the two.
#5
05-17-2013, 08:07 AM

Junior Member
Join Date: Apr 2013
Location: Johannesburg, South Africa
Posts: 7
Likes: 0
Received 0 Likes
on
0 Posts
#6
05-20-2013, 10:22 AM

Member
#7
10-06-2013, 11:58 AM
Trending Topics
#8
10-11-2013, 02:36 PM

Junior Member
Join Date: Oct 2013
Location: Ventura, CA
Posts: 3
Likes: 0
Received 0 Likes
on
0 Posts

Thread
Thread Starter
Forum
Replies
Last Post
42Ajd
PRIVATE For Sale / Trade or Buy Classifieds
2
12-30-2015 09:45 AM
Poet
XK8 / XKR ( X100 )
14
10-06-2015 09:40 PM
FS[MidAtlantic]: 1997 XJ6 VDP - Very RARE Black on Black
42Ajd
PRIVATE For Sale / Trade or Buy Classifieds
2
09-21-2015 07:37 PM
Currently Active Users Viewing This Thread: 1 (0 members and 1 guests)