Cheap Fix For Dreaded A/C Drain
#1
 03-12-2014, 09:43 PM


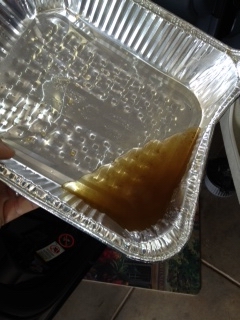
I'm to cheap to pull the dash or drop the tranny to fix a $2.00 part, so I tried the close the vents and blow like hell trick but it did not work for me. Then tried the bent tool to try to reach the duck bill from above the Tranny, but that didn't work either, so I decided to add my own drain...and that worked!
Here's how you do it:
1) remove kick panel on the forward edge of the door jam so the rug can be pulled back out of the way. Just snaps off easily.
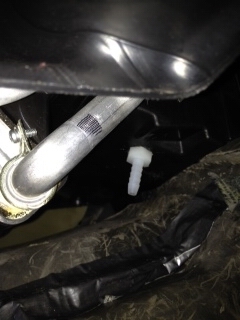
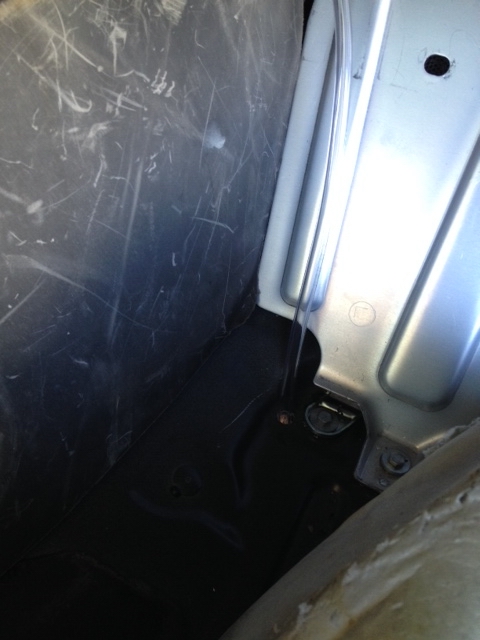
2) Drill a 1/2" hole(double ck that) into the evaporator plastic box.**Go very-very slowly and stop immediately when you punch through so you don't drill into the evaporator fins that's on the other side. *important*
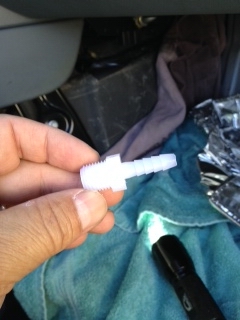
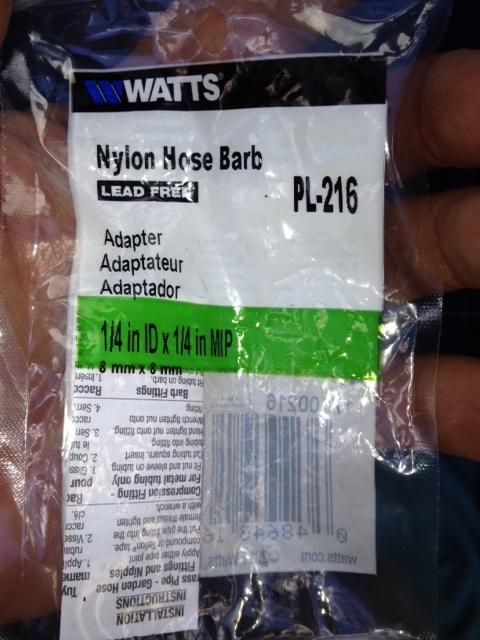
3) Buy a 1/4" nylon hose barb from Ace Hardware part#PL216 and screw it into the hole by hand to start it. Put alittle clear RTV on the threads. Screw it in with a wrench or socket until it's snug. Don't over tighten it and strip the threads. It doesn't need to be screwed all the way in. It's actually better to be shallow in the evaporator. It will drain easier.
4) Put 3ft of clear plastic tubing on the end of the barb (also from Ace Hardware) and run it to the floor board.
5) Drill a hole through the aluminum floor board just big enough for the tube and secure it with a tie wrap on the bottom of the car on the nearby bracket. Also, put some RTV silicon around the tube at the floorboard.
*Check the pictures for areas to drill on Evaporator box and floor. You won't hit anything on the floorboard.
5) Leave enough length so you can easily reach under the car and occasionally blow on the hose with your air compressor to keep debris off the hole, and you are done!
Cheap Hillbilly fix for under $10.
I hope this helps somebody on the forum that is as cheap as I am!
Here's how you do it:
1) remove kick panel on the forward edge of the door jam so the rug can be pulled back out of the way. Just snaps off easily.
2) Drill a 1/2" hole(double ck that) into the evaporator plastic box.**Go very-very slowly and stop immediately when you punch through so you don't drill into the evaporator fins that's on the other side. *important*
3) Buy a 1/4" nylon hose barb from Ace Hardware part#PL216 and screw it into the hole by hand to start it. Put alittle clear RTV on the threads. Screw it in with a wrench or socket until it's snug. Don't over tighten it and strip the threads. It doesn't need to be screwed all the way in. It's actually better to be shallow in the evaporator. It will drain easier.
4) Put 3ft of clear plastic tubing on the end of the barb (also from Ace Hardware) and run it to the floor board.
5) Drill a hole through the aluminum floor board just big enough for the tube and secure it with a tie wrap on the bottom of the car on the nearby bracket. Also, put some RTV silicon around the tube at the floorboard.
*Check the pictures for areas to drill on Evaporator box and floor. You won't hit anything on the floorboard.
5) Leave enough length so you can easily reach under the car and occasionally blow on the hose with your air compressor to keep debris off the hole, and you are done!
Cheap Hillbilly fix for under $10.
I hope this helps somebody on the forum that is as cheap as I am!
The following 10 users liked this post by hawaii:
amcdonal86 (03-12-2014),
bobdr1 (03-13-2014),
CleverName (03-12-2014),
GGG (04-23-2014),
Glenn Gardin (03-30-2014),
and 5 others liked this post.
#2
03-12-2014, 09:46 PM
Awe Crap...my pictures never load right..sorry. If someone knows how, just rotate the pics to the right once.
The blower motor seen in one of the pictures comes off very easily with three screws, just incase you have to replace that, one day from being submerged in water to long. All that dirty water came off the blower motor.
The blower motor seen in one of the pictures comes off very easily with three screws, just incase you have to replace that, one day from being submerged in water to long. All that dirty water came off the blower motor.
#3
03-12-2014, 09:56 PM

Veteran Member
Very interesting approach. I'm sure many will be doing it this way in the future as they become cheap enough to actually get in the hands of hillbillies! 
Personally, I would be too afraid to drill through the floorboard! The problem is, you forgot to put a new duckbill on your hillbilly drain. But that would defeat the purpose, now wouldn't it?
Personally, I would be too afraid to drill through the floorboard! The problem is, you forgot to put a new duckbill on your hillbilly drain. But that would defeat the purpose, now wouldn't it?
#4
03-13-2014, 05:49 AM

Interesting, lateral thinking approach!I would also be afraid of drilling holes there, but, hey, the prospect of removing the whole dash isn't so promising either!
Incidentally, there is a duckbill drain in the wheel well as well, very easily seen. I suppose it's like the same one used for the AC drain.
Incidentally, there is a duckbill drain in the wheel well as well, very easily seen. I suppose it's like the same one used for the AC drain.
#5
03-30-2014, 08:10 AM

Hawaii you are a genius! I have been trying to come uo with a fix and never considered this. I guess that beautiful island you live on promotes clear thinking!
How about a final picture of the install? Does the hose show in the pass foot well? Thanks again!!! I can easily get this done before summer hits Colorado.
How about a final picture of the install? Does the hose show in the pass foot well? Thanks again!!! I can easily get this done before summer hits Colorado.
The following users liked this post:
hawaii (03-30-2014)
#7
03-30-2014, 01:16 PM

Junior Member
Jaguar did help me with the bill...the dealer would not pull the trans to do the work...said they had done it many times and requires the half dash pull to fix properly....worked and I am and have been satisfied with the fix..so far.
Contact Customer Relationship Rep Amber DiCostanzo at Jaguar Land Rover North America, LLC 1-800-4-JAGUAR, Option 9. She can help!
Contact Customer Relationship Rep Amber DiCostanzo at Jaguar Land Rover North America, LLC 1-800-4-JAGUAR, Option 9. She can help!
Trending Topics
#8
03-30-2014, 09:28 PM
You don't see anything different because it's all under the rug. The nice thing is there is a nice hose you can get to easily now to blow some air into the box. Your old duck bill might start working again.
The previous owner had the duck bill replaced under warranty, but back then they put the same one back on, so the problem returned for me.
Again sorry about the pictures. They need to be rotated a quarter turn to the right. Not techie enough to figure it out.
Last edited by hawaii; 03-30-2014 at 09:46 PM.
The following users liked this post:
sherbercars (03-31-2014)
#9
03-30-2014, 09:45 PM
Interesting, lateral thinking approach!I would also be afraid of drilling holes there, but, hey, the prospect of removing the whole dash isn't so promising either!
Incidentally, there is a duckbill drain in the wheel well as well, very easily seen. I suppose it's like the same one used for the AC drain.
Incidentally, there is a duckbill drain in the wheel well as well, very easily seen. I suppose it's like the same one used for the AC drain.
#10
04-23-2014, 06:51 PM


The following users liked this post:
hawaii (04-24-2014)
#14
04-24-2014, 10:24 AM
#15
04-24-2014, 02:55 PM
That dirty water came out of the blower fan area, which came from evaporator . I guess when you see it on the ground it hides the color. That's the water that drips onto your passengers legs!
#16
04-25-2014, 07:26 AM
Junior Member
To Hawaii....sorry to say but the water I caught in a bucket (lots) was perfectly clear...not sure where your water came from.
#17
04-25-2014, 07:33 AM
Junior Member
Mine is 2008 Xk convertible...When I discovered the problem I was running with the top down and the A/C on automatic....so it was sucking up the outside air and trying to convert it which would be almost impossible with a lot of condensation...could not handle it so spit the runover out onto my wife's feet...wow!
In the manual, it recommends not to do this...ie run with top down and A/C on. Even though , it should not have done this.
Got it fixed at Jag dealer.
In the manual, it recommends not to do this...ie run with top down and A/C on. Even though , it should not have done this.
Got it fixed at Jag dealer.
#18
04-25-2014, 11:32 AM
Well if yours was clear I probably will have to replace my blower motor sometime in the near future. Probably rust from the windings being submerged in water for too long. The good news is the motor is easily changed with only three bolts! Not sure on the cost of one of those puppies though!
#19
04-25-2014, 01:32 PM

Veteran Member
hi all, getting my 2007 xkr on wedensday, saw in glove box where previous owner had reciepts for replacing this issue in 2013, dont know wheter it was replaced with upgrade part/tube, but dash was taken out to fix, how long will it take for this problem to occor again or will it. Should i just do the tube in the evaporater quick fix and it will be finished with.
#20
04-25-2014, 02:52 PM
hi all, getting my 2007 xkr on wedensday, saw in glove box where previous owner had reciepts for replacing this issue in 2013, dont know wheter it was replaced with upgrade part/tube, but dash was taken out to fix, how long will it take for this problem to occor again or will it. Should i just do the tube in the evaporater quick fix and it will be finished with.
It takes time for it to stick again. I won't do the second drain until you absolutely had to.
The following users liked this post:
powerhouse (04-25-2014)