When you click on links to various merchants on this site and make a purchase, this can result in this site earning a commission. Affiliate programs and affiliations include, but are not limited to, the eBay Partner Network.
So many questions...
how are you powering the leds?
Can you compare the specs of the original with your desired replacements?
If the LEDs are wired in series then if one fails they all will not light.
determining the power source specs is step one
Wj
we will take the power supply from the existing power to the original LEDS and take it to the new ones.
I have compared the specs as much as I can and the replacement LEDS appear from the data sheet to be as bright or brighter than the originals. We will see what happens with heat also....that is potentially an issue, but I am placing a heat mat bewteen the new LEDS and the old LED circuit board
re series - yes, that is another good point. We could wire them in parallel but that might complicate matters. I want to avoind having to add in complications or create another circuit board if I can help it.
The good news is that replacing a bust LED will from now on be a simple matter taking just a few moments. I am epecting/hoping the new ones will be very reliable.
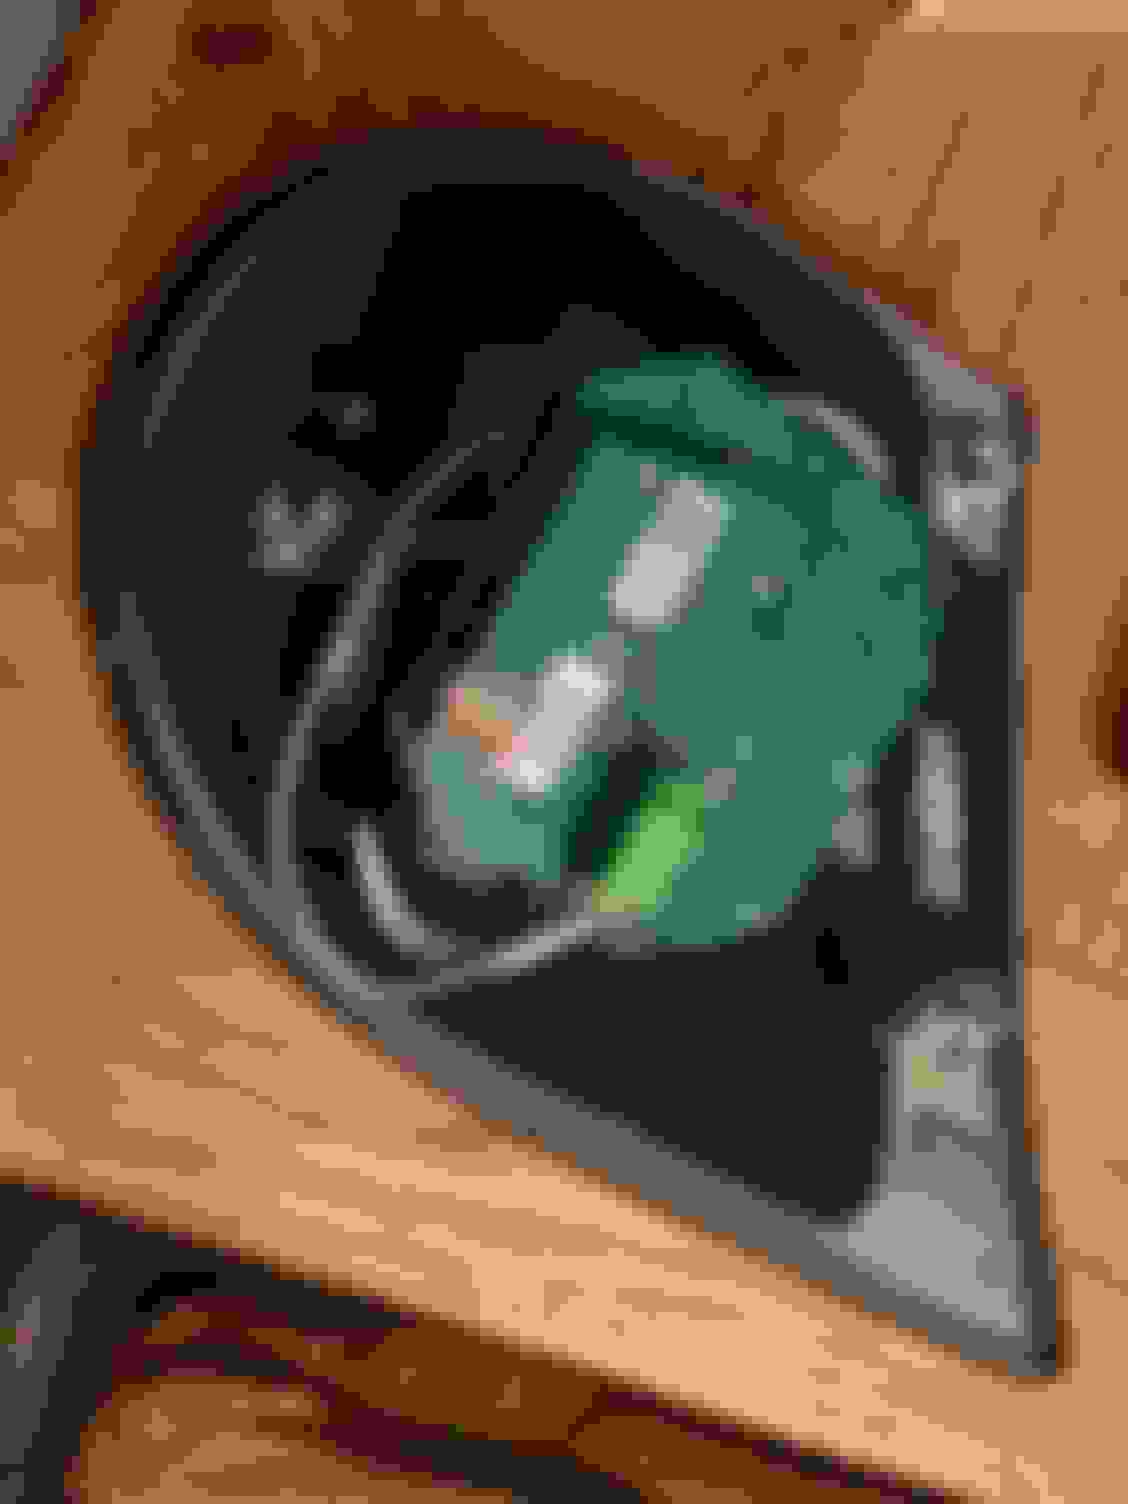
OK, so here is an update. We took the new push through LEDS which are 5mm in diameter and placed them into the very slightly enlarged holes that you can see in previous pictures and through which the old LEDS shine. I learned that LEDS have (in this case) two legs and the slightly longer one is the positive. As they are in series, we thought it would be a good idea to do two banks of four. That means that if one LED should fail, then you only lose half of them. Also checking them out and replacing one LED is now a very simple job. Each bank of four needed two 120ohm resistors wired in to reduce the voltage. There is a bit of maths to be done here which is above my pay grade....good to have a mate who knows this stuff at this point !
Twist the legs of adjoining LEDS together and solder them, checking the polarity is correct and then snip any excess off the legs. Place a bit of heat shrink around the resistors so as to avoid any possibility of a short, A bit of blob of glue off a glue gun to keep the resistors in situ. Place the little piece of solder mat between the new LEDS and the old ones so as to avoid any possibility of a short or heat problems.
Talking of heat problems, we ran the lights on 13.8 volts for half an hour on the bench but didn't notice any heat being generated. Originally we were going to snip the positive connection that supplies power to the circuit board for the fog LEDS and then connect the new LEDS to that. However, we thought it would be best to leave that un-snipped and simply solder onto the exisiting supply - in that way the original system still fires up, the old LEDS that work will still shine, but of course they will not be visible as the piece of solder mat blocks them and the new LEDS are in those holes. This was one reason why we did a half hour bench test as we were not sure how much heat might be generated, but everything stayed at room temperature so no problems.
This picture hopefully explains what I mean at this stage
Once it is all put back together, this is what it looks like. You can see tht we added an extra blob off the glue gun to the connector to act as extra insulation. You can also see the blob of glue close to the heat shrink wrapped resistors which simply stops them from moving around.
So....job done, and if I ever had to do it again it would now be a lot quicker having thought it all out and figured out a way around the various little problems.
It saved quite a few pennies ! If anyone wants theirs fixed, give me a shout !
Last edited by Falkie; 09-06-2022 at 11:39 PM.
Reason: typos
Just had my 2009 XKR LED rear fogs refurbished as 6 lights out on one and 2 on the other. Found a man who replaced all the LED'S with a two day turnaround as I didnt fancy experimenting on them myself. Jaguar quoting �315 +vat each side plus labour I took them out (three nuts) and sent them off and they were returned within 3 days as new �160. Home
 09-02-2022, 06:44 AM