When you click on links to various merchants on this site and make a purchase, this can result in this site earning a commission. Affiliate programs and affiliations include, but are not limited to, the eBay Partner Network.
Strange how associations change. When I was growing up, especially in London, leather, tobacco, even pipes were not associated with the geriatric or the archaic, rather a requisite of proper adulthood.
Its like those vape pens that kids are addicted to today- watch they will fall out of fashion and these kids too will get old.
Picked up three Asiatic Lily's and three cinder block top caps so far today. Why the Jag? Because my flippin back is still sore from laying block yesterday...
Good times and funny looks from the loader drivers at the block plant.
"Proprietary coating that provides headlight clarity for up to a year"
Can that be re-applied on top of an old coat?
Generally the DIY coatings I've seen bundled with the polishing kits are said to provide protection for up to a year, though there are some that may go for two years. A windshield polisher who I'm in talks with regarding my windshield said he also does headlights, and uses some sort of clearcoat wipes which result in 1-2 years of protection.
For a more durable solution, some of the shops offering headlight polish & clearcoat said they use a two-component spray can clearcoat. I read a bit about those when I still considered tackling the job myself, but they were $50+ per can, and once the can is "activated" (two-component after all), it is only usable for 18 hours max. Apparently those would provide a longer-lasting protection, however.
The guy whose car paint shop did my headlights said they don't use spray cans, but rather applied the clearcoat just as they do when they finish an entire car. I'm under the impression that it should last a long time, just like clearcoat on painted panels does.
I don't know if you could simply re-coat but I generally wouldn't do that. Depending on the look after a year, I would probably go 1000 grit again and polishing compound, then reapply. Mine were in rough shape but shouldn't be going forward. What was a Florida car is now a Minnesota car driven only half the year sadly.
The 3M kit I used didn't include UV protection. Many of them are gel and applied with a foam or cloth applicator. Some clear bra materials resist yellowing and cracking due to UV exposure, or so I read.
Ran errands. Car really, really wants plugged in overnight. Need to get the back cleaned up so I can park it off street and plug it in. Persistent TPMS faults and smart key battery low warnings.
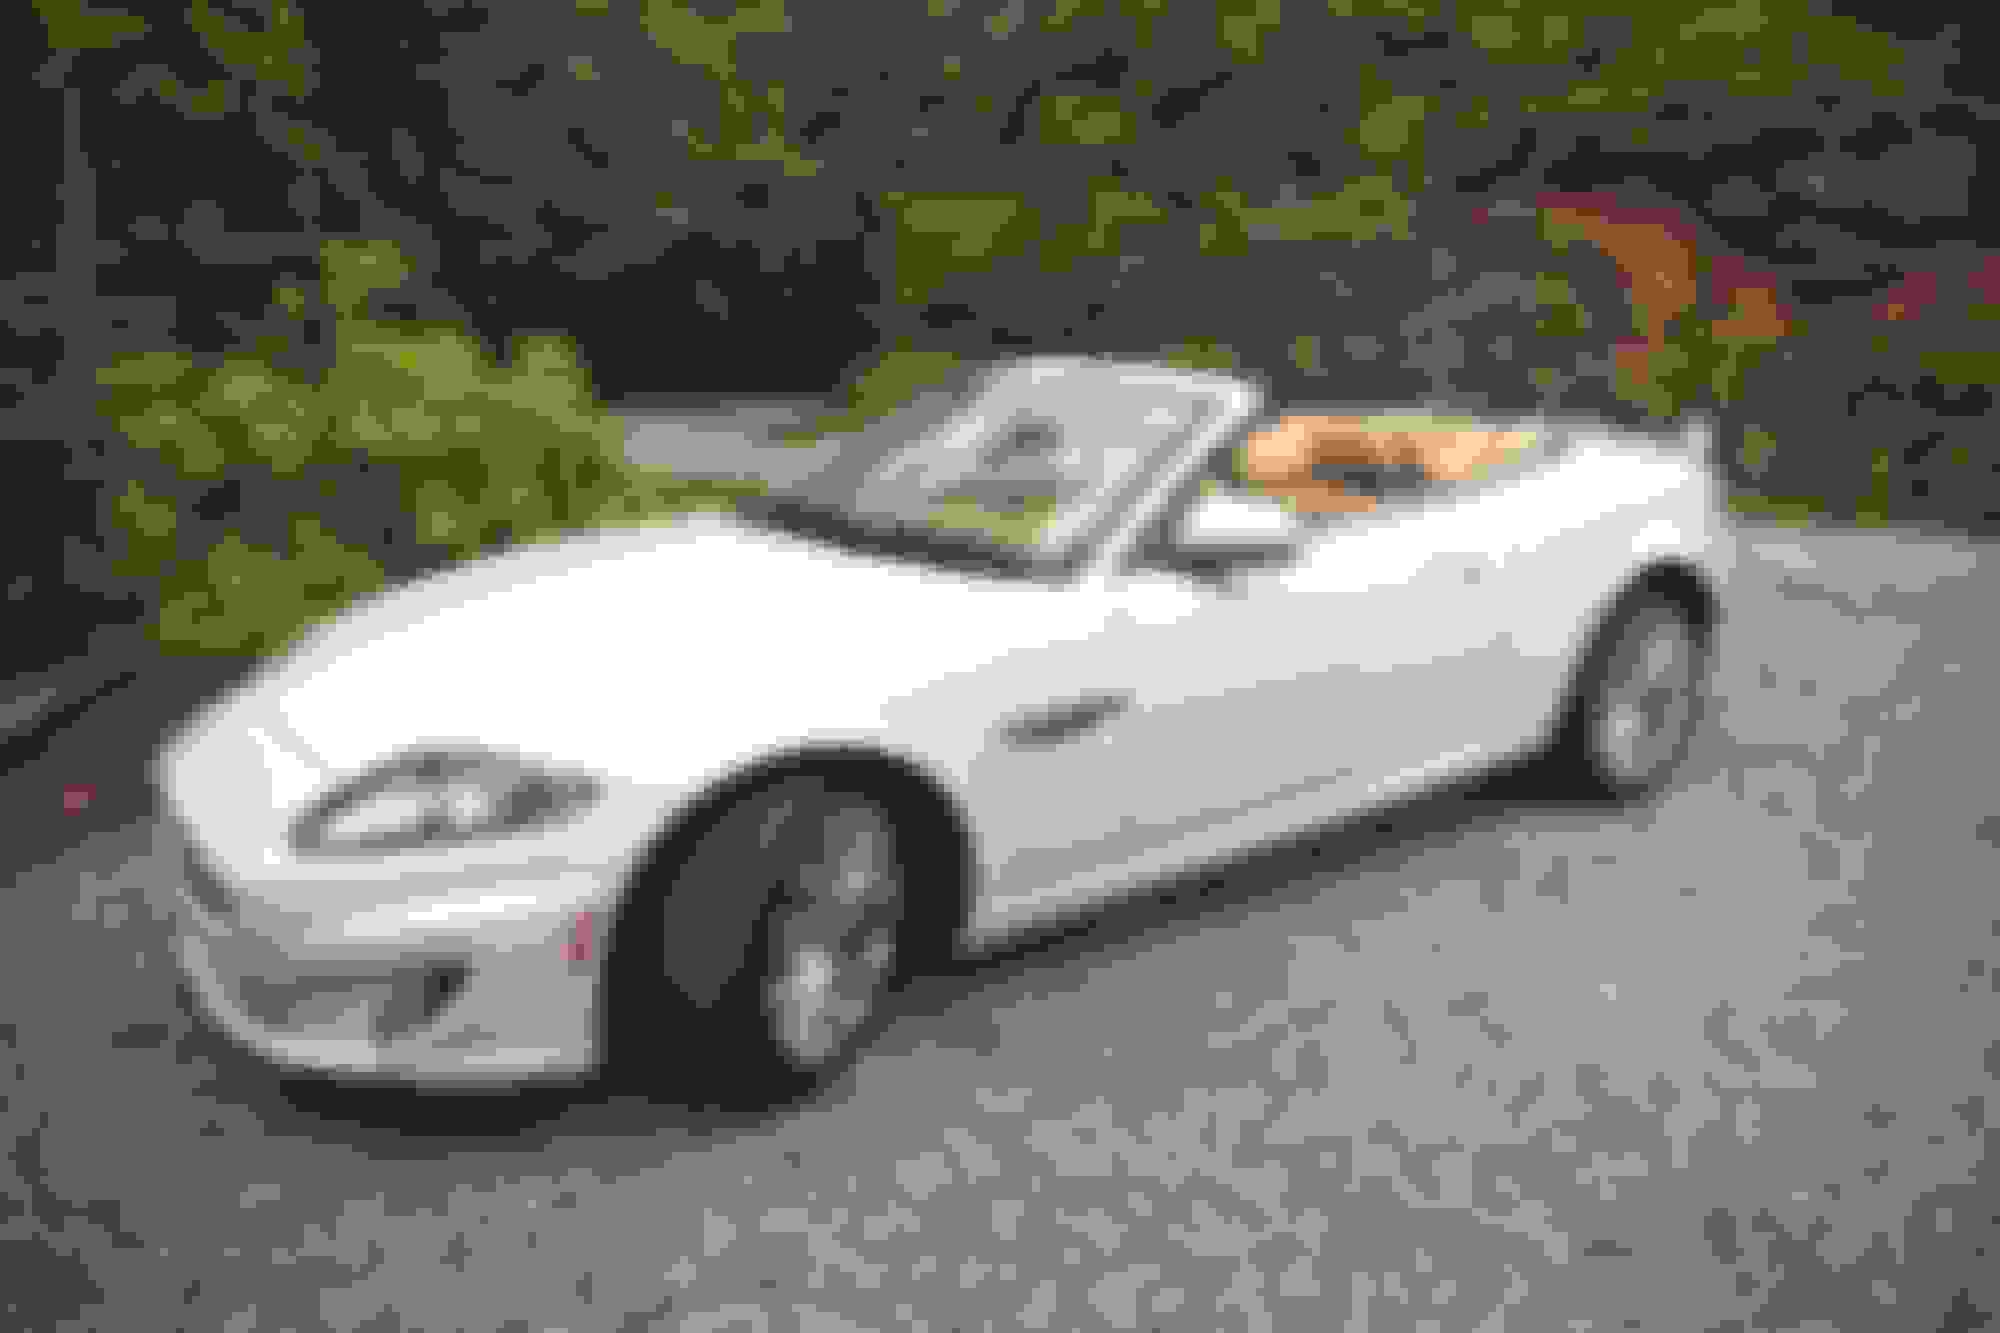
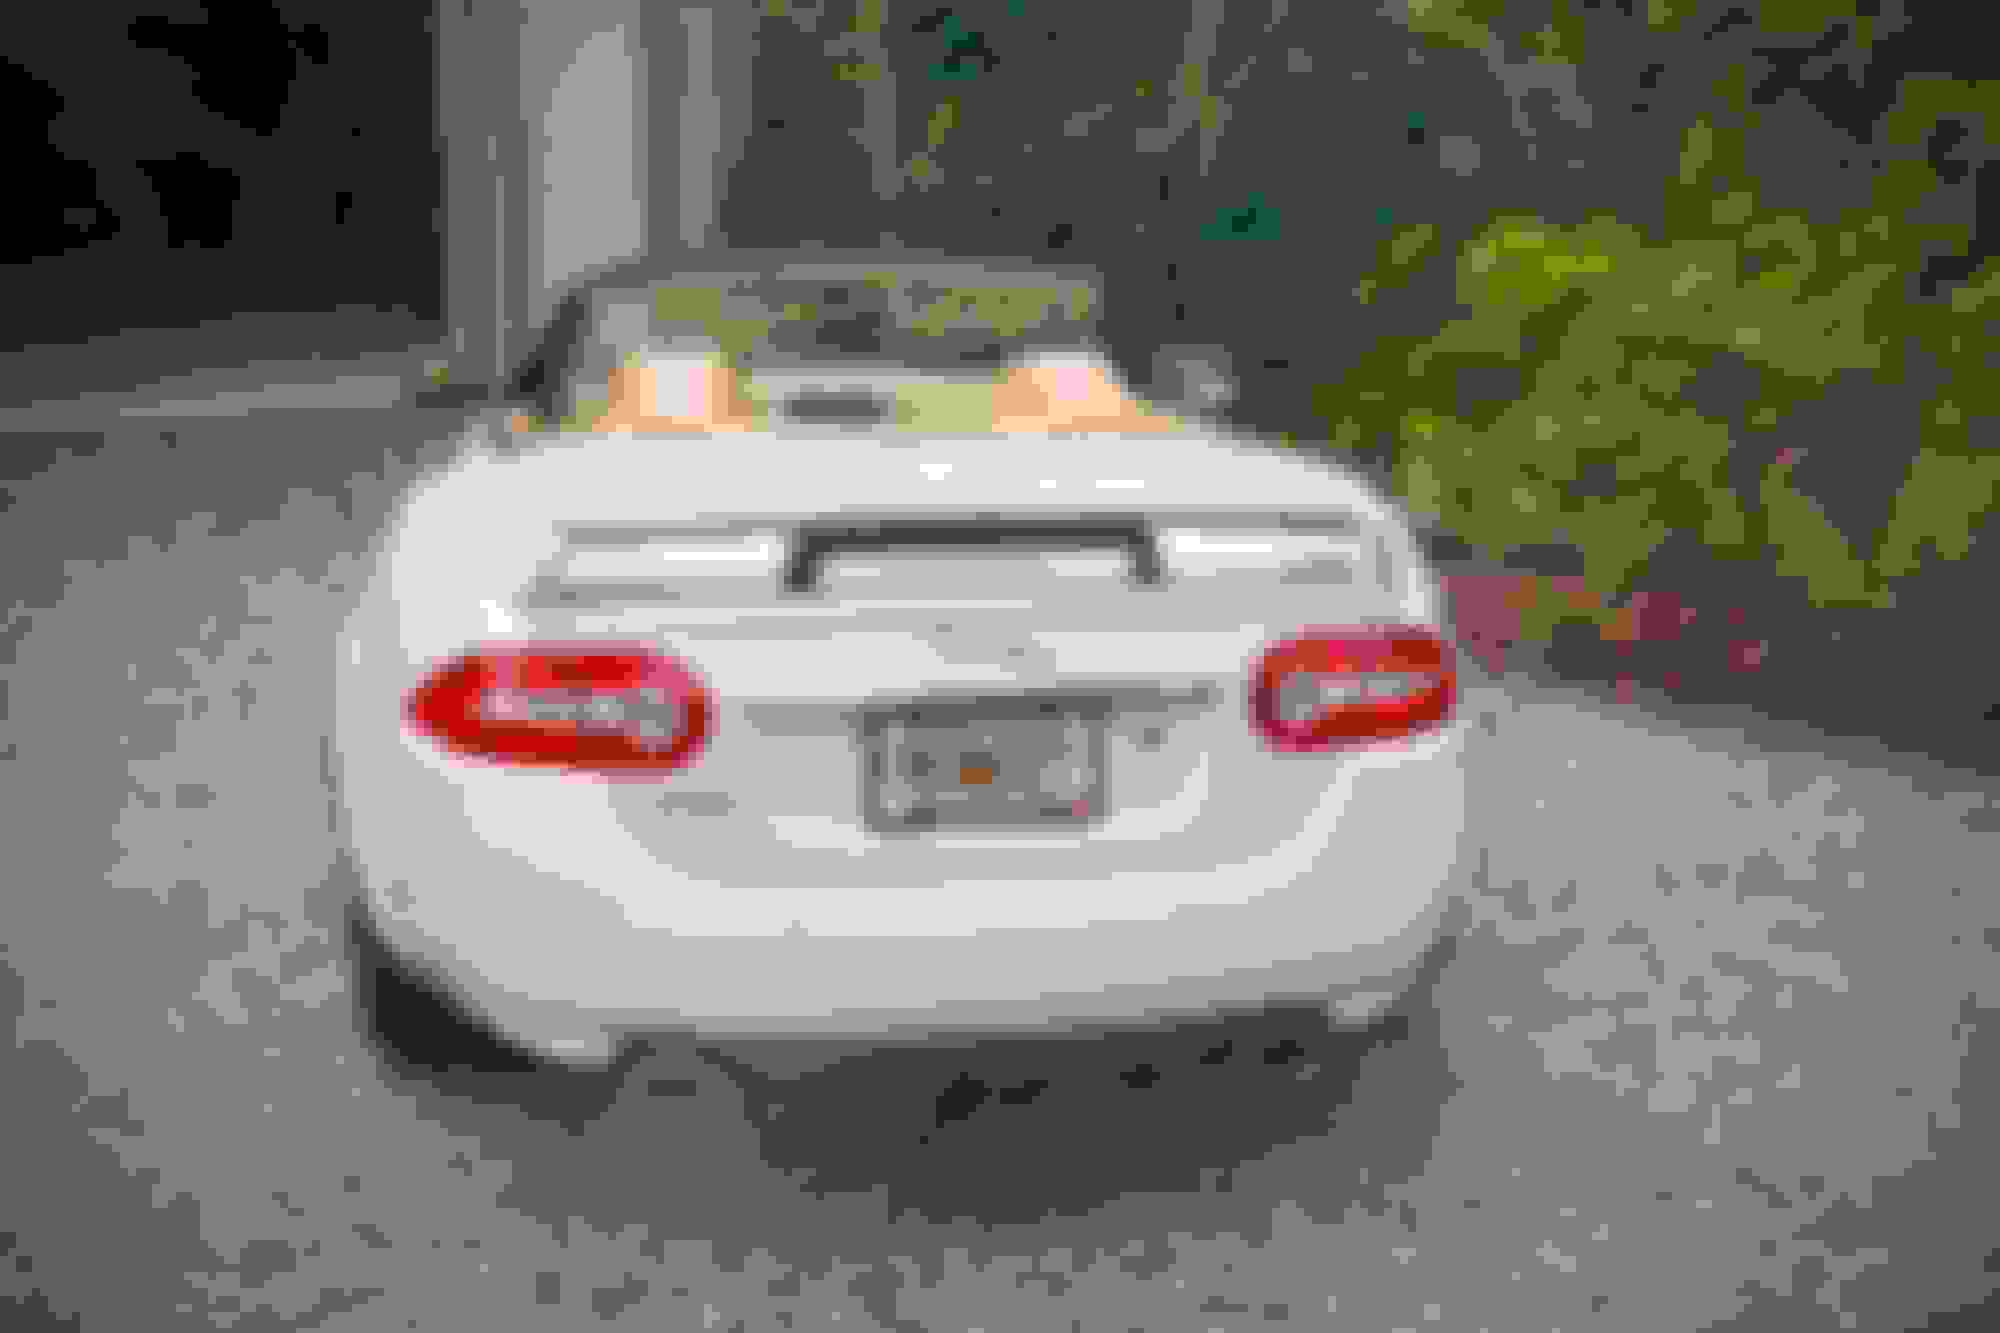
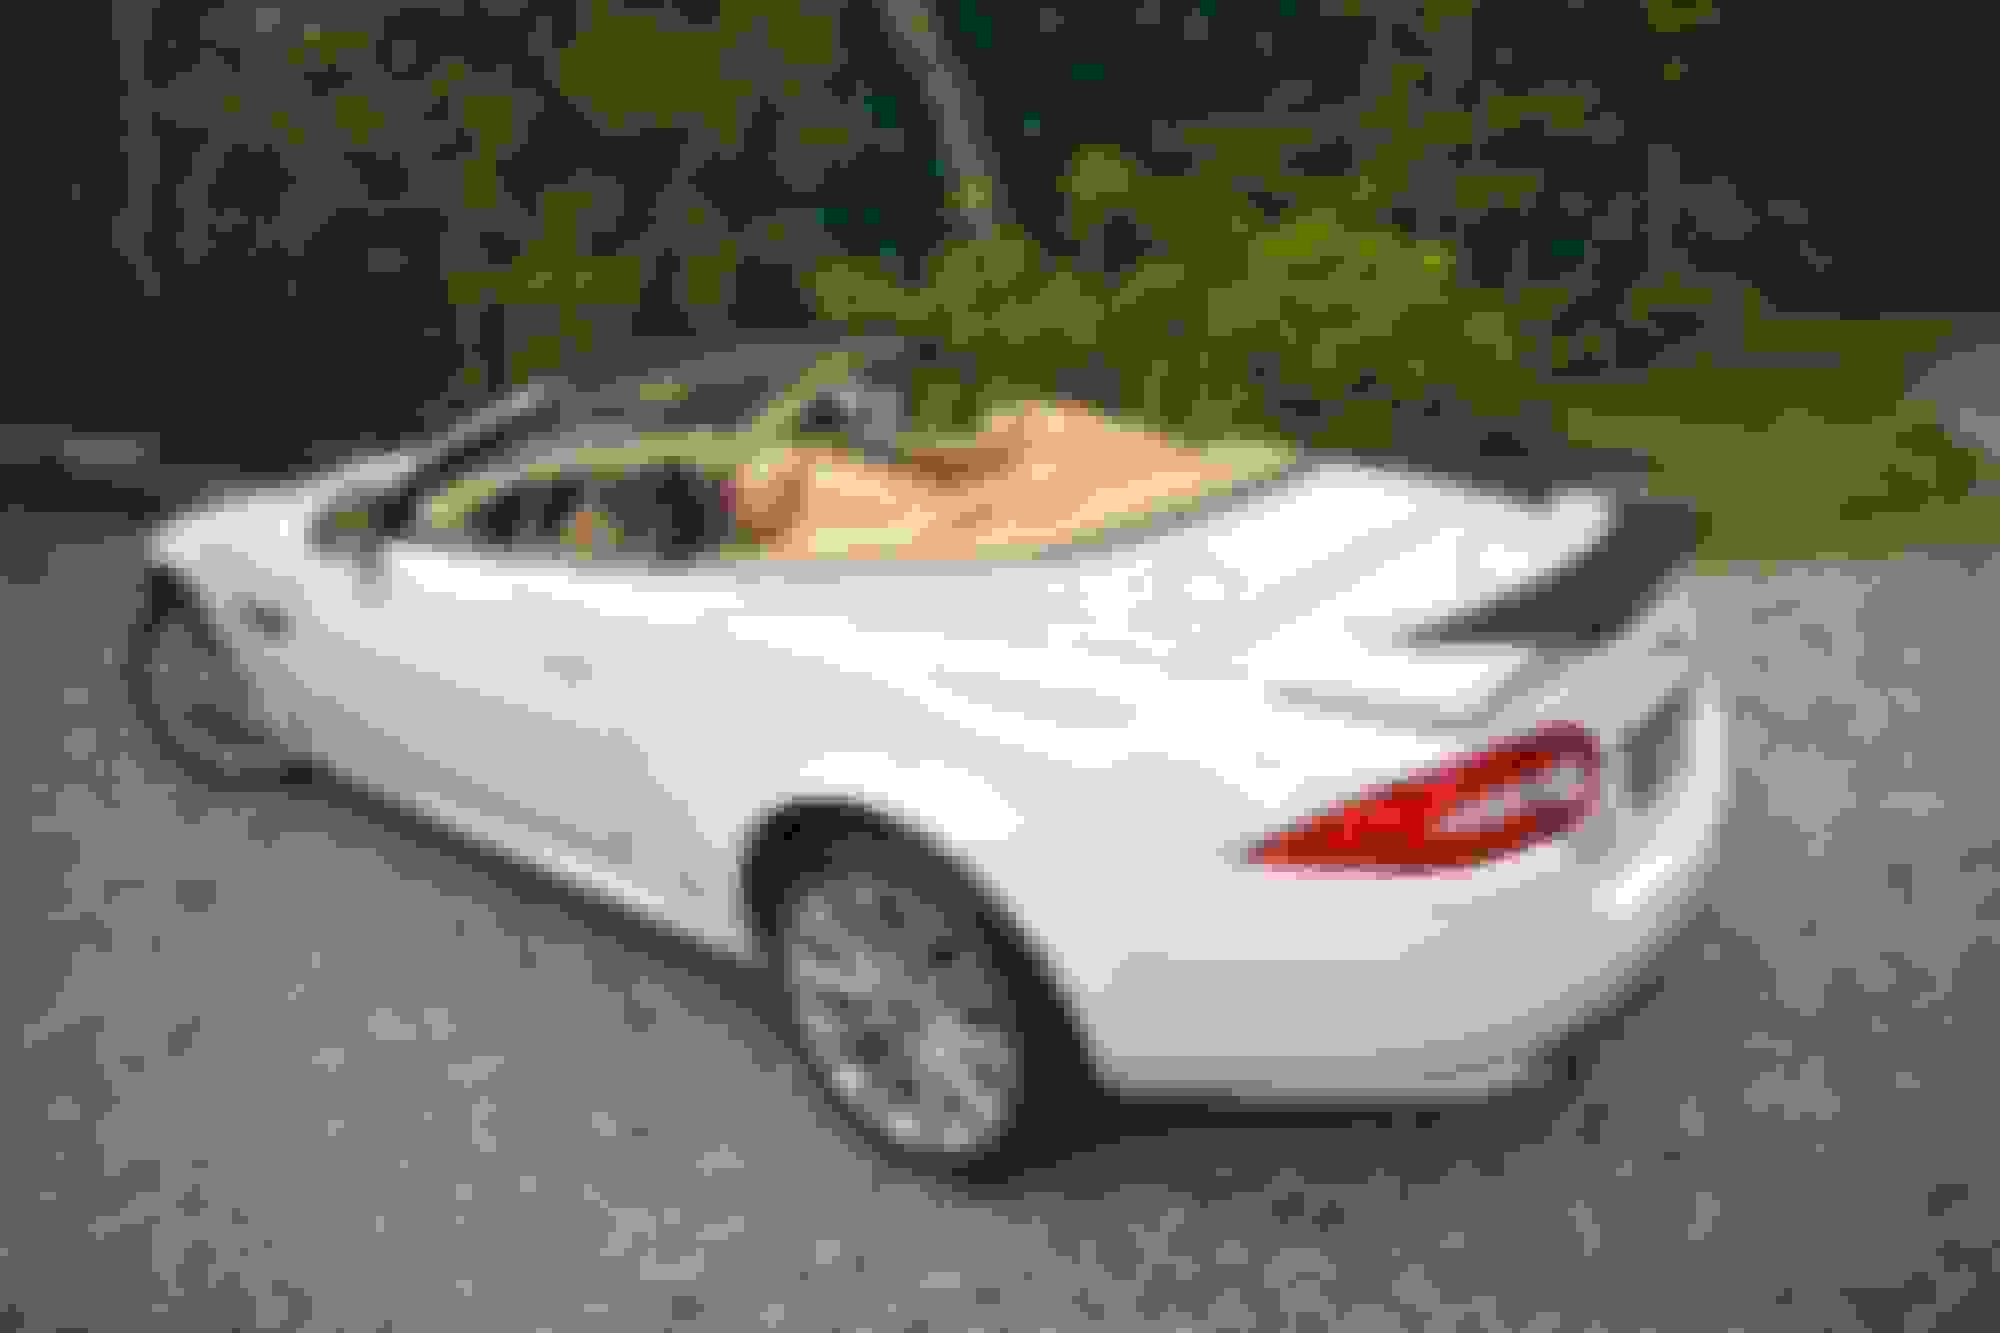
Finally finished installation of my Mina R-S wing today! What a bear.....small hands would have been a plus to reach the outer most bolts in the boot lid. I'm a little scraped up from the reach in there but really tickled with the end result!
Finally finished installation of my Mina R-S wing today! What a bear.....small hands would have been a plus to reach the outer most bolts in the boot lid. I'm a little scraped up from the reach in there but really tickled with the end result!
Great! It looks a LOT better than MY Mina spoiler.... which is back at Mina with a refund to me, minus the $200 I wasted on paint.
Finally finished installation of my Mina R-S wing today! What a bear.....small hands would have been a plus to reach the outer most bolts in the boot lid. I'm a little scraped up from the reach in there but really tickled with the end result!
I got a few shots this morning between thunderstorms. Some may not be partial to the look but, for me anyway, it exceeds my expectations and was well worth my effort.
Next will be adding the WhiteXKR one button top module. Maybe a Father's Day gift to myself!
Yeah, the dirt really is that red here! I was surprised at how the wing is barely noticable in the rear view mirror while driving.
Yeah, ascetically it looks like it should be 10-15% larger but considering how air flows around this chassis it's probably exactly how large it needs to be for its intended duty.

 05-26-2018, 10:31 AM