
Is the leather on your armrest creased and wrinkled?
#1
 11-04-2010, 08:38 PM

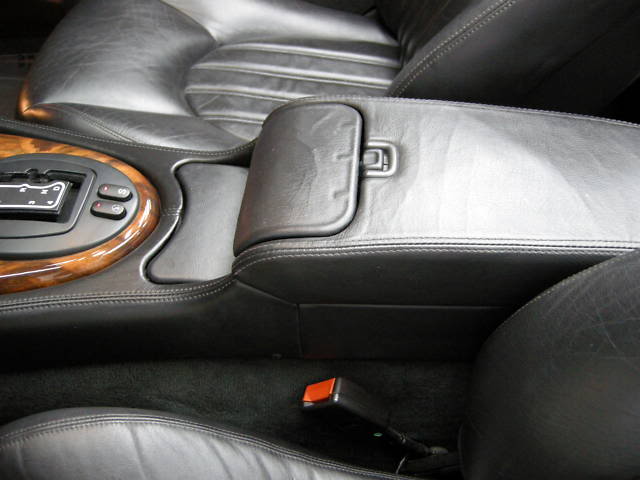
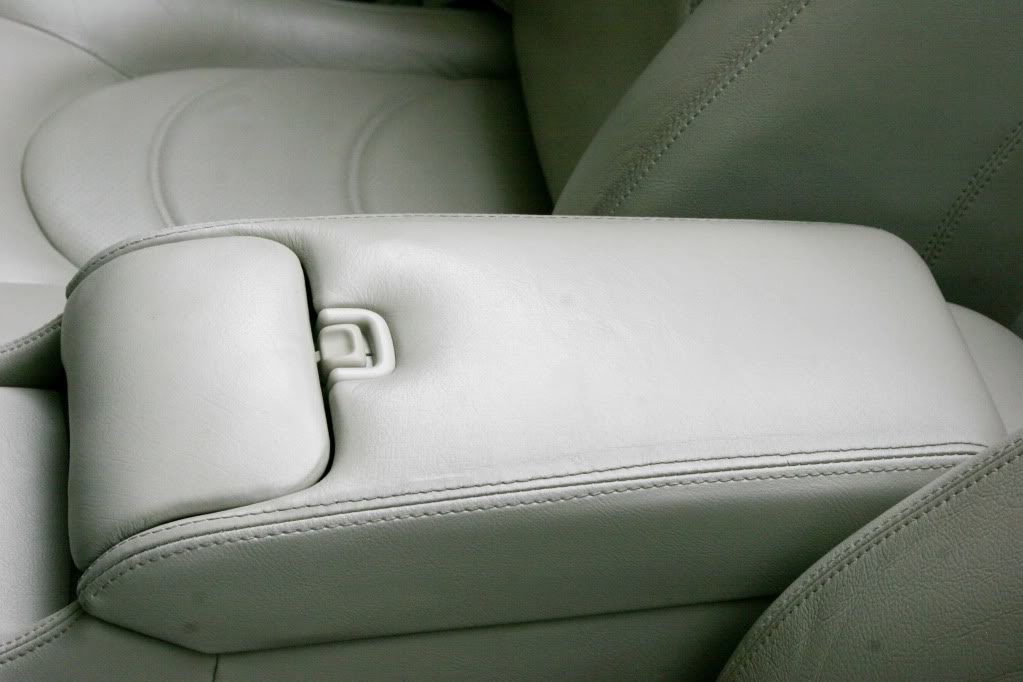
When I acquired my XKR about 16 months ago, my center armrest was an eyesore. The leather finish was fine, but it was flat and had creases and wrinkles on the surface. I then saw pictures of a new armrest, and saw that it was supposed to be smooth and pillowy, like an overstuffed leather chair.
I came up with an extremely successful fix that takes about $20 and an hours time...I could not believe how well it restored the appearance.
Anyway, this was before I joined this great forum. Anyone else have this problem? If so I'll describe what I did.
I came up with an extremely successful fix that takes about $20 and an hours time...I could not believe how well it restored the appearance.
Anyway, this was before I joined this great forum. Anyone else have this problem? If so I'll describe what I did.
Last edited by WhiteXKR; 11-04-2010 at 08:41 PM.
#3
11-04-2010, 09:10 PM
Veteran Member
Join Date: Nov 2006
Location: Glasgow, Scotland UK
Posts: 47,302
Received 9,011 Likes
on
4,114 Posts

#6
11-05-2010, 07:15 AM

It's one of the first thing that goes when a convertible gets caught in both sun and rain a few times. I've replaced a few of them with either used, or a guy in Fla had a bunch of newly covered ones.
Curious too what you did, as occasionally I still get customers in looking for low cost solutions.
Curious too what you did, as occasionally I still get customers in looking for low cost solutions.
#7
11-05-2010, 07:37 AM

Junior Member
Join Date: Nov 2010
Location: Oklahoma
Posts: 7
Likes: 0
Received 0 Likes
on
0 Posts
It's one of the first thing that goes when a convertible gets caught in both sun and rain a few times. I've replaced a few of them with either used, or a guy in Fla had a bunch of newly covered ones.
Curious too what you did, as occasionally I still get customers in looking for low cost solutions.
Curious too what you did, as occasionally I still get customers in looking for low cost solutions.
Trending Topics
#8
11-05-2010, 07:56 AM
#9
11-05-2010, 09:21 AM
Here he is:
http://paulsjaguar.com/leather.htm
You'll probably have to contact him, ask him what he has available.
#10
11-05-2010, 11:12 AM
My '03's armrest was never soft and pillowy but I'd like to see what yours looks like now that it is. I could use a little soft and pillowy in that spot.
#11
11-05-2010, 01:34 PM
The armrest consists of a plastic frame lined with foam rubber and covered with leather. The leather on the top of the armrest is additionally lined with open cell foam. The problem is with the open cell foam leather lining…it rapidly deteriorates literally to dust. This removes the underside pressure on the leather, and it loses its pillow-like look and starts to wrinkle and crease.
The solution is simply to replace the open cell foam lining. I have found that 2 layers of standard, widely available 3/16” foam backed headliner material do the job perfectly. There are many sources of this by the yard, such as wlsheadliners.com. Since this is hidden, it does not matter what color headliner material you get. I have heard that Joann’s fabrics also sells this material, but have never verified this myself. If you are a real economizer, see if your local auto-upholstery shop will give you some scraps…you only need two pieces, each the size of the top of the armrest.
You will also need headliner spray adhesive. Wlsheadliners.com also sells this. Permatex brand headliner adhesive is also available at your local Advance Auto parts.
Since I performed this procedure over a year ago, I am just going to summarize it from memory. Perhaps another one of our members can embellish it and add photos some time later.
The day before you perform this job, I recommend that you give the armrest leather a generous treatment of your favorite leather conditioner to soften it up.
You will need a #2 phillips and a T10 torx driver. First remove the armrest from the car by removing the two hinge screws and the screws and washers on the prop rod. Take note of the prop rod washer sequence for reassembly later.
Once out of the car, remove the black bottom cover, armrest latch, the cup holder assembly and the cup holder latch. On the underside of the armrest, you will see that the leather is glued to the white plastic frame. Gently peel the leather off of the plastic frame. Once the leather cover is off, clean up the residual grey powder from the old deteriorated foam. Note that the original foam was attached with a clear adhesive liner. This clear liner is your ‘template’ for cutting the replacement foam.
Cur two pieces of headliner material a little larger than the armrest. Glue one on top of another to double the thickness. Note that this adhesive must be applied to both glued surfaces, and needs 5-10 minutes to tack-up before placing the pieces together. It is very difficult to separate without damage once in contact, so smooth the two sheets very carefully together. Now cut the double thick headliner to match the ‘template’ with very sharp scissors.
Next glue the double thick foam over the clear liner on the back of the leather, again gluing both surfaces and allowing it to tack up first.
Now, mask off the foam you just attached and spray a couple of coats of adhesive on the cut ends of the leather, exactly where the old adhesive residue remains. Likewise spray two coats of adhesive on the white plastic frame, in the same places the old adhesive remains. Allow it to tack up for 10 minutes, and then very carefully re-adhere the leather/foam assembly to white plastic frame. Start at the center and work your way to the corners, pulling taut, following the original folds, and making sure the stitching on the leather is straight and centered on the armrest, until the entire cover is back in place.
If the cup-holder cover has also lost its pillowiness, a similar procedure can be repeated by removing the T-10 torx screws holding the cup-holder cover in place and replacing the foam under the leather of the cup-holder. Use only a SINGLE layer of 3/16 foam on the cupholder.
If your armrest was squeaky or creaky before, now is a good time to add a little lubricant to the cupholder, the latches, as well as the area where the leather contacts the black plastic bottom cover. There are special lubricants for interior squeaks, but I have found that a TINY amount of synthetic brake grease is very effective.
Now reassemble the cupholder, the cupholder in the armrest, the cupholder latch, the armrest latch and the bottom cover of the armrest. Be careful not to over-tighten any screws, the plastic is a bit fragile. Finally reattach the armrest at the hinges in the car and reattach the prop rod and washers. Adjust the prop rod screw so that the cover lifts easily, but there is no play.
Finish the project off with a good leather cleaning and a fresh application of leather conditioner.
Enjoy your now restored, soft, attractive and quiet armrest!
Last edited by WhiteXKR; 11-08-2010 at 01:17 PM. Reason: Change cupholder to single layer of foam.
The following 3 users liked this post by WhiteXKR:
#12
11-06-2010, 12:54 PM

#15
11-06-2010, 04:54 PM
Great fix for what I perceived to be nearly a deal breaker. It takes this issue off of my list of concerns when looking for my cat. As an aside, I was amazed to find the exact same upholstery fabric that was on my lounge chair at Joann's. I needed some for a repair after one of my dogs nibbled on the chair's skirt. Saved the pooch from a more severe attitude adjustment experience.
#16
11-06-2010, 05:20 PM
Veteran Member
#17
11-06-2010, 07:42 PM
Lew-
Not to pick nits, but if your foam was OK, and a redye restored your armrest, then the problem you had was probably fine cracks, or scuffs or finish wear in the leather. That is a slightly different issue than I am addressing here.
In any event, I am glad you successfully solved your problem also. Your post points to the fact that it is important to assess just which problem you have before jumping into one solution or the other.
#18
11-07-2010, 01:56 AM
Veteran member
my armrest is creased and flat, not to mention not very comfy for my belbow. Wish I had pillowy armrest. I'm shipping you mine on monday. Address - WhiteXKR, Arlington, VA. See how long it takes to get to you. 
I may have some time to try this tomorrow, I've got foam and I've got adhesive. Now I just need the courage to open that sucker up. I wonder if I can fix the 'instant open' cup holder while I am in there.
I may have some time to try this tomorrow, I've got foam and I've got adhesive. Now I just need the courage to open that sucker up. I wonder if I can fix the 'instant open' cup holder while I am in there.
#19
11-08-2010, 12:08 PM
Veteran member
Did mine over the weekend (and took waaayyy too long - 5 hours) my foam was too thick though for both the armrest and cupholder section. I had the 3/8" foam, and when doubled up, that was too much for the armrest, problems with latching and the leather where it 'grabs' the latch base, small existing holes to keep it from sliding ended up visible...so had to start from scratch again. A single layer of that was perfect in the end. However, the 3/8 foam for the cupholder left too many creases and there wasn't enough leather material to wrap around that thickness, plus it ends up rubbing the side of the armrest when in the closed position...need 1/4" or even 3/16 for this to work here better.
I've got pictures of the process, and will note my obstacles a bit later. I'll post later when my 'final' product looks better.
I've got pictures of the process, and will note my obstacles a bit later. I'll post later when my 'final' product looks better.
#20
11-08-2010, 01:20 PM
The following users liked this post:
Orthodixie (06-27-2017)