When you click on links to various merchants on this site and make a purchase, this can result in this site earning a commission. Affiliate programs and affiliations include, but are not limited to, the eBay Partner Network.
I decided to start a new thread to cover my own thoughts and approach to the top mount issue rather than muddy the effort Wayne is putting in on the existing thread on the issue.
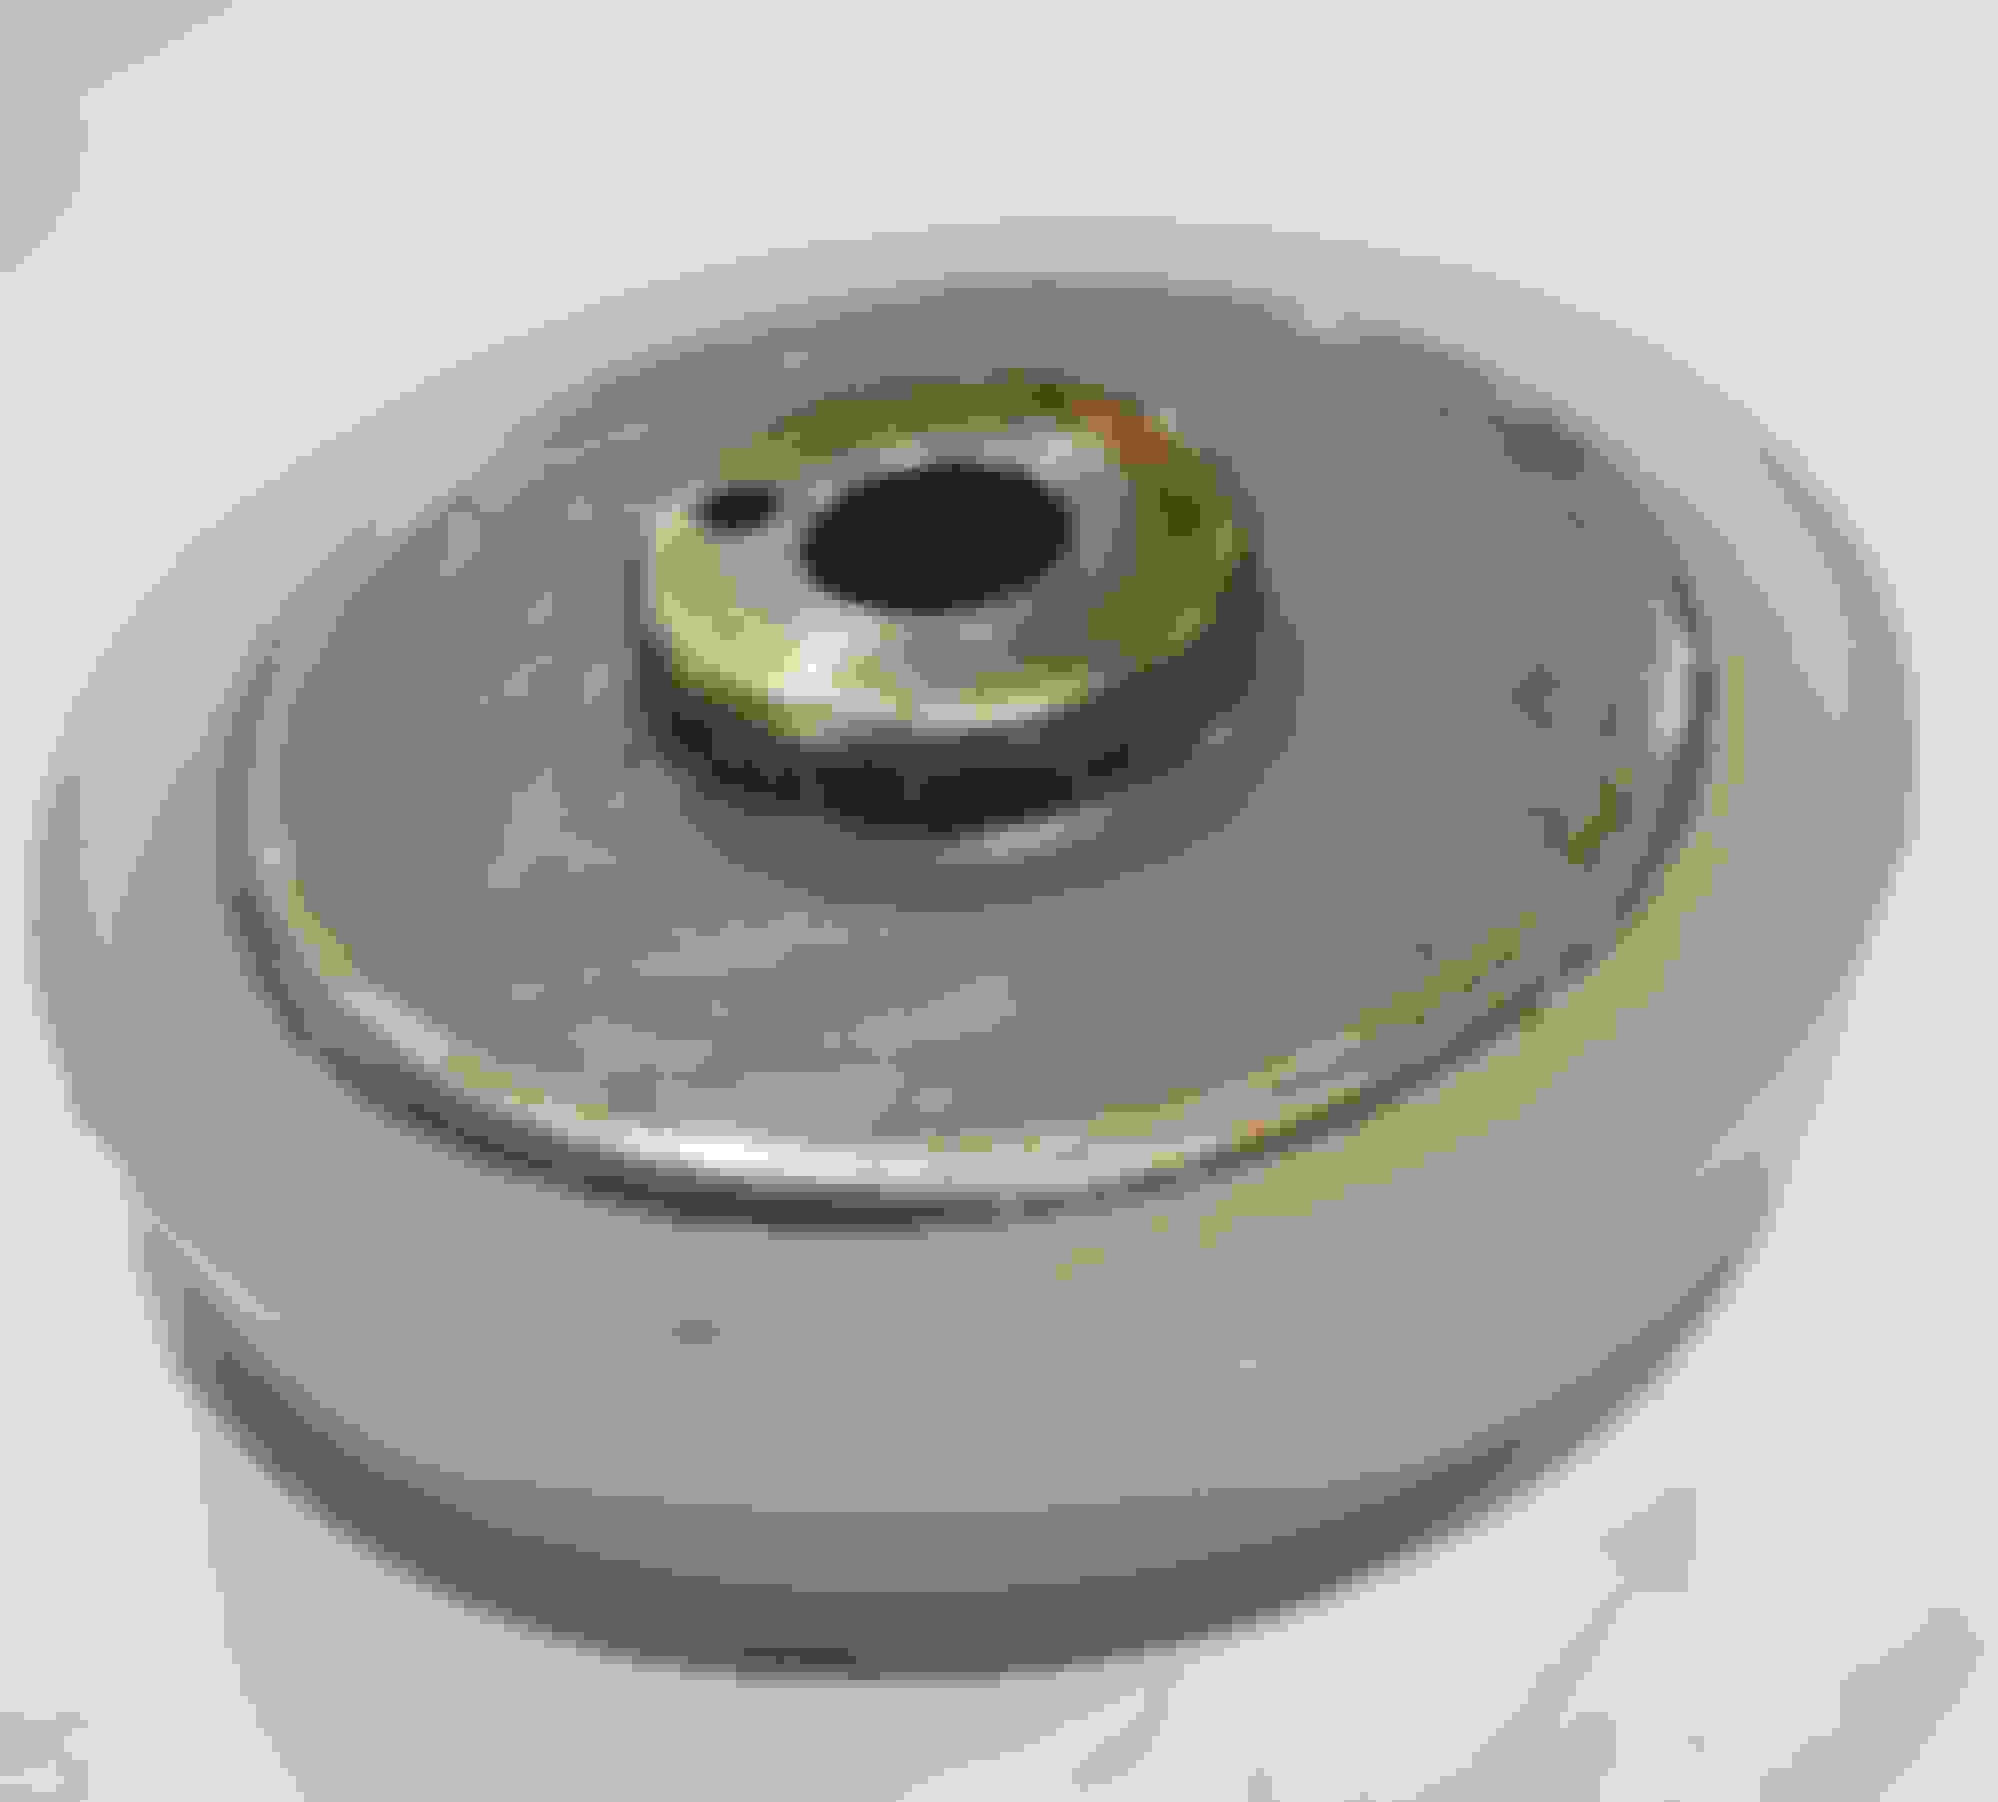
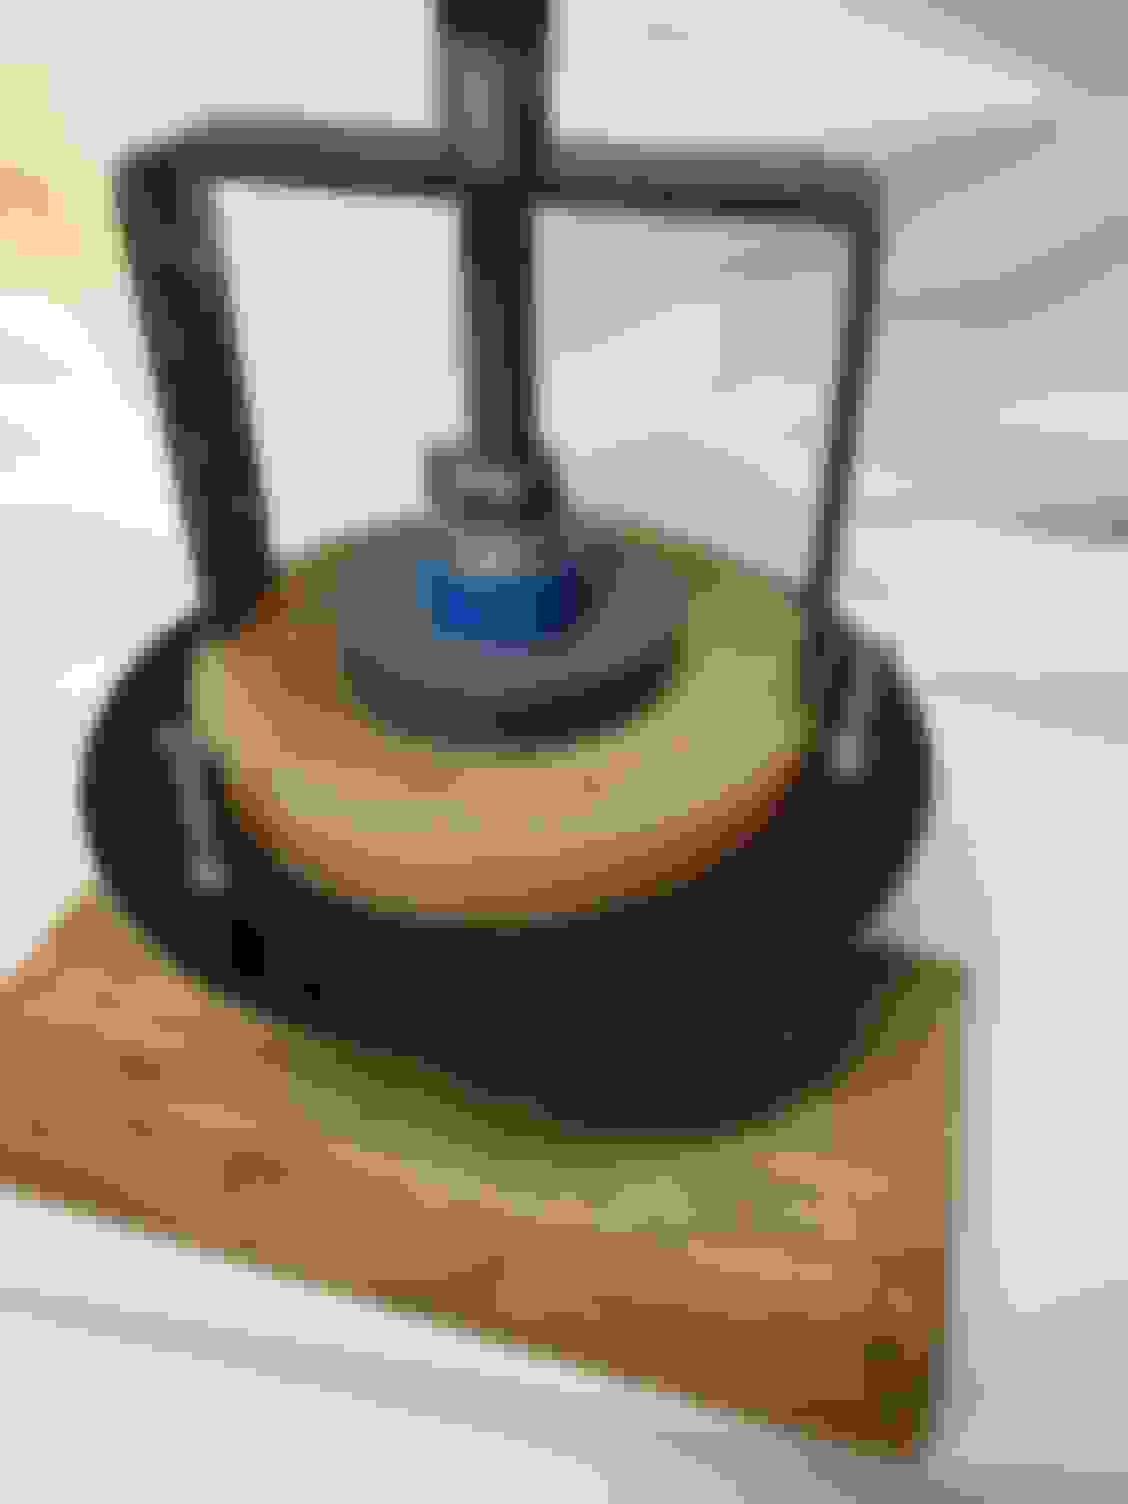
l finally got round to refining the mould l have been experimenting with for a while now and obtained a new batch of polyurethane. Some pics show today's effort straight from mould.
Most mount problems seem to be rooted in the initial lateral movement of the bushings which then likely leads to increased deflection and abrasion of the material. By fully encapsulating and bonding the shock mount "washer" l think the possibility of lateral movement is gone.
I still need to road test this idea and settle on the most suitable shore hardness of the poly. It might be that the restriction in the deflection of the bushes allowed by this design creates other issues. We will see.
One thought regarding the spring seat cushion is to note the difference between the X100 and the later X150 top mount (shared by many other jaguar models). The later design is basically an upturned pressed steel cup with a rim enclosing the spring seat cushion and no doubt limiting the deflection and fatigue of the seat. The X100 has no such support. It would however be an easy task to weld a, say 10mm high rim around the mount which l plan to do in the coming weeks.
Sorry for the length of this post. Others thoughts?
(Excuse the casting flash on bushing, l prefer to leave removal until poly is fully cured)
That does looking promising and along the lines of my initial thoughts.
What I'm using was tested by Dale in the 70A range and seems to have just the right amount of flex.
The large donut did present a major effort to find something that would hold the ring that keeps the spring in place.
I also think I might have found a bottom spring seat, you don't happen to have that sleeve setting around and measure the bottom of the round part of the cone. I got 4 inches for the outside and of course 2 inches for the hole of the shock.
Thanks for getting into the ball game, the more thoughts might get us the answer.
That does looking promising and along the lines of my initial thoughts.
What I'm using was tested by Date in the 70A range and seems to have just the right amount of flex.
The large donut did present a major effort to find something that would hold the ring that keeps the spring in place.
I also think I might have found a bottom spring seat, you don't happen to have that sleeve setting around and measure the bottom of the round part of the cone. I got 4 inches for the outside and of course 2 inches for the hole of the shock.
Thanks for getting into the ball game, the more thoughts might get us the answer.
I have nothing off the car at the moment to measure. As far as the spring seats go, best l can remember was around the 65/70mm range but not certain.
Initial test will be with 60A poly. In the more restrictive confines of the bell with less deflection possible it may mimic a higher durometer poly anyway.
I decided to start a new thread to cover my own thoughts and approach to the top mount issue rather than muddy the effort Wayne is putting in on the existing thread on the issue.
l finally got round to refining the mould l have been experimenting with for a while now and obtained a new batch of polyurethane. Some pics show today's effort straight from mould.
Most mount problems seem to be rooted in the initial lateral movement of the bushings which then likely leads to increased deflection and abrasion of the material. By fully encapsulating and bonding the shock mount "washer" l think the possibility of lateral movement is gone.
I still need to road test this idea and settle on the most suitable shore hardness of the poly. It might be that the restriction in the deflection of the bushes allowed by this design creates other issues. We will see.
One thought regarding the spring seat cushion is to note the difference between the X100 and the later X150 top mount (shared by many other jaguar models). The later design is basically an upturned pressed steel cup with a rim enclosing the spring seat cushion and no doubt limiting the deflection and fatigue of the seat. The X100 has no such support. It would however be an easy task to weld a, say 10mm high rim around the mount which l plan to do in the coming weeks.
Sorry for the length of this post. Others thoughts?
(Excuse the casting flash on bushing, l prefer to leave removal until poly is fully cured)
Great to now have possibly 2 options. Definitely following both as they look to be better then the current after market options. Good work guys.
Great work guys. Definitely following both developments in hopes we have a better solution. I have new shocks for my XKR waiting to see how this turns out.
I have nothing off the car at the moment to measure. As far as the spring seats go, best l can remember was around the 65/70mm range but not certain.
Initial test will be with 60A poly. In the more restrictive confines of the bell with less deflection possible it may mimic a higher durometer poly anyway.
Baxtor & wayne,
I have a new set of XKR springs (JLM20706) that came with white lower seat attached and two MJA2162AA... are these the pieces you need measurements of ?
I have a new set of XKR springs (JLM20706) that came with white lower seat attached and two MJA2162AA... are these the pieces you need measurements of ?
max & XKRFACE
The white spring seat at the bottom is a MJB2158GD.
Baxtor, Bravo! You're definitely on the right track with your 'device'. The problem with the upper shock mount is that the top of the shock (the threaded rod) is NOT rigidly attached to the body of the car. The foam or urethane bushing inside the shock mount doesn't prevent the top of the shock from moving forward/backward or side to side. It does limit it's vertical travel until the bushing disintegrates but that's insignificant compared to the lateral motion. The lateral motion creates shear forces that tear the bushings apart rather quickly. Tying the top of the shock directly to the body is essential in significantly extending the life of the mounts. I've been thinking about using some thin perforated steel plates to try and tie the shock rod to the upper mount studs if/when I get my upper mounts replaced. I'm not sure if steel is the correct material to use to link things together but it's the easiest material to obtain. If you succeed in your efforts it will save me some 'engineering' that I really don't want to do.
Baxtor, Bravo! You're definitely on the right track with your 'device'. The problem with the upper shock mount is that the top of the shock (the threaded rod) is NOT rigidly attached to the body of the car. The foam or urethane bushing inside the shock mount doesn't prevent the top of the shock from moving forward/backward or side to side. It does limit it's vertical travel until the bushing disintegrates but that's insignificant compared to the lateral motion. The lateral motion creates shear forces that tear the bushings apart rather quickly. Tying the top of the shock directly to the body is essential in significantly extending the life of the mounts. I've been thinking about using some thin perforated steel plates to try and tie the shock rod to the upper mount studs if/when I get my upper mounts replaced. I'm not sure if steel is the correct material to use to link things together but it's the easiest material to obtain. If you succeed in your efforts it will save me some 'engineering' that I really don't want to do.
Good job.
Well done Baxtor! I need to replace my upper shock mounts asap as well. Sure wish you or Wayne had something on the market already! I had been thinking similarly along the lines of TropiCat's thoughts concerning a steel mounting plate for the upper shock rod being tied to the three mount studs. I found myself wondering why it hadn't been tried before as it seems a much stronger solution? I think you could either put a smaller rubber bushing in the center hole to help force it to stay centered, or actually bolt the plate to the top of the rod to force it to stay centered. It might even be possible to make it adjustable to help with alignment issues. A very interesting concept IMHO. Anyone know if it has been tired in some form or the other?
Well done Baxtor! I need to replace my upper shock mounts asap as well. Sure wish you or Wayne had something on the market already! I had been thinking similarly along the lines of TropiCat's thoughts concerning a steel mounting plate for the upper shock rod being tied to the three mount studs. I found myself wondering why it hadn't been tried before as it seems a much stronger solution? I think you could either put a smaller rubber bushing in the center hole to help force it to stay centered, or actually bolt the plate to the top of the rod to force it to stay centered. It might even be possible to make it adjustable to help with alignment issues. A very interesting concept IMHO. Anyone know if it has been tired in some form or the other?
Back in December 2012 a forum member with access to a machine shop had a couple of front upper shock mount plates made from steel at a cost of $240 for the pair. I remember that he posted a schematic drawing of the plates. I wish I could remember his screen name. If he ever reported back on how those steel plates performed in his car, I do not remember that either....
Wow! I like the NTR parts. But the sticker shock is paralyzing. Given that the system includes springs/shocks/mounts AND is tunable (for on-track use, obviously) a $1K price tag/per corner doesn't seem so far fetched. If only they offered the fronts and rears as separate items instead of as a total 4 piece system for the car. A $2K hit for the fronts only compared with $500+ per pair for the OEM mounts might not be so overwhelming. It might even be worth the investment considering the durability of the OEM style parts.
Another weekend in the shed and a bit of evolution of my alternative mount.
l had a rethink of the original idea and determined it to be a bit impractical since the assembly needs to be preassembled in house.
l will attempt to detail the progression under each pic.
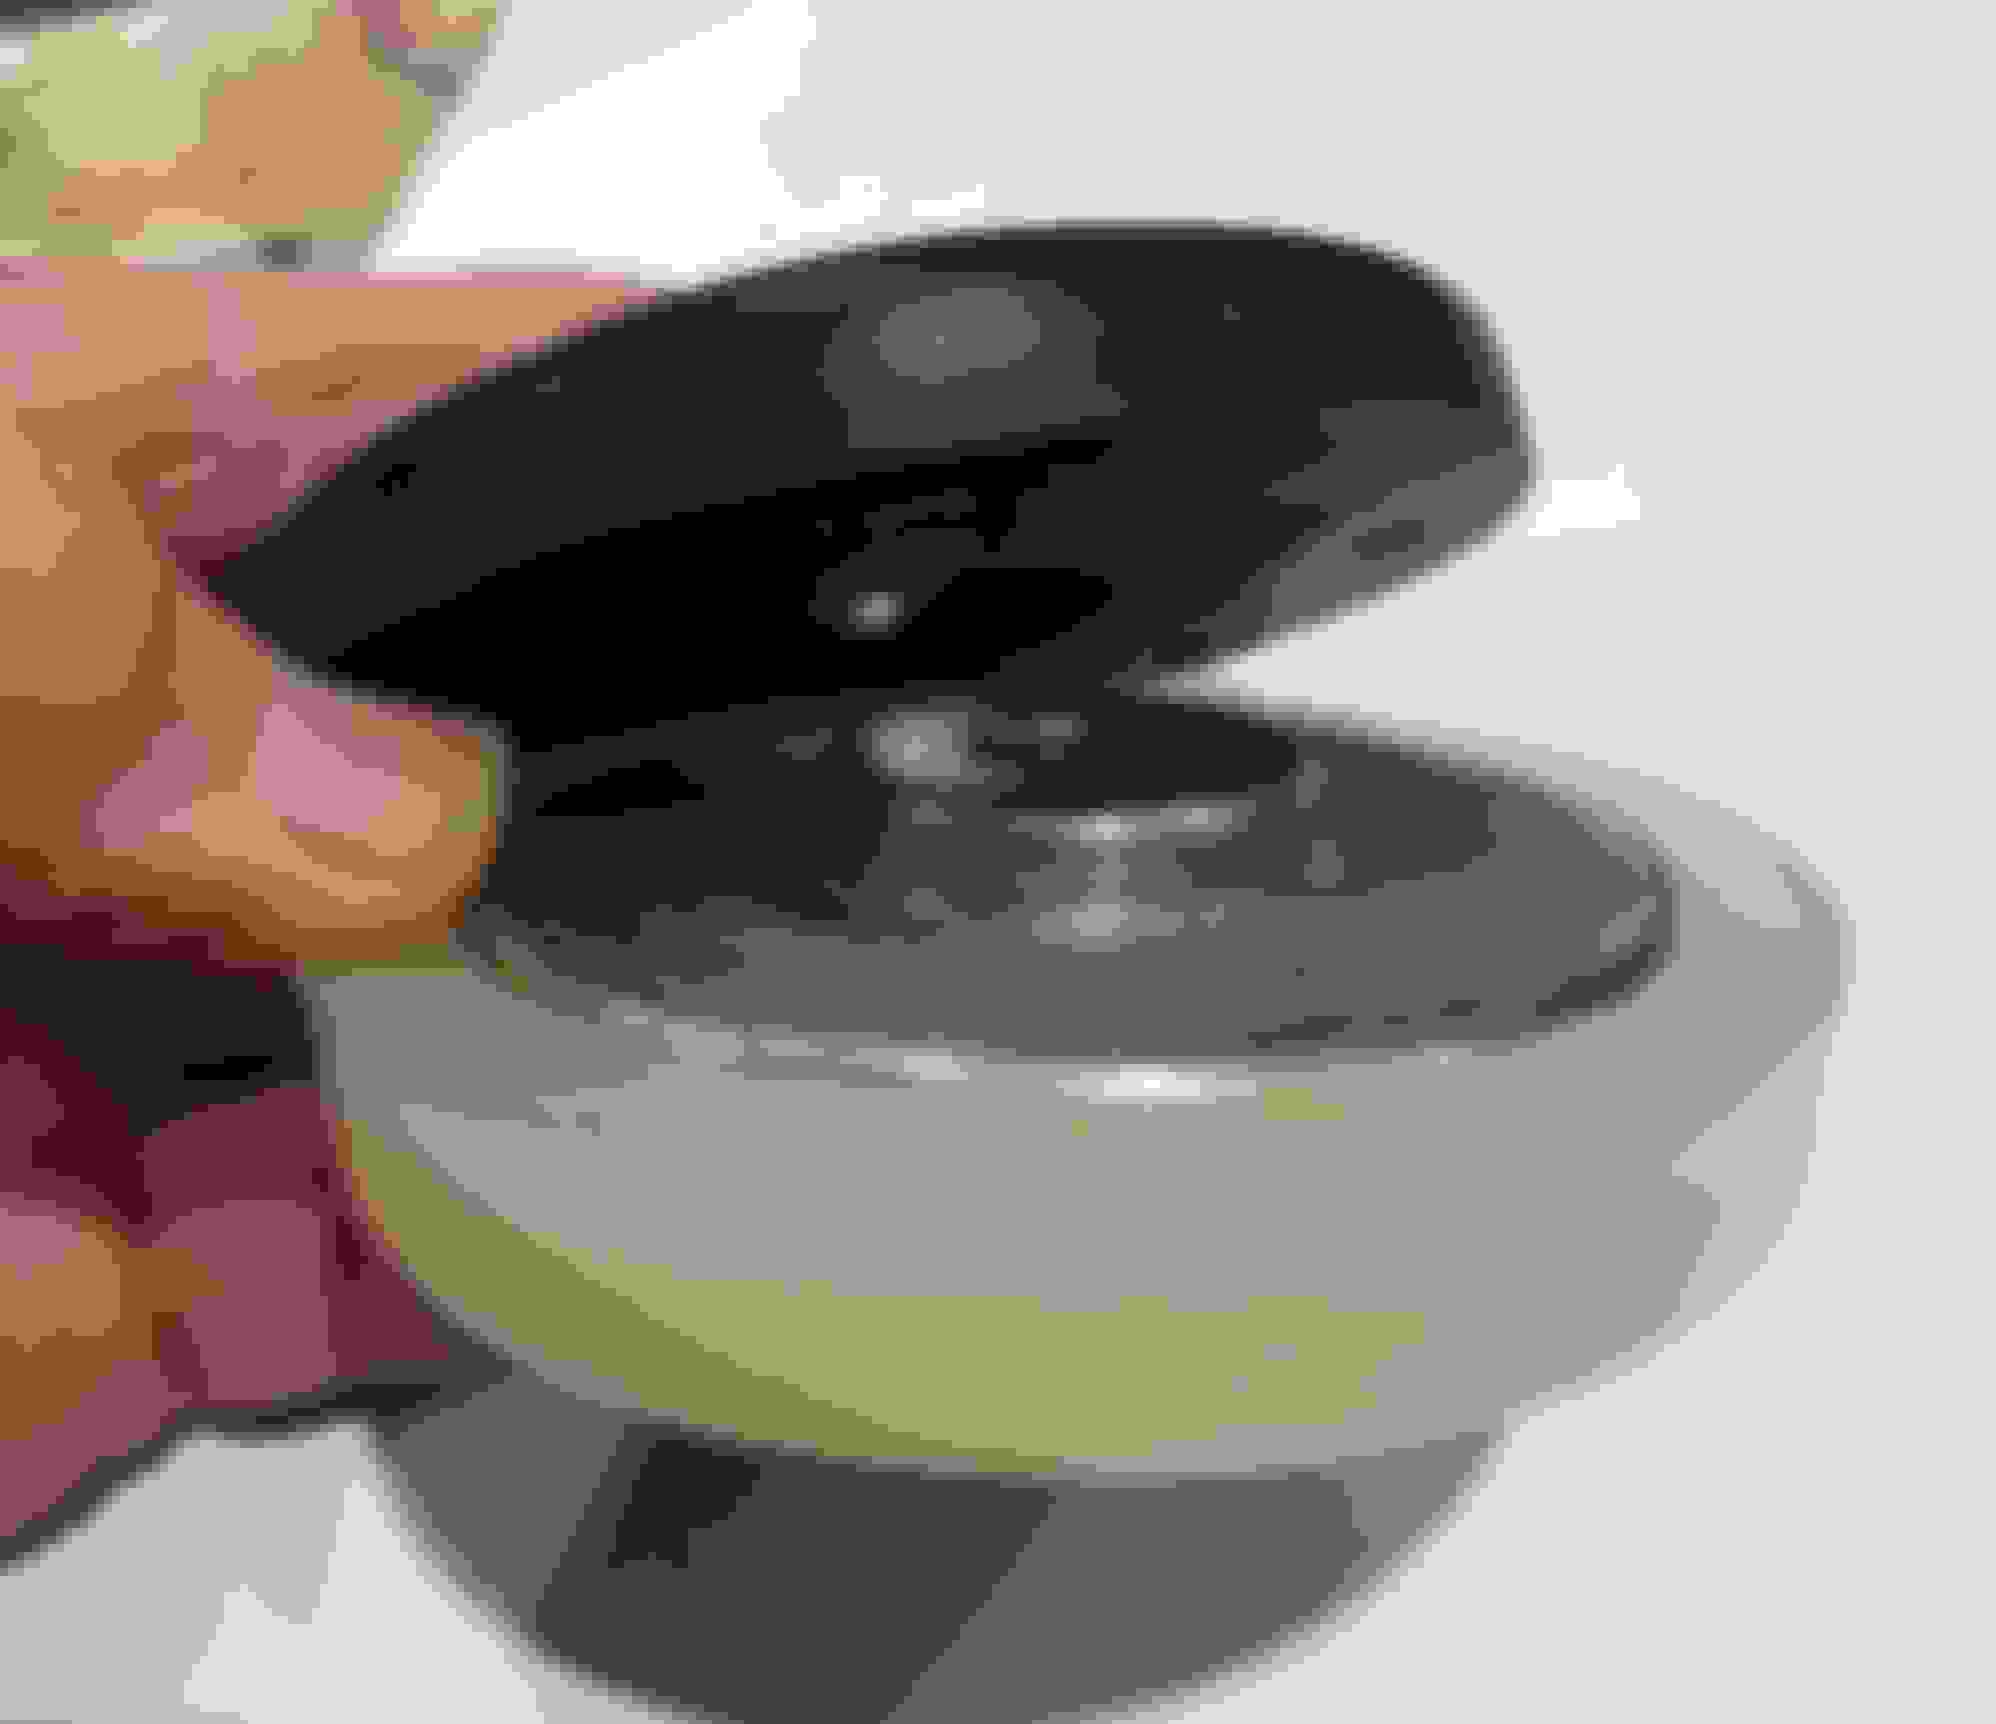
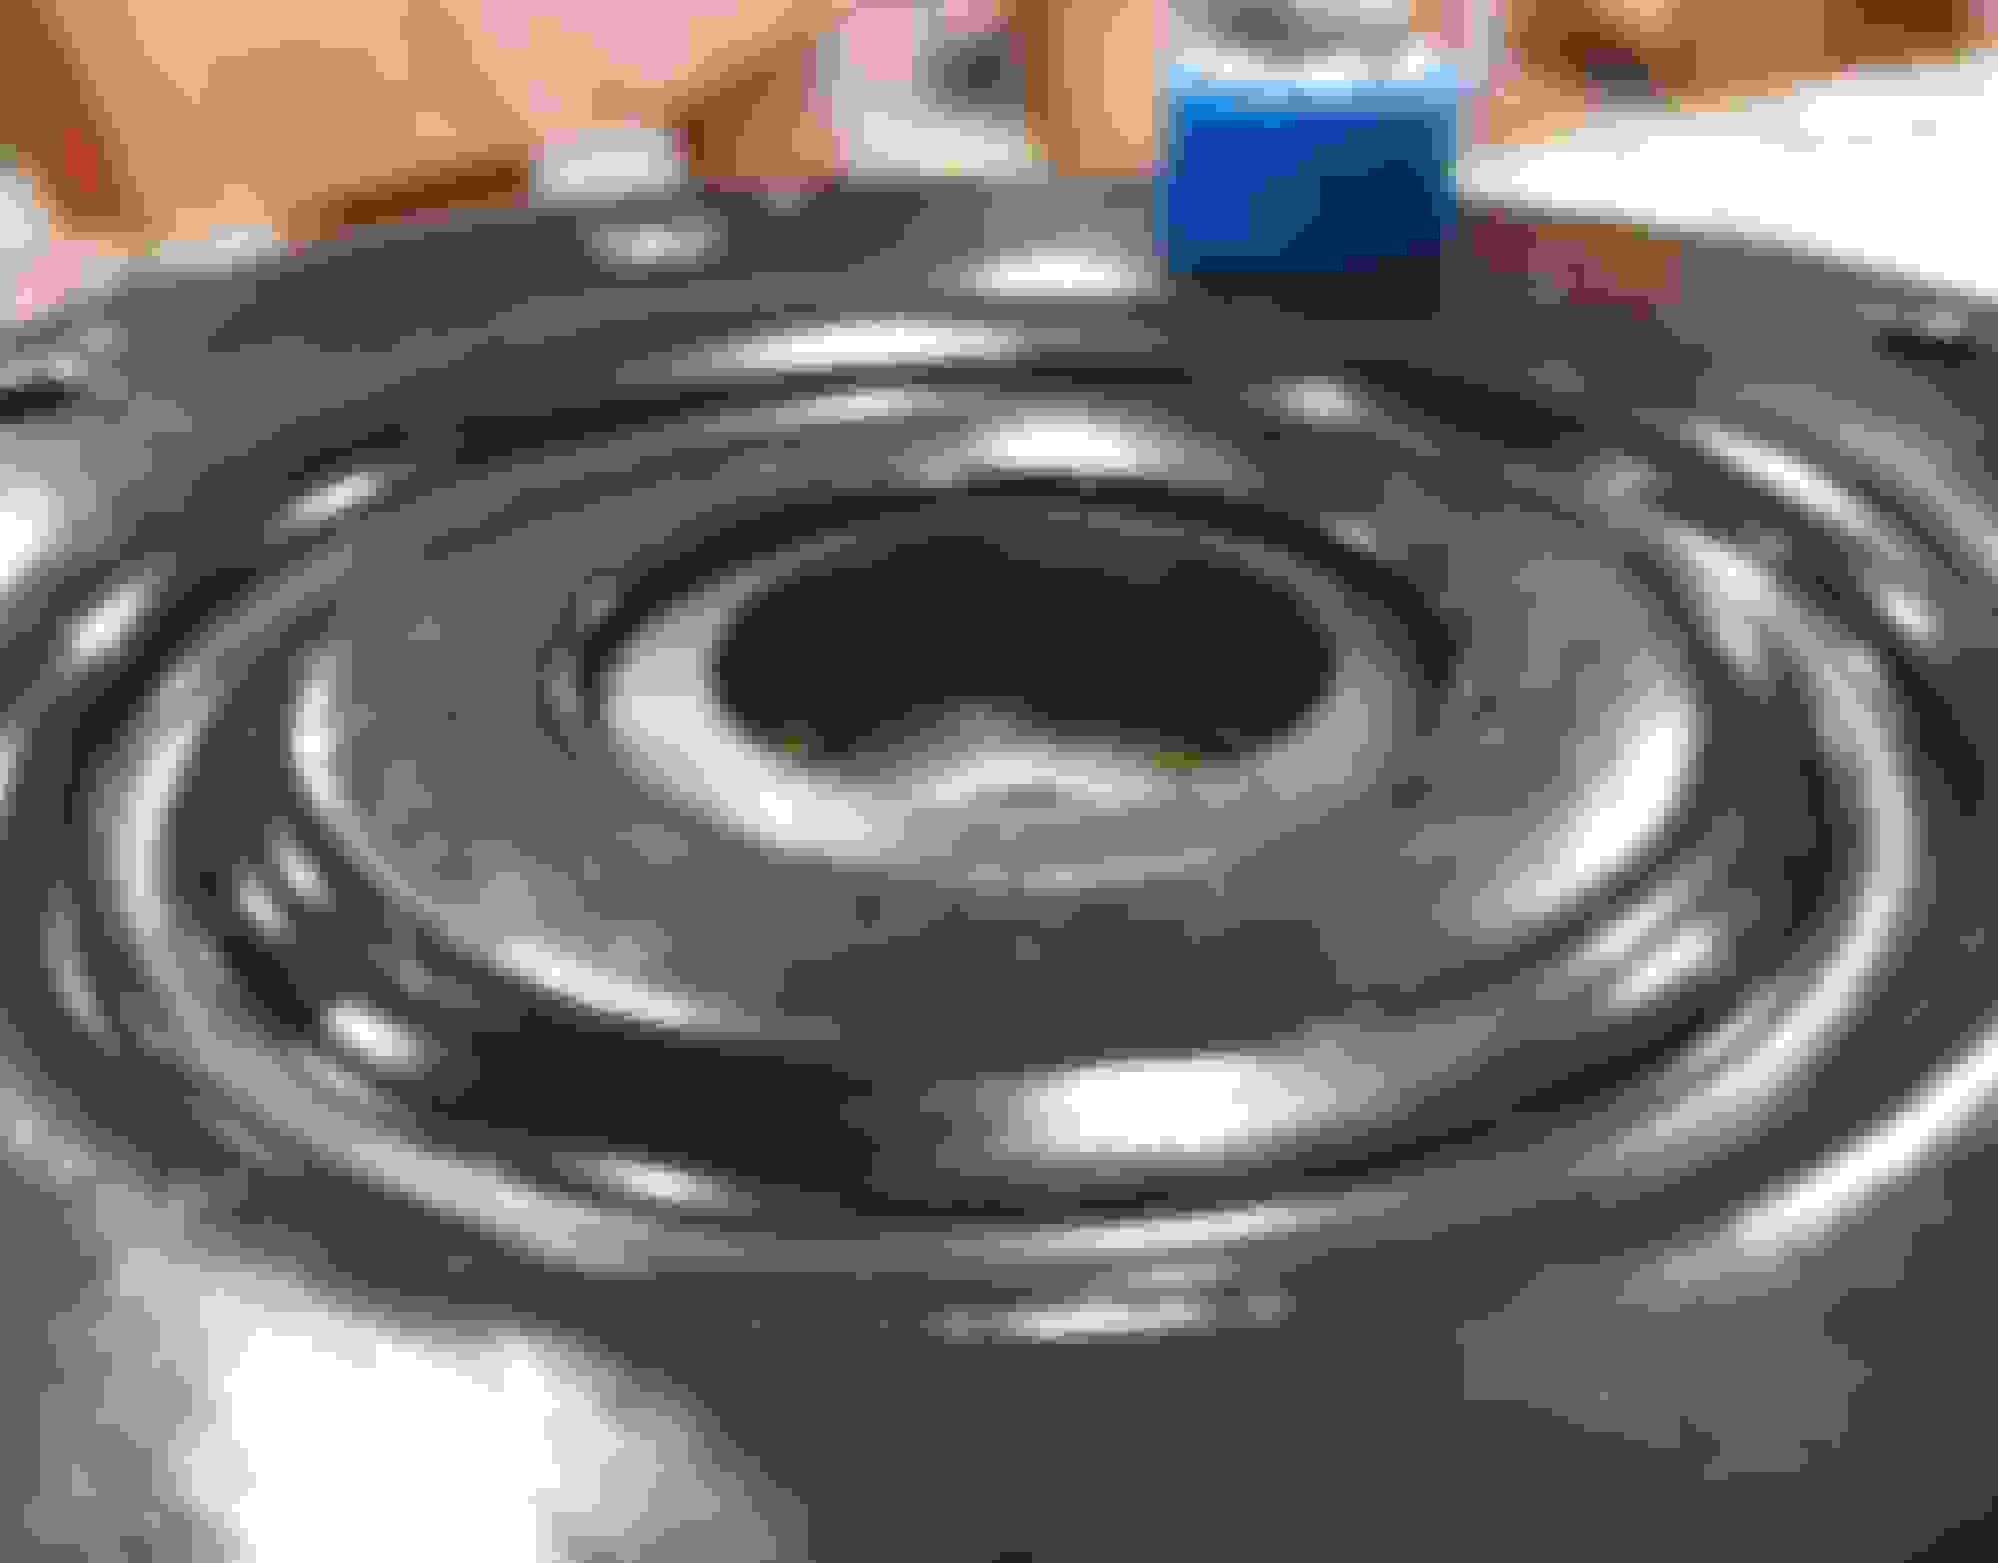
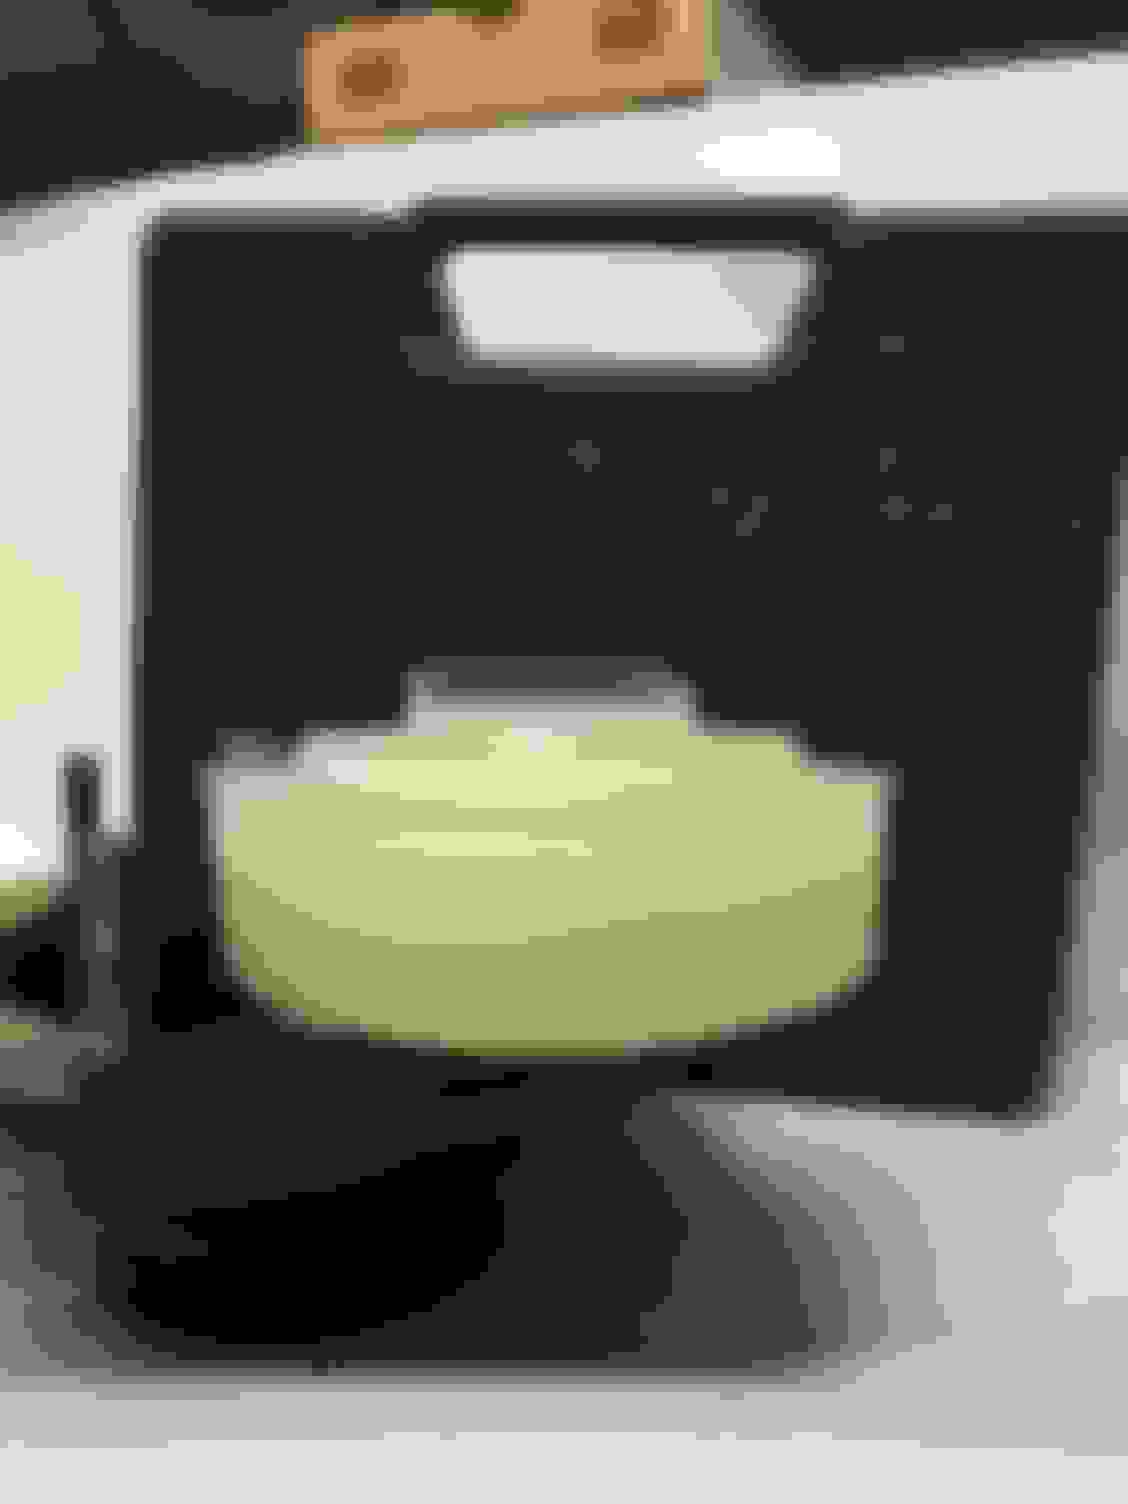
Issues with tinting led to cure/oozing problems which depleted my supply of poly. Have some more on the way. l think this will work as is, others thoughts? This is the bottom bush after deciding to split original into two pieces. Was not happy with finish after tinting upset the curing process. Was going to ditch it but it will make a return appearance Modified version of the bottom bush with additional ledge to keep shock washer centred. Shock washer in place in bottom bush. I did have a fancy top bush in mind and made the mold and actually produced a couple. Then occured to me the bottom bush will hold the washer in position easily enough. Top only needs to do the up down work. Enter the previously rejected bottom bush to it's new role on top. Assembly ready to drop in. Production bushes would probably be bonded together as would the washer. I ended up with 4-5mm squash required. This appears to be about right for the 60A poly l used but can be easily adjusted by simply changing the thickness of one spacer in the molding process. Lid screwed down.
Those donuts look top notch baxtor, excellent job. Question:- Did you use OEM or after market mount pressings for your moulds? With several aftermarket offerings out there... Welsh, URO etc., etc. and with the pressings on each one slightly different to the OEM parts, and to each other, I wonder if a 'one size fits all' donut design might be difficult to find? Several 'pressing specific' designs? Either way, another viable option to OEM emerging.
Those donuts look top notch baxtor, excellent job. Question:- Did you use OEM or after market mount pressings for your moulds? With several aftermarket offerings out there... Welsh, URO etc., etc. and with the pressings on each one slightly different to the OEM parts, and to each other, I wonder if a 'one size fits all' donut design might be difficult to find? Several 'pressing specific' designs? Either way, another viable option to OEM emerging.
I used oem mount for this but so long as height is the only issue it would be very easy to change at production stage to suit whatever is needed but that means pre order is then required based on particular mount.
Another option could be as simple as donuts to suit the most shallow bell and suitable shim packers to be fitted as required to different mounts.
Excellent work Baxtor and the differences in the bells might be a shim, but on mine a issue with the depth of the bushings covering on each side of the dome on the washer.
What you have will certainly be more stable than anything on the market right now, if the rubber is the right hardness.
Look forward to a test and thanks.
 05-22-2021, 04:32 AM


 But the top plate sure looks interesting!