
Another Avos Twin-Screw Supercharger Kit in USA
#181
 03-25-2013, 10:44 AM

Senior Member
The following 2 users liked this post by Mike V:
Jeff in Tucson (03-29-2013),
User 070620 (03-28-2013)
#182
03-25-2013, 11:50 AM
Thank you for posting these here. That helps to see the difference. It is nice to see 2 patches of rubber being laid down. In the 2nd video, the car seems more controlled and stable than without the Quaife diffy.
In the 3rd video, when both lines of rubber are laid down, you can see how the Quaife unit works. It didn't lock up, but apportioned some power to the tire that was spinning less quickly. Interesting!
Today, I ordered the OS Giken TCD differential. That's the unit with the dual clutches. It is available without too much delay, so it won't be too long before it arrives in the USA, around 2 or 3 weeks from now. After it arrives, it will be installed within just a few days... then I get to make some of my own Mike style videos!
I believe that the 1.5 version is what AVos prescribes: http://www.osgiken.net/products.php?product=lsd
Last edited by Jeff in Tucson; 03-25-2013 at 01:18 PM.
The following 3 users liked this post by Jeff in Tucson:
#183
03-25-2013, 12:00 PM
Senior Member
You should be really happy with the Giken. My understanding is the Quaife is great for swapping out an open diff for the improvement of an LSD but the Giken is a full race ready diff that will be awesome at the track! i.e. Quaife for the street and Giken for Street and Racing.
I don't know how used to the stock diff you got but if you have, now that you've added all that power AND the Giken diff, take some time to relearn how the car handles. I believe you're gonna love the animal you're unleashing
I don't know how used to the stock diff you got but if you have, now that you've added all that power AND the Giken diff, take some time to relearn how the car handles. I believe you're gonna love the animal you're unleashing
The following 2 users liked this post by Mike V:
Jeff in Tucson (03-25-2013),
User 070620 (03-28-2013)
#184
03-25-2013, 12:14 PM
#185
03-25-2013, 12:14 PM
Member
The following users liked this post:
User 070620 (07-16-2014)
#186
03-25-2013, 03:16 PM
#187
03-26-2013, 08:08 PM

#190
03-28-2013, 07:36 AM

The following users liked this post:
Jeff in Tucson (03-28-2013)
#191
03-28-2013, 03:42 PM
I've been sitting here all day waiting for a FedEx delivery to bring me one section of silicone hose for the intake. It will help to facilitate a better location for the huge K&N air filter. The techs moved the XKR's alarm horn to another location to make room for the filter.
The techs are almost done and plan to start the engine for the first time tonight or in the morning!
If I am able to bring the silicone coupler to them today, I'll post a pic later on that shows the intake going through the fender well.
I am taking JgaXkr's advice and have had the techs disable the water/methanol injection system. I don't want to risk damage to this new installation. I will probably remove the system completely, later, and consider the installation of a Chiller Killer cooling system for the intercoolers. Even if there is a chance that the water/methanol is turning to steam in the supercharger, then cooling in the intercoolers and going into the engine as water, I don't want to risk this investment. I'll access a cooler intake charge in a safer way. Thanks for the advice, JgaXkr!
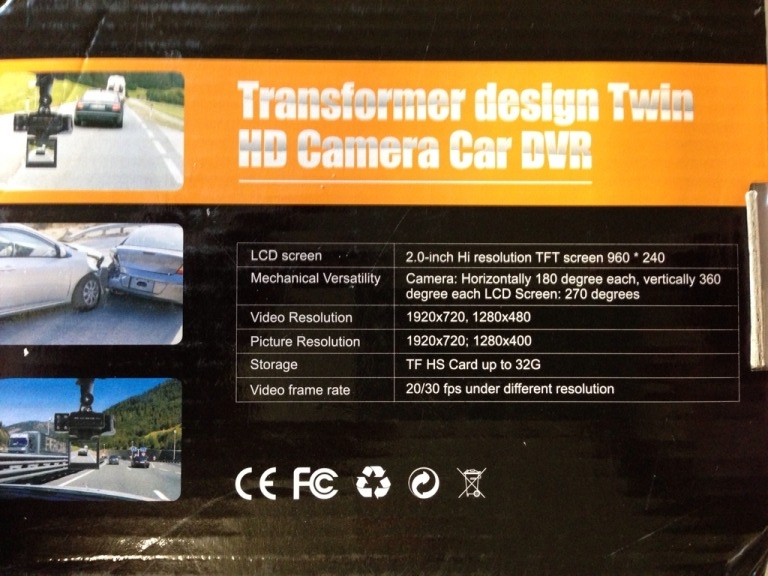
Hopefully pictures later today, but it is looking like pictures AND a video of the car running tomorrow! If all goes well, I will break in the system and allow the computer to adjust to its new settings on Saturday with a run up the highway to Phoenix from Tucson. I am heading up there, anyway, for 2 events that I had already committed to attending. That will give me a chance to try out this really cool $65 dual camera system with black box. =) The cameras can be pointed in any direction for recording.
UPDATE: The part just now showed up and I'm heading over to Falconworks. =)

The techs are almost done and plan to start the engine for the first time tonight or in the morning!
If I am able to bring the silicone coupler to them today, I'll post a pic later on that shows the intake going through the fender well.
I am taking JgaXkr's advice and have had the techs disable the water/methanol injection system. I don't want to risk damage to this new installation. I will probably remove the system completely, later, and consider the installation of a Chiller Killer cooling system for the intercoolers. Even if there is a chance that the water/methanol is turning to steam in the supercharger, then cooling in the intercoolers and going into the engine as water, I don't want to risk this investment. I'll access a cooler intake charge in a safer way. Thanks for the advice, JgaXkr!
Hopefully pictures later today, but it is looking like pictures AND a video of the car running tomorrow! If all goes well, I will break in the system and allow the computer to adjust to its new settings on Saturday with a run up the highway to Phoenix from Tucson. I am heading up there, anyway, for 2 events that I had already committed to attending. That will give me a chance to try out this really cool $65 dual camera system with black box. =) The cameras can be pointed in any direction for recording.
UPDATE: The part just now showed up and I'm heading over to Falconworks. =)
Last edited by Jeff in Tucson; 03-28-2013 at 03:52 PM.
#193
03-28-2013, 05:02 PM

Join Date: Sep 2008
Location: Damon /Houston, Texas
Posts: 7,254
Received 2,192 Likes
on
1,358 Posts
#194
03-28-2013, 05:25 PM
I took the part to Falconworks. Elbows were flying doing final electrical and intake work, so I didn't stay long and interrupt. I did take a photo of the great fuel pressure regulator installation that they did. They are REALLY thorough. Everything has brackets or mounts holding the items securely. They do a better job than I would have done.

The camera is like so many on eBay... made in China and quite affordable. It almost seems like a toy, which is funny because of the maker's comparison to Transformers. I turned it on the other day after it arrived and it seems to work great. Both camera's images can show up on the viewing screen at the same time or one at a time. The recording loops and saves to a removable data card. I got it on eBay for $69.90 from this store: eBay My World
Described as: Dual Lens In-Car Camera DVR Vehicle Dashboard Black Box HD 1080P AVout 1920x720
Last edited by Jeff in Tucson; 03-28-2013 at 05:30 PM.
The following users liked this post:
Brutal (03-28-2013)
#195
03-29-2013, 02:03 PM
That would mean that I can probably drive it with care for the first time Monday afternoon. We shall see!
Let me start off by telling everyone that JgaXkr was incredibly helpful to the wiring tech, Steve. Falconworks had questions about the best way to deal with the temperature sensor for the new 3.5" MAF. After coaching from JgaXkr, they decided to steal a temp sensor from a different Jag and wire it into the system, rather than using the one built into the original stock air flow meter. THANK YOU JgaXkr!!
In this photo, the image is taken looking straight down at the 'black box' of electronics (actually a silver box) that controls the throttle body. What? You don't see it? That's because it is underneath the factory black plastic components pictured in the lower left corner of the photo. =)

This photo simply shows the intake with the custom 3.5" MAF being worked on for wiring.

This photo shows the hole in the fender well where the intake passes through. I supplied the black rubber extrusion that is on the cut metal edge.

This shows the location of the cone filter in the front fender.

As I was pulling out of Falconworks' parking lot, a Jag that I've seen in the area (owner works in a nearby industrial park) drove by. Aw, YEAH, baby!

...and since I missed out on lunch today, I figure that I will now raid some of the Hostess snack cakes that I've got stashed in the freezer. Happy Friday to all!

Let me start off by telling everyone that JgaXkr was incredibly helpful to the wiring tech, Steve. Falconworks had questions about the best way to deal with the temperature sensor for the new 3.5" MAF. After coaching from JgaXkr, they decided to steal a temp sensor from a different Jag and wire it into the system, rather than using the one built into the original stock air flow meter. THANK YOU JgaXkr!!
In this photo, the image is taken looking straight down at the 'black box' of electronics (actually a silver box) that controls the throttle body. What? You don't see it? That's because it is underneath the factory black plastic components pictured in the lower left corner of the photo. =)
This photo simply shows the intake with the custom 3.5" MAF being worked on for wiring.
This photo shows the hole in the fender well where the intake passes through. I supplied the black rubber extrusion that is on the cut metal edge.
This shows the location of the cone filter in the front fender.
As I was pulling out of Falconworks' parking lot, a Jag that I've seen in the area (owner works in a nearby industrial park) drove by. Aw, YEAH, baby!
...and since I missed out on lunch today, I figure that I will now raid some of the Hostess snack cakes that I've got stashed in the freezer. Happy Friday to all!
Last edited by Jeff in Tucson; 03-29-2013 at 02:41 PM.
The following users liked this post:
Anders Hansen (03-30-2013)
#196
03-29-2013, 04:19 PM
AVos sent me the instructions that should have come from the custom MAF manufacturer. They had left them out of the box.
He also recommended that better performance might be had by having the piping that goes between the cone filter and MAF be straight. I agree that could have a positive effect and will consider replacing the 2 forward 45 degree bends with a single straight piece of silicone tubing later.
Thanks, AVos!
Last edited by Jeff in Tucson; 03-29-2013 at 04:22 PM.
#197
03-29-2013, 06:45 PM
#198
03-30-2013, 09:10 AM

I have found on the EEC-IV ecu when making these kinds of MAF plumbing changes, one may need to clock the MAF a particular way to get the best result. I have not found anything on a user friendly programming option for these cars so far [would love that], so if tip in or light throttle seems 'off', turning the MAF a bit can sometimes make a significant difference.
cheers,
TonyL
cheers,
TonyL
The following users liked this post:
Jeff in Tucson (03-30-2013)
#199
03-30-2013, 09:34 AM
Veteran Member
I have found on the EEC-IV ecu when making these kinds of MAF plumbing changes, one may need to clock the MAF a particular way to get the best result. I have not found anything on a user friendly programming option for these cars so far [would love that], so if tip in or light throttle seems 'off', turning the MAF a bit can sometimes make a significant difference.
This one is a drop in style and comes pre-mounted in a round tube of a specific length. I wouldn't think the orientation would matter much in this case.
#200
03-30-2013, 11:52 AM

Senior Member
All I ask is that after you get everything done PLEASE do those fuel lines the correct way with actual braided fuel line... all you need is a -6an tee and 3 more fittings... not to mention it will look a ton better and more professional.
Over the years I've seen nothing but problems from clamps on aluminum AN Fittings.
Other than that it's looking sweet
Over the years I've seen nothing but problems from clamps on aluminum AN Fittings.
Other than that it's looking sweet
The following users liked this post:
Jeff in Tucson (03-30-2013)