
Another Avos Twin-Screw Supercharger Kit in USA
#121
 03-08-2013, 11:24 PM

Veteran Member
The following users liked this post:
Jeff in Tucson (03-12-2013)
#122
03-12-2013, 11:25 AM
The install techs agree that we need to use the 4.0 coil packs. The cam covers from the 4.0 are quite old and don't seem like they'll close properly, so we're ordering new ones today (minor delay, but the right thing to do). We're having the parts sent overnight, so it appears that this Friday may be the new finishing date.
The wait is driving me bonkers, but it sure will be worth it!
The wait is driving me bonkers, but it sure will be worth it!
#123
03-13-2013, 05:30 PM
The new camshaft covers are being installed tonight! Also, the EGR is being retained and installed down by the transmission on a stock bracket.
Kenne Bell sent the wrong supercharger pulley a second time (not AVos' fault) and it wouldn't fit. The owner of Falconworks got a tech at Kenne Bell on the phone and they've been very cooperative, able to supply a perfect fit. It will be here on Friday.
As much as I'd like to be driving this thing RIGHT NOW, it certainly is important to make sure that all the details are done properly.
In this photo, you can see the old 4.0 under its cam covers (150,000 miles):

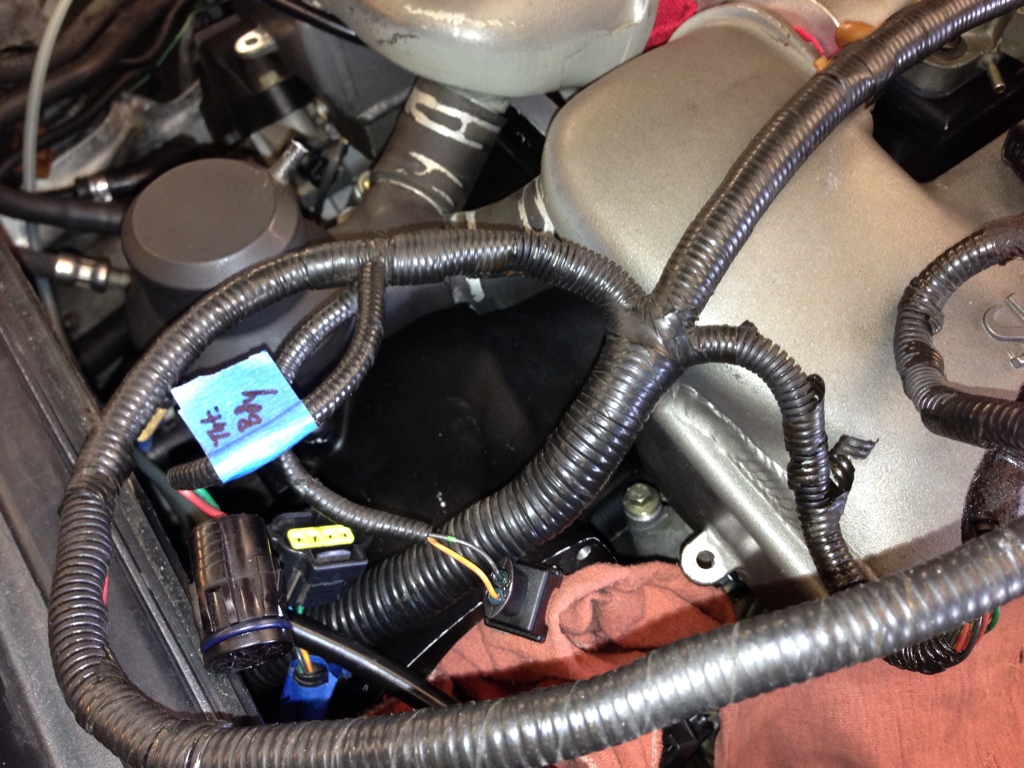
In this photo, you can see how amazingly clean the newer 42,000 mile 4.2 liter engine is:

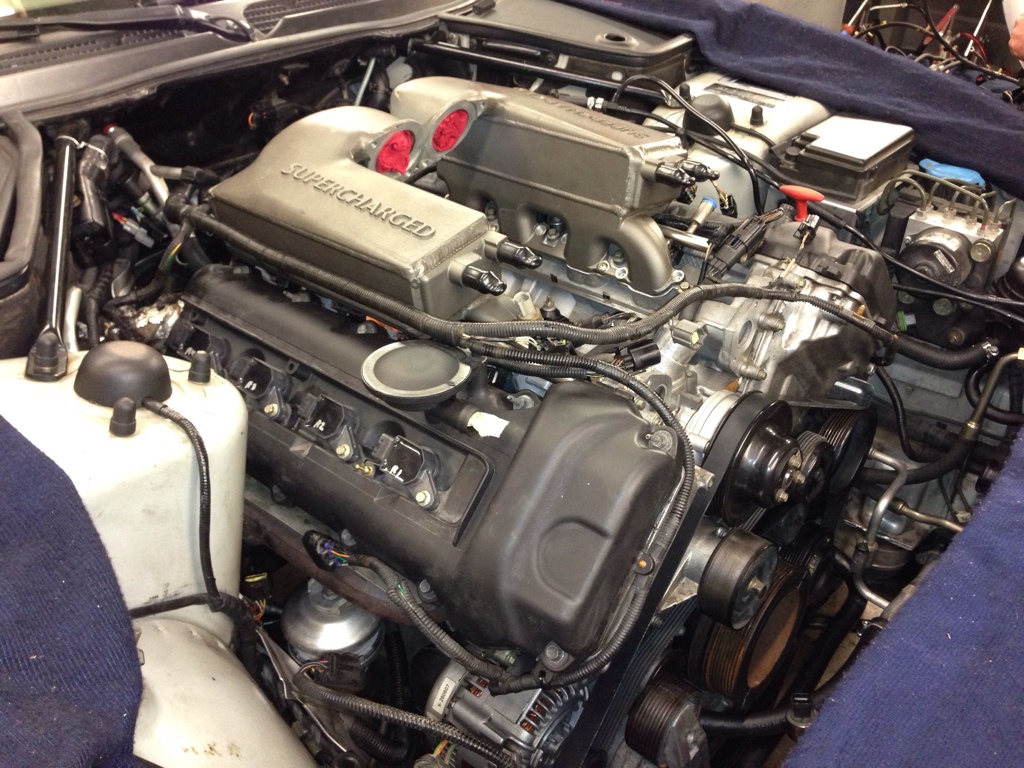
In this photo, you can see the supercharger being aligned with the other pullies:

In this photo, you can see how nicely the custom aligned (cut and re-welded) intercooler ports match the blow-off:
In this photo, you can see the other side:

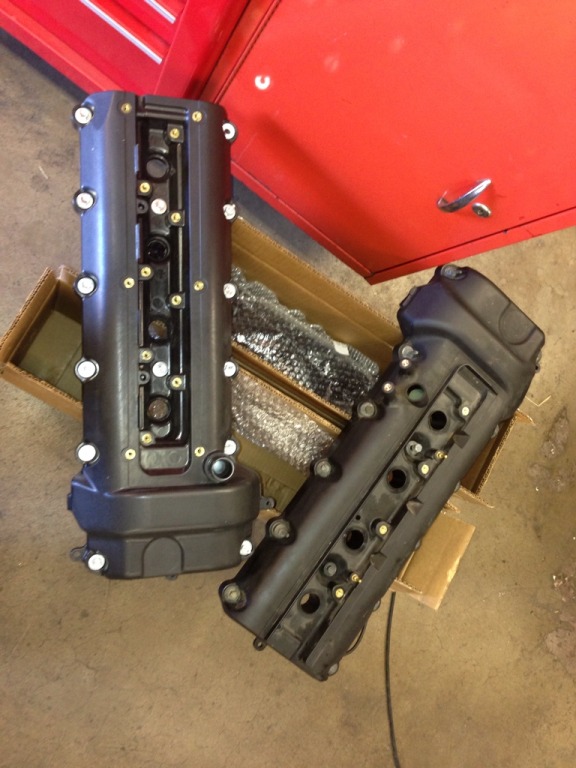
In this photo, you can see the new 4.0 camshaft covers (left) compared to the old (right). These are retained so that the 4.0 coils can be utilized, functioning properly with the factory 4.0 ECU:
Kenne Bell sent the wrong supercharger pulley a second time (not AVos' fault) and it wouldn't fit. The owner of Falconworks got a tech at Kenne Bell on the phone and they've been very cooperative, able to supply a perfect fit. It will be here on Friday.
As much as I'd like to be driving this thing RIGHT NOW, it certainly is important to make sure that all the details are done properly.
In this photo, you can see the old 4.0 under its cam covers (150,000 miles):
In this photo, you can see how amazingly clean the newer 42,000 mile 4.2 liter engine is:
In this photo, you can see the supercharger being aligned with the other pullies:
In this photo, you can see how nicely the custom aligned (cut and re-welded) intercooler ports match the blow-off:
In this photo, you can see the other side:
In this photo, you can see the new 4.0 camshaft covers (left) compared to the old (right). These are retained so that the 4.0 coils can be utilized, functioning properly with the factory 4.0 ECU:
The following users liked this post:
Anders Hansen (03-13-2013)
#124
03-13-2013, 09:49 PM
The following users liked this post:
Jeff in Tucson (03-13-2013)
#126
03-14-2013, 02:17 PM
#127
03-14-2013, 02:22 PM
#128
03-14-2013, 04:21 PM
Veteran Member
I have a 4.2 and had to grind the intake runners.
#129
03-14-2013, 05:11 PM
The new 4.0 cam covers are on and minor detail work got done (polishing of the words 'supercharged'). The V8 will also get polished.
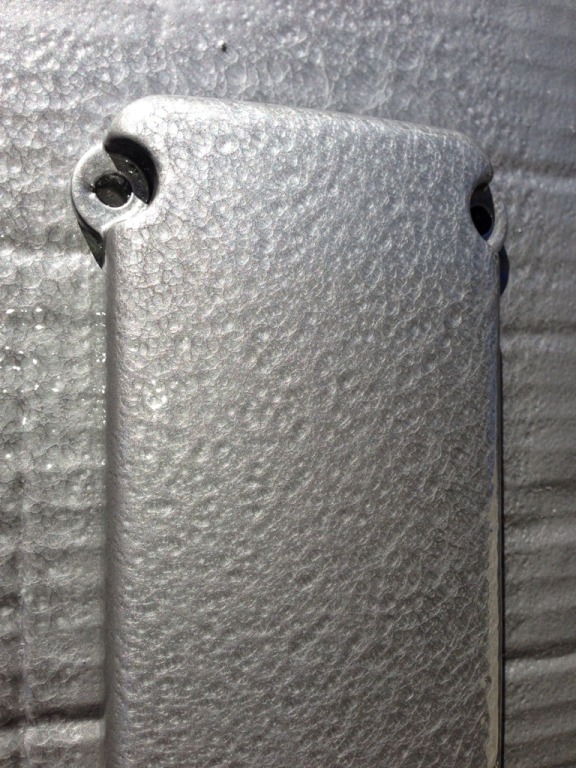
I'm painting the inner panels (cam covers) today so that they look newer with a hammered grey finish.

I'm painting the inner panels (cam covers) today so that they look newer with a hammered grey finish.
Last edited by Jeff in Tucson; 03-14-2013 at 05:41 PM.
#130
03-14-2013, 05:42 PM


Join Date: Oct 2007
Location: PHX some of the time
Posts: 117,495
Received 6,327 Likes
on
5,513 Posts


#131
03-14-2013, 05:57 PM
#132
03-14-2013, 06:11 PM
#133
03-14-2013, 06:31 PM
Join Date: Oct 2007
Location: PHX some of the time
Posts: 117,495
Received 6,327 Likes
on
5,513 Posts
#134
03-14-2013, 08:15 PM
Veteran Member
Jeff,
The pics are most welcome. Please keep them coming.
And I would agree the hammered aluminum paint looks great! I've used crinkle finish before for motorcycle applications, but this looks even better. I assume since it is on plastic that no heating was required to get the textured finish?
The pics are most welcome. Please keep them coming.
And I would agree the hammered aluminum paint looks great! I've used crinkle finish before for motorcycle applications, but this looks even better. I assume since it is on plastic that no heating was required to get the textured finish?
#136
03-15-2013, 11:10 AM
Senior Member
The polished "supercharger" text looks really nice. How did you do this? Jeff, this is one of my favorite posts to follow on this forum. I think a lot of us with the Eaton S/C's are living extraneously through you during this project---maybe one day. Can't wait to see the finished product.
#137
03-15-2013, 12:01 PM
Mountaincat, the polish is accomplished by using a block of wood or rubber sanding block (to keep the sandpaper in a flat plane), and successively finer grits of sandpaper, starting with 220. As far as the sanding block goes, you can even use a straight paint stirring stick that you get for free at the hardware store. When you get to around a 600 grit, the surface is fairly shiny, but then you can take it to finer grits, like 1000. I haven't actually buffed the lettering with a wheel and rouge because the look is already decent and I don't want to have to scrub waste rouge out of the lettering. Some would recommend that the finishing of letters on metal would be better if used with wet sandpaper. I do recommend using the wet 'kind' of sandpaper, but the amount of work is so small, and the desire to keep the engine area dry, lead me to NOT use water. The sandpaper will load up with a bit of aluminum, but you'll only need one piece of about 3 different grades of sandpaper, so it's cheap. If you have never done this before, I recommend that you use painter's masking tape (low adhesion) to roughly tape around the lettering in a box shape. This is so that any sandpaper that leaves the flat plane of the sanding block (at the lettering level), and touches the surrounding surface of the rough aluminum non-lettering areas, does NOT scuff unintended ares. That could result in a weird looking effect!
The following users liked this post:
Mountaincat (03-15-2013)
#138
03-15-2013, 01:31 PM


Loving the updates, keep them coming, the bit of detail work is certainly nice, I love how it will still look like a relatively stock setup when it's done,
That red engine bay posted looks absolutely...
That sort of red color scheme has no place on a Jag; looks like something you see under the hood of a '98 cavalier z24 'show-car'
Although the polished bits do look well done, I'll give him that,
Keep it up man, you're almost there, the project is going really quick despite what anyone says, stuff like this takes time, and there is no need to rush!
The following users liked this post:
Jeff in Tucson (03-15-2013)
#139
03-15-2013, 02:17 PM

Jeff, you are doing a wonderful job! What a HUUUUGE and exciting undertaking!
Now IS the time to do some detail work for sure.
BTW, since we are talking top of engine finish at the moment, I thought I'd mention that I too, used a hammered finish on both my supercharger and charge air coolers. I painted all surfaces first, then used a dremel tool to sand off the lettering and overcoated all parts with high-temp clear coat enamel.
Opening the hood never fails to get a Wow! out of my gear-head buddies.
We're cheering for ya, Man!
The following users liked this post:
Jeff in Tucson (03-15-2013)
#140
03-15-2013, 02:17 PM

Join Date: Sep 2008
Location: Damon /Houston, Texas
Posts: 7,254
Received 2,192 Likes
on
1,358 Posts
NO doubt, Im at the 9 month mark on the rebuild the enigne and fab to install the 2.6l Kenne Bell on my Nissan 4.0 in the truck. Its done a running. just waiting on the custom upper pulley to correct belt alignment and then retune for the new blower and 1000cc injectors. great JOB Jeff love it and youve done a great job on the thread too
The following users liked this post:
Jeff in Tucson (03-15-2013)