
back from the dead...
#1
 01-12-2013, 05:03 PM

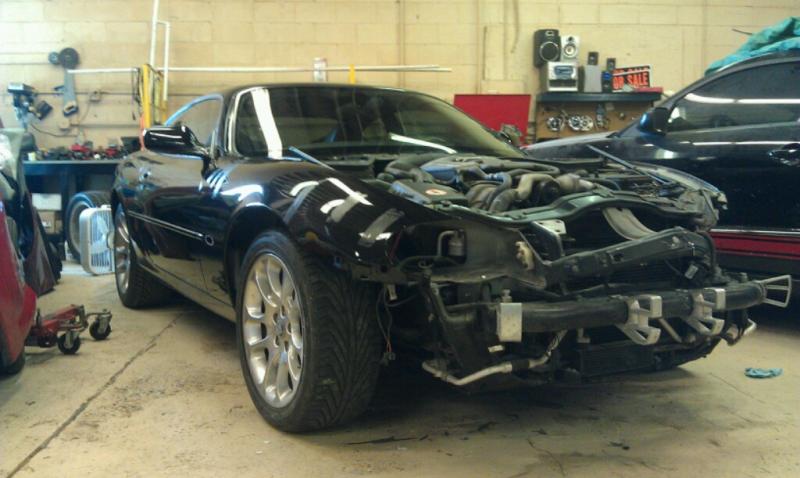
hey guys, alex here. Thought I would put up a post of the "restoration" of my 2000 xkr coupe. I came across this car through work, it came from an insurance agency in arizona.
It suffered from an impact to the front left of the car. the frame damage was minimal, and by an act of god the airbag did not deploy! =] saving me about $500 in repairing this little cat.
Unfortunately I didn't not take many photos of the process, but here is what I've got.
So to start off I bought this car roughly 2 years ago and it sat in my shop for most of that time, no time to work on it.

*at this point I already had the left and right suspension out, I can't seem to find the photos of when she came in.
A 2005 cab came in that needed a subframe and other than the dealership I could not find one so I opted to take the good subframe from my car, luckily enough I picked one up from e-bay for only $250.
So within several months of owning it I've already managed to make it worse haha.
Little by little I spend some time working on it and got the suspension back together.
Here is the new subframe going up.


* the rack is out because the genius towtruck operator in arizona decided
the best possible way to tow a jaguar is by the inner tie rods.....
Just to warn you all, buying cheap inner tie rods from taiwan is not the best route.....I highly recommend buying a rebuilt rack and pinion from your local parts supplier. It will save a lot of time, not money however haha
I ended up having to cut off a part of the inners and threading further with a tap and die set to get enough adjustment for the toe to be correct.
Unfortunately this was all after I had pulled the frame and completed the car so It was a bit of a pain to bring it back to the shop.
So next here is the suspension going back together. This is a diy job for sure, no special skills or tools needed.


Now back on her wheels ready for the frame machine. It stayed in my shop for about 3 months before I had two days I could put to the side for my baby.
It suffered from an impact to the front left of the car. the frame damage was minimal, and by an act of god the airbag did not deploy! =] saving me about $500 in repairing this little cat.
Unfortunately I didn't not take many photos of the process, but here is what I've got.
So to start off I bought this car roughly 2 years ago and it sat in my shop for most of that time, no time to work on it.
*at this point I already had the left and right suspension out, I can't seem to find the photos of when she came in.
A 2005 cab came in that needed a subframe and other than the dealership I could not find one so I opted to take the good subframe from my car, luckily enough I picked one up from e-bay for only $250.
So within several months of owning it I've already managed to make it worse haha.
Little by little I spend some time working on it and got the suspension back together.
Here is the new subframe going up.
* the rack is out because the genius towtruck operator in arizona decided
the best possible way to tow a jaguar is by the inner tie rods.....
Just to warn you all, buying cheap inner tie rods from taiwan is not the best route.....I highly recommend buying a rebuilt rack and pinion from your local parts supplier. It will save a lot of time, not money however haha
I ended up having to cut off a part of the inners and threading further with a tap and die set to get enough adjustment for the toe to be correct.
Unfortunately this was all after I had pulled the frame and completed the car so It was a bit of a pain to bring it back to the shop.
So next here is the suspension going back together. This is a diy job for sure, no special skills or tools needed.
Now back on her wheels ready for the frame machine. It stayed in my shop for about 3 months before I had two days I could put to the side for my baby.
The following users liked this post:
The Coupe (01-13-2013)
#2
01-12-2013, 05:52 PM
So now for the frame pull. There are many parts I no dot have photos of.
First off I got the car in clamps.


Next I measured the frame using my alvis light measuring tool. Everything is right with in spec, the left frame rail only backed up about 5mm.
First I pulling the section of rail that was back, because the frame only moved 5mm and only at the very end of the rail. It was not necessary to pull it, however this would ruin the alignment of the rebar and bumper so I pulled it just to be ascetically correct. haha
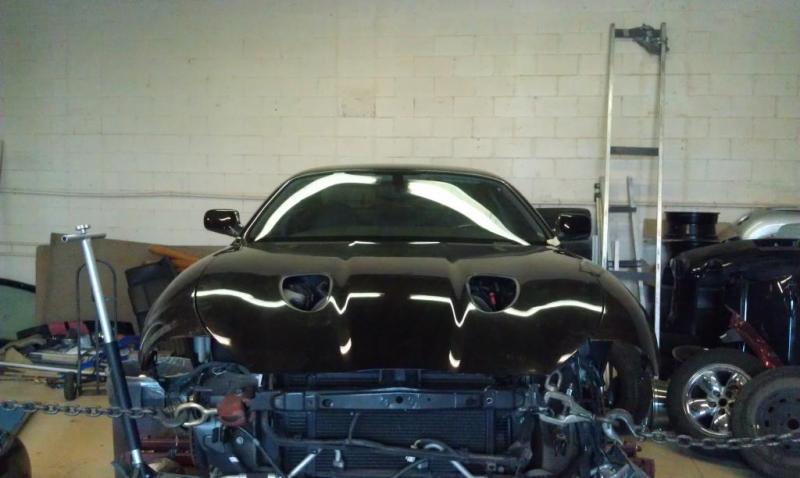
Now for the tedious part of the pull. Aligning the crossmember to adjust the front clip. As you can see the crossmember is bowed upwards and backwards.

I like to leave the hood on when doing these kinds of pulls to avoid going too far, this is much easier that measuring the crossmember after every single pull.
Because this is entirely cosmetic, eye-balling the pull is just fine.

Done pulling the crossmember to the side, now pulling it back out.
This is the most important part of the pull for adjusting the hood, because jaguars are front hinged if it is not pulled out just right it makes it very difficult to make the final hood adjustments on the hinges.
Now I have the member pulled and I adjusted the hood with the fenders.


It is not perfect but as with is for myself, close is good enough
Now for the final adjustments and many tedious micro pulls to get the headlight support and rebar in place.
I worked out the mangled support for quite some time to get it close enough to weld on the new support I cut out from a parts car.
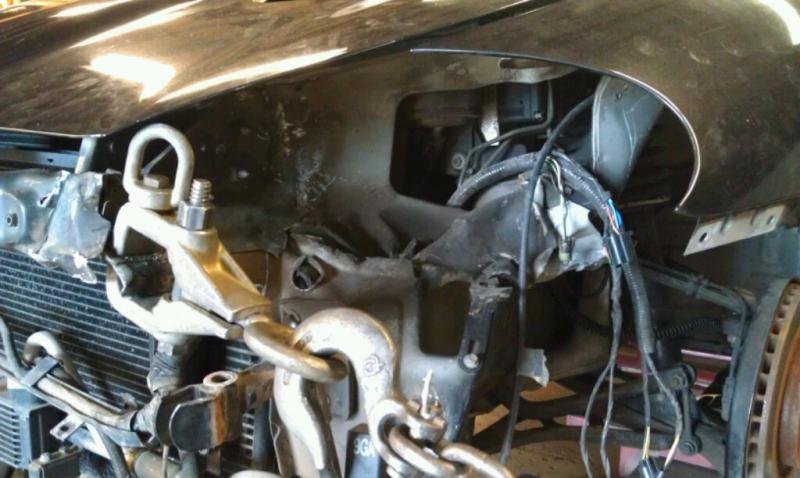
After making the final pulls and welding the new headlight support on I was a bit to excited about getting her on the road to take photos of everything.
At long last here she is!! I decided to name her Naomi.

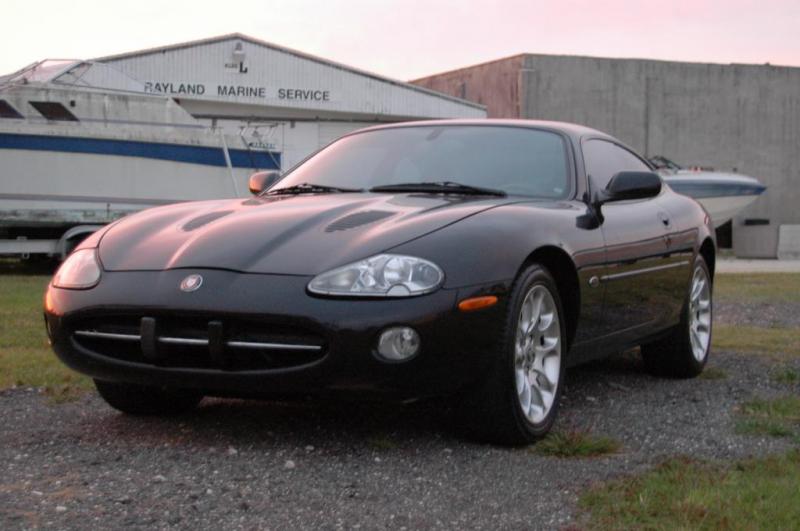
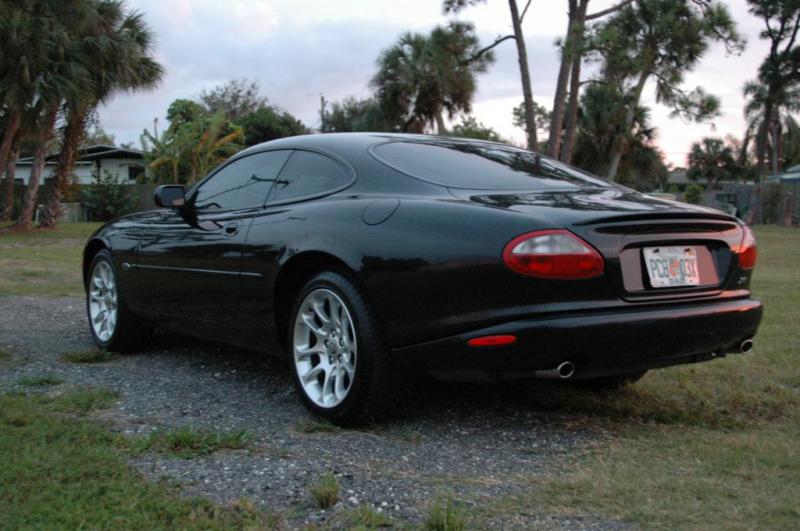
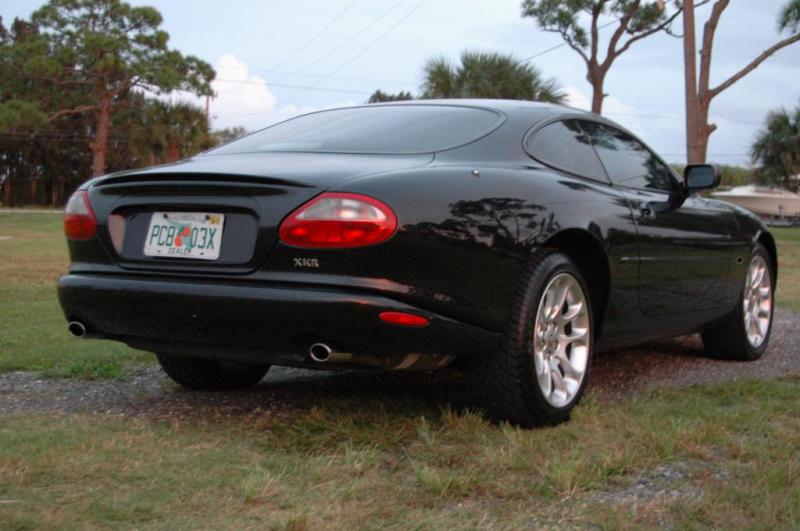
After the 4-wheel alignment, she drives in a perfect straight line!!

I took the grill from an xk8 on the lot, I have tracked down an xkr grill and passenger fender badge now. I'll post some up to date photos soon.
First off I got the car in clamps.
Next I measured the frame using my alvis light measuring tool. Everything is right with in spec, the left frame rail only backed up about 5mm.
First I pulling the section of rail that was back, because the frame only moved 5mm and only at the very end of the rail. It was not necessary to pull it, however this would ruin the alignment of the rebar and bumper so I pulled it just to be ascetically correct. haha
Now for the tedious part of the pull. Aligning the crossmember to adjust the front clip. As you can see the crossmember is bowed upwards and backwards.
I like to leave the hood on when doing these kinds of pulls to avoid going too far, this is much easier that measuring the crossmember after every single pull.
Because this is entirely cosmetic, eye-balling the pull is just fine.
Done pulling the crossmember to the side, now pulling it back out.
This is the most important part of the pull for adjusting the hood, because jaguars are front hinged if it is not pulled out just right it makes it very difficult to make the final hood adjustments on the hinges.
Now I have the member pulled and I adjusted the hood with the fenders.
It is not perfect but as with is for myself, close is good enough
Now for the final adjustments and many tedious micro pulls to get the headlight support and rebar in place.
I worked out the mangled support for quite some time to get it close enough to weld on the new support I cut out from a parts car.
After making the final pulls and welding the new headlight support on I was a bit to excited about getting her on the road to take photos of everything.
At long last here she is!! I decided to name her Naomi.
After the 4-wheel alignment, she drives in a perfect straight line!!
I took the grill from an xk8 on the lot, I have tracked down an xkr grill and passenger fender badge now. I'll post some up to date photos soon.
The following 10 users liked this post by pitifulpluto:
ccfulton (01-13-2013),
GGG (01-12-2013),
giandanielxk8 (01-14-2013),
Jacsun (01-13-2013),
Jag#4 (01-12-2013),
and 5 others liked this post.
#3
01-12-2013, 05:59 PM
Veteran Member
#4
01-12-2013, 06:03 PM

#6
01-12-2013, 06:14 PM
#7
01-12-2013, 06:20 PM
Veteran Member
Trending Topics
#9
01-12-2013, 10:40 PM


Join Date: Oct 2007
Location: PHX some of the time
Posts: 117,811
Received 6,361 Likes
on
5,534 Posts
#10
01-12-2013, 11:29 PM
Senior Member
#11
01-13-2013, 01:31 AM
Senior Member
#12
01-13-2013, 02:29 AM
Veteran member
I agree with the other posters, you did a fantastic job considering the damage you had to repair. As for the hood, I am sure there are rubber bumpers and latch adjustments you could make to lower that bonnet (gotta speak british terms to properly own and drive a jag) a bit to match the fender.
#13
01-13-2013, 08:19 AM

Veteran Member
pitifulpluto, we're just in awe of your guts and professionalism into resurrecting that beautiful cat. I was glued to each post with photos. That you understood where everything went during reassembly was mind boggling. One thing was left out... Avos's 200 chp twin screw conversion? Just kidding. She's just fine the way she is. Are you to enjoy Naomi, or is she for re-sale? Likely has a salvage title.
Last edited by bfsgross; 01-13-2013 at 08:25 AM.
#14
01-13-2013, 09:46 AM
Veteran Member
Well done! Great to see the body shop work in action. I only wish I had the skill set you've got.
Just one thought...because like you, I suffer from OCD on these little aesthetic things...the left headlight seems to have a larger than normal gap at the bottom. Perhaps an adjustment can be made.
Since you're a body shop guru, you might also consider doing the rear light conversion to the MUCH nicer later style. It requires some cutting that is a nightmare for guys like me, but a breeze for guys like you. I did this upgrade for my 97 coupe last year, and it really updates the look of the entire car. If you were to do just one exterior upgrade for the most visual impact, the later style tail lights would be it.
.
#15
01-13-2013, 09:51 AM
Thanks all =] I plan on hanging onto this one. She's got a salvage title but that doesn't bother me one bit, at least I know exactly what happened and there's no guessing game. My only concern about the twin screw kit is ruining the transmission.
I've done 4k miles and absolutely tickled to death. =] I've got the xkr grill and the missing fender badge installed now.
The clearcoat could use a good wetsanding and buffing all around.
I've done 4k miles and absolutely tickled to death. =] I've got the xkr grill and the missing fender badge installed now.
The clearcoat could use a good wetsanding and buffing all around.
#16
01-13-2013, 09:56 AM
I could not agree more! I got a set of the newer style taillights, just haven't gotten around to getting it done.
The left headlight is a disaster haha It sicks out too far and the angle is so far off. From a top angle it is hardly noticeable, I plan to go trough and redo the work on the support when I get my hands on a 2005 front bumper. =D
The left headlight is a disaster haha It sicks out too far and the angle is so far off. From a top angle it is hardly noticeable, I plan to go trough and redo the work on the support when I get my hands on a 2005 front bumper. =D

#18
01-13-2013, 11:37 AM
Veteran Member
Thanks all =] I plan on hanging onto this one. She's got a salvage title but that doesn't bother me one bit, at least I know exactly what happened and there's no guessing game. My only concern about the twin screw kit is ruining the transmission.
I've done 4k miles and absolutely tickled to death. =] I've got the xkr grill and the missing fender badge installed now.
The clearcoat could use a good wetsanding and buffing all around.
I've done 4k miles and absolutely tickled to death. =] I've got the xkr grill and the missing fender badge installed now.
The clearcoat could use a good wetsanding and buffing all around.
