Black & Tan Door Card

#24
 08-19-2013, 06:47 PM
Veteran Member
#26
08-19-2013, 09:06 PM
Anyone have an experience with plastidip? Seems fairly popular, and if you can just peel it off there isn't much risk.
https://www.jaguarforums.com/forum/x...art-1-a-99517/
https://www.jaguarforums.com/forum/x...gestars-94807/
https://www.jaguarforums.com/forum/x...art-1-a-99517/
https://www.jaguarforums.com/forum/x...gestars-94807/
#27
08-19-2013, 09:11 PM
Veteran Member
Anyone have an experience with plastidip? Seems fairly popular, and if you can just peel it off there isn't much risk.
https://www.jaguarforums.com/forum/x...art-1-a-99517/
https://www.jaguarforums.com/forum/x...gestars-94807/
https://www.jaguarforums.com/forum/x...art-1-a-99517/
https://www.jaguarforums.com/forum/x...gestars-94807/
#29
08-22-2013, 06:43 AM
Veteran Member
Ok, ok, I know that this will be polarizing and 50% of people will like it and 50% will hate it, but that's part of the fun.
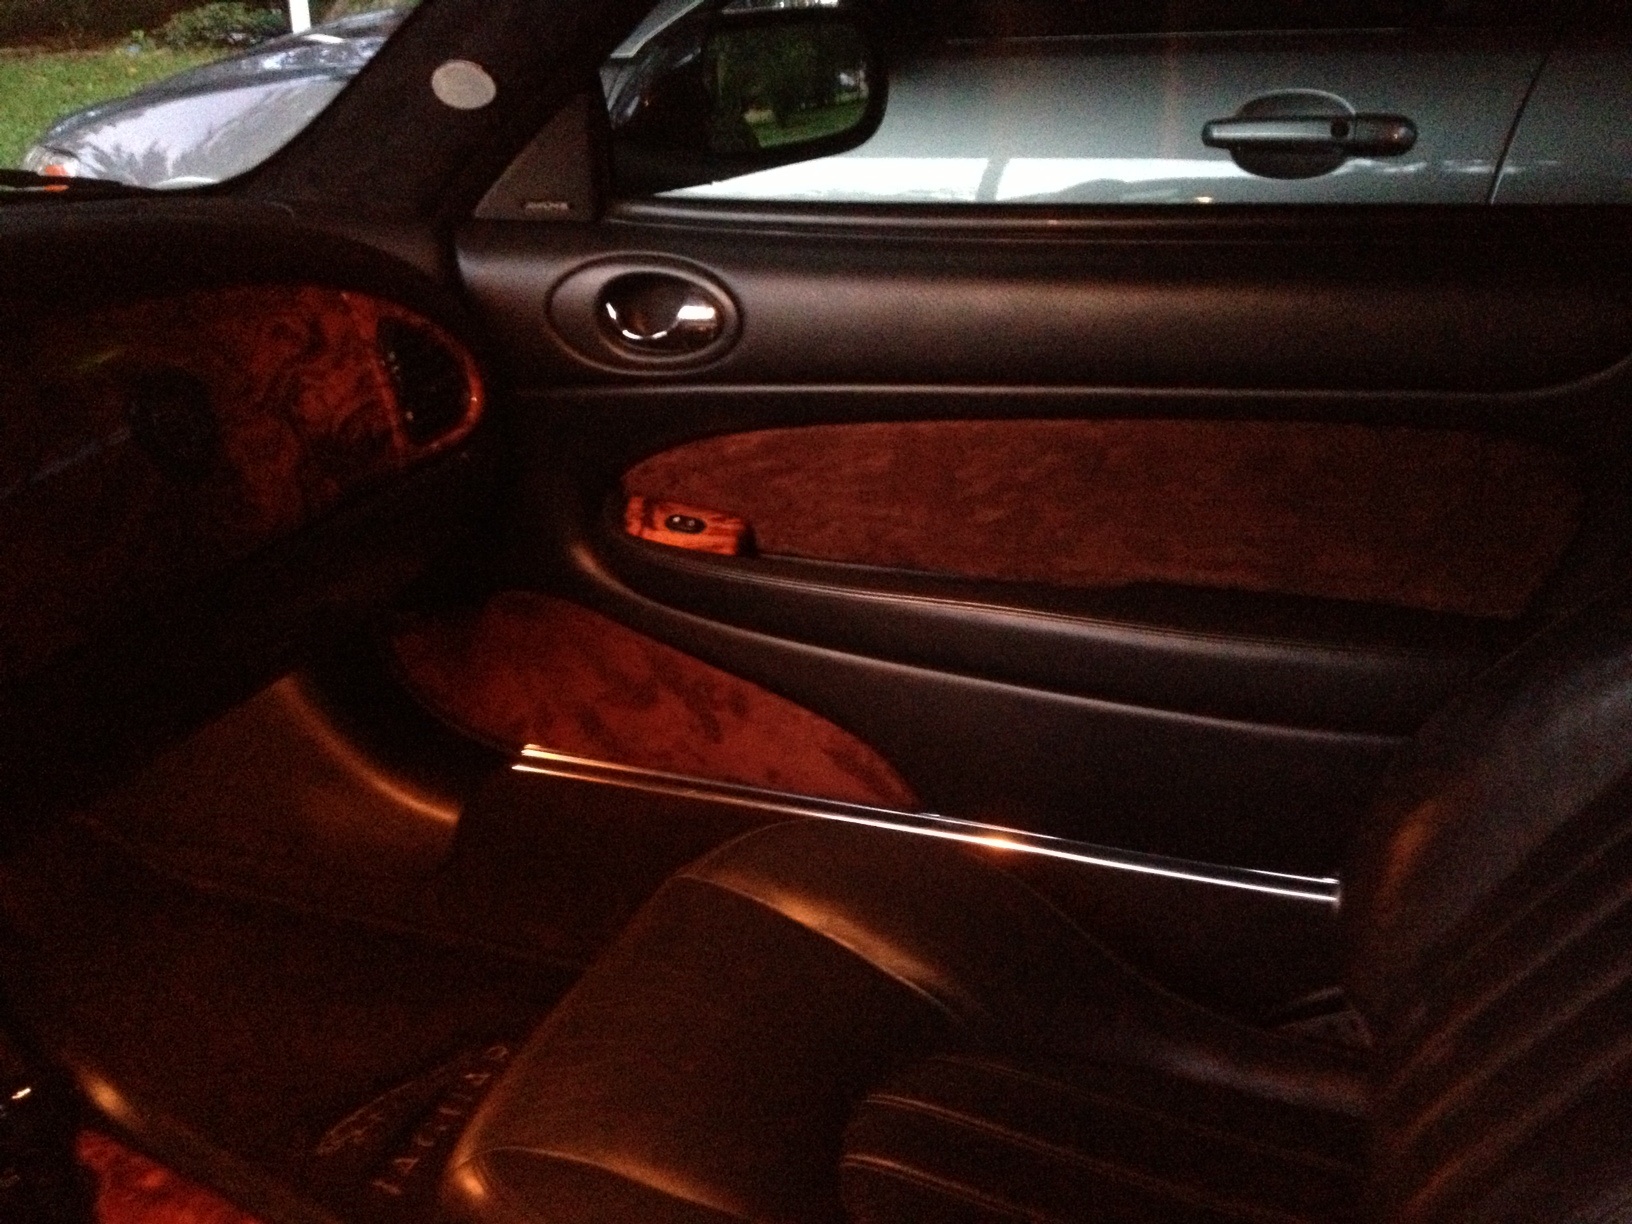
I've got a cashmere interior which, which, after 80k miles and a good bit of neglect from the previous owner, is looking a little shabby, so I've been thinking about things I could do with it. The car is black on the outside and tan on the inside so I've settled on continuing the black and tan theme inside.
I freely admit that this took WAY more time and effort than it was worth but this is my idea of a relaxing weekend, so who cares.
The door caps are done with a 3M carbon fiber wrap and the inserts with black Passion Suede. Thought about re-doing the speaker in black, but the wife said the alternating black, tan, black, tan, black would be a little too Holstein.
I am not completely sure about the door handle surround, I may yet change it to black. I have some ideas for the dash top to blend it in with the door caps. Don't worry purists, whatever I end up doing, the wood dash face will still be there, that's part of it being a Jaguar.
Before:
Attachment 51451
After:
Attachment 51452
Attachment 51453
Don't know if you came across this with your inserts but how did you re attach them? Mine were melted on with tabs in the back. I sorta popped them back and added some double stick. I expected screws but there's not enough "meat" to hold it.
#30
08-22-2013, 08:01 AM
To remove:
Used a solder iron to soften the rivets and pop them through. Did the door cap the same way excepting that the door cap also has a little glue at the far ends to deal with.
To install:
Put the shaft of the rivet back through, used the tip of the solder iron to make a detente in the end to get started and then put a #4 x 1/2" sheet metal screw and washer strait down the length of the rivet. Snugged them up by hand so as not to strip them. I used a little hot glue on the ends of the door cap similar to the way it was assembled before.
#31
08-22-2013, 08:17 AM
Veteran Member
I spent way too much time on it.
To remove:
Used a solder iron to soften the rivets and pop them through. Did the door cap the same way excepting that the door cap also has a little glue at the far ends to deal with.
To install:
Put the shaft of the rivet back through, used the tip of the solder iron to make a detente in the end to get started and then put a #4 x 1/2" sheet metal screw and washer strait down the length of the rivet. Snugged them up by hand so as not to strip them. I used a little hot glue on the ends of the door cap similar to the way it was assembled before.
I just put the red piping on door insert but I can't get it to fit back in at all! Piping simply makes panel to big to fit. I may have to cut new panel or try to cut off 1/4 inch all the way around. Didn't like red any way. I'm going to pick up some dark tan suede to match wood tone. And that factory panel is so flexible if it slightly bends, I get ripples in the suede! Ugh.
#34
08-25-2013, 10:01 AM
Not yet. It has been unbearably hot so I have been trying to do as little in the garage as possible. The door panels I can bring in the house and do in the A/C but I have yet to convince my better half that it is acceptable to bring the car into the kitchen.
I do have a rough template cut from the carbon wrap for the dash top and am making preparations to install it. Vents are all out, A-pillars are removed and the wood dash is removed. I'll probably have a go at it next weekend since it is a holiday and I'll have an extra day to fiddle with it.
After the discussion about the brown plastic pieces and the impracticality of painting them, I picked up a full black dash for a good price. I now have all the black pieces and also a complete dash top out of the car that I can refine my pre-cut piece on.
It is SO much easier to do when you can get all the way around the thing.
#35
01-15-2015, 09:08 AM
Senior Member
I'm going to be installing some aftermarket walnut burl door caps in place of the original vinyl. Any help on how you removed yours would be very helpful. I've contacted the fellow I'm buying the door caps from and his directions were quite terse, i.e. they would be understandable after I am done.......
#37
01-16-2015, 03:19 AM
I'm going to be installing some aftermarket walnut burl door caps in place of the original vinyl. Any help on how you removed yours would be very helpful. I've contacted the fellow I'm buying the door caps from and his directions were quite terse, i.e. they would be understandable after I am done.......
If you look at the bottom there are yellow tabs and yellow plastic rivets. The rivets have to be melted or cut to pass through the fiber board and the tabs can be unclipped.
At the front of the door where the cap meets the dash, there is a bit of glue holding it on that will have to be carefully pried off.
Once you get the door card out and can look at it, then it is pretty easy to figure out.

#39
05-10-2015, 11:19 AM
Not difficult but takes some time. The insert (on the x100 anyway) is attached by plastic rivets. You can heat them with a solder iron like I did, or you could drill them out to release the insert. I assume that the S-type is similar in construction.
Recovering is just a matter of pealing the old skin off and putting a new one. I used the old as a pattern.
To replace you can utilize the rivets in the way I did or just flatten them and affix the insert with velcro, which I think is what Phil ended up doing. That is probably the easier way in hindsight, and no real downside.
The following users liked this post:
JagSTR2004 (05-10-2015)
#40
05-11-2015, 07:58 AM
Veteran Member
Not difficult but takes some time. The insert (on the x100 anyway) is attached by plastic rivets. You can heat them with a solder iron like I did, or you could drill them out to release the insert. I assume that the S-type is similar in construction.
Recovering is just a matter of pealing the old skin off and putting a new one. I used the old as a pattern.
To replace you can utilize the rivets in the way I did or just flatten them and affix the insert with velcro, which I think is what Phil ended up doing. That is probably the easier way in hindsight, and no real downside.
Recovering is just a matter of pealing the old skin off and putting a new one. I used the old as a pattern.
To replace you can utilize the rivets in the way I did or just flatten them and affix the insert with velcro, which I think is what Phil ended up doing. That is probably the easier way in hindsight, and no real downside.

Thread
Thread Starter
Forum
Replies
Last Post
99xk8guy
XK8 / XKR ( X100 )
11
06-05-2023 06:28 AM
WinterJag
XJ XJ6 / XJ8 / XJR ( X350 & X358 )
16
10-09-2015 07:49 PM
Currently Active Users Viewing This Thread: 5 (0 members and 5 guests)