Disconnecting the power antenna
#1
 09-12-2009, 10:40 AM


First of all...thanks to all of you who have responded and helped me in the past...everyone has been a great help...i was thinking of somehow disconnecting my power antenna so that it doesn't go up everytime i have the radio on...i think it might give the car a cleaner look while driving down the road...first of all...is it simple to do and how do i do it...i am not a technician but can get around the vehicle...i for sure don't want to have to pull the radio out...and most importantly...should i do this...will it be something i regret down the road...like messing up the radio,motor,cable,or anything else...it's not worth it to me to have a messed up radio...i would much rather have my car in perfect working order...but if it is a simple un-plug something at the rear inside quarter panel and be able to plug it back in...i'm ok with that. I just don't want to have a potential problem down the road over something so minor....thanks for your input....eroc....2002 xk8 convert
The following 3 users liked this post by Eroc:

Top Answer
09-12-2009, 12:21 PM
Veteran Member
With the demise of the Classical Music FM station in Milwaukee, I have to rely on my CD's for entertainment, Hence, I installed a Antenna On/Off Switch.
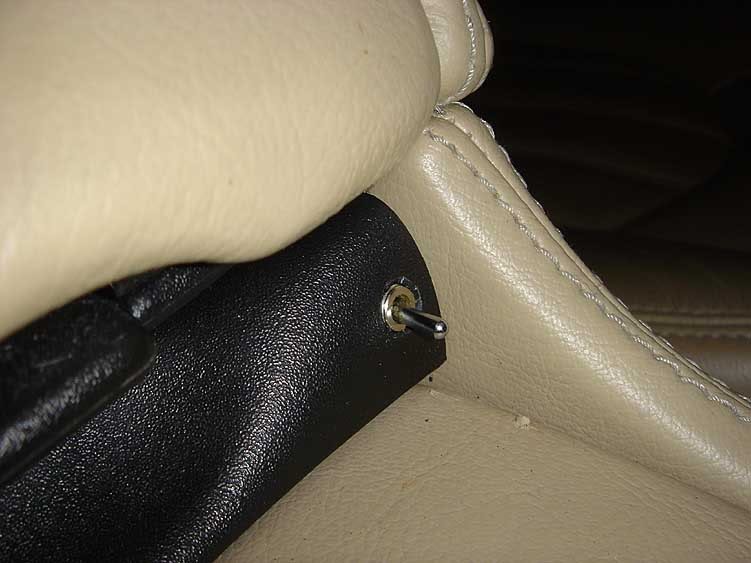
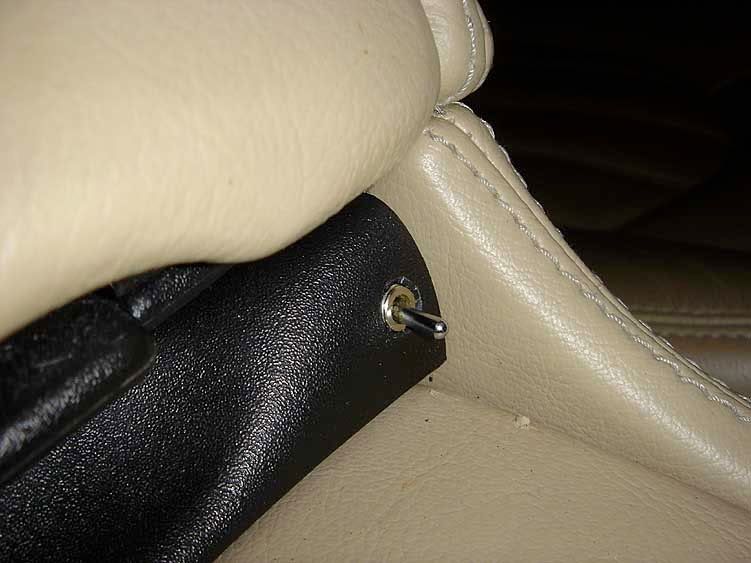
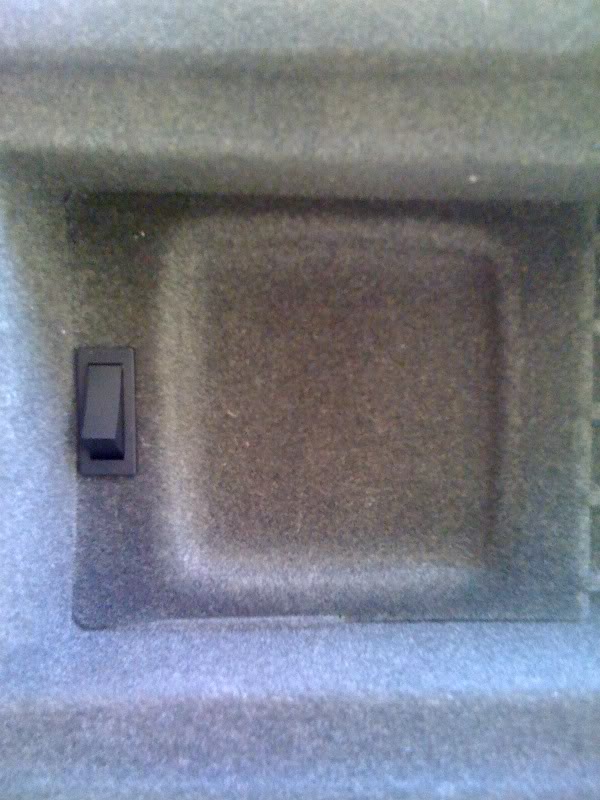
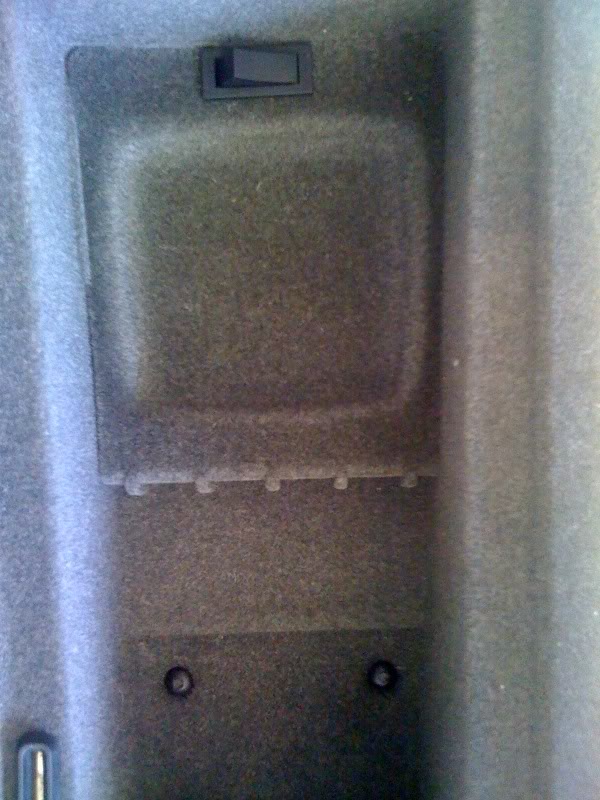
I mounted a Subminiture Toggle Switch in the panel beneath the front of the Armrest:
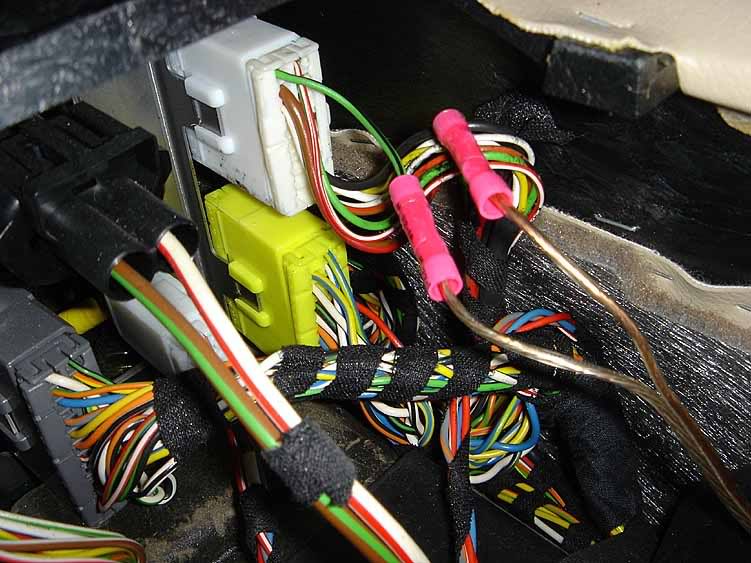
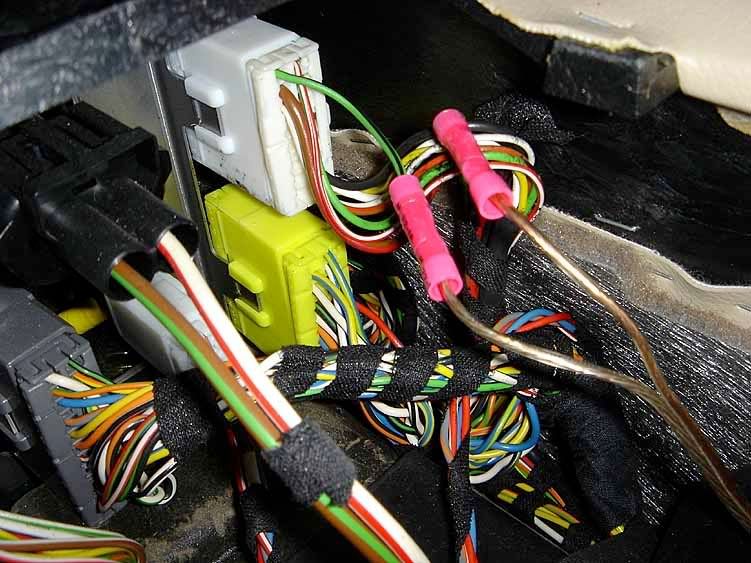
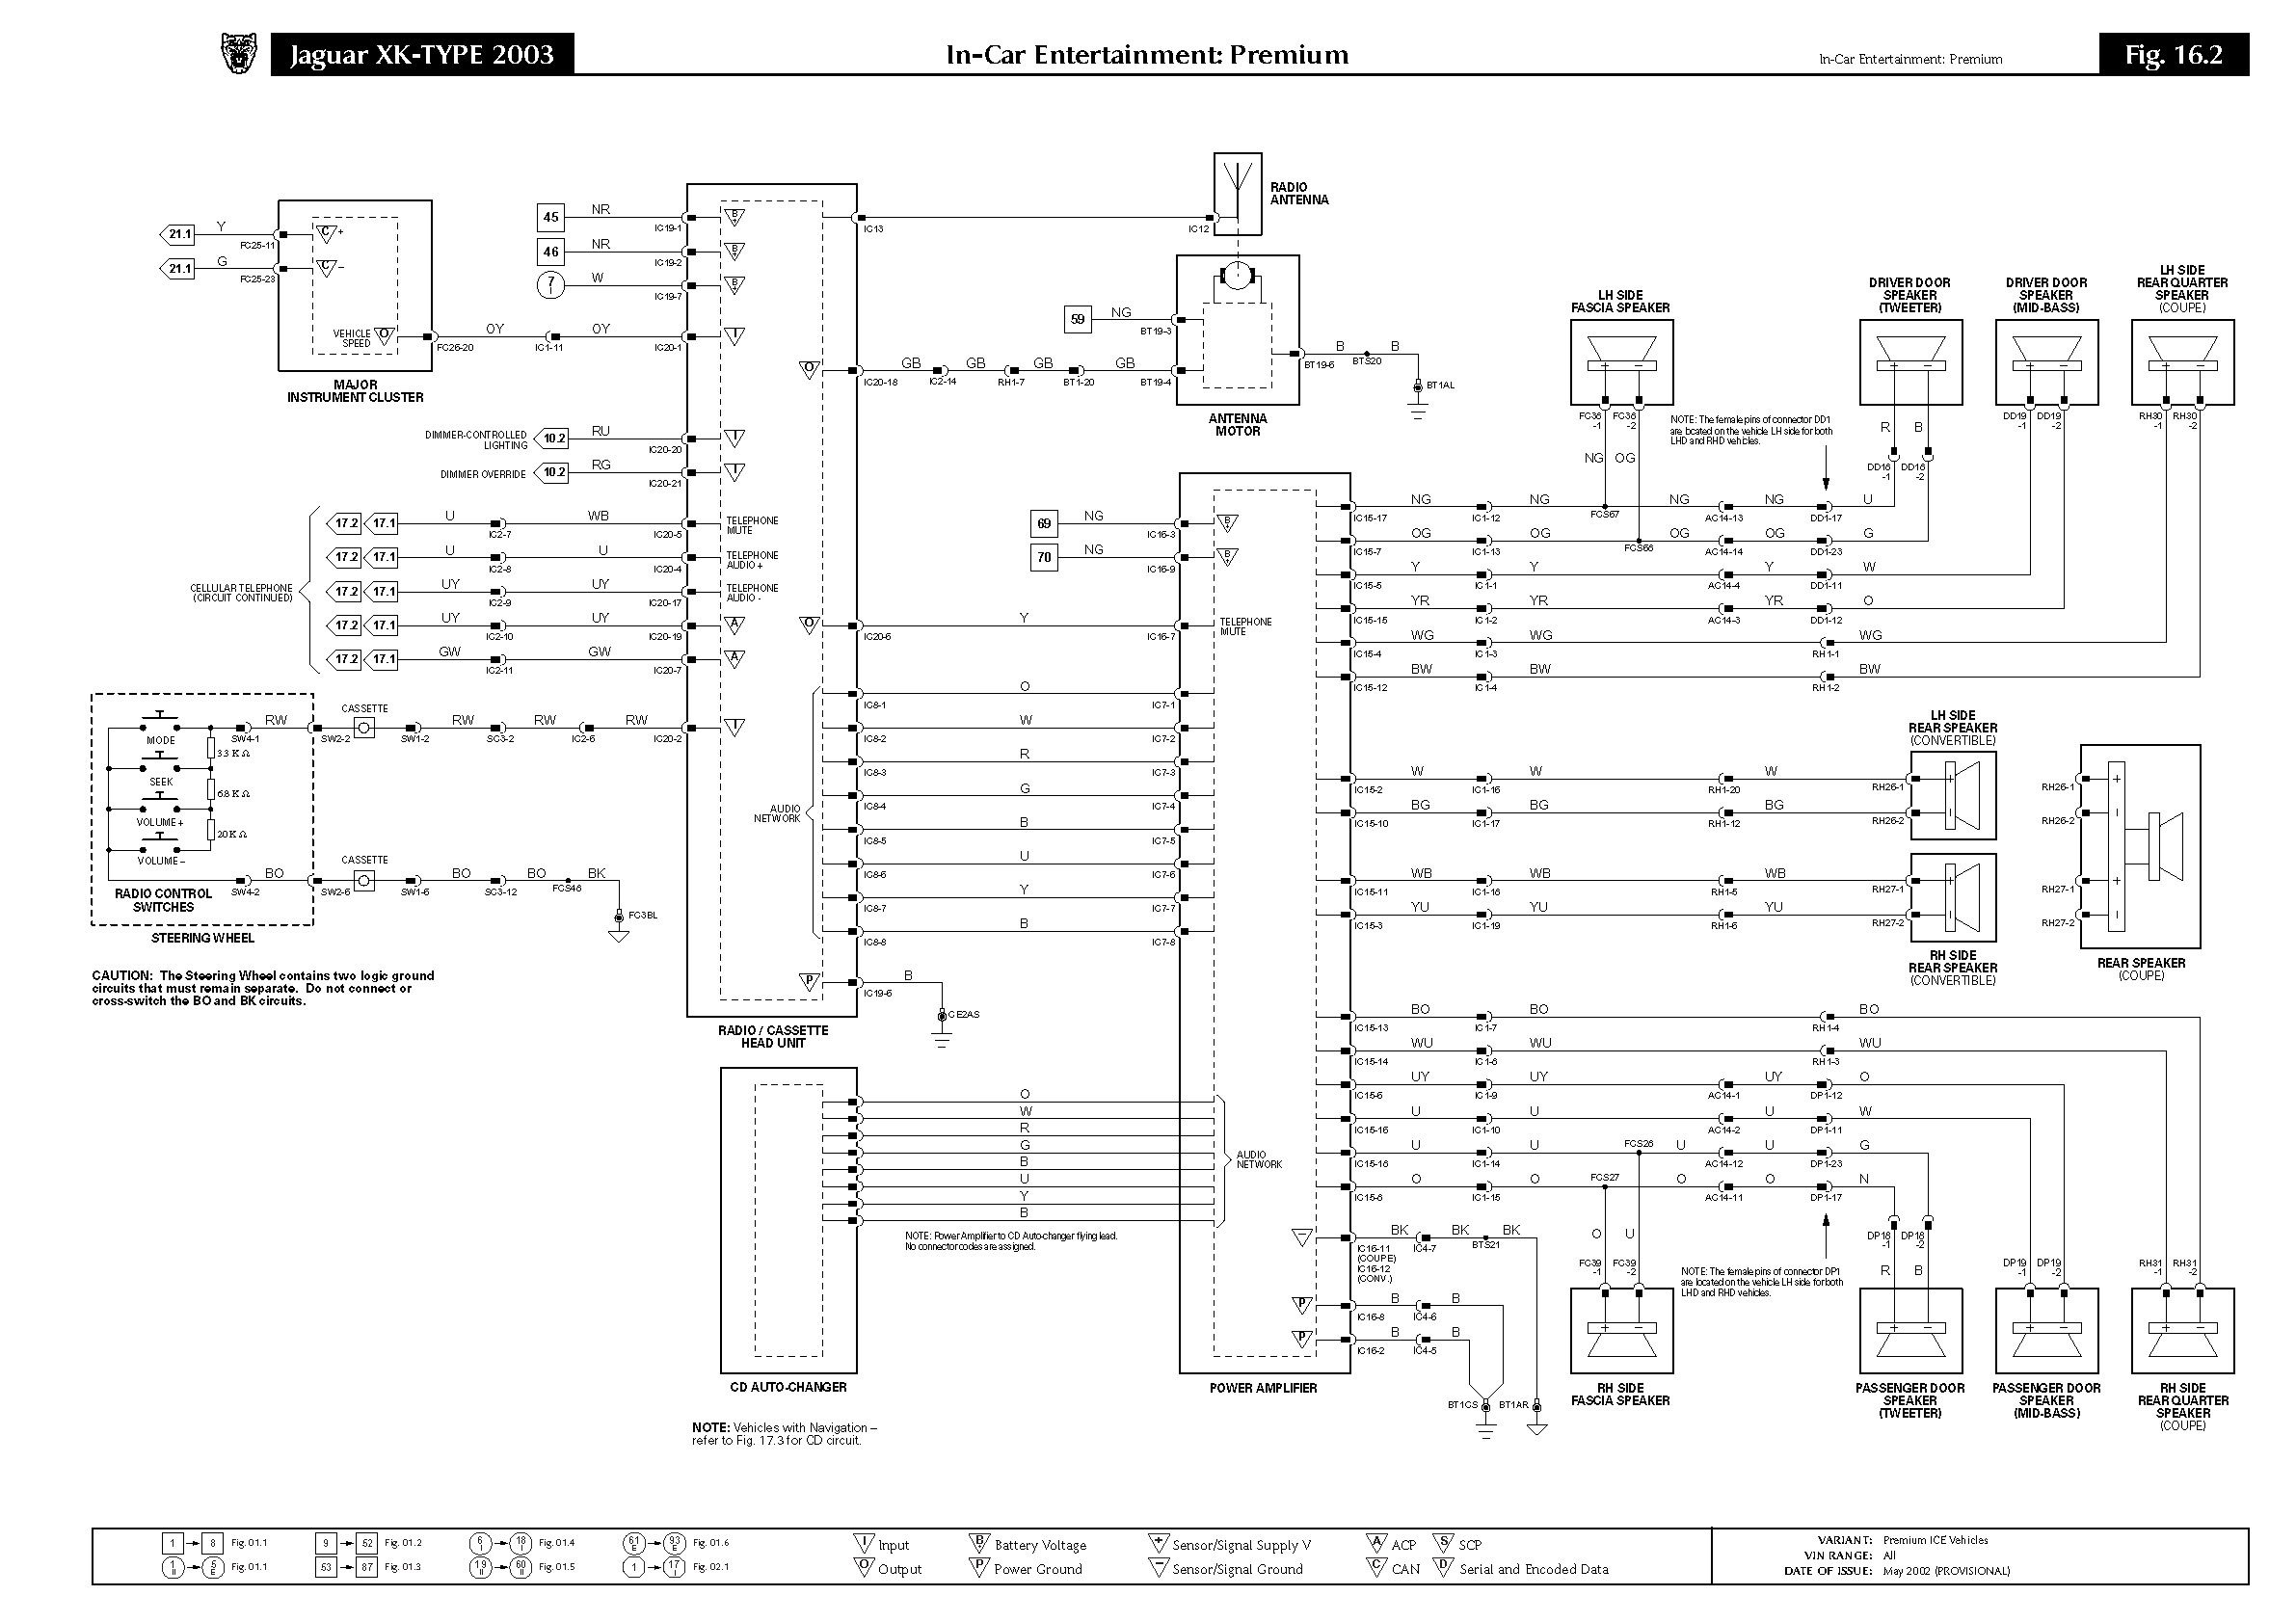
I removed the 4 screws holding the compartment under the Armrest and cut the Green\Black-Tracer wire connected to the large white Harness Connector. Then, I used crimp connectors to connect the leads from the Switch to the harness:
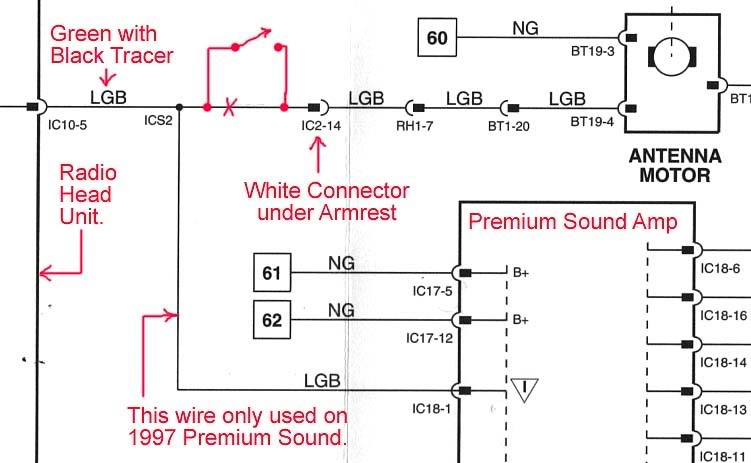
The diagram:
Here is a link to a Switch that can be used:
http://www.radioshack.com/product/index … age=search
The nice thing about this mod is that you don't have to remove the Console.
I mounted a Subminiture Toggle Switch in the panel beneath the front of the Armrest:
I removed the 4 screws holding the compartment under the Armrest and cut the Green\Black-Tracer wire connected to the large white Harness Connector. Then, I used crimp connectors to connect the leads from the Switch to the harness:
The diagram:

Here is a link to a Switch that can be used:
http://www.radioshack.com/product/index … age=search
The nice thing about this mod is that you don't have to remove the Console.
#2
09-12-2009, 12:21 PM
Veteran Member
With the demise of the Classical Music FM station in Milwaukee, I have to rely on my CD's for entertainment, Hence, I installed a Antenna On/Off Switch.
I mounted a Subminiture Toggle Switch in the panel beneath the front of the Armrest:
Attachment 181257
I removed the 4 screws holding the compartment under the Armrest and cut the Green\Black-Tracer wire connected to the large white Harness Connector. Then, I used crimp connectors to connect the leads from the Switch to the harness:
Attachment 181258
The diagram:
Attachment 181259
Here is a link to a Switch that can be used:
http://www.radioshack.com/product/index … age=search
The nice thing about this mod is that you don't have to remove the Console.
The following 12 users liked this post by Paul Pavlik:
Alvin Burns (02-11-2011),
DaveC (11-02-2012),
eieio (06-07-2013),
Fla Steve (01-09-2018),
FSULongM (11-01-2018),
and 7 others liked this post.
#3
09-13-2009, 09:29 PM
Veteran member
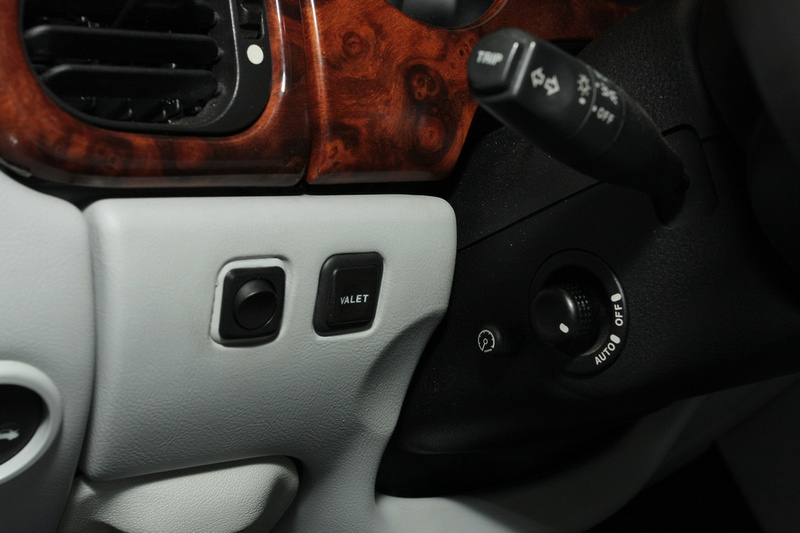
You can also put a LED toggle on that 'vacant' switch cover by you're lower left knee. The one shown here is 'not' an LED type. The one I speak of fits that opening perfectly. I've got a pdf of a process that will work, including part numbers for this install that is shown here. Just PM me or send me an email where I can email it to you.
#5
09-18-2009, 10:20 AM
Veteran Member
I soldered them. Also, I had to remove a small amount of console material (behind the plastic piece that the Switch is mounted in) to provide clearance for the Switch.
#6
09-18-2009, 11:35 PM

Member
I actually took a different approach and disconnected the white and yellow wiring harnesses shown in the above picture. If we take the Cat out to a drive in movie up in good 'ol Mayberry (Mt Airy, NC), I just pull back the carpet inside of the trunk and reconnect the antenna.
On a side note, I am an advocate of changing the term used to describe our power antennas on our XKs to the more appropriate Alien Beacon. For such a gorgeous work, the designers must have just forgotten about the antenna until the last minute when they decided to install the 80 feet tall Alien Beacon.
Tony Cottrell
Winston Salem, NC
97 XK8
05 XJ8 L
The following users liked this post:
Berglmir (09-17-2019)
#7
12-21-2009, 12:05 PM

Trending Topics
#8
12-21-2009, 04:55 PM
Veteran Member
Yes, you can install the switch as shown. Just be sure to splice the switch into the circuit right at the white connector under the arm rest (IC2-14) as shown in the picture. This should (circuit wise) be "after" the splice (ICS2) which feeds the Premium Sound Amp.
The following users liked this post:
Orthodixie (03-26-2019)
#9
12-22-2009, 05:51 PM
Veteran Member
That is correct. My car is a '97, and the splice behind the head unit did not work; however, the splice further back, as Paul describes above, works perfectly.
The following users liked this post:
Orthodixie (03-26-2019)
#10
05-12-2010, 08:01 PM

I like keeping my additions hidden or looking as stock as possible. I decided to put my switch in the center console tray. I apologize for the quality of the pictures as I took them with my iPhone. This is a great thread!

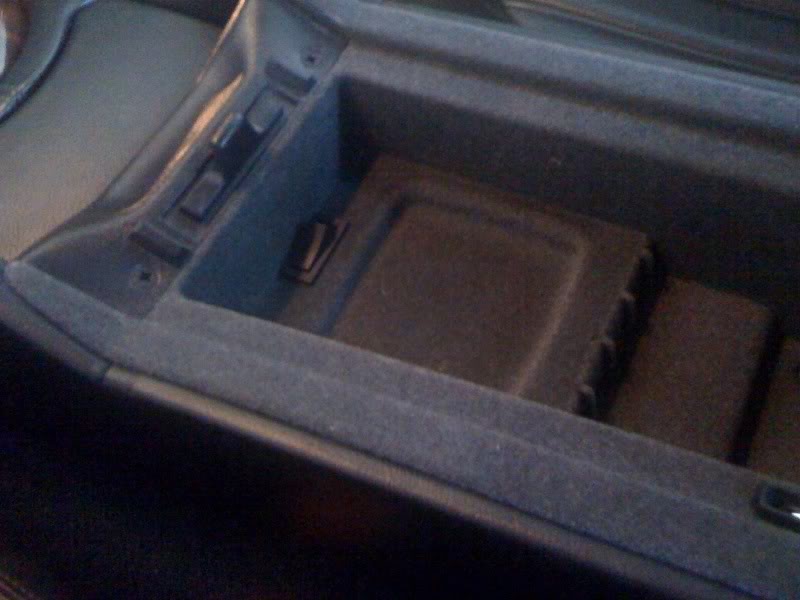
I ended up soldering the green and black wire to my new wire as I did not want them to separate. Super easy mod!
I ended up soldering the green and black wire to my new wire as I did not want them to separate. Super easy mod!
The following 5 users liked this post by Dalen:
Fla Steve (01-09-2018),
Orthodixie (03-26-2019),
Reverend Sam (12-01-2010),
Terrapin (08-26-2011),
XK8+XJ8L (12-01-2010)

#12
05-15-2010, 11:27 AM
#13
05-15-2010, 01:07 PM
Veteran Member

#15
05-16-2010, 05:17 AM
Veteran Member
Should be the same procedure. If you get to the wires and get confused, post some pictures and we can help you, but I think when you get to them you should be able to figure it out. I will tell you there is very little slack in the wire that you are splicing into. Other that than it is straightforward.
#18
05-16-2010, 07:43 PM
