When you click on links to various merchants on this site and make a purchase, this can result in this site earning a commission. Affiliate programs and affiliations include, but are not limited to, the eBay Partner Network.
One of my door speaker facias was hanging loose at the top and after removing the two screws on the bottom of the facia and removing it, I saw that I was missing the two plastic clips that were present on the other doors, speaker facia.
I took measurements off of one of the original clips and used my CAD program to draw a replica and I then printed it on my 3D printer. I removed the two remaining clips as they were starting to come loose and I reinstalled all four with fresh epoxy.
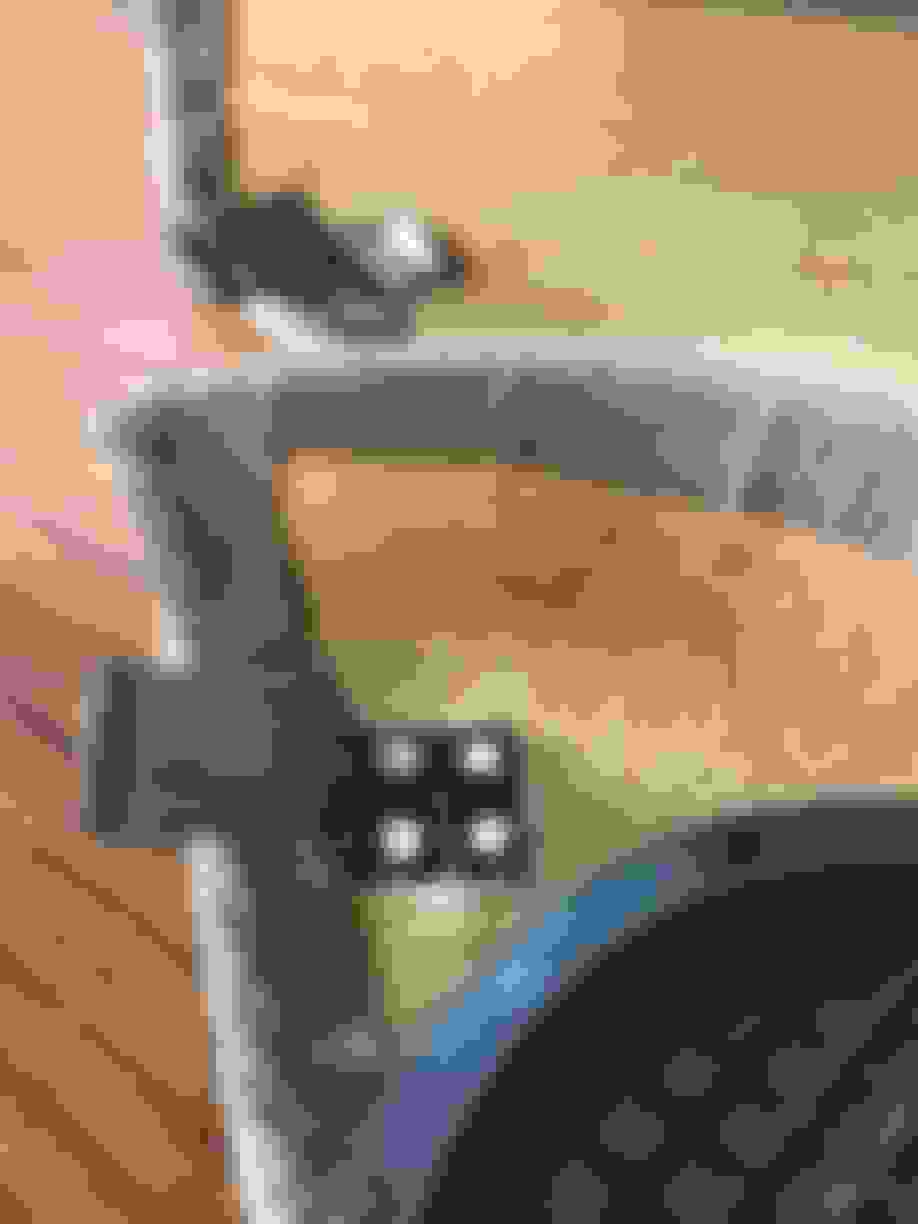
In this photo the original clip is on the bottom and the 3D printed clip is on the top. This is how they are installed from the factory, with a bit of epoxy oozing thru the four holes.
If anyone needs some clips, I'd be happy to print them up for a nominal fee to cover postage.
Both facias with clips installed. I decided to put one original clip and one 3D printed clip on each facia instead of two original clips on one and two 3D printed clips on the other..
The drivers side were missing and thats why it was hanging off kilter. They could be in the bottom of the door as I didn't go on a fishing expedition. Maybe the next time I'm working on the door I'll see if they are there. Remember, I can easily print these for you or others if needed.
What did you use for your "goop" when you re-adhered them? I used a flexible epoxy adhesive called "Mr. Sticky" which was original made here in Northern California but then they sold out to a larger company. It's still goes by the same name and I like it because its semi flexible and can withstand vibration which for these clips sounds like a perfect fit.
Cheers.
So long as they aren't rattling let 'em rest in the door. I used liquid nails construction adhesive on mine. Everything else I tried failed pretty quick. 4 years later the construction adhesive is still holding.
Nice to see the advantages of 3d-printing when it comes to these "unobtainium" parts. Well done!
I think, meanwhile it could be a nice idea to establish a download section for the .stl-files used for printing, so over time we would get an parts-archive for the forum-users.
Would you be willing to publish your construction?
I think you have a good idea and maybe we can get a moderator to help us out with this endeavor as I'd be willing to contribute. This past week I was working on the rear interior quarter panels and for the convertible, you have to remove the quarter casing (#2 in the image) and there was a missing locknut which is more like a press fit insert with a boss (#8 ) This connector press fits in to a square hole in the frame and it has a stand off that a machine screw screws in to. I've seen that they are available for a few dollars yet it was nice to have it as quickly as I did.
I really appreciate your generous offer, as publishing the .stl's would help over short or long, at least with these damned small parts - and maybe with bigger items in the future, too. And the fasteners, you've built, look really OEM-like. If there could be a library of parts, this would be much helpful with getting these cars on the road.
So, if one of the Admin's could chime in: Do you see a chance?
And as my impression is, more and more parts for these cars are getting the EOL state. As an example, the last "thingy", i've to build, was the heatshield over the LH-Kat. But due to the enourmous heat, these parts have to withstand, this was done with an alu-sheet and heatshield's armor. So there was no chance to use 3d-printing . To my regret it looks more as an knight's armor...
Until now, i've only done some testing with 3D-Objects at a borrowed equipment, but i've plans to buy a printer during the next 2 or 3 month. I hope, then there is a possibility to contribute, too.
BTW: Don't blame me for the language, sorry, i'm not a native speaker.

 08-22-2017, 08:59 PM


 I used liquid nails construction adhesive on mine. Everything else I tried failed pretty quick. 4 years later the construction adhesive is still holding.


 . To my regret it looks more as an knight's armor...