Duck Tail rear spoiler (modified XKR OEM spoiler)
#1
 05-26-2013, 07:15 PM

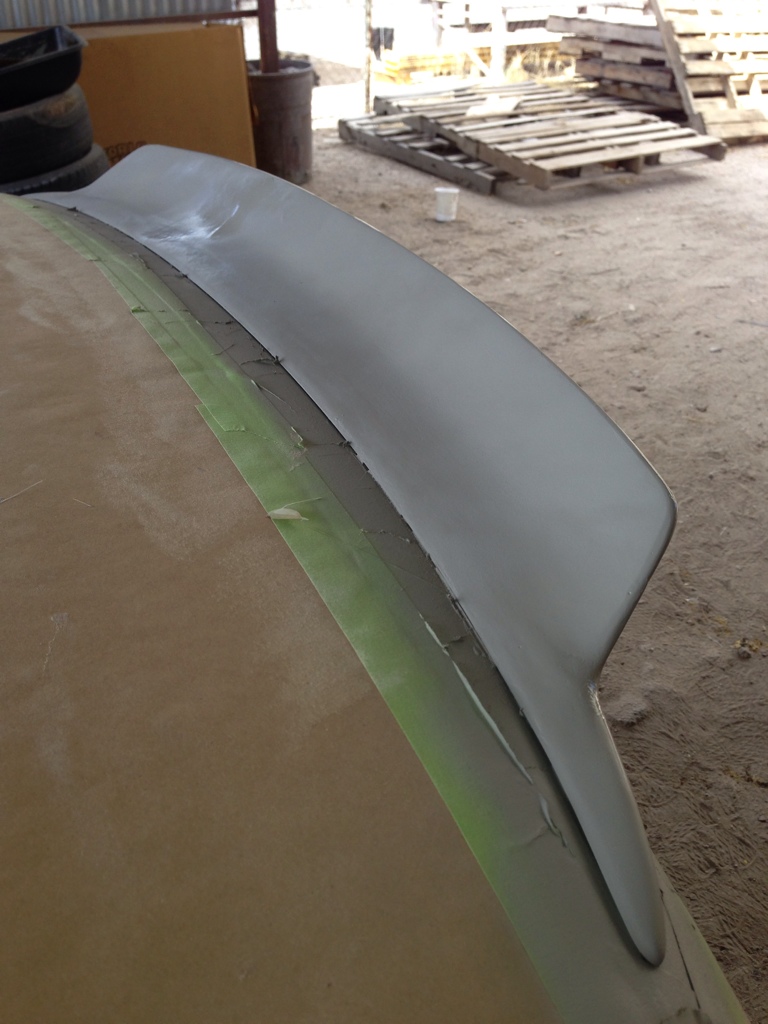
I started at 9:30 this morning and will finish by 5:30 or so. These pics show the use of balsa wood and isophthalic polyester resin with fiberglass to extend the spoiler to actually grab some air. Though it's still too small for real racing purposes, I wanted to have a unique rear spoiler but couldn't find one that was quite right for me. I'm a sculptor/designer/moldmaker, so I went ahead and made my own. =) It didn't turn out too bad for a little bit of work on a Sunday.
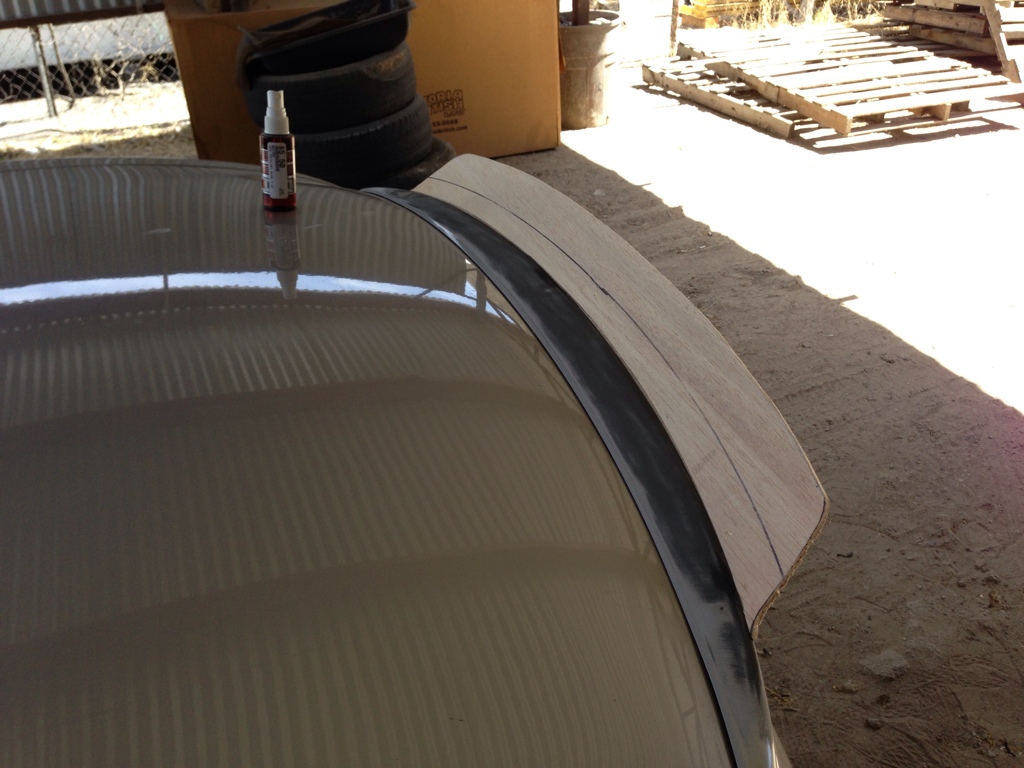
First look at design in wood, superglued to OEM spoiler for mounting:
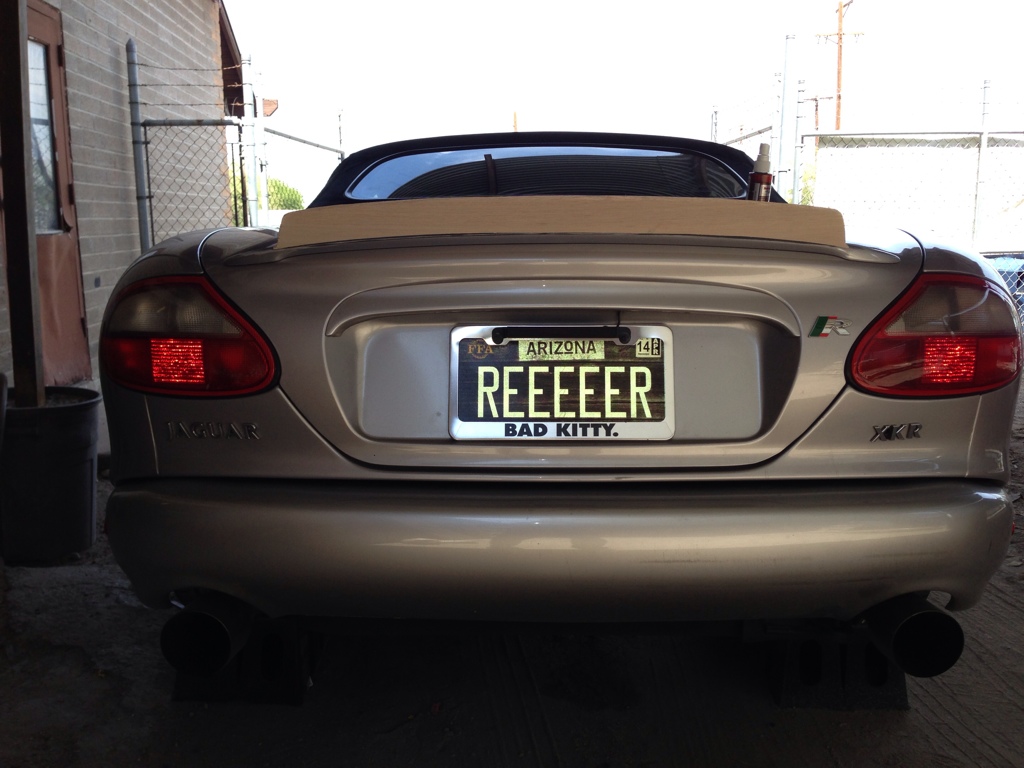
Rear:
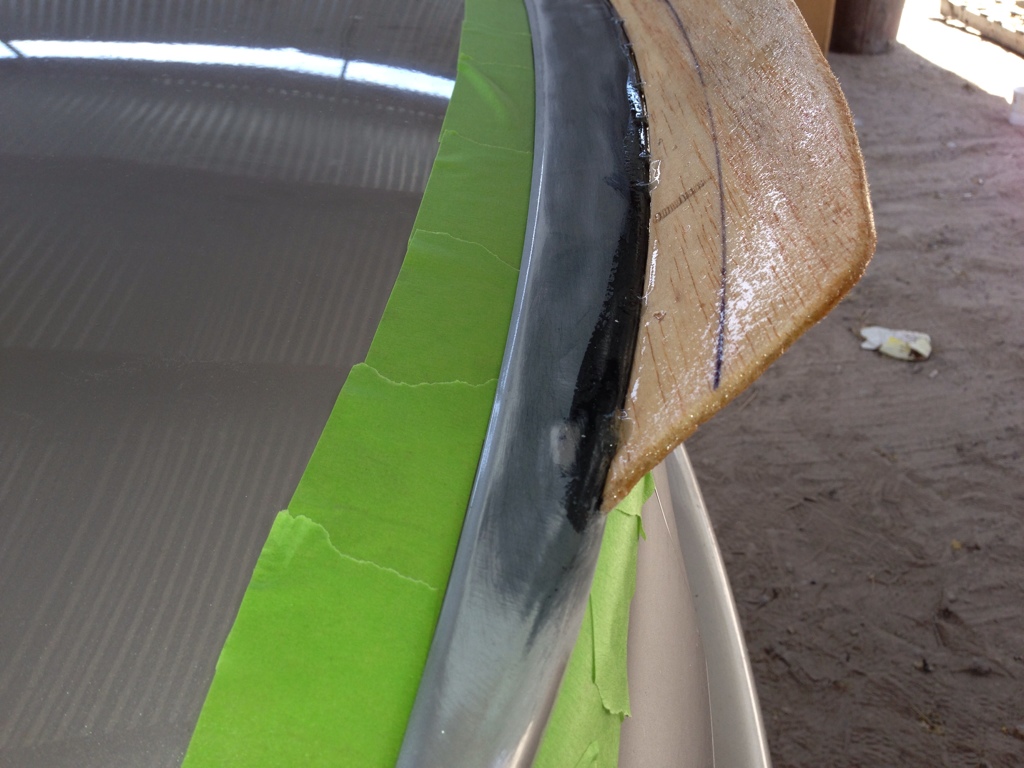
It's time to fiberglass it on for strength. I always put resin onto wood first to get the fibers to stick better:
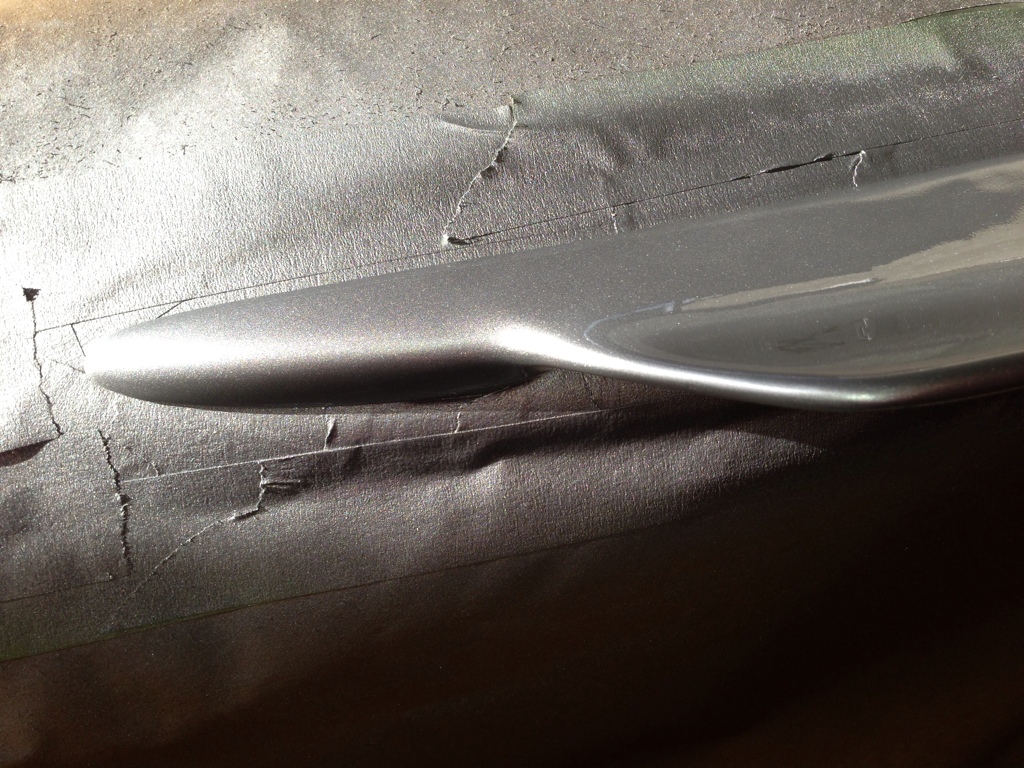
Yep, this will grab some air:
Tape it off because it's going to get messy:

Laying up the fiberglass:

Using loose fibers on the edges so that they are strong as well:

Rough sand (40 grit) so that the bodywork will stick:

Standard bodywork from here:

Several coats of Bondo then primer:
Hours of sanding, sculpting, re-application of small amounts of Bondo, then more priming and red spot putty:

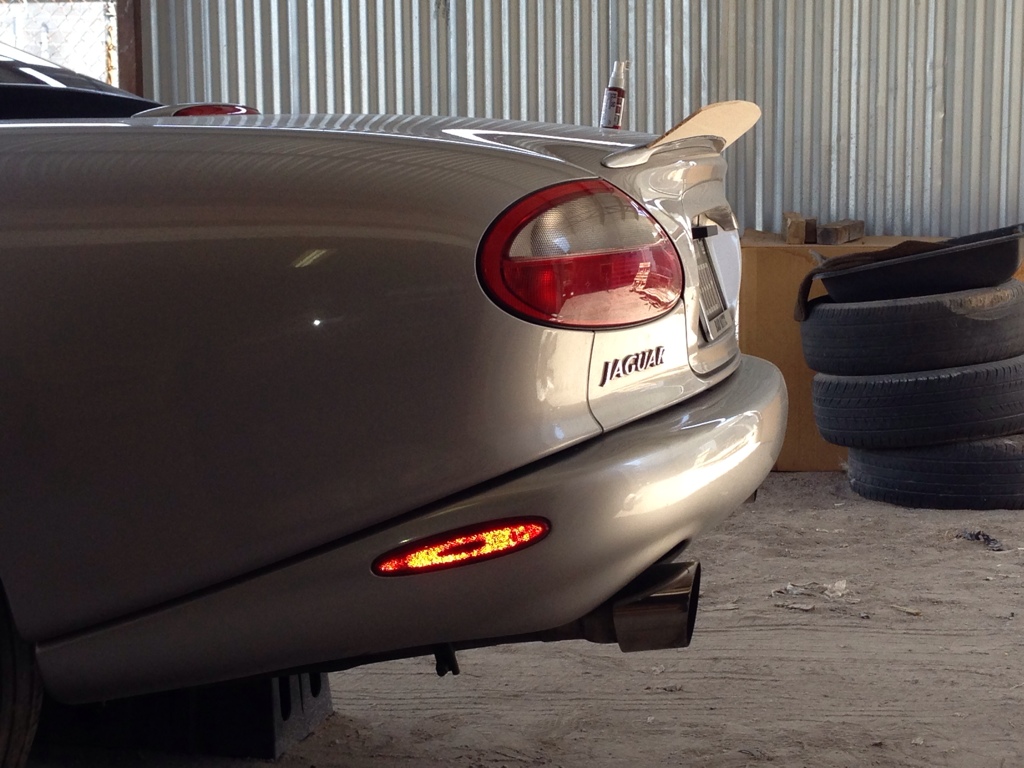
Ready to paint... that's what I'm doing right now!

It's now painted. I'll peel the masking off in about 10 minutes then take some pictures showing the spoiler from different angles:

Close up:
All done! Now, it needs a bath. That will wait for tomorrow:


First look at design in wood, superglued to OEM spoiler for mounting:
Rear:
It's time to fiberglass it on for strength. I always put resin onto wood first to get the fibers to stick better:
Yep, this will grab some air:
Tape it off because it's going to get messy:
Laying up the fiberglass:
Using loose fibers on the edges so that they are strong as well:
Rough sand (40 grit) so that the bodywork will stick:
Standard bodywork from here:
Several coats of Bondo then primer:
Hours of sanding, sculpting, re-application of small amounts of Bondo, then more priming and red spot putty:
Ready to paint... that's what I'm doing right now!
It's now painted. I'll peel the masking off in about 10 minutes then take some pictures showing the spoiler from different angles:
Close up:
All done! Now, it needs a bath. That will wait for tomorrow:
Last edited by Jeff in Tucson; 05-26-2013 at 07:54 PM.
#2
05-26-2013, 08:03 PM
The following users liked this post:
Jeff in Tucson (05-26-2013)
#3
05-26-2013, 08:18 PM

The following users liked this post:
Jeff in Tucson (05-26-2013)
#4
05-26-2013, 08:28 PM
Veteran Member
The following users liked this post:
Jeff in Tucson (05-26-2013)
#5
05-26-2013, 08:45 PM
Veteran Member
Impressive work and I don't mean to poo poo it but the asthetics seem a little off for me. The side profile is appropriately aggressive but the strait on rear view seems a little abrupt. I think it would fit the curves of the car better if it tapered more gently to the ends rather than the sudden tuck in.
Mina does one for the x150 that is similar to what I am imagining.
Jaguar XK / XKR Rear Spoiler Upgrade
Mina does one for the x150 that is similar to what I am imagining.
Jaguar XK / XKR Rear Spoiler Upgrade
The following users liked this post:
Jeff in Tucson (05-26-2013)
#6
05-26-2013, 09:36 PM
#7
05-26-2013, 10:10 PM
Veteran Member

The following users liked this post:
Jeff in Tucson (05-27-2013)
Trending Topics
#8
05-27-2013, 12:05 AM
Senior Member
Nice job Jeff, I think it looks GREAT!
I might even need to make a trip to Tuscon again, but I'll wait a bit for the tires and differential!
I also saw you new interior Leather and dye job, that really makes a difference .
You are one talented SOB ! LOL
No really you should be proud.
Happy Motoring...
I might even need to make a trip to Tuscon again, but I'll wait a bit for the tires and differential!
I also saw you new interior Leather and dye job, that really makes a difference .
You are one talented SOB ! LOL
No really you should be proud.
Happy Motoring...
The following users liked this post:
Jeff in Tucson (05-27-2013)
#9
05-27-2013, 03:51 AM
Jeff, you certainly have a unique car. The more I look at the picture of your new spoiler, the more I like it! Your car is awesome fast and it looks the part. The new seat covers look great too.
Dude, please do yourself a favor...get some upgraded brakes!!! Just sayin'!!!
Cheers to you and your awesome cat!
Jon
Dude, please do yourself a favor...get some upgraded brakes!!! Just sayin'!!!
Cheers to you and your awesome cat!
Jon
The following users liked this post:
Jeff in Tucson (05-27-2013)
#11
05-27-2013, 01:01 PM
#12
05-27-2013, 01:16 PM

The following users liked this post:
Jeff in Tucson (05-27-2013)
#13
05-27-2013, 01:25 PM
TucsonTops.com installed the leather seat covers that I got on eBay for less than $600. They were surprised at the low cost and said they charged a lot more to sew up their own. They charged $360 to do the installation. High quality shop. They do all of Falconworks' Jaguar restoration upholstery.
The following users liked this post:
beg3yrs (05-27-2013)
#14
05-27-2013, 02:06 PM
TucsonTops.com installed the leather seat covers that I got on eBay for less than $600. They were surprised at the low cost and said they charged a lot more to sew up their own. They charged $360 to do the installation. High quality shop. They do all of Falconworks' Jaguar restoration upholstery.
#15
05-27-2013, 04:20 PM
#16
05-27-2013, 05:30 PM
Veteran Member

#17
05-27-2013, 05:52 PM
Jeff, you certainly have a unique car. The more I look at the picture of your new spoiler, the more I like it! Your car is awesome fast and it looks the part. The new seat covers look great too.
Dude, please do yourself a favor...get some upgraded brakes!!! Just sayin'!!!
Cheers to you and your awesome cat!
Jon
Dude, please do yourself a favor...get some upgraded brakes!!! Just sayin'!!!
Cheers to you and your awesome cat!
Jon
I'm looking forward to future reports on how your car performs after you install your new LSD and other goodies!!!
Cheers!
Jon
The following users liked this post:
Jeff in Tucson (05-27-2013)
#18
05-27-2013, 07:46 PM
The following users liked this post:
Jeff in Tucson (05-27-2013)
#19
05-27-2013, 09:24 PM
Veteran Member
The following users liked this post:
Jeff in Tucson (05-27-2013)
#20
05-27-2013, 11:07 PM
It's OK to make a minor mistake in symmetry since it is easy to grind cut and adjust. Just jump in and get it done! =) It is pretty easy to modify a part that is out of symmetry with a few cuts/splices and some minor bodywork. You can also use visual trickery such as large rounded corners to keep mistakes from being obvious. For corners, you can always cut a template from a heavy piece of card paper, then pull a bead of Bondo with it to get the overall shape across a distance. You can also add a small amount of fumed silica to the Bondo to modify the putty into a thicker type of goo that is easier to shape prior to curing (it hardens faster, though). You can also make your own putty from scratch using polyester and the fumed silica and microspheres (easy to sand).
The following users liked this post:
plums (05-28-2013)