Going to refinish leather - easiest way to clean?
#1
 06-18-2017, 01:19 PM


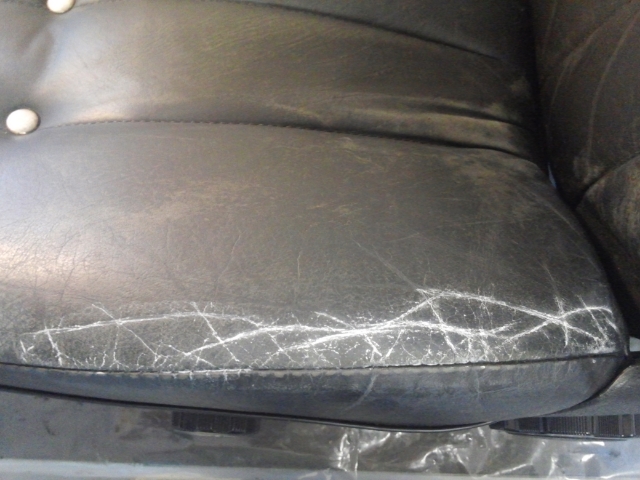
I'm poised to refinish my seats, they are worn. Just did a color test with magic Mender - I'm stunned, it is exact! I couldn't believe how much it took to get the test spot perfectly clean.
As I plan to move into the full job, I'm concerned about trying to clean really worn spots as directed (soap and h2O, followed by their special alcohol based prep). The act of cleaning may further destroy the surface complicating the job.
Anyone know of a solvent I can use here? Anywhere it touches will be patched and painted over. Ive got: xylol, lacquer thinner, denatured alcohol, brake cleaner (took me a while to believe the recommendation to clean the interior roof with that, but it works well!), ammonia.
Maybe I'm over thinking this, heck the surface to be patched will be sanded first, but I'd love to find a chemical way to clean the checkered surface to minimize wear from abrasion.
Thanks for looking, maybe there's a chemist out there who'll see an easy answer.
John
#2
06-18-2017, 01:59 PM

Senior Member
chemist here. use Stoner carpet cleaner and a soft sponge. it removed every stain that the zymol cleaner which is excellent could not remove. the Stoner cleaner also is great for seat belts and cleaned my headliner so well i am planning an informative post.
be careful with solvents like xylol, lacquer thinner, brake cleaner as they penetrate skin and most gloves not to mention that keeping this stuff off your skin is not enough as you are breathing it. lacquer thinner and brake thinner are neurotoxic and should not be used by the public without proper precautions such as a fitted mask.
be careful with solvents like xylol, lacquer thinner, brake cleaner as they penetrate skin and most gloves not to mention that keeping this stuff off your skin is not enough as you are breathing it. lacquer thinner and brake thinner are neurotoxic and should not be used by the public without proper precautions such as a fitted mask.
The following users liked this post:
Johnken (06-18-2017)
#3
06-18-2017, 03:54 PM
#4
06-18-2017, 06:51 PM

Veteran Member
Another chemist. I like using xylol or lacquer thinner, even acetone. They soften and even remove the existing dye, allowing better penetration of the new dye. But to do so you need to remove the seats, work outdoors and wear heavy plastic gloves that are not attacked by the solvent. The seat sides are vinyl, so be careful you don't damage them.
I have never used magic mender and will be interested in hearing of your results.
I have never used magic mender and will be interested in hearing of your results.
The following 2 users liked this post by RJ237:
CorStevens (06-19-2017),
Johnken (06-18-2017)
#5
06-18-2017, 08:59 PM

#7
06-18-2017, 09:56 PM

Veteran Member
Not a chemist.
I'm a big fan of Leatherique cleaning and refinishing products having done two 30+ year old leather interiors. They recommend cleaning the vinyl paint off the leather with rubbing alcohol, either 70% or 90%. I have used both and cannot tell the difference.
Gently cleaned with a 3M auto paint fine scuff pad and the alcohol will remove the majority of the old finish and expose the leather for refinish. Be careful of stitching as the scuff pad will cut through it.

The Leatherique finishing products do a grand job of making old leather look new. They also have a product to fill cracks.


How's that for a 36 year old interior?
I'm a big fan of Leatherique cleaning and refinishing products having done two 30+ year old leather interiors. They recommend cleaning the vinyl paint off the leather with rubbing alcohol, either 70% or 90%. I have used both and cannot tell the difference.
Gently cleaned with a 3M auto paint fine scuff pad and the alcohol will remove the majority of the old finish and expose the leather for refinish. Be careful of stitching as the scuff pad will cut through it.
The Leatherique finishing products do a grand job of making old leather look new. They also have a product to fill cracks.
How's that for a 36 year old interior?
Trending Topics
#8
06-19-2017, 04:20 AM

Veteran Member
I use cellulose thinners to remove the old surface and some of the dye then ethanol for a final clean.
Full thread here https://www.jaguarforums.com/forum/x...refurb-168683/
Full thread here https://www.jaguarforums.com/forum/x...refurb-168683/
The following users liked this post:
Johnken (06-19-2017)
#9
06-19-2017, 09:28 AM
Senior Member
Another chemist. I like using xylol or lacquer thinner, even acetone. They soften and even remove the existing dye, allowing better penetration of the new dye. But to do so you need to remove the seats, work outdoors and wear heavy plastic gloves that are not attacked by the solvent. The seat sides are vinyl, so be careful you don't damage them.
I have never used magic mender and will be interested in hearing of your results.
I have never used magic mender and will be interested in hearing of your results.
The following users liked this post:
Johnken (06-19-2017)
#10
06-21-2017, 08:48 PM

Senior Member
#11
06-21-2017, 10:22 PM


Join Date: Feb 2014
Location: Crossroads of America
Posts: 19,525
Received 13,007 Likes
on
6,498 Posts
+1 on the Leatherique products. Their Prepping Agent is a mild solvent blend that works really well as a lubricant for wet-sanding with 600 grit wet-or-dry sandpaper to remove approximately one one-thousandth of an inch of old dye, which is all you need to remove unless you are smoothing around cracks. You do not want to expose the leather any more than necessary because it is too easy to abrade it into suede, which complicates the application of new dye.
As test point mentioned, don't sand stitching. Also, when applying the new dye, save the stitching for last and apply the dye with just enough on your brush to work into the stitching in a "dry brush" technique, or if spraying, use a very light spray and multiple passes until it's "just right." Otherwise the stitching will soak up a lot of dye and look like plastic when it dries.
Something about the Leatherique method that is counterintuitive but very effective, is that prior to redyeing is a great time to condition the leather with Leatherique's Rejuvinator (oil), which floats deep contaminants to the surface, which you then clean away with Prestine Clean, followed by your surface preparation with Prepping Agent and sandpaper. If you don't condition and clean before you apply the new dye, deep contaminants will be trapped, and you won't be able to condition the leather until the dye has fully cured (which may take a month or more). Following Leatherique's method results in newly-dyed leather that is not only more thoroughly clean, but more supple and durable.
Typical disclaimers. I have no association with Leatherique, but I have been very pleased with the results of using their products in the sequence they recommend.
Cheers,
Don
The following 2 users liked this post by Don B:
Johnken (06-22-2017),
test point (06-22-2017)
#12
06-21-2017, 11:46 PM
Honest question here: Are you really getting any of the leather conditioning product to the leather when it has been surface dyed? It seems like you've got a protective barrier of 'paint' between your conditioner and the actual leather surface. Does it really soak through or is it just giving me a nice feeling and pleasant smell?
#13
06-22-2017, 10:10 AM
Senior Member
Honest question here: Are you really getting any of the leather conditioning product to the leather when it has been surface dyed? It seems like you've got a protective barrier of 'paint' between your conditioner and the actual leather surface. Does it really soak through or is it just giving me a nice feeling and pleasant smell?
#14
06-22-2017, 10:53 AM
Join Date: Feb 2014
Location: Crossroads of America
Posts: 19,525
Received 13,007 Likes
on
6,498 Posts
+1. This is also true of our '04 X350 - conditioner soaks right into the pores of the leather.
I should have mentioned in my previous post that when you are conditioning the leather in preparation for redyeing them, it's good to do the conditioning on a warm day, with the car sitting in the sun and all windows closed. I apply the Rejuvinator generously with my bare hands or rubber gloves (a cloth or sponge soaks up and wastes too much conditioner). Allow to soak in for an hour, then go back and reapply conditioner to spots where so much oil has soaked in that the surface has become dry or nearly dry again. I repeat this process until no areas become dry after an hour or two. Then clean with Prestine Clean and remove the seats to prepare for the dye work.
In our '88 XJ40, this process restored the softness and suppleness of leather that had become cardboard hard.
One other thought: when working with shallow cracks in the old dye, rather than filling them with Leatherique's crack filler, try carefully wet-sanding over the cracks with your sandpaper wrapped over a small flat sanding block to smooth the edges of the cracks and reduce the thickness of the old dye (and therefore the depth of the cracks).
Now use an artist's paint brush to apply one or more coats of dye only in the cracks. Allow to dry thoroughly (a few days is best), then use your 600-grit sandpaper and sanding block to dry scuff over the cracks to level the new dye with the old. Don't use the Prepping Agent or it will dissolve the new dye. Once you have the surface flat and smooth you're ready to apply dye to the entire surface.
Cheers,
Don
Last edited by Don B; 06-22-2017 at 10:45 PM.
The following 2 users liked this post by Don B:
Johnken (06-22-2017),
test point (06-22-2017)
#15
06-22-2017, 08:18 PM
Veteran Member
Vinyl and vinyl dye (paint) is very porous and sweat and leather treatments will migrate into the actual leather. If you are going to really restore the leather you are going have to strip it and bring it back.
I was really amazed at what surfaced from the Leatherique 'Restorer'. Many years of sweat and whatever that had soaked past the vinyl coating. It was obvious that you had to get that ugly crap out of the leather.
I used black garbage bags to cover the treated seats put in the sun. Boiled out out all sorts of stuff you would not want to sit on.
Used car lot restoration consists of wiping with alcohol and spraying on a vinyl paint made to be flexible enough to last for a few months.
Last edited by test point; 06-22-2017 at 08:21 PM.
#16
06-22-2017, 11:21 PM
Thanks whitehat! The thought that nothing was really getting through has always gnawed in the back of my mind. Glad to hear that the little voice was wrong.
#17
06-23-2017, 10:46 AM
Thanks to all! Anthony who mentioned Magic mender, and all the chemists with the great advice.
I finished the job, it dried an I am thrilled. I would up using Xylol to clean, followed by Magic Eraser then as recommended by instructions their alcohol based cleaner followed by 350 grit sand paper.
I rushed the layers of patch over a hole, my fault, you can see an irregularity. Will headdress it later.
This keeps my from cutting perfection, but it was my choice/mistake and no one will notice until they decide to inspect closely.
Where this brand gets 4 stars / perfection is in the paint/dye. It is a perfect match. I was even able to order using Jaguars AGD code.
I never used Leatherique so can't compare. Very happy with this brand though.
THANKS AGAIN to all,
John
The following users liked this post:
Don B (06-23-2017)