When you click on links to various merchants on this site and make a purchase, this can result in this site earning a commission. Affiliate programs and affiliations include, but are not limited to, the eBay Partner Network.
Help Needed in removing CD Changer from XKR 2000 Conv
Hi
I've been reading up on removing the CD Changer but it looks a lot more compicated han expected.
There's a lot of electronics and wires at the left side of the rack so I can't easily get to the back bolt and on the top of the rack is all the workings for the roof so I really don't want to mess anything up.
Looking at the CD Changer it doesn't look you you can get to the screws at the sides easily anyway.
Surely I must be missing something simple. The idea of having a rack is to remove things from it without having to remove the rack.
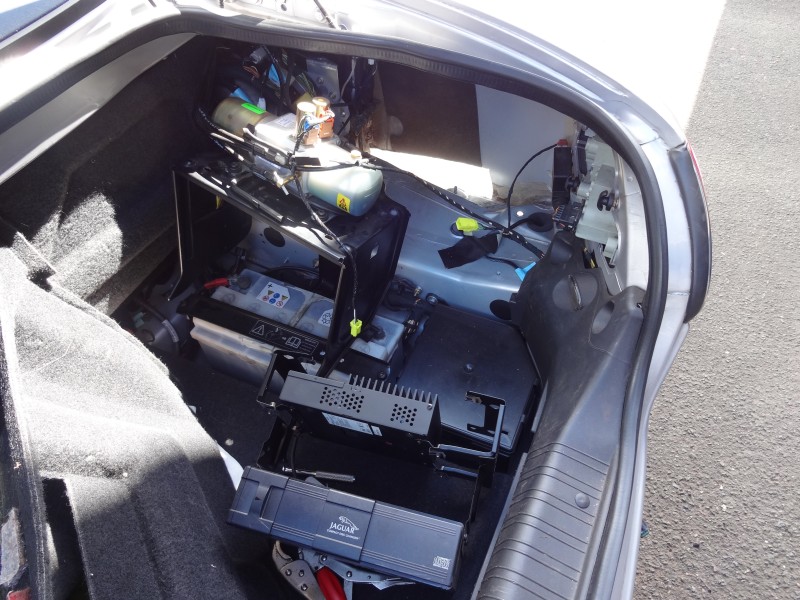
I have attached a photo of the rack, CD Changer etc.
Any help will be greatfully appreicated.
Kind Regards
Rocky15
Jaguar XKR 2000 model with CD Changer, Nav and Alpine Premium Sound
It has been a while since I did my CD changer, but you do not have to remove the rack as I remember. It is a little tight (everything on these cats is tight).
Surprised there's not better pics/how-to's on the forum.
I remember removing the contents of the cage first before I removed the cage. Here is a snippet from another post.
First I removed the inner amp/cd cage, the outer cage is held in by 5 bolts, the first three came out ok but the fourth captive nut sheared off, need to sort that out later.
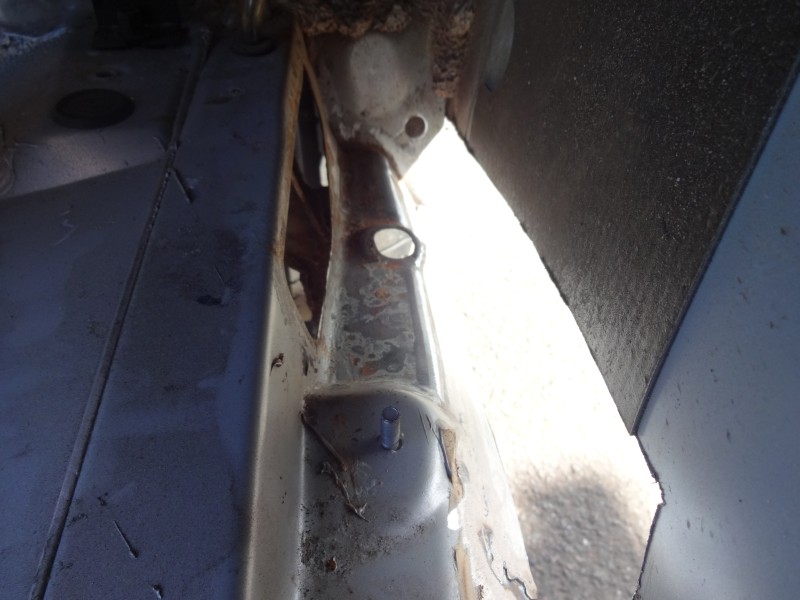
The fifth fixing point is a nut in the middle behind the cage and can not be seen, you have to remove it by touch, the outer cage can then be manipulated out. You can see the stud for the fifth fixing point below.
The stud.
Last edited by RaceDiagnostics; 12-27-2015 at 10:25 AM.
I'm not sure but it seems like you might have an answer. If not:
I always remove mine to work on it while attached to the black metal rack.
1) remove the two plugs into the amplifier.
2) In my opion leave the plug into the changer's umbillical alone for a bit. This one takes much more muscle than you'd ever expect, so much that if you're like me, you will be much more comfortable with a clear view after you unbolt and swing the rack into the trunk.
3) Get star bolt driver and loosen the two front bolts that attach the convertible pump to the top of the rack. They are not very tight. Once loosened, wiggle the pump out of the rear pressure fit connection. BE VERY GENTLE with the electric connections on top. There are way too many stories of folks breaking these connections inadvertantly. You do not need to disconnect them.
Once the pump is loose, it will be left in that verticle space so as not to stress any hoses.
4) Un bolt the 3 bolts securing the bottom of the rack to the floor. The one in the rear is the hardest to reach. Frankly I can attest that it is not needed, I've only used the two front/back bolts for well over a year now with no effects at all.
5) Now swing the rack into the trunk while balancing the pump. Gently lay down the pump and disconnect that CD changer umbillical cord connection.
6) Removing the CD changer from the rack is self evident from here.
7) You need to unbolt the 3 hex or allen wrench head grey bolts from the back of the cd changer to get its plastic cover off.
8) If you're going to remove the CD player chassis from the plastic enclosure, take a note of how and where the spring attaches to the chassis. When re-assmbling it, I found it much easier to first attach the spring to the black chassis cover, then with long thin longnose pliers, attach the spring to the chassis.
9) If you need to separate the chassis from the sub chassis (trust me on this one) Take a picture of how the rubbery isolation pads attach to that chassis (i.e. from inside out or outside in). This one will make sense to anyone who is on this path with the unit in front of them.
If you need info on the "eject" button, just ask. I can save time for you. Good luck with it.
I've had another quick look anyway and discovered removing two screws on top of the rack and two at the side loosens the inner frame the CD, Nav and Amp are attached to.
I can see it will possibily slide out once the amp wires at the side are unplugged but will try this tomorrow now. I would imagine there's enough cable at the back of these units to allow them to come out and unplug (hope so) All I want to do is make an aux input.
Looking at some of the other threads where they say undo the rack and move it forward must refer to another car as that's not what the idea of a rack system is and looking at the photo I sent I'd be very nervous abut doing that.
I just posted a reply. I think I might only need to remove two nuts and the top of the rack and one at either side. The seems to release the inner frame with the changer on and the I assume once the amp wires disconnected the whole thing will slide out then I can get the CD Changer.
I found it easiest to take the two side ones out first, then the top two. Reverse to install. The hard part is unplugging the leads on the forward face before you slide the rack out.
The rack slides out with a little gentle manoeuvring and there is enough lead length on the back plugs to unplug them once the rack is slid clear of the frame.
Put a rag on top of your battery to prevent any chance of shorting it with the rack.
 12-27-2015, 07:29 AM