
Loud clunk from front left when turning, getting worse...
#41
 03-25-2013, 07:22 PM

Veteran Member
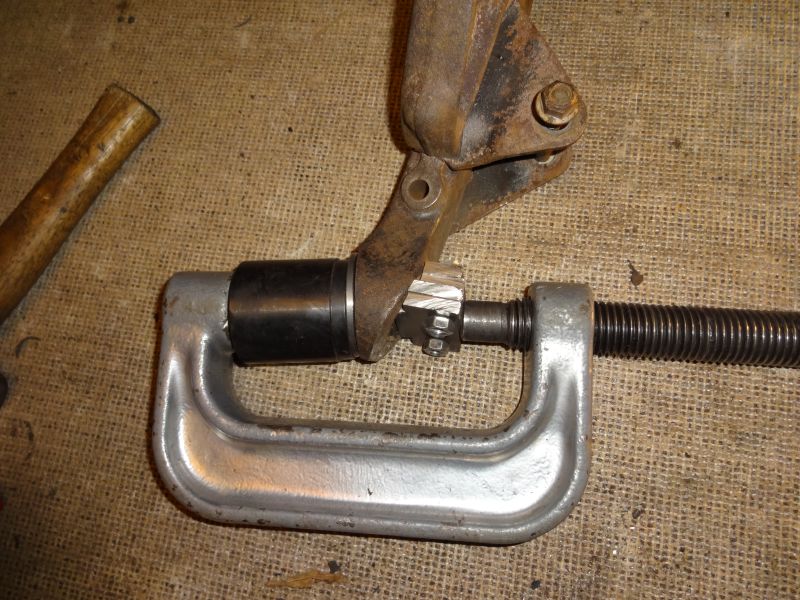
Now here is a tricky job, I've been trying to push in the new lower ball joint with my C clamp and a simple tool shown in one of the pictures above, however it has been very time consuming and due to tool problems am looking for an alternative solution.
Does anyone else know how to do it?
Does anyone else know how to do it?
Prepare oven mitts, work surface and all tools.
Then working quickly to avoid losing the advantage, marry the two.
You might find it helpful to polish the bore with crocus cloth beforehand.
It might also be possible to use a length of square steel tubing long enough to run from under the bolt shown in the picture to above the hole for the balljoint and use it as one of the bearing surfaces for the clamp. The other end of the clamp goes on the balljoint.
Last edited by plums; 03-25-2013 at 07:33 PM.
#42
03-26-2013, 05:29 PM

If you do not have any rubber bushings in the arm yet, how about putting the joint in the freezer overnight, the arm in the oven at 300F for two hours.
Prepare oven mitts, work surface and all tools.
Then working quickly to avoid losing the advantage, marry the two.
You might find it helpful to polish the bore with crocus cloth beforehand.
It might also be possible to use a length of square steel tubing long enough to run from under the bolt shown in the picture to above the hole for the balljoint and use it as one of the bearing surfaces for the clamp. The other end of the clamp goes on the balljoint.
The rubber bushes are already in and the balljoint is three quarters in so no deal there, but I will go this way on the other arm, thanks.
But I did have a go with a different design of tool.


And it's in!
#43
04-07-2013, 03:46 PM
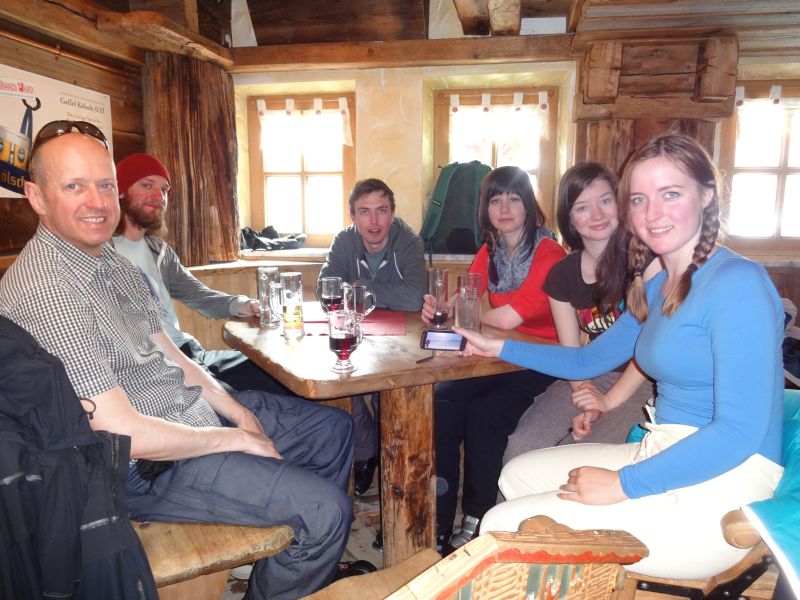
Had a break from the XK for a week or so to get a bit of boarding in.
Top station at Hintertux, -10degC

Down a crevasse.

In the bar with some of my kids, one missing.
But today I got back into the garage, first on with the engine support.

It took a while to spot where to hook it up, different to what is shown in the manual.

Once it was taking the strain I removed the front supports, as expected the two bolts into the box section sheared but the two though the front rubber mounts came out ok. The bolts into the engine supports also came out no problem but access to the rear rubber mounts is very restricted, I think it would need a crows foot spanner to remove which I don�t have. So I decided to remove the four screws holding the rubber mounts from the cross member and leave them attached to the chassis leg.

After removing a couple of screws the torx bit looked like this, so I set off to the tool shop for a better quality one which did the job.

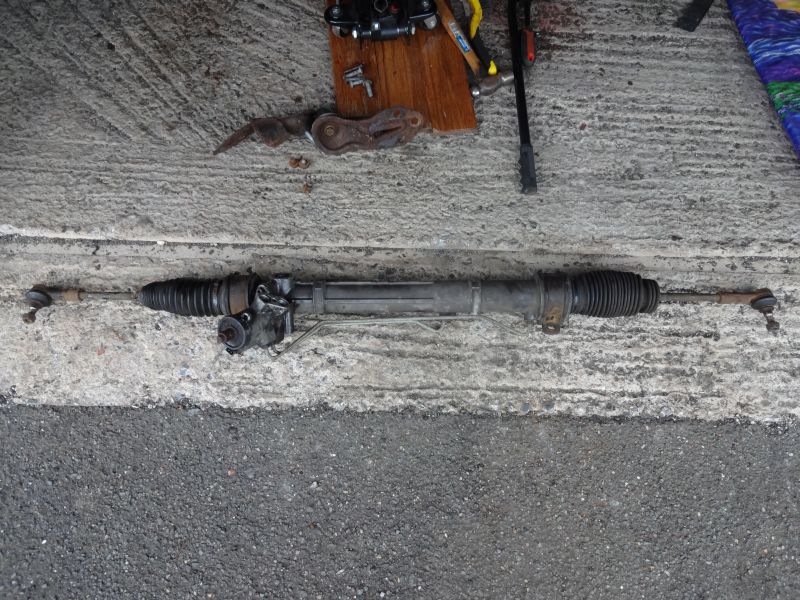
Next I started to remove the steering rack.

I decided to remove it completely first as the u-joint connection to the steering column was a bit stuck and I was worried that it would be damaged as the cross member was lowered, also the pipe work to the rack is a bit interweaved so it seems safer to remove it first.
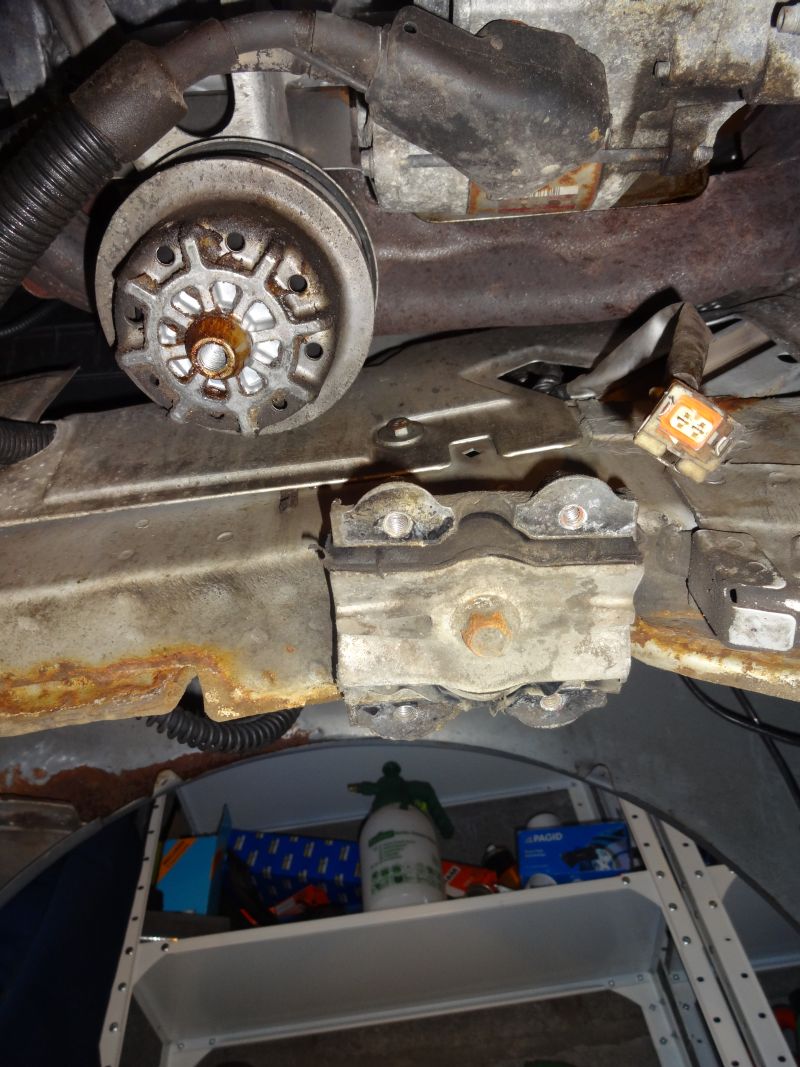
The cross member was then clear to be lowered and removed.

Now I found this lying on the back of the cross member, It is one of the top fulcrum bolt spacers, not sure if I dropped it or if was lying there from a previous repair.

The left rubber mount is in good condition, but the right one is shot.

The rear chassis led mounts still in place.

And off the car.

The bodywork behind the cross member looks ok.

Now these four sheared bolts will need some attention, I plan to screw them into the box section, this will be easier than trying to screw them out.


Top station at Hintertux, -10degC
Down a crevasse.
In the bar with some of my kids, one missing.
But today I got back into the garage, first on with the engine support.
It took a while to spot where to hook it up, different to what is shown in the manual.
Once it was taking the strain I removed the front supports, as expected the two bolts into the box section sheared but the two though the front rubber mounts came out ok. The bolts into the engine supports also came out no problem but access to the rear rubber mounts is very restricted, I think it would need a crows foot spanner to remove which I don�t have. So I decided to remove the four screws holding the rubber mounts from the cross member and leave them attached to the chassis leg.
After removing a couple of screws the torx bit looked like this, so I set off to the tool shop for a better quality one which did the job.
Next I started to remove the steering rack.
I decided to remove it completely first as the u-joint connection to the steering column was a bit stuck and I was worried that it would be damaged as the cross member was lowered, also the pipe work to the rack is a bit interweaved so it seems safer to remove it first.
The cross member was then clear to be lowered and removed.
Now I found this lying on the back of the cross member, It is one of the top fulcrum bolt spacers, not sure if I dropped it or if was lying there from a previous repair.
The left rubber mount is in good condition, but the right one is shot.
The rear chassis led mounts still in place.
And off the car.
The bodywork behind the cross member looks ok.
Now these four sheared bolts will need some attention, I plan to screw them into the box section, this will be easier than trying to screw them out.
#44
04-09-2013, 03:37 PM
I now have the new cross member front bush (~�18) and V mounts (~�60 each) on order from ebay and Rimmer Bros, so in the mean time I cleaned up the crossmember, removed the stabiliser bar then tried to push out the old bush. Unfortunately the C clamp kit I have does not have a big enough cup to push out the front bush so I may have to go to Jaguar to get it done.

I then went on to the ball joint in the second lower arm, it started to go in but then my home made tool started to slip, I will need to reshape it tomorrow to get the ball joint all the way in.

I then went on to the ball joint in the second lower arm, it started to go in but then my home made tool started to slip, I will need to reshape it tomorrow to get the ball joint all the way in.
#45
04-09-2013, 04:28 PM

#46
04-10-2013, 04:50 PM
Spoke to jag and will see them on Friday morning to get a price to push the new bush in, they want to see the subframe before giving a price.
Anyway, onwards.
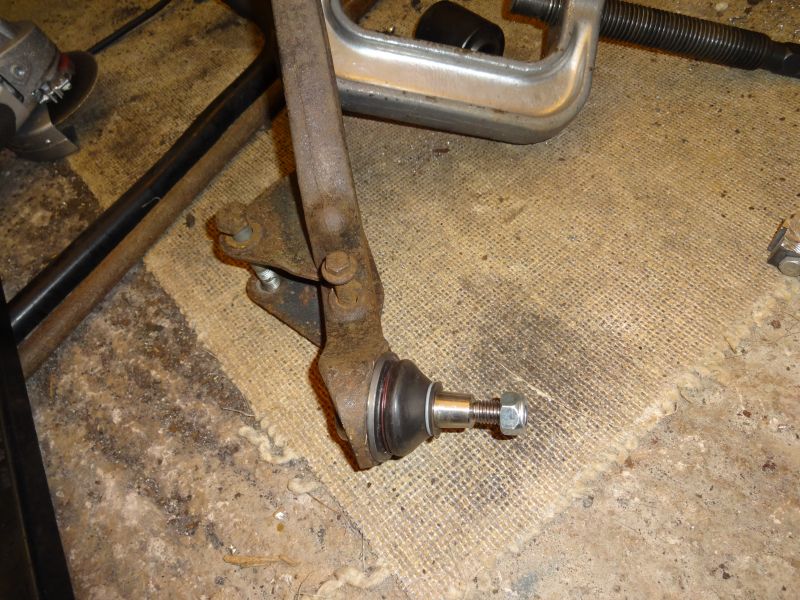
I ground down the tool for the lower arm, it was almost there...

After a bit more grinding, I got it fully seated.
Next job was to drill out the bolts that holds the oil cooler pipe brackets.

Old bracket prised off.

I then drilled the rest of the bolt out with a smaller bit, then tapped out the thread.

All done, small steps taking me closer each day.

Anyway, onwards.
I ground down the tool for the lower arm, it was almost there...
After a bit more grinding, I got it fully seated.
Next job was to drill out the bolts that holds the oil cooler pipe brackets.
Old bracket prised off.
I then drilled the rest of the bolt out with a smaller bit, then tapped out the thread.
All done, small steps taking me closer each day.
#47
04-11-2013, 04:58 PM
Easy job to start off with tonight, pushed in the other upper arm ball joint.

Next on to the hub carrier, I now know it was a mistake to chisel off the screw heads, it is better to sacrifice the dust/heat shield and buy a new one rather than have this hassle, that's what I did with the other side.
First, the three studs were centre punched.

Then drilled with a 3mm drill.
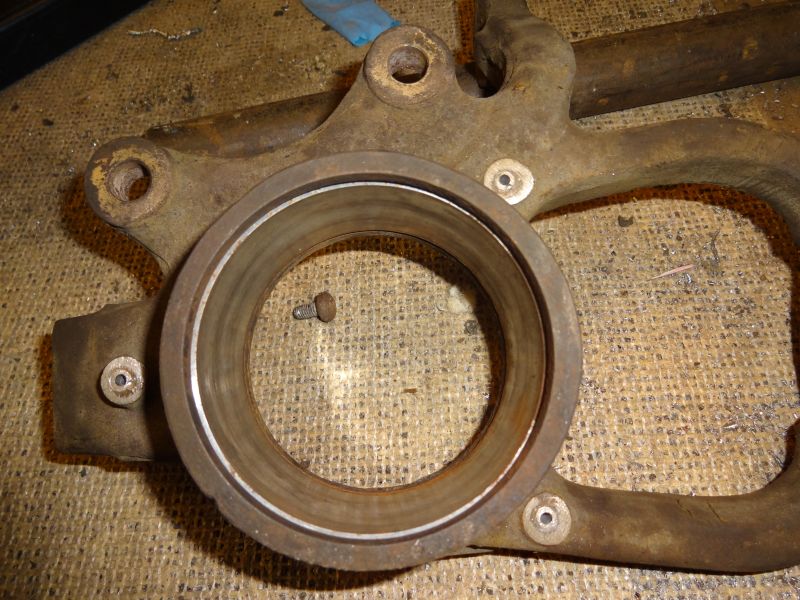
Almost centred.

Opened up another mm.
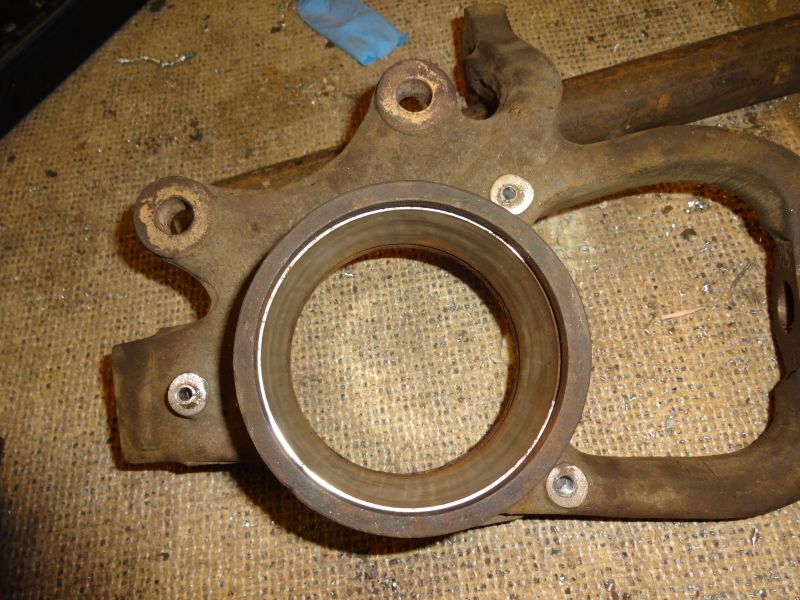
Luckily the bottom right one opened right up.
Now I swore I would never use an "easy out" again (the most inappropriately named tool going) but I did have a go in the left stud.


Now for the last stud, I tried the "easy out" again, but no luck, and this time I did not force it as a sheared "easy out" means a lot of grief.
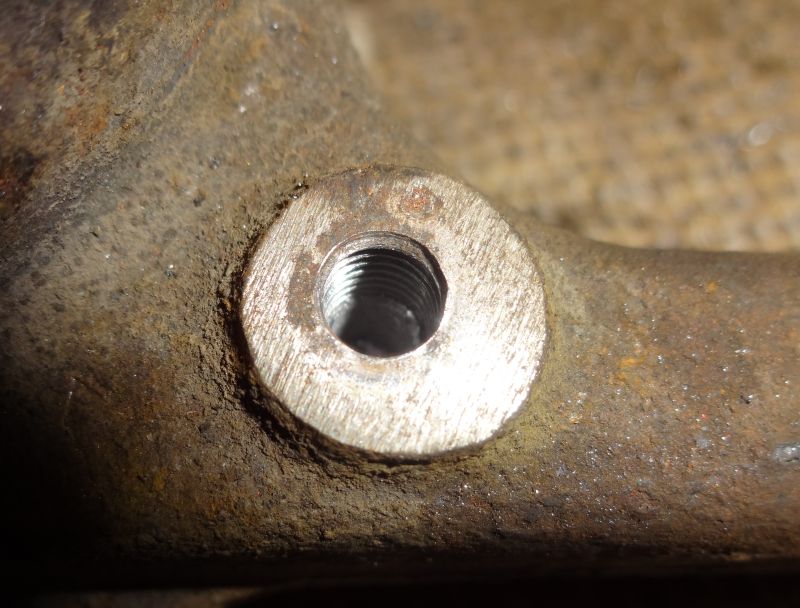
I decided to drill it out to 5mm and ended up with this, a broken drill bit stuck in the hole.

But it did come out!
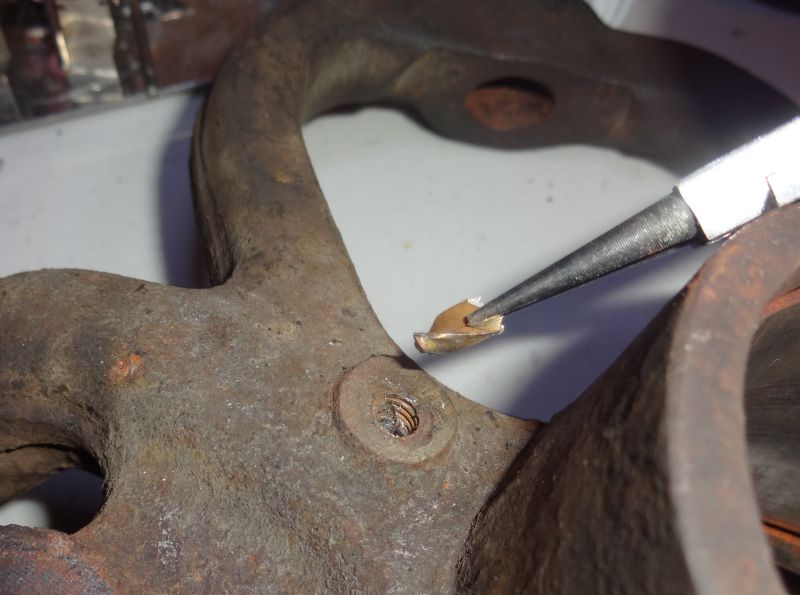
Close up, this should clean up ok.

Next on to the hub carrier, I now know it was a mistake to chisel off the screw heads, it is better to sacrifice the dust/heat shield and buy a new one rather than have this hassle, that's what I did with the other side.
First, the three studs were centre punched.
Then drilled with a 3mm drill.
Almost centred.
Opened up another mm.
Luckily the bottom right one opened right up.
Now I swore I would never use an "easy out" again (the most inappropriately named tool going) but I did have a go in the left stud.
Now for the last stud, I tried the "easy out" again, but no luck, and this time I did not force it as a sheared "easy out" means a lot of grief.
I decided to drill it out to 5mm and ended up with this, a broken drill bit stuck in the hole.
But it did come out!
Close up, this should clean up ok.
Last edited by RaceDiagnostics; 04-11-2013 at 05:08 PM.
#48
04-12-2013, 01:04 PM
I dropped the subframe off with a new bush at Jaguar today, they quoted �100 to do the job, marginally cheaper than buying the special tools, but pretty good for 10 minutes work.
I exclaimed at the charge but the receptionist explained, "someone does have to for the marble and alabaster floors in the workshop and showroom"
I exclaimed at the charge but the receptionist explained, "someone does have to for the marble and alabaster floors in the workshop and showroom"
#49
04-15-2013, 04:36 PM
The subframe is still with jaguar but there is still plenty for me to be getting on with.
The parts.

And after sand blasting and painting with epoxy mastic.
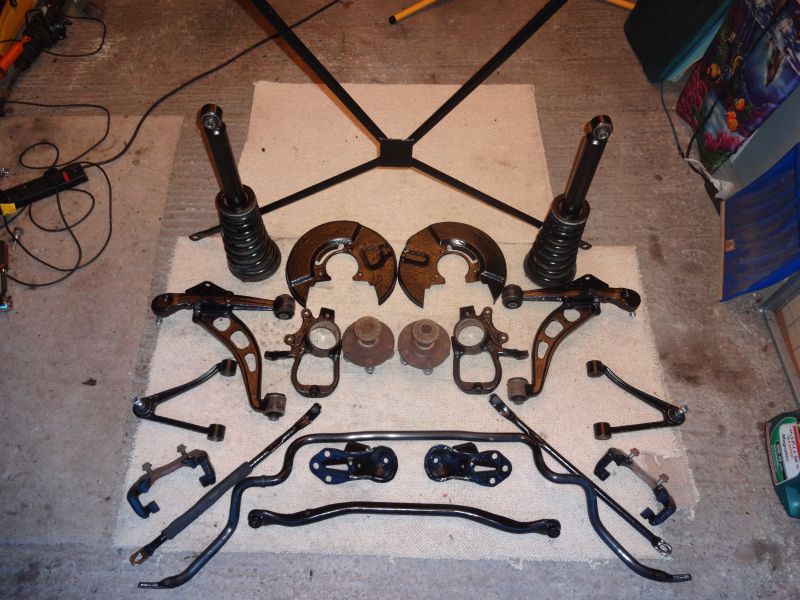
Some of the parts that came off and damaged tools.

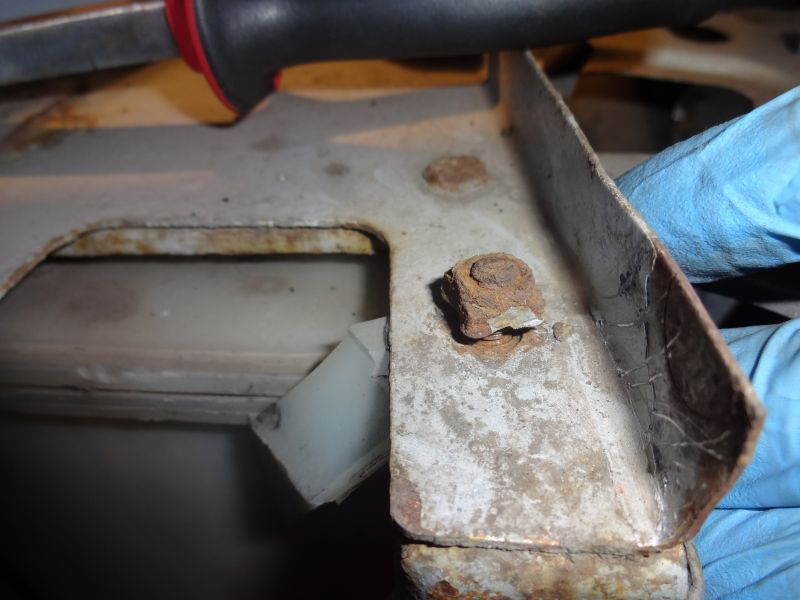
Next I found this unbelievable bodge, this nut is the fixing for the X cross brace, it was stuck in with RTV silicone sealant, looks like the bolt had sheared on a previous repair and this was the fix!

Next, on to find a fix for the four sheared bolts, two for the subframe braces and two for the X brace. Drilled out the first bolt.


I then tapped out the bolt and screwed in an M8 bolt, my plan was to screw the bolt through into the cavity and then cut off the bolt head.

One step forward and two steps back, now need to rethink my plan, the m8 bolt sheared off too.

The parts.
And after sand blasting and painting with epoxy mastic.
Some of the parts that came off and damaged tools.
Next I found this unbelievable bodge, this nut is the fixing for the X cross brace, it was stuck in with RTV silicone sealant, looks like the bolt had sheared on a previous repair and this was the fix!
Next, on to find a fix for the four sheared bolts, two for the subframe braces and two for the X brace. Drilled out the first bolt.
I then tapped out the bolt and screwed in an M8 bolt, my plan was to screw the bolt through into the cavity and then cut off the bolt head.
One step forward and two steps back, now need to rethink my plan, the m8 bolt sheared off too.
#50
04-15-2013, 08:43 PM
Veteran Member
#51
04-15-2013, 09:02 PM
Veteran Member
LOL yes, that is what I was thinking also. But I am reminded how all the British undercarriages rust every time I watch Wheeler Dealer. When Ed China puts those cars up on the rack, they all look like rust buckets from a brine pool. He doesn/t even try to clean it up or use POR15. I guess that's the price of living in Britain.
#52
04-16-2013, 05:01 PM
Ok tonight I drilled out both the bolts to 8.5mm, then tried to knock them through with a drift. In both cases the captive nuts which I guess were welded on, popped off. I think I will be able to retrieve the remains of the bolt and captive nuts though various drain holes so I started to remove the washer bottle to get access.
But the question now is, how to attach new nuts, I guess the options are;
1) Fit riv-nuts
2) Weld a couple of nuts to a plate and then weld the plate in place.
3) any other suggestions?

But the question now is, how to attach new nuts, I guess the options are;
1) Fit riv-nuts
2) Weld a couple of nuts to a plate and then weld the plate in place.
3) any other suggestions?
#53
04-16-2013, 05:14 PM

Join Date: Oct 2007
Location: PHX some of the time
Posts: 117,538
Received 6,330 Likes
on
5,516 Posts
#54
04-19-2013, 04:49 PM
Back to the car tonight, I started to remove the windscreen washer tank to get access to the chassis for more rust treatment and to get the sheared bolt out of the access hole behind the washer bottle.
The bottle is held in with three bolts, this one is tricky to get to from below, and the captive nut sheared off so I had to remove the headlight to get access to cut it off.

While removing the headlanp the locating fork also snapped off, should be easy enough to make a fix.

Anyway I finally got access to the hole in the box section to get the sheared bolt out.

This is what came out the hole.


The bottle is held in with three bolts, this one is tricky to get to from below, and the captive nut sheared off so I had to remove the headlight to get access to cut it off.
While removing the headlanp the locating fork also snapped off, should be easy enough to make a fix.
Anyway I finally got access to the hole in the box section to get the sheared bolt out.
This is what came out the hole.
#55
04-20-2013, 04:52 PM
Prep work for the new "captive" nuts, made from 2mm plates and M12 nuts.

My welding skills are unfortunately very poor.

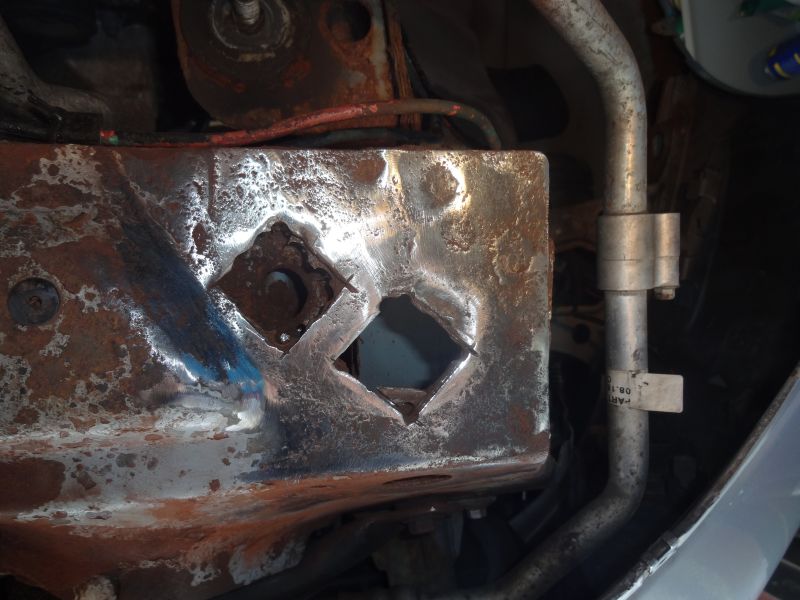
Next on make cut out for the recessed bolts.

This was what remained of the second nut/bolt.

I then went on to weld in one of the plates, and test the strength of the welded nut, I could feel the nut start to give way so cut out the new plate, no pics of this as I was so pi*** of. I'll have a rethink tomorrow.
My welding skills are unfortunately very poor.
Next on make cut out for the recessed bolts.
This was what remained of the second nut/bolt.
I then went on to weld in one of the plates, and test the strength of the welded nut, I could feel the nut start to give way so cut out the new plate, no pics of this as I was so pi*** of. I'll have a rethink tomorrow.
#56
04-21-2013, 12:18 PM
OK today I got some 3mm plate (actually square washers from B&Q) and welded on some new nuts, I was able to turn the welder up a bit as suggested with the 3mm plate. Hopefully these will hold a bit better.

I also decided to lap weld on the new plate rather than try to make them flush, as yesterday I was starting to melt the edge of the box section.
New plates tacked in place to allow a trial fit of the link to the cross member.

I was please with that but ran out of time to finish the weld.
I also cut out the sheared bolts from the other side of the car.
I also decided to lap weld on the new plate rather than try to make them flush, as yesterday I was starting to melt the edge of the box section.
New plates tacked in place to allow a trial fit of the link to the cross member.
I was please with that but ran out of time to finish the weld.
I also cut out the sheared bolts from the other side of the car.
Last edited by RaceDiagnostics; 04-21-2013 at 12:20 PM.
The following users liked this post:
plums (04-22-2013)
#57
04-22-2013, 03:54 AM
Veteran Member

#58
04-23-2013, 08:06 AM
Thanks for the moral support, the garage can be a lonely place.
Anyway I had a welder buddy drop by last night to comment on the patches I have been putting on. He suggested that I just tack them in place and rebuild the car without the "subframe" to "crossmember" link in place and drive the car down to his shop (about a mile away) where he will do a good job to professionally weld them in place.
He did not think that it would be any issue to drive the car that short distance without the link pieces in place, he though that the purpose of them was to support the bottom of the bolt that goes through the from subframe bush to prevent long term stress as it would otherwise be acting as a long lever.
I think I will go down that route as I would need to buy a gas regulator, gas bottle and new welding wire to get a neat weld myself.

#60
04-23-2013, 04:35 PM
On to my last sheared screw tonight, it is one if the screws that hold on the odd little box just in front of the crosmember front bush.
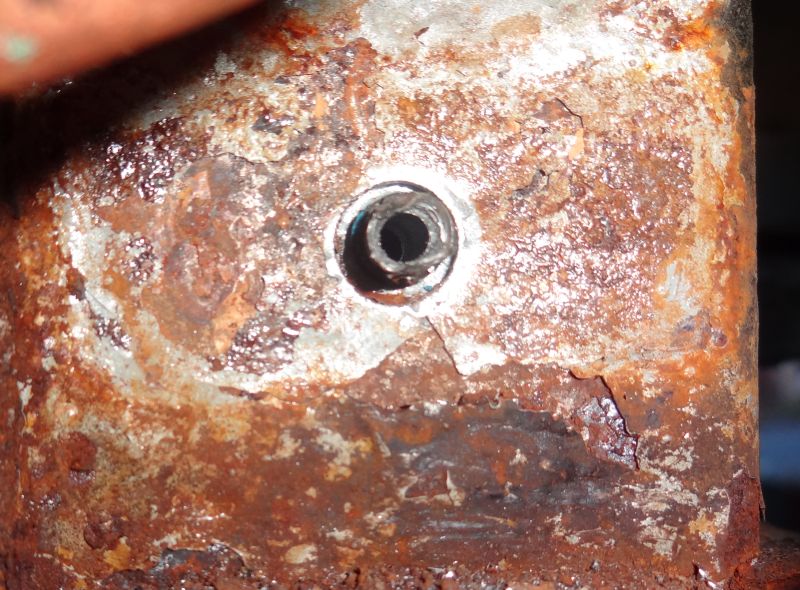
and once drilled out.

Then on to the fuel evaporation canisters which I wanted to take out to replace the braclet and de-rust.


I bet Jag will charge a fortune for this bracket so will look for a second hand one.
and once drilled out.
Then on to the fuel evaporation canisters which I wanted to take out to replace the braclet and de-rust.
I bet Jag will charge a fortune for this bracket so will look for a second hand one.