Loud clunk from front left when turning, getting worse...
#101
 05-03-2013, 12:36 PM


Guys, I need some help with refitting the front subframe, I'm thinking about bolting the the rear V mount to the chassis leg before fitting the subframe, rather than fitting it to the sobrame (with the 4 smaller bolts) then bolting it to the car.
The problem is that access to the bolt hole in the V mount is virtually impossible after it is screwed to the subframe.
How have you done it?
The problem is that access to the bolt hole in the V mount is virtually impossible after it is screwed to the subframe.
How have you done it?
#102
05-03-2013, 03:06 PM
Veteran Member
I responded to your PM, but apparently the msg did not get sent.
I left the V-mount in place primarily because it was serviceable and therefore wasn't necessary to remove it. Consequently it was already on the cross member when I installed new engine mounts.
I installed the engine mount first to the engine mount brackets, while the crossmember (and attached V mount) was still off the car. The the stud on the engine mount fits up into the engine mount bracket. It is held in place by a single nut [12-14mm?] attaching the motor mount stud to the cast aluminum engine mount bracket.
While it is a tight fit up in there, I found that if the threads on both the engine mount top stud and the nuts are clean; I could reach up and over the cast bracket and finger tighten the nuts onto the engine mount studs.
These nuts can then be tightened from underneath. I used a 3/8 ratchet drive, and deep well socket, with the handle pointed towards the rear of the car. The wrench can only swing about 20 degrees arc of movement, but the nut can be accessed, and it can be tightened down. I estimate the nut was tightened to at least 20-25 ftlbs. Loctite was used to insure the nut doesn't back off.
For the most part, the weight of the engine weight holds itself onto the mount, and this attachment point is only there to insure the engine doesn't bounce up and down. (Like mine was doing with two (2) broken mounts... but that is another story)
Last edited by GordoCatCar; 05-03-2013 at 03:13 PM.
#103
05-03-2013, 10:32 PM
Veteran Member
It is held in place by a single nut [12-14mm?] attaching the motor mount stud to the cast aluminum engine mount bracket.
While it is a tight fit up in there, I found that if the threads on both the engine mount top stud and the nuts are clean; I could reach up and over the cast bracket and finger tighten the nuts onto the engine mount studs.
While it is a tight fit up in there, I found that if the threads on both the engine mount top stud and the nuts are clean; I could reach up and over the cast bracket and finger tighten the nuts onto the engine mount studs.
A crowsfoot wrench on a universal and 12 inch extension can reach from the top.
eg. Snap-on BFCRM 15A which is a ratcheting ring type crowsfoot. $20 from the truck or online.
Brutal uses a different type which is more expensive, but more versatile.
Last edited by plums; 05-03-2013 at 10:35 PM.
The following users liked this post:
GordoCatCar (05-03-2013)
#104
05-04-2013, 09:52 AM
Guys, I dont think I have explained my self very well.
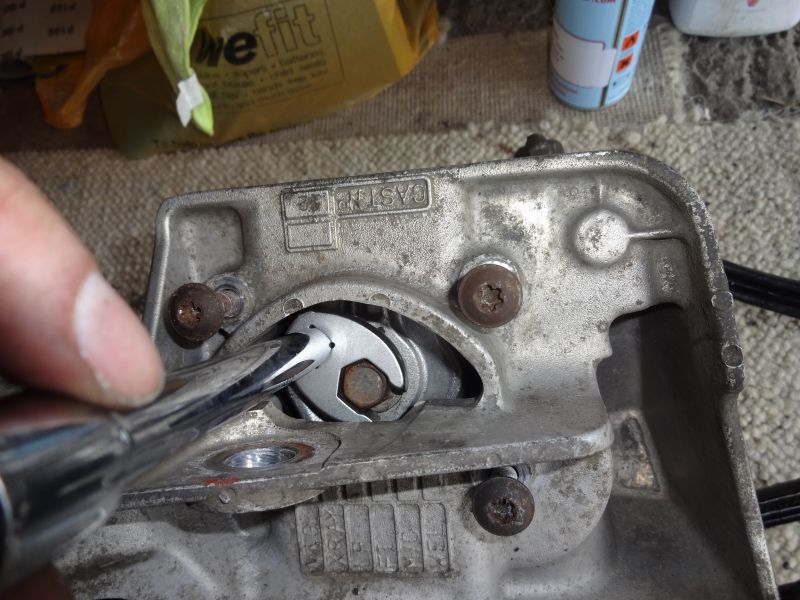
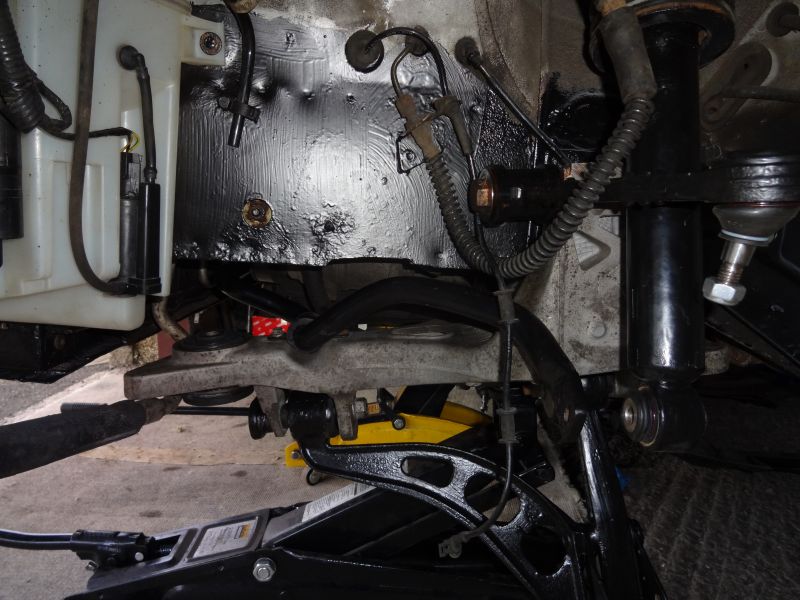
This is the bolt in question. It seems impossible to get a normal socket on to.

I have bought a crows foot spanner set and have ground this one down to fit.
The alternative is to bolt the V mount to the chassis leg first, but then the lower arms have to be put on after the subframe is put onto the car to get access to the 4 smaller screws.
One worry also it to get the alignment of the four screw hols in the right place for the subframe.
This is the bolt in question. It seems impossible to get a normal socket on to.
I have bought a crows foot spanner set and have ground this one down to fit.
The alternative is to bolt the V mount to the chassis leg first, but then the lower arms have to be put on after the subframe is put onto the car to get access to the 4 smaller screws.
One worry also it to get the alignment of the four screw hols in the right place for the subframe.
#105
05-04-2013, 10:40 AM
Veteran Member
I ground down the subframe flange at that point. Used a dremel and 1/4" dia. aluminum cutting tool to carve out just enough space to fit the socket more vertical over the fastener. Also the bolt was a torx head, not a hex head. The torx allowed for some angle on the bit end. But be careful to not strip out anything here.
Installation used a 3/8 drive with a wobbly extension... not a universal extension, a wobbly, which gives 5-10 degrees of angle off the end of the torx socket
Installation used a 3/8 drive with a wobbly extension... not a universal extension, a wobbly, which gives 5-10 degrees of angle off the end of the torx socket
Last edited by GordoCatCar; 05-04-2013 at 10:43 AM.
The following users liked this post:
RaceDiagnostics (05-04-2013)
#106
05-04-2013, 11:19 AM
#107
05-04-2013, 11:28 AM

#108
05-04-2013, 11:39 AM


#109
05-04-2013, 11:45 AM

#111
05-04-2013, 12:59 PM
#112
05-05-2013, 10:35 AM


#113
05-05-2013, 02:31 PM
#115
05-06-2013, 02:19 PM
#116
05-06-2013, 02:52 PM
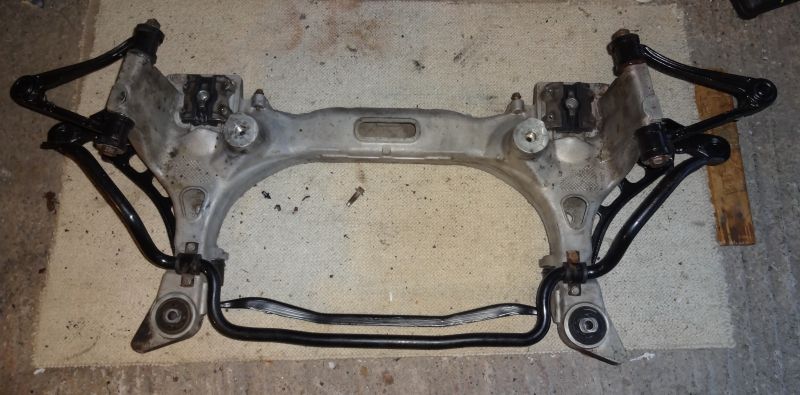
Spot the mistake..................
The anti roll bar is upside down, arghhhhhh.
So out it came and the bar was swapped over, I also took off the lower arms to make it easier to manoeuvre.

The parts dept at the Jag dealer were closed today so I pushed on with the old subframe bolts, I will swap out for the torx version later as I didn't want to take these up to the recommended torque level.

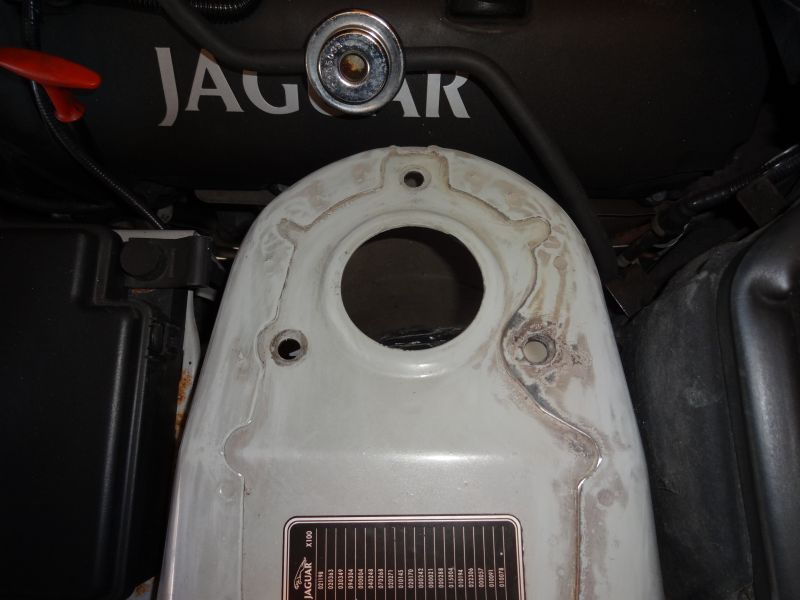
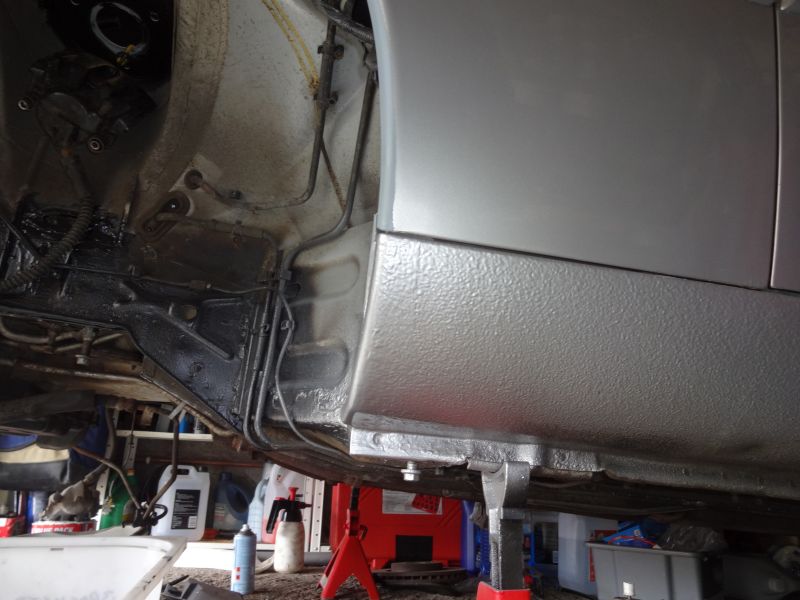
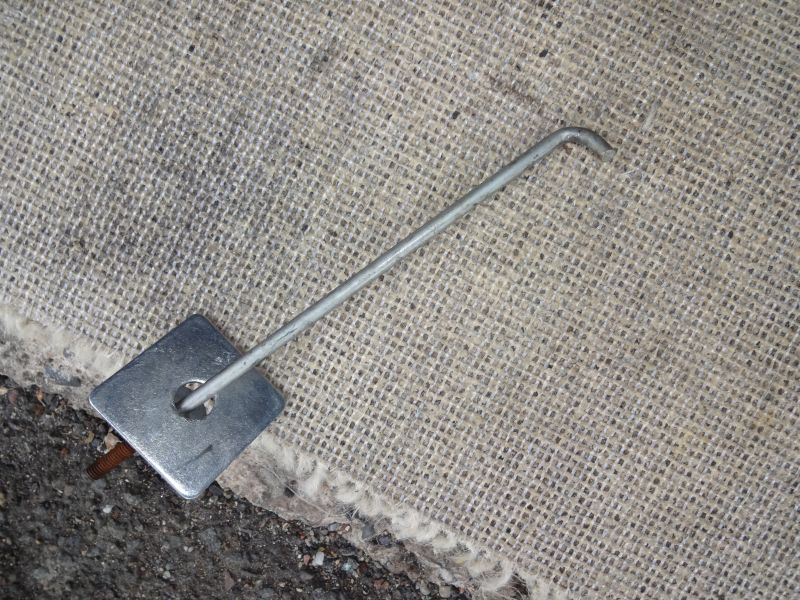
Next on to the steering rack, it was very difficult to refit due the awkward pipe work and impossible steering spline and U joint, after hours I got it to this point but it would not fully seat.

So I made up this tool so that I could "pull" it onto the spline. It was a horrible job.
And finally the near side was fully assembled.

Tomorrow the other side,
The anti roll bar is upside down, arghhhhhh.
So out it came and the bar was swapped over, I also took off the lower arms to make it easier to manoeuvre.
The parts dept at the Jag dealer were closed today so I pushed on with the old subframe bolts, I will swap out for the torx version later as I didn't want to take these up to the recommended torque level.
Next on to the steering rack, it was very difficult to refit due the awkward pipe work and impossible steering spline and U joint, after hours I got it to this point but it would not fully seat.
So I made up this tool so that I could "pull" it onto the spline. It was a horrible job.
And finally the near side was fully assembled.
Tomorrow the other side,
#117
05-06-2013, 06:19 PM
Veteran Member
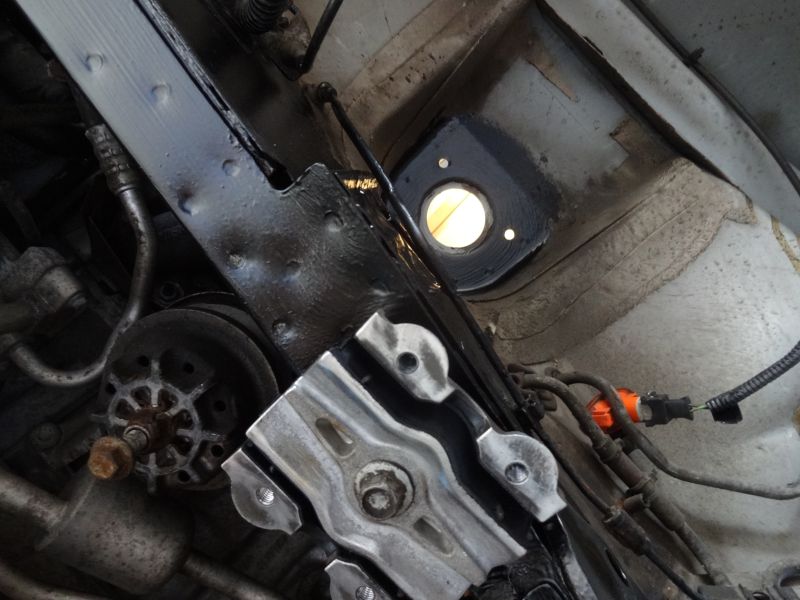
Looks like a straight shot with a socket and extension.
BTW, the ground strap next to the steering union looks like it could use a refresh.
Last edited by plums; 05-06-2013 at 06:22 PM.
#118
05-07-2013, 08:31 AM
Veteran Member
Viewed along the axis of the bolt, the bolt head is situated half under the overhang. To provide a more perpendicular access to the bolt head I milled a slight depression and cleaned up a ridge of flash . Also the torqx bolt allowed a slight angle to the approach.
Last edited by GordoCatCar; 05-07-2013 at 11:33 AM.
#119
05-07-2013, 04:21 PM
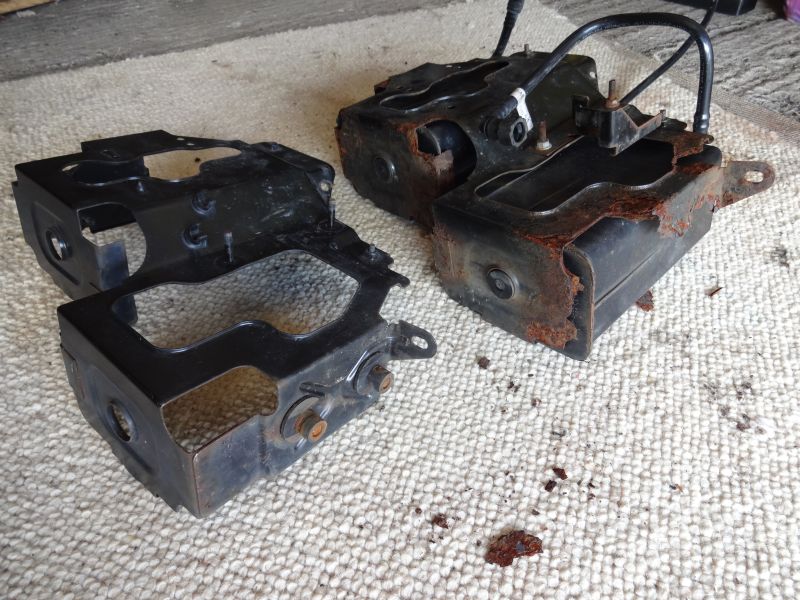
I built up the other hub assembly tonight and finally got the engine support off.
I ordered up some new V-mount torx bolts and a new earth strap so may be here tomorrow.
Still got the wiper scuttle, wipers, mud flaps, wheel arch liners and bumper under tray to go, then an alignment check so may get the car on the road for a test drive tomorrow.
I ordered up some new V-mount torx bolts and a new earth strap so may be here tomorrow.
Still got the wiper scuttle, wipers, mud flaps, wheel arch liners and bumper under tray to go, then an alignment check so may get the car on the road for a test drive tomorrow.
#120
05-08-2013, 03:50 PM
At last after 8 weeks it is back on its wheels.

Out for a test drive, a couple of small issues, steering wheel is offset an 1/8 of a turn to the left, must have happened when I was struggling to refit the steering rack.

Right hand brake disk rubbing on the dust shield slightly, I'll need to bend it a bit.
But the clunk has gone!
Thanks to everyone for the invaluable help and support, it really is much appreciated.
Out for a test drive, a couple of small issues, steering wheel is offset an 1/8 of a turn to the left, must have happened when I was struggling to refit the steering rack.
Right hand brake disk rubbing on the dust shield slightly, I'll need to bend it a bit.
But the clunk has gone!
Thanks to everyone for the invaluable help and support, it really is much appreciated.
The following 2 users liked this post by RaceDiagnostics:
cjd777 (05-25-2014),
Timeisrelative (01-12-2020)