My project...
#241
 07-27-2013, 06:37 PM


I had a wonderful time reading your epic trials and tribulations restoring that Jag. I can't believe how brave and fearless you are when it comes to a challenge. I on the had am your exact opposite. I would not attempt to do half of what you did. I would like to pick your brain as I have complete trust that you know what you are doing. My hydraulic lines are shot and since i very rarely lower my top, i have never bothered to repair them primarily because of the exhorbitant cost of the lines. The last, i read you were still going manual concerning the top and I would like to know how you managed to wire the rear quarter windows. I've seen all kind of modifications for the top but i want to do the most drastic of all. I want to chuck the hydraulic system altogether and go strictly manual. I've got my hex key and I'm ready to go. The only thing blocking my way is a separate switch to open and close the rear windows. I wonder if you could explain to a novice how this is done.
Thank you and I am glad you enjoyed it... My top is totally manual, and my rear windows work as if the hydraulics were still there... I will convert an allen wrench into a knob I can just turn when I want the top to go down, but for now the allen wrench hides away in my center console... As for the windows; I just fool the system... I unlock the hydraulic top cylinders, then the front top latch... If the windows aren't already down, they go down automatically... When you lock the cylinders up, and latch the top above the mirror; the windows go up with a push of the "TOP UP" button... I wish I could make the windows go up or down when I want, but I would have to rewire some stuff... I can post pics if you need me to...
Thanks again!!
Cheers!!!
Last edited by bluexk8ragtop; 09-21-2013 at 09:37 PM.
#243
09-21-2013, 09:33 AM
Good day all!!
I've been back to work and I just don't drive the blue cat as much as I thought when I purchased it... I still love going out to the shop and seeing it sit there, but I think it needs to be owned by someone that will drive it...
Here are some updated pictures...
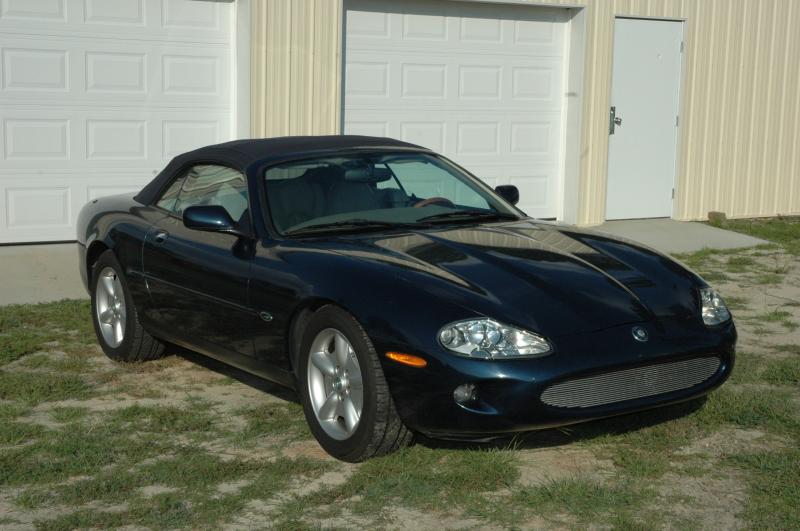


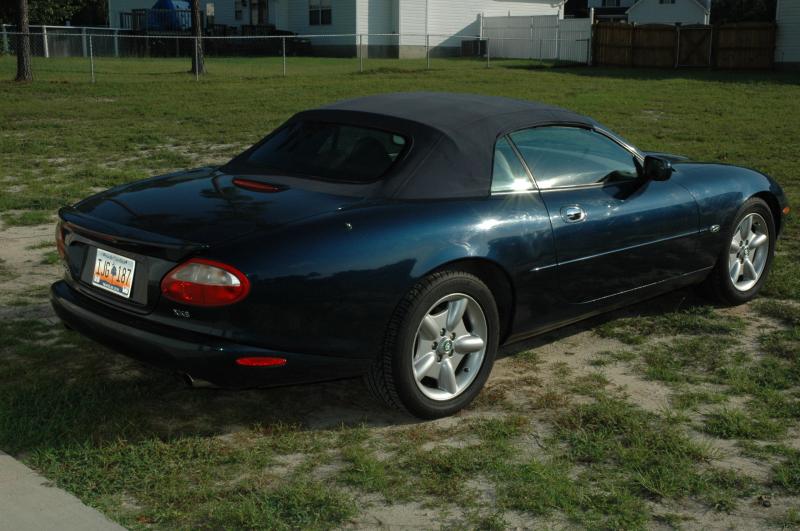
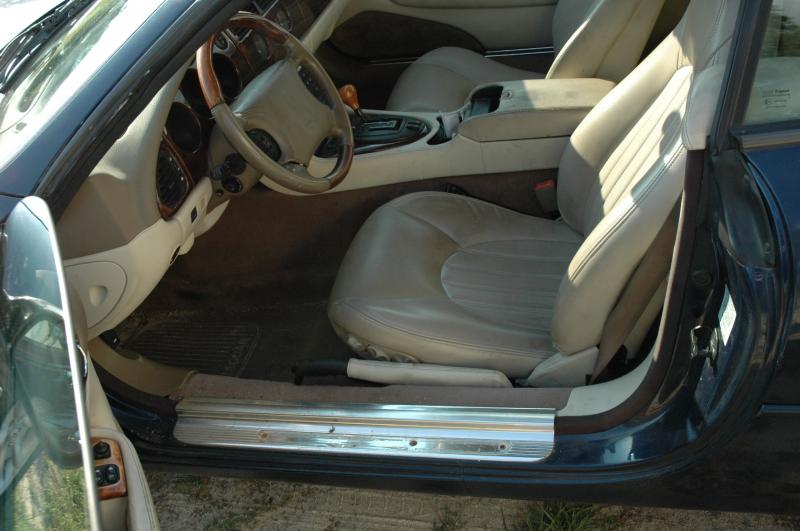


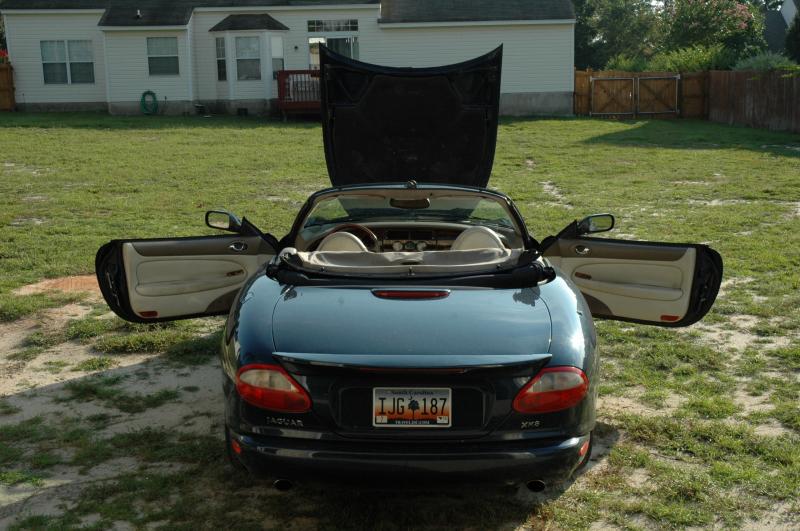


All lug nuts match and are the best I could find used... Driver side sill plate cover is missing... Interior light is missing (by the mirror)... Cup holder is missing... All the top sensors work, but the hydraulic part is done manually now... Still missing the spare tire wing nut... A few more odds and ends need to be touched up...
Let me know if you are interested in owning this beautiful cat!!!
Cheers all!!!
I've been back to work and I just don't drive the blue cat as much as I thought when I purchased it... I still love going out to the shop and seeing it sit there, but I think it needs to be owned by someone that will drive it...
Here are some updated pictures...


All lug nuts match and are the best I could find used... Driver side sill plate cover is missing... Interior light is missing (by the mirror)... Cup holder is missing... All the top sensors work, but the hydraulic part is done manually now... Still missing the spare tire wing nut... A few more odds and ends need to be touched up...
Let me know if you are interested in owning this beautiful cat!!!
Cheers all!!!
#244
09-21-2013, 09:55 PM


That is exactly what I thought too!! I looked on the website and didn't find just the plastic part... So, I called them thinking I would have better luck talking to a human... Well, Hampton Jaguar here in Lexington did not OR would not sell me just the catch, but insisted I buy the whole door with catch for $81 plus tax...
I need the name of your Jag dealer please, which is where I will be getting all my parts from, from now on... ...and I owe you a beer!!!
Thanks much!!!!!
Cheers!!!
I need the name of your Jag dealer please, which is where I will be getting all my parts from, from now on... ...and I owe you a beer!!!
Thanks much!!!!!
Cheers!!!
#245
11-23-2013, 11:22 PM
Good day all!!
It's been awhile, but I have two new issues that have suddenly sprung up... I have noticed my steering getting difficult and it appears the top mounts have worn out... New ones are on order...
In attempts to sell the Beautiful Blue Cat, I have replaced some of the items needed to finish the project... New seat controller... New engine cover... New coolant cap... Two new security modules (that didn't work)... Still have a few more items to go... drivers sill plate... overhead light assy... spare tire hold down screw... Top will stay manual, but the windows still work...
Okay, so I did all this in attempt to get her sold... On my way to work the day I was going to put her on the sale lot, she throws her belt... It didn't shred or break, it just slipped off... WHY!? Well, I found out later that she wanted a trans fluid change and the only way she can let me know this piece of info is to throw up trans fluid all over my driveway... I still haven't found the break or leak point, but I suspect the bottom cooler line somewhere close to the power steering pulley... The belt is soaked and thus the reason it slipped off....... More to follow...
Cheers!!!
#246
11-25-2013, 05:54 AM
Senior Member
A really interesting and daring project. I bought mine through ebay in August this year, and I thought mine was a bit of a gamble with only a potential gearbox problem. Your buy entered new frontiers and I admire your enthusiastic approach to the car. Just having found the thread it had me engrossed for hours. A very well documented and thoroughly engrossing read, I only wished we had lived on the same continent and I could have offered some help. Were you a mechanic in the services or have some background in auto repairs, or was this just pure desire to get the car back into shape?
I am a colliery trained engineer and have loved cars since an early age, I bought a kit car in 1981 ( vw based Eagle SS with a Ford 1600cc engine ) and went on to repair crash damaged Japanese sports cars in the eighties. I just loved messing with cars. I'm 58 now and still love to get the spanners out and fix things.
Many thanks for a great read and the education;-)
Kind regards,
ArtyH
#247
11-30-2013, 09:45 AM
A really interesting and daring project. I bought mine through ebay in August this year, and I thought mine was a bit of a gamble with only a potential gearbox problem. Your buy entered new frontiers and I admire your enthusiastic approach to the car. Just having found the thread it had me engrossed for hours. A very well documented and thoroughly engrossing read, I only wished we had lived on the same continent and I could have offered some help. Were you a mechanic in the services or have some background in auto repairs, or was this just pure desire to get the car back into shape?
I am a colliery trained engineer and have loved cars since an early age, I bought a kit car in 1981 ( vw based Eagle SS with a Ford 1600cc engine ) and went on to repair crash damaged Japanese sports cars in the eighties. I just loved messing with cars. I'm 58 now and still love to get the spanners out and fix things.
Many thanks for a great read and the education;-)
Kind regards,
ArtyH
I am a colliery trained engineer and have loved cars since an early age, I bought a kit car in 1981 ( vw based Eagle SS with a Ford 1600cc engine ) and went on to repair crash damaged Japanese sports cars in the eighties. I just loved messing with cars. I'm 58 now and still love to get the spanners out and fix things.
Many thanks for a great read and the education;-)
Kind regards,
ArtyH
Good day!!
Thank you!! I actually went through the thread the other day and it really never occurred to me that it does take quite some time to read all of it... Didn't notice it when I was only adding notes every other day or so...
I was a commo guy in the Army, but that was due to my father wanting me to learn something new from the Army... Auto mechanics was kind of in the DNA so to speak... I started when I was 9 honing cylinders and such... Then it just grew from there... Top student in HS for auto mechanics... Rebuilt anything cheap to earn a few bucks... Finally decided to take the tests and get the certs... Now ASE Master certified and only working on cars as a hobby again... I like to take my time and do the job right... Most mechanic shops are "quick, in and out" so I didn't enjoy it too much...
Thanks for taking the time to read it through and let me know if you need help with anything... I did have the gearbox failure on mine too... I think it was a low battery condition and a destroyed J-shifter...
Good luck with your project!!
Cheers!!
#248
12-02-2013, 10:40 PM
Good day all!!!
Well, another addition to the restoration of the beautiful blue cat... I had purchased the strut mounts from parts geek, only because they were the cheapest and had them in stock... I would have gone with the harder rubber version I saw on a different thread, but the thread was a couple years old and the car needed these in a serious way!! While I was waiting for the mounts to come in, I had a trans hose spring a leak that sprayed trans fluid on my accessory belt which caused it to slip off... Good thing too because I wouldn't have noticed anything wrong until it may have been too late... The lack of a belt caused me to turn around right away and as such she didn't lose enough fluid to cause an issue... So, I got to tackle two problems at the same time... Here are the pictures...
Lets see.... Where to start... Strut mount since I really did that first, even though getting the car on the road would make more sense... I found out that the hoses on the trans cooler lines could be removed and replaced, but didn't figure on it being as easy as it turned out... Not a hard job to do and good preventative measure if you are changing the fluid... My fluid was very dark and it needed to be changed... more on that in a few...
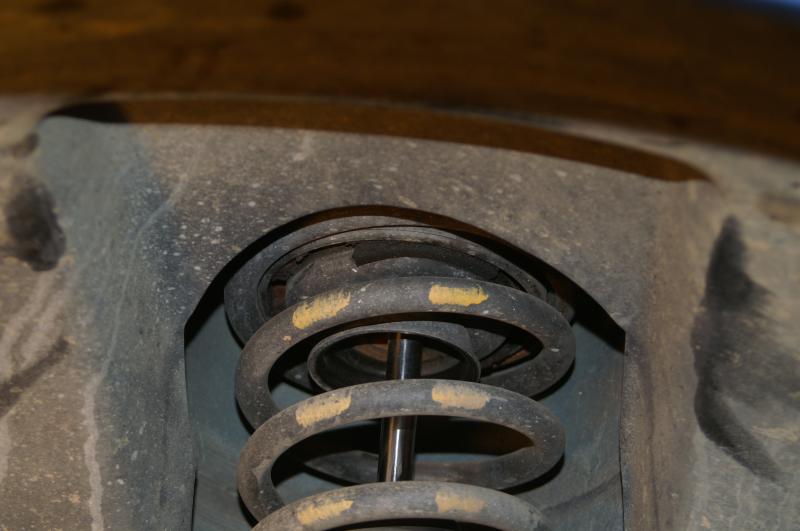
Strut mounts... Vids I found suggest you need a spring compressor... Since I don't have one, I had to find the alternative... And I did which ended up making the 1.5 hour job on the driver side into a 20 min job on the pass side...
Here is the crushed bushing... Causes the whole suspension to sit higher in the shock tower OR the front of the car to sit lower and throws off the suspension geometry...
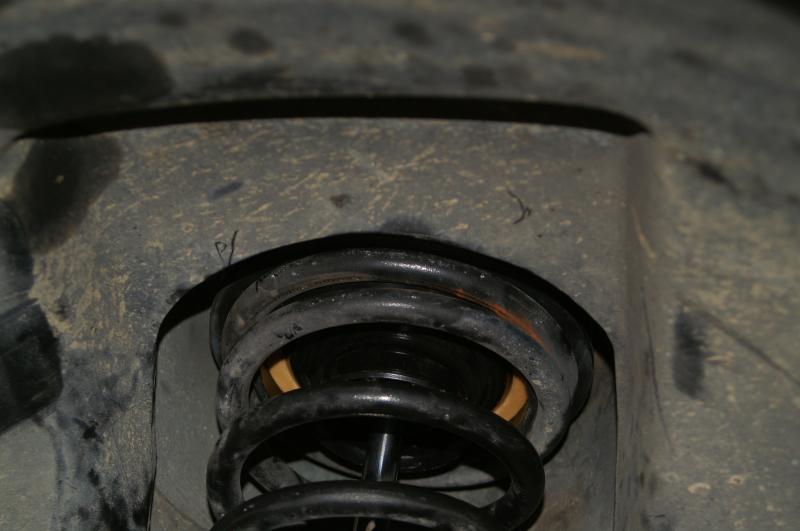
New one as a reference to the difference... Your real first indication that these are needed is if you hear rubbing going around a sharp corner pretty quickly... Or the steering gets considerably tighter and doesn't return to center on it's own...
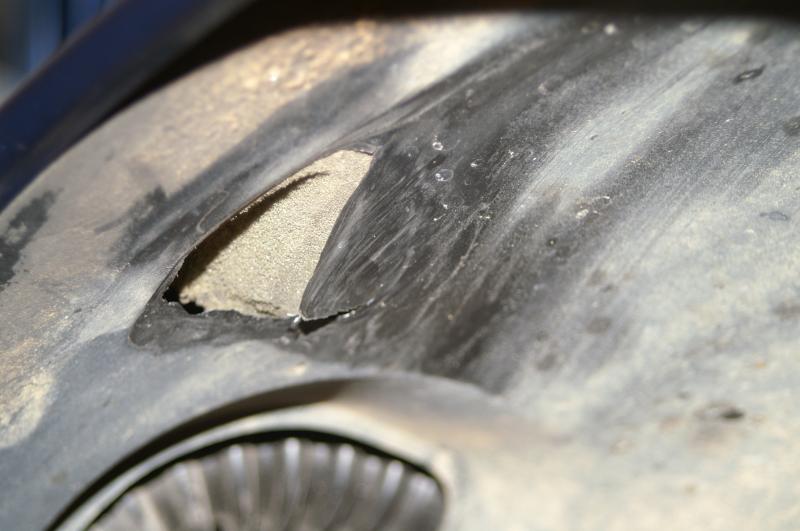
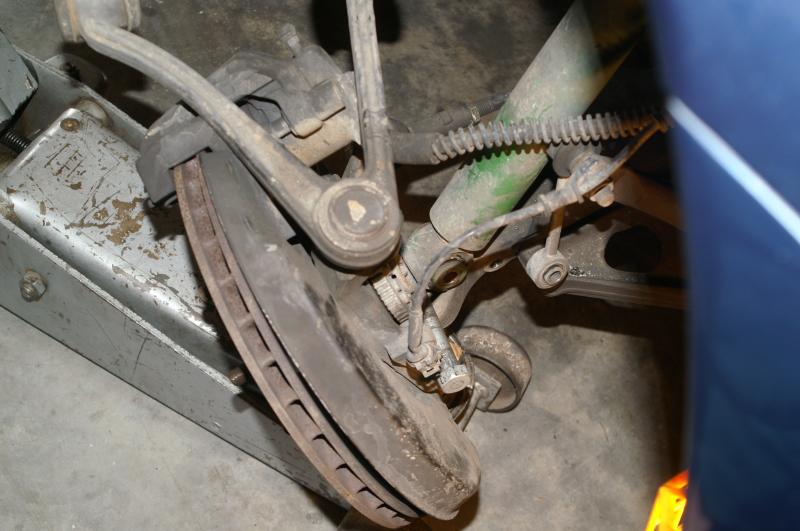
Where mine was rubbing... drivers side looking up and towards the front...
Keep in mind that I didn't use a spring compressor and while it worked for me, if you feel you are unable to use the method I did, by all means get a spring compressor!!!!!!!
First I removed the three bolts after the tire is off, which I am sure you all can do... This long upper control arm bolt... THERE ARE SHIMS WITH THIS ONE!!!! The washer are kind of cone shaped and flat side faces out... Shims go between the flat side and the aluminum sub-frame...
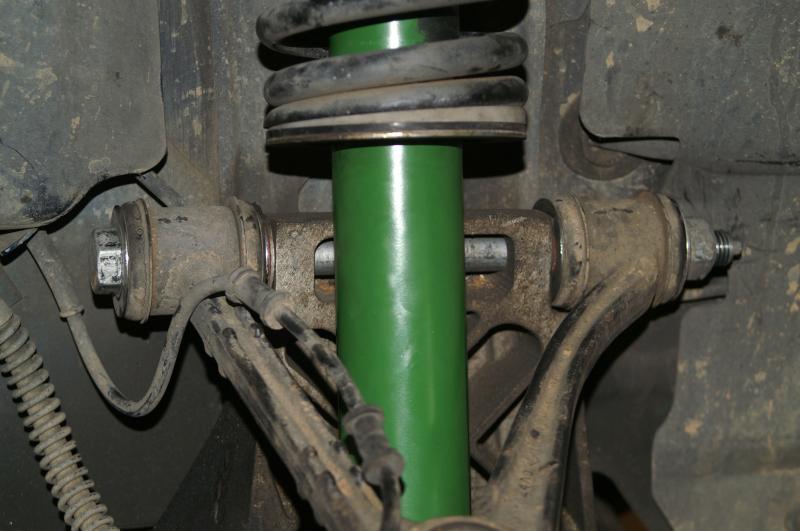
I removed the bottom sway bar bolt first... I didn't really get a good shot of these individually... I also removed the lower strut bolt... You can see the upper control arm bolt holding the bottom of the strut away from the ABS tone ring... IMPORTANT!! Oh, I cut the zip ties holding the wire to the top of the upper control arm... Once like this, I compressed the spring until the top shock nut would come off with no affect on the car... I supported the car from the front radiator support... When compressing the spring, the front will lift off this jack stand!!!! Once you have the top nut off, lower the jack that is under the lower control arm/rotor until all tension is removed... Wiggle everything out...
You can remove the three mount bolts now, or wait until the strut assembly is out...

Strut and spring assembly... It looks more like a basic shock with a snap ring on it that holds the lower spring mount in place...

If you didn't know, this is a ball joint type bushing... There should be dust covers on both sides... Both of mine had both dust covers missing... Just old...

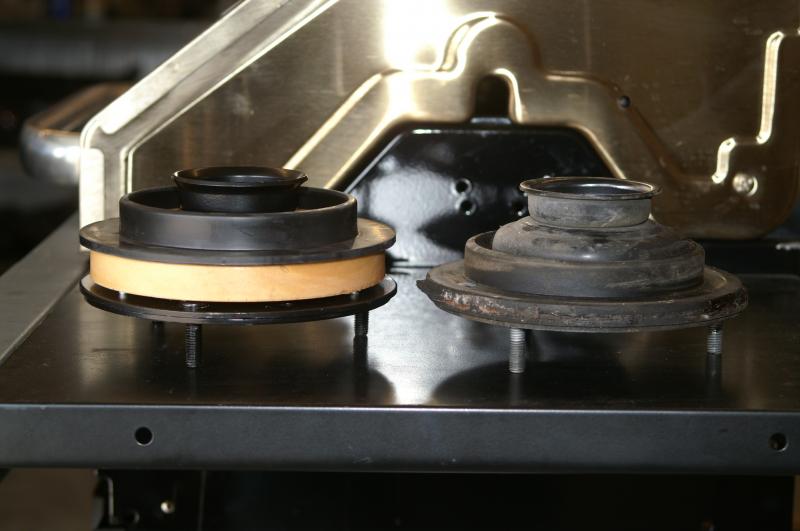
Here is the difference between old and new... Essentially, I had no center section on either side... I can't wait to get her out on the road and see how she handles now...

That is it for the struts... Oh, assembly is reverse of removal... You will have to take your time lifting everything to guide the shock rod where it goes... I used the end of a ratchet strap as I couldn't fit my fingers between the spring coils... Once you can turn the nut on the shock rod a few turns, tighten it up a little and then you can remove the jack... Put everything back where it goes, and start all three bolts... Once started, you can tighten them up in any order... I would leave the three mount bolts loose at first... Once everything else is tight, hit the three mount bolts on the shock tower and hit the shock rod bolt again with the impact...
Now the fun part... Trans cooler hose removal and replacement!! Too easy to not do before they spring a leak!!
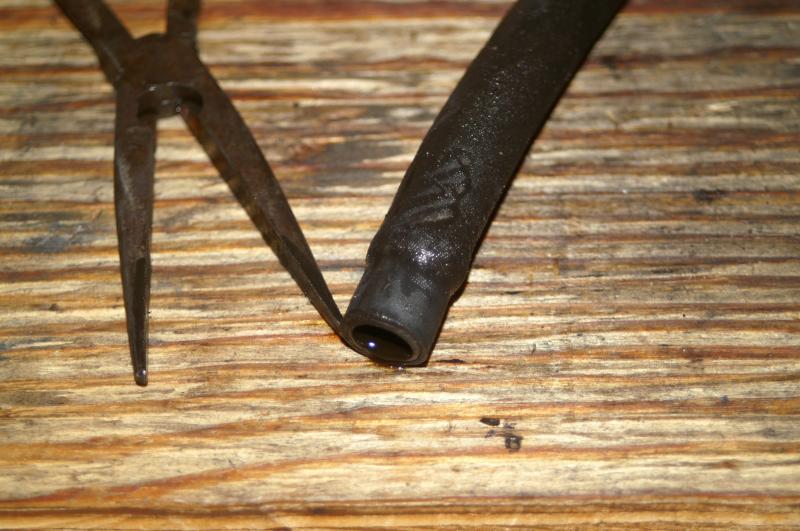
From below, you can see the two hoses by the drivers side frame rail, right below the power steering pump... Long needle nose pliers will make light work of these hoses here... Once these are off, you can take the rest to the work bench... Pinch and twist... Pinch and twist the other way... Pinch and twist... That is it!!
This is what happens if you just pinch, without twisting...

This is if you add the twisting...

I just pulled the hose off the rest of the way... The metal ring came right off three of the ends... A little tug with a small flat tip got the last one off...
and the rings... I actually cut the first one before I figured out how easy it was to remove... It wouldn't have mattered with the one I cut because that is where the leak was and the hose broke at that fitting with little effort...

So, off to the parts store for some hydraulic / trans fluid hoses and two more clamps... I have two already... Some Mercon V and there you have it...
I have heard that I should use the SP type fluid, but I think the jury is still out on what is the best for our cars... Thoughts anyone!??!
That's it for now... Until tomorrow!!
Cheers!!!
Well, another addition to the restoration of the beautiful blue cat... I had purchased the strut mounts from parts geek, only because they were the cheapest and had them in stock... I would have gone with the harder rubber version I saw on a different thread, but the thread was a couple years old and the car needed these in a serious way!! While I was waiting for the mounts to come in, I had a trans hose spring a leak that sprayed trans fluid on my accessory belt which caused it to slip off... Good thing too because I wouldn't have noticed anything wrong until it may have been too late... The lack of a belt caused me to turn around right away and as such she didn't lose enough fluid to cause an issue... So, I got to tackle two problems at the same time... Here are the pictures...
Lets see.... Where to start... Strut mount since I really did that first, even though getting the car on the road would make more sense... I found out that the hoses on the trans cooler lines could be removed and replaced, but didn't figure on it being as easy as it turned out... Not a hard job to do and good preventative measure if you are changing the fluid... My fluid was very dark and it needed to be changed... more on that in a few...
Strut mounts... Vids I found suggest you need a spring compressor... Since I don't have one, I had to find the alternative... And I did which ended up making the 1.5 hour job on the driver side into a 20 min job on the pass side...
Here is the crushed bushing... Causes the whole suspension to sit higher in the shock tower OR the front of the car to sit lower and throws off the suspension geometry...

New one as a reference to the difference... Your real first indication that these are needed is if you hear rubbing going around a sharp corner pretty quickly... Or the steering gets considerably tighter and doesn't return to center on it's own...

Where mine was rubbing... drivers side looking up and towards the front...

Keep in mind that I didn't use a spring compressor and while it worked for me, if you feel you are unable to use the method I did, by all means get a spring compressor!!!!!!!
First I removed the three bolts after the tire is off, which I am sure you all can do... This long upper control arm bolt... THERE ARE SHIMS WITH THIS ONE!!!! The washer are kind of cone shaped and flat side faces out... Shims go between the flat side and the aluminum sub-frame...

I removed the bottom sway bar bolt first... I didn't really get a good shot of these individually... I also removed the lower strut bolt... You can see the upper control arm bolt holding the bottom of the strut away from the ABS tone ring... IMPORTANT!! Oh, I cut the zip ties holding the wire to the top of the upper control arm... Once like this, I compressed the spring until the top shock nut would come off with no affect on the car... I supported the car from the front radiator support... When compressing the spring, the front will lift off this jack stand!!!! Once you have the top nut off, lower the jack that is under the lower control arm/rotor until all tension is removed... Wiggle everything out...

You can remove the three mount bolts now, or wait until the strut assembly is out...

Strut and spring assembly... It looks more like a basic shock with a snap ring on it that holds the lower spring mount in place...

If you didn't know, this is a ball joint type bushing... There should be dust covers on both sides... Both of mine had both dust covers missing... Just old...

Here is the difference between old and new... Essentially, I had no center section on either side... I can't wait to get her out on the road and see how she handles now...


That is it for the struts... Oh, assembly is reverse of removal... You will have to take your time lifting everything to guide the shock rod where it goes... I used the end of a ratchet strap as I couldn't fit my fingers between the spring coils... Once you can turn the nut on the shock rod a few turns, tighten it up a little and then you can remove the jack... Put everything back where it goes, and start all three bolts... Once started, you can tighten them up in any order... I would leave the three mount bolts loose at first... Once everything else is tight, hit the three mount bolts on the shock tower and hit the shock rod bolt again with the impact...
Now the fun part... Trans cooler hose removal and replacement!! Too easy to not do before they spring a leak!!
From below, you can see the two hoses by the drivers side frame rail, right below the power steering pump... Long needle nose pliers will make light work of these hoses here... Once these are off, you can take the rest to the work bench... Pinch and twist... Pinch and twist the other way... Pinch and twist... That is it!!
This is what happens if you just pinch, without twisting...

This is if you add the twisting...

I just pulled the hose off the rest of the way... The metal ring came right off three of the ends... A little tug with a small flat tip got the last one off...

and the rings... I actually cut the first one before I figured out how easy it was to remove... It wouldn't have mattered with the one I cut because that is where the leak was and the hose broke at that fitting with little effort...

So, off to the parts store for some hydraulic / trans fluid hoses and two more clamps... I have two already... Some Mercon V and there you have it...
I have heard that I should use the SP type fluid, but I think the jury is still out on what is the best for our cars... Thoughts anyone!??!
That's it for now... Until tomorrow!!
Cheers!!!
Last edited by bluexk8ragtop; 12-02-2013 at 10:48 PM.
#249
01-09-2014, 12:10 AM

Member
i found your post because im looking for the dome light bracket and you have the best pic i have found yet and i see you have a big project. i had the same type of thing not too long ago, for example i replaced the hoses and repaired several convertible parts with better psi ratings and 1/4 the costs of oem. several things of that sort (by the way i went to Please wait while we redirect... one of the local stores and got most of what i needed
#251
01-09-2014, 08:38 AM
No, please... Feel free to post anything!! I still don't have my dome light and the bracket you speak of is cracked... I don't have the top finished and will look into the hoses you are talking about... It is manual for now... I will have to adjust the drivers side lock point because it is incredibly difficult to lock in place with little or no effort on the pass side... I was going to keep the lock latch above the mirror manual... I found out yesterday that if you hold the key in the unlock or lock position, all the windows raise or lower... will that work the same with the remote buttons if you hold them down?! My remote is still not registering, but it too is on the list of fixes...
Thanks for reading and let me know if you need any pictures or such of anything... That goes for anyone!!
Cheers all!!!
#252
01-10-2014, 04:13 AM
Member
on the convertible tops i find they are pretty straight forward if the reason you are making it manual is the piston and micro switch the piston for can be disassembled and there are two orings to replace and a small stop screw at the top then to sync everything including the remotes which work the same as the key in the door shut all the doors key on position press the up buttons on the windows and hold them 5 secs after the stop then the same down also the lock pins on the outer edges for the convertible can be adjusted and they also sync with procedure above i once read a nice overview by gus
#253
01-10-2014, 11:54 AM
on the convertible tops i find they are pretty straight forward if the reason you are making it manual is the piston and micro switch the piston for can be disassembled and there are two orings to replace and a small stop screw at the top then to sync everything including the remotes which work the same as the key in the door shut all the doors key on position press the up buttons on the windows and hold them 5 secs after the stop then the same down also the lock pins on the outer edges for the convertible can be adjusted and they also sync with procedure above i once read a nice overview by gus
#255
04-05-2014, 03:50 PM
Good day everyone!!
Well, I got the interior light finally!! It is from an 03, but the connector is the same and it looks better than what was there... Mainly cause I didn't have anything there... I can't seem to get my garage door opener to program... The Jag UGDO times out instead of receiving the signal from the remote... BUT the lights work!! It is an upgrade as they look better... There is an airbag deployment sensor in the newer one, but it's not hurting anything sitting in there not connected... I got my CD changer installed too... I think I will be keeping it!! The weather is getting warmer and I don't think I've had the top up since last week... Only a few more things to get done and then fine tuning everything... The OCD touches that the paint needs and such...
Take care all!!
Cheers!!
The following users liked this post:
RJ237 (04-05-2014)
#256
08-20-2014, 11:08 PM
Good day all!!
I know it has been some time since I last posted anything on here, but I have been crazy busy with work and trying to find a house.
I just wanted to let everyone know that I have found someone that loves Jaguars and we agreed to trade vehicles. I just got an email from him stating that the Jag depicted in this thread was at a specialist for two days and this specialist has now deemed the car non road worthy. This is after it made a two and a half hour drive to his house for him to look at the car and purred perfectly in his driveway after I got there. I tempted to offer to take the car back and reverse the trade but decided it might not be in my best interest after the car has been in the hands of a specialist that deems it non road worthy...
Well, this will probably be my last post unless someone wants to pick my brain about an issue they are having... I loved my blue ragtop and kinda miss it... It just wasn't practical to keep anymore... I'm going to miss all of yous that helped me with my project!! Thanks to each and every one of you!! I hope I helped at least a few of yous out there with your projects!!
Cheers all!!!
#258
08-21-2014, 04:48 AM


Join Date: Oct 2007
Location: PHX some of the time
Posts: 117,432
Received 6,321 Likes
on
5,508 Posts
#259
08-21-2014, 07:45 AM
MAFS and spark plugs were "wrong". All the rubber in the engine bay needs to be replaced. Valve cover gaskets (Honestly, it does need)... Bad BPM?? New strut bushings as the ones I recently got were sub-par quality... Alignment... and it is "scary" to drive at anything above 65MPH...
I'm thinking I should just get the car back... I don't know.......
Cheers!!
I'm thinking I should just get the car back... I don't know.......
Cheers!!
#260
08-21-2014, 09:42 PM
Veteran Member
Did the new buyer test drive it and accept the condition? Did you provide a warranty? As long as you acted in good faith you have no additional responsibility. It's good of you to feel responsibility however buying used cars of any make is a buyer beware arrangement and if the car blows up 10 miles latter than that's the buyers issue not the seller.
Many years ago I sold an Alfa Sprint to a guy who was just in love with the car and had no interest in my details concerning what I had done and what issues I was disclosing. He just had to have the car! I was very clear to him that the car had an issue with the parking brake, manual transmission. Well he bought the car, I even took a personal check from him. Next morning when his bank opened I was at the door and cashed the check, 30 minutes later I get a call from him that he had started the car and gone back inside to get something, when he came back out the car had rolled into a 30 foot gulch and landed upside down. He was now calling his bank to stop payment on the check, Well too late I had the cash and his dumb *** had a totaled Alfa. Some people you just can't help!
Many years ago I sold an Alfa Sprint to a guy who was just in love with the car and had no interest in my details concerning what I had done and what issues I was disclosing. He just had to have the car! I was very clear to him that the car had an issue with the parking brake, manual transmission. Well he bought the car, I even took a personal check from him. Next morning when his bank opened I was at the door and cashed the check, 30 minutes later I get a call from him that he had started the car and gone back inside to get something, when he came back out the car had rolled into a 30 foot gulch and landed upside down. He was now calling his bank to stop payment on the check, Well too late I had the cash and his dumb *** had a totaled Alfa. Some people you just can't help!
Last edited by Jandreu; 08-21-2014 at 09:50 PM.